

Vengeance Sound Avenger - How to use - Sound design with the LFO
Using the powerful Wavetable Editor to design sound
 Product URL : http://sonicwire.com/product/A3178
LFOs always come with a synth.
You can use this LFO to accent sounds or create movement.
In this article we will discuss the LFO function in Avenger and how to make a lead sound that works great with EDM.
There are many tips that can be applied to products other than Avenger, so there’s plenty to learn in this article.
Avenger LFO section – Tutorial video
- 1Basics and reading presets
- 2Editing drum patches and sequences
- 3OSC control (waveform, voice, portamento)
- 4Using the wavetable
- 5Sound design with the LFO
- 6Sound control with the arpeggiator/macro
- 7Individual outputs for oscillators
Using the highly functional LFO section

Lets take a look at multi sample waveforms.
From OSC 1 presets, choose Samples → Factory Lead / Synth → DS2 Screamer and double click.
We’ll look at the MOD MATRIX before the LFO.
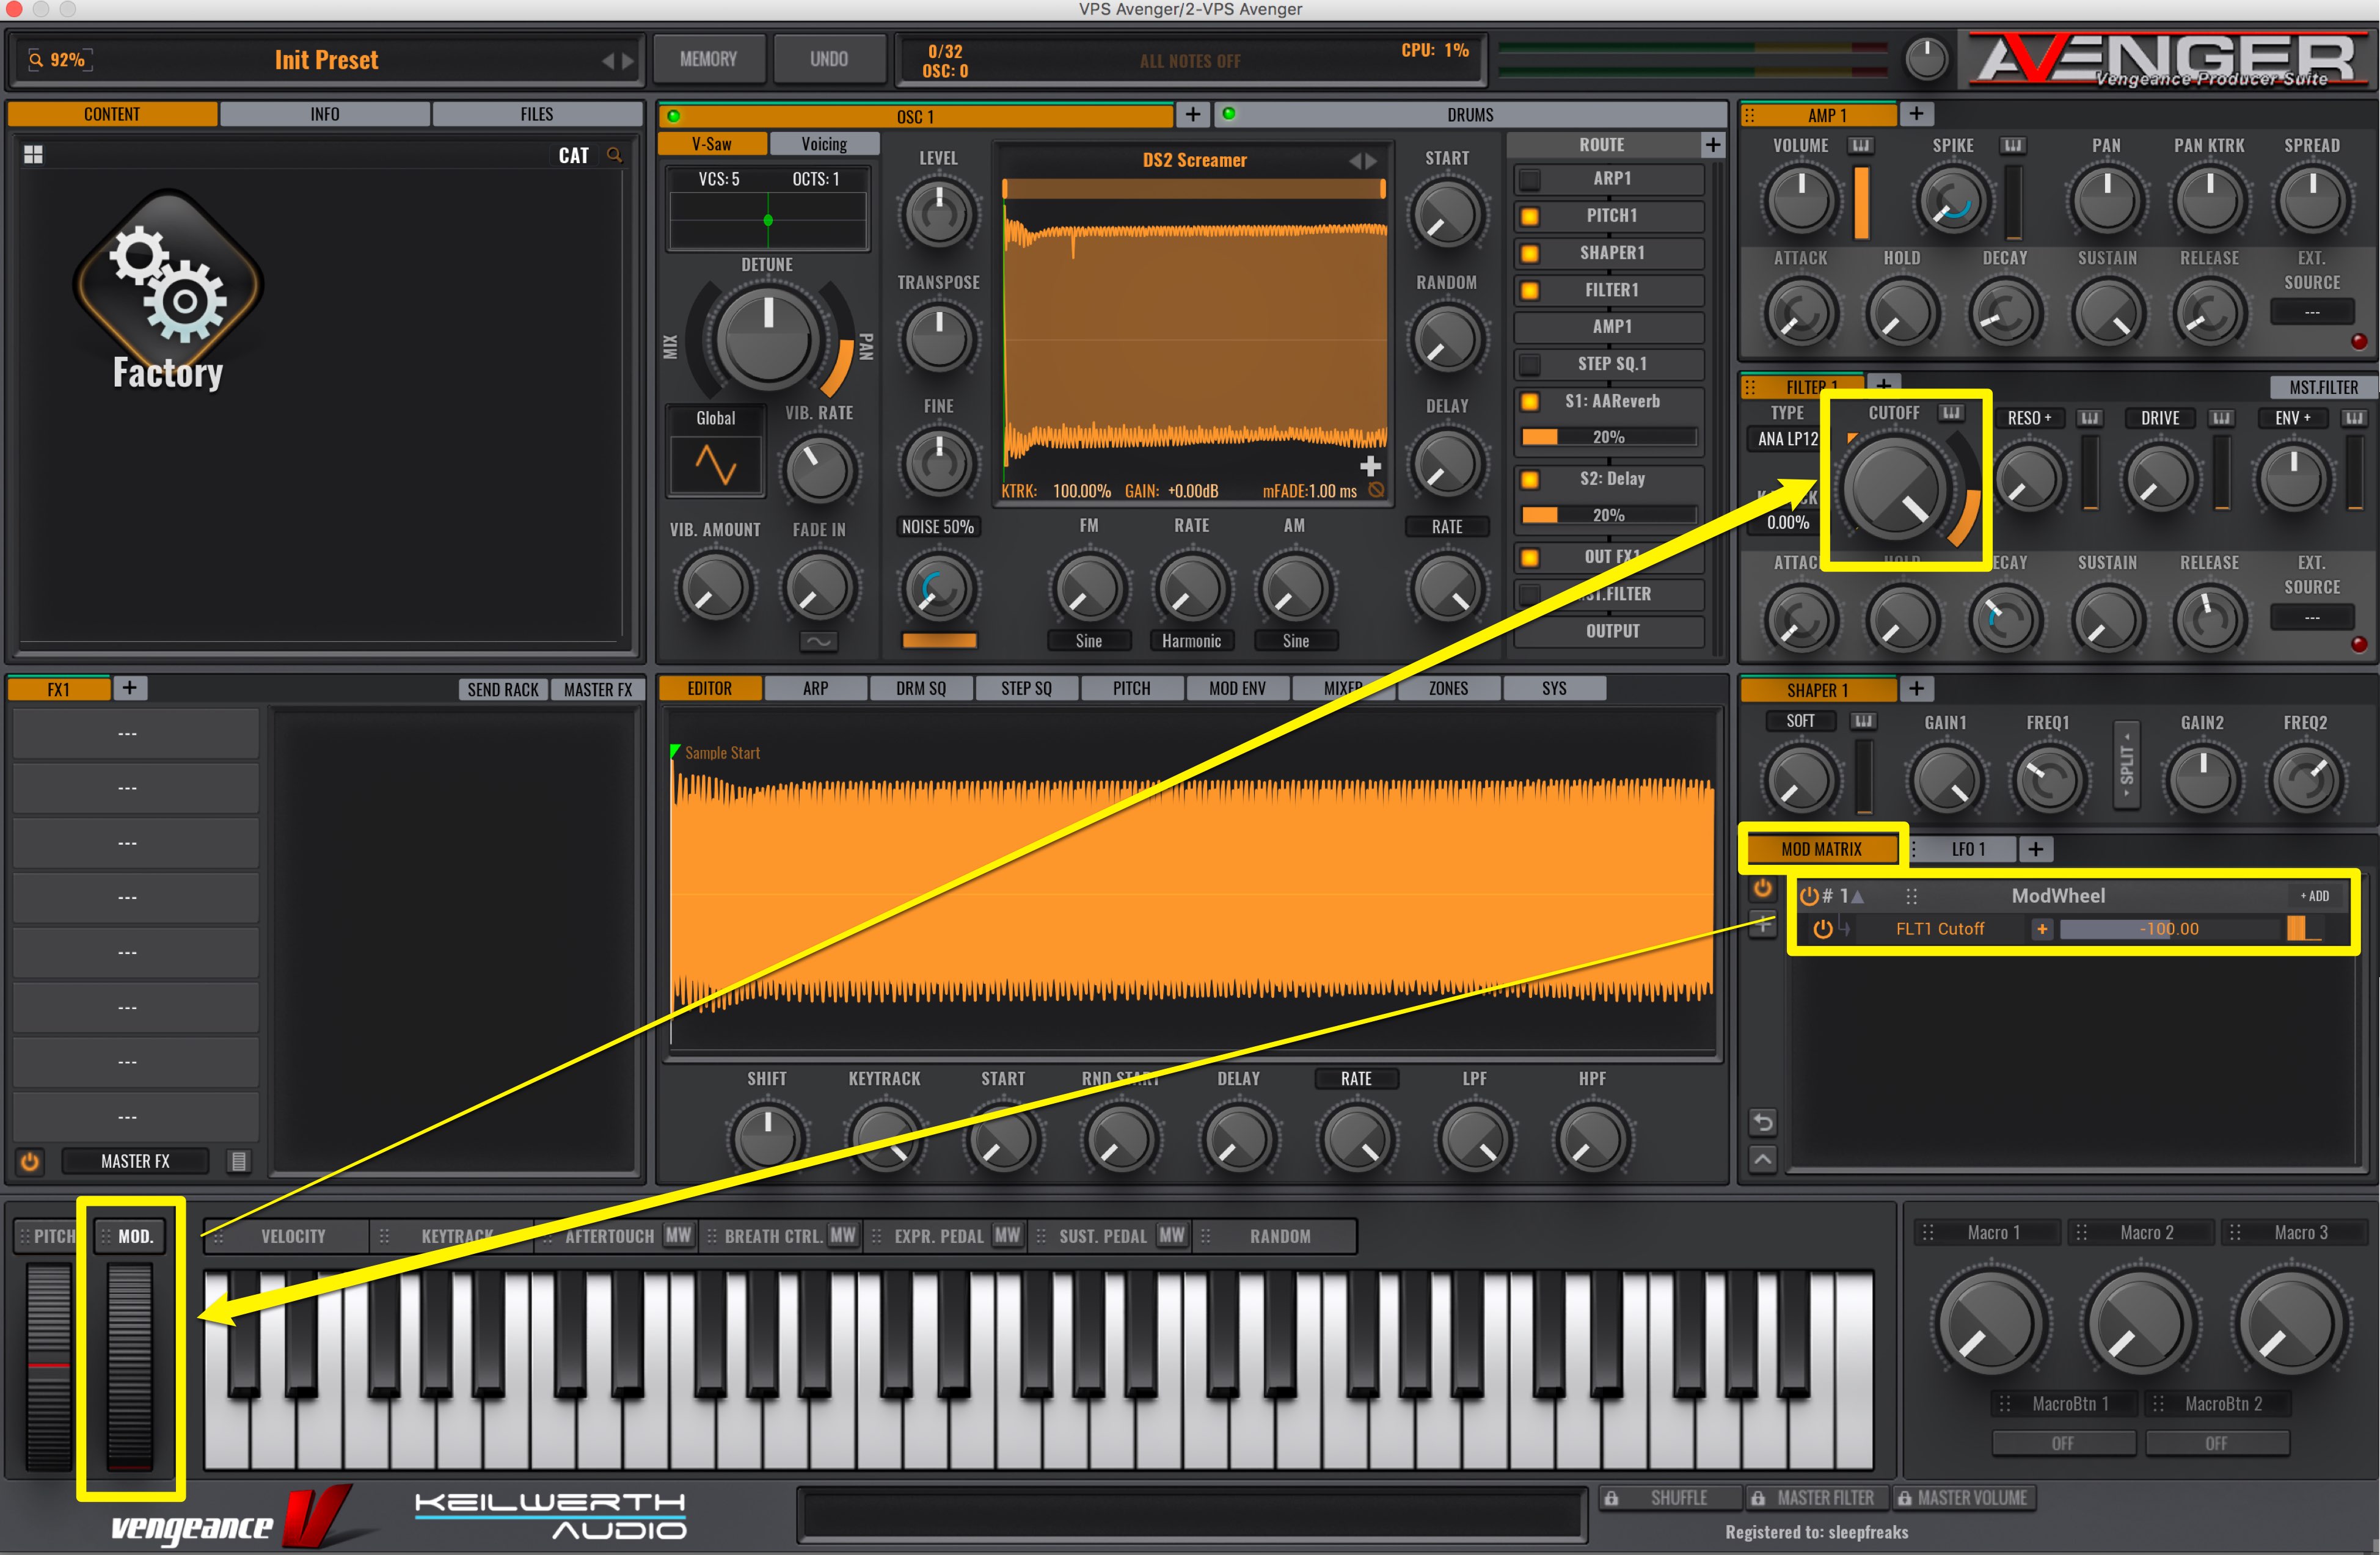
In the default setting, ModWheel’s Filter 1 has a Cutoff on it.
Lets go ahead and remove this setting.
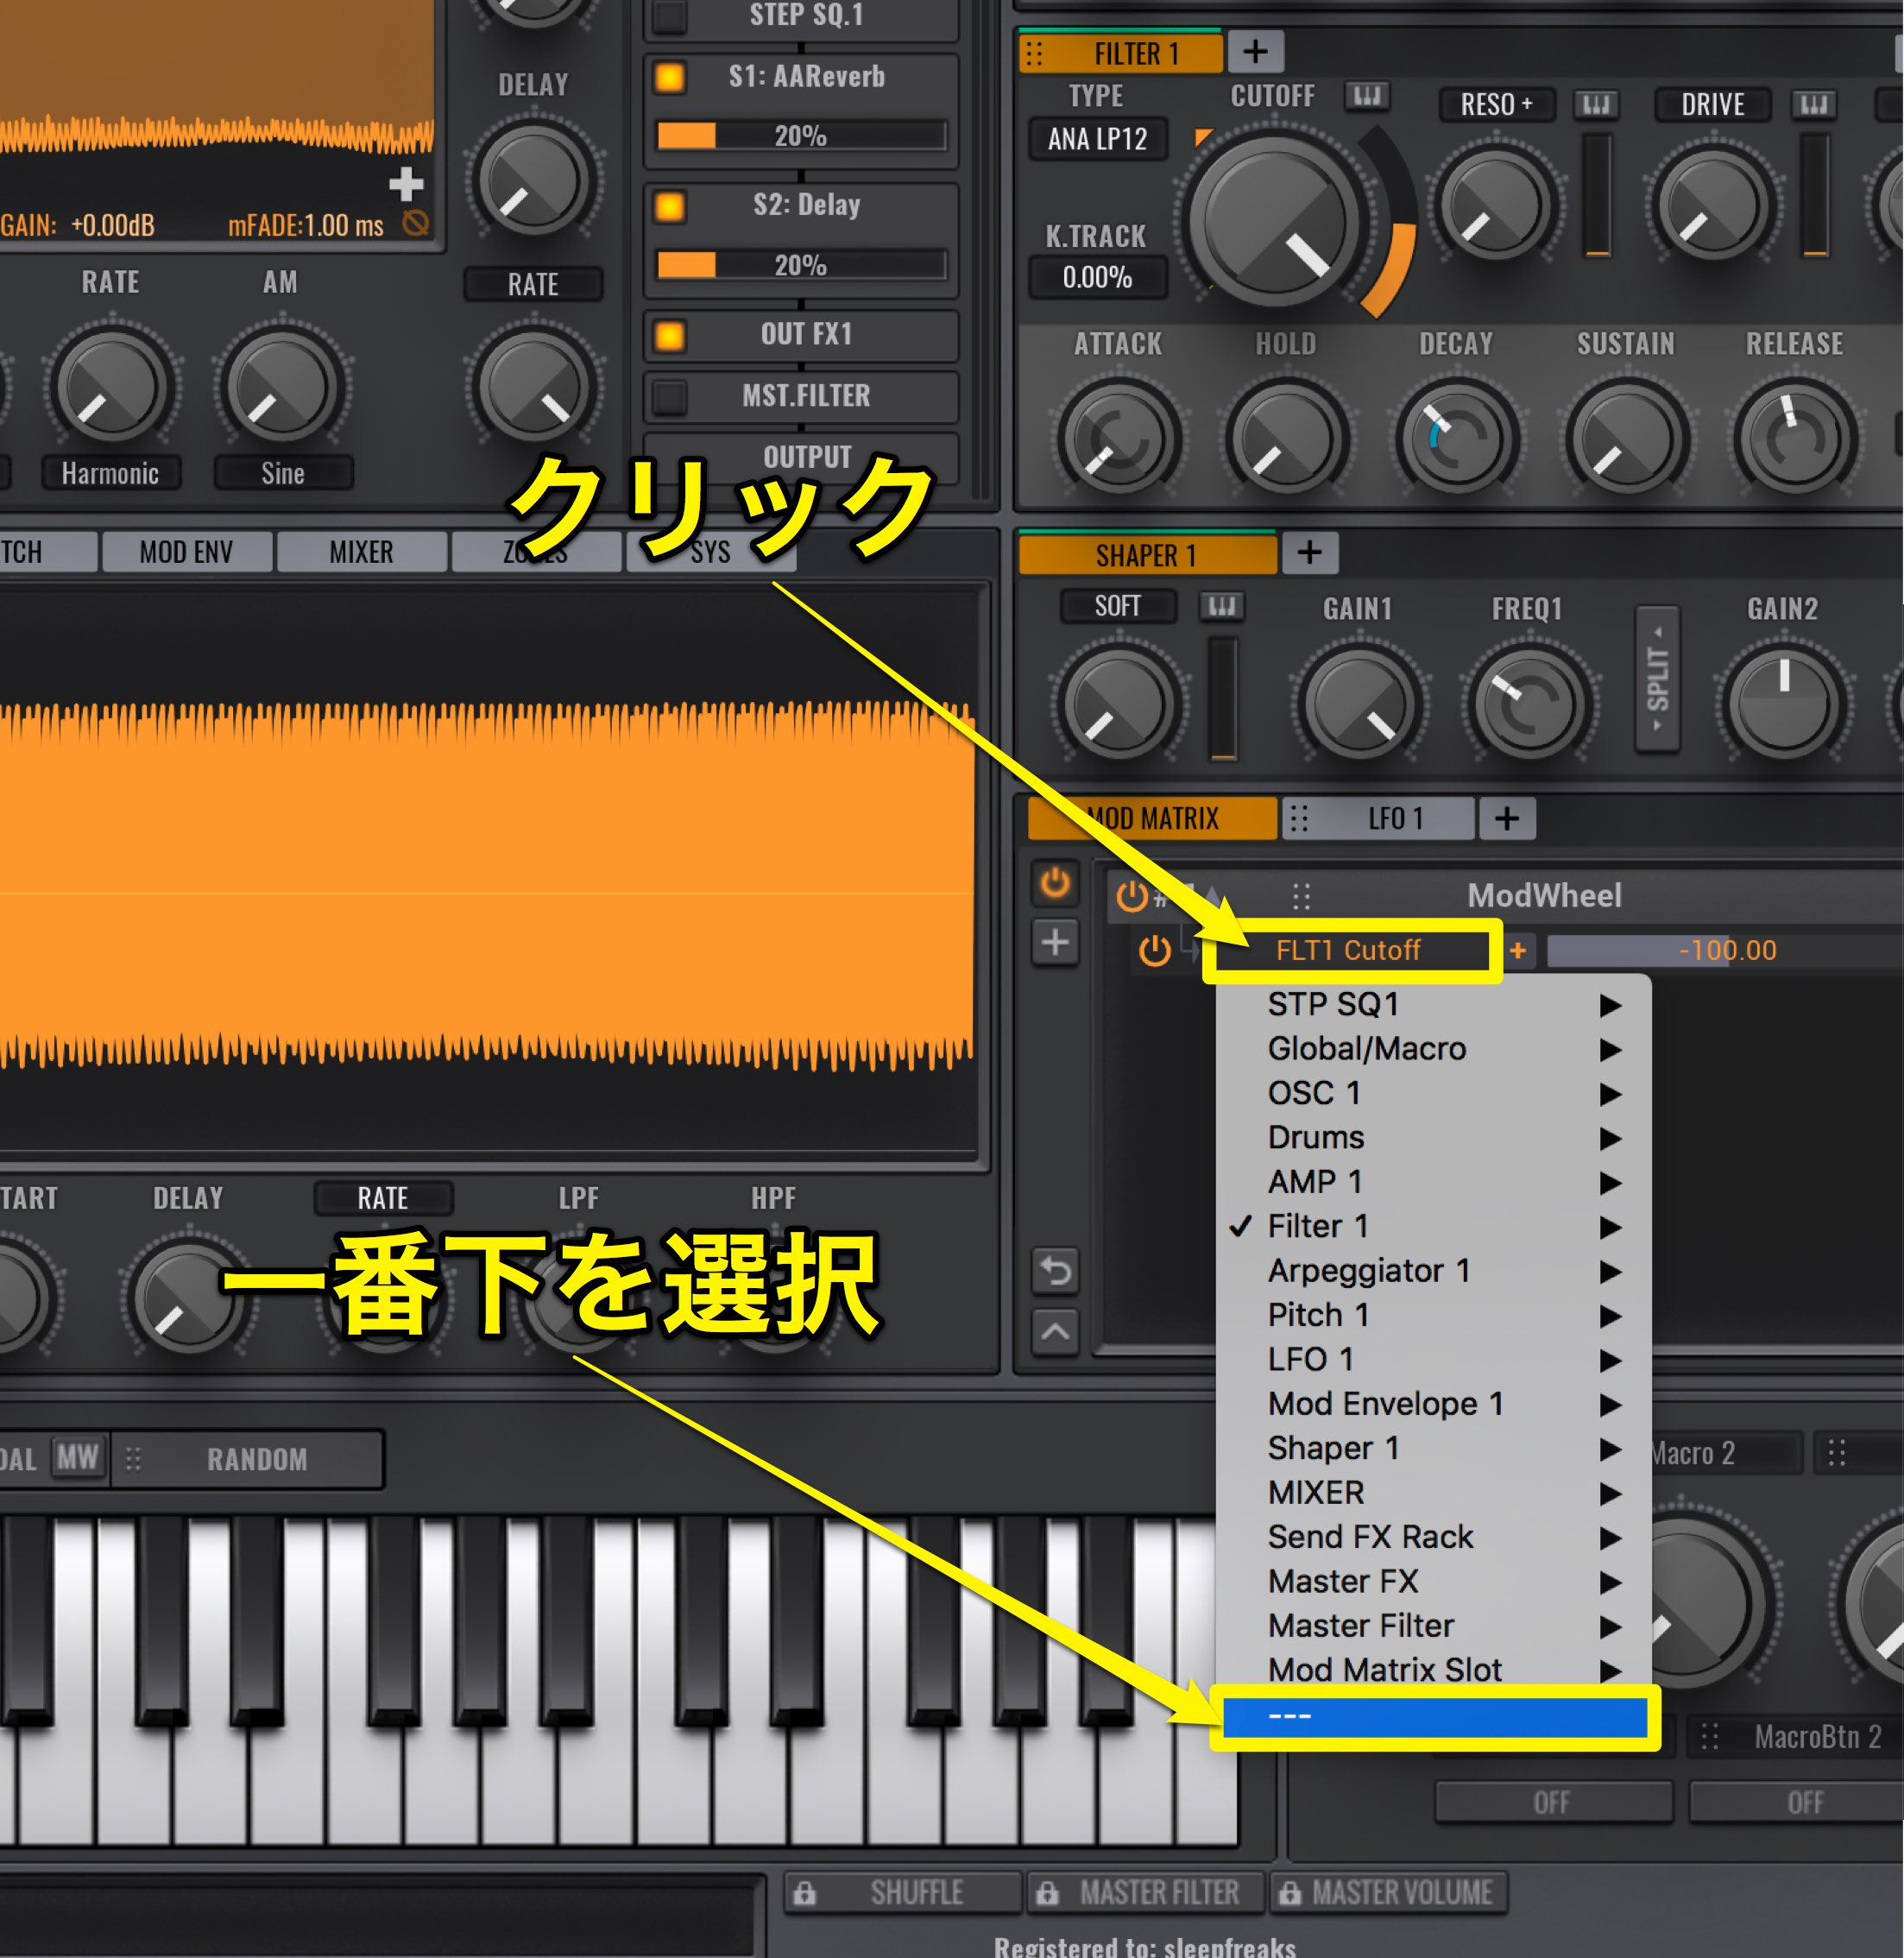
Click on the FLT 1 Cutoff, and select the bottom option.
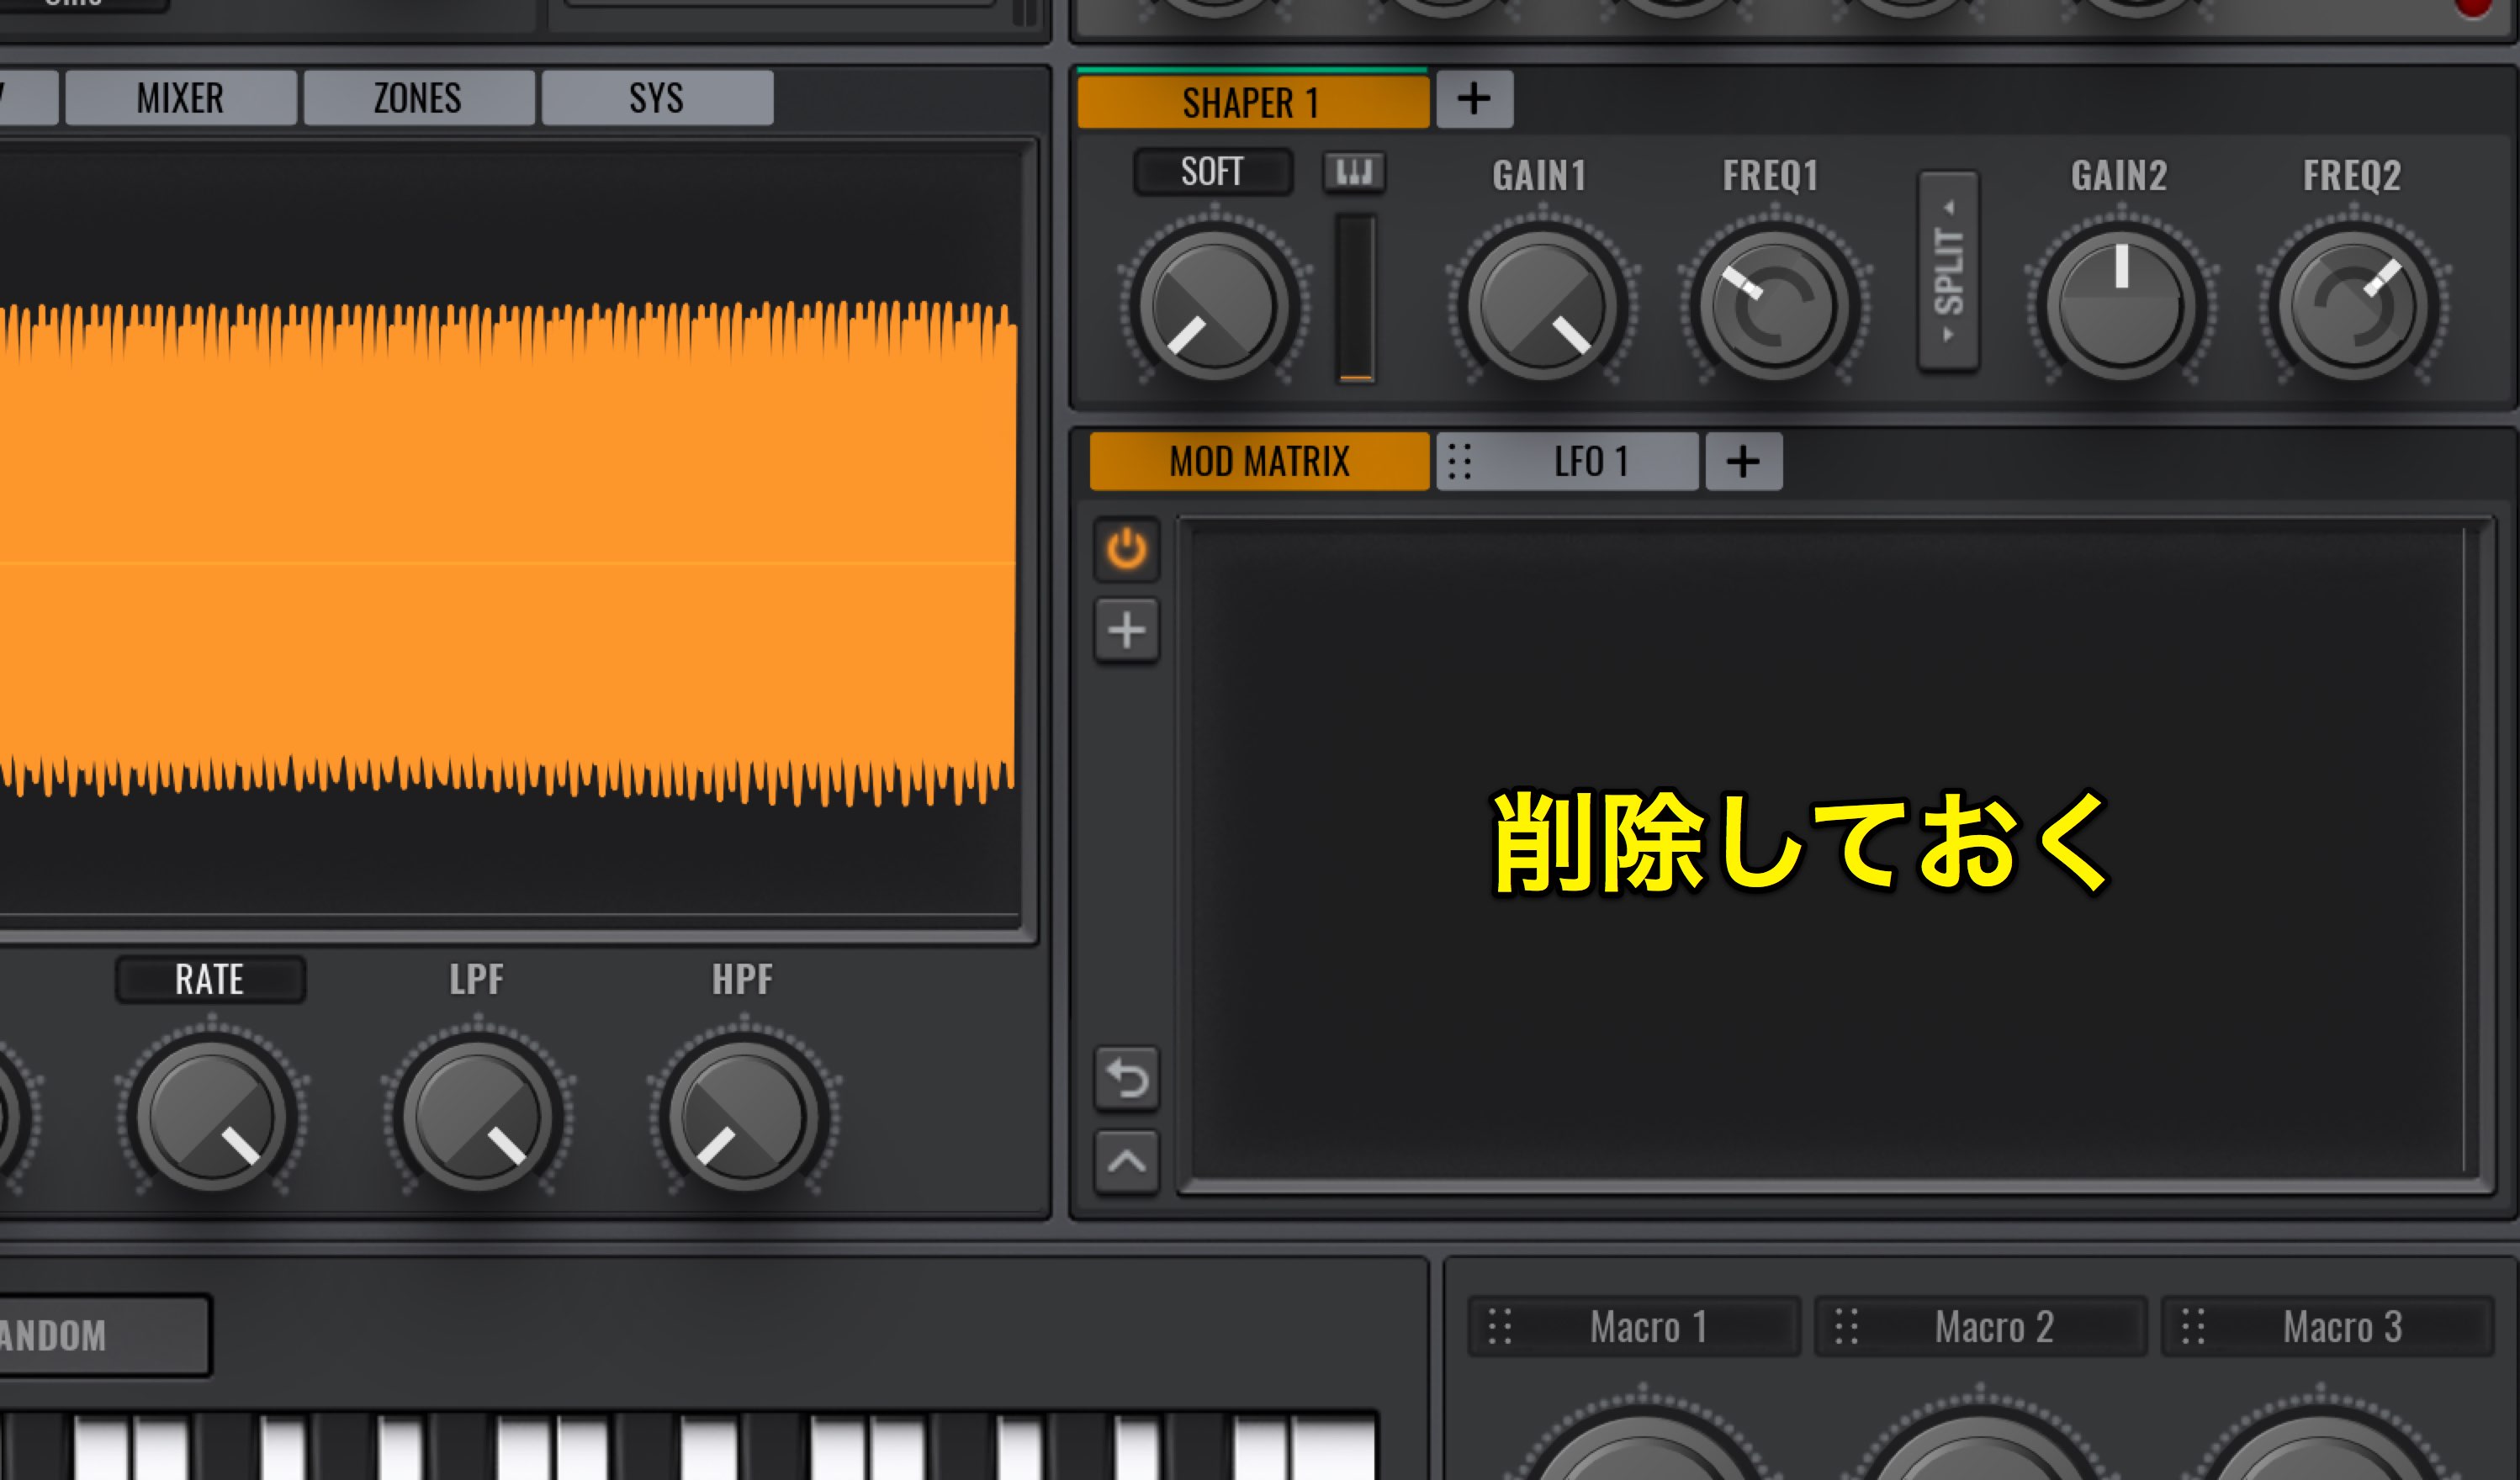
You can remove it as so.
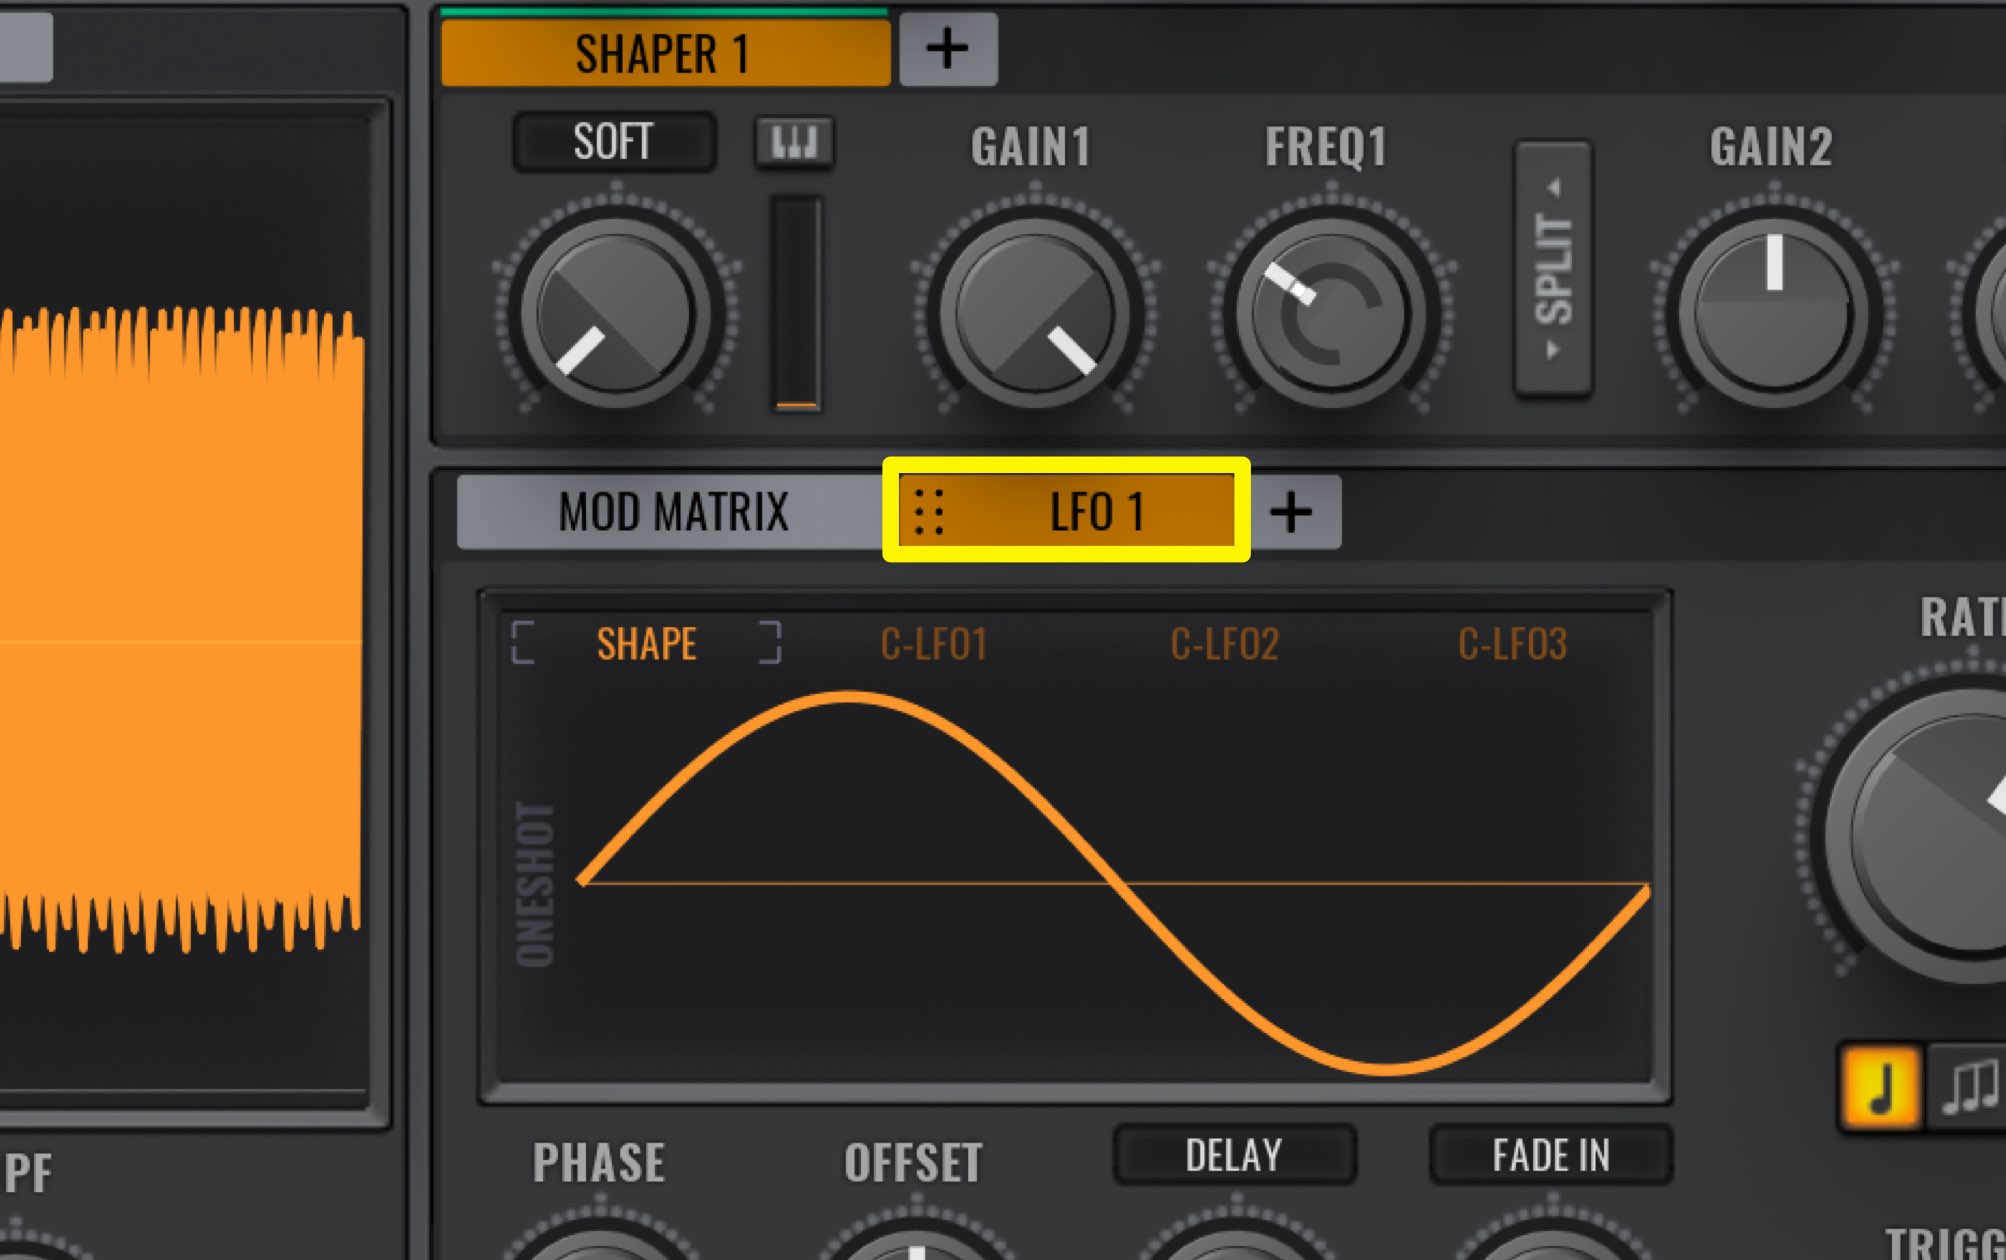
You can find the LFO next to the MOD MATRIX.
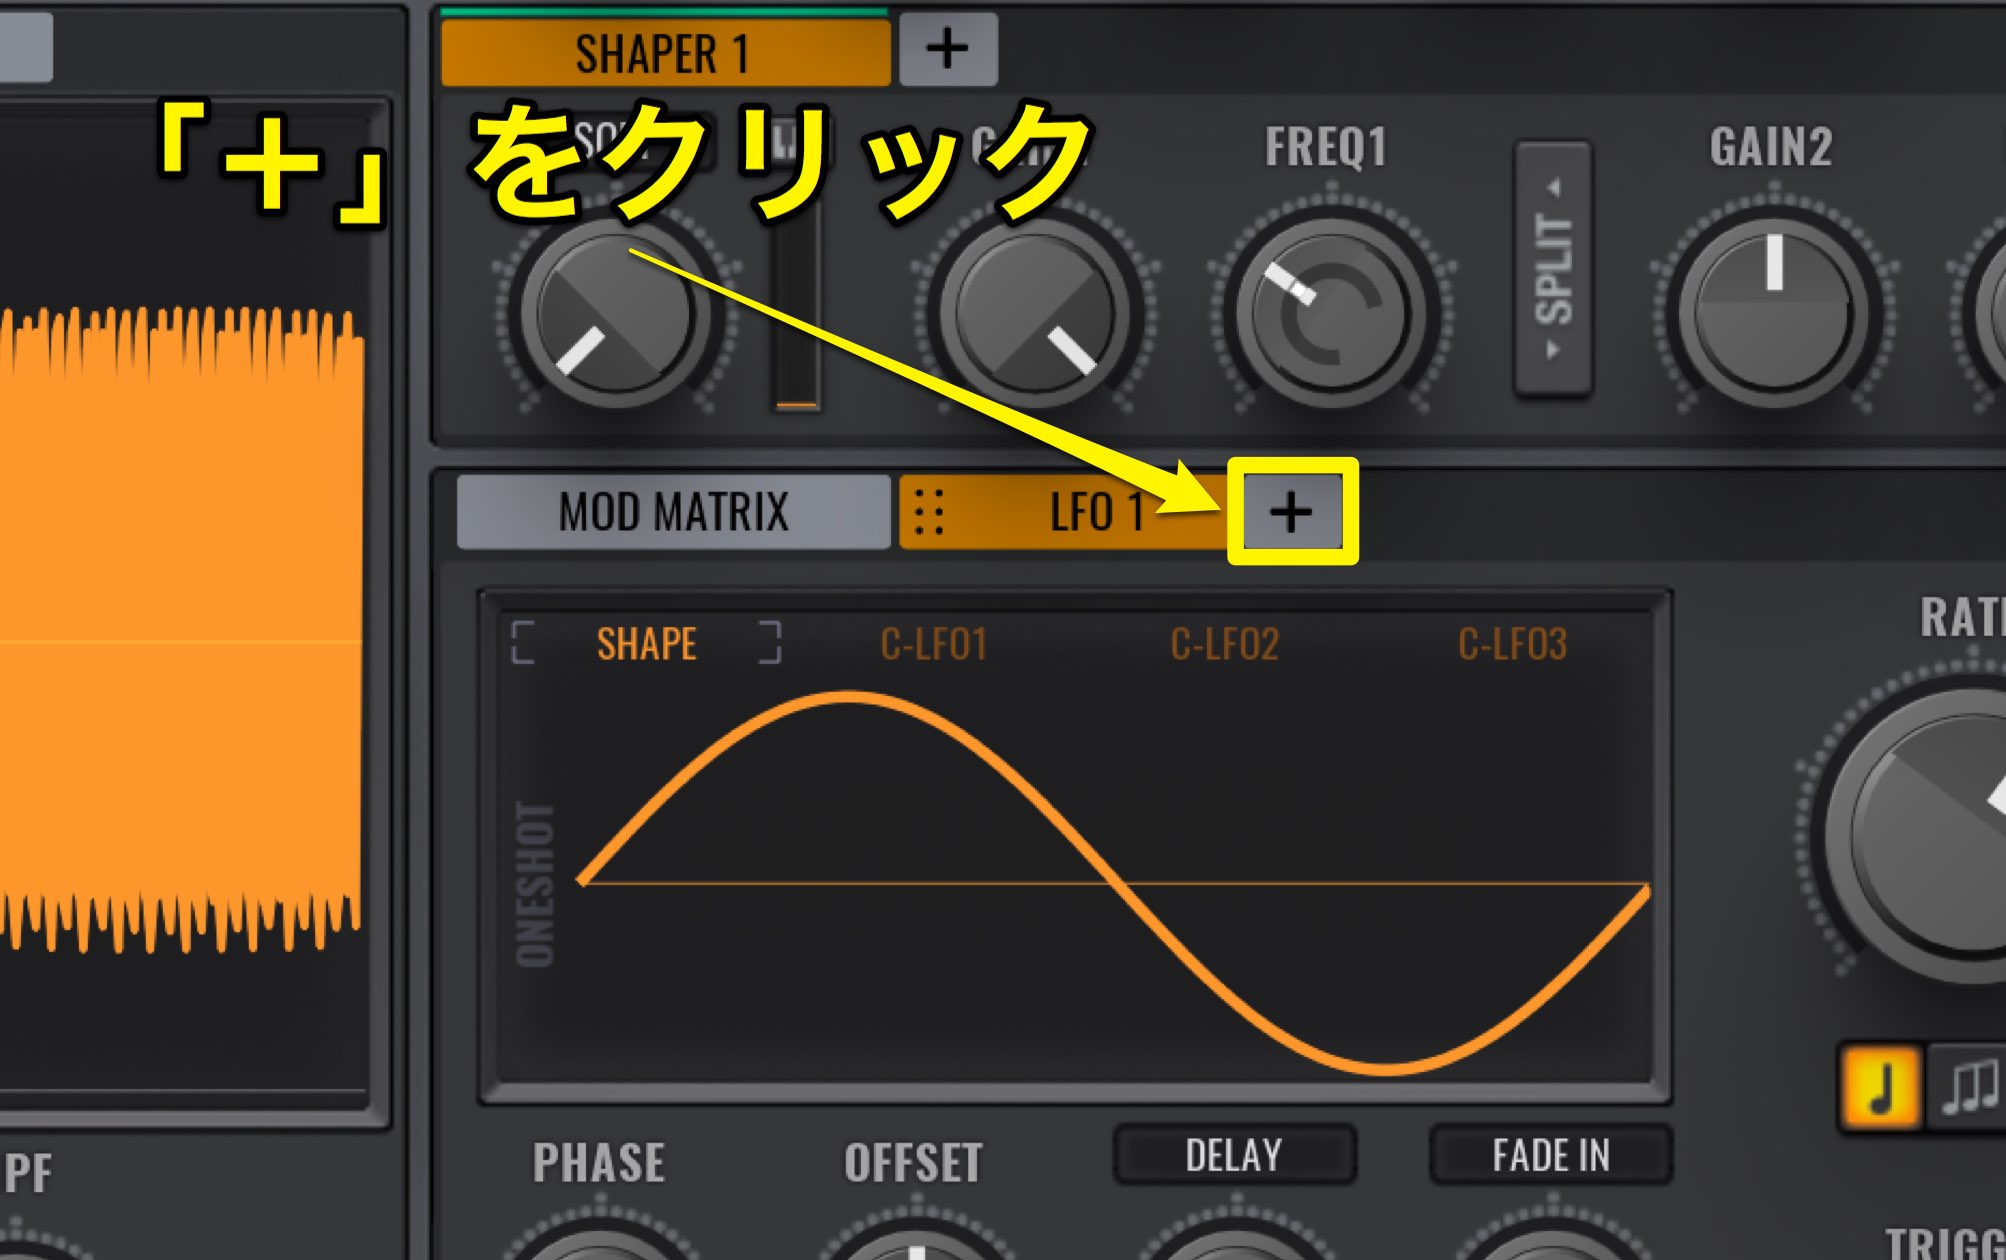
By clicking the “+” mark,
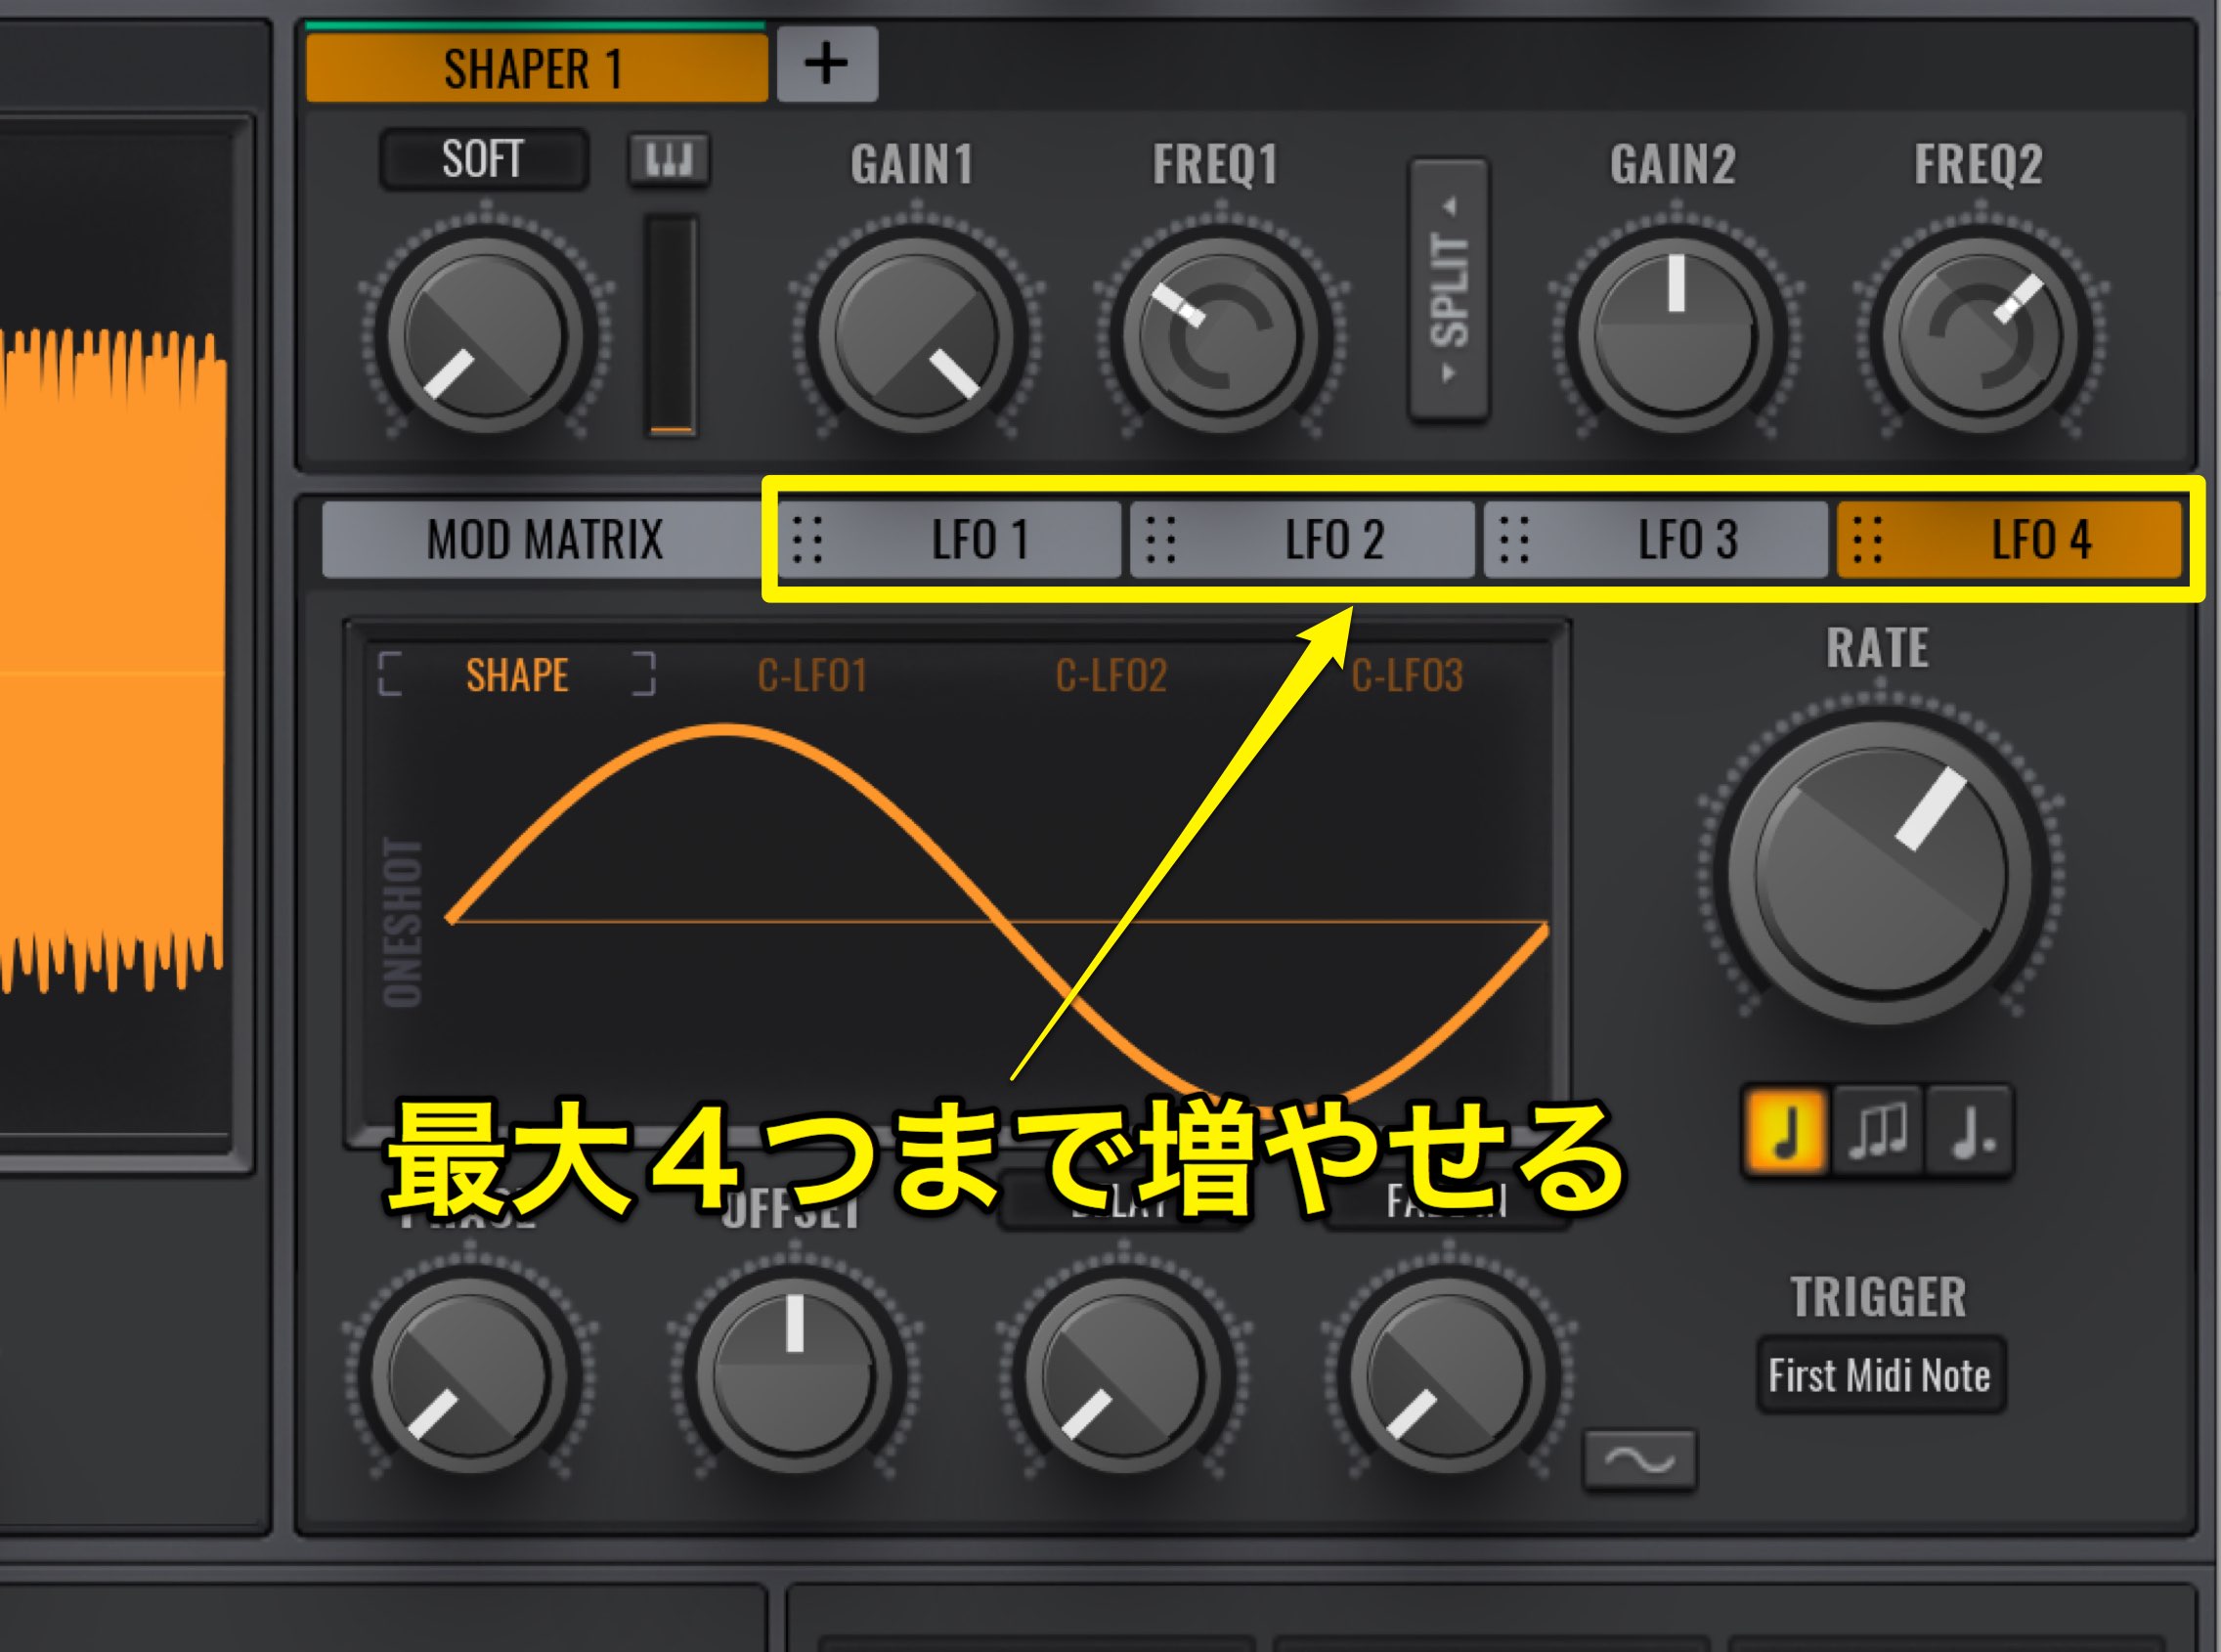
you can add up to 4 LFOs.
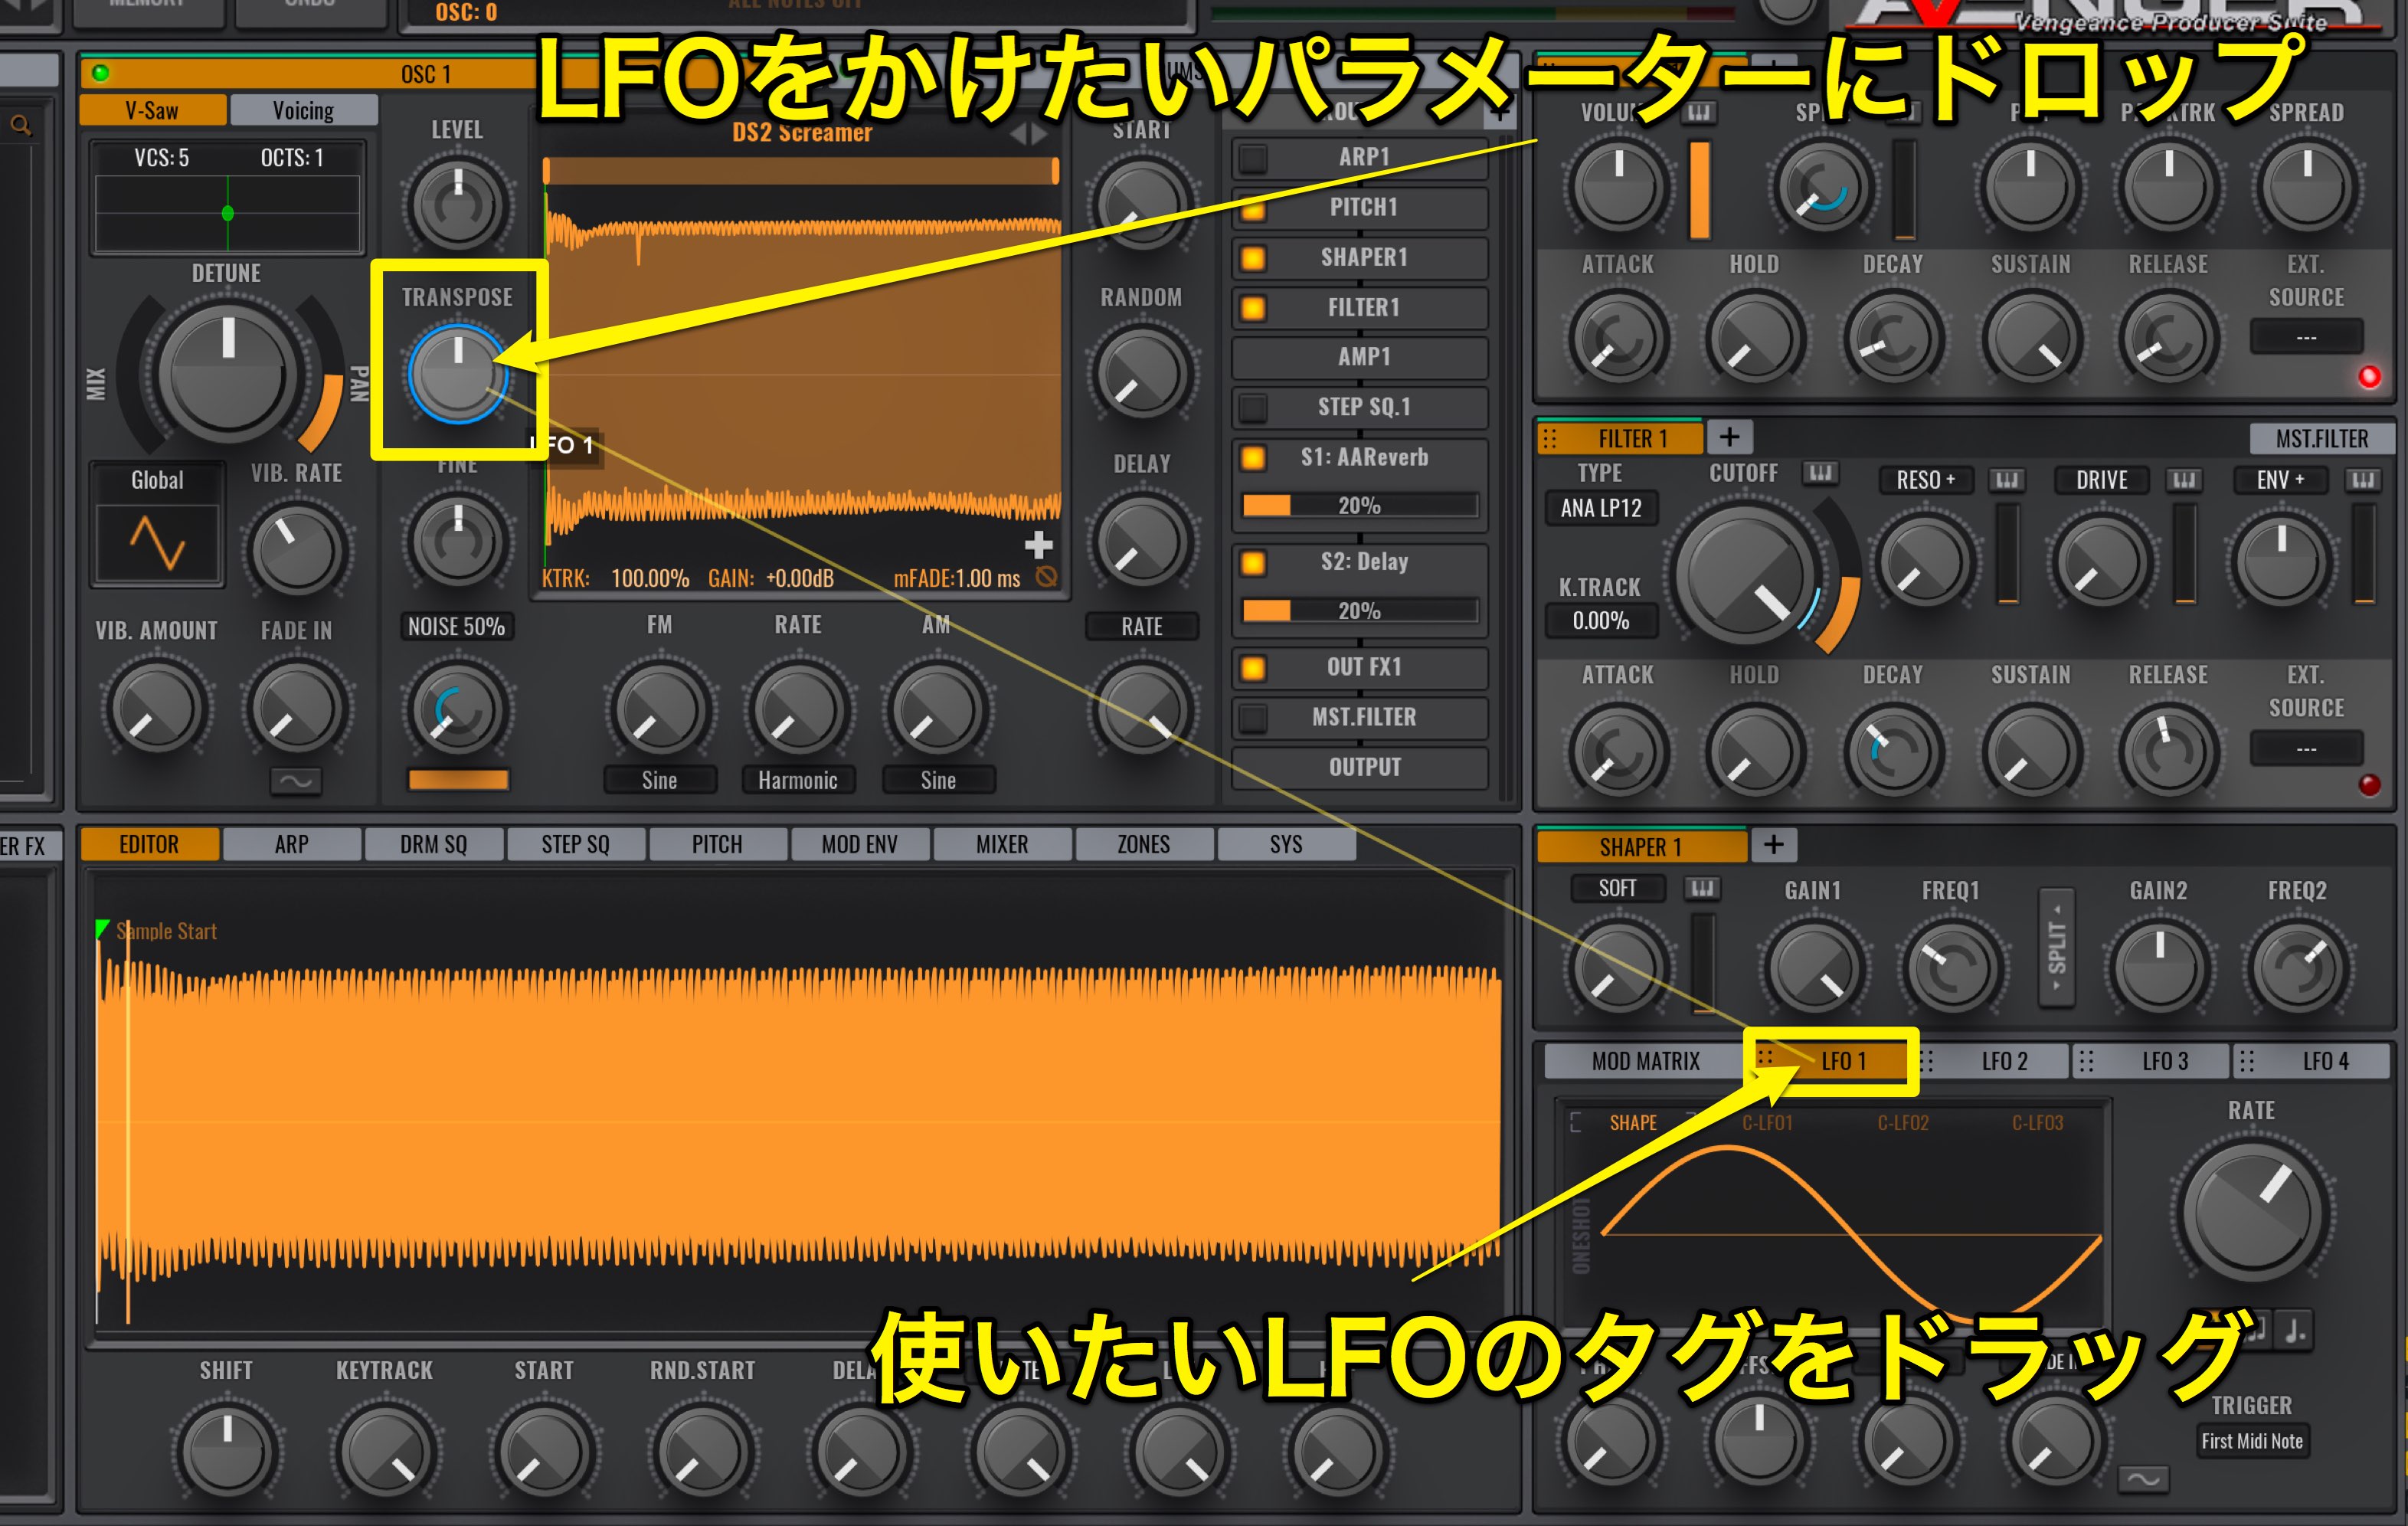
You can apply the LFO to the parameter you choose.
Drag the LFO 1 tag.
A yellow line will come up, and you can drop the LFO on the parameter you want the effect applied to.
Here, lets try applying it to a parameter that’s easy to hear changes on; the TRANSPOSE (pitch) knob.
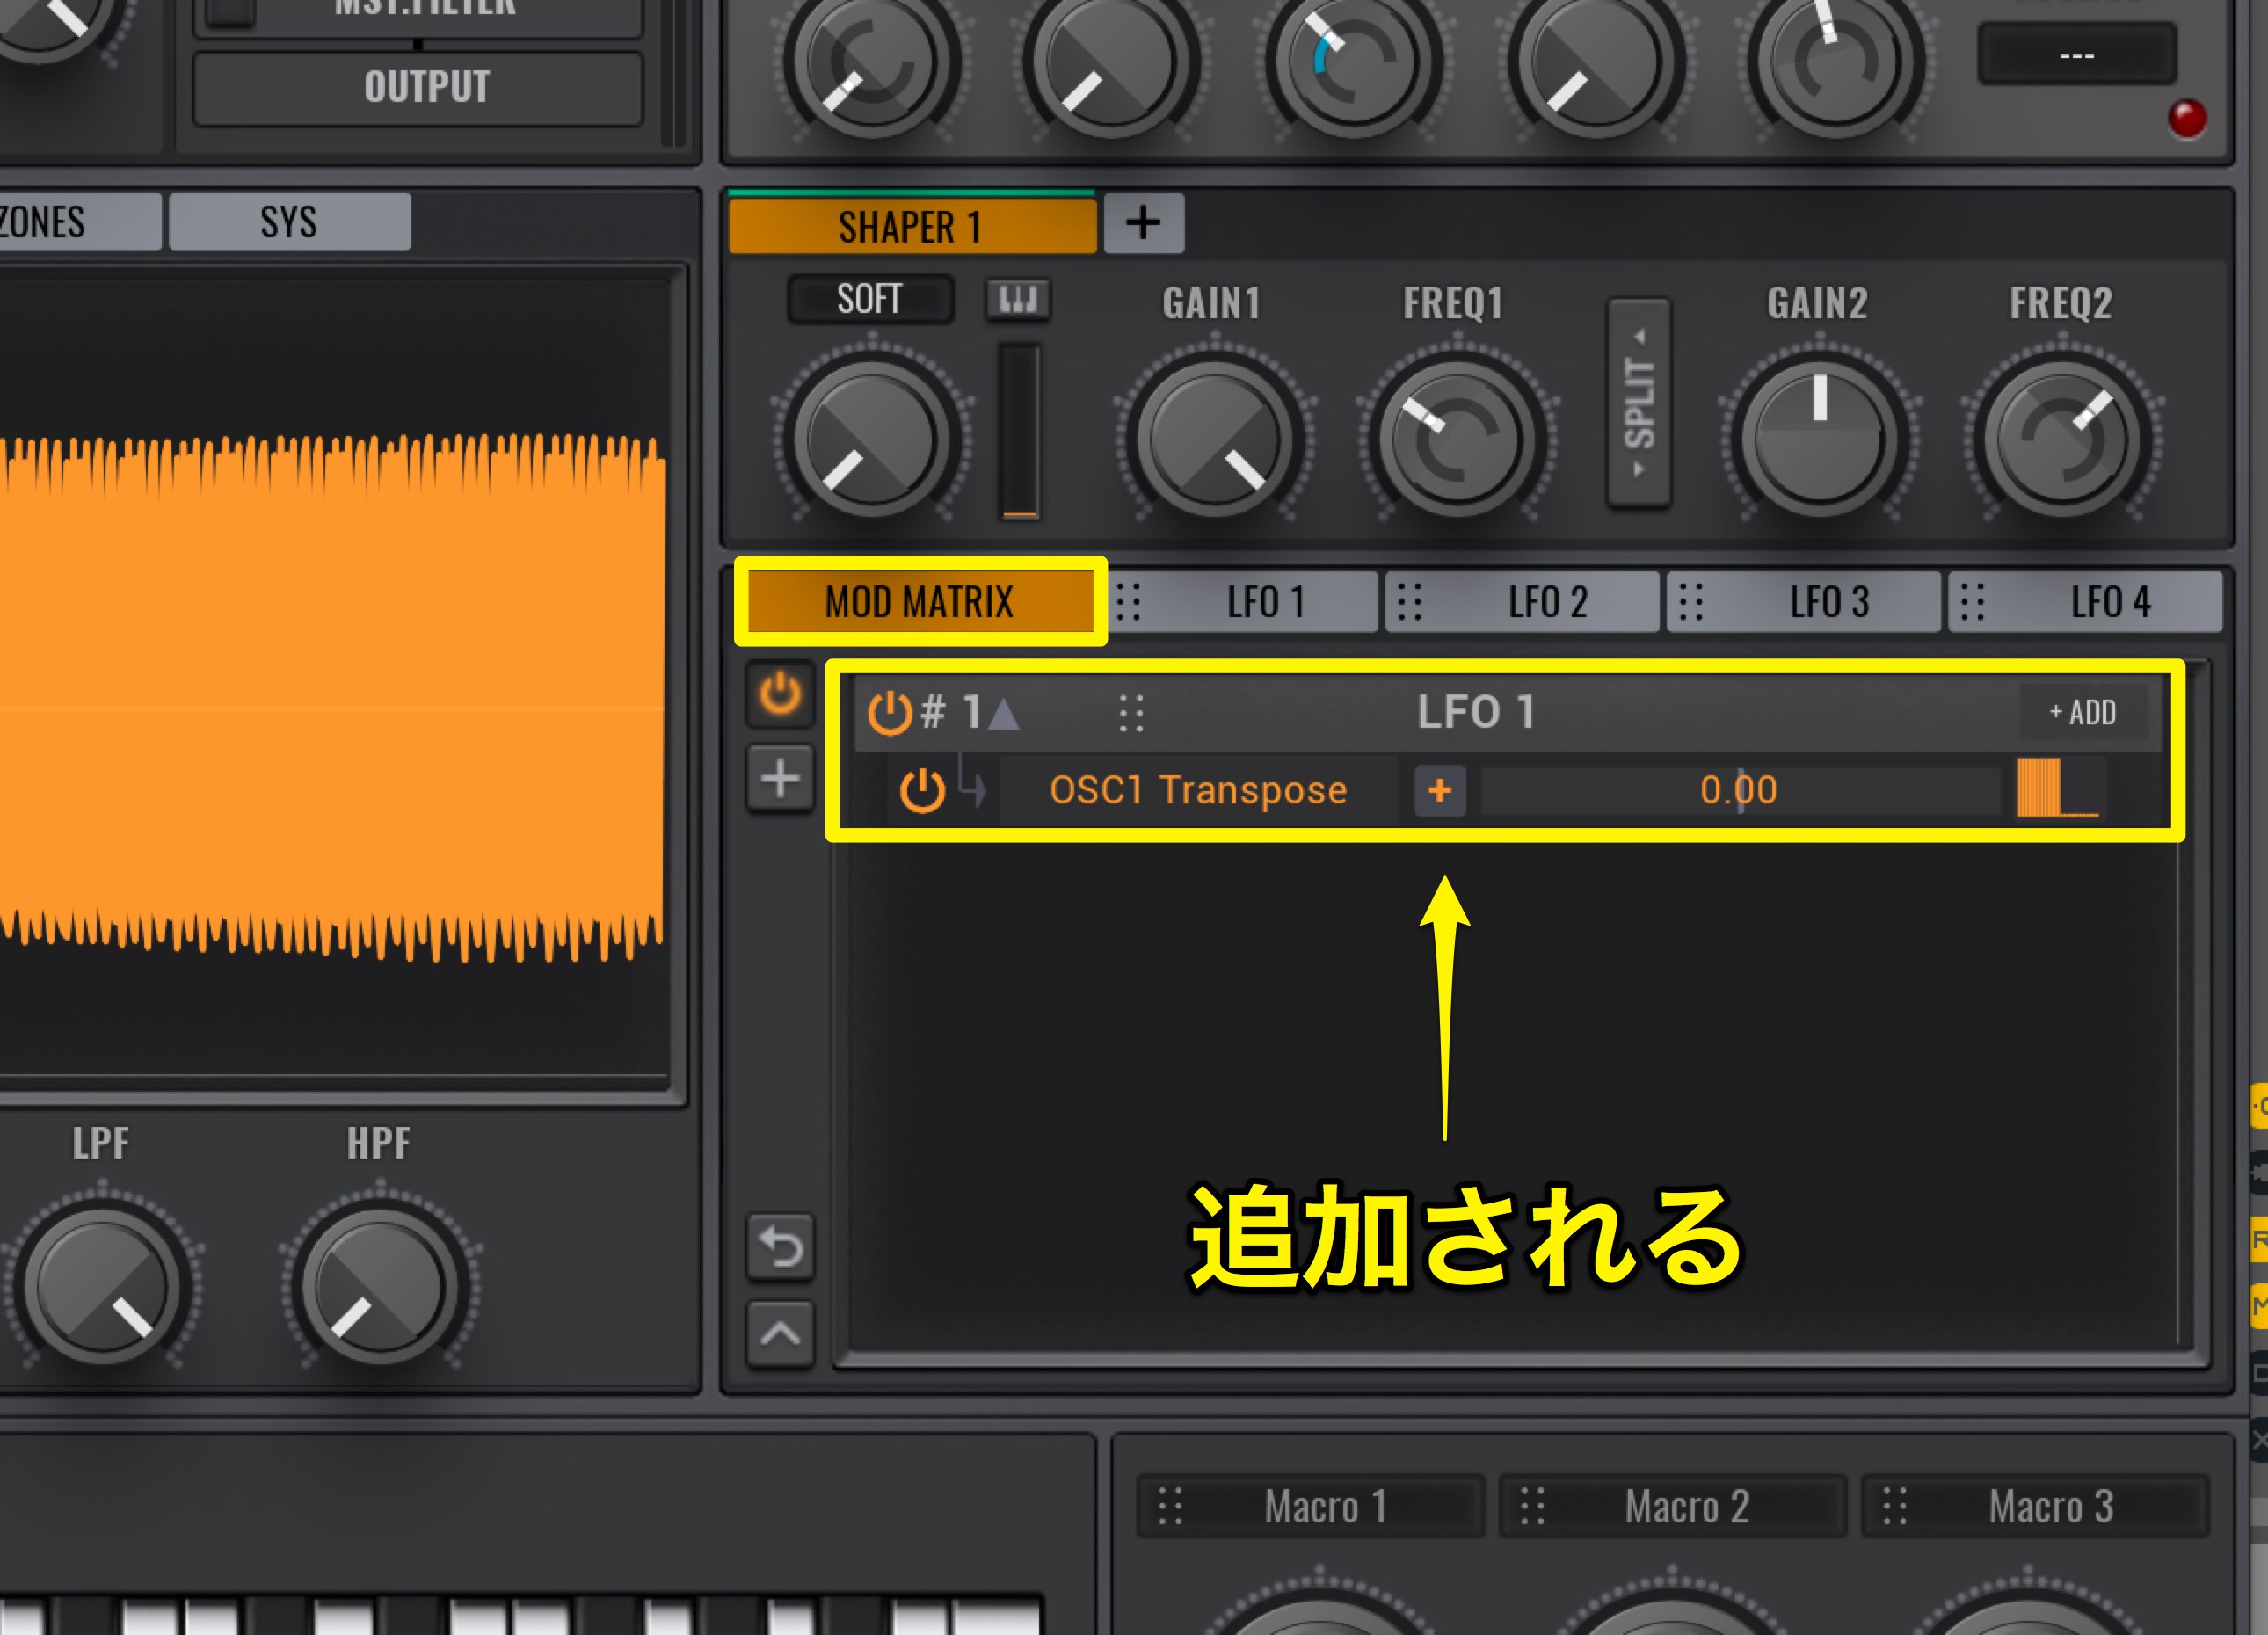
The LFO will be added to the MOD MATRIX.
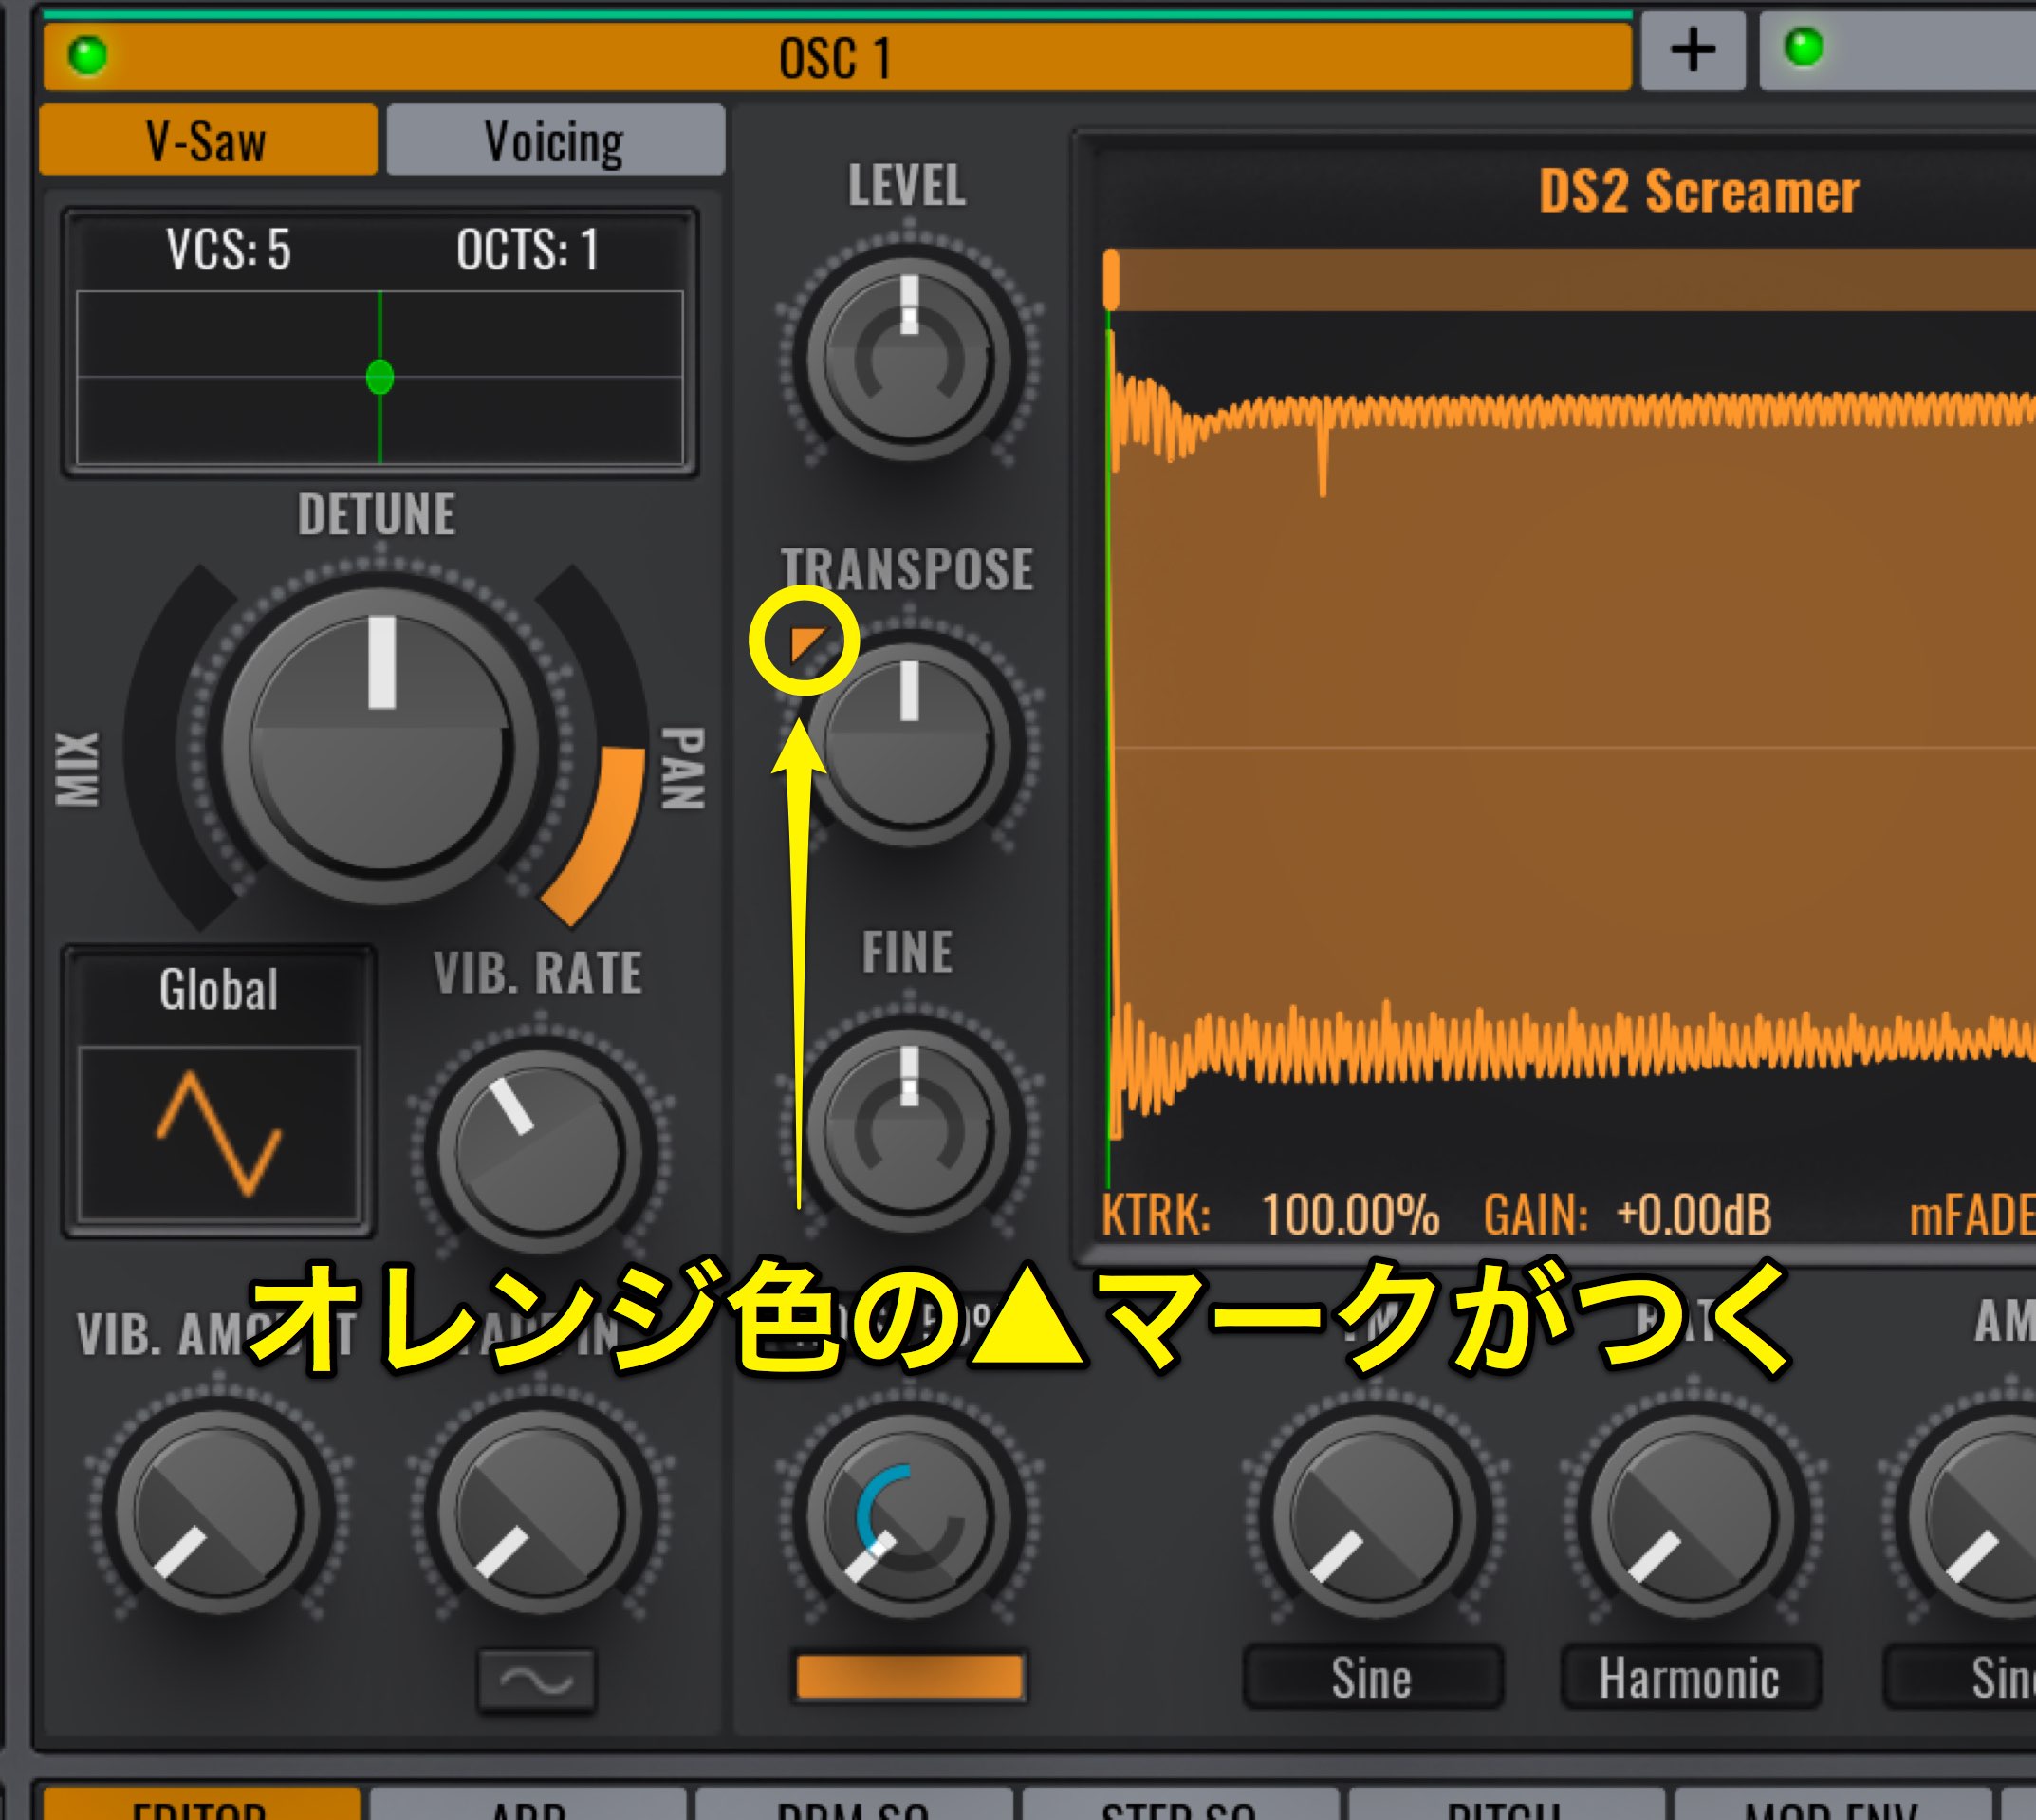
An orange ▲ mark will come up on the parameter added to the MOD MATRIX.
This makes it easy to figure out.
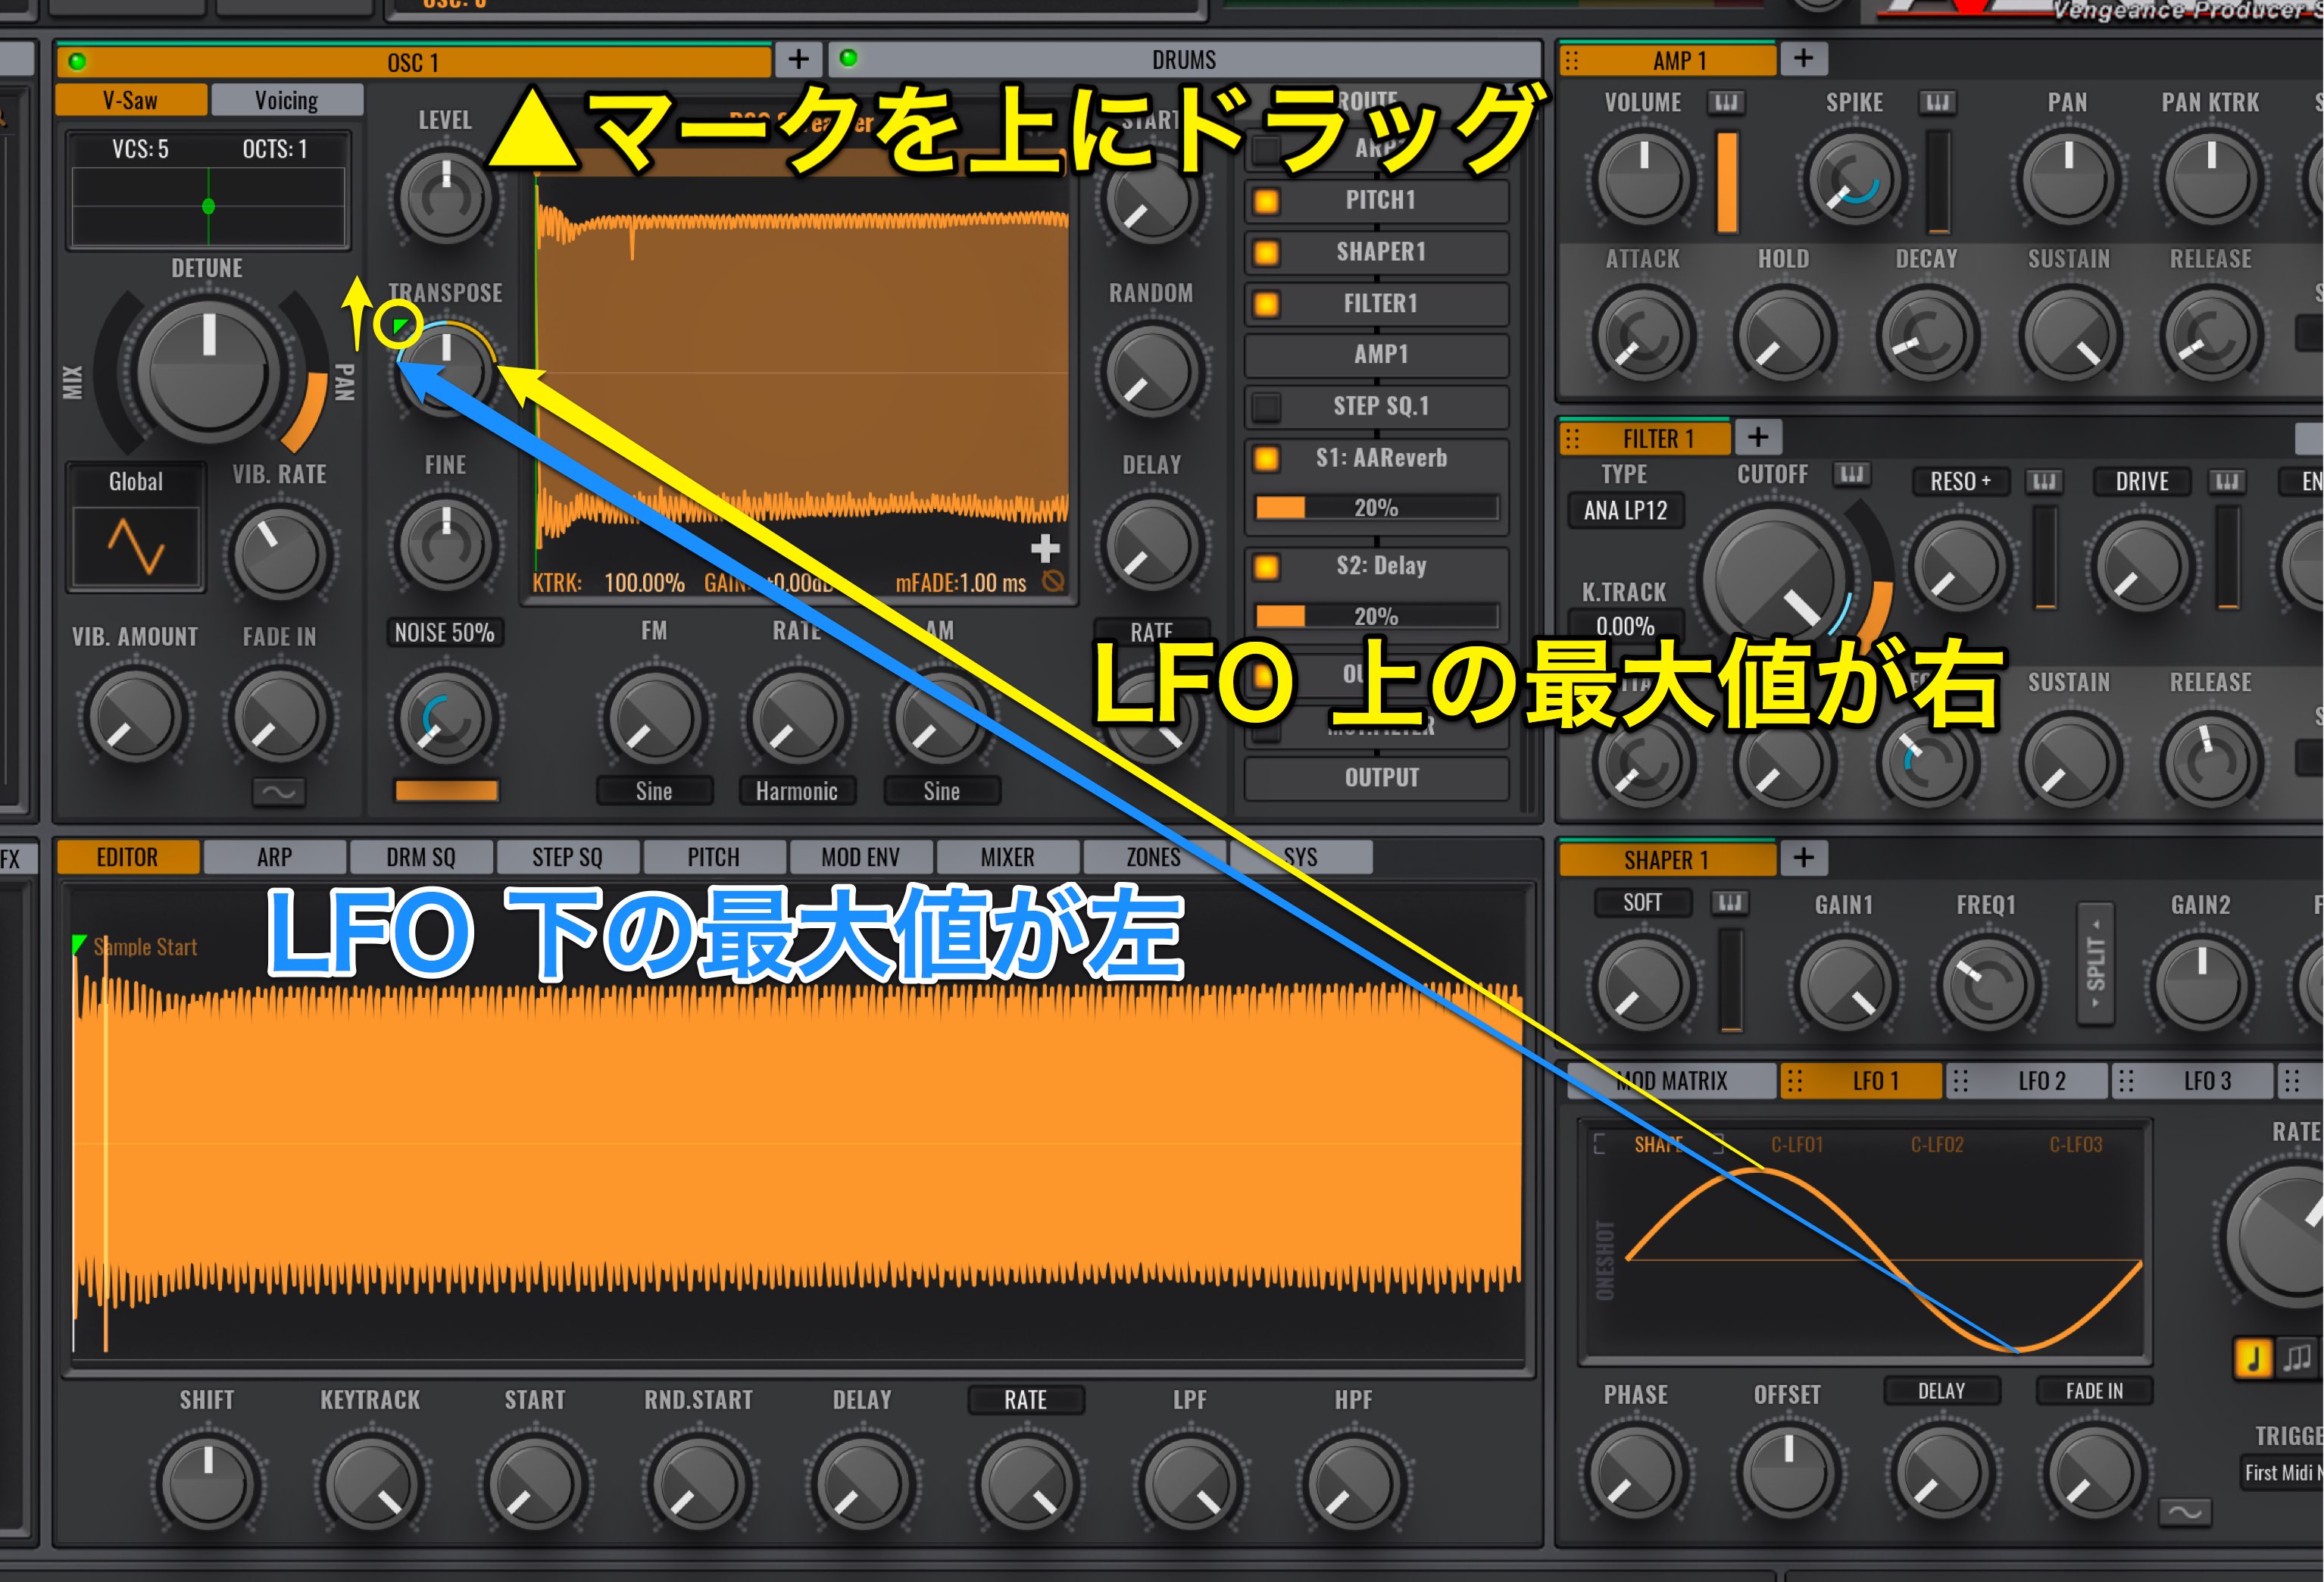
By dragging the orange ▲ mark up/down, you can decide how much of the LFO effect is applied.
By dragging up, the LFO’s highest point will be shown on the right, and the lowest point will be shown on the left.
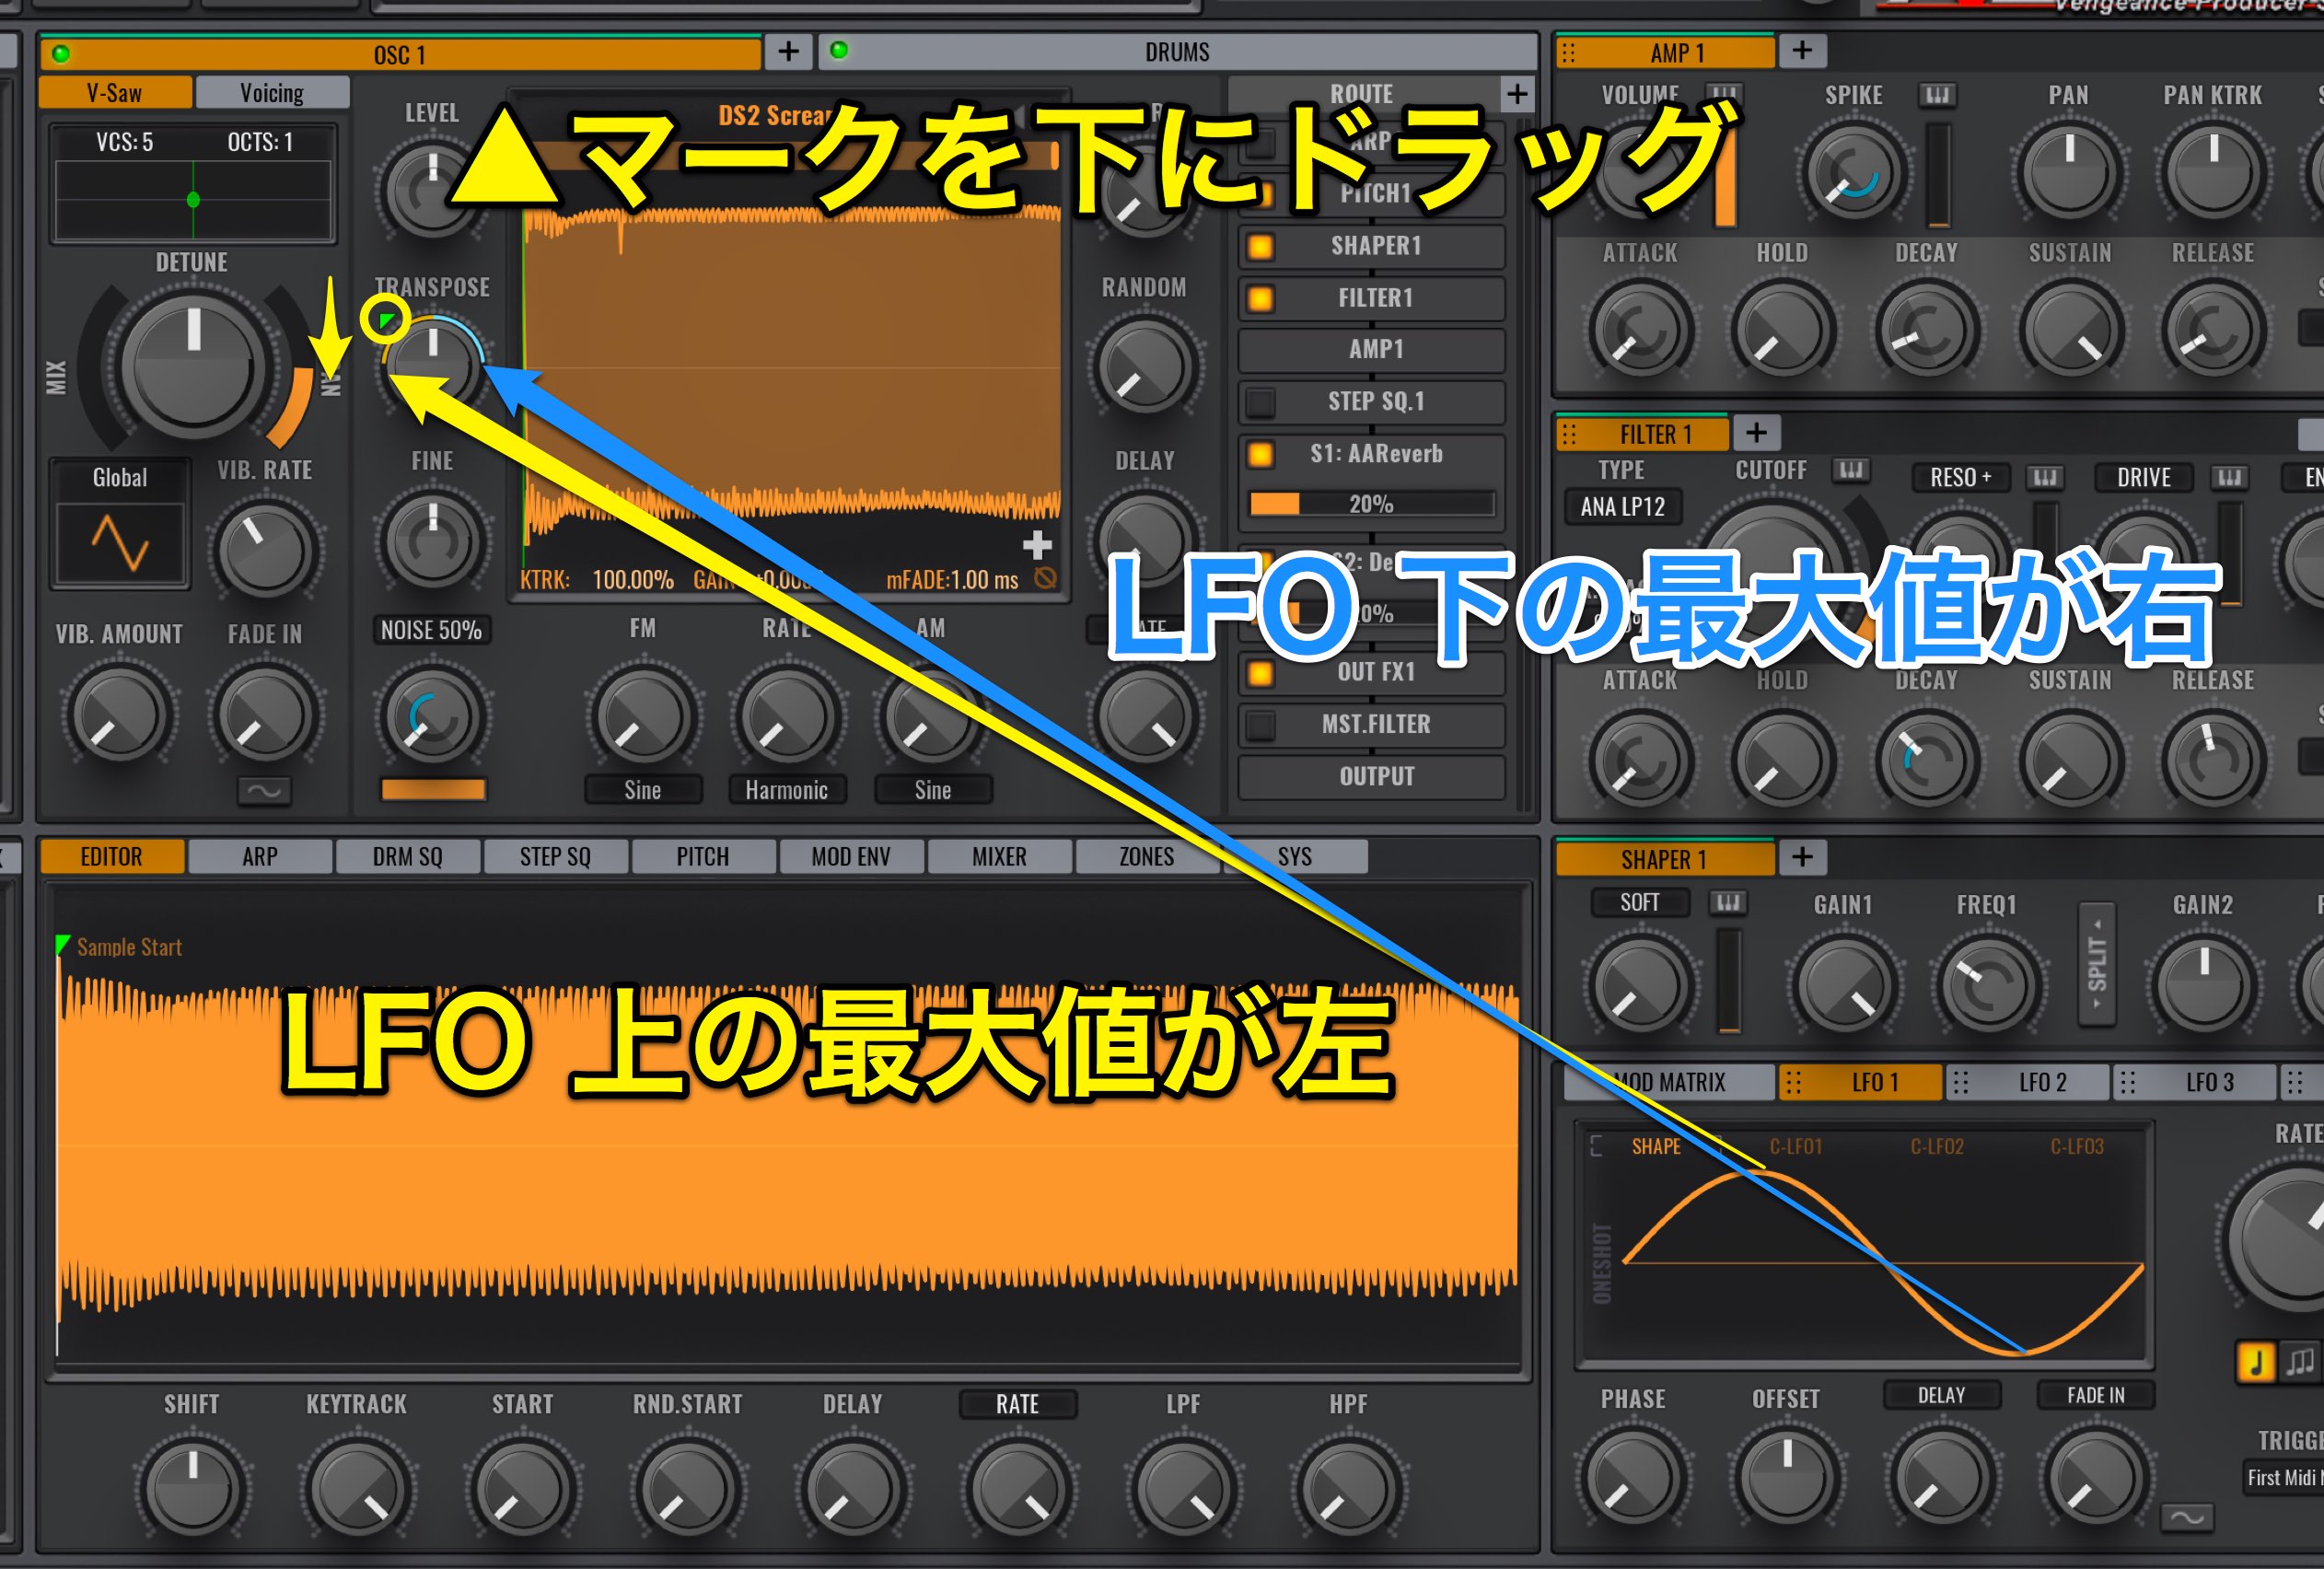
By dragging the ▲ mark down, the LFO’s highest point will be shown on the left, and the lowest point will be shown on the right.
The effect becomes applied oppositely.
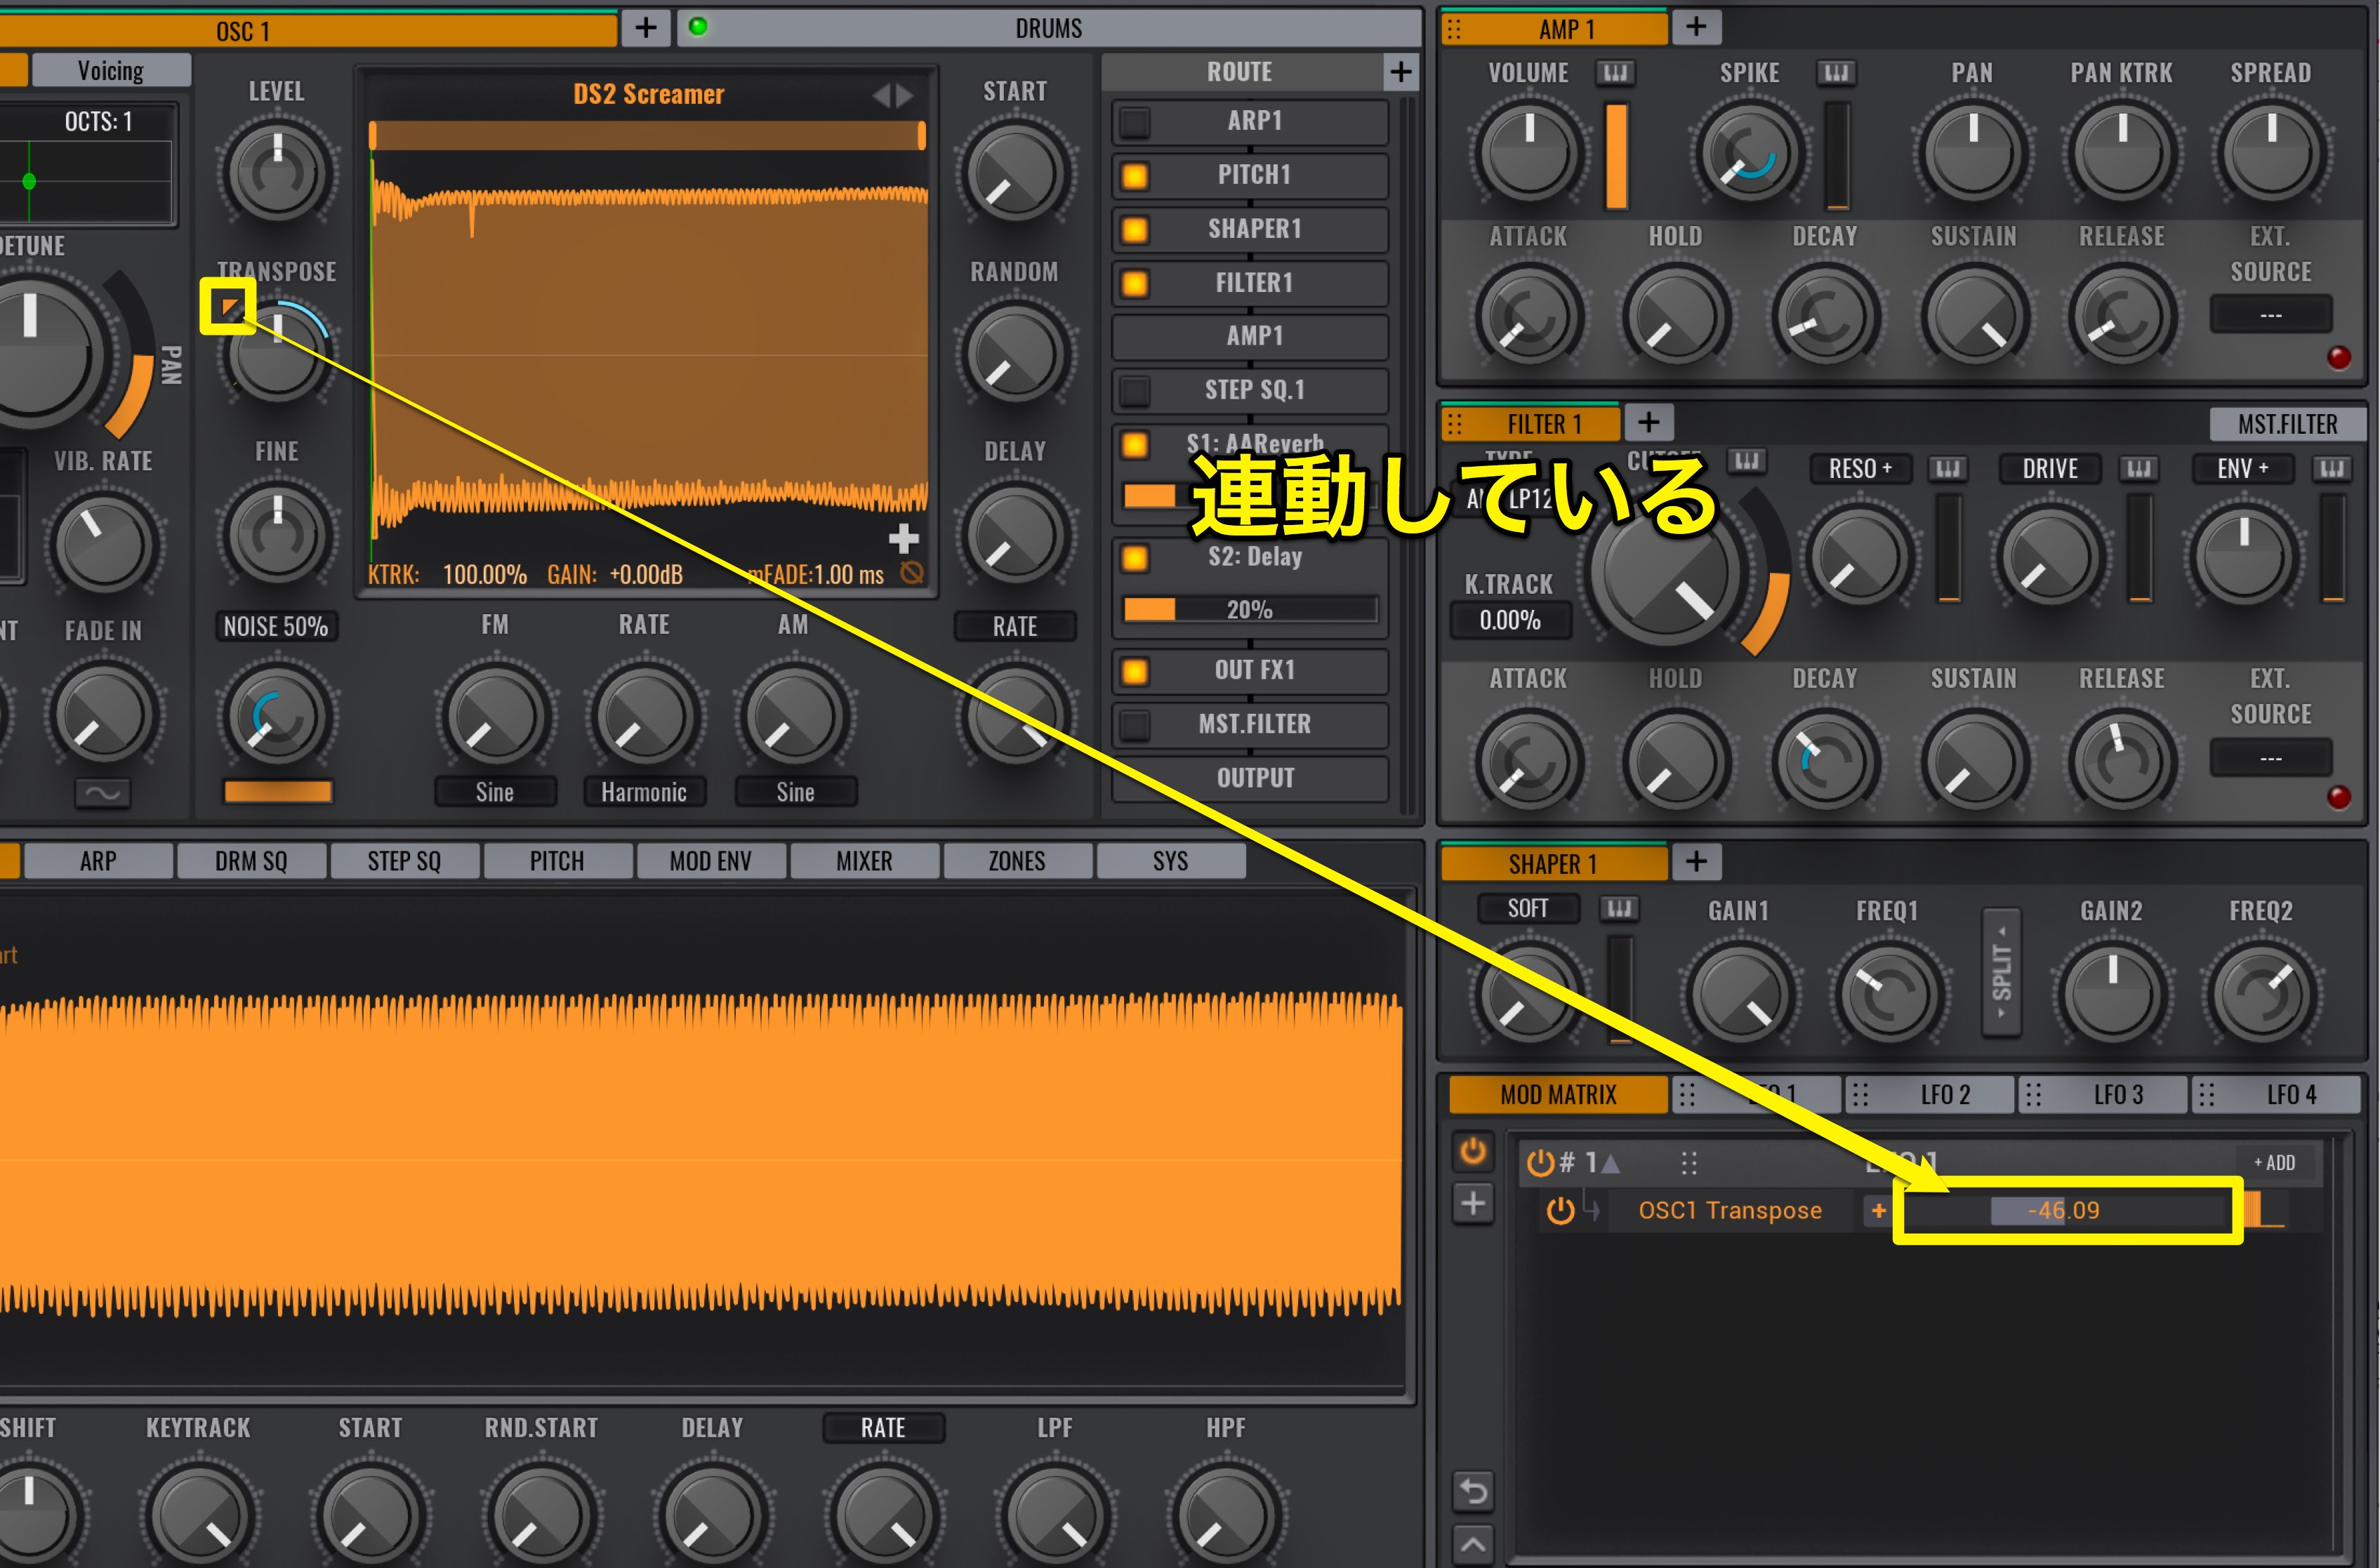
The ▲ mark’s up/down amount, is synced with the area in the MOD MATRIX shown in a box.
The positive number is right and the negative is the left. You can also drag in the MOD MATRIX to adjust the parameter.
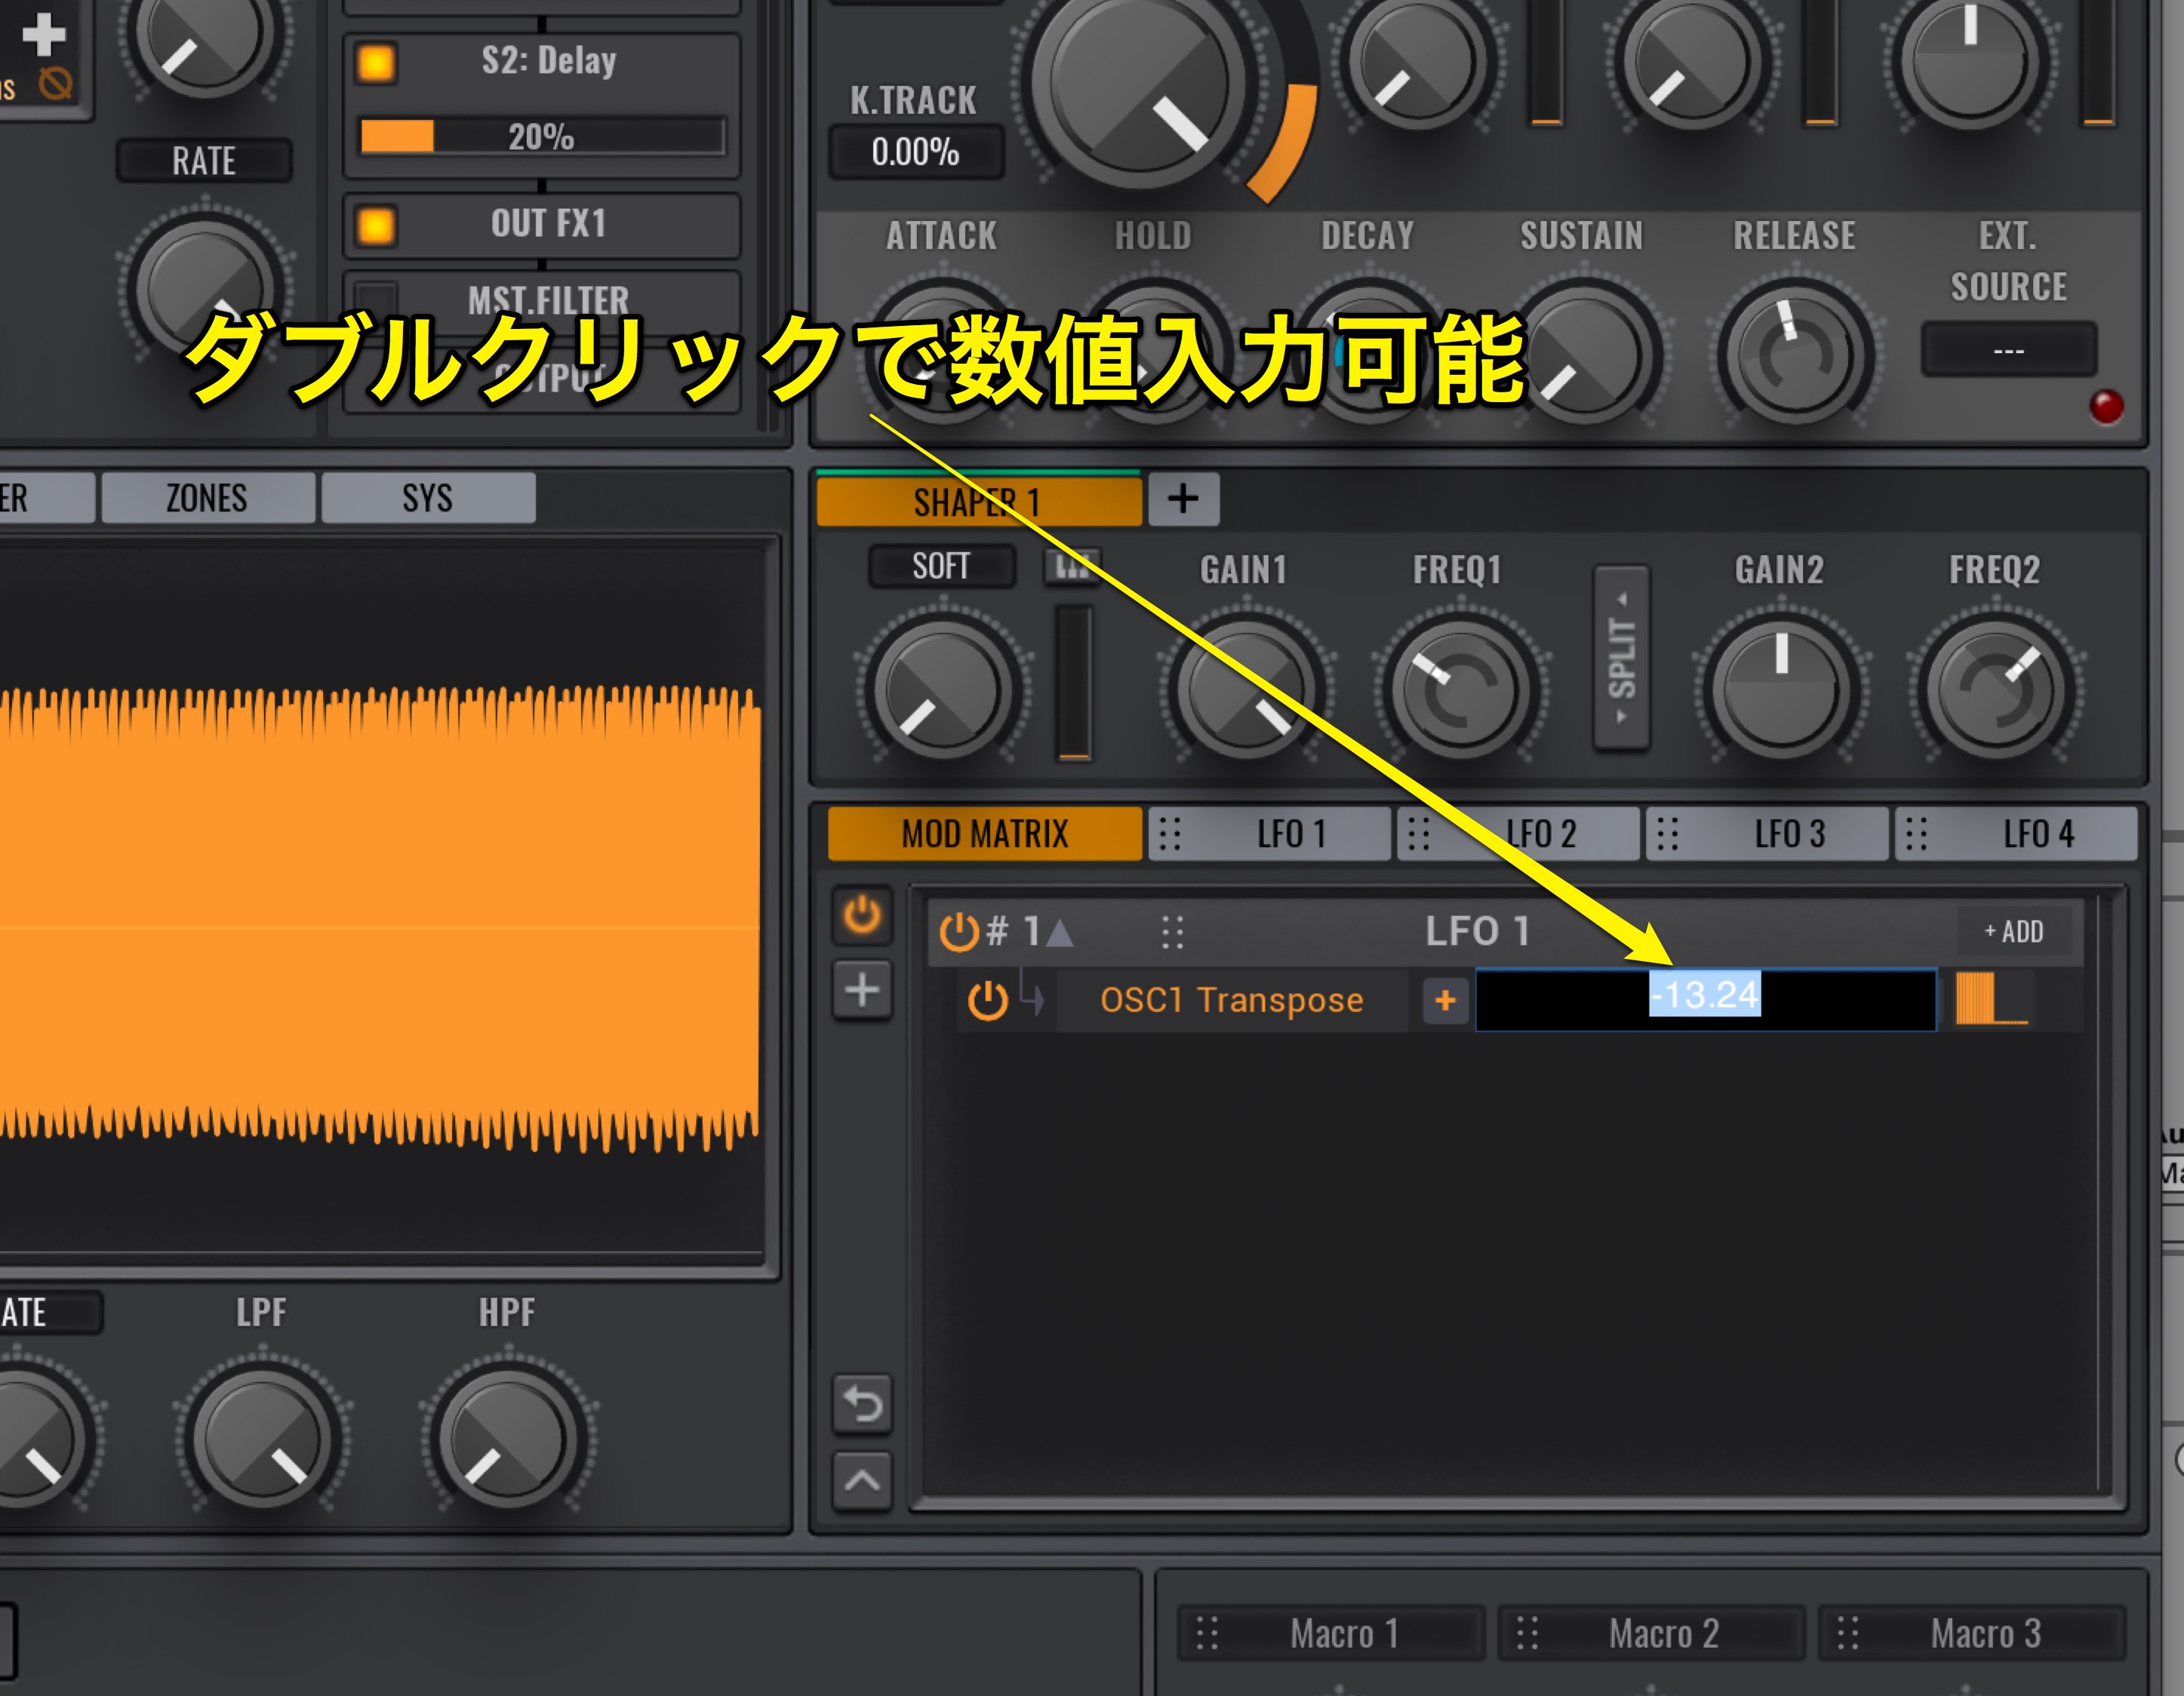
You can also double click on the number area to input a numbers.
Lets take a look at the LFO.
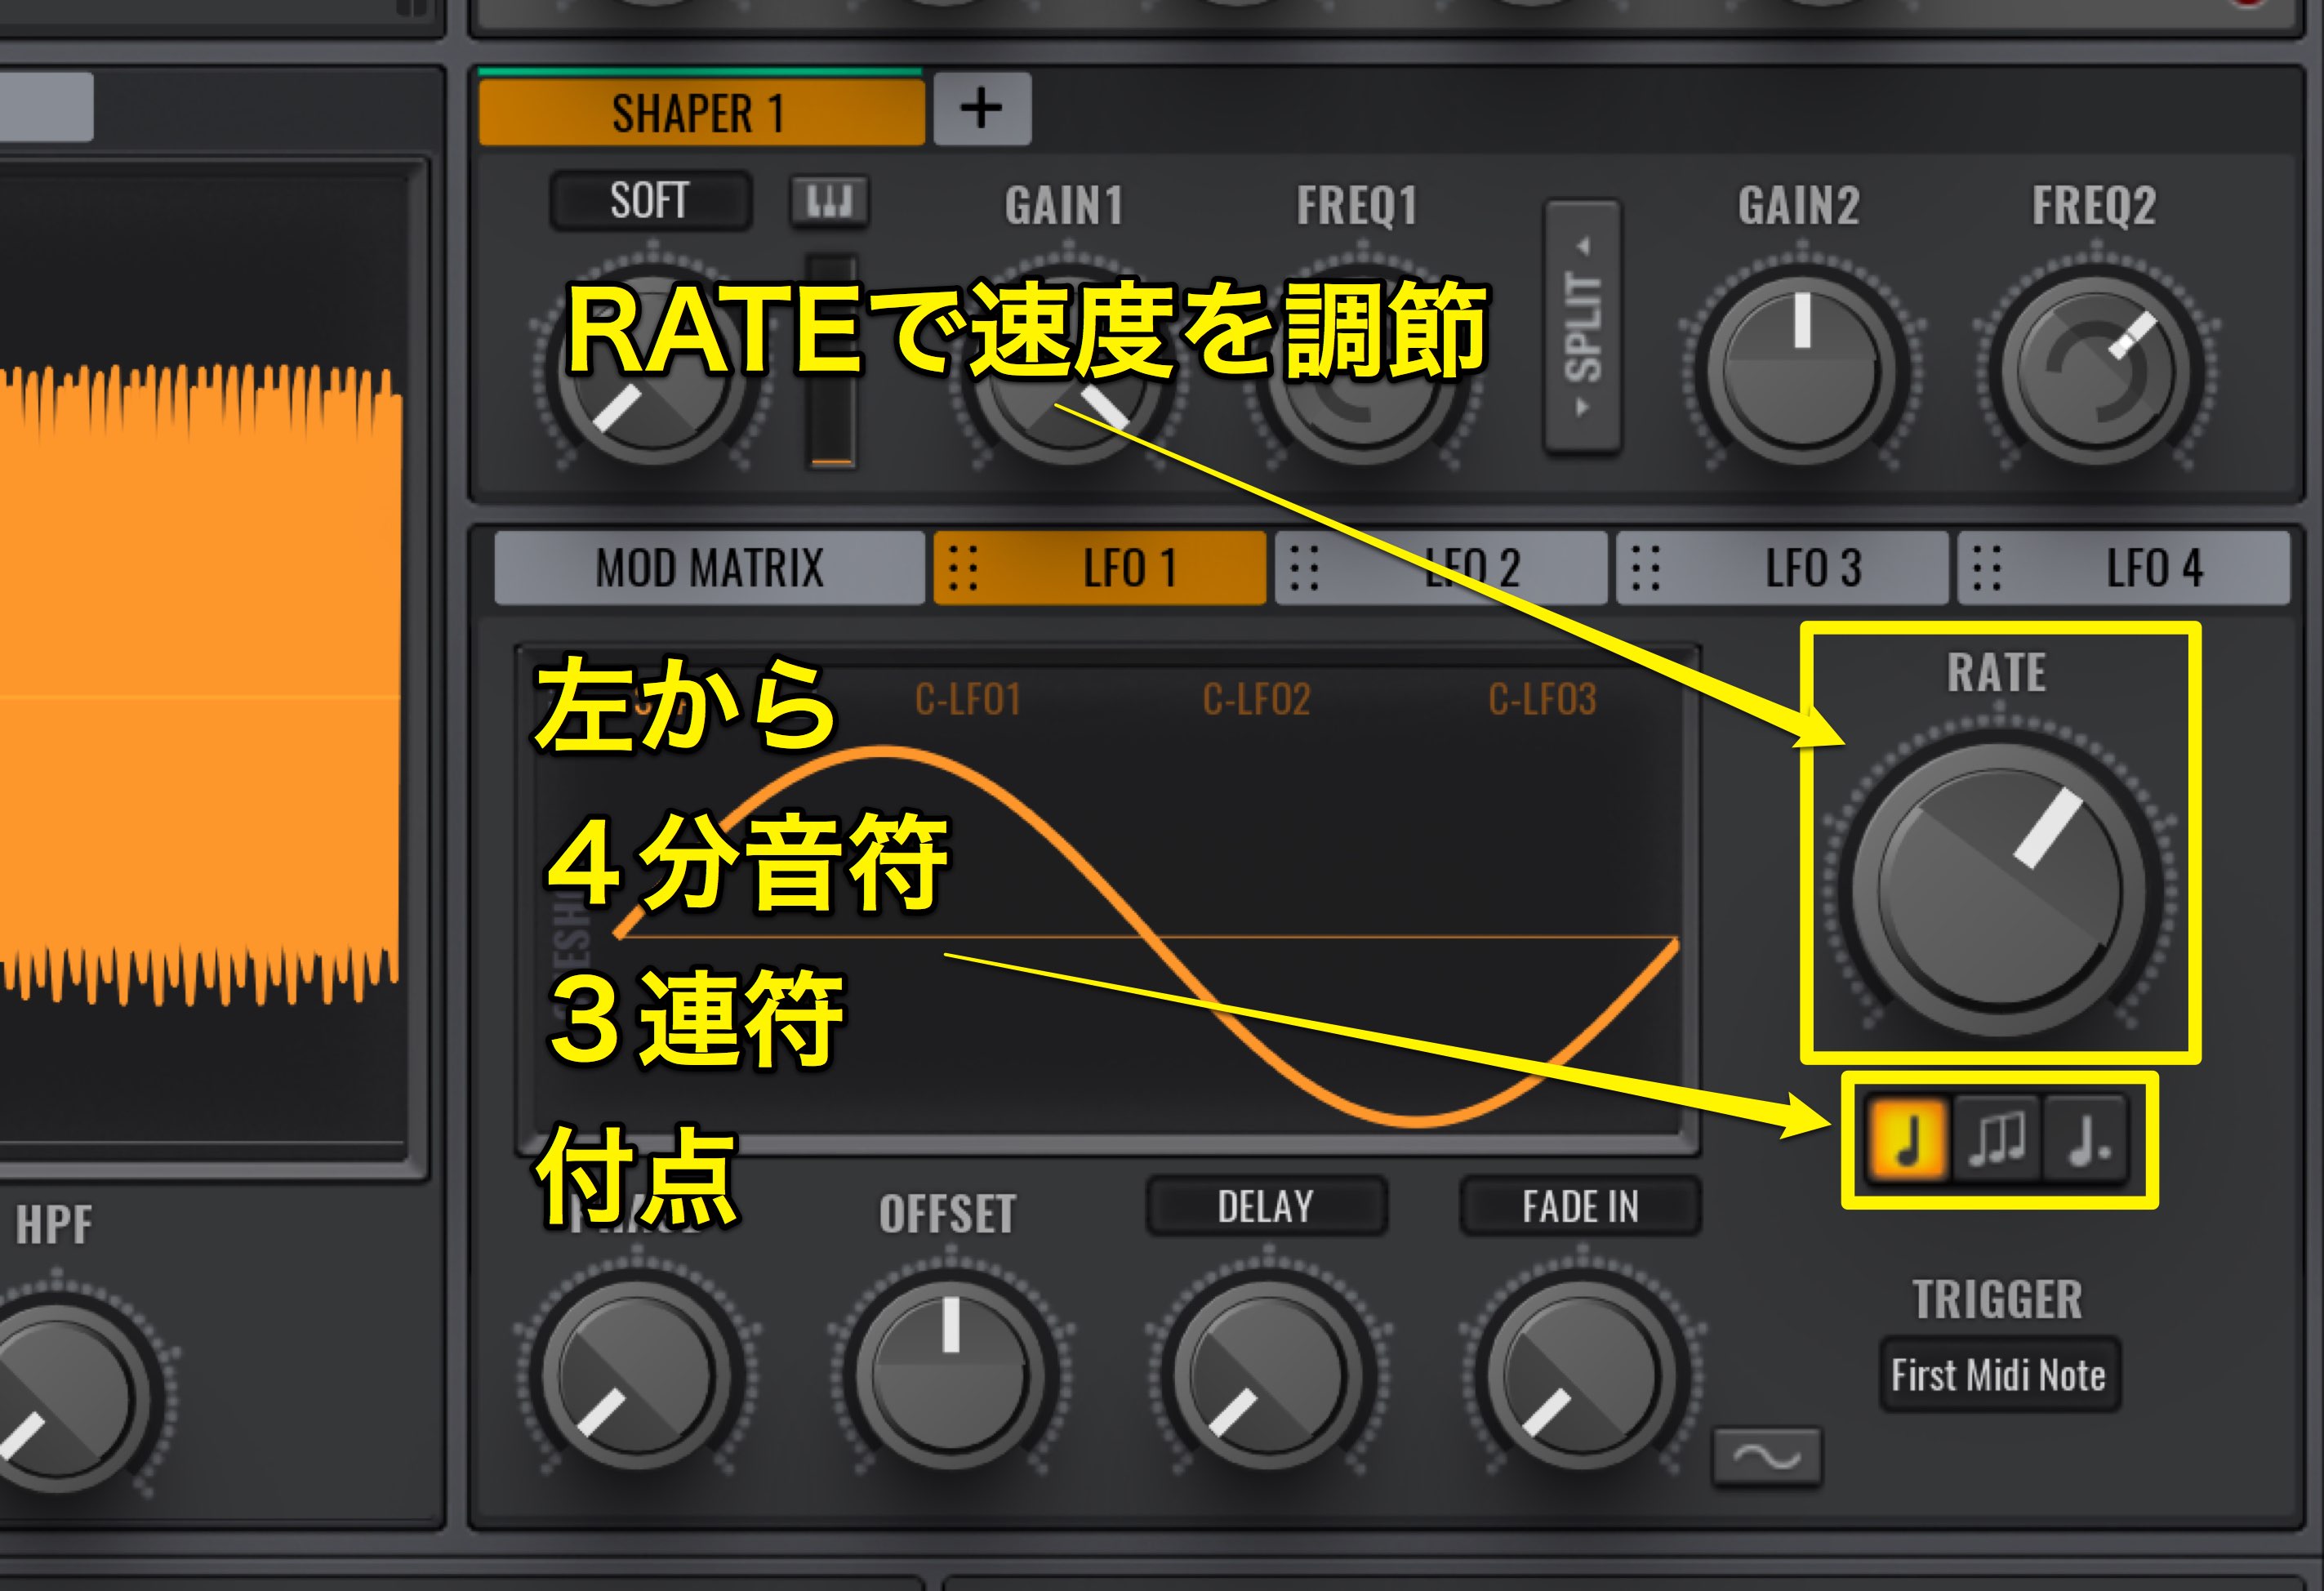
Adjust the LFO speed with the RATE.
The further right its turned, the faster the LFO is.
Below that is the Sync button, and as a default it is active.
It is set to the tempo setting in your DAW.
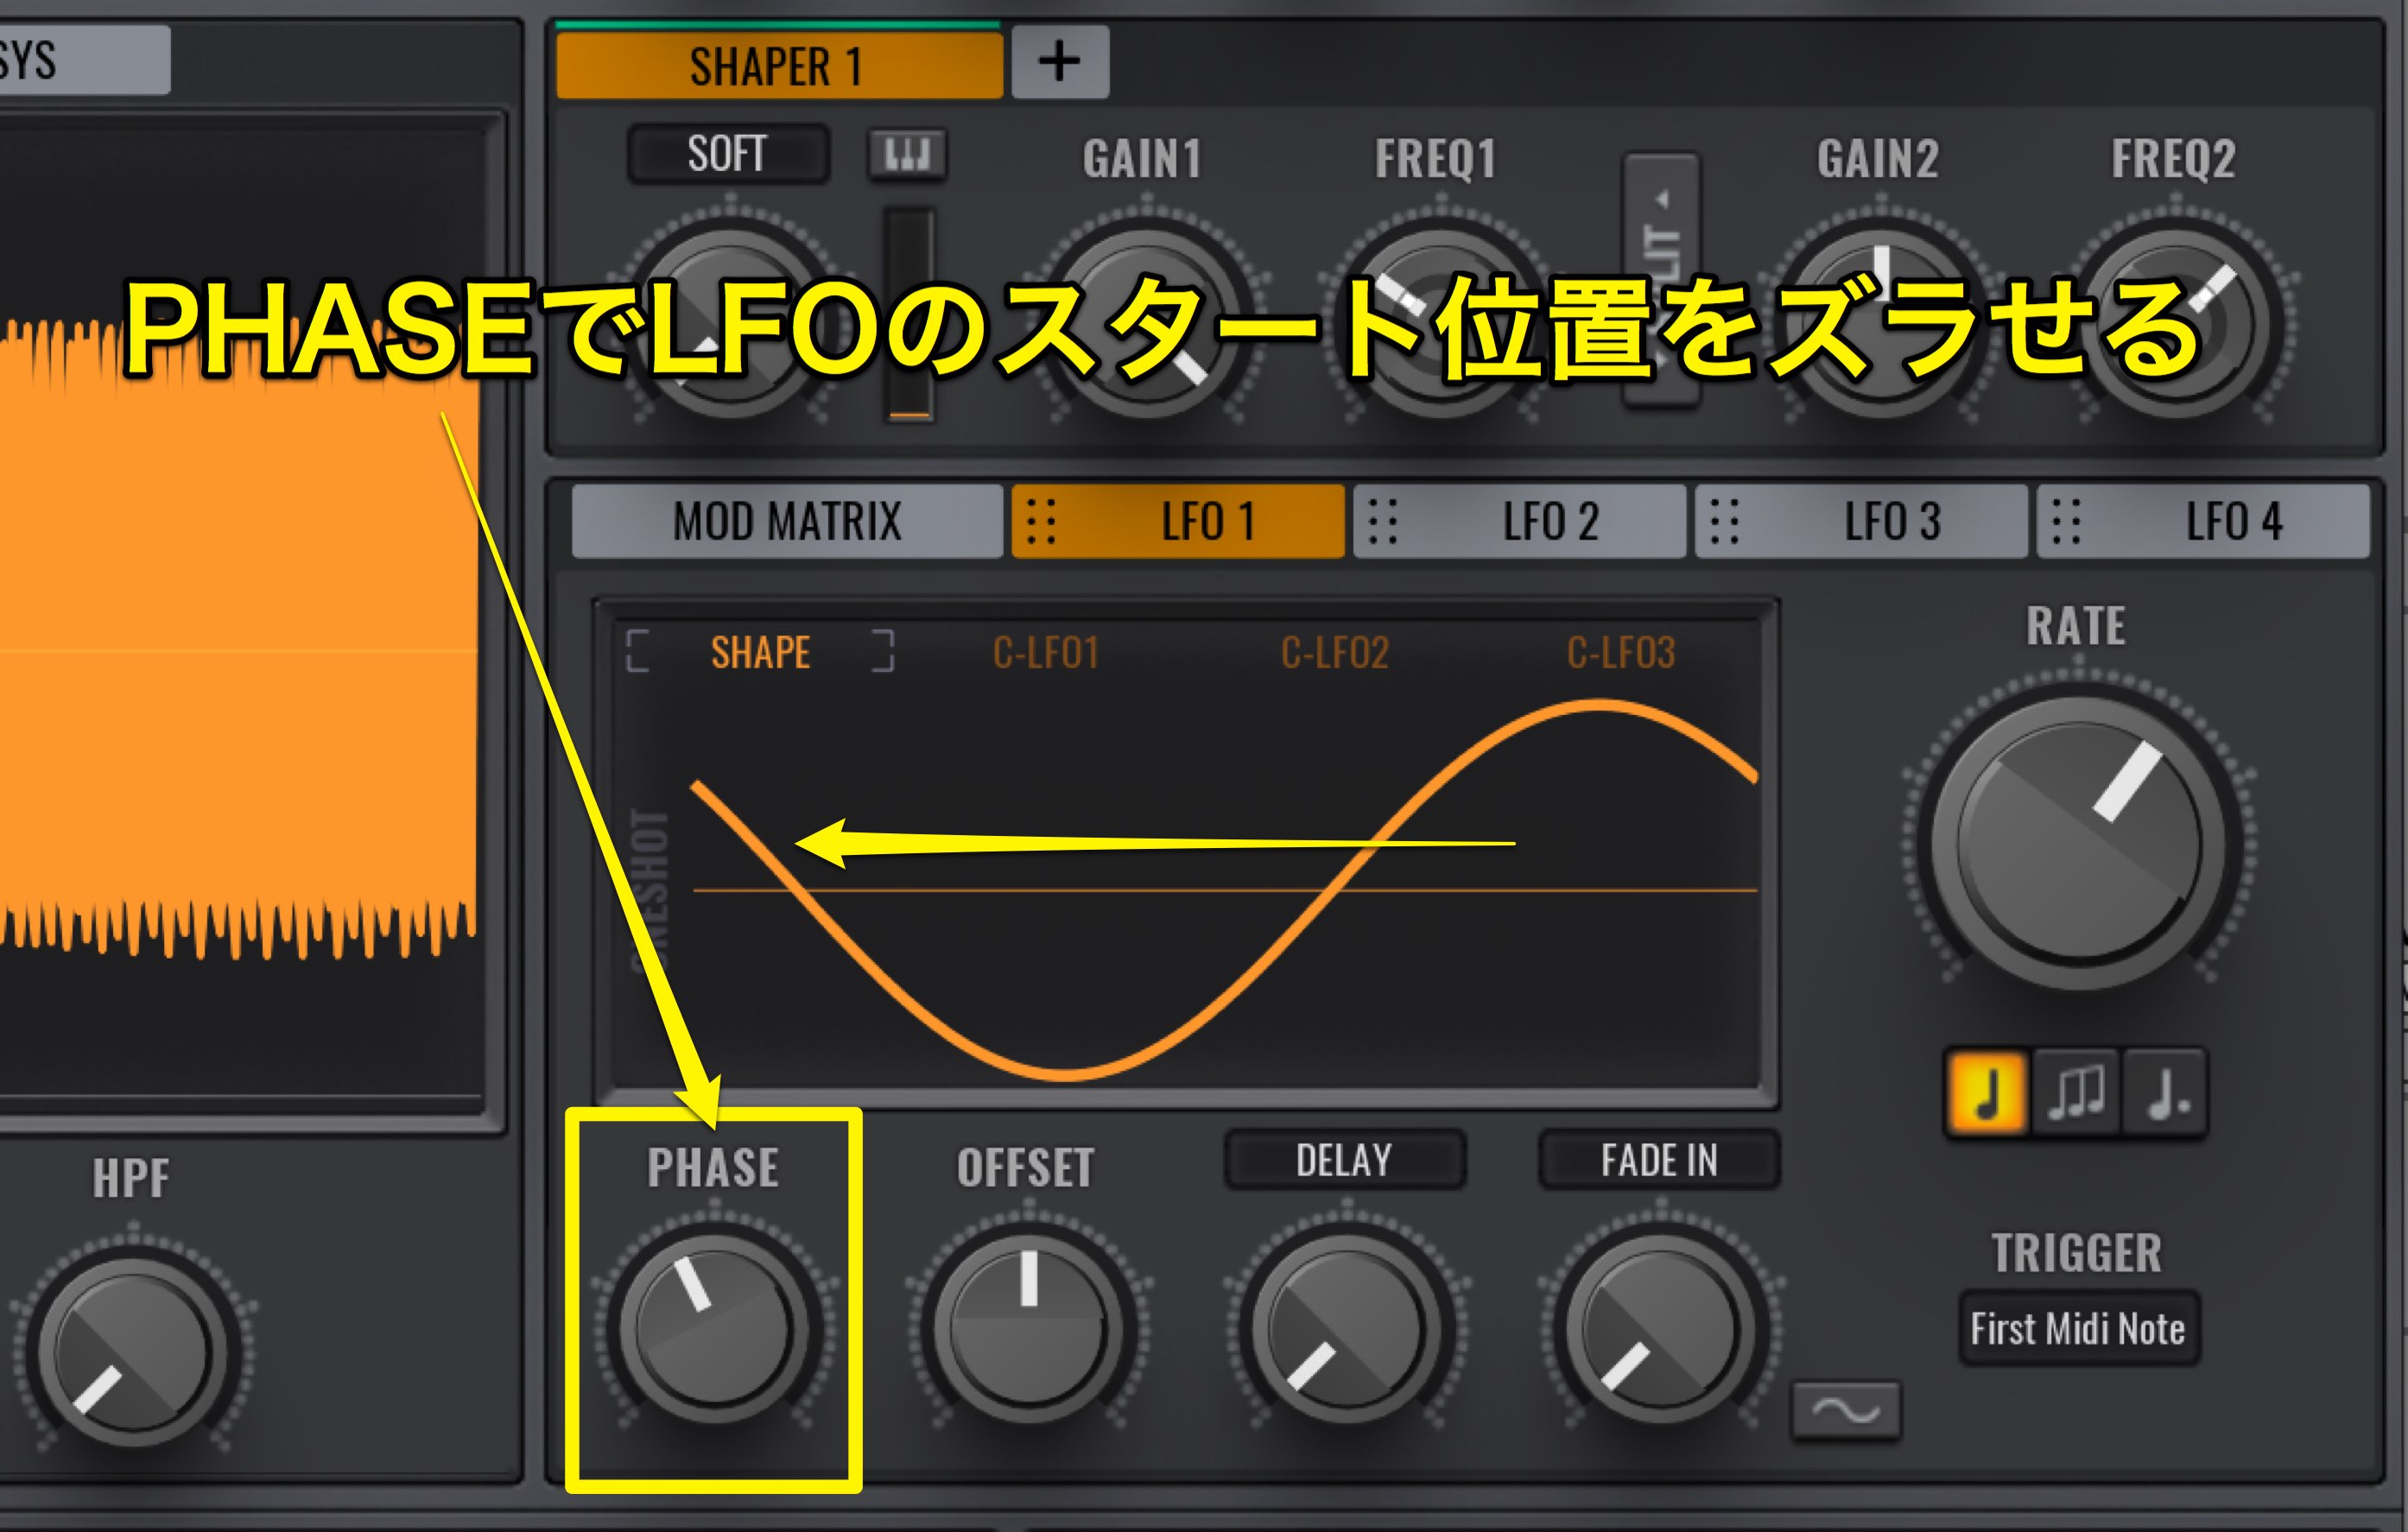
You can change the starting point of the LFO with PHASE.
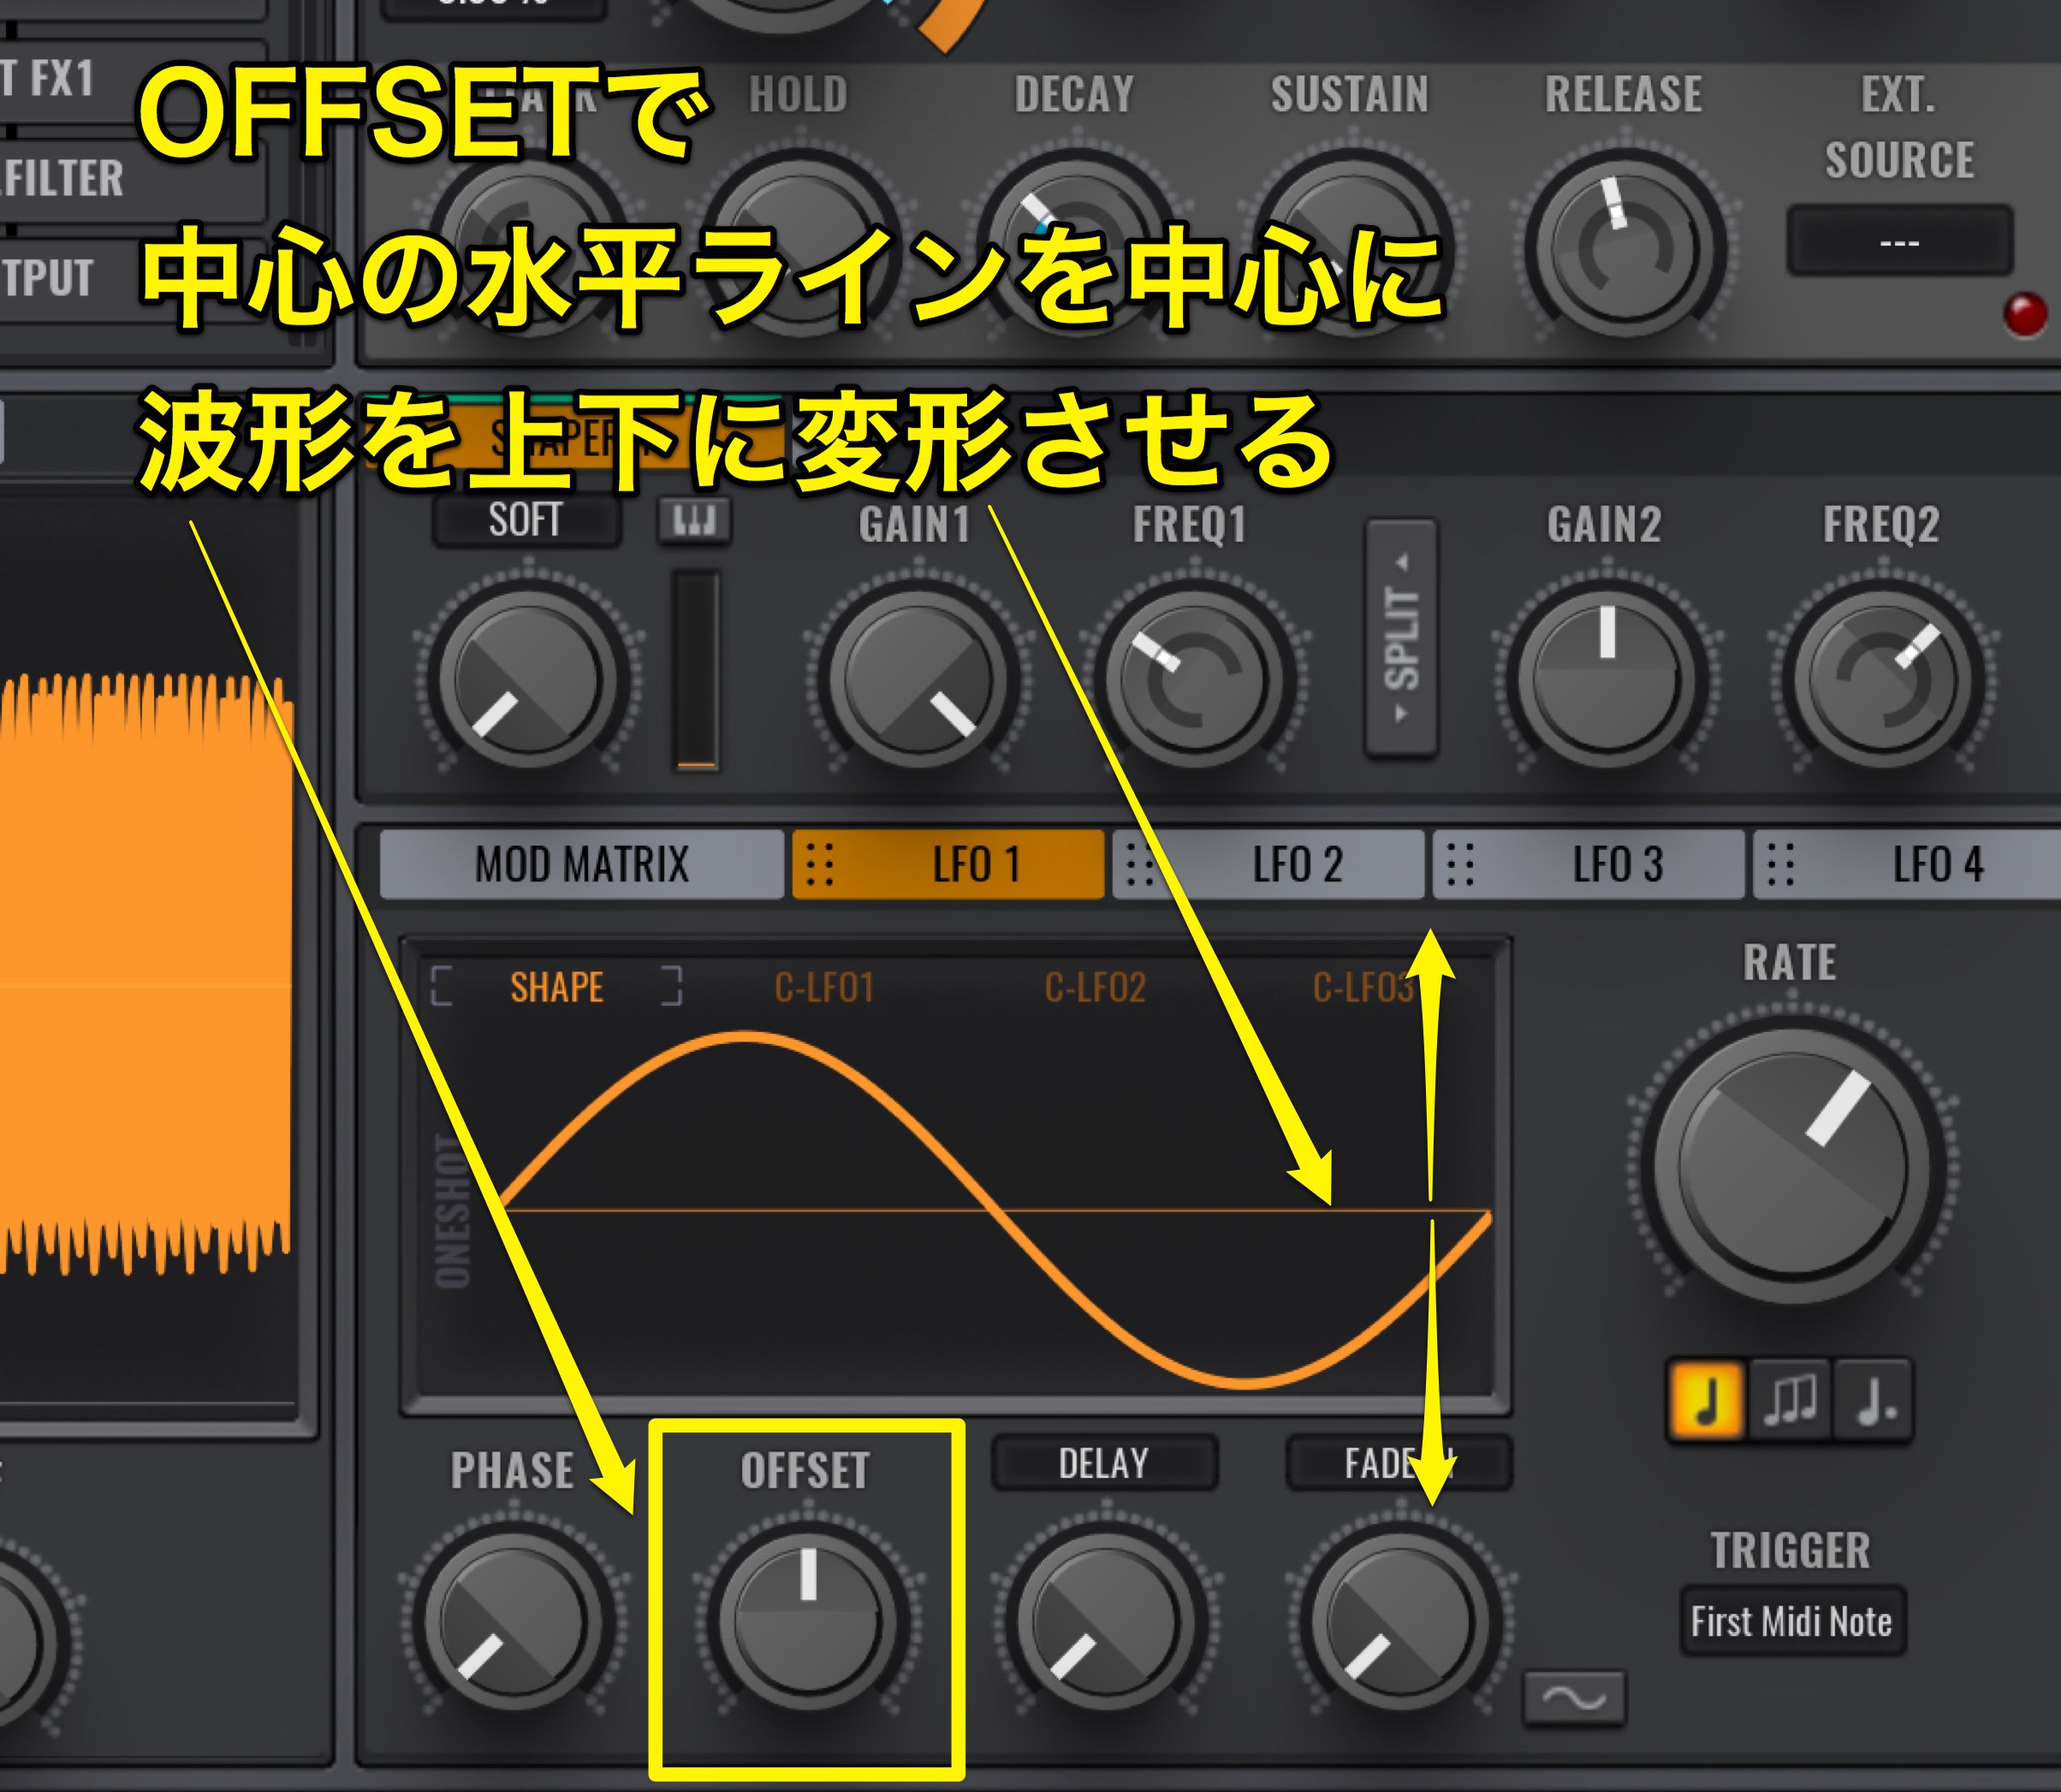
With OFFSET being the horizontal line, you can switch how far the waveform will move up and down giving the LFO variation.
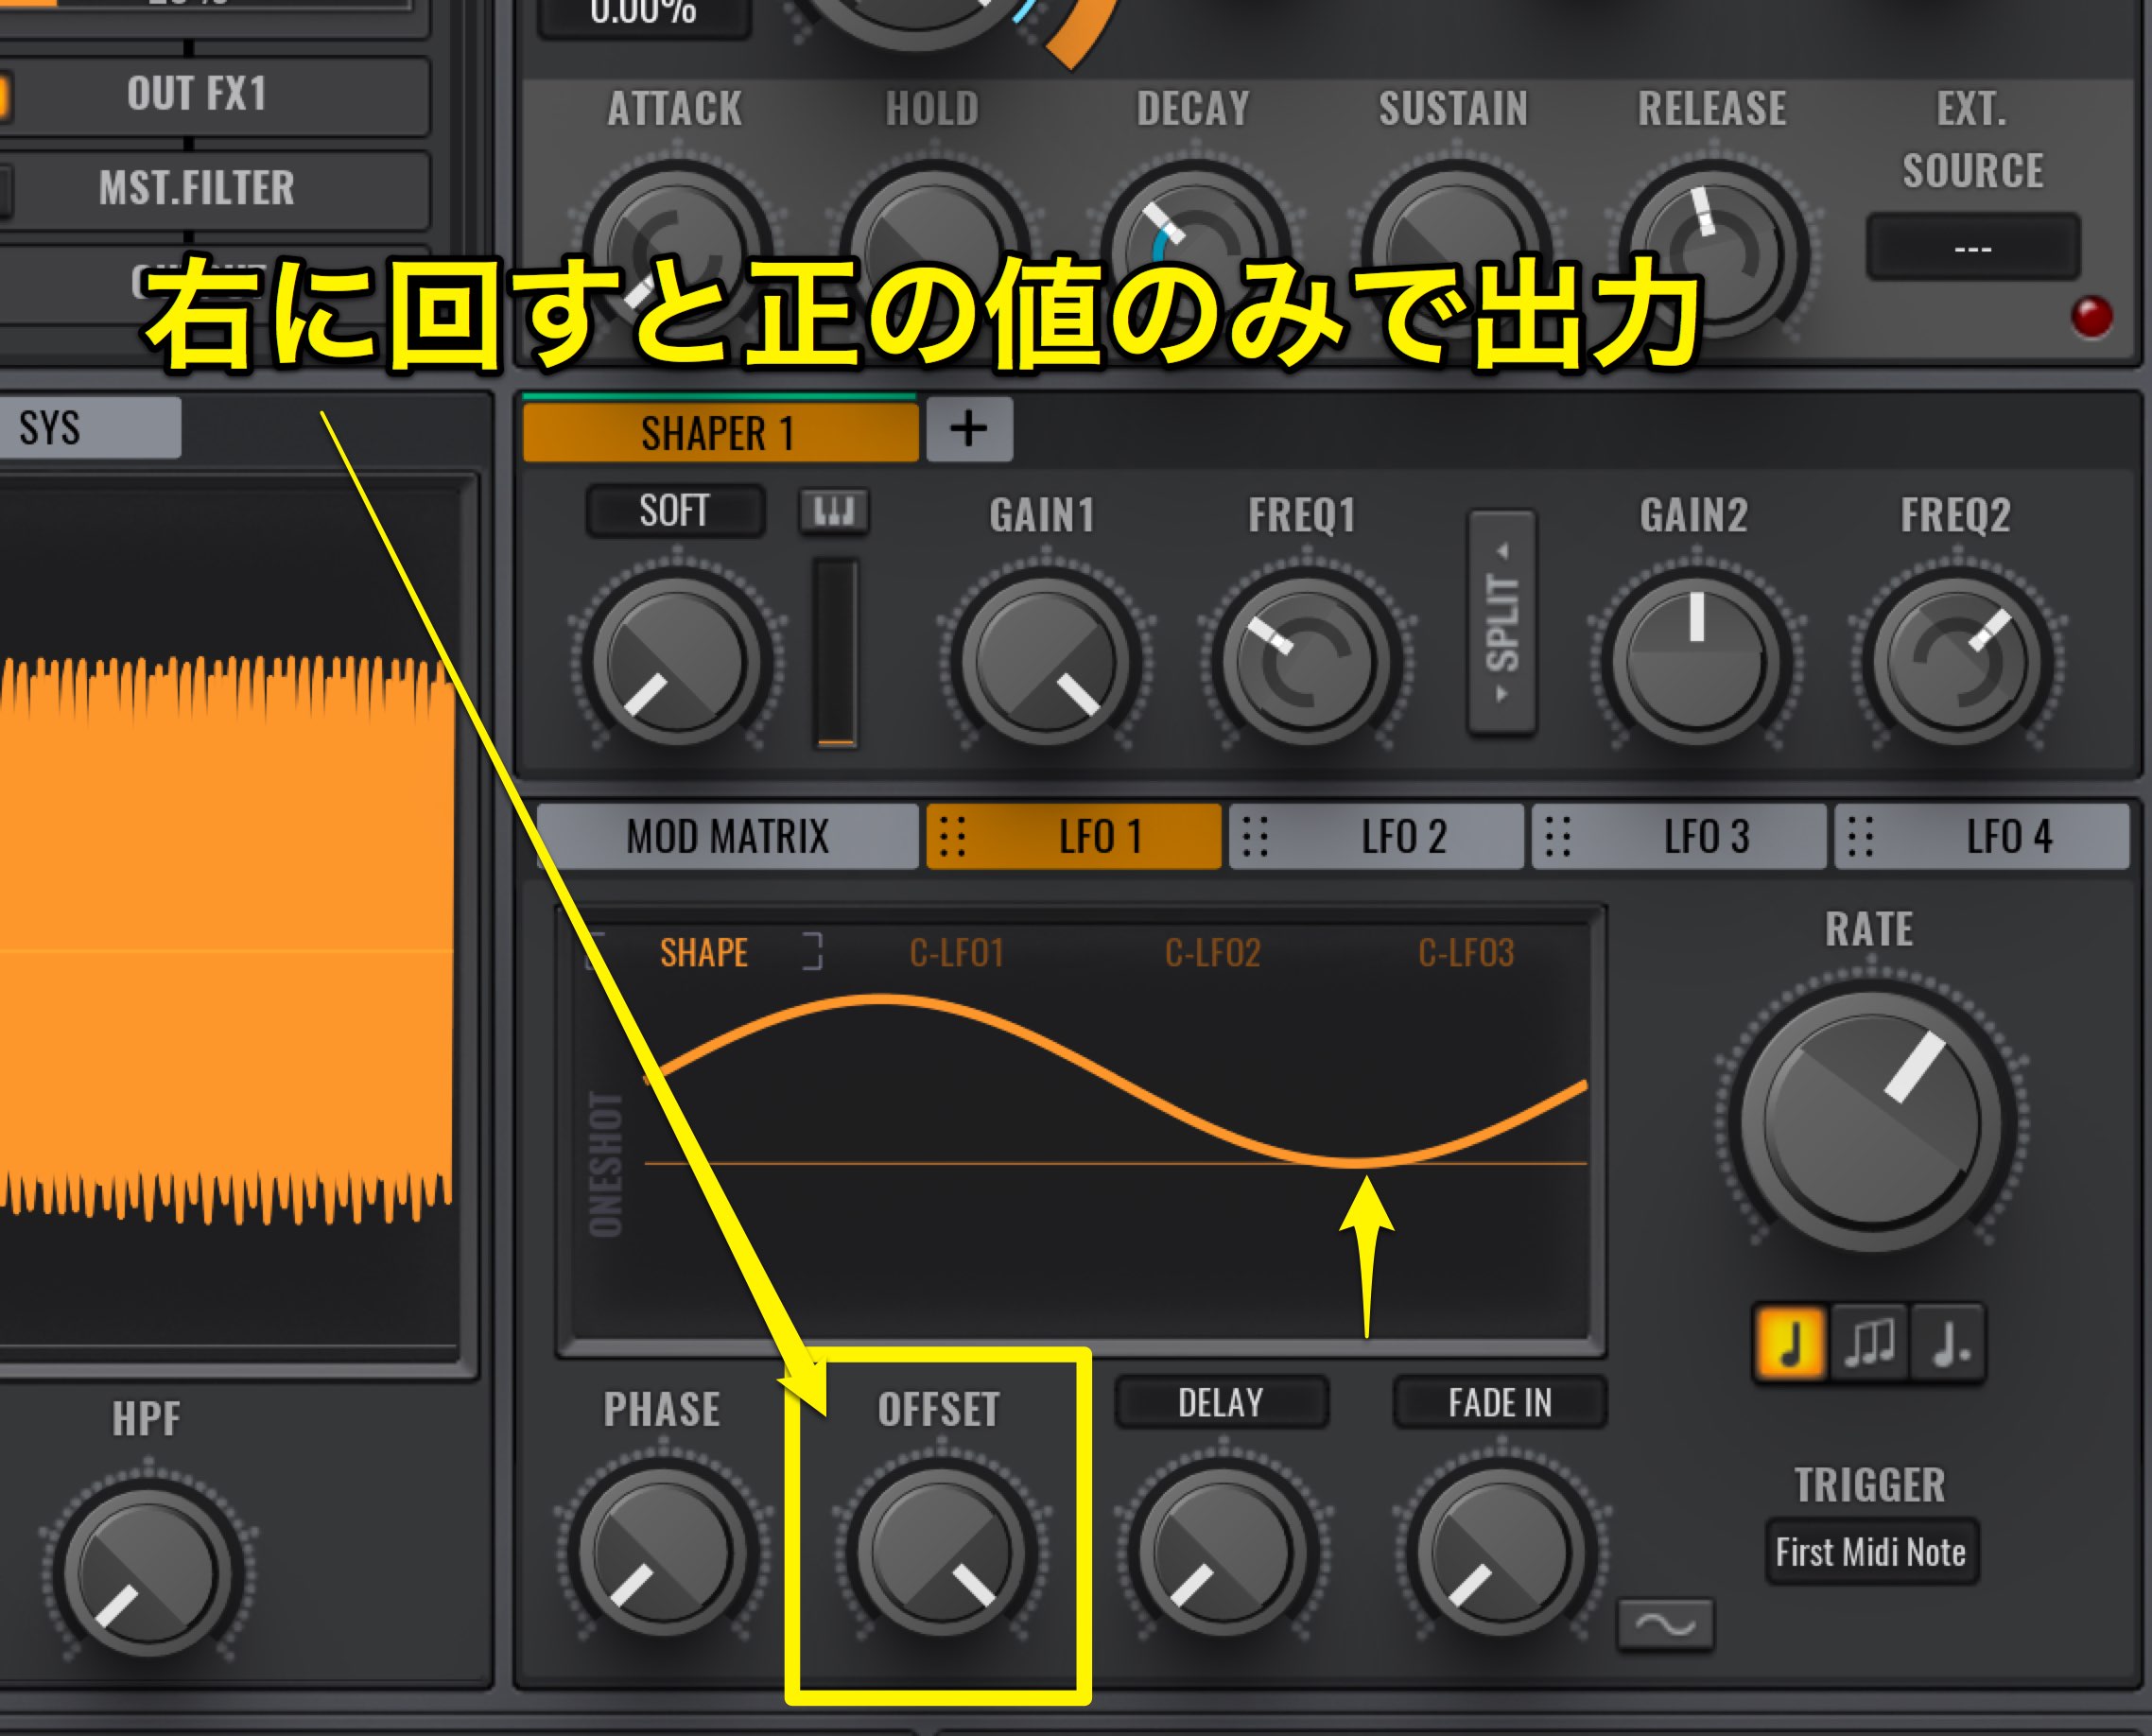
With this parameter all the way to the right, only the waveform on the positive side is read,

and when all the way to the left, only the negative side is read.
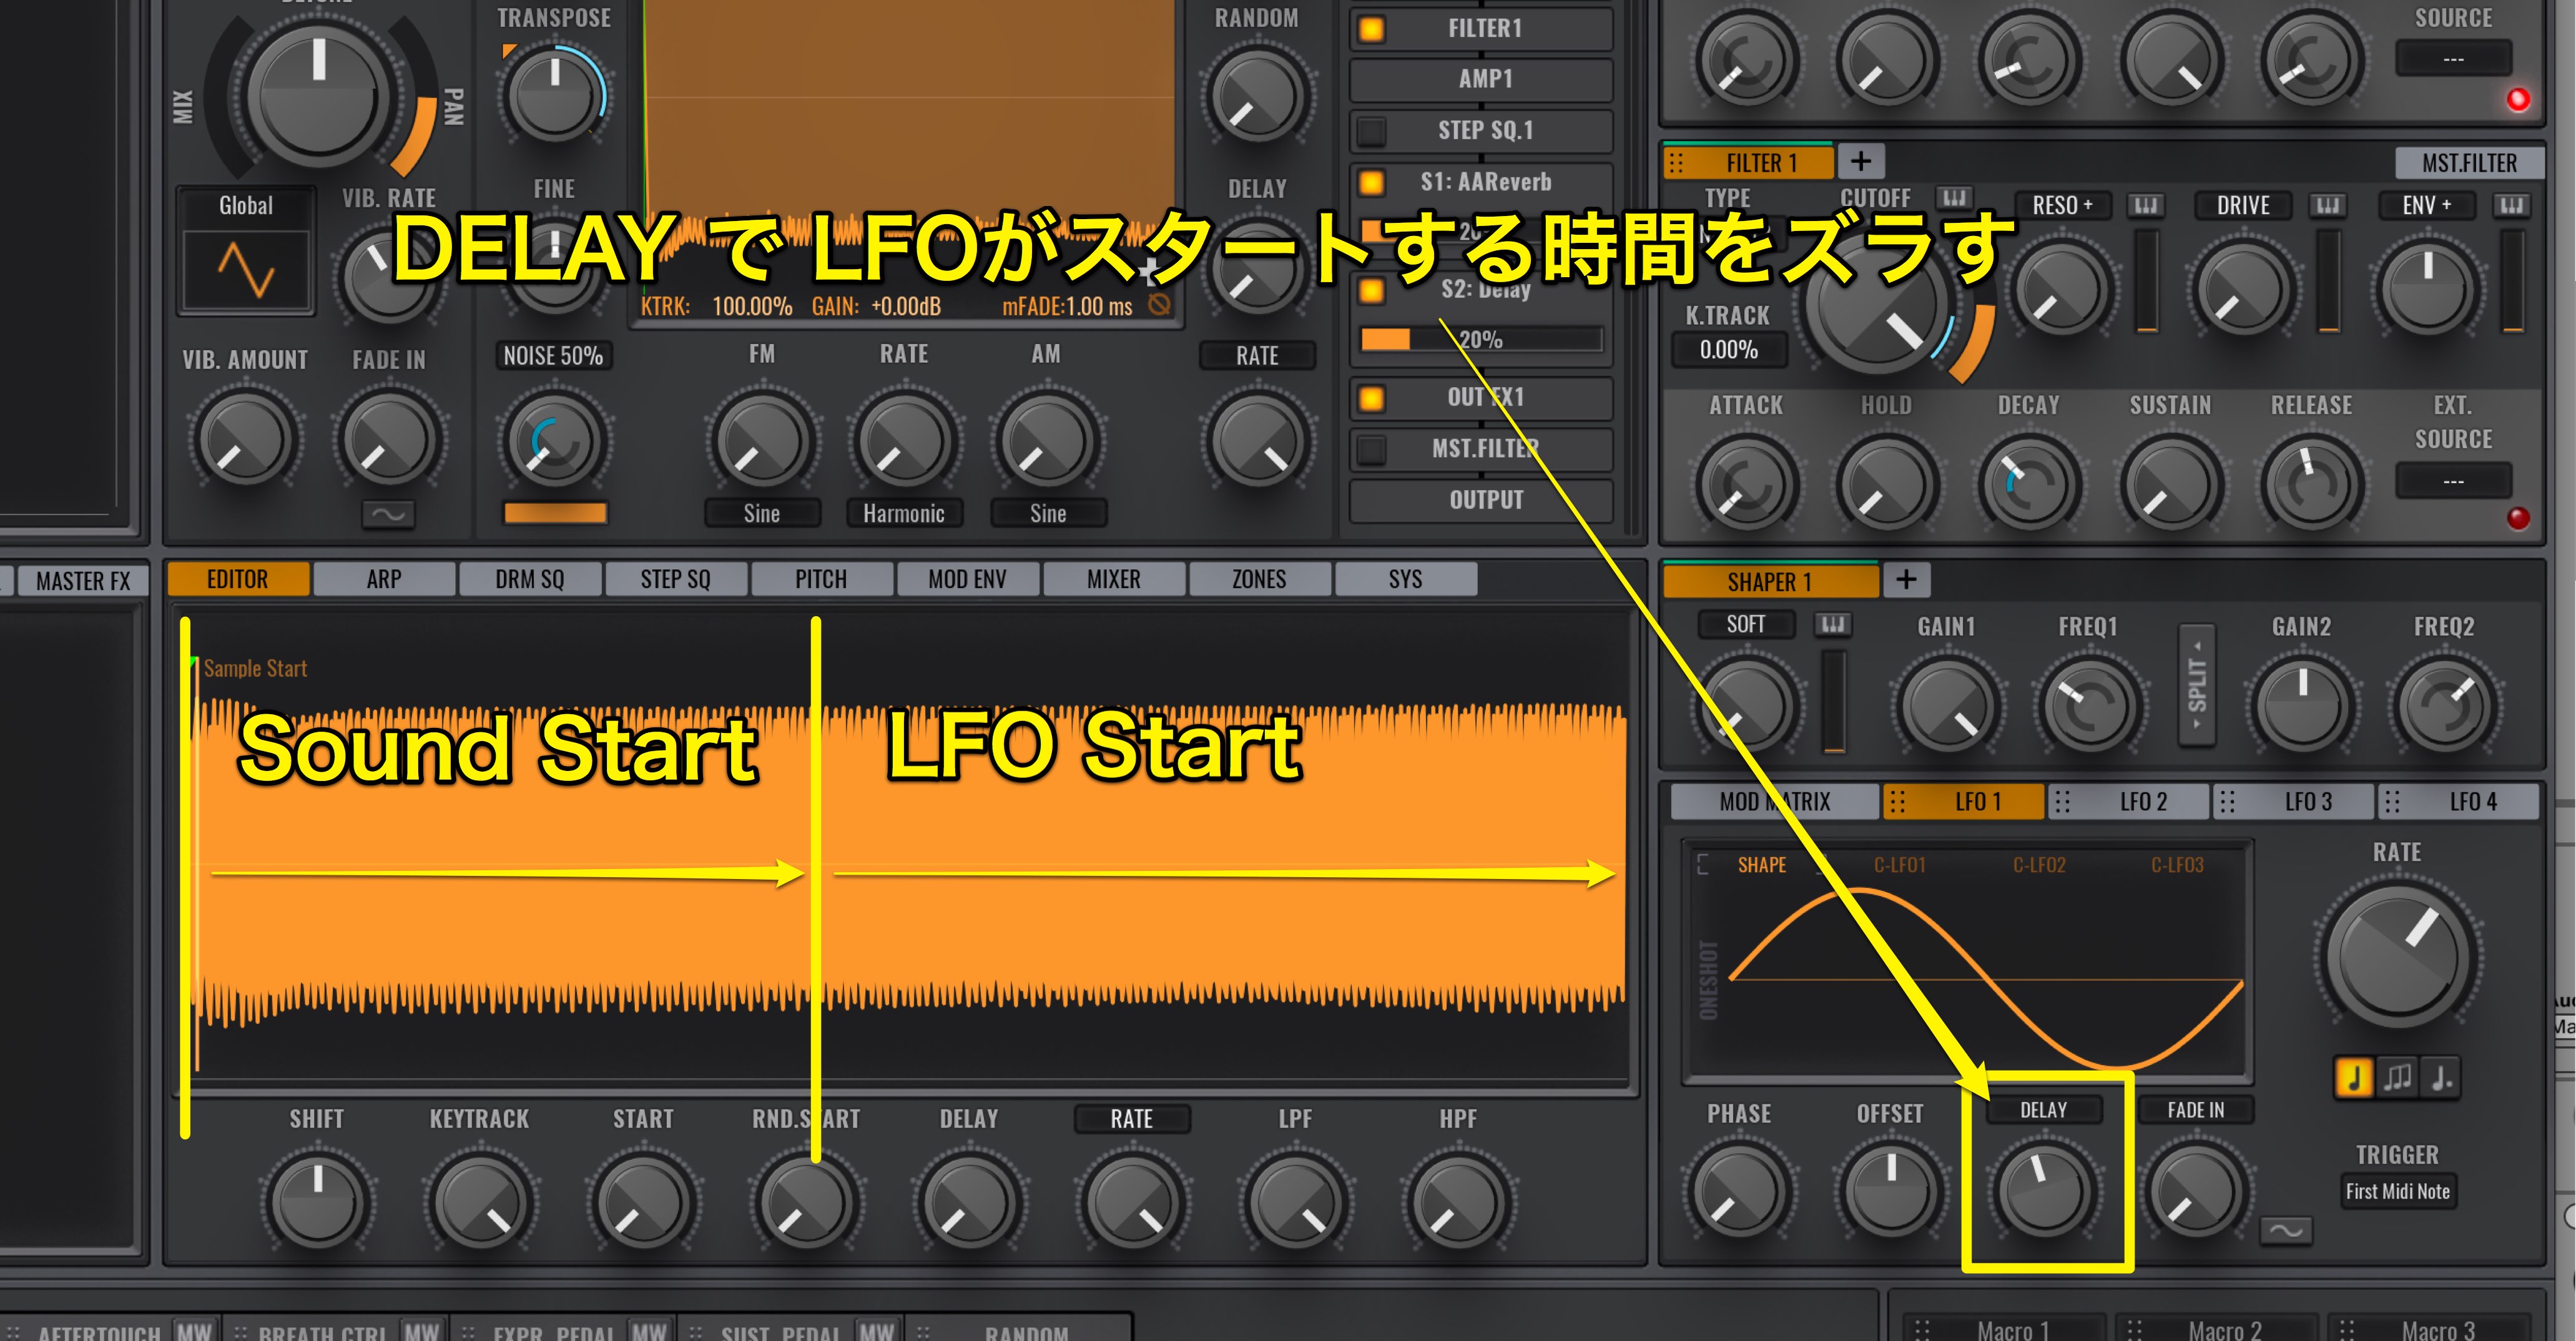
Use DELAY to shift when the LFO starts being applied.
This is great for when you don’t want an LFO applied to shorter notes, but just long phrases.
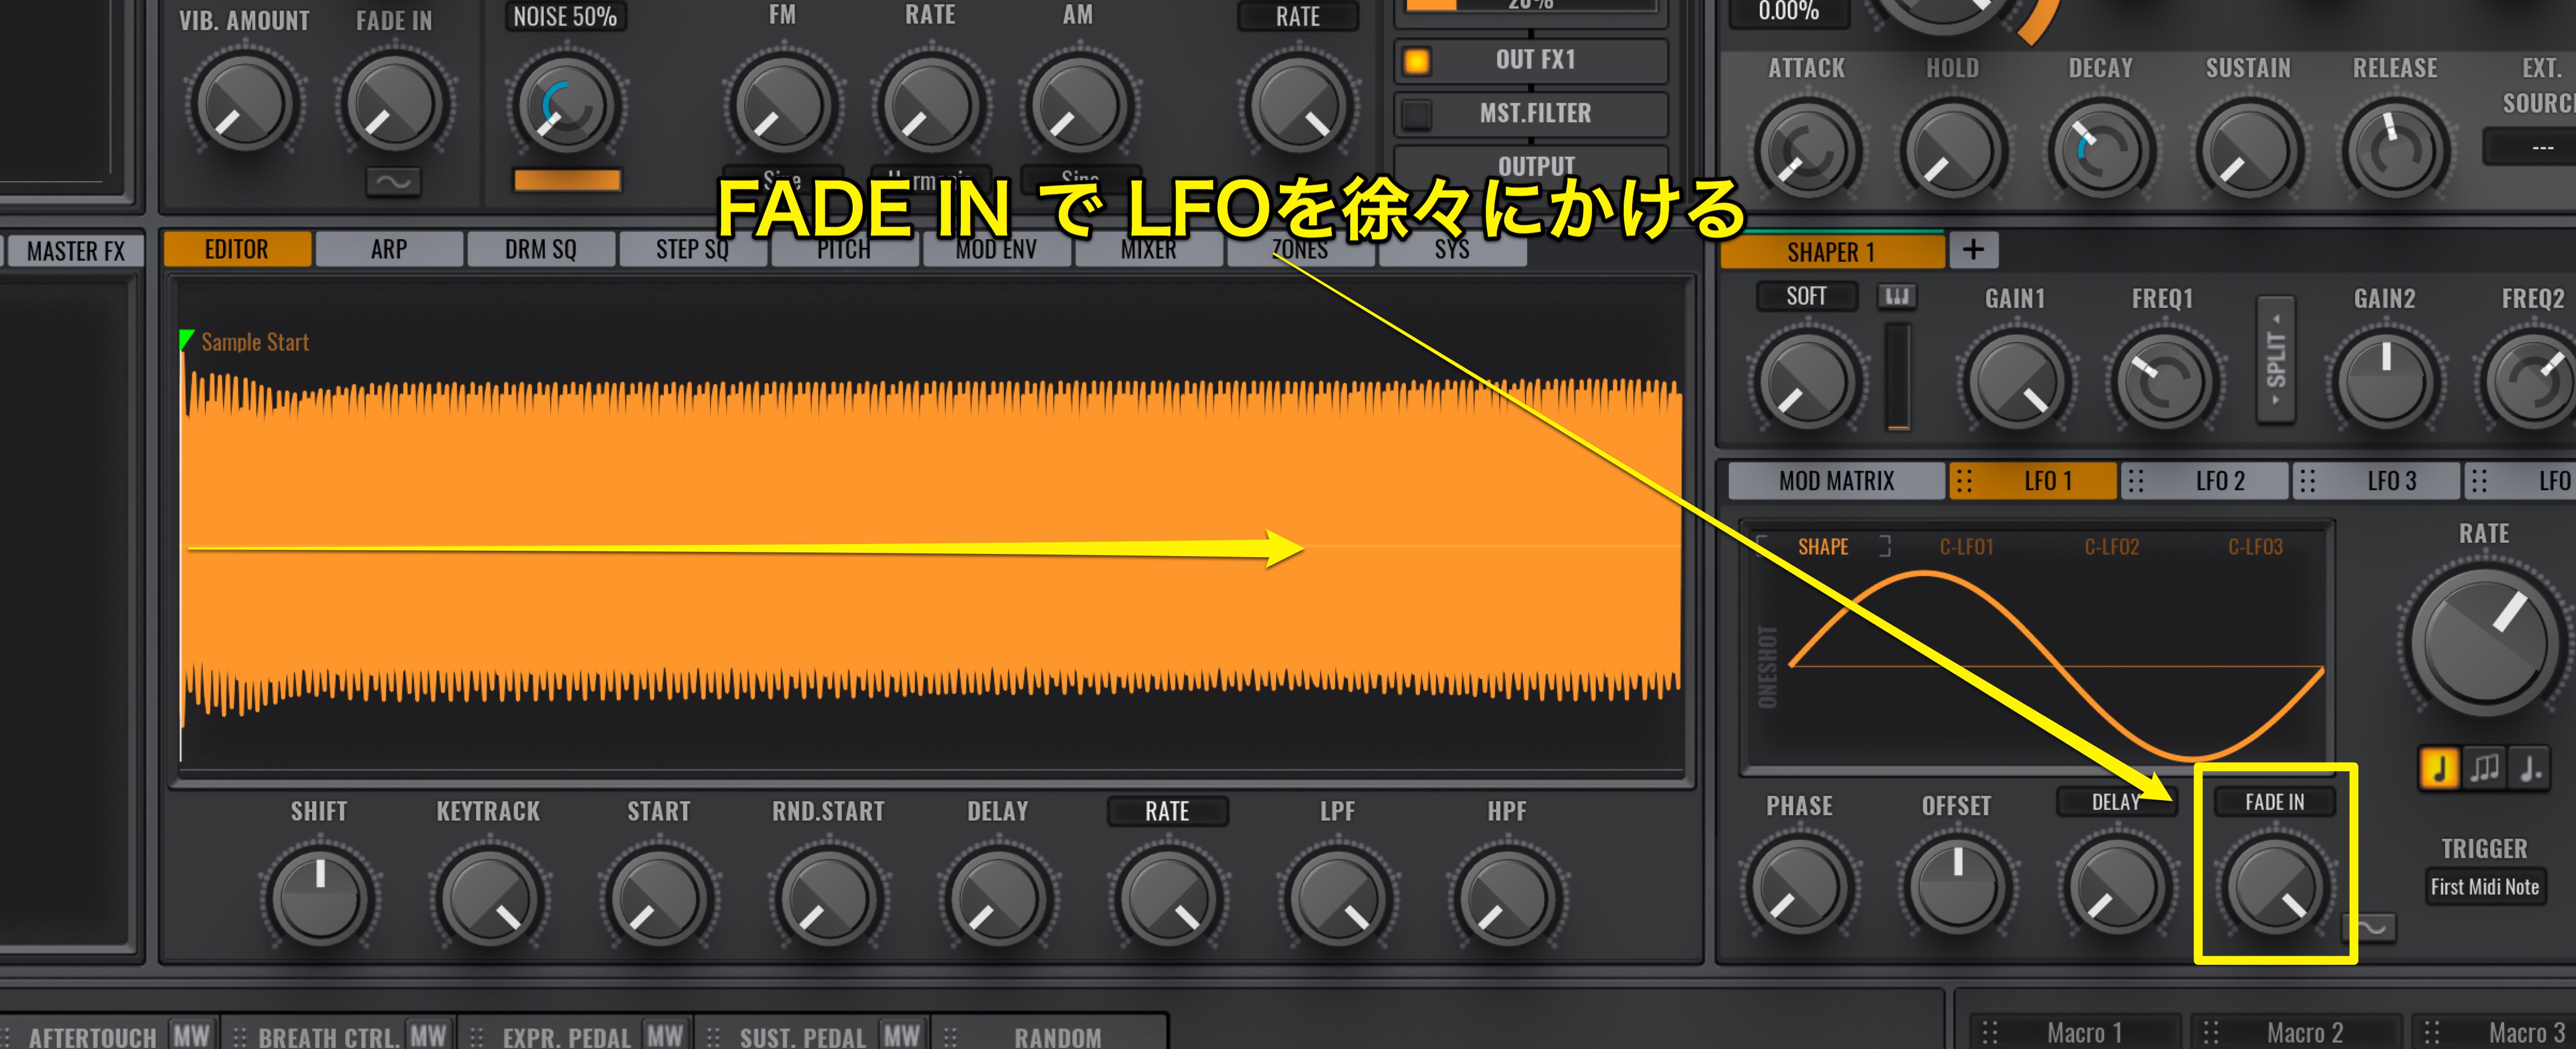
Next to it is the FADE IN, and allows for the LFO to slow be applied to the parameter.
In addition, Avenger has a wide variety of waveforms to use.
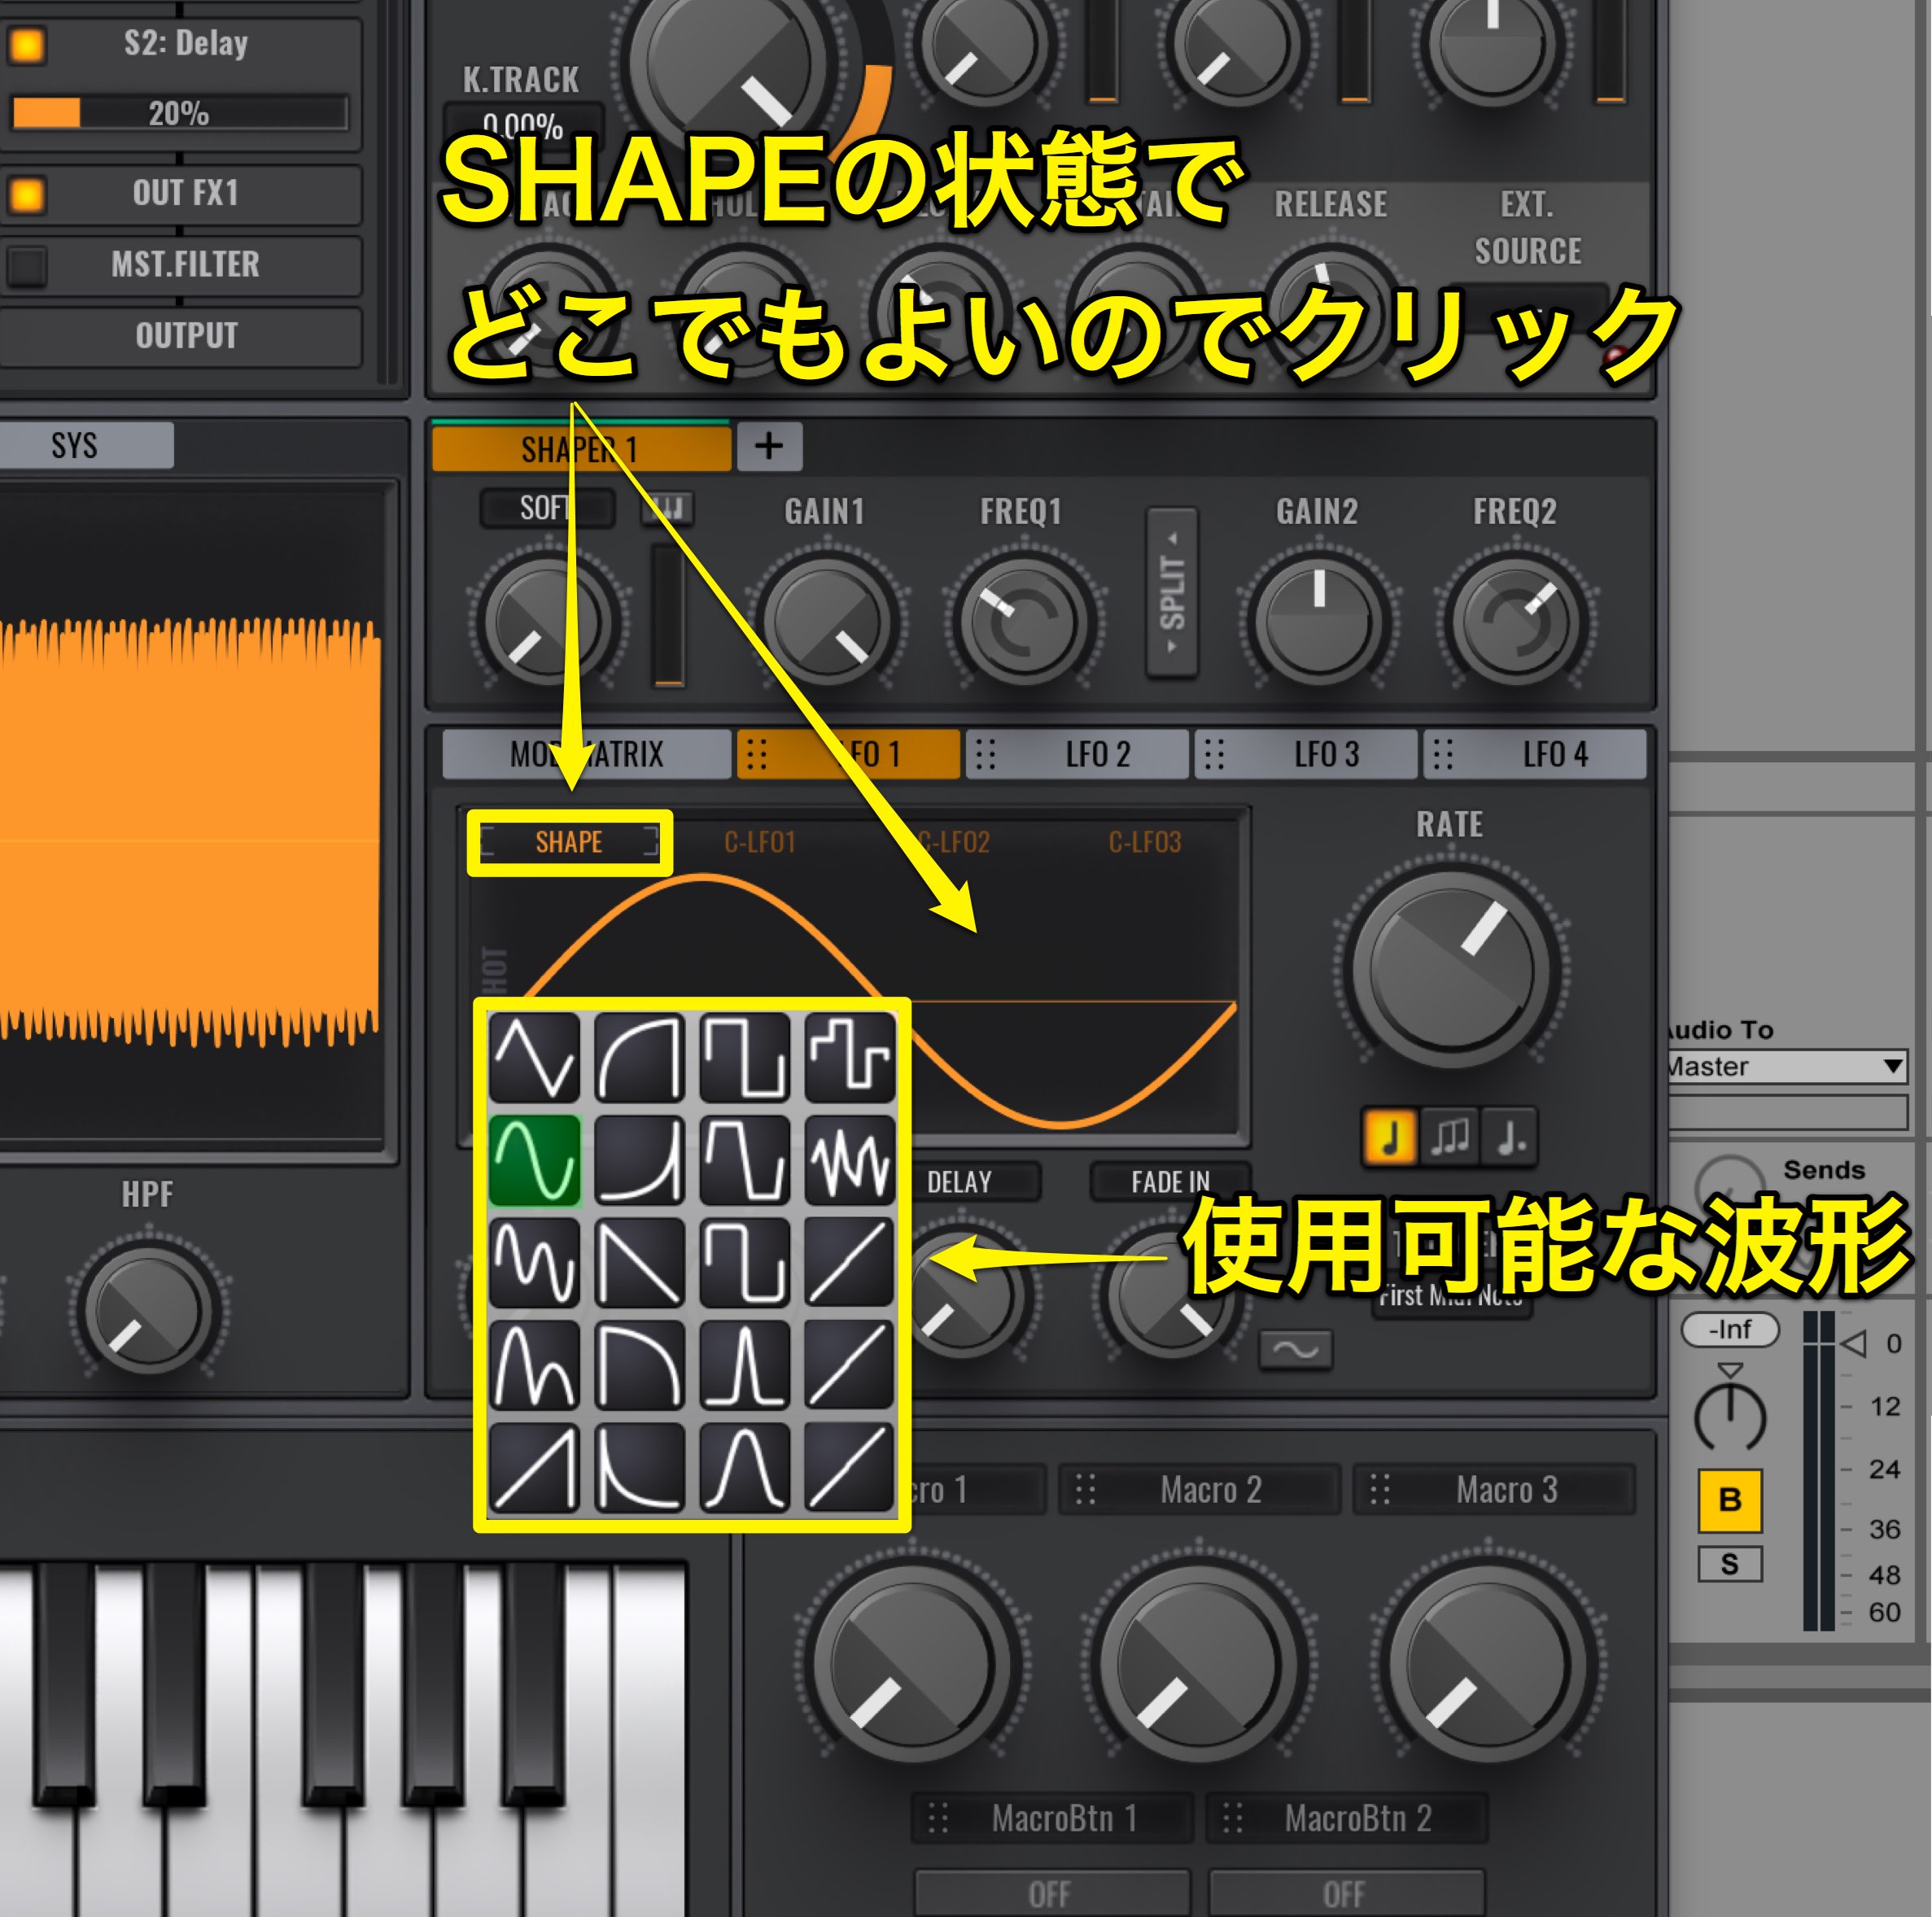
In the SHAPE setting, click anywhere on the waveform screen.
Here you can choose from a wide selection of waveforms.
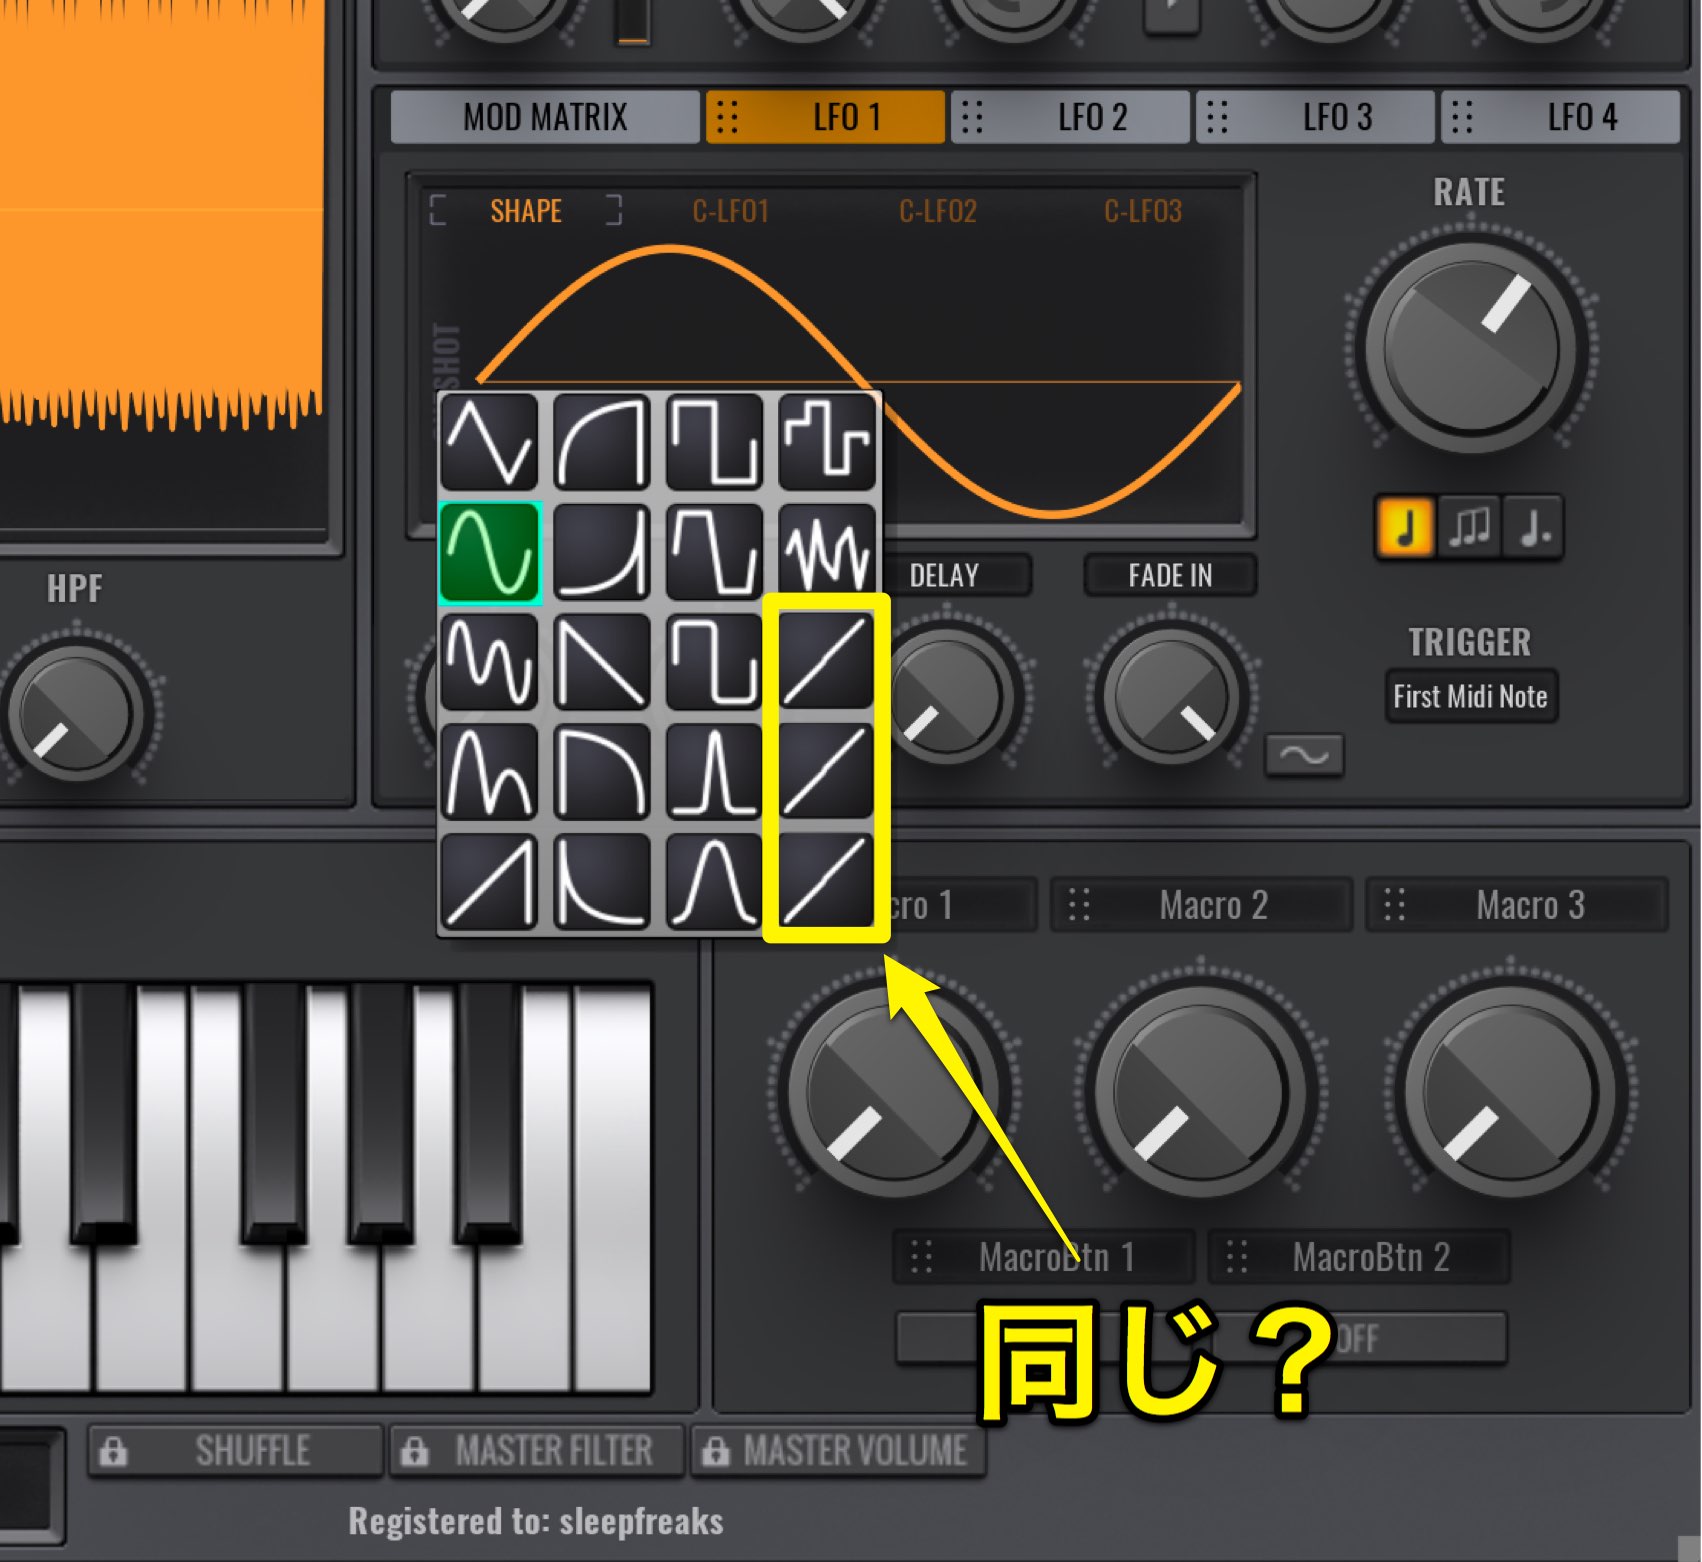
If you look closely the bottom right 3 are the same.
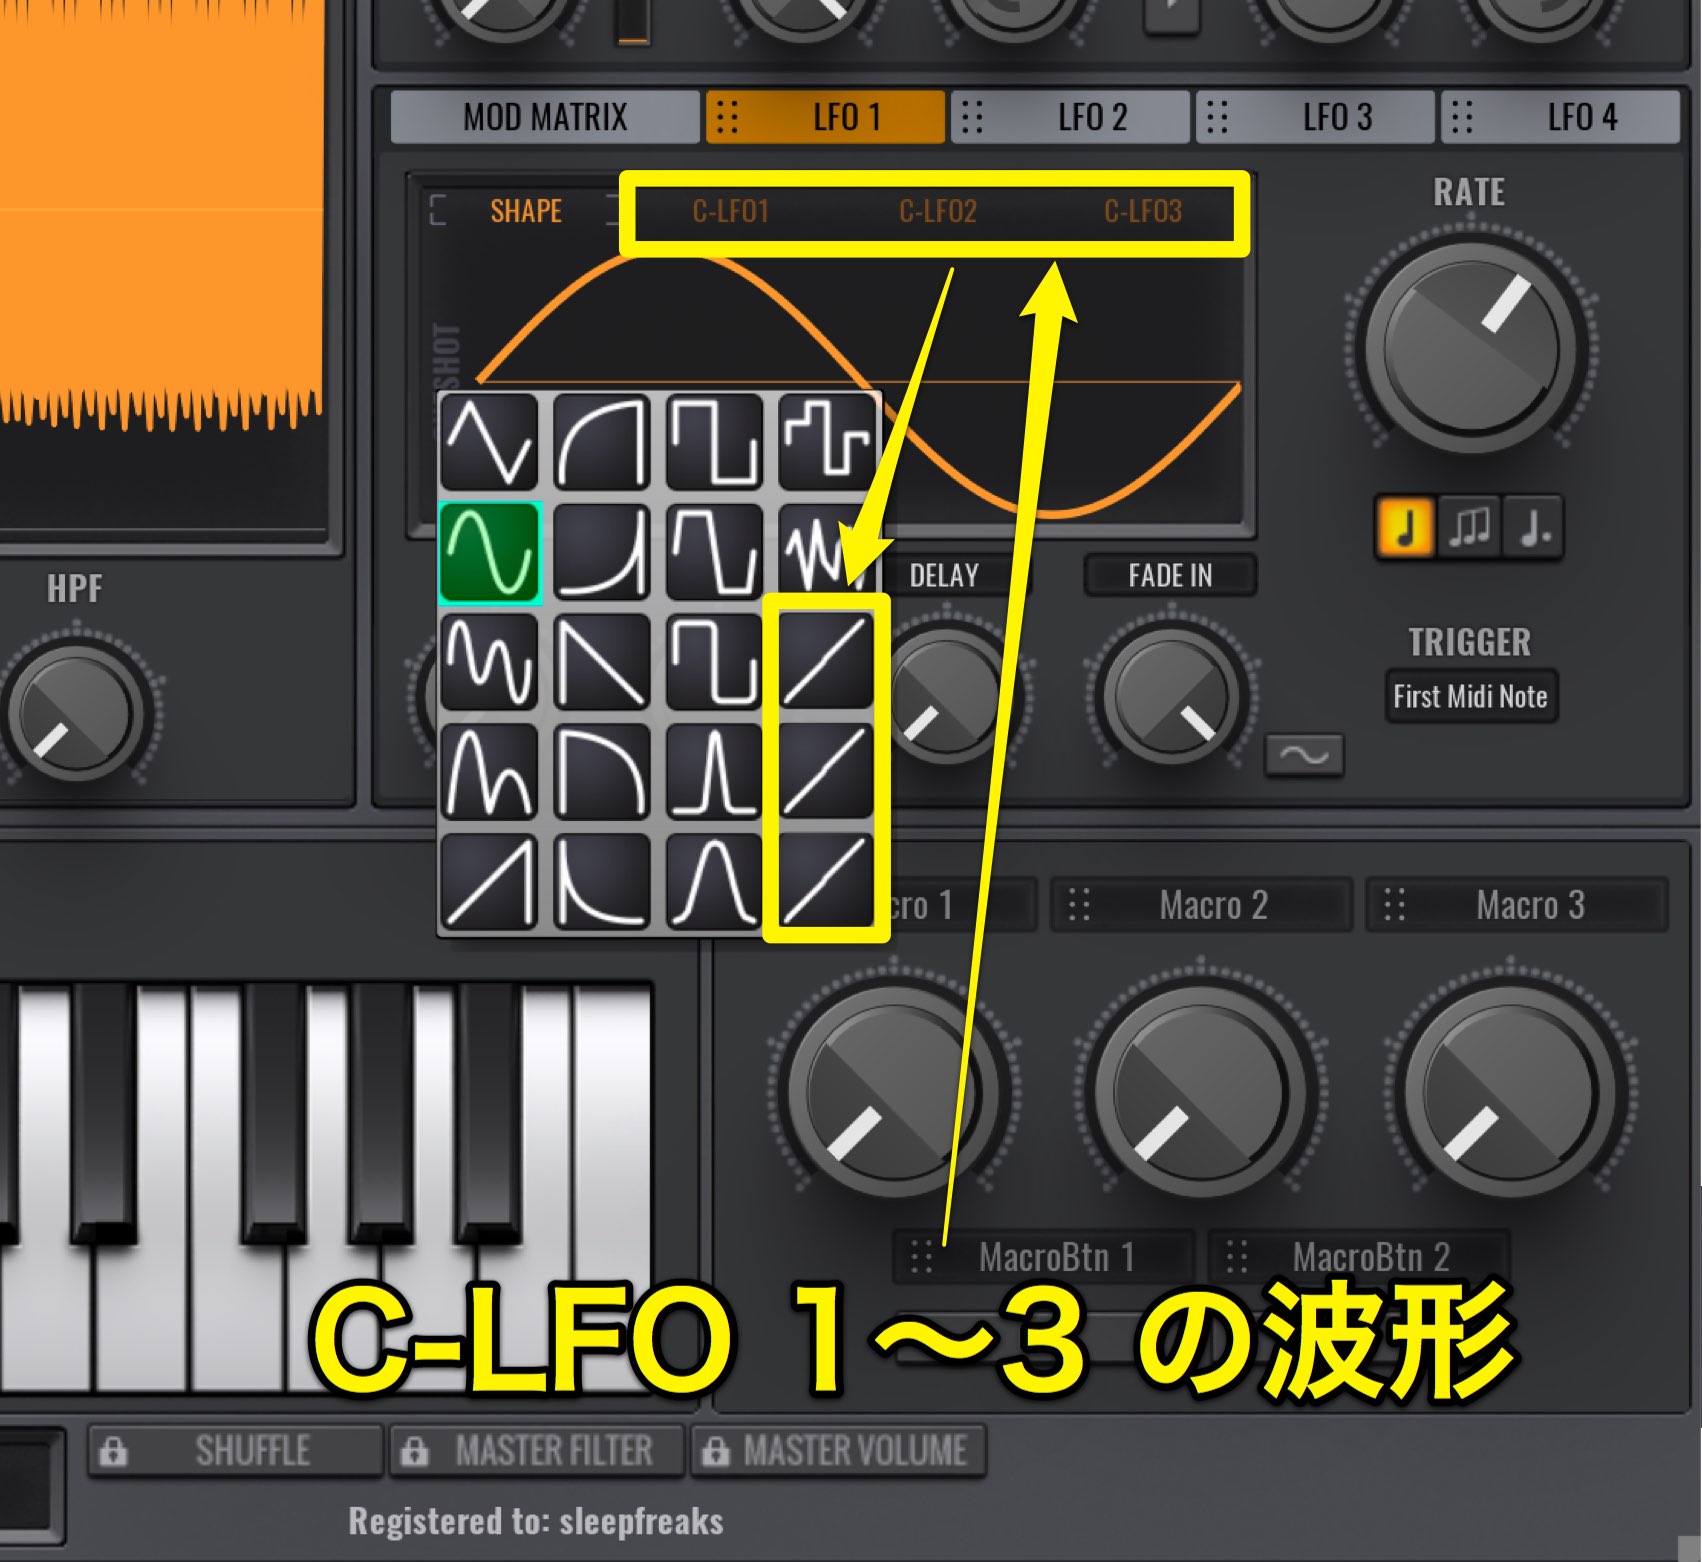
These 3 are the waveforms for C-LFO 1〜3 .
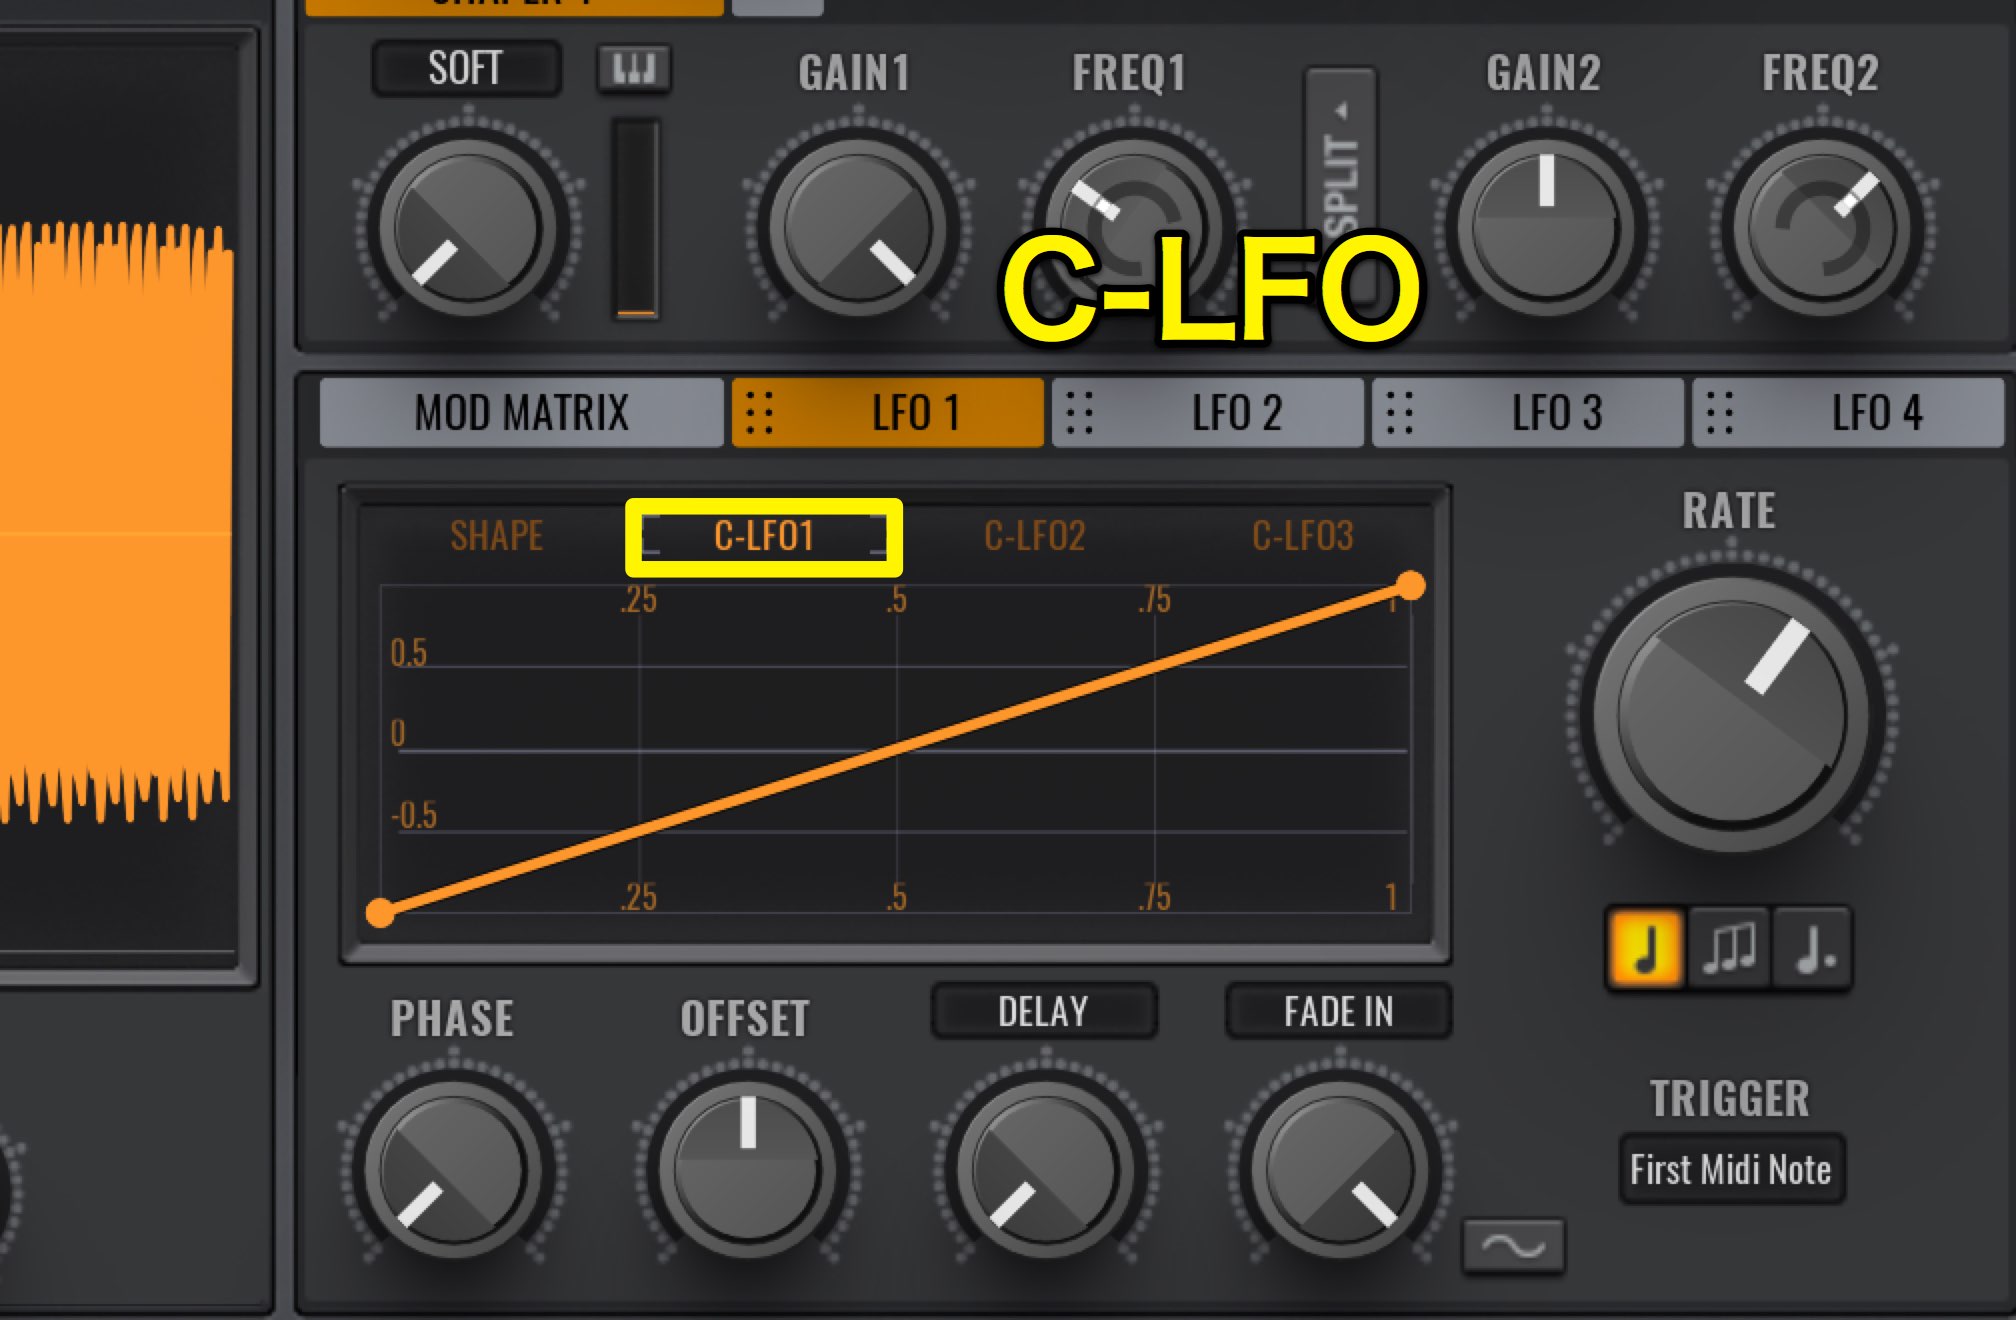
C-LFO allows you to draw your own waveforms.
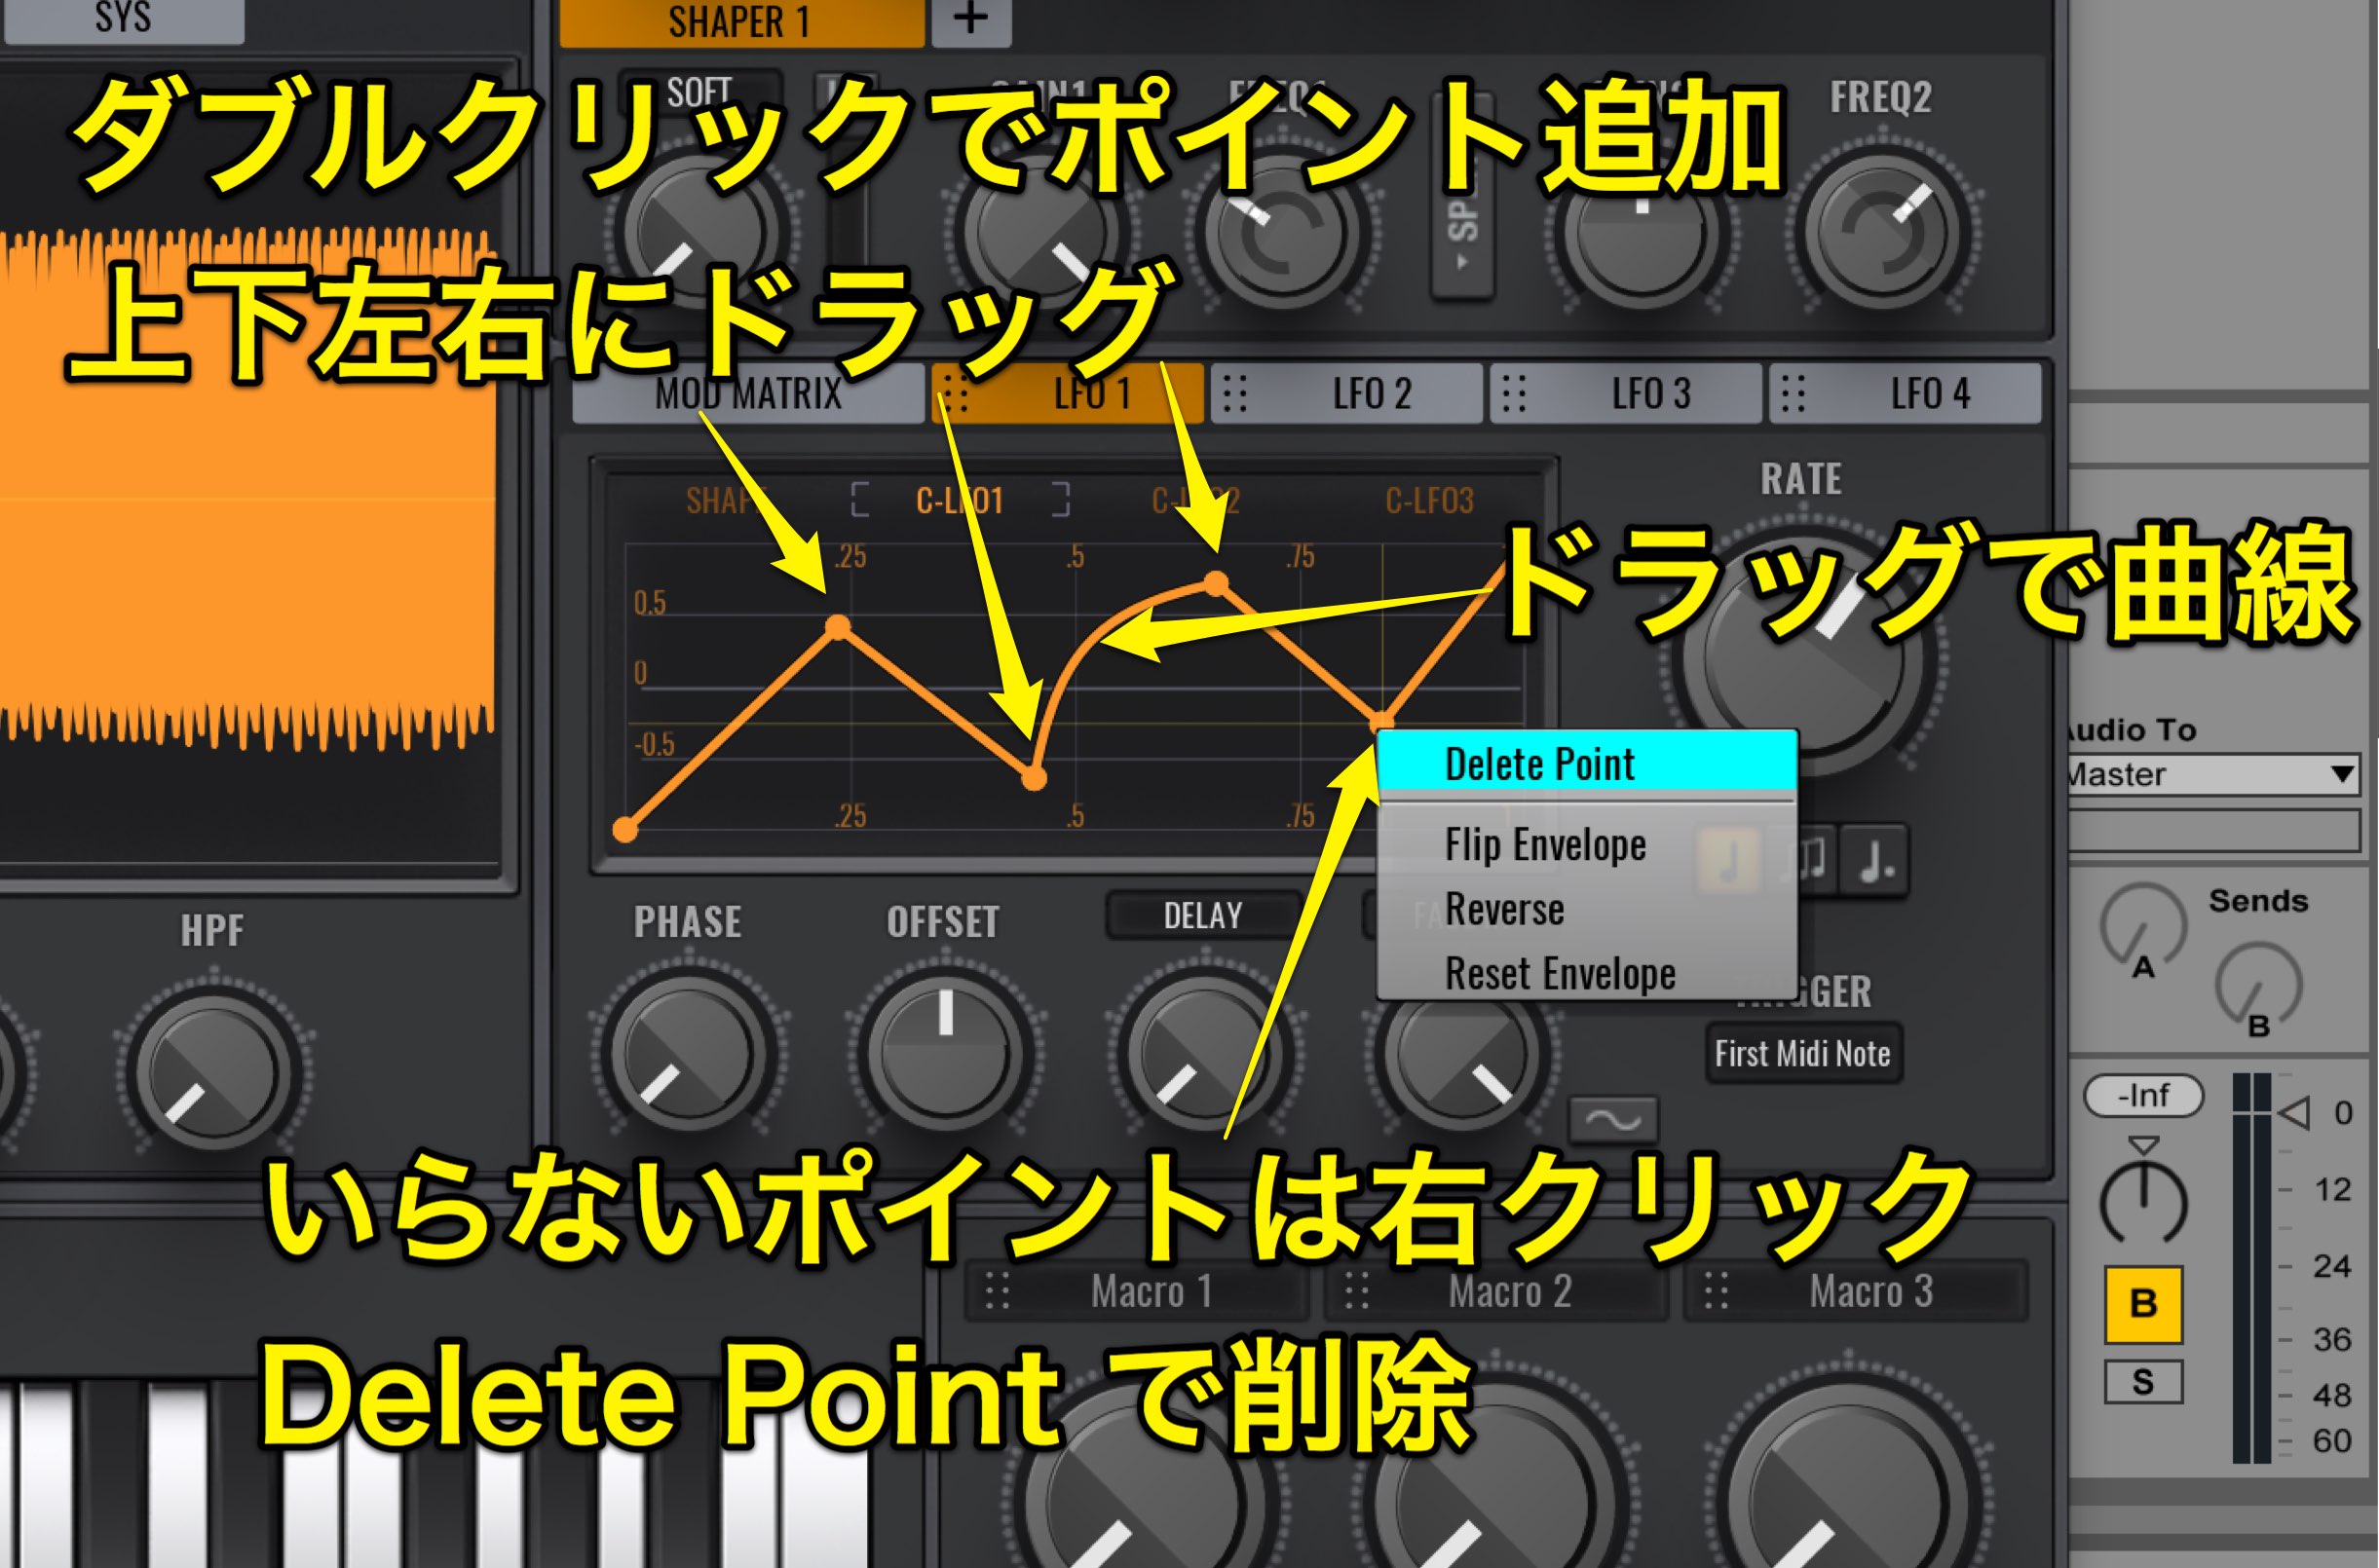
Double click to add a point, and drag it up/down left/right.
Right click on a point you don’t need and select Delete Point.
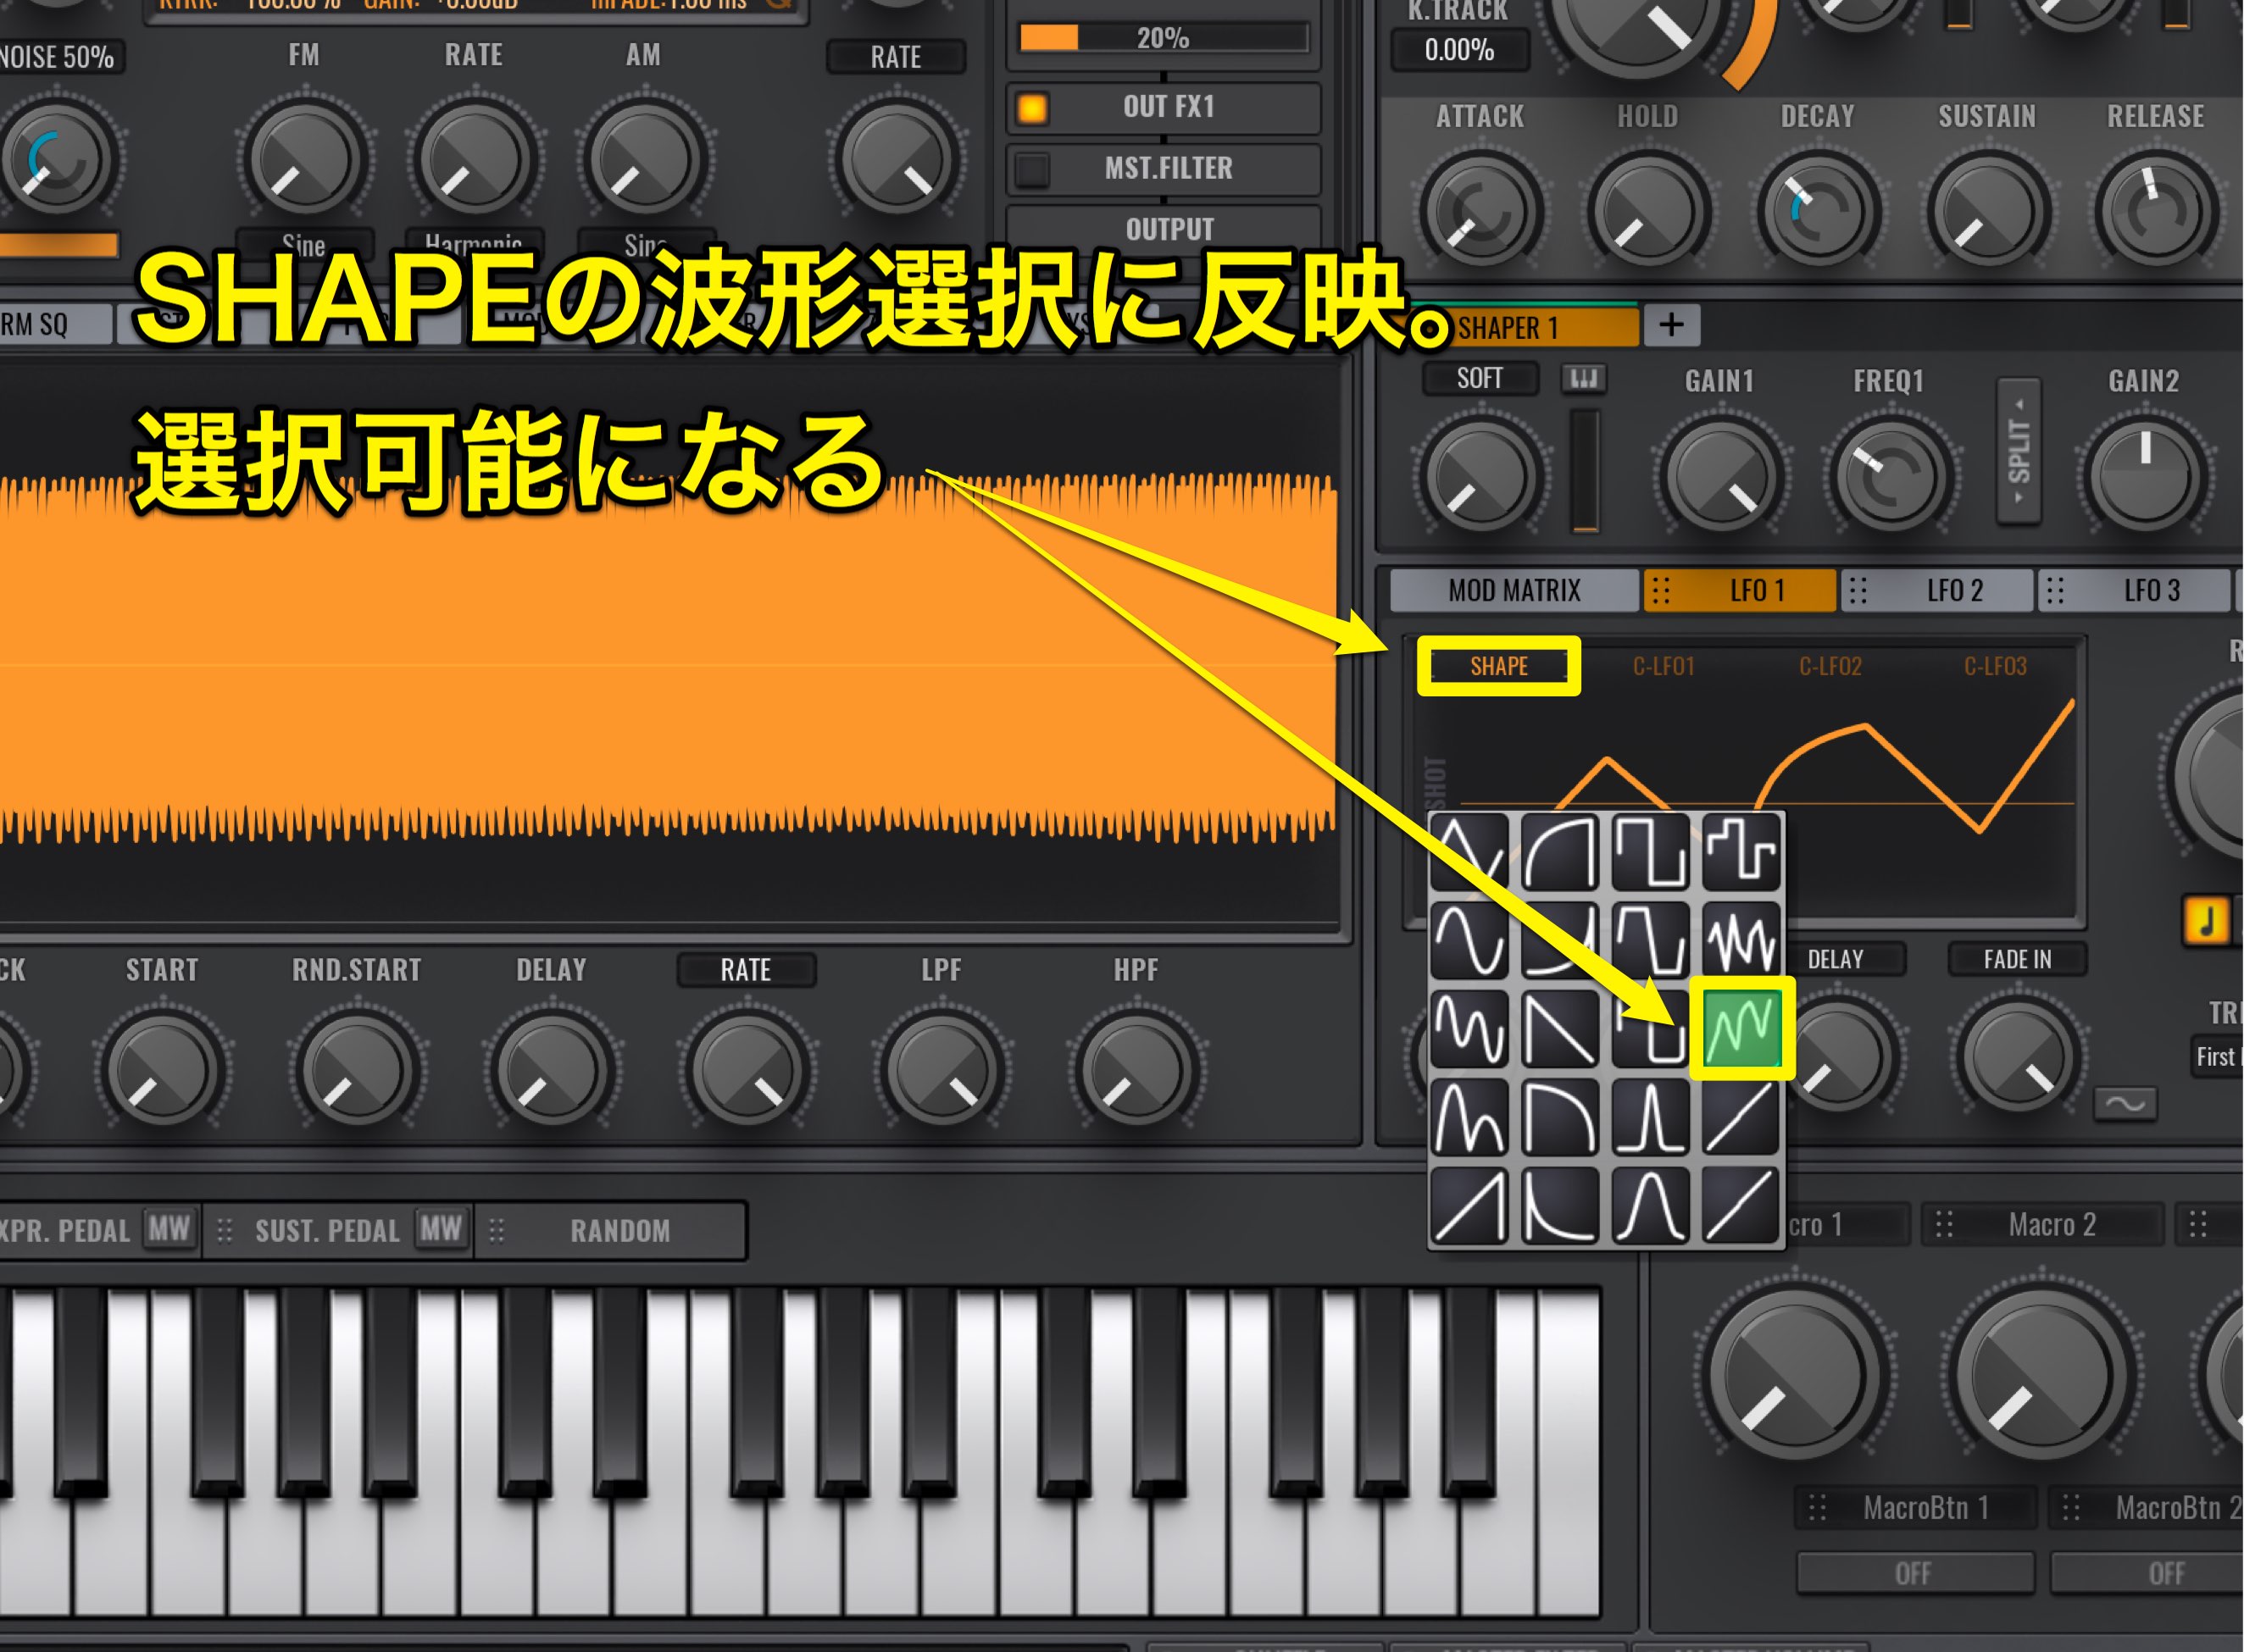
The waveform you create will be reflected in SHAPE, and can be selected.
This allows for lots of creative freedom.
Now that we understand how to use the LFO, lets use these tools to make a synth lead.
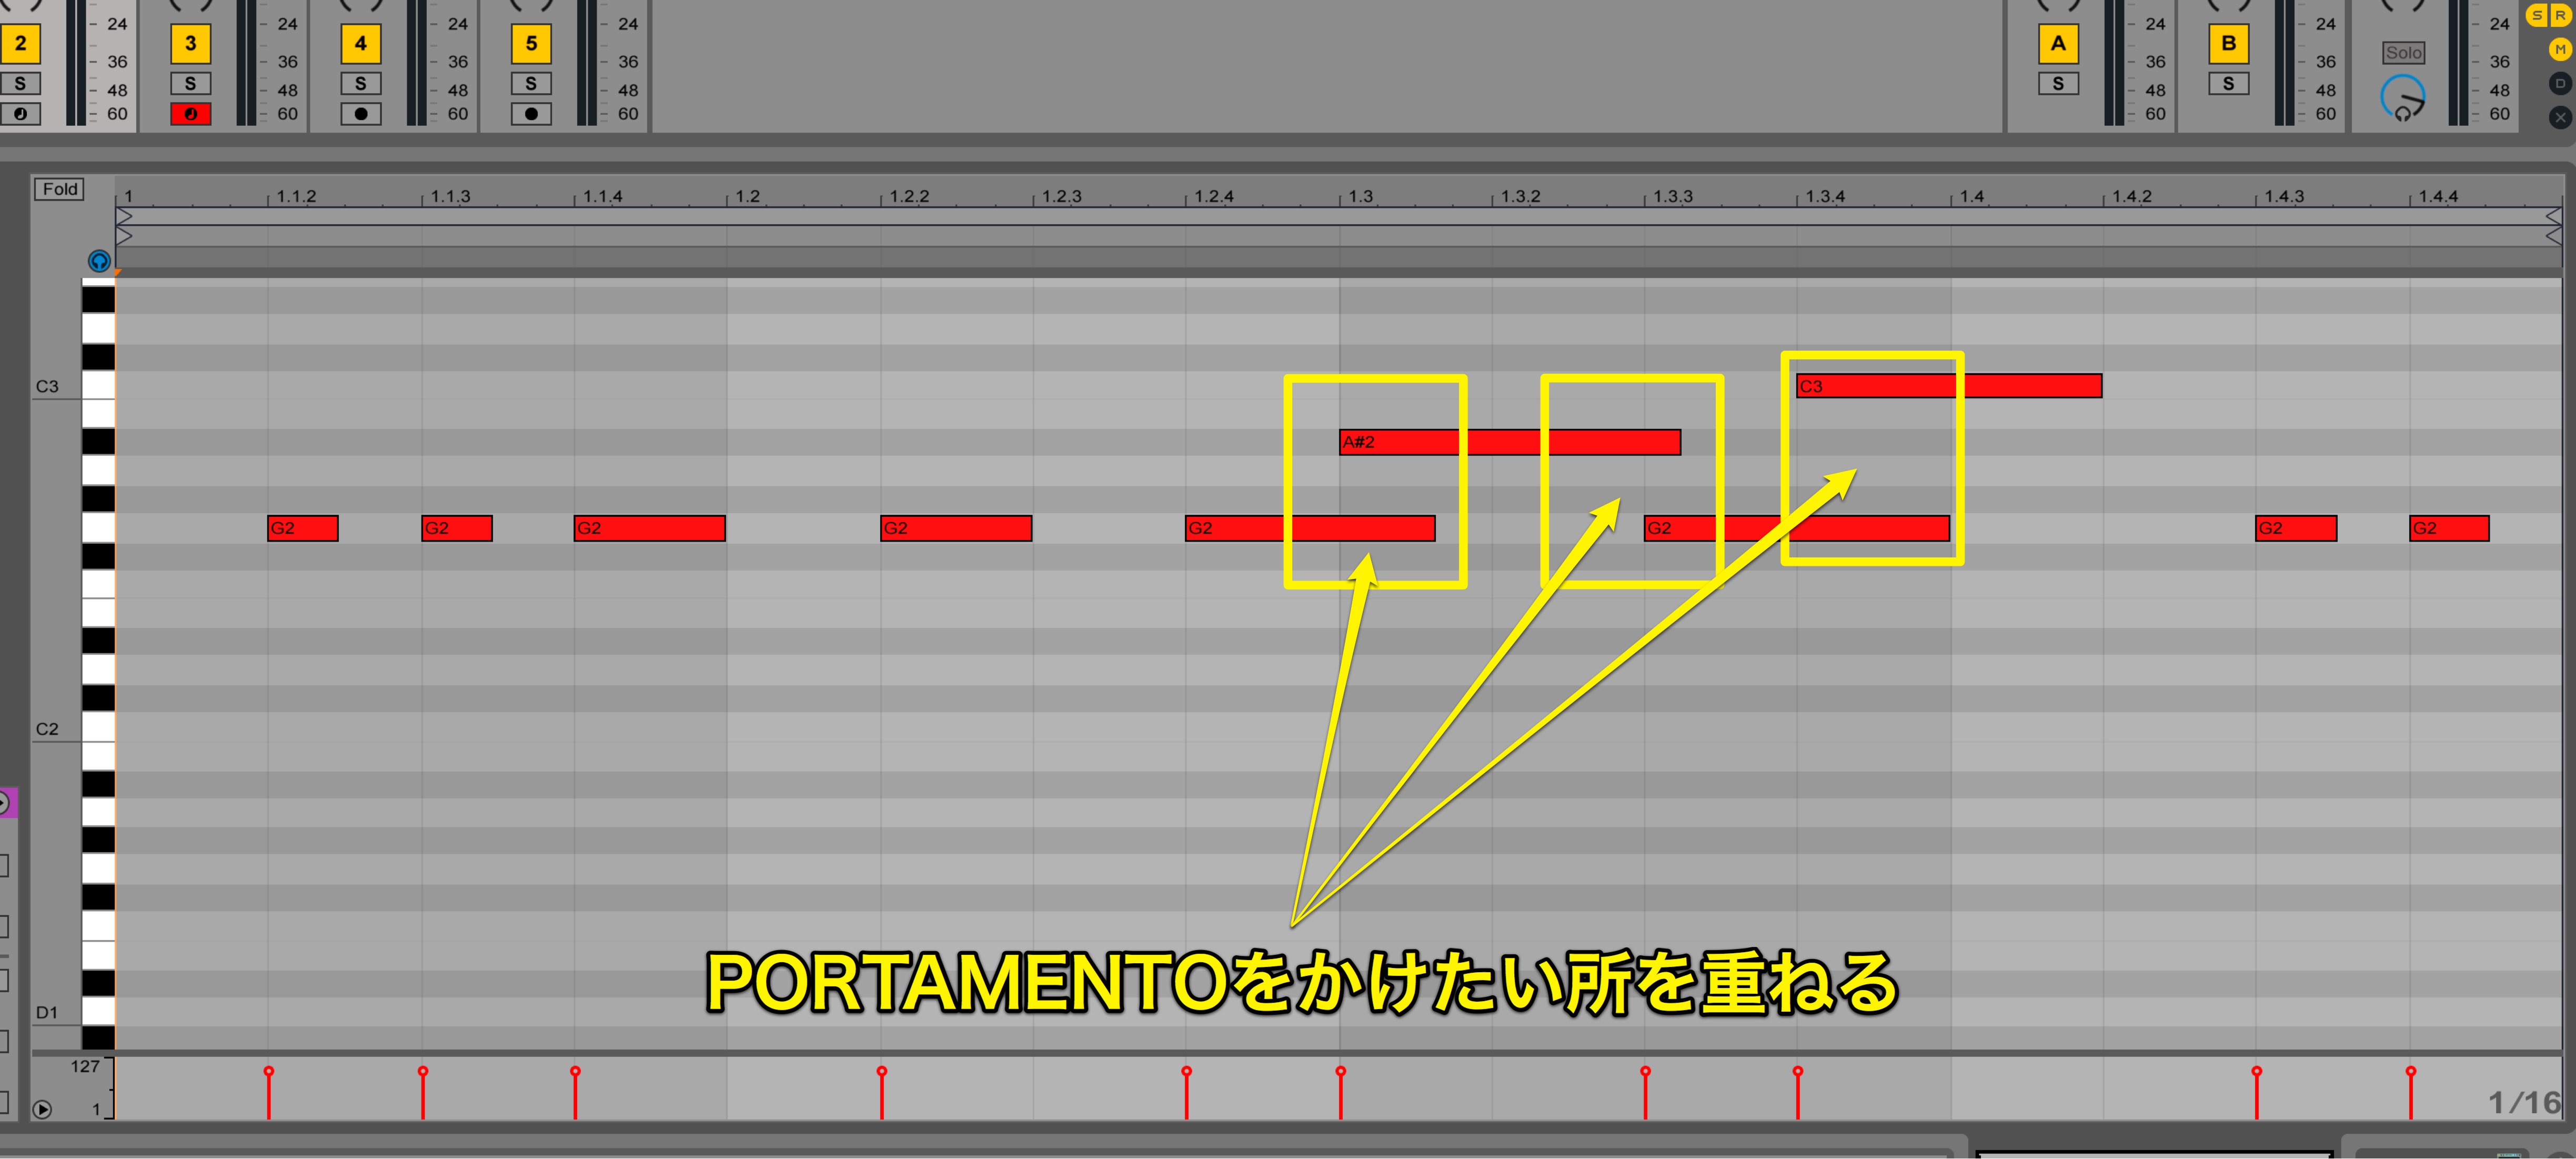
MIDI data has been entered as shown.
When you want the notes to be legato, we enter it so the notes overlap.
First, to make sure the notes smoothly move in the way we want, lets set up PORTAMENTO.
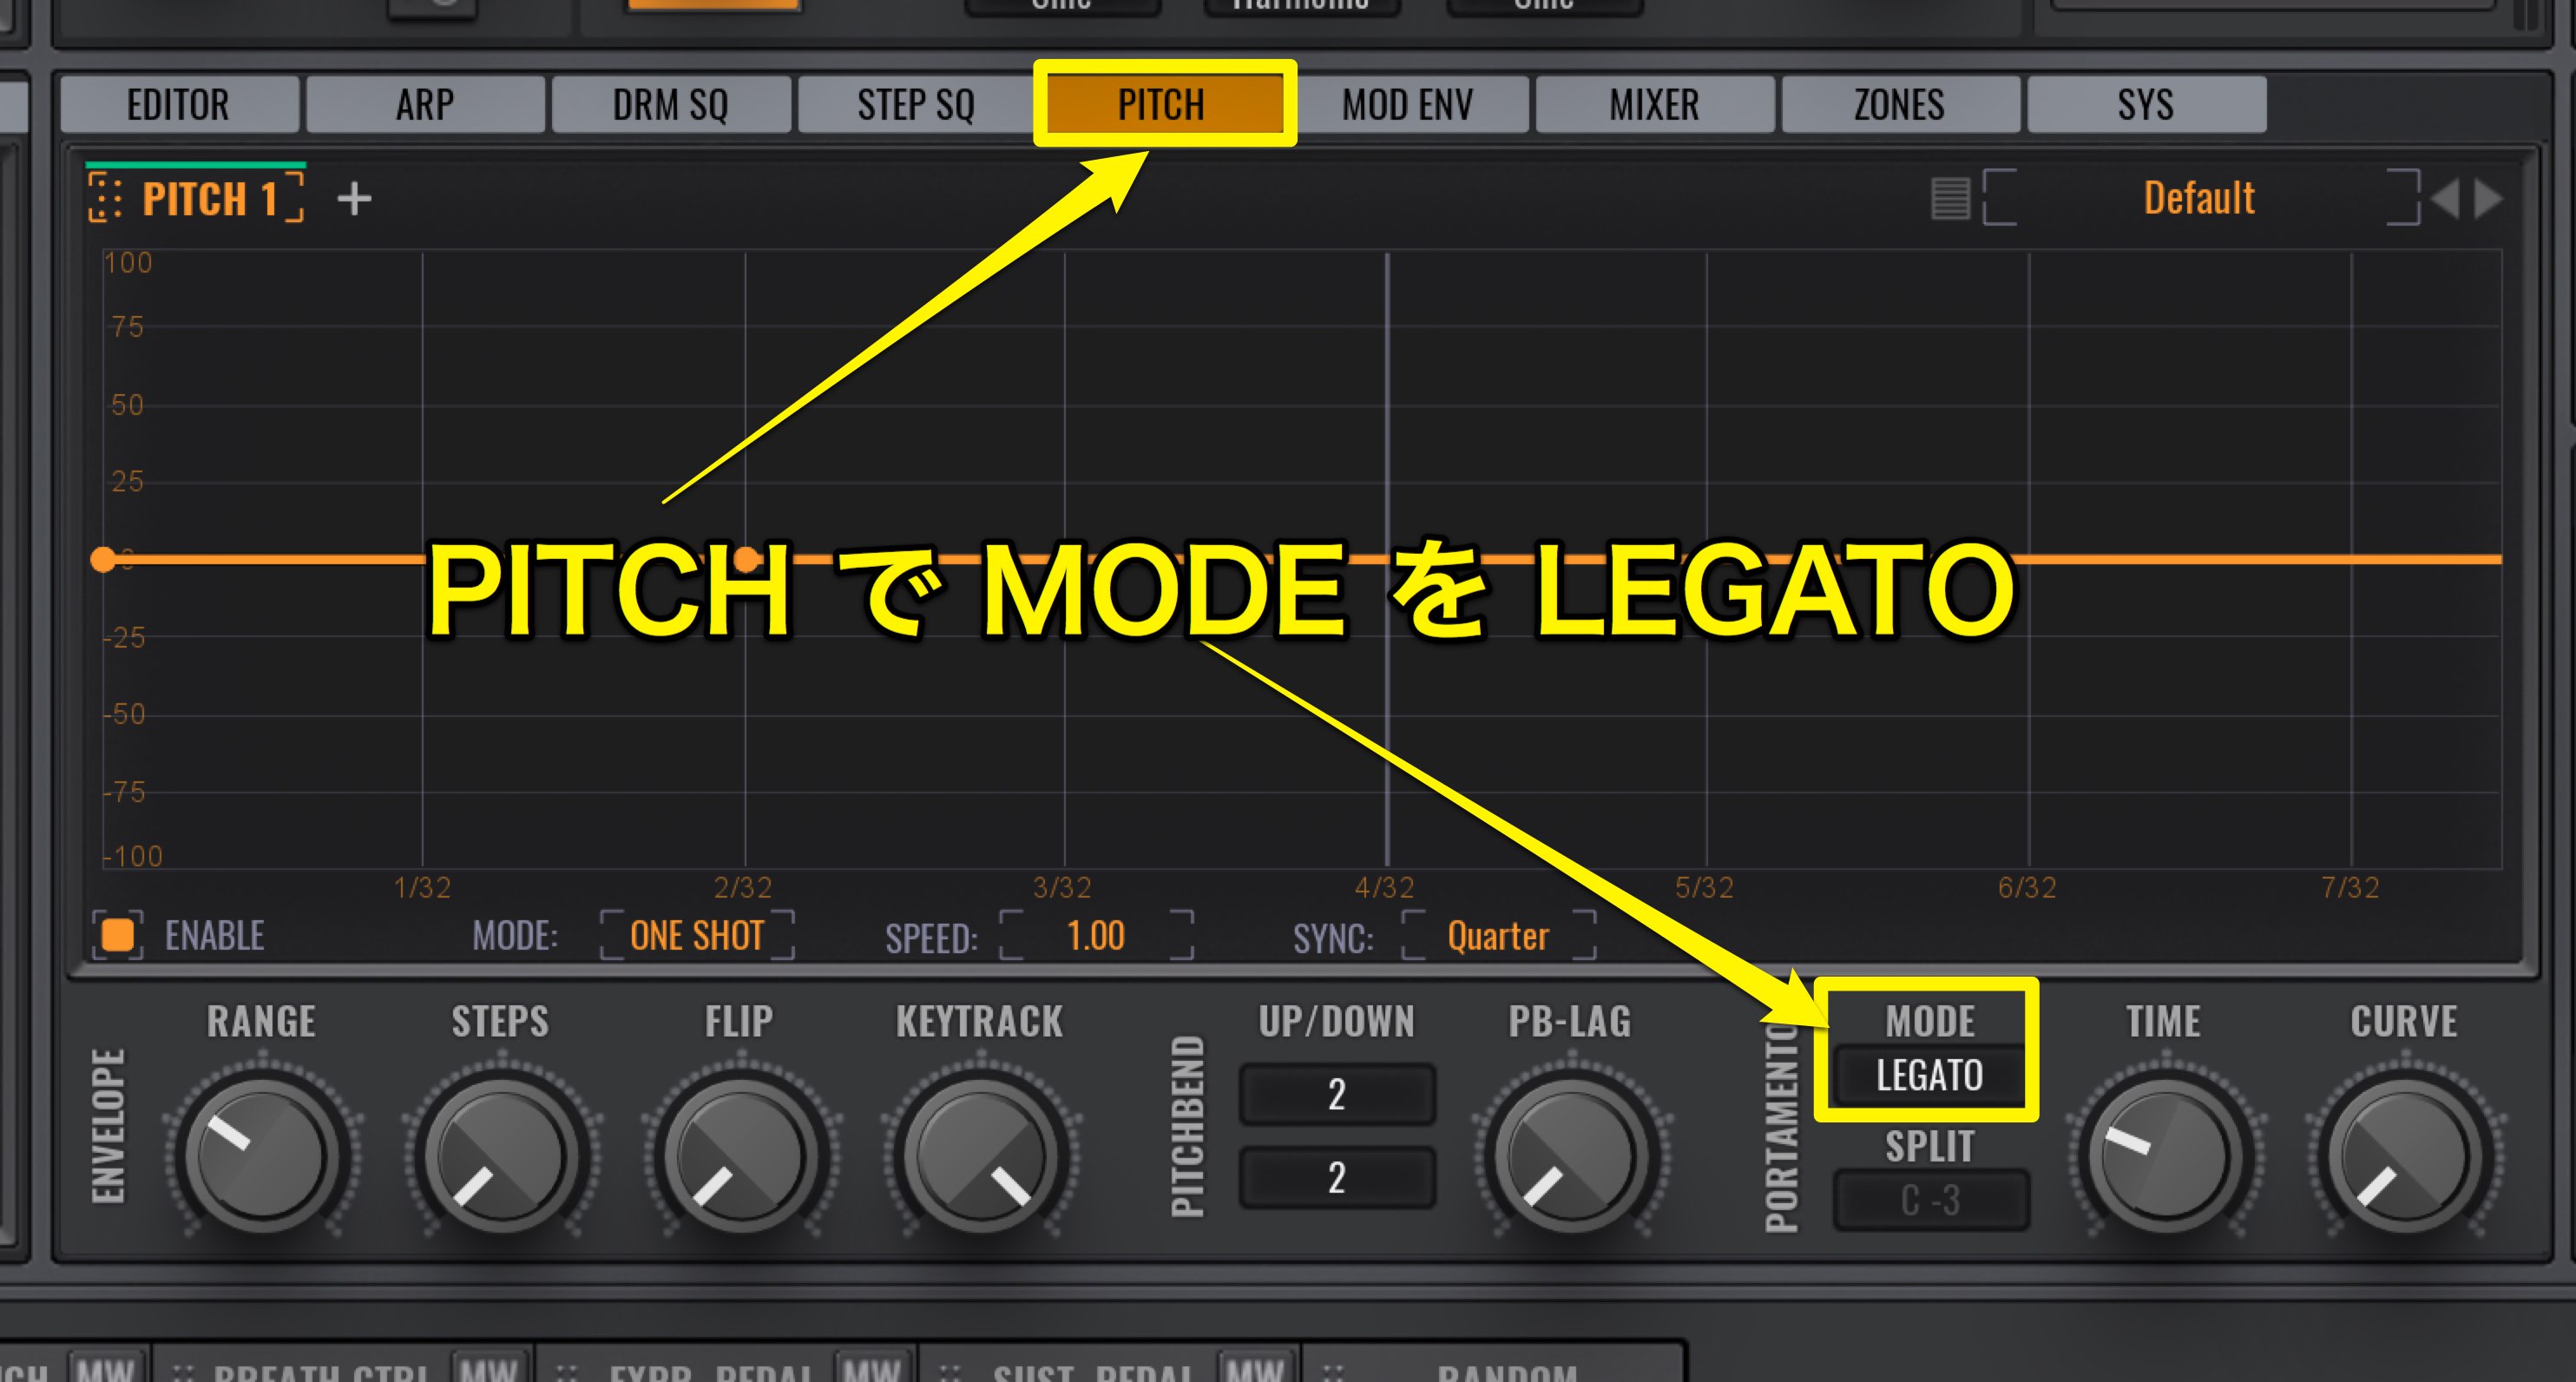
Open PITCH, and set the PORTAMENTO MODE to LEGATO.
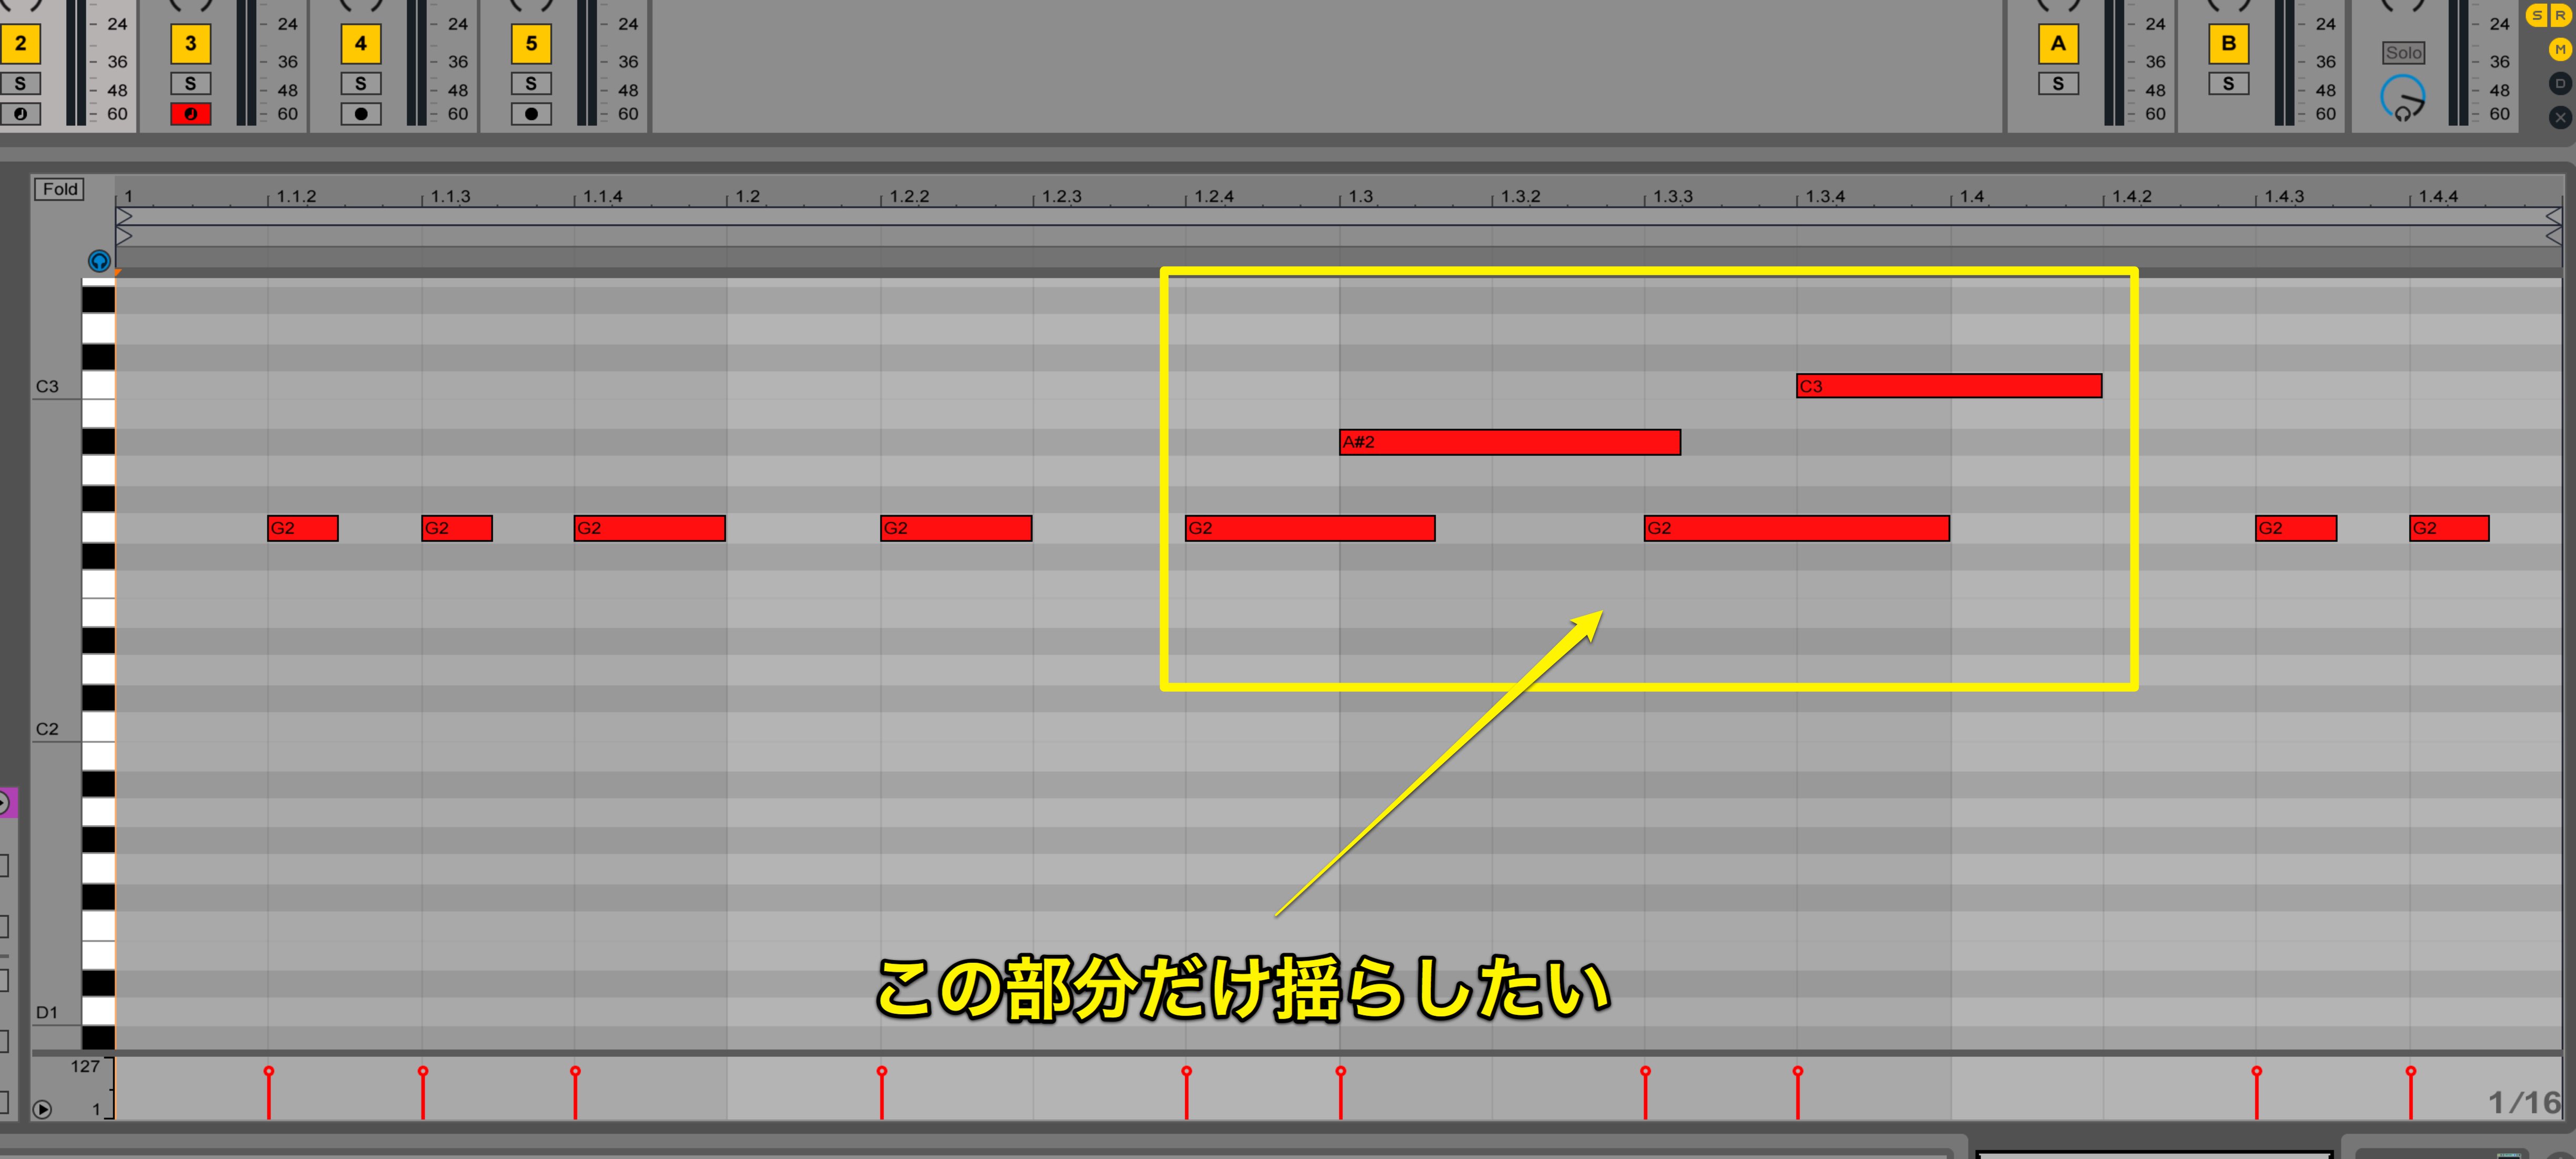
We will make adjustments so that the overlapping notes have the LFO effect applied.
As mentioned above, we can use DELAY or FADE IN.
For this article we will use FADE IN.
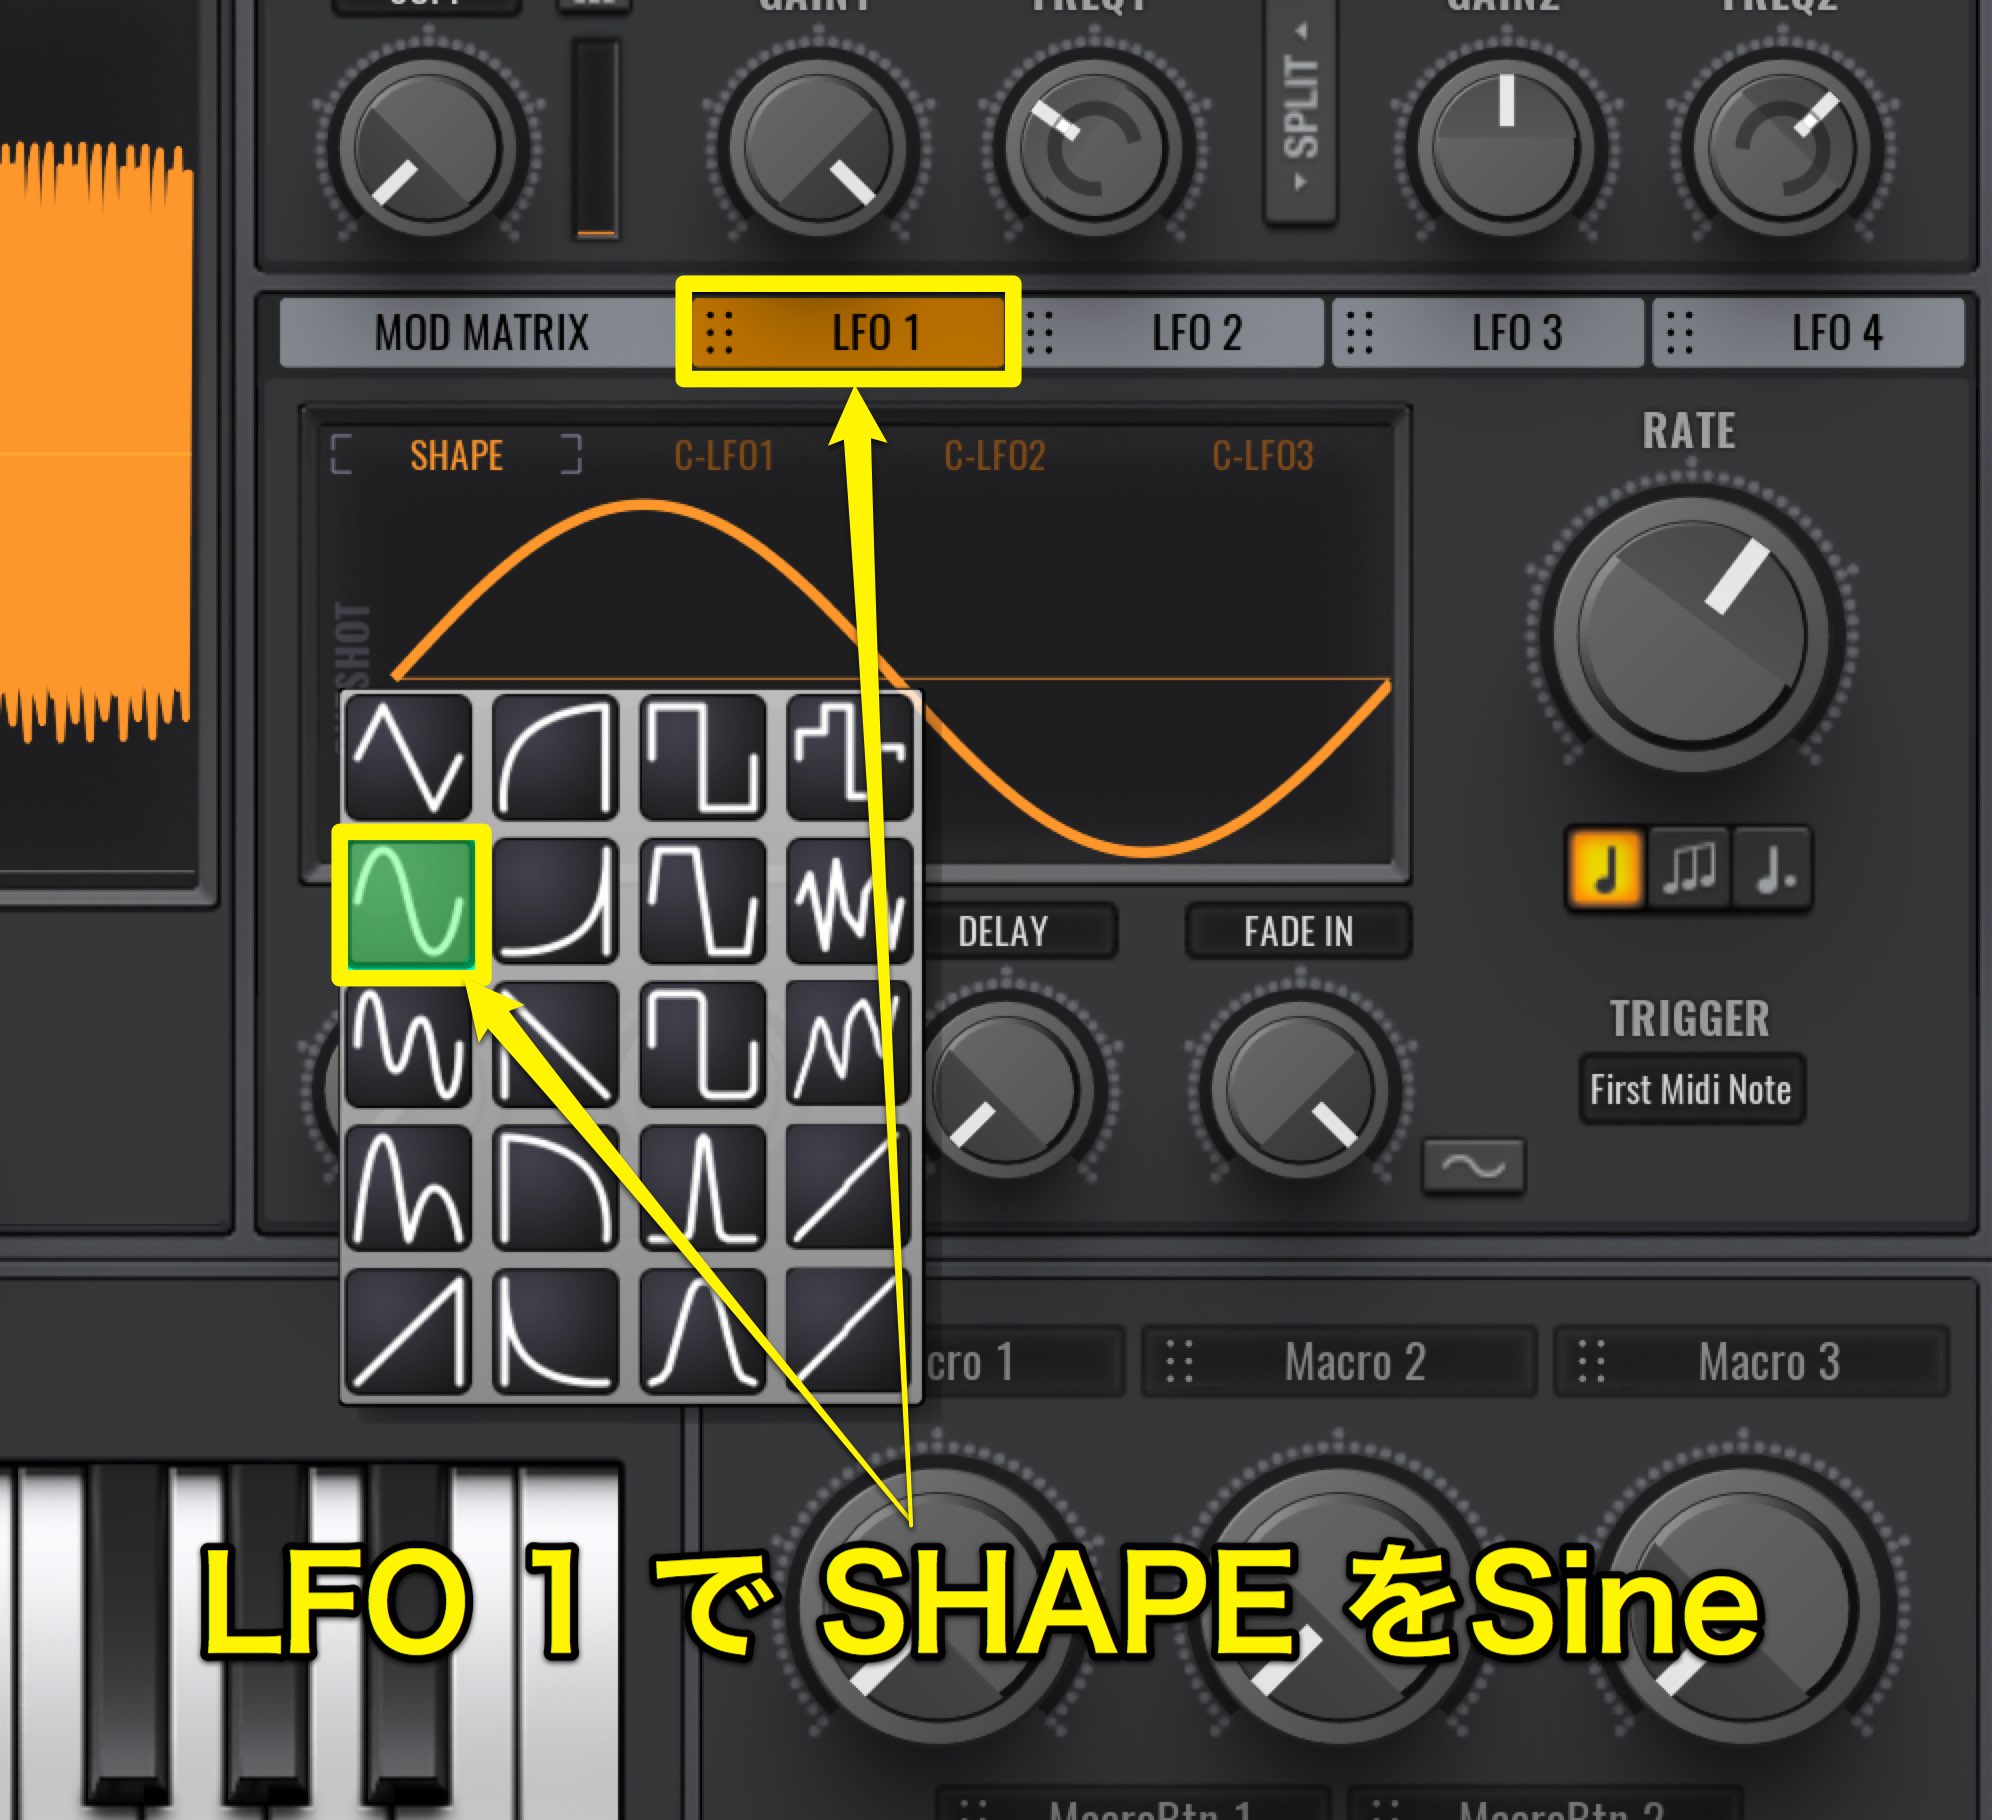
First we will make LFO 1’s SHAPE a Sine wave.
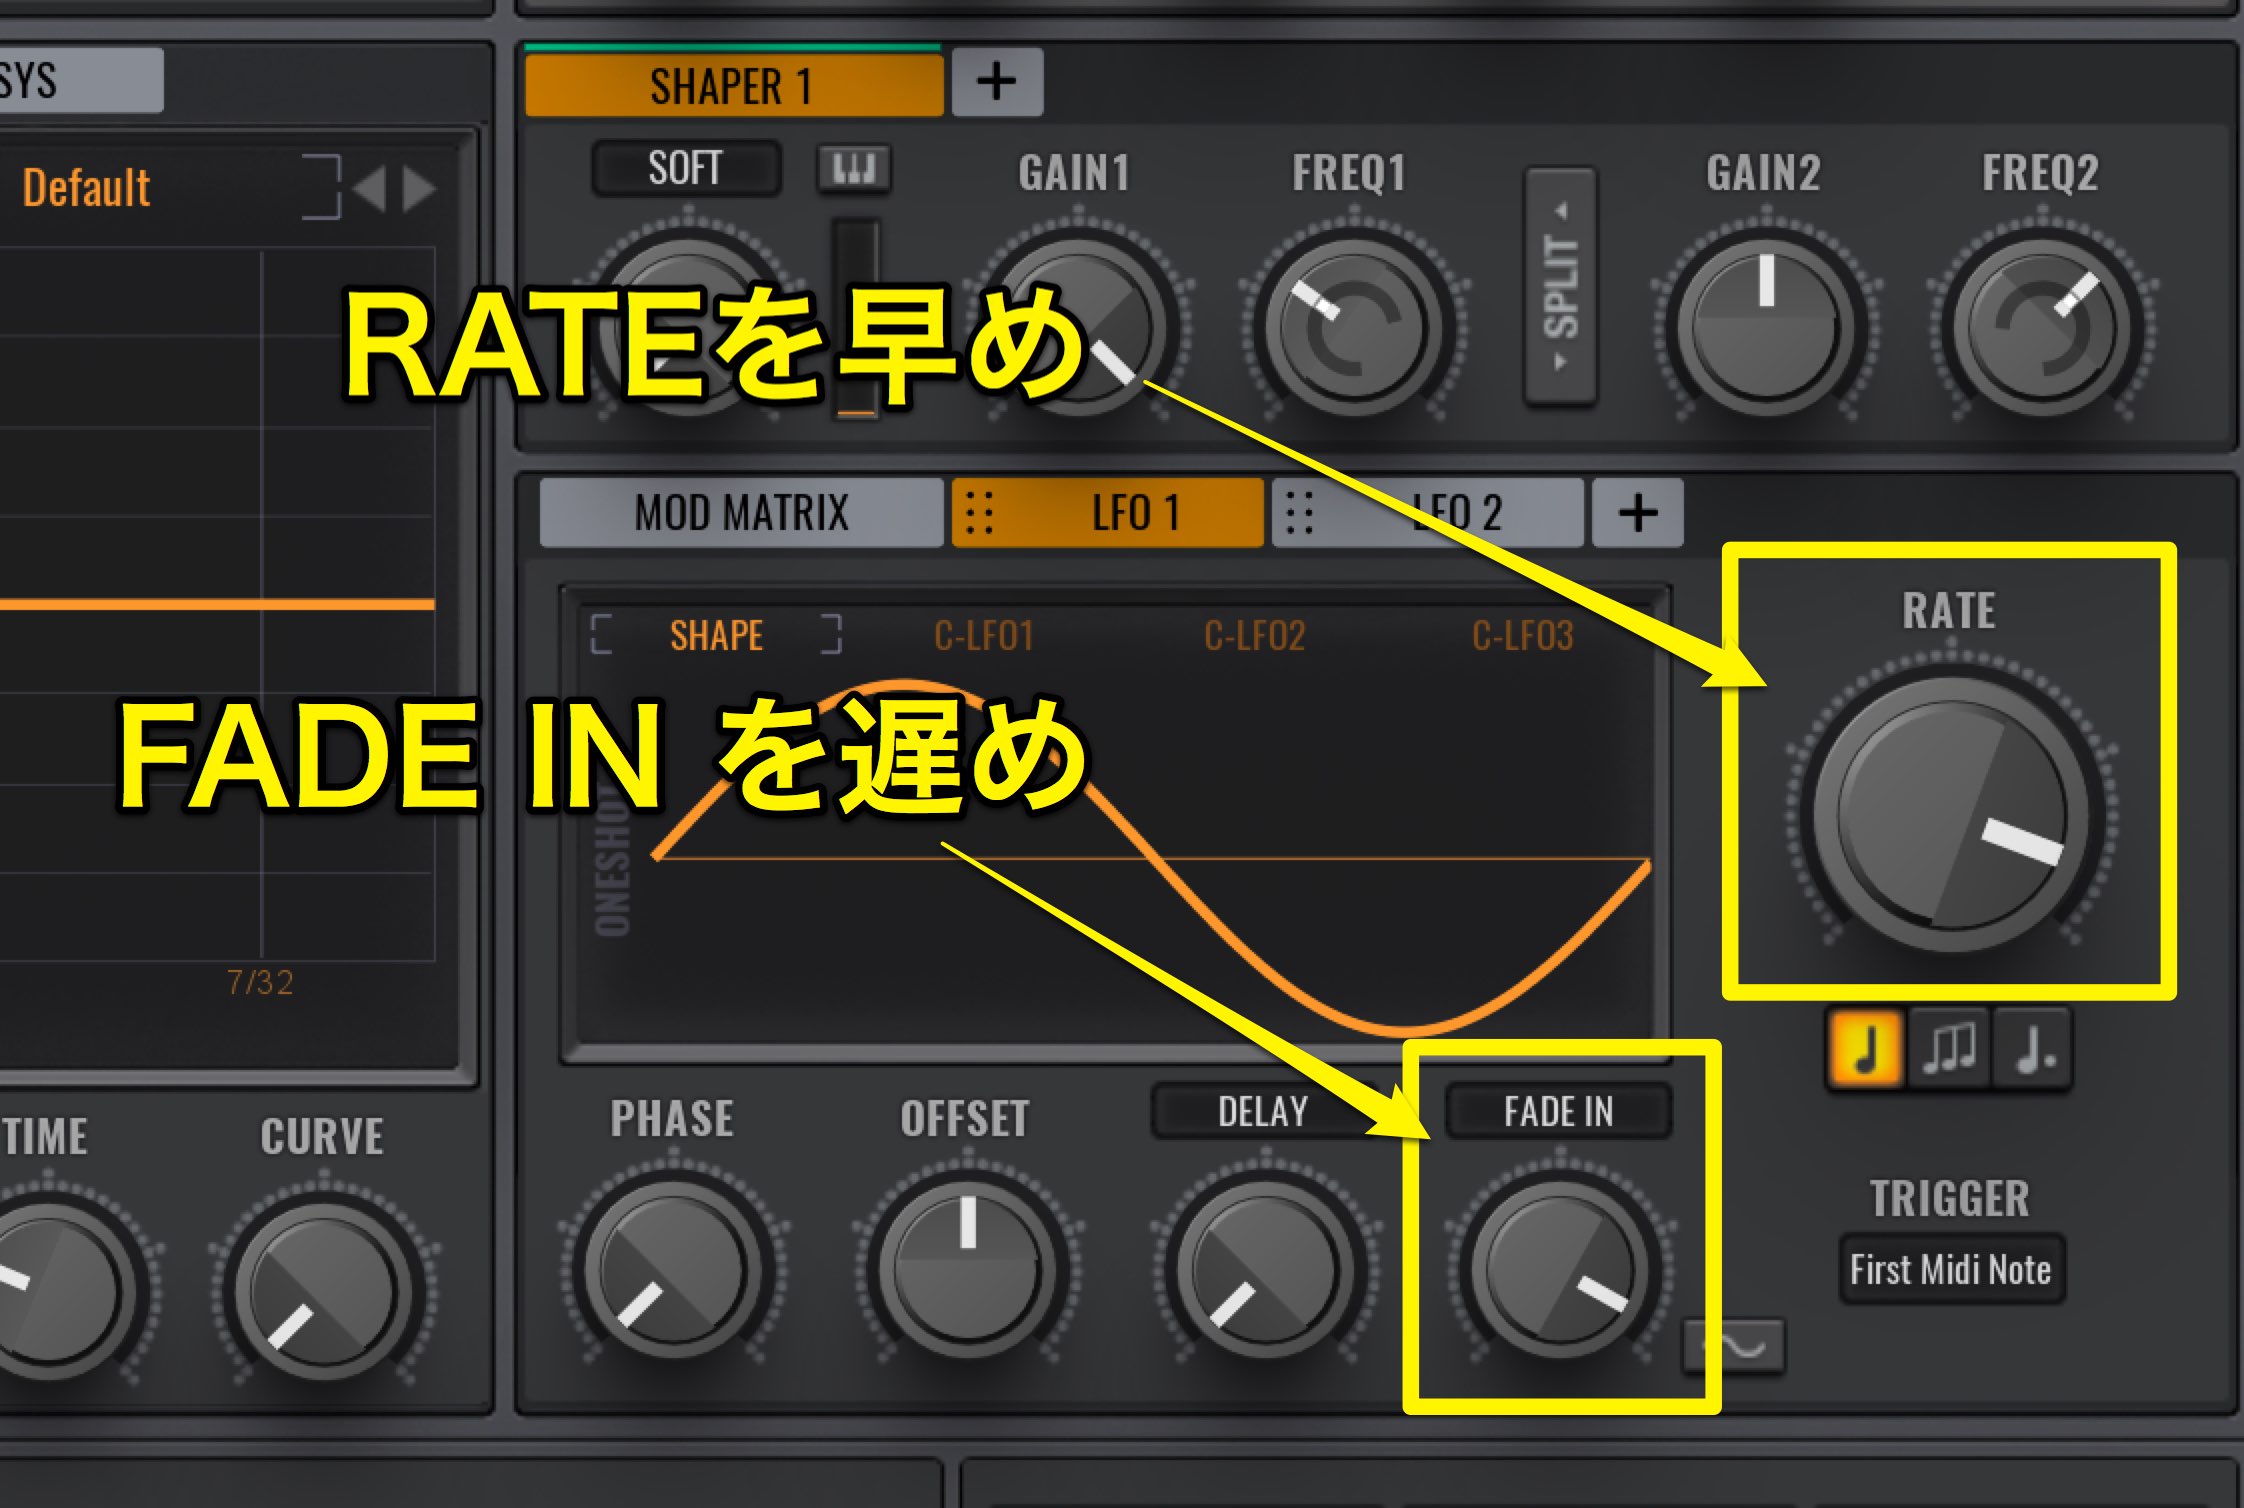
Set LFO1’s FADE IN to slow. This will prevent the effect from being applied to short notes.
Use RATE to determine the speed of the LFO.
Where will we apply LFO 1 to make the sound wobbly?
Apply it to TRANSPOSE (pitch) for vibrato, but in this case we will try applying it to FILTER.
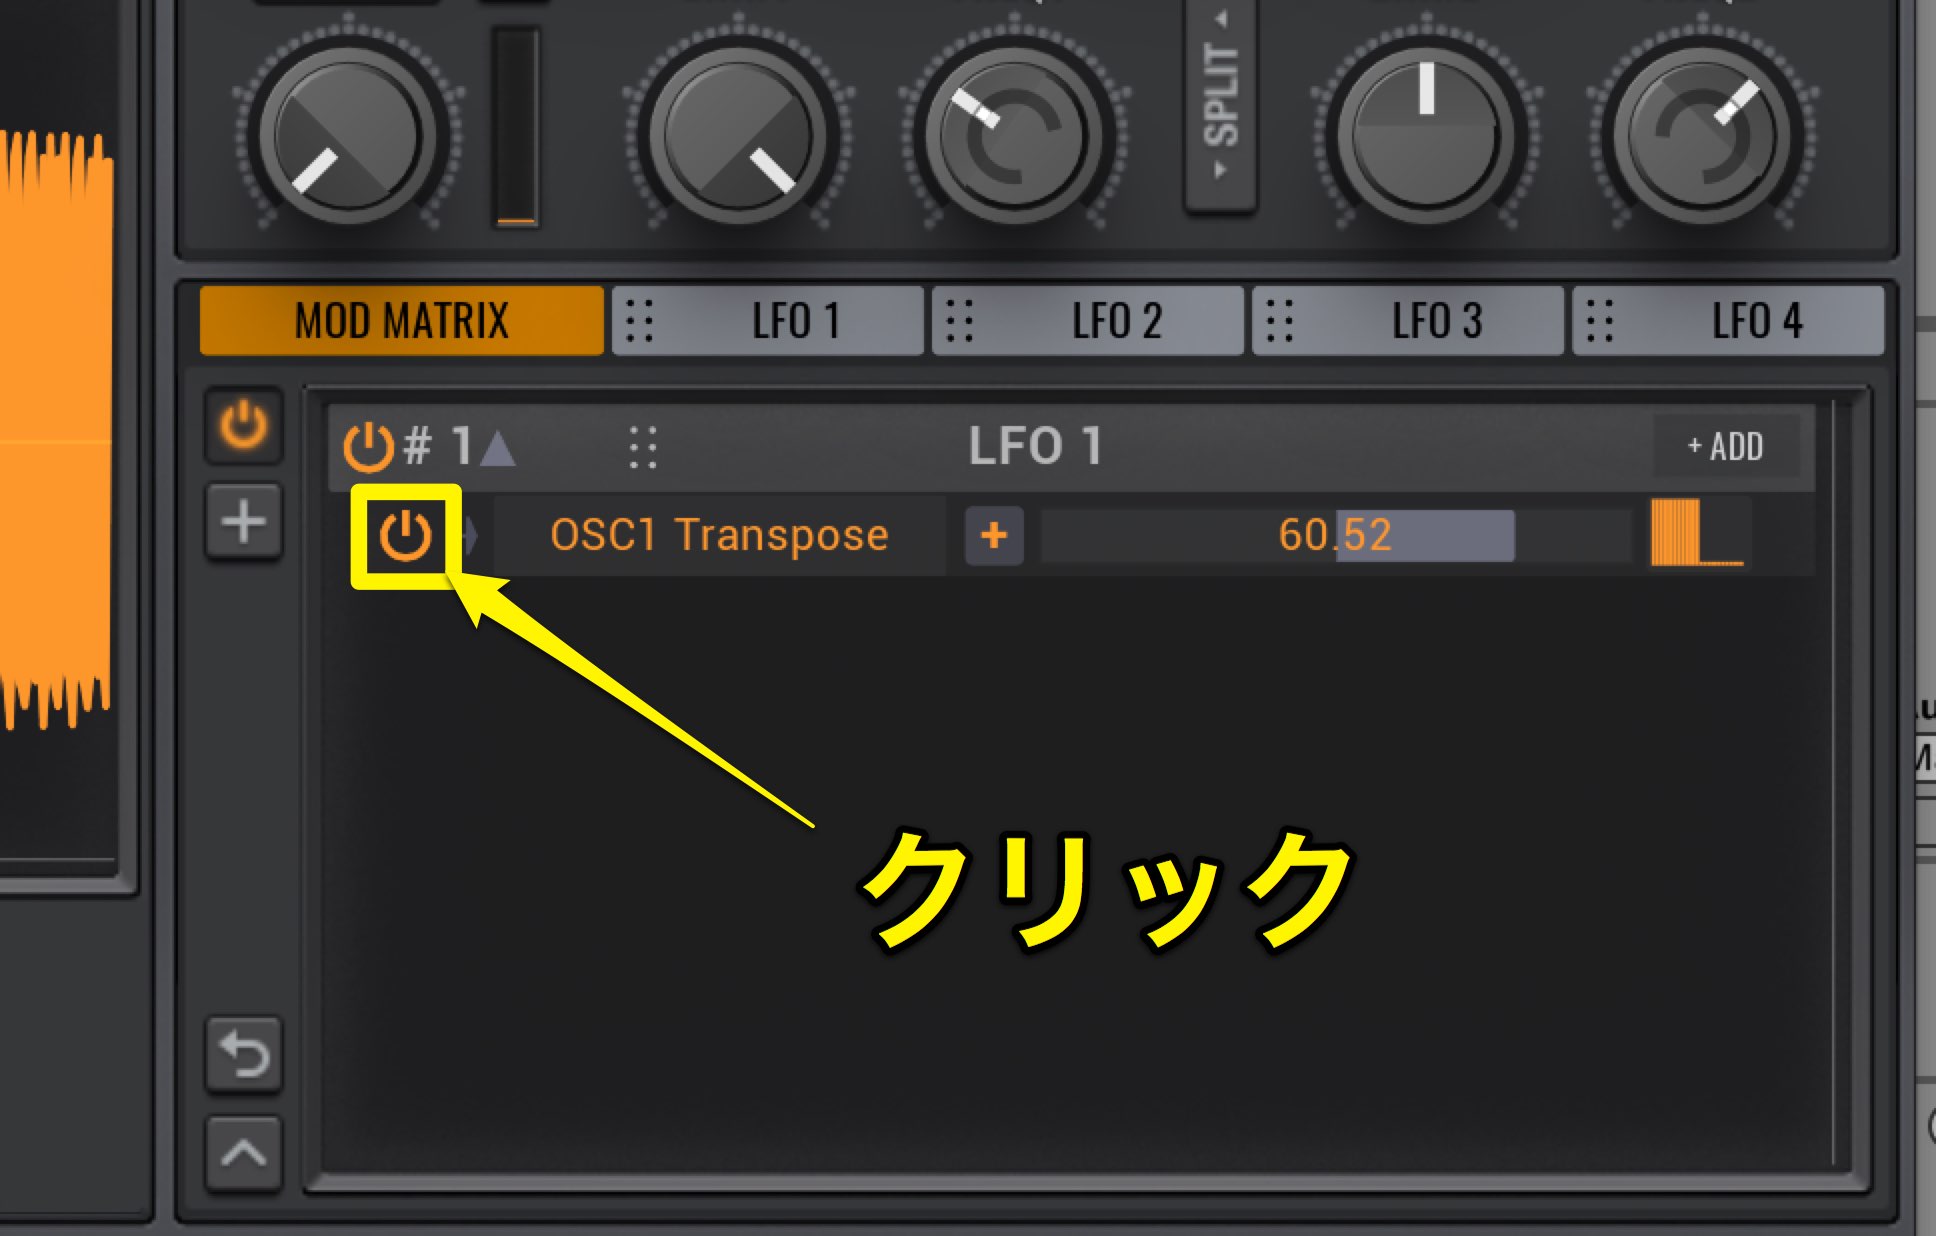
At the current moment, there is not LFO on TRANSPOSE.
Just click on the MOD MATRIX’s power button.
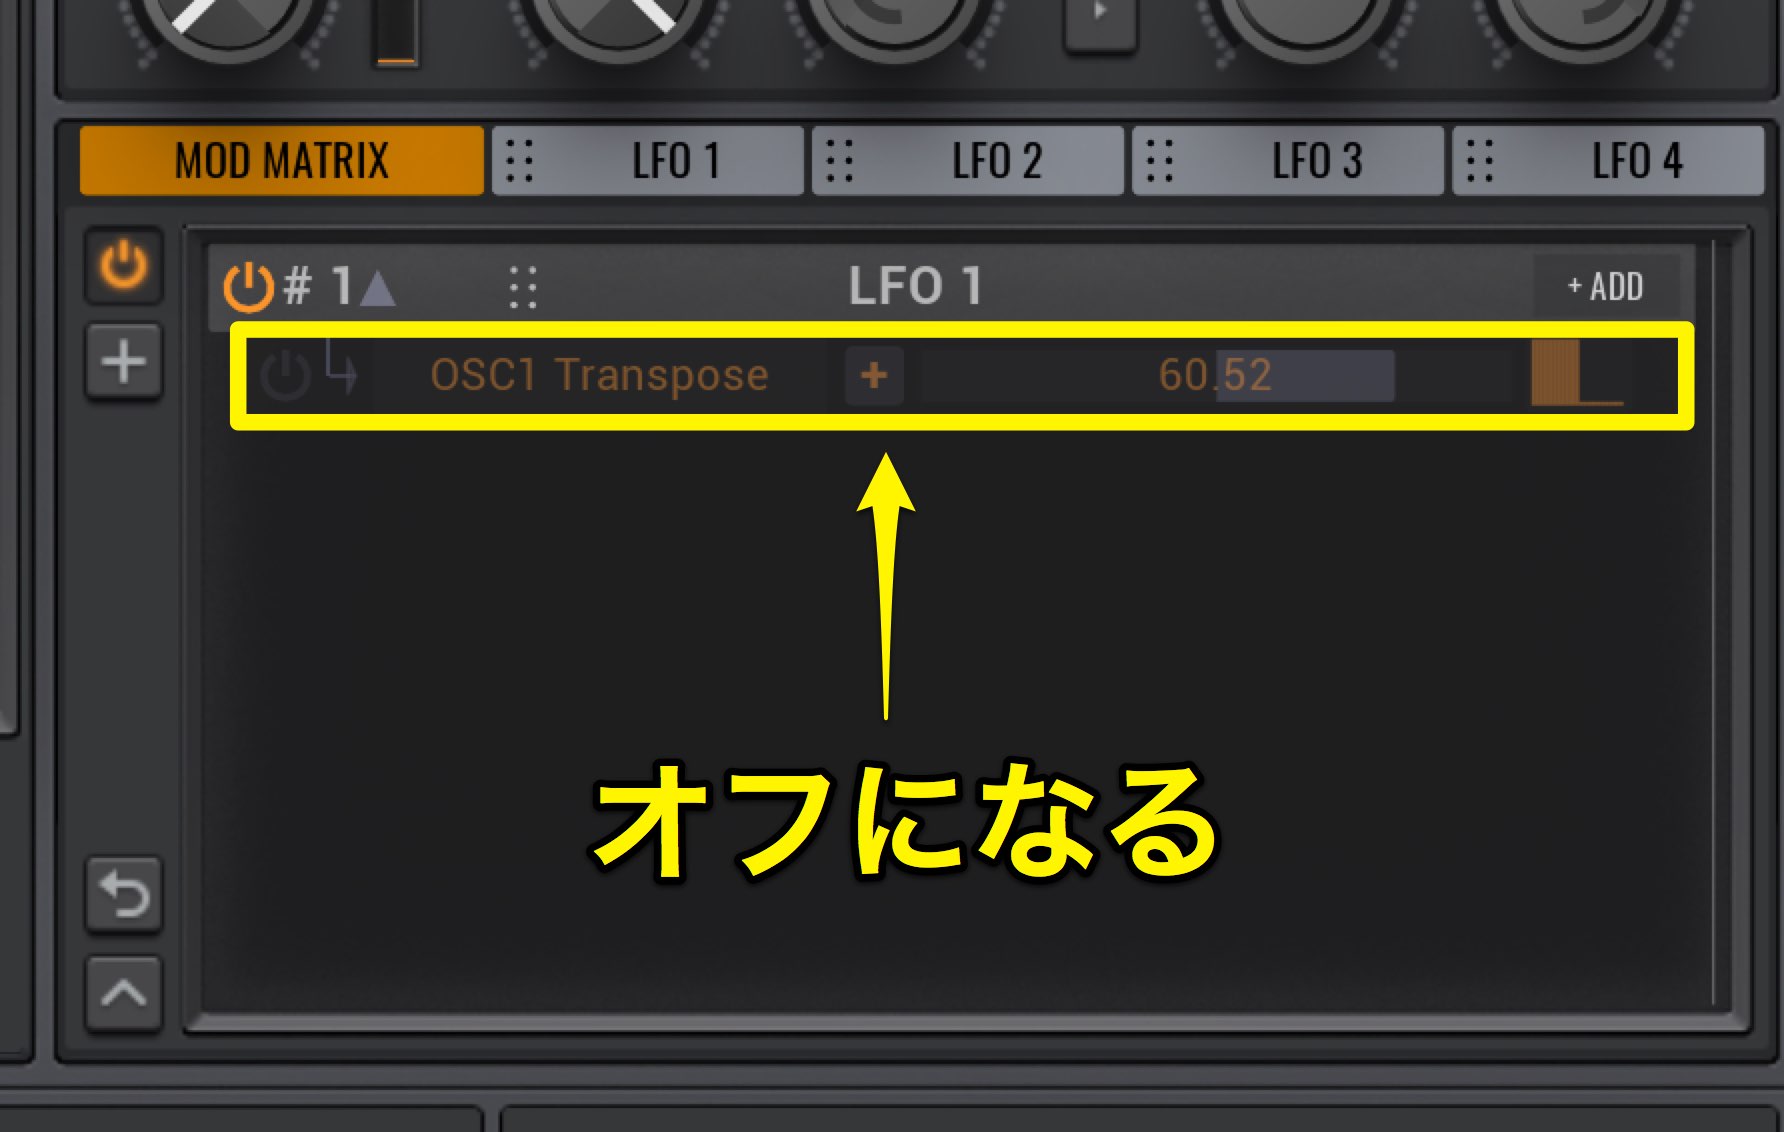
It is easily turned off.
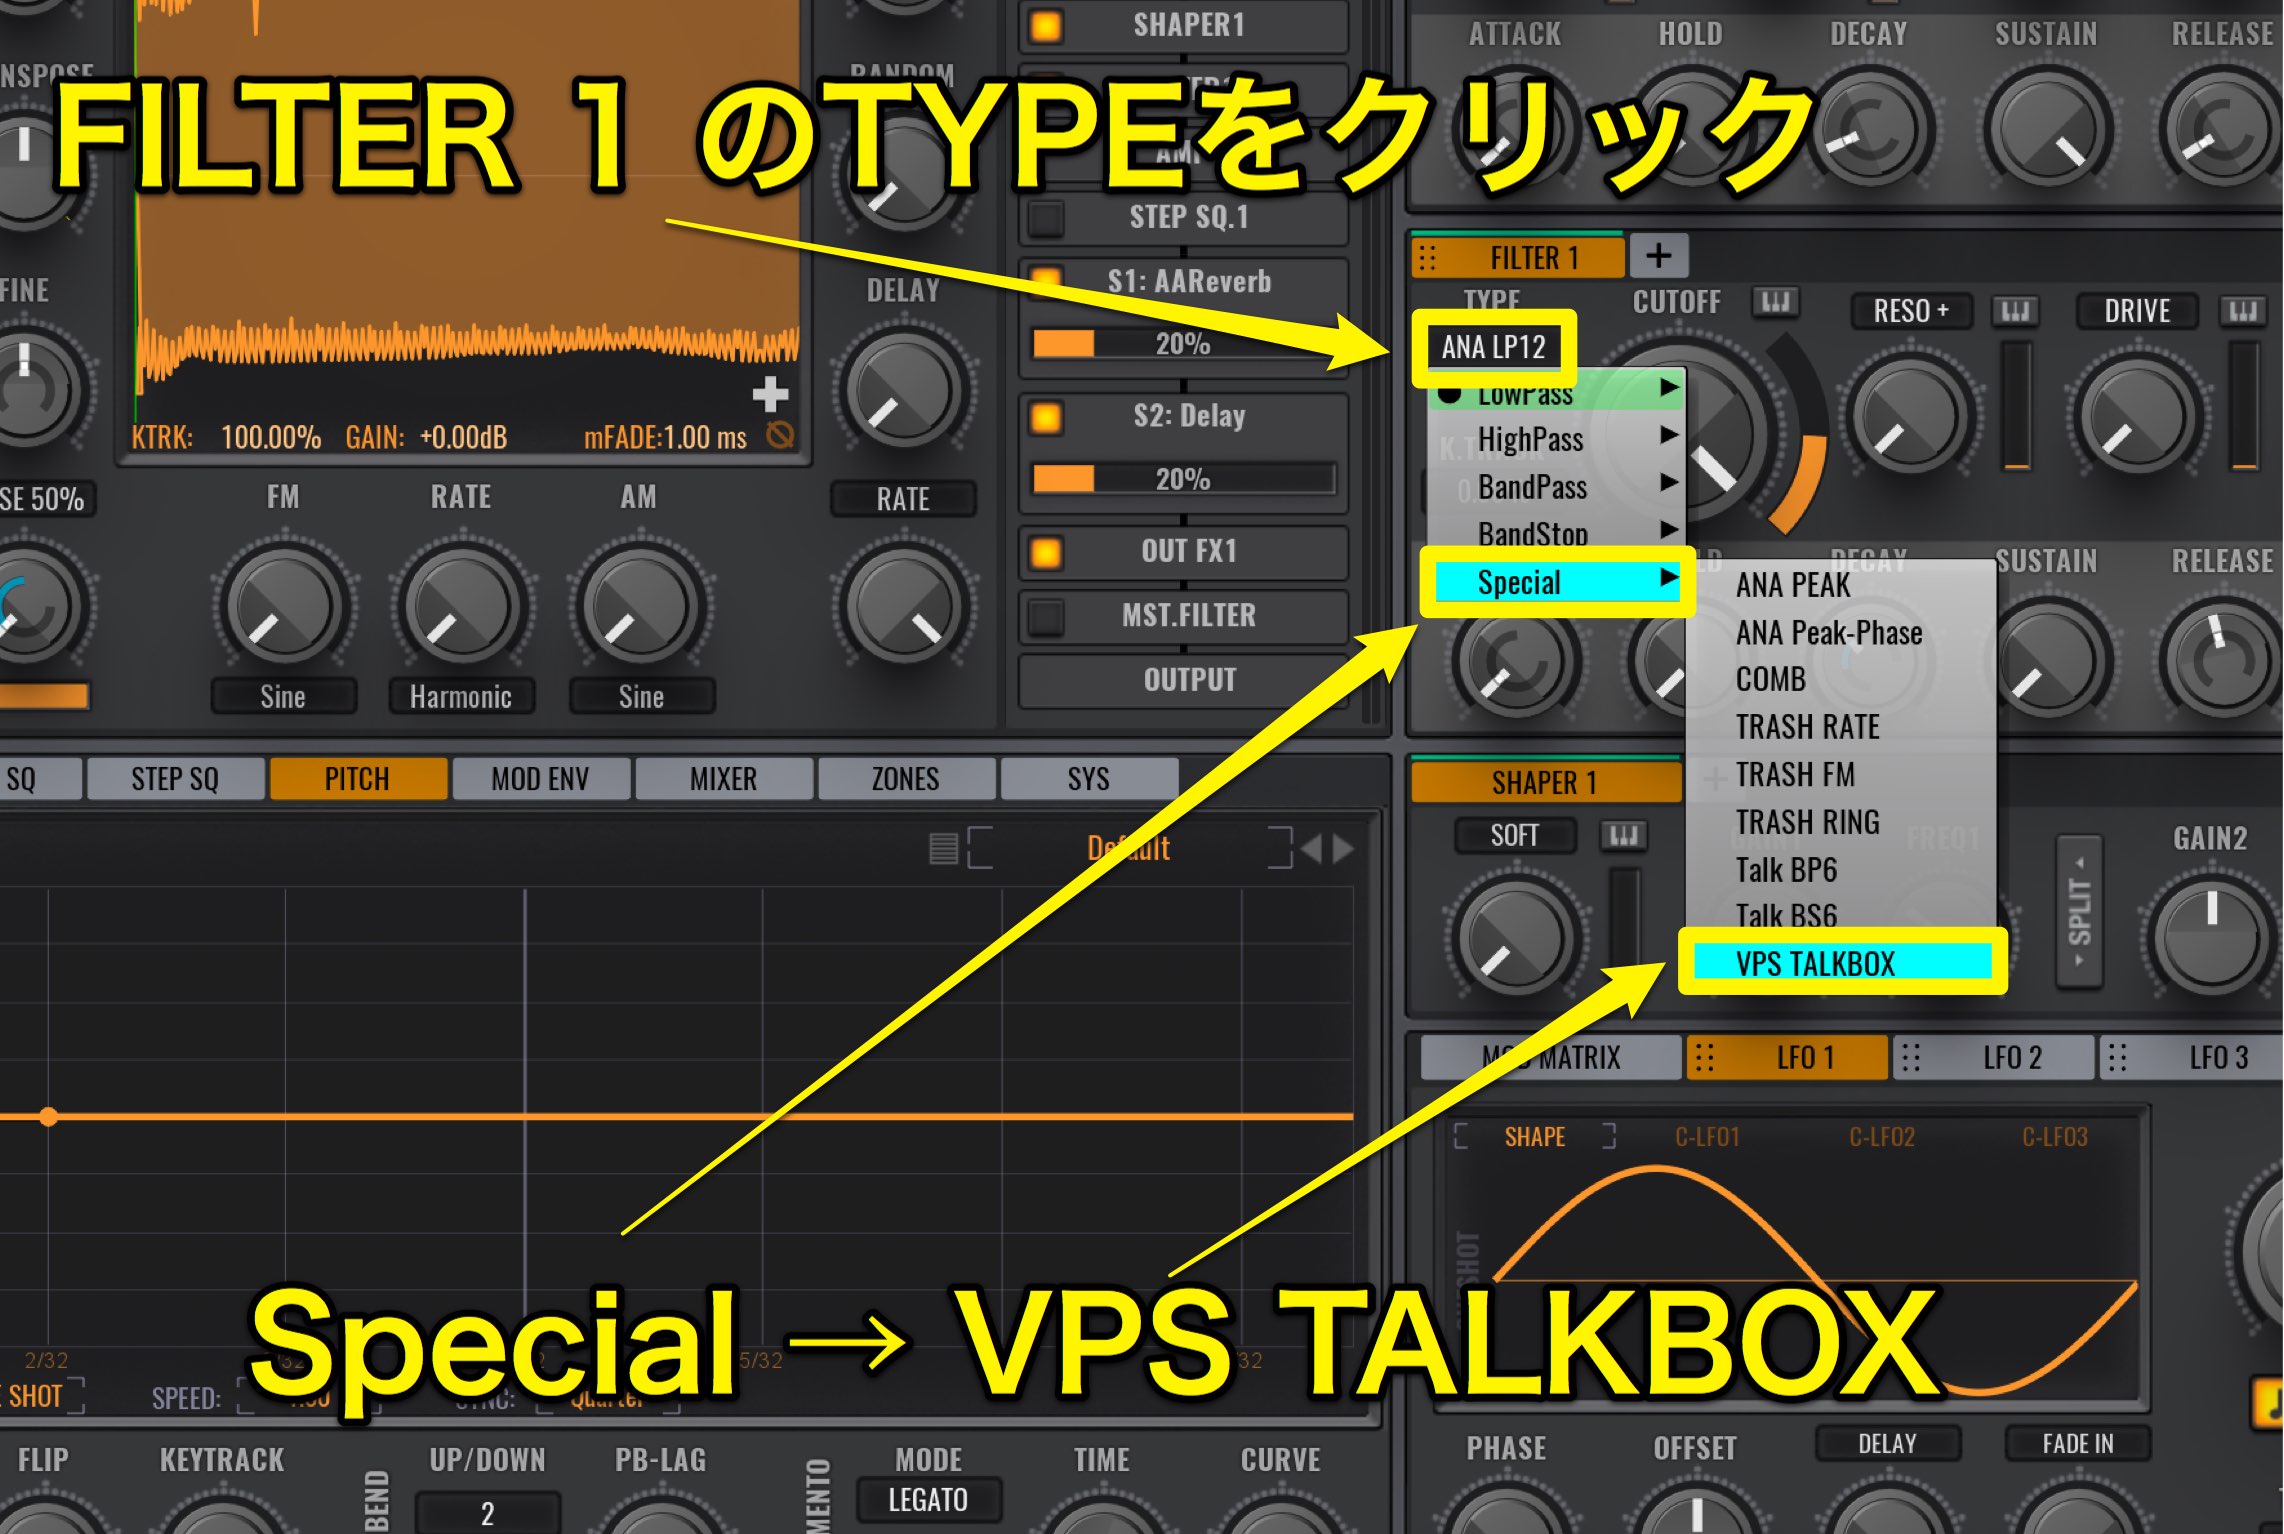
Choose a FILTER from FILTER 1’s TYPE.
We will select VPS TALKBOX from Special.
By having the CUTOFF move fast, it vibrates the sound.
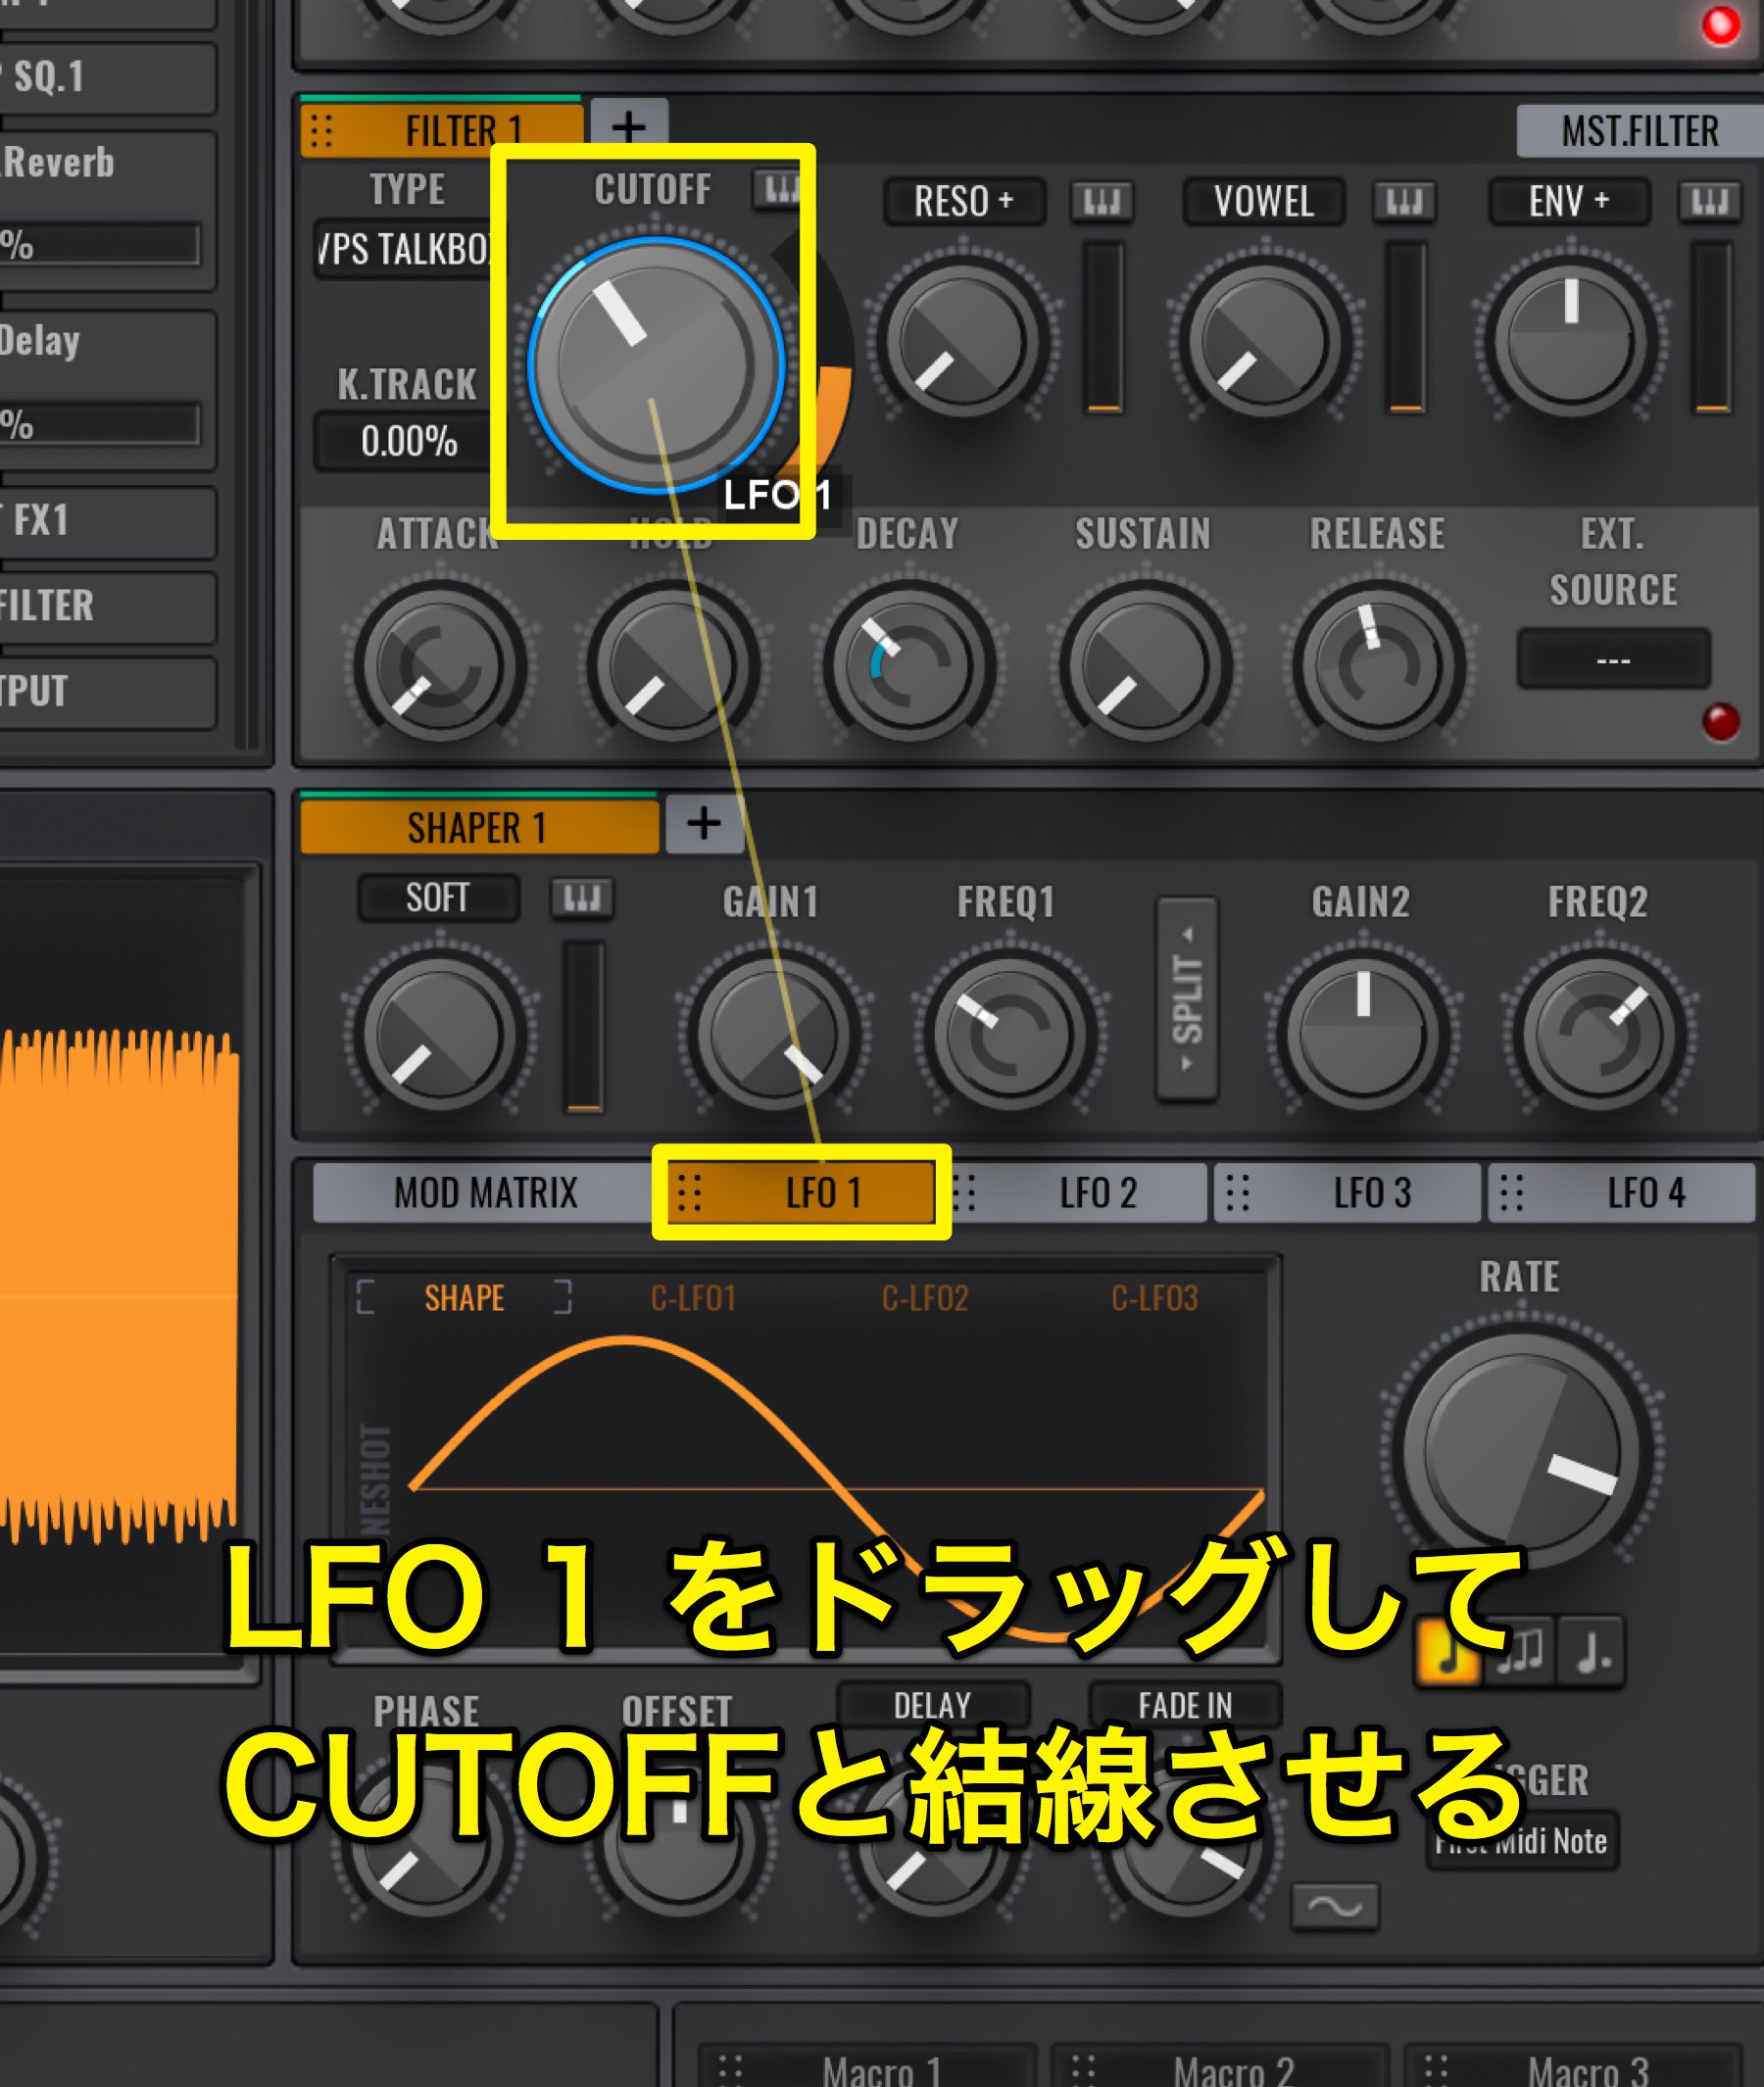
Drag LFO 1 to CUTOFF.
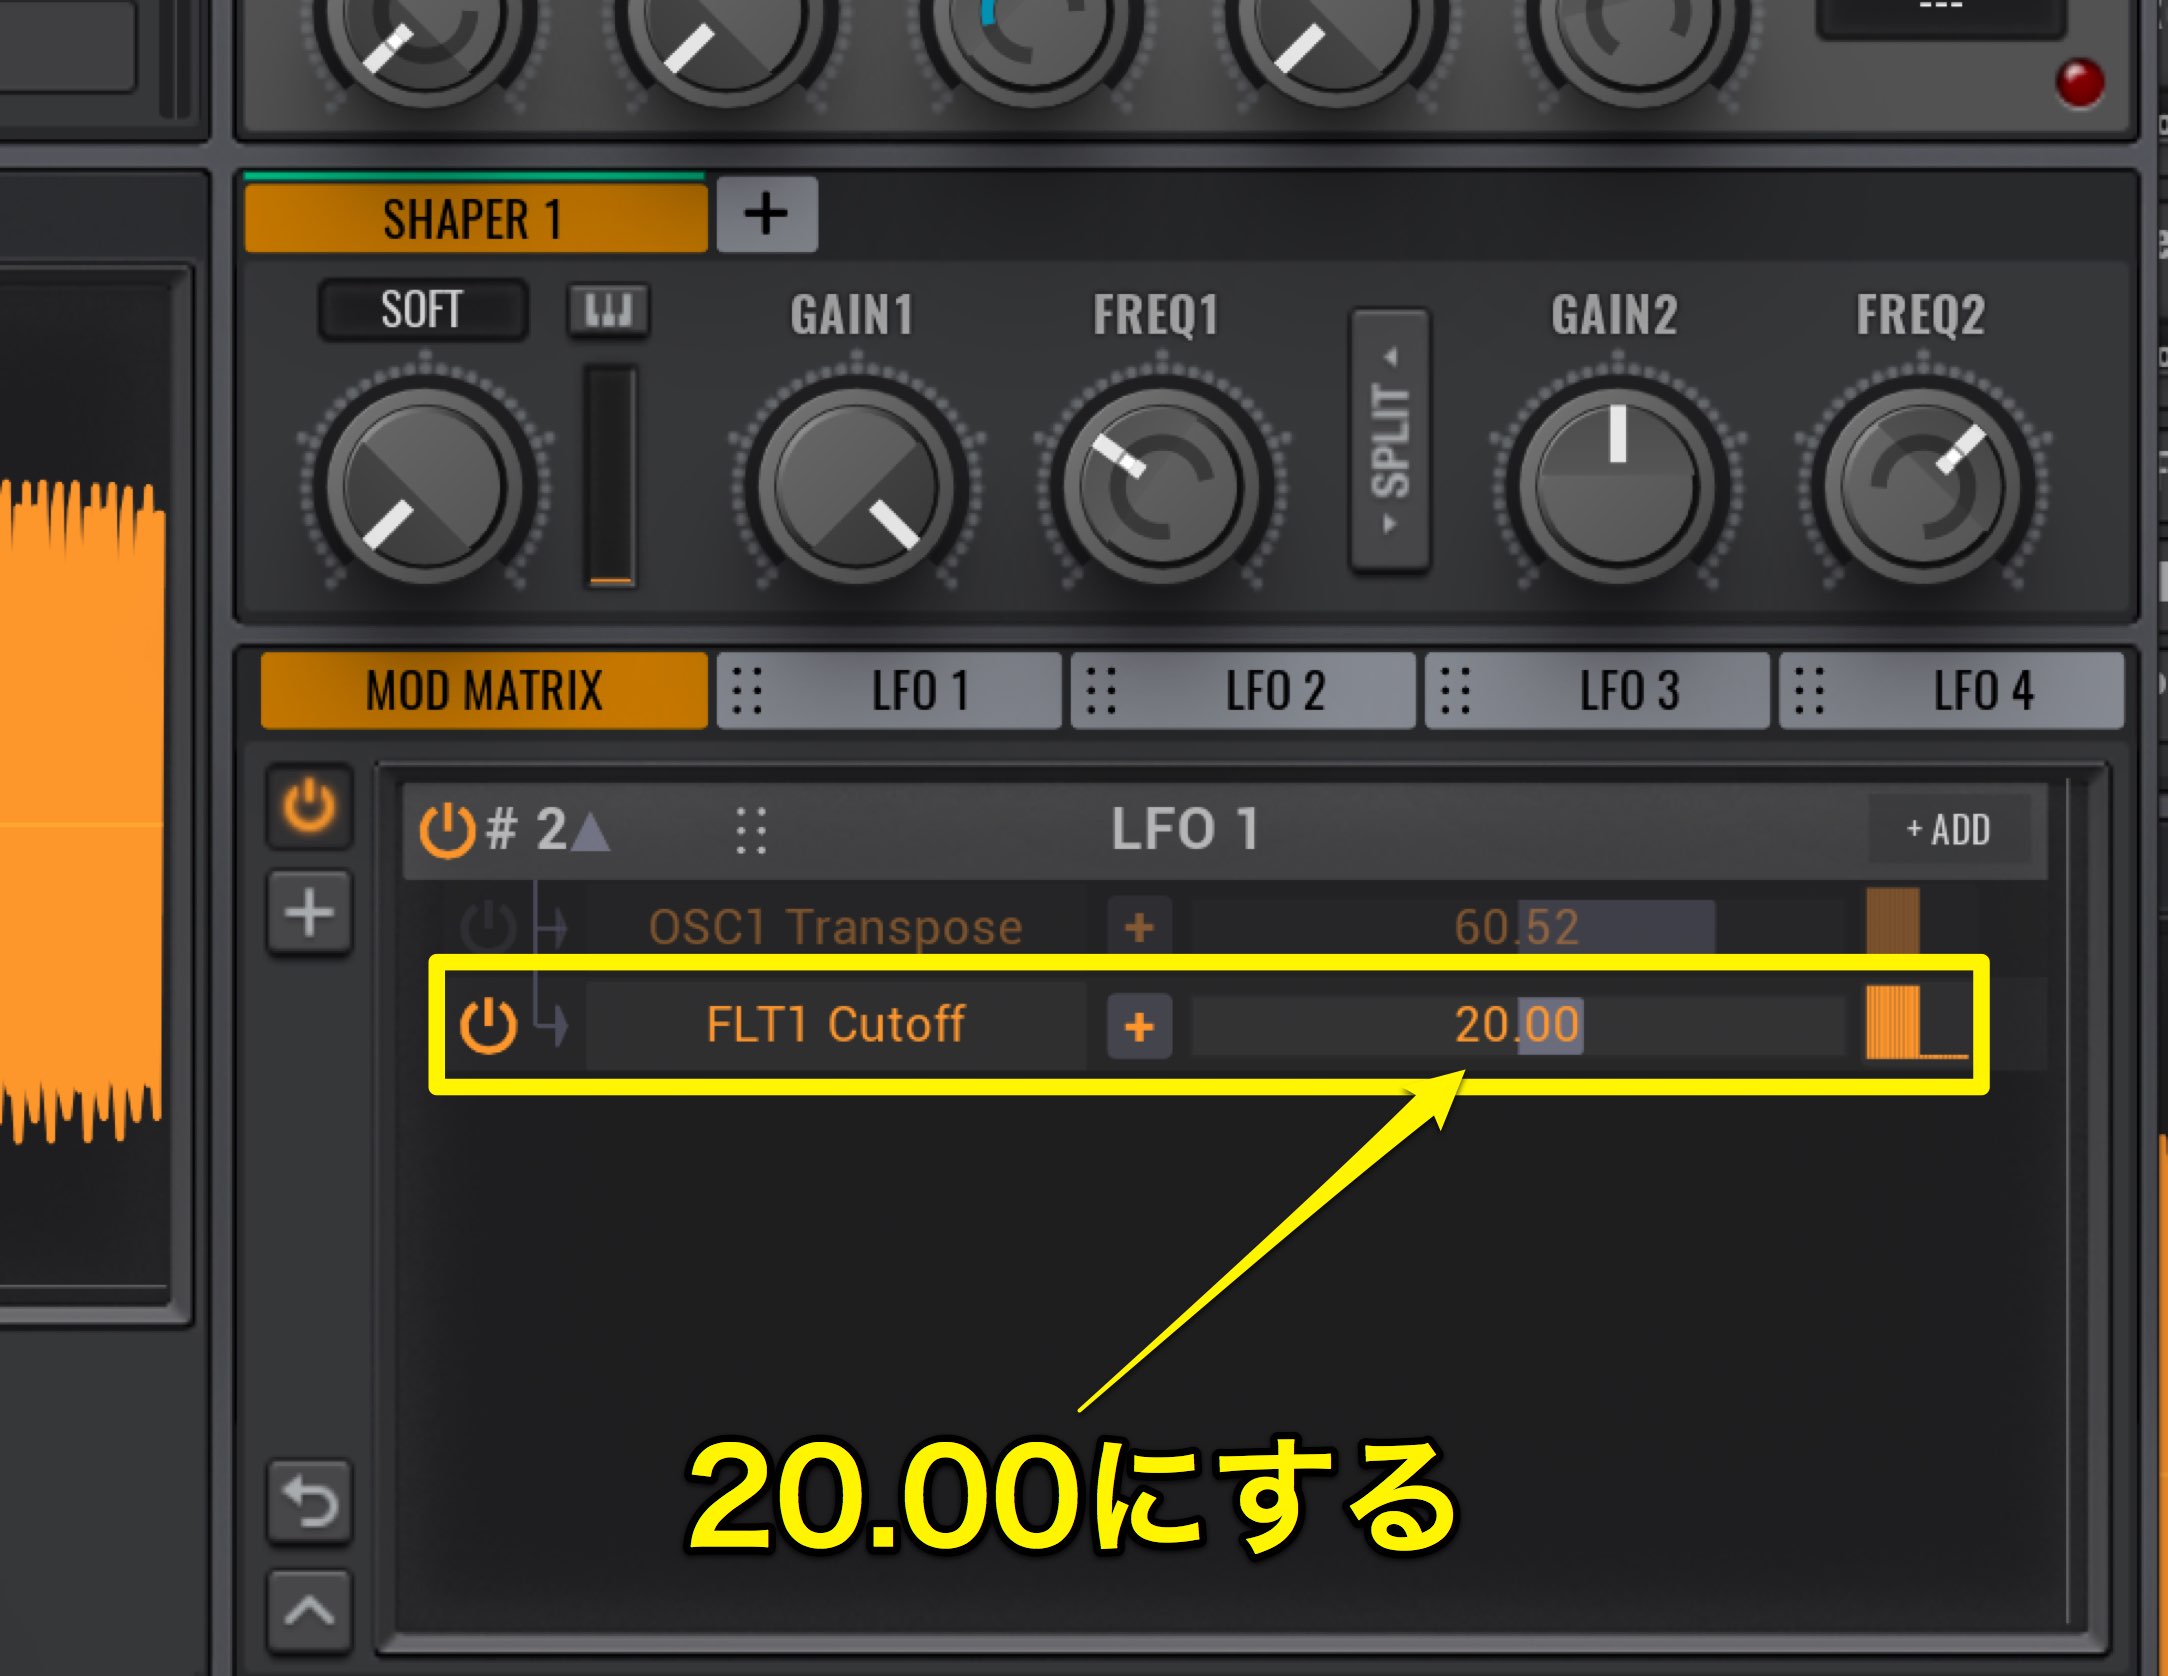
Open the MOD MATRIX and set the number to 20.00.
If the number is too big, the wobble is to wide and feels unnatural.
A subtle amount works great.
However, with this setting the CUTOFF only moves to the left.
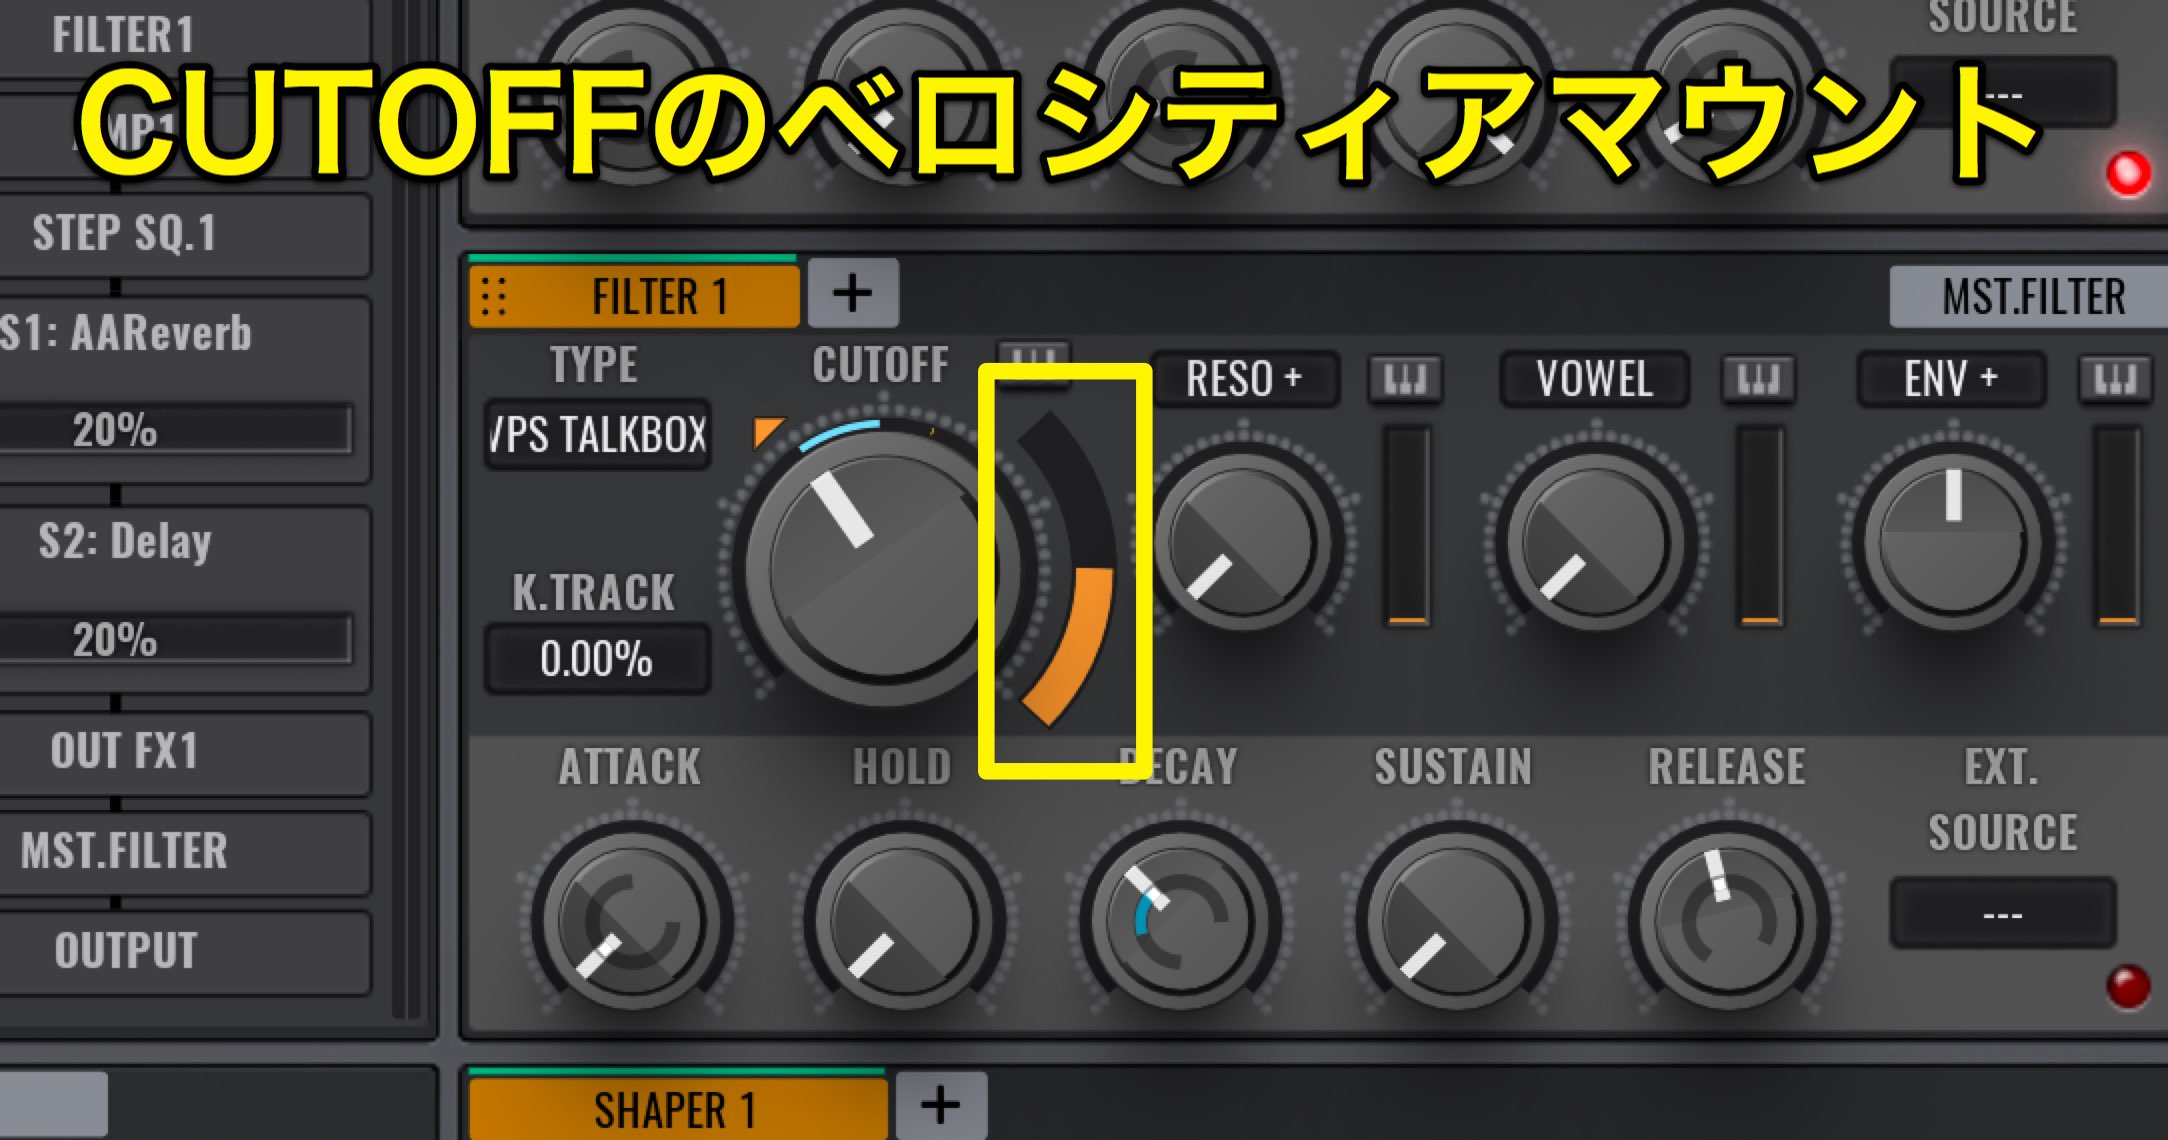
Because the default is for the CUTOFF’s velocity amount to be applied, depending on the velocity strength, the amount of the LFO movement is limited.
We will turn off this setting because it does not allow us to utilize the LFO in the way we want for this article.
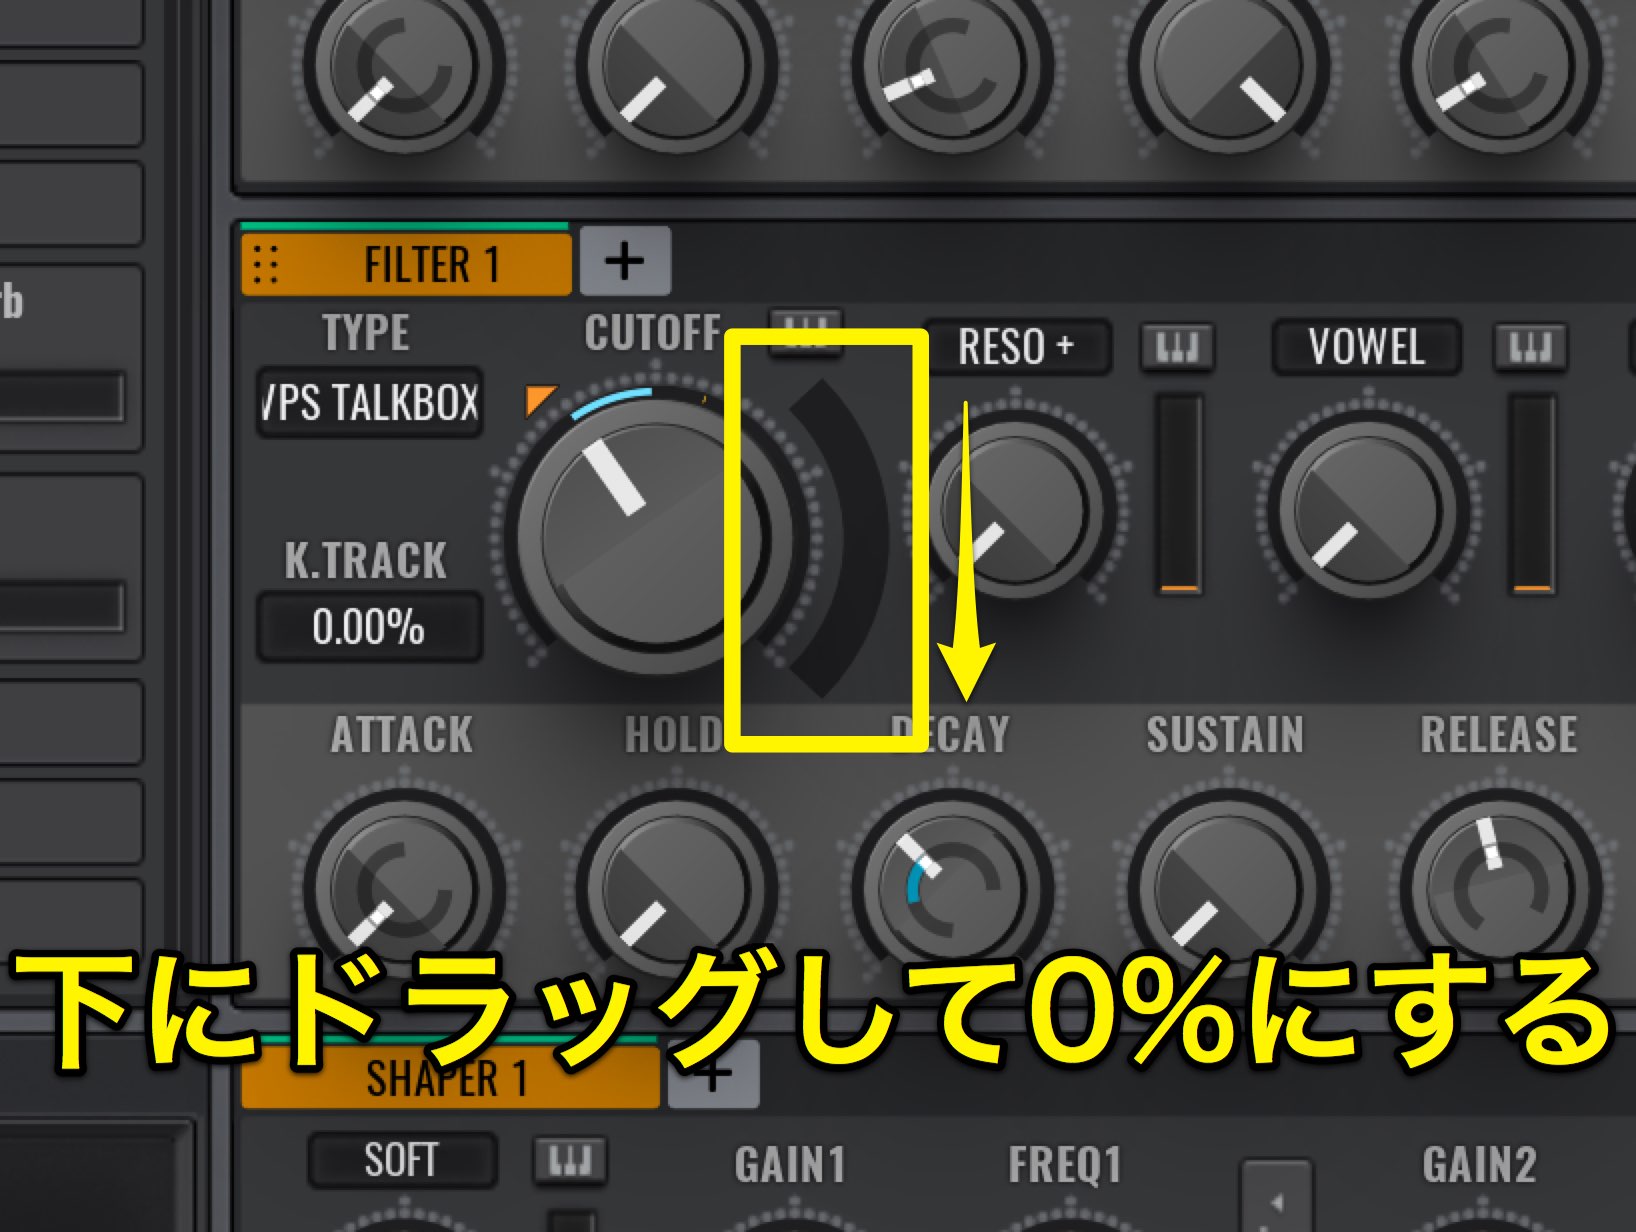
Drag down and set the amount to 0%.
The velocity will not be effected now, allowing for a steady application of the LFO’s effect.
Next, we will make settings to allow the notes to vary in sound.
In FILTER TYPE’s VPS TALKBOX, VOWEL can be found next to RESO +.
By moving VOWEL you can add variety to the sound.
We will apply an LFO here.
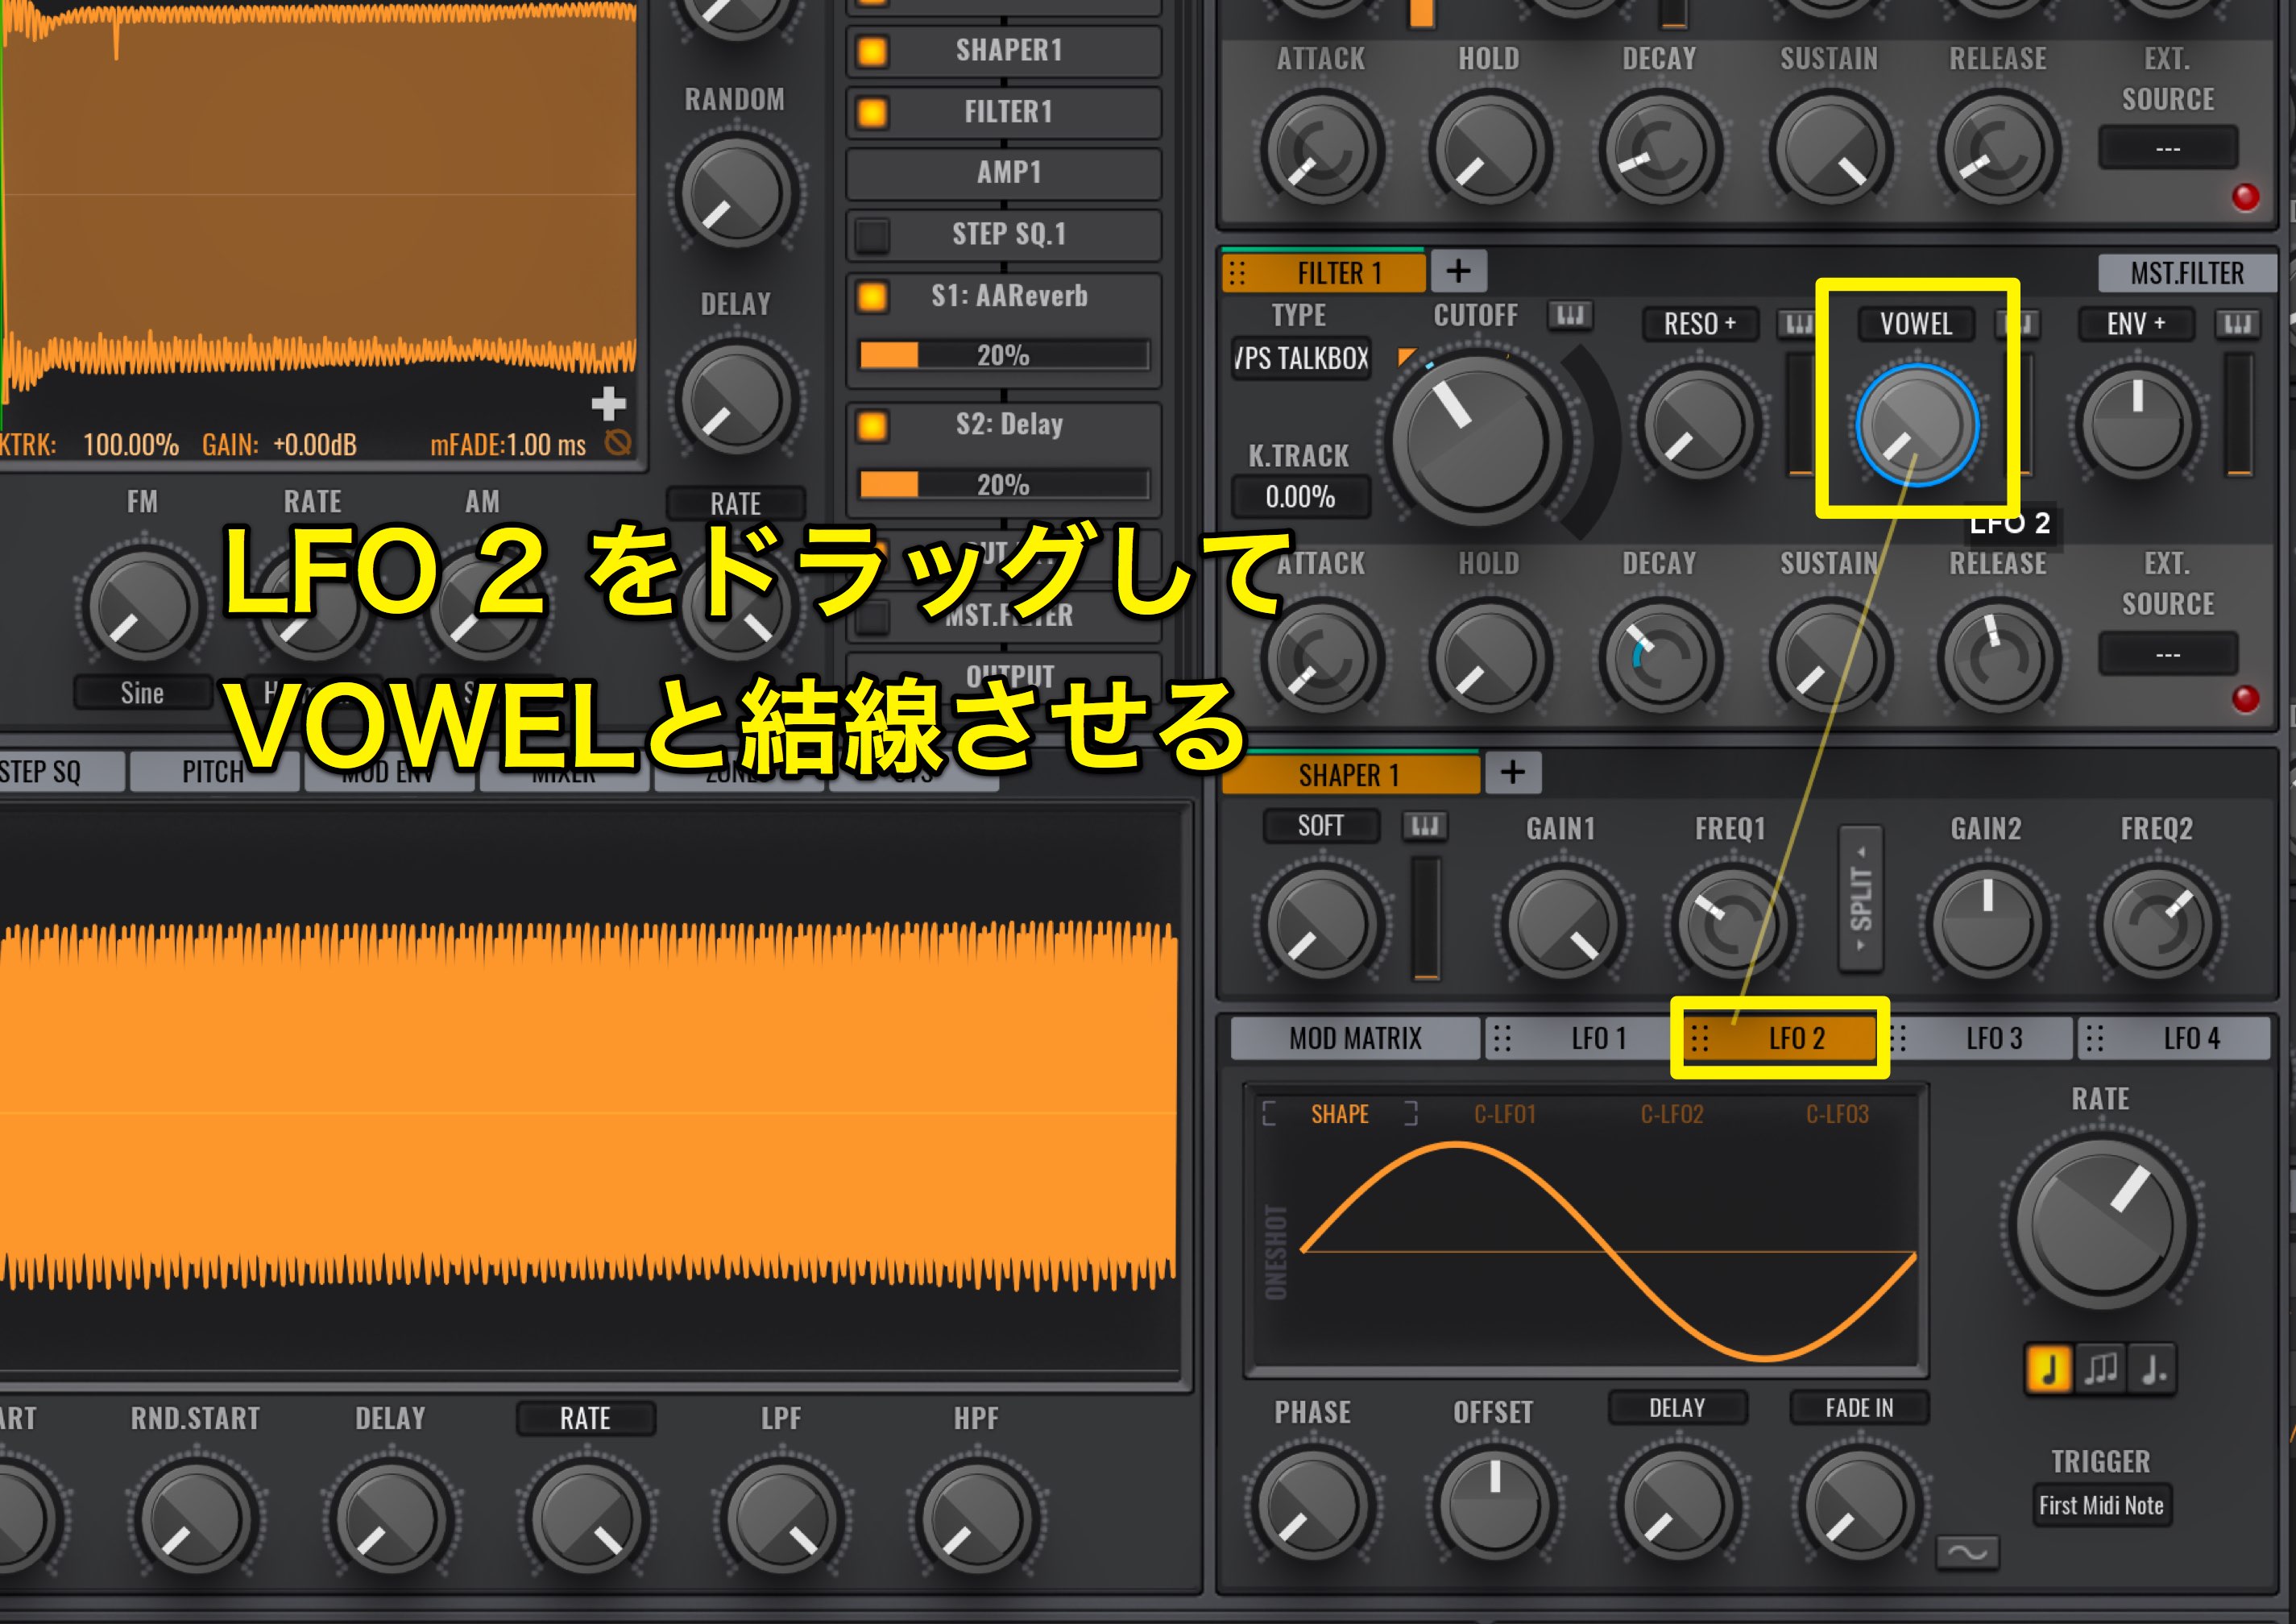
Use LFO 2.
Drag to VOWEL.
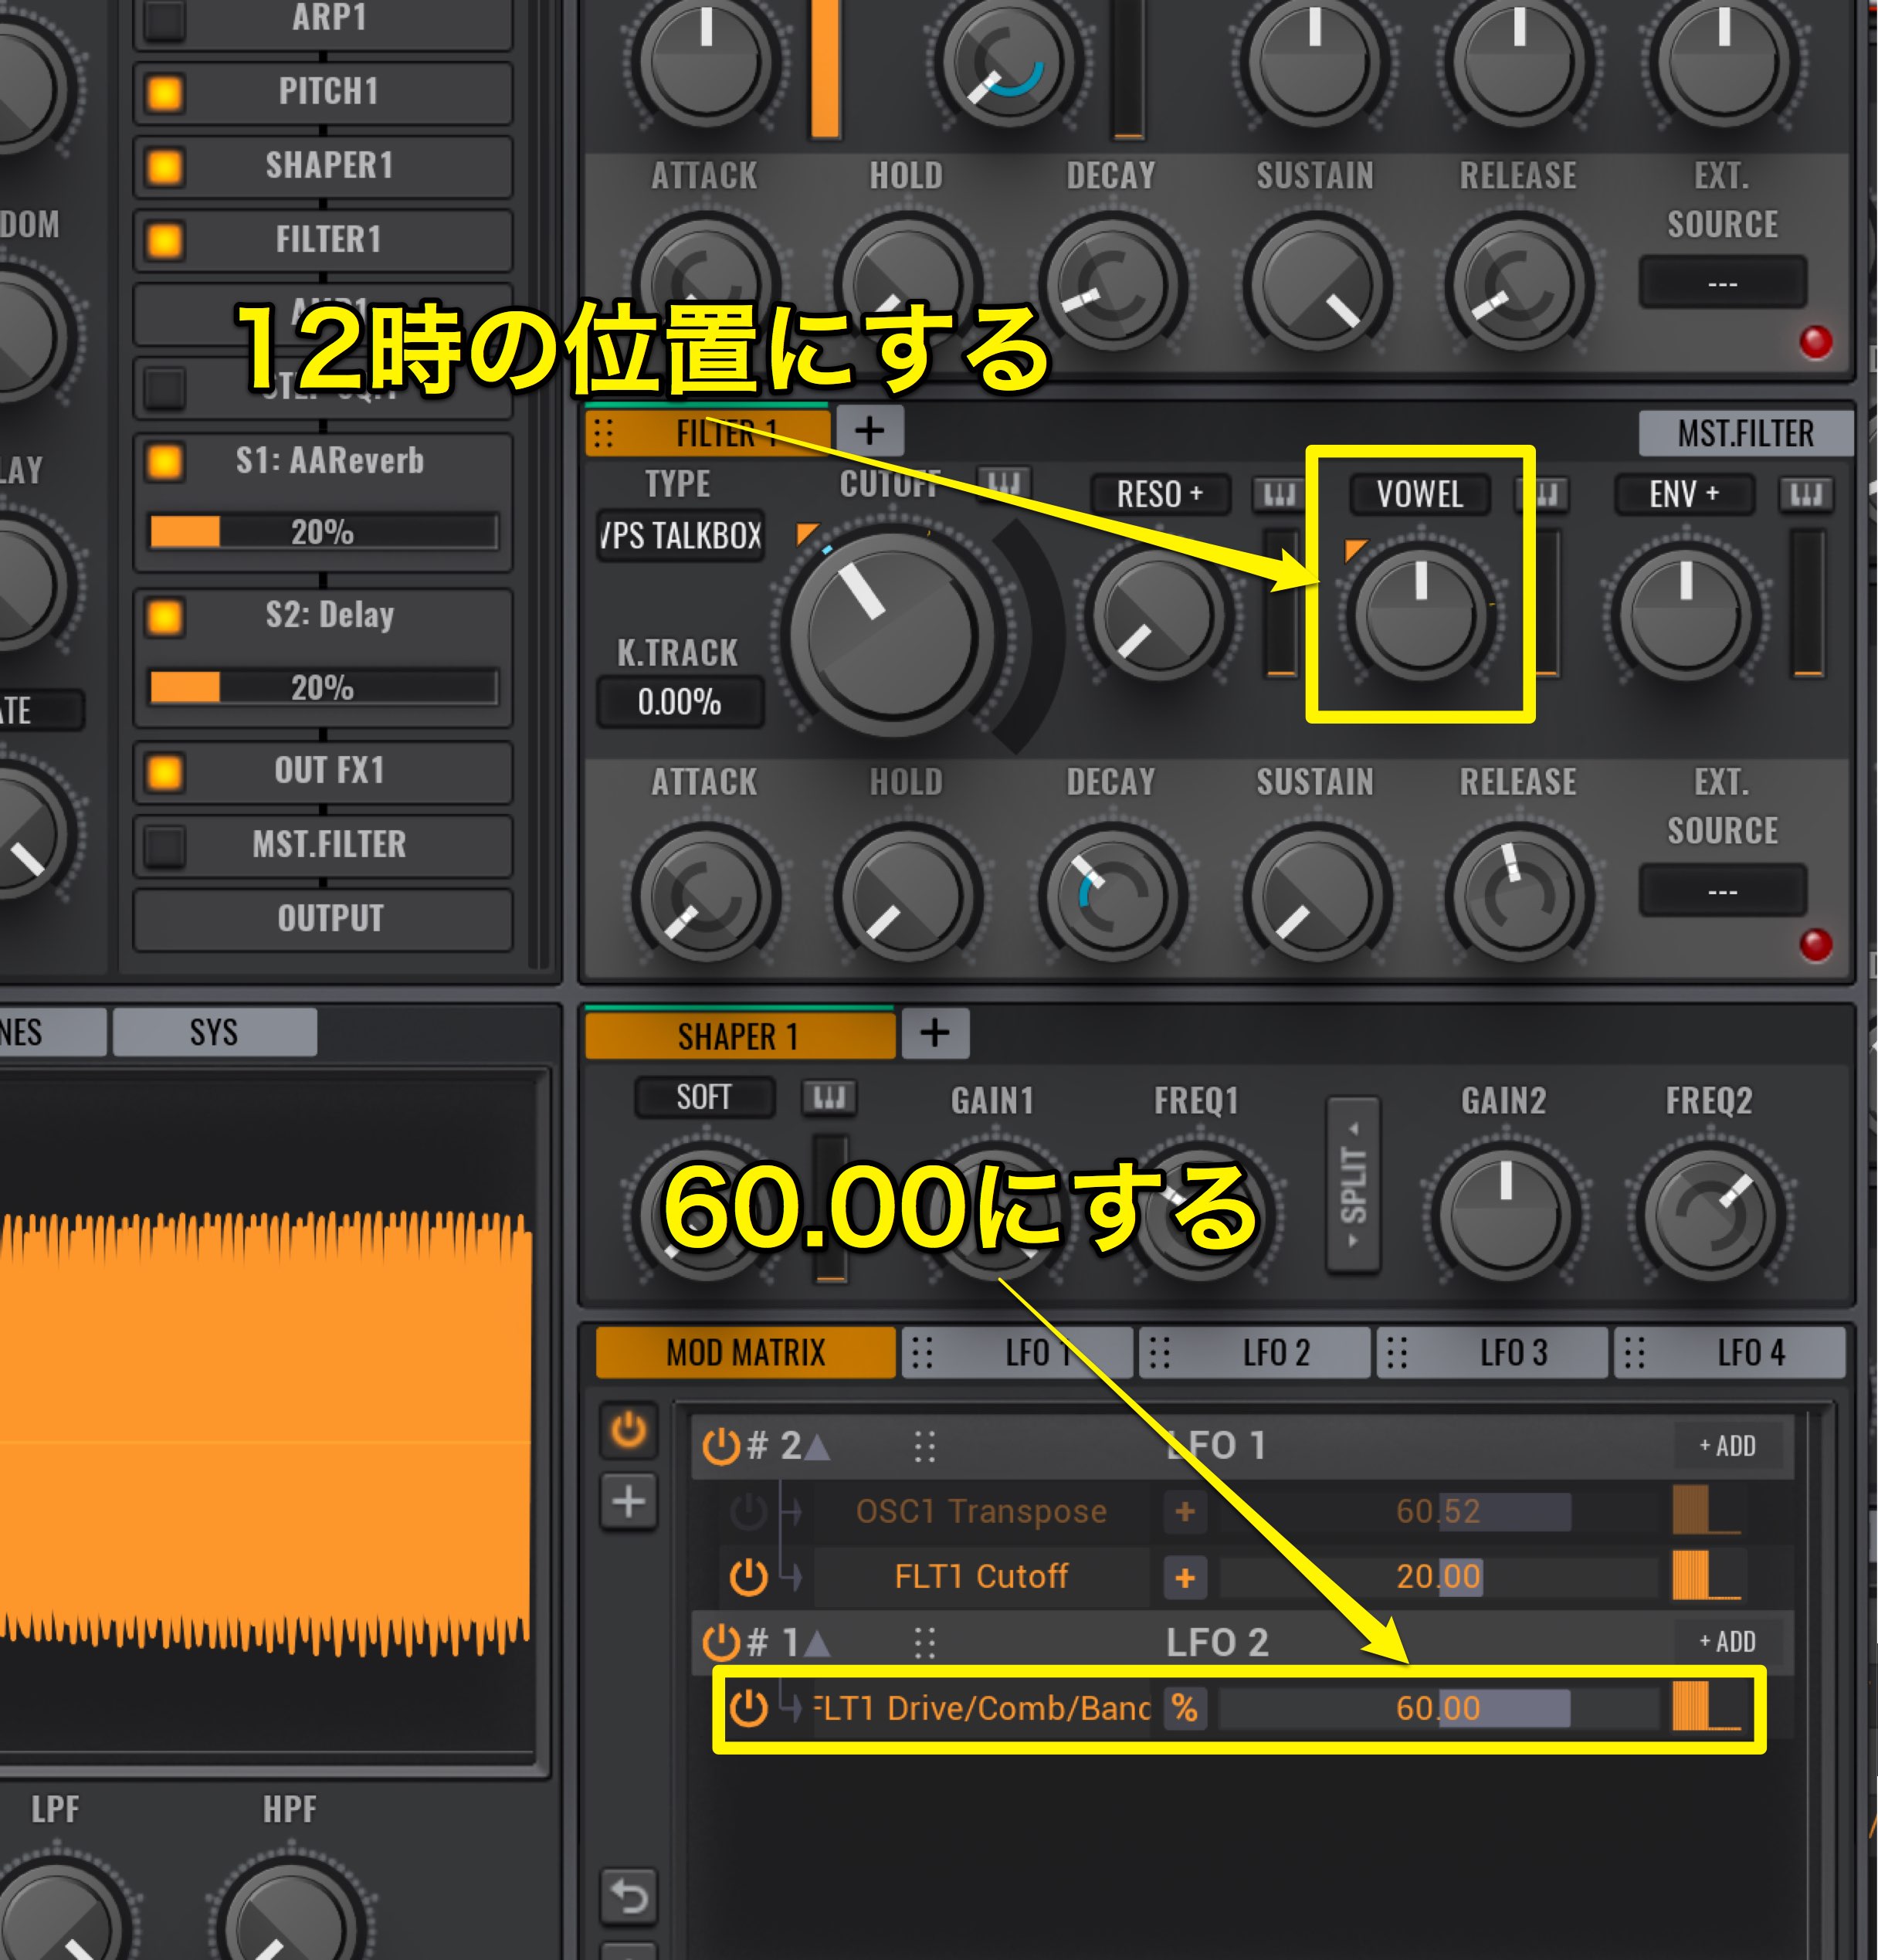
Move VOWEL to 12 o’clock, and the LFO will move it right and left.
Open MOD MATRIX and set it to 60.00. You can choose the parameter of your choice.
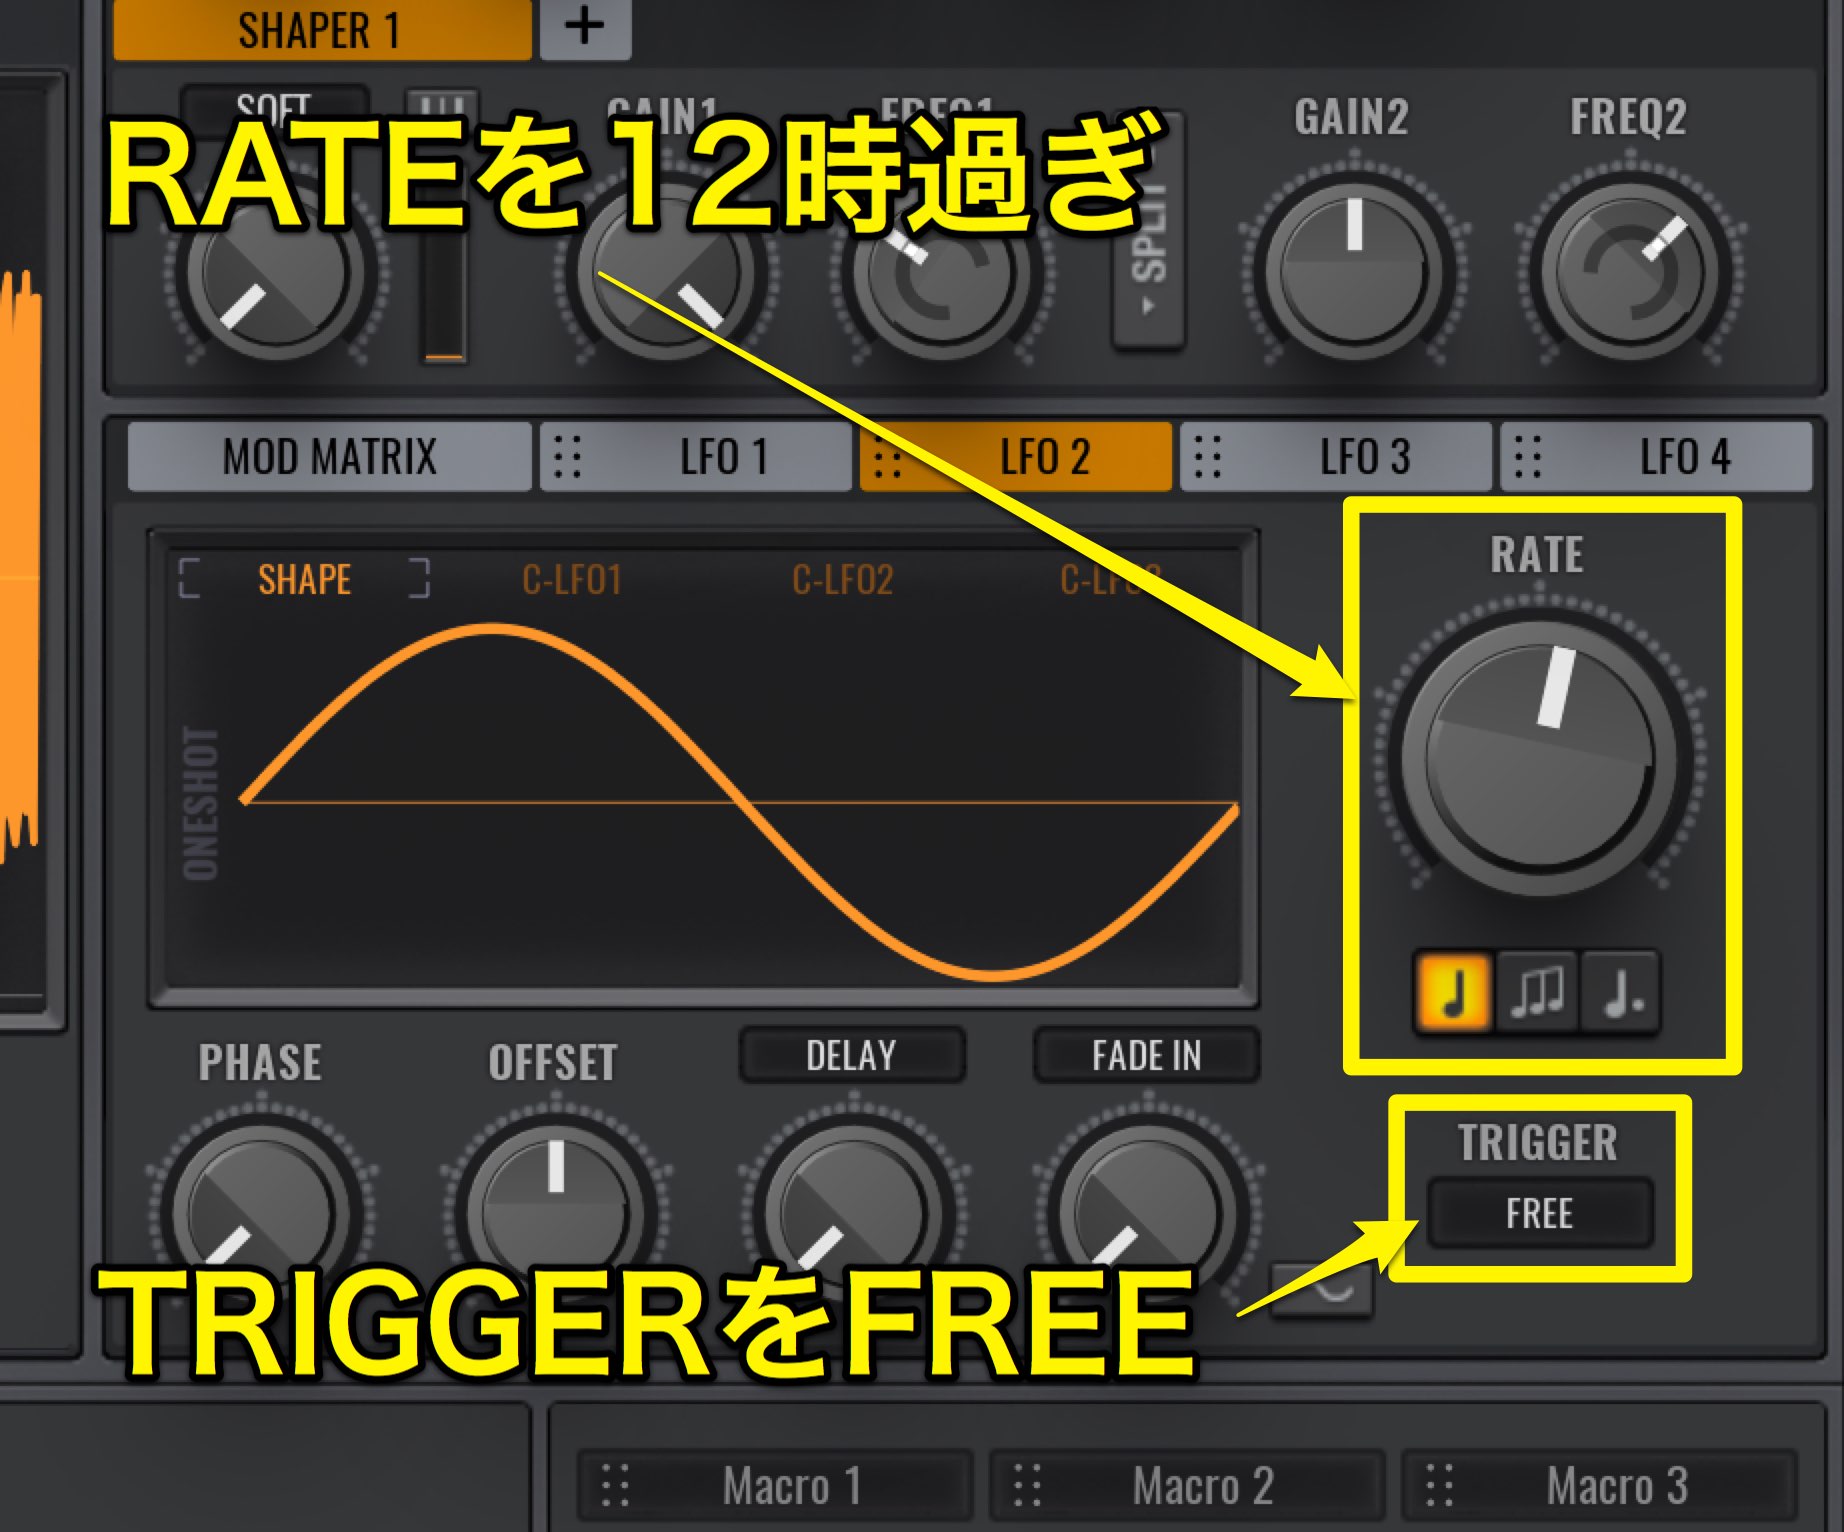
Next is the LFO2 setting.
RATE is set slowly at a little past 12.
We don’t want the LFO to start from the same spot everytime, so we will set TRIGGER to FREE.
With this we are finished!
For this article we used LFO and FILTER, but depending on your ideas you can make a wide variety of sound designs.
Try out your own ideas and see what you come up with!