
Vengeance Sound Avenger - How to use - Editing drum patches and sequences
Not only for synths – Avenger is great for drums
Product URL : http://sonicwire.com/product/A3178
In this article, we will focus on using Avenger’s OSC area and editing drum sequences.
Avenger works great not only for synth sounds, but as a drum sequencer as well.
You can input rhythmic patterns and phrases into your music with this tool.
Avenger Editing drum patches and sequences – Video tutorial

- 1Basics and reading presets
- 2Editing drum patches and sequences
- 3OSC control (waveform, voice, portamento)
- 4Using the wavetable
- 5Sound design with the LFO
- 6Sound control with the arpeggiator/macro
- 7Individual outputs for oscillators
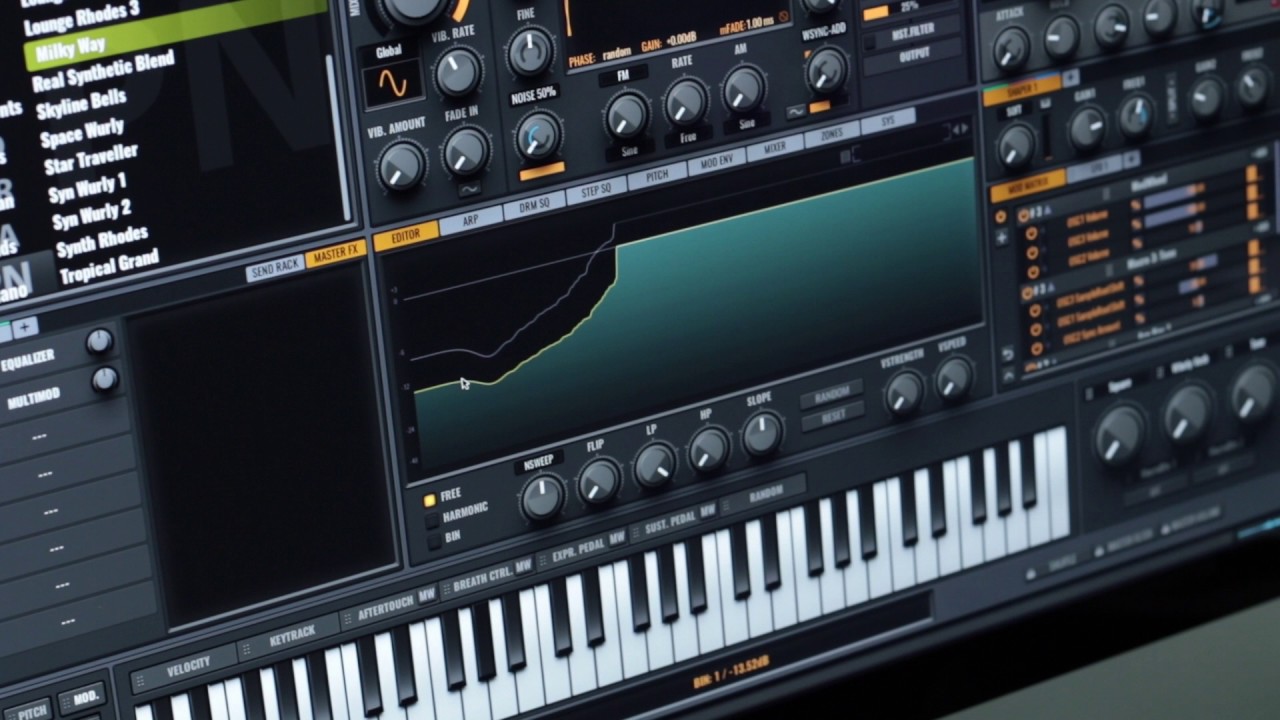
Choosing an OSC
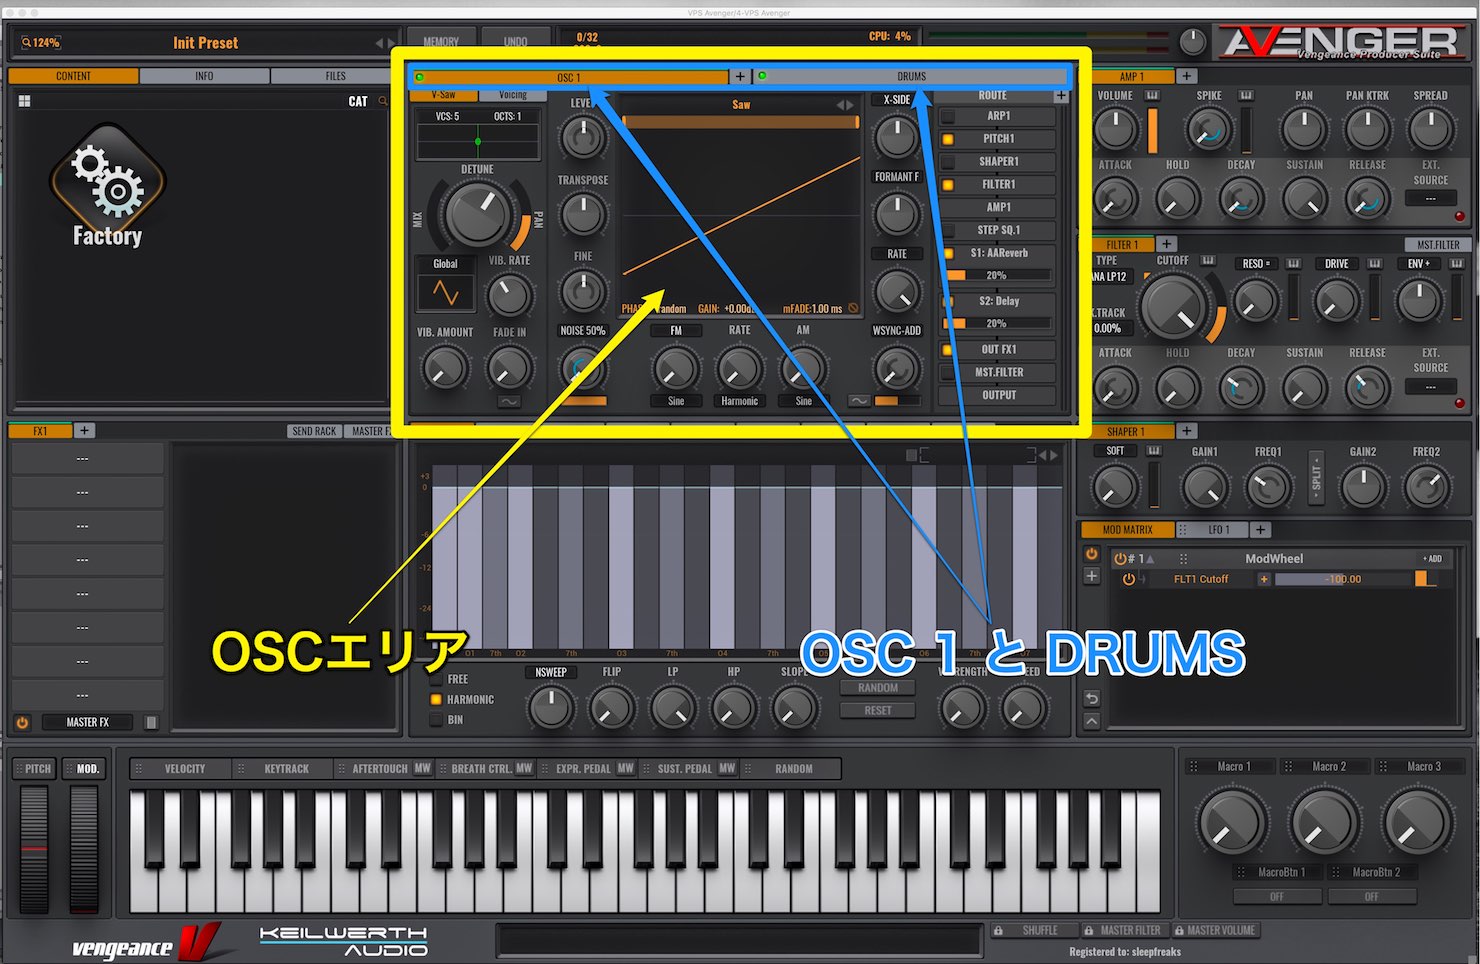
The area in the upper middle of the screen is Avenger’s OSC area, and contains OSC1 and Drums as a default setting.
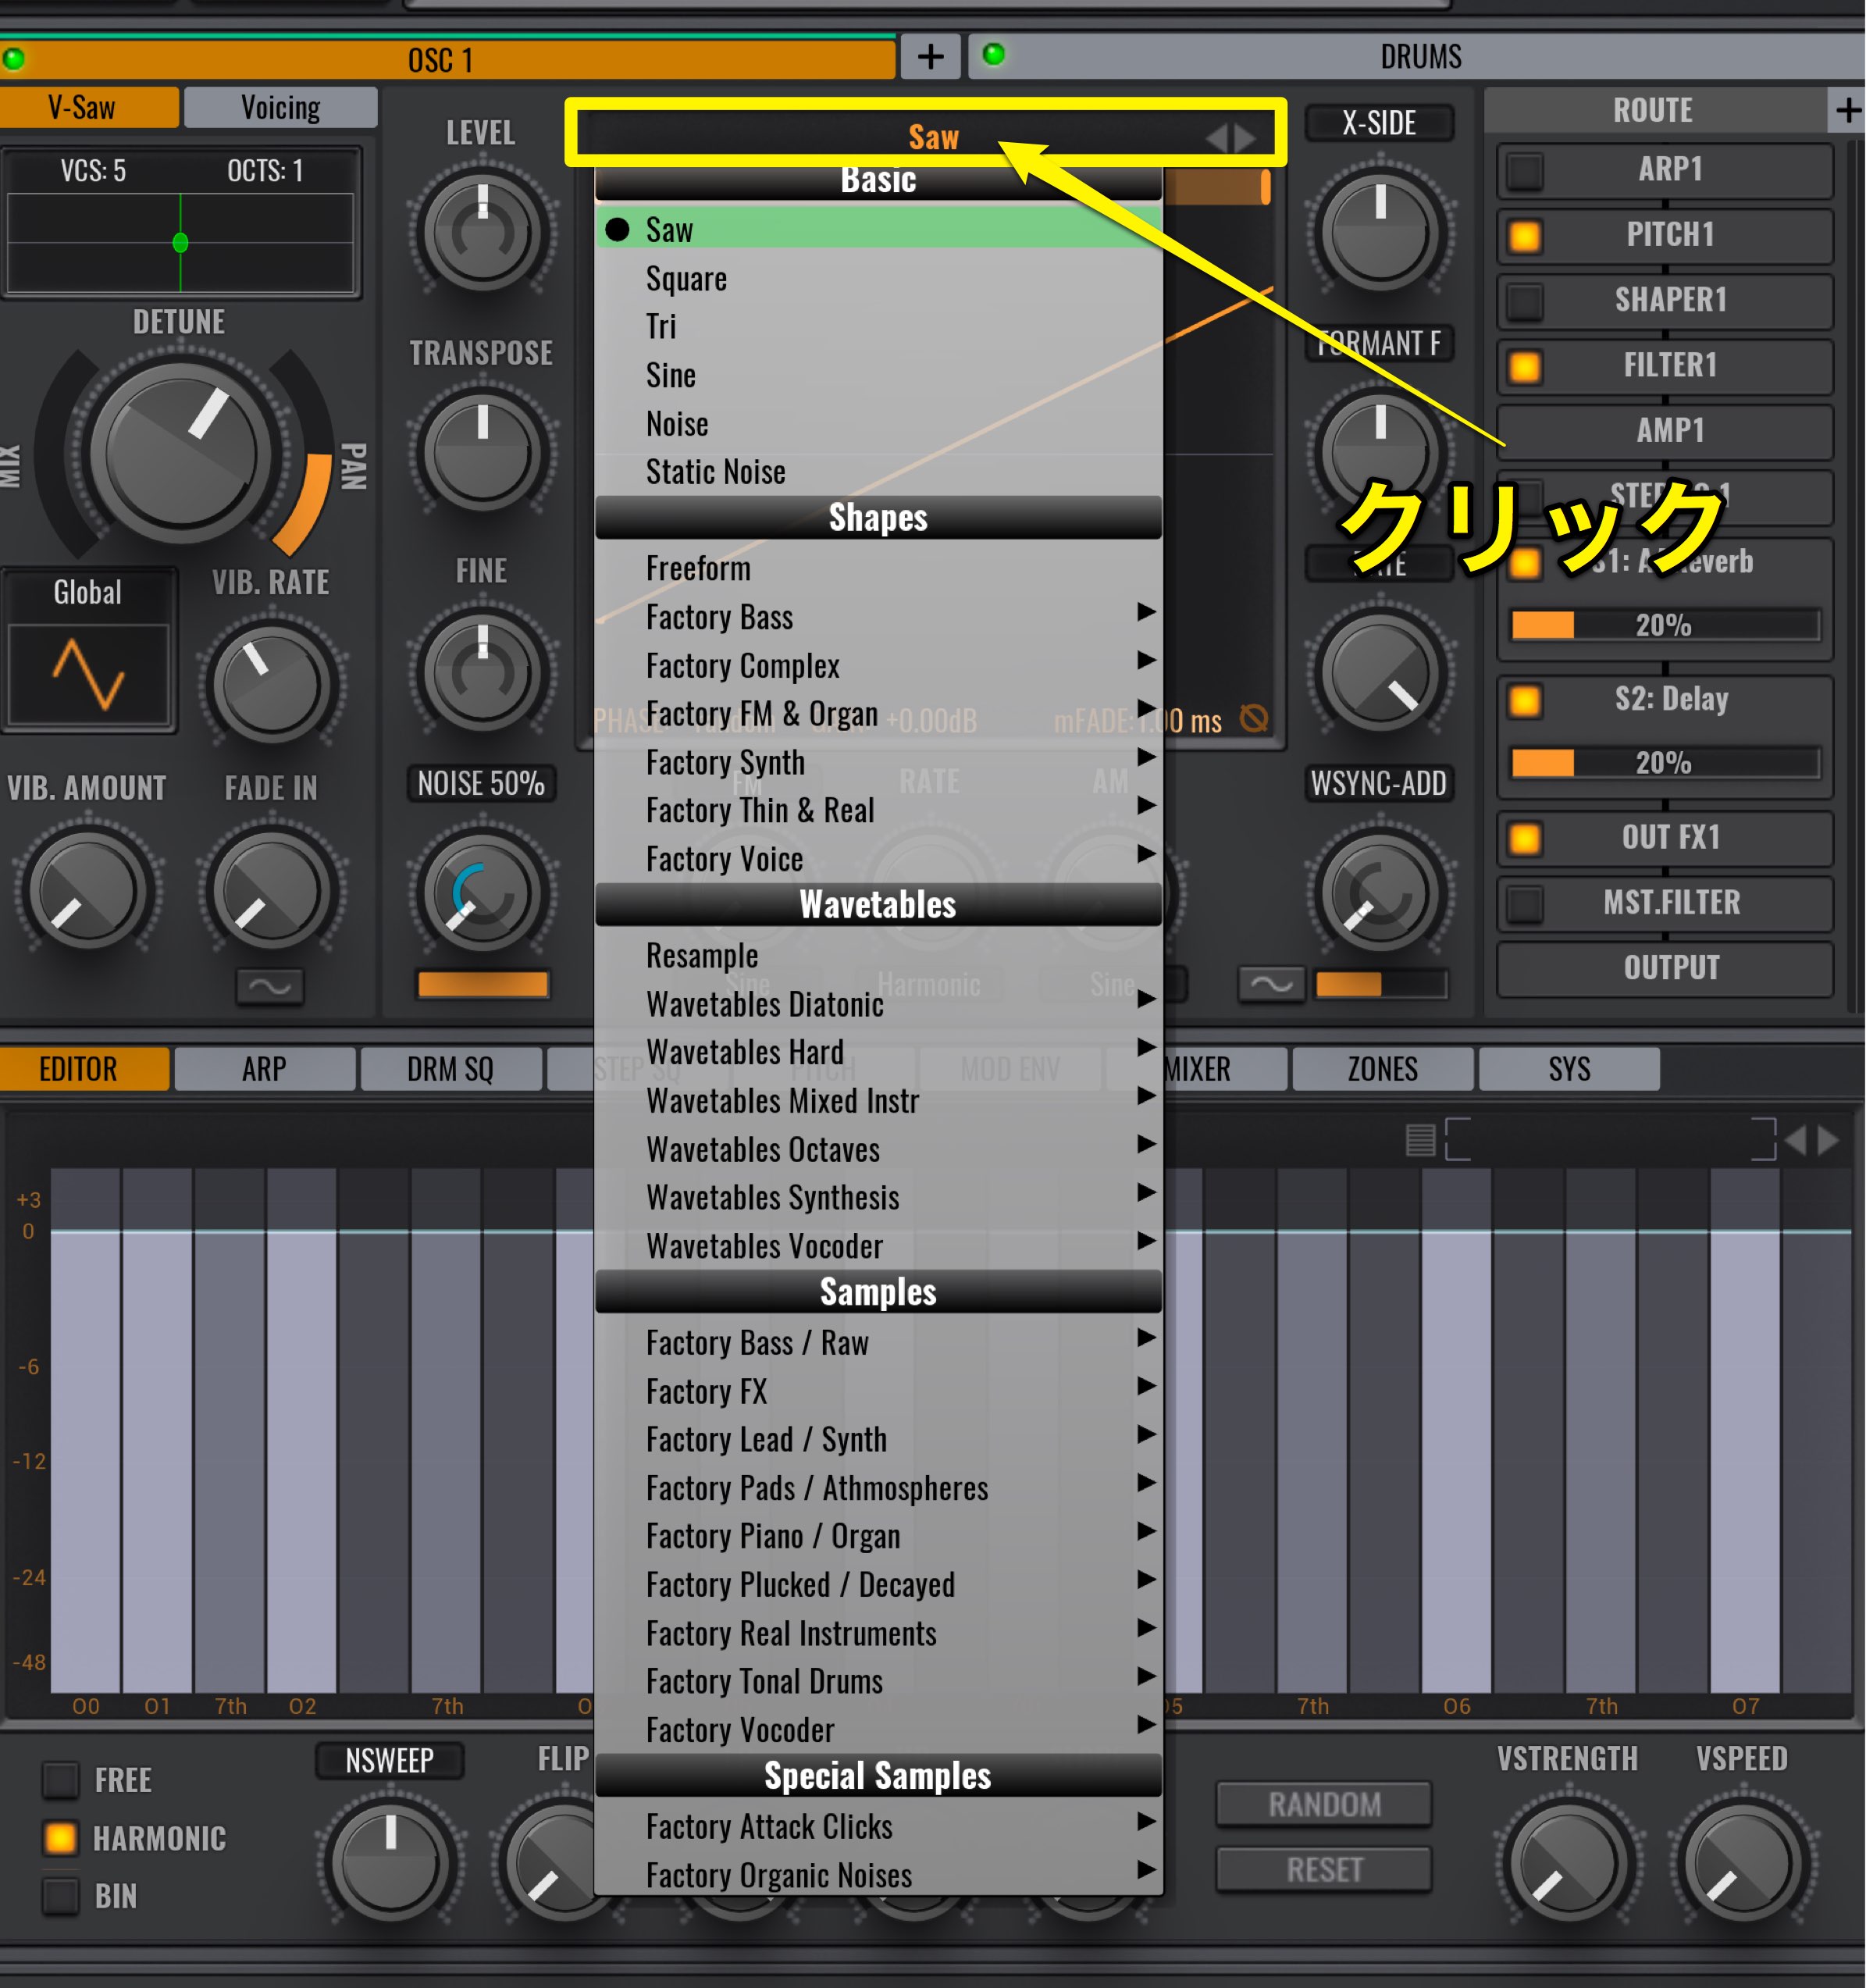
To choose sounds for the oscillator, click on the area labelled “Saw.”
You can choose from a variety of waveforms and samples here.
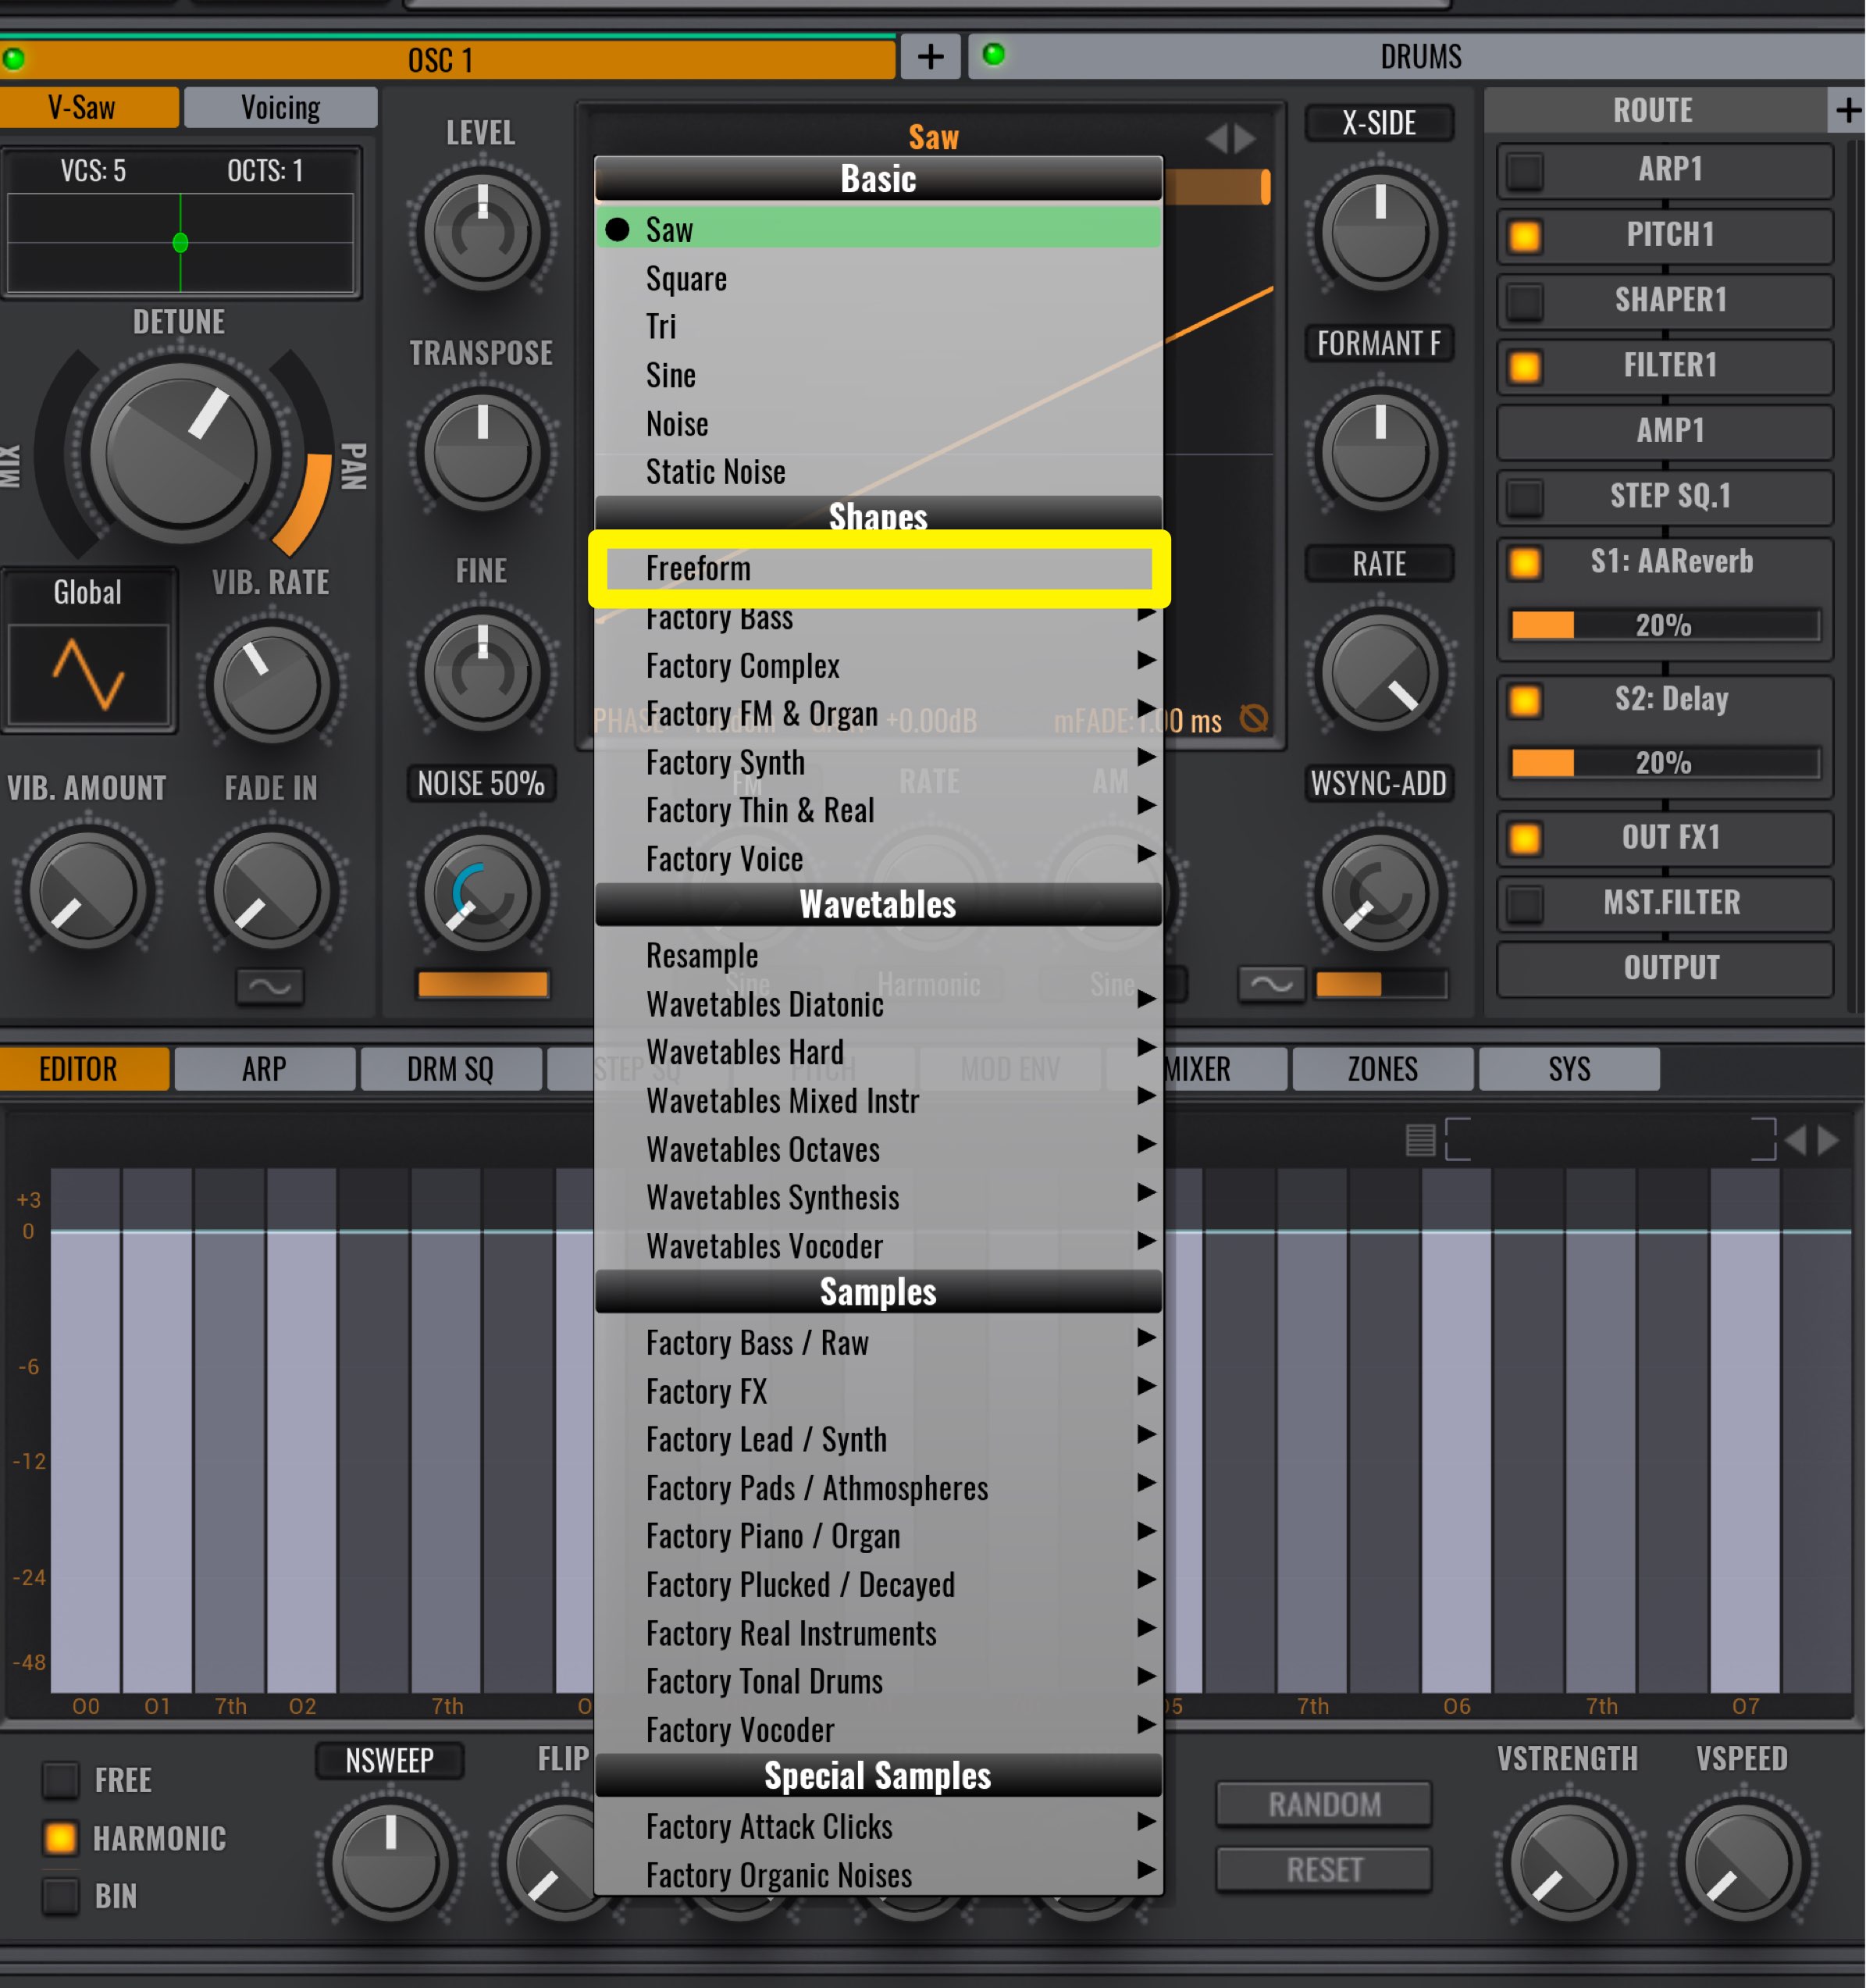
Freeform from Shapes provides some unique functions.

Upon selection, it doesn’t make any sound; however –
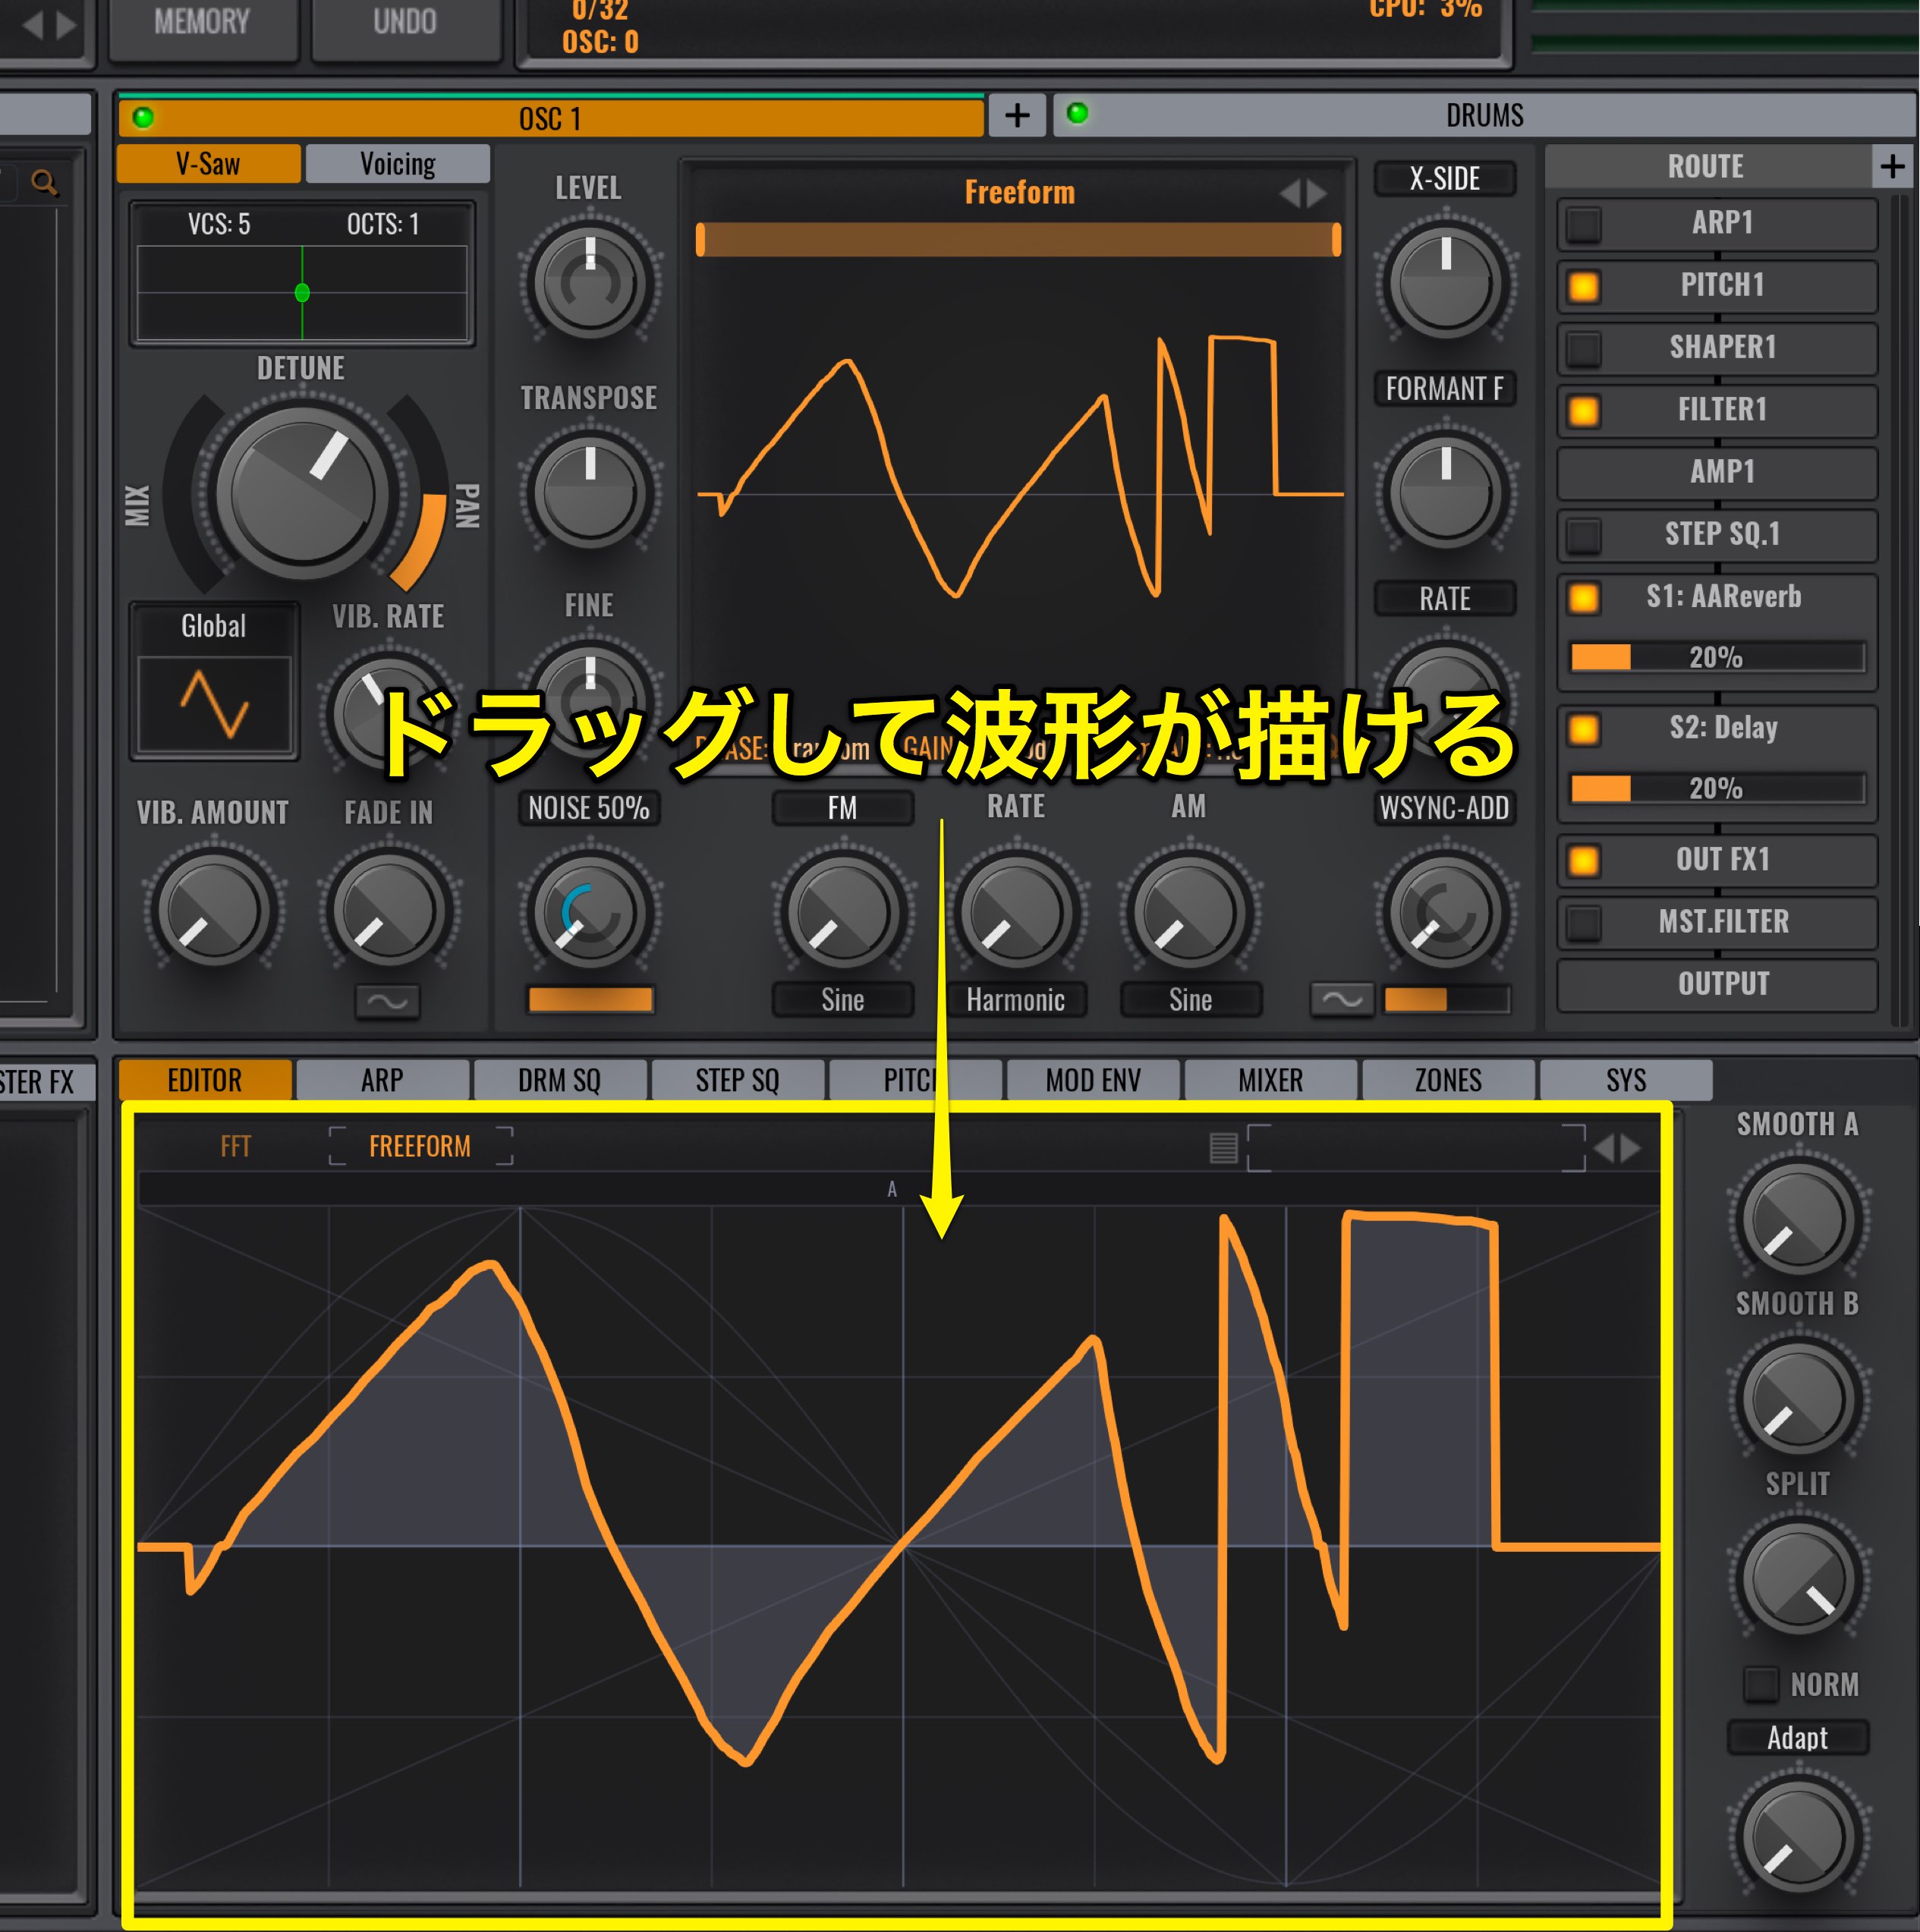
you can drag EDITOR to draw your own waveforms.
You can easily and instinctively make your own unique sounds.
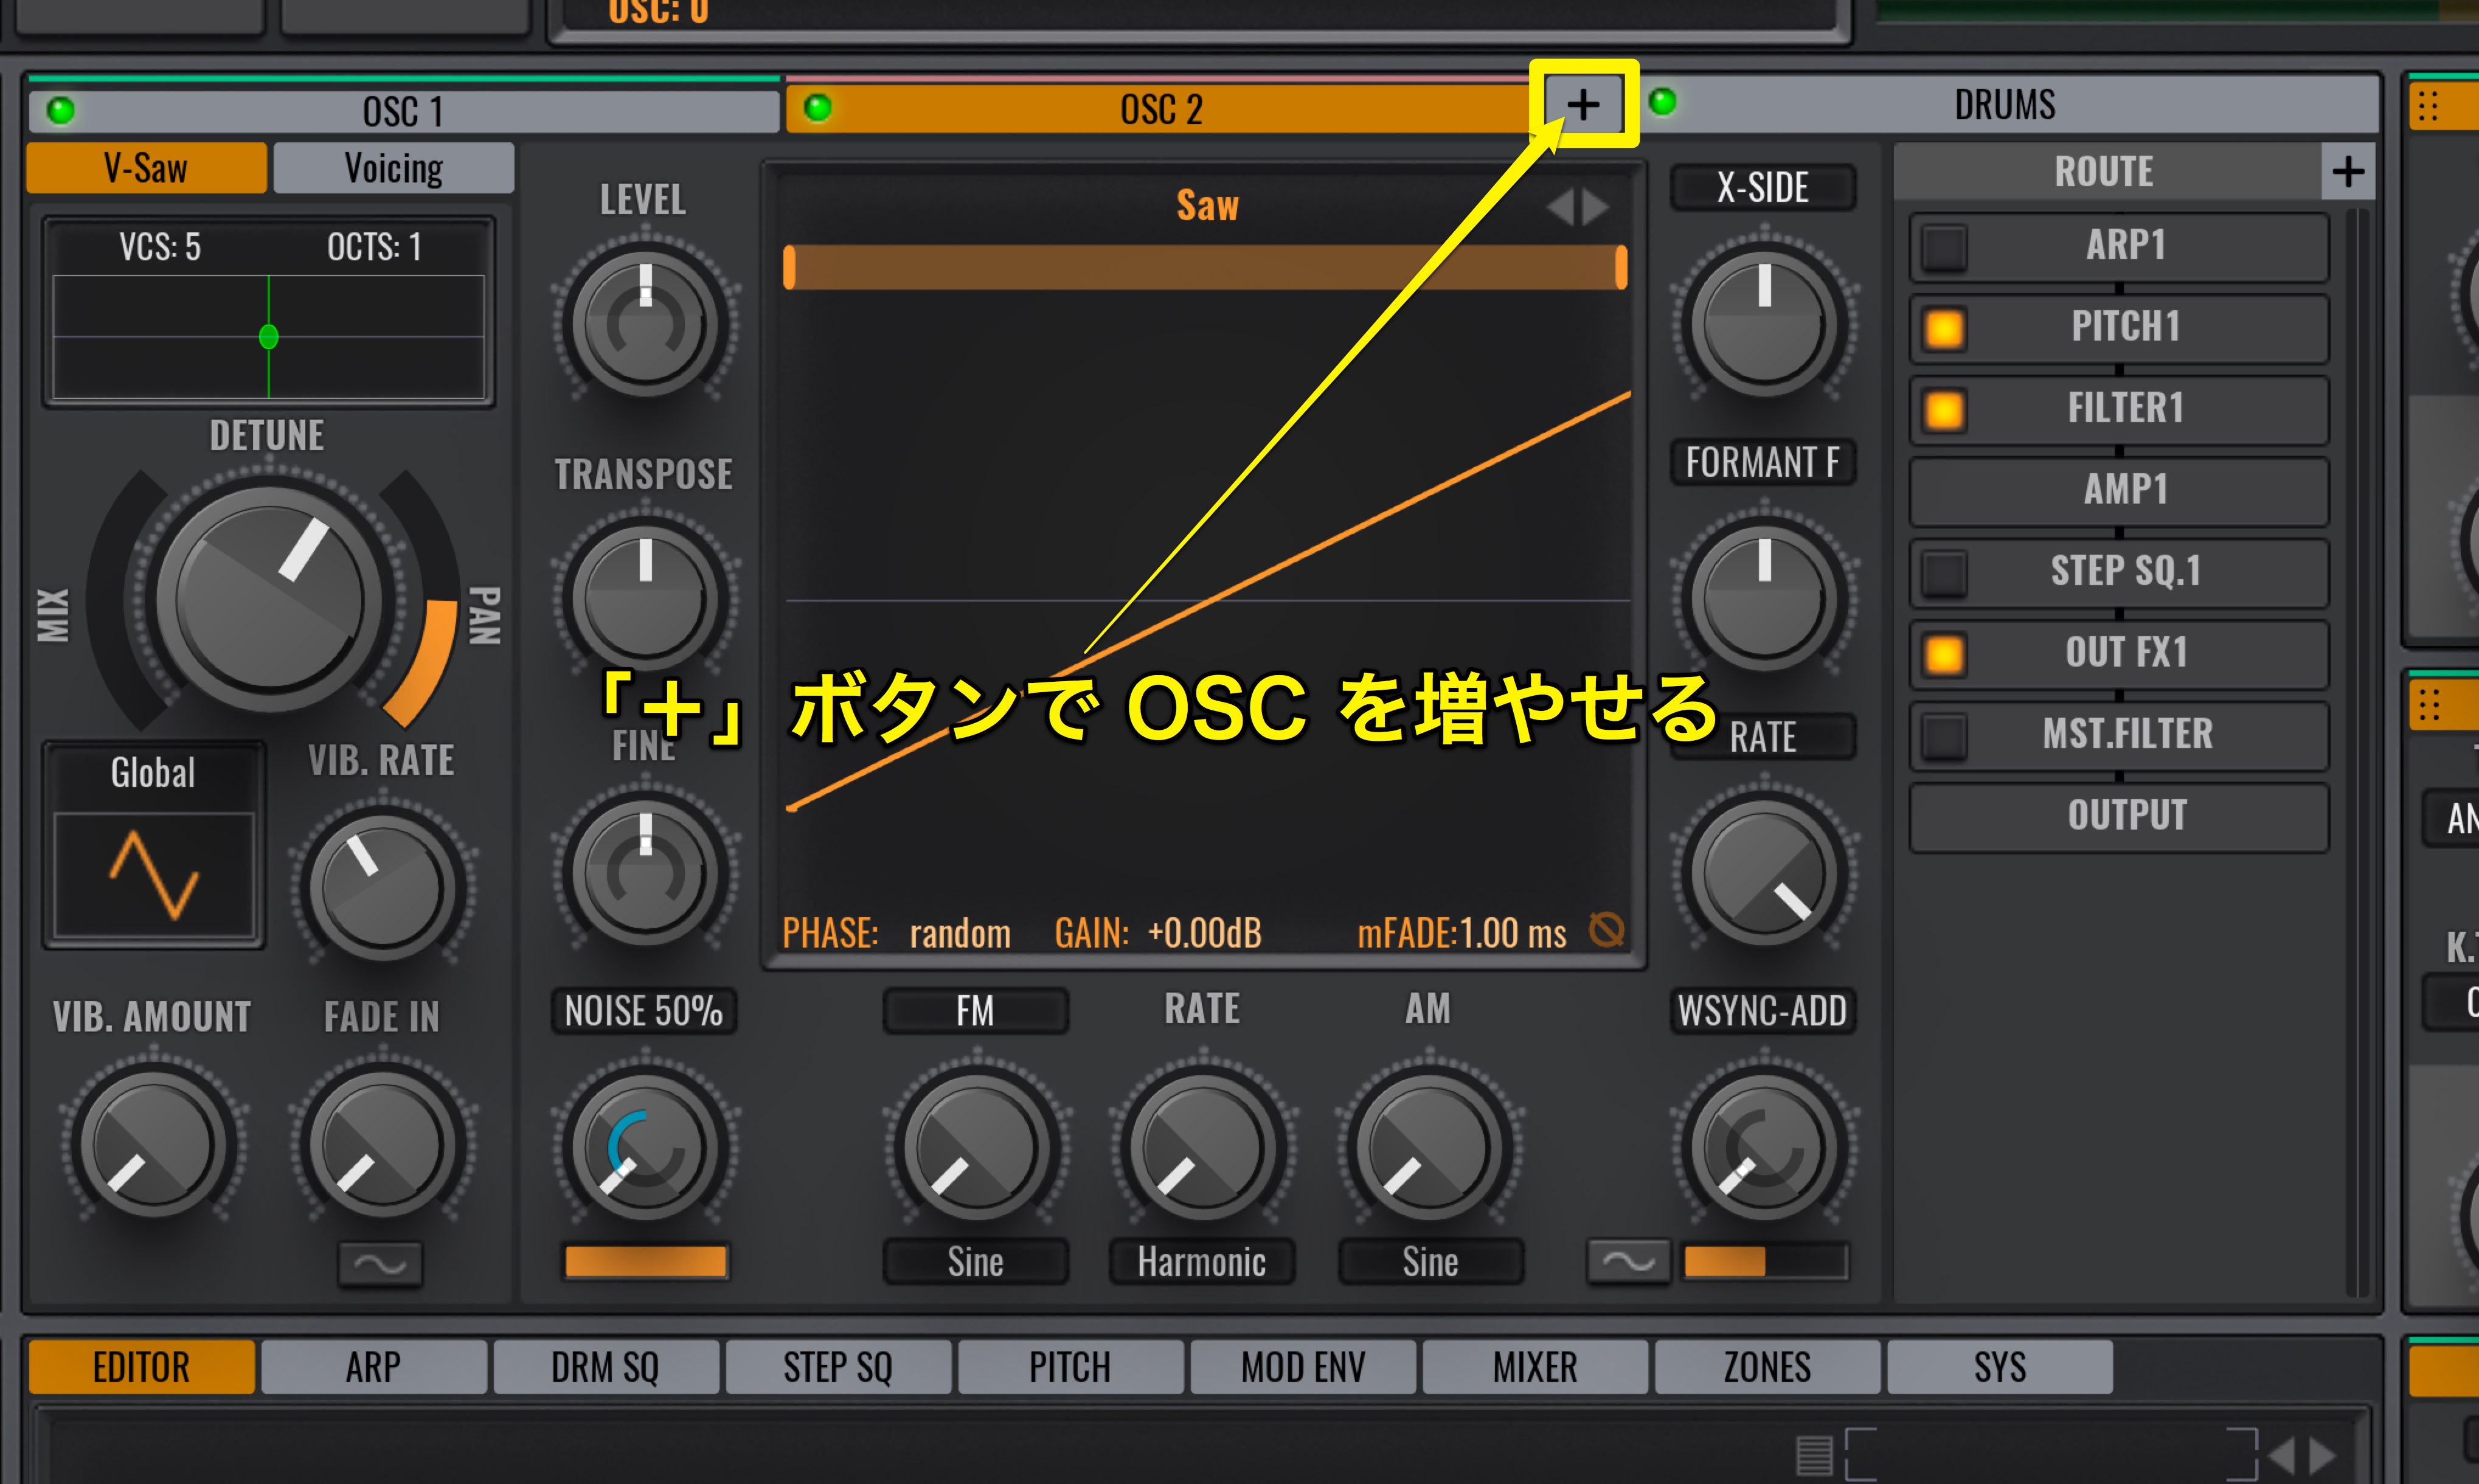
Click the plus button to add oscillators.
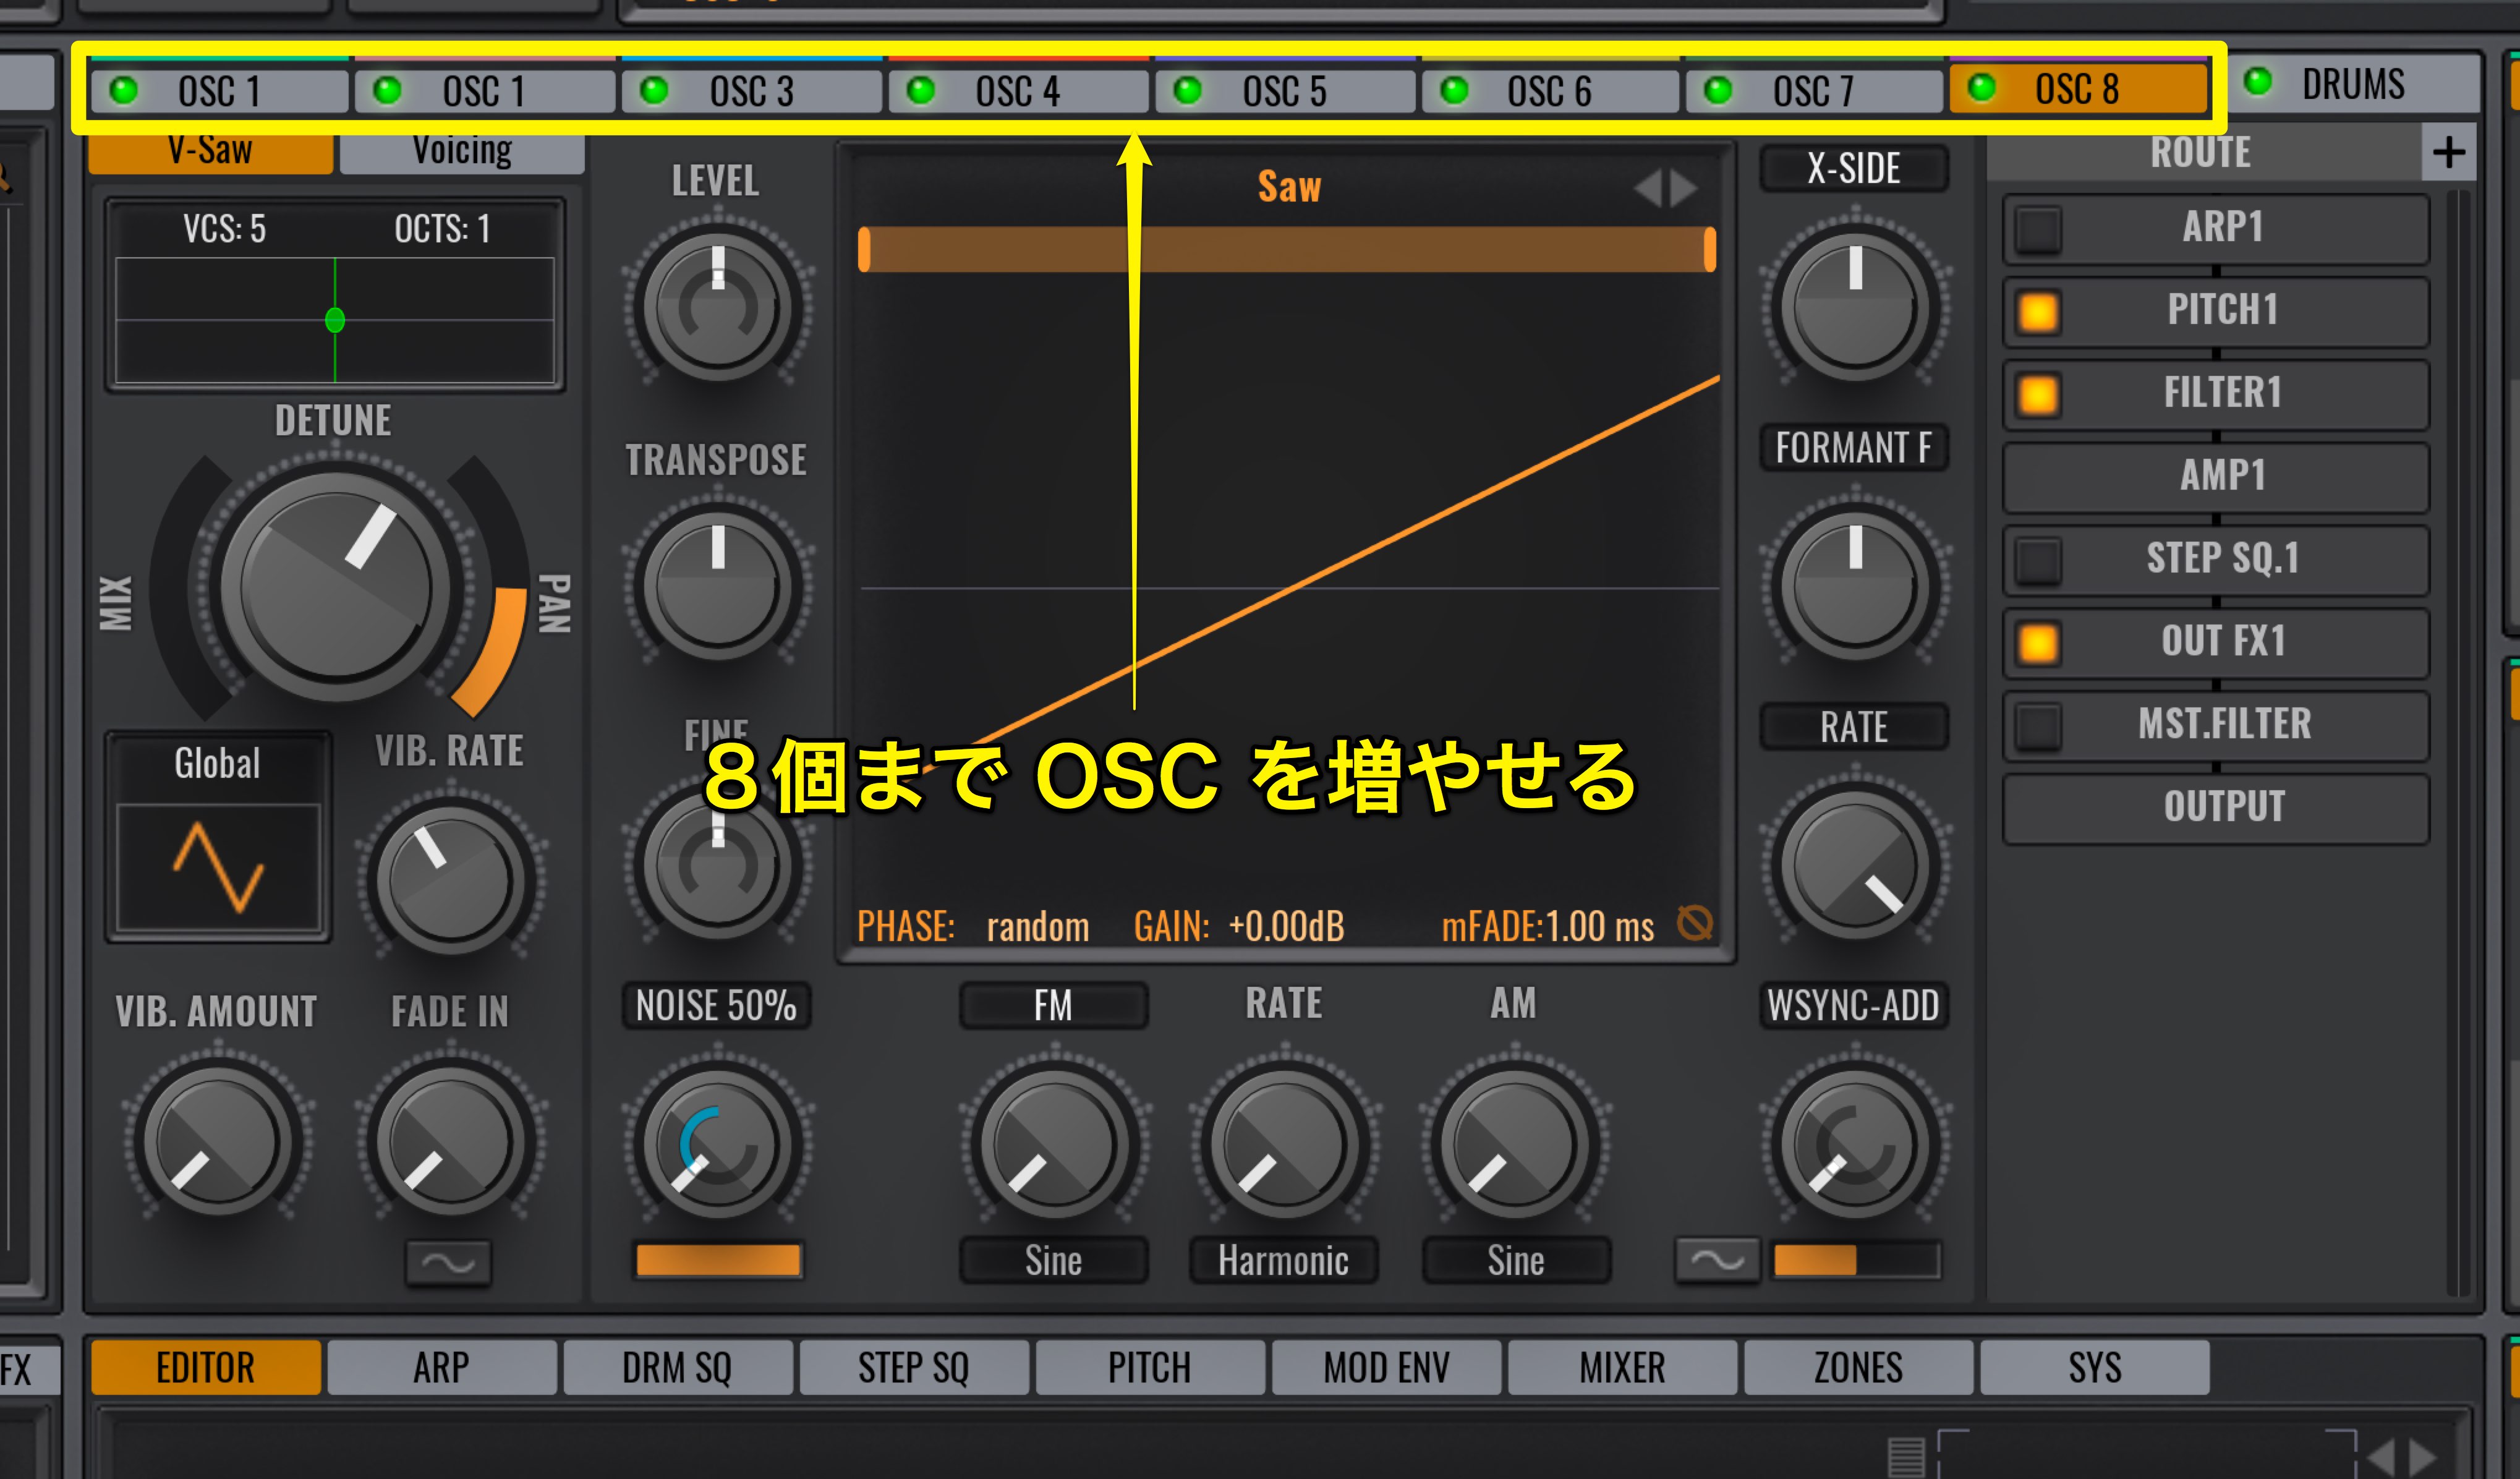
You can have a maximum of 8 OSC and layer these sounds.
Making fat synth sounds is easy with this function.
We will discuss the OSC in detail in our next article.
Editing the drum section
Check the contents of the drums tab section.
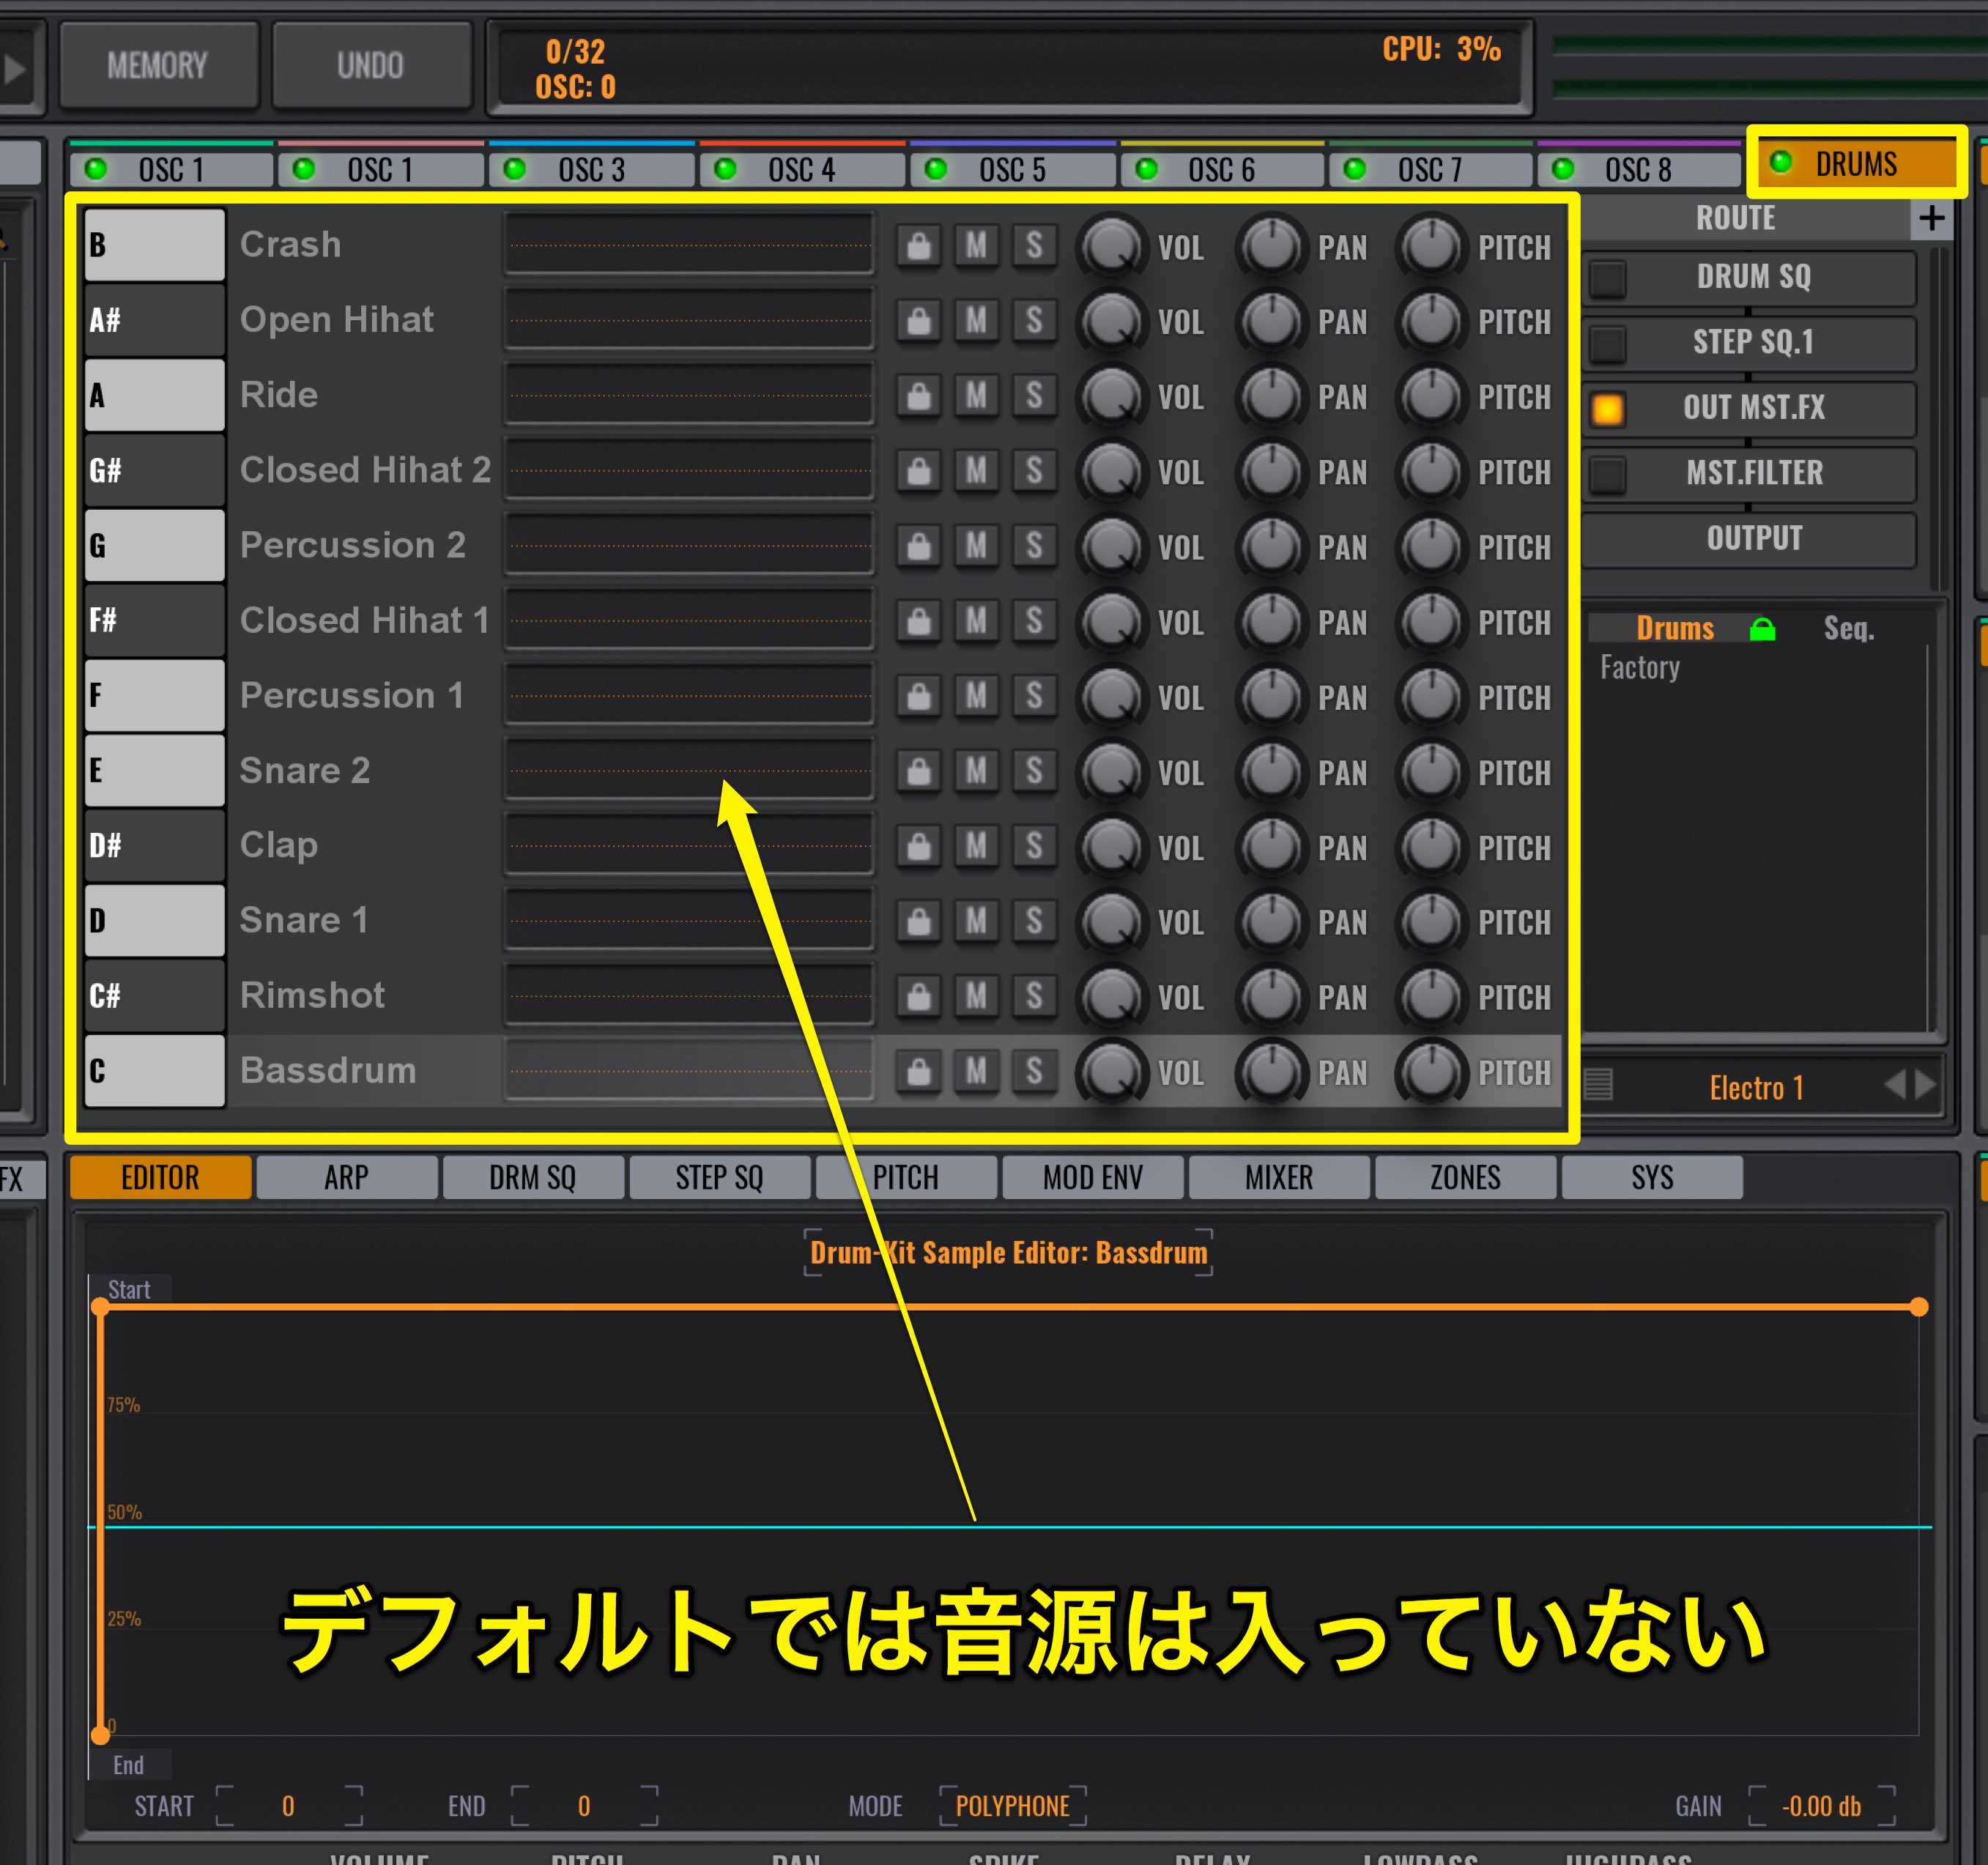
By default, there are no sounds set up in it.
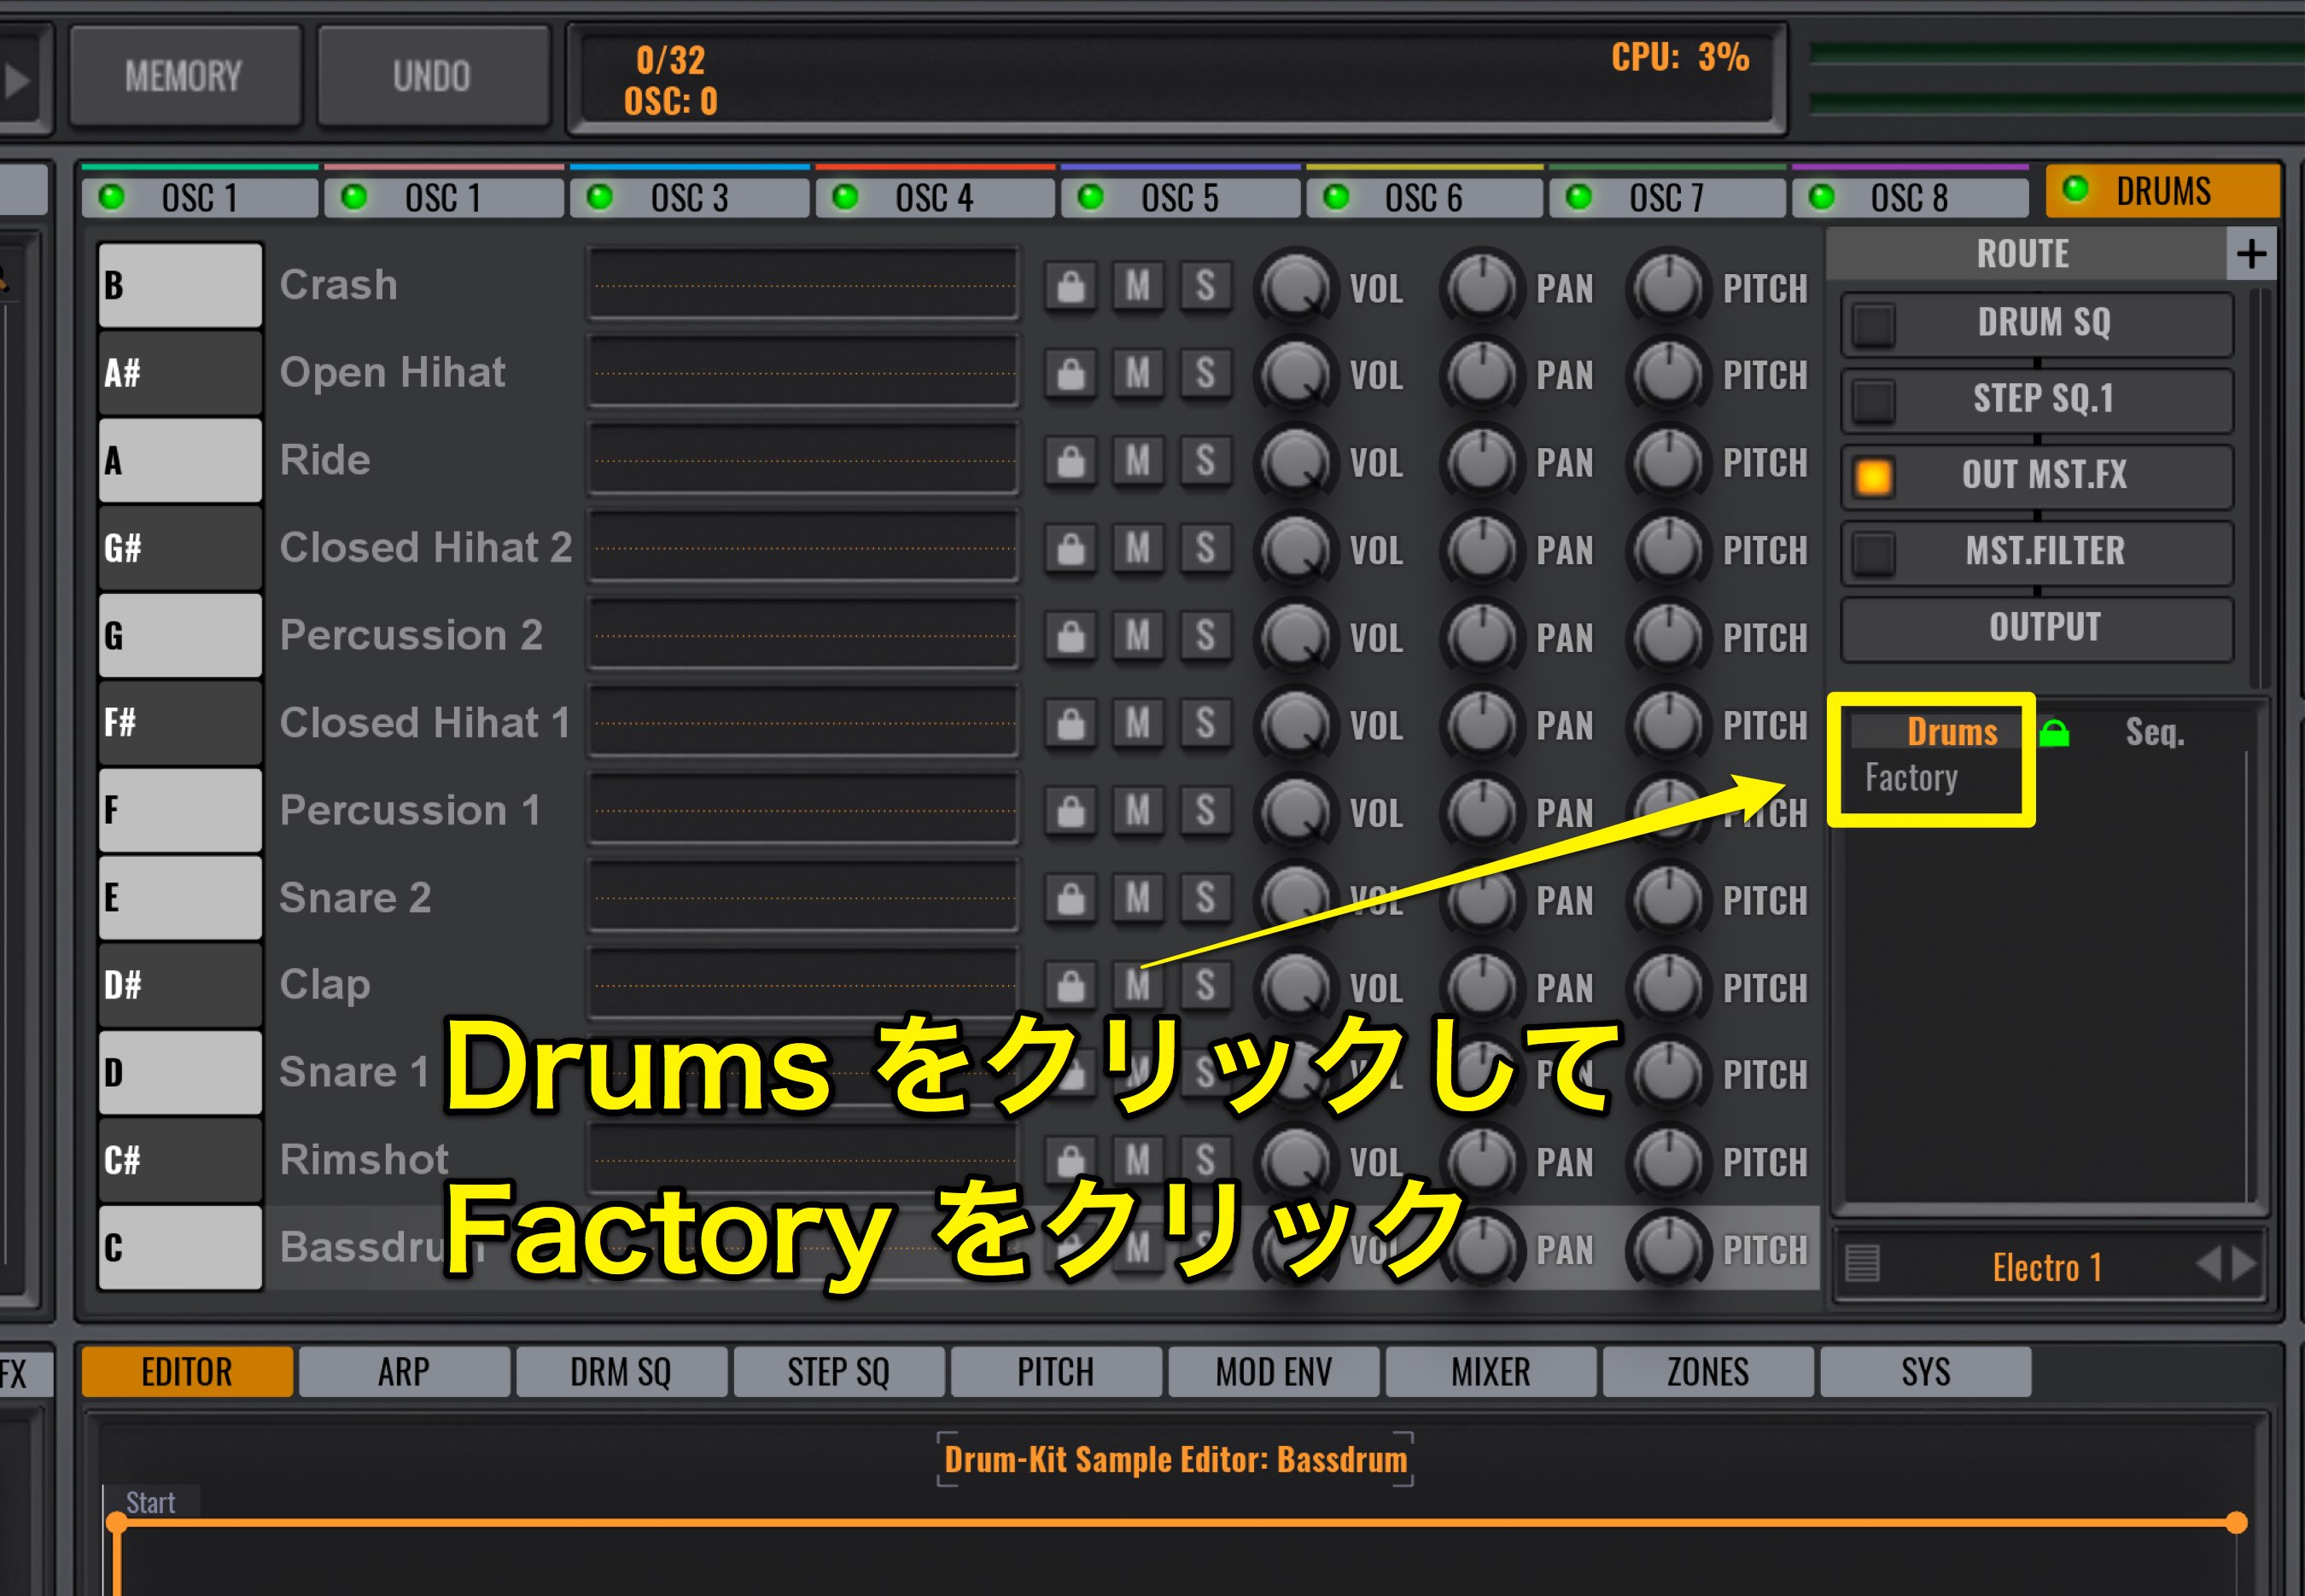
On the bottom right area, click on Drums, and select Factory.
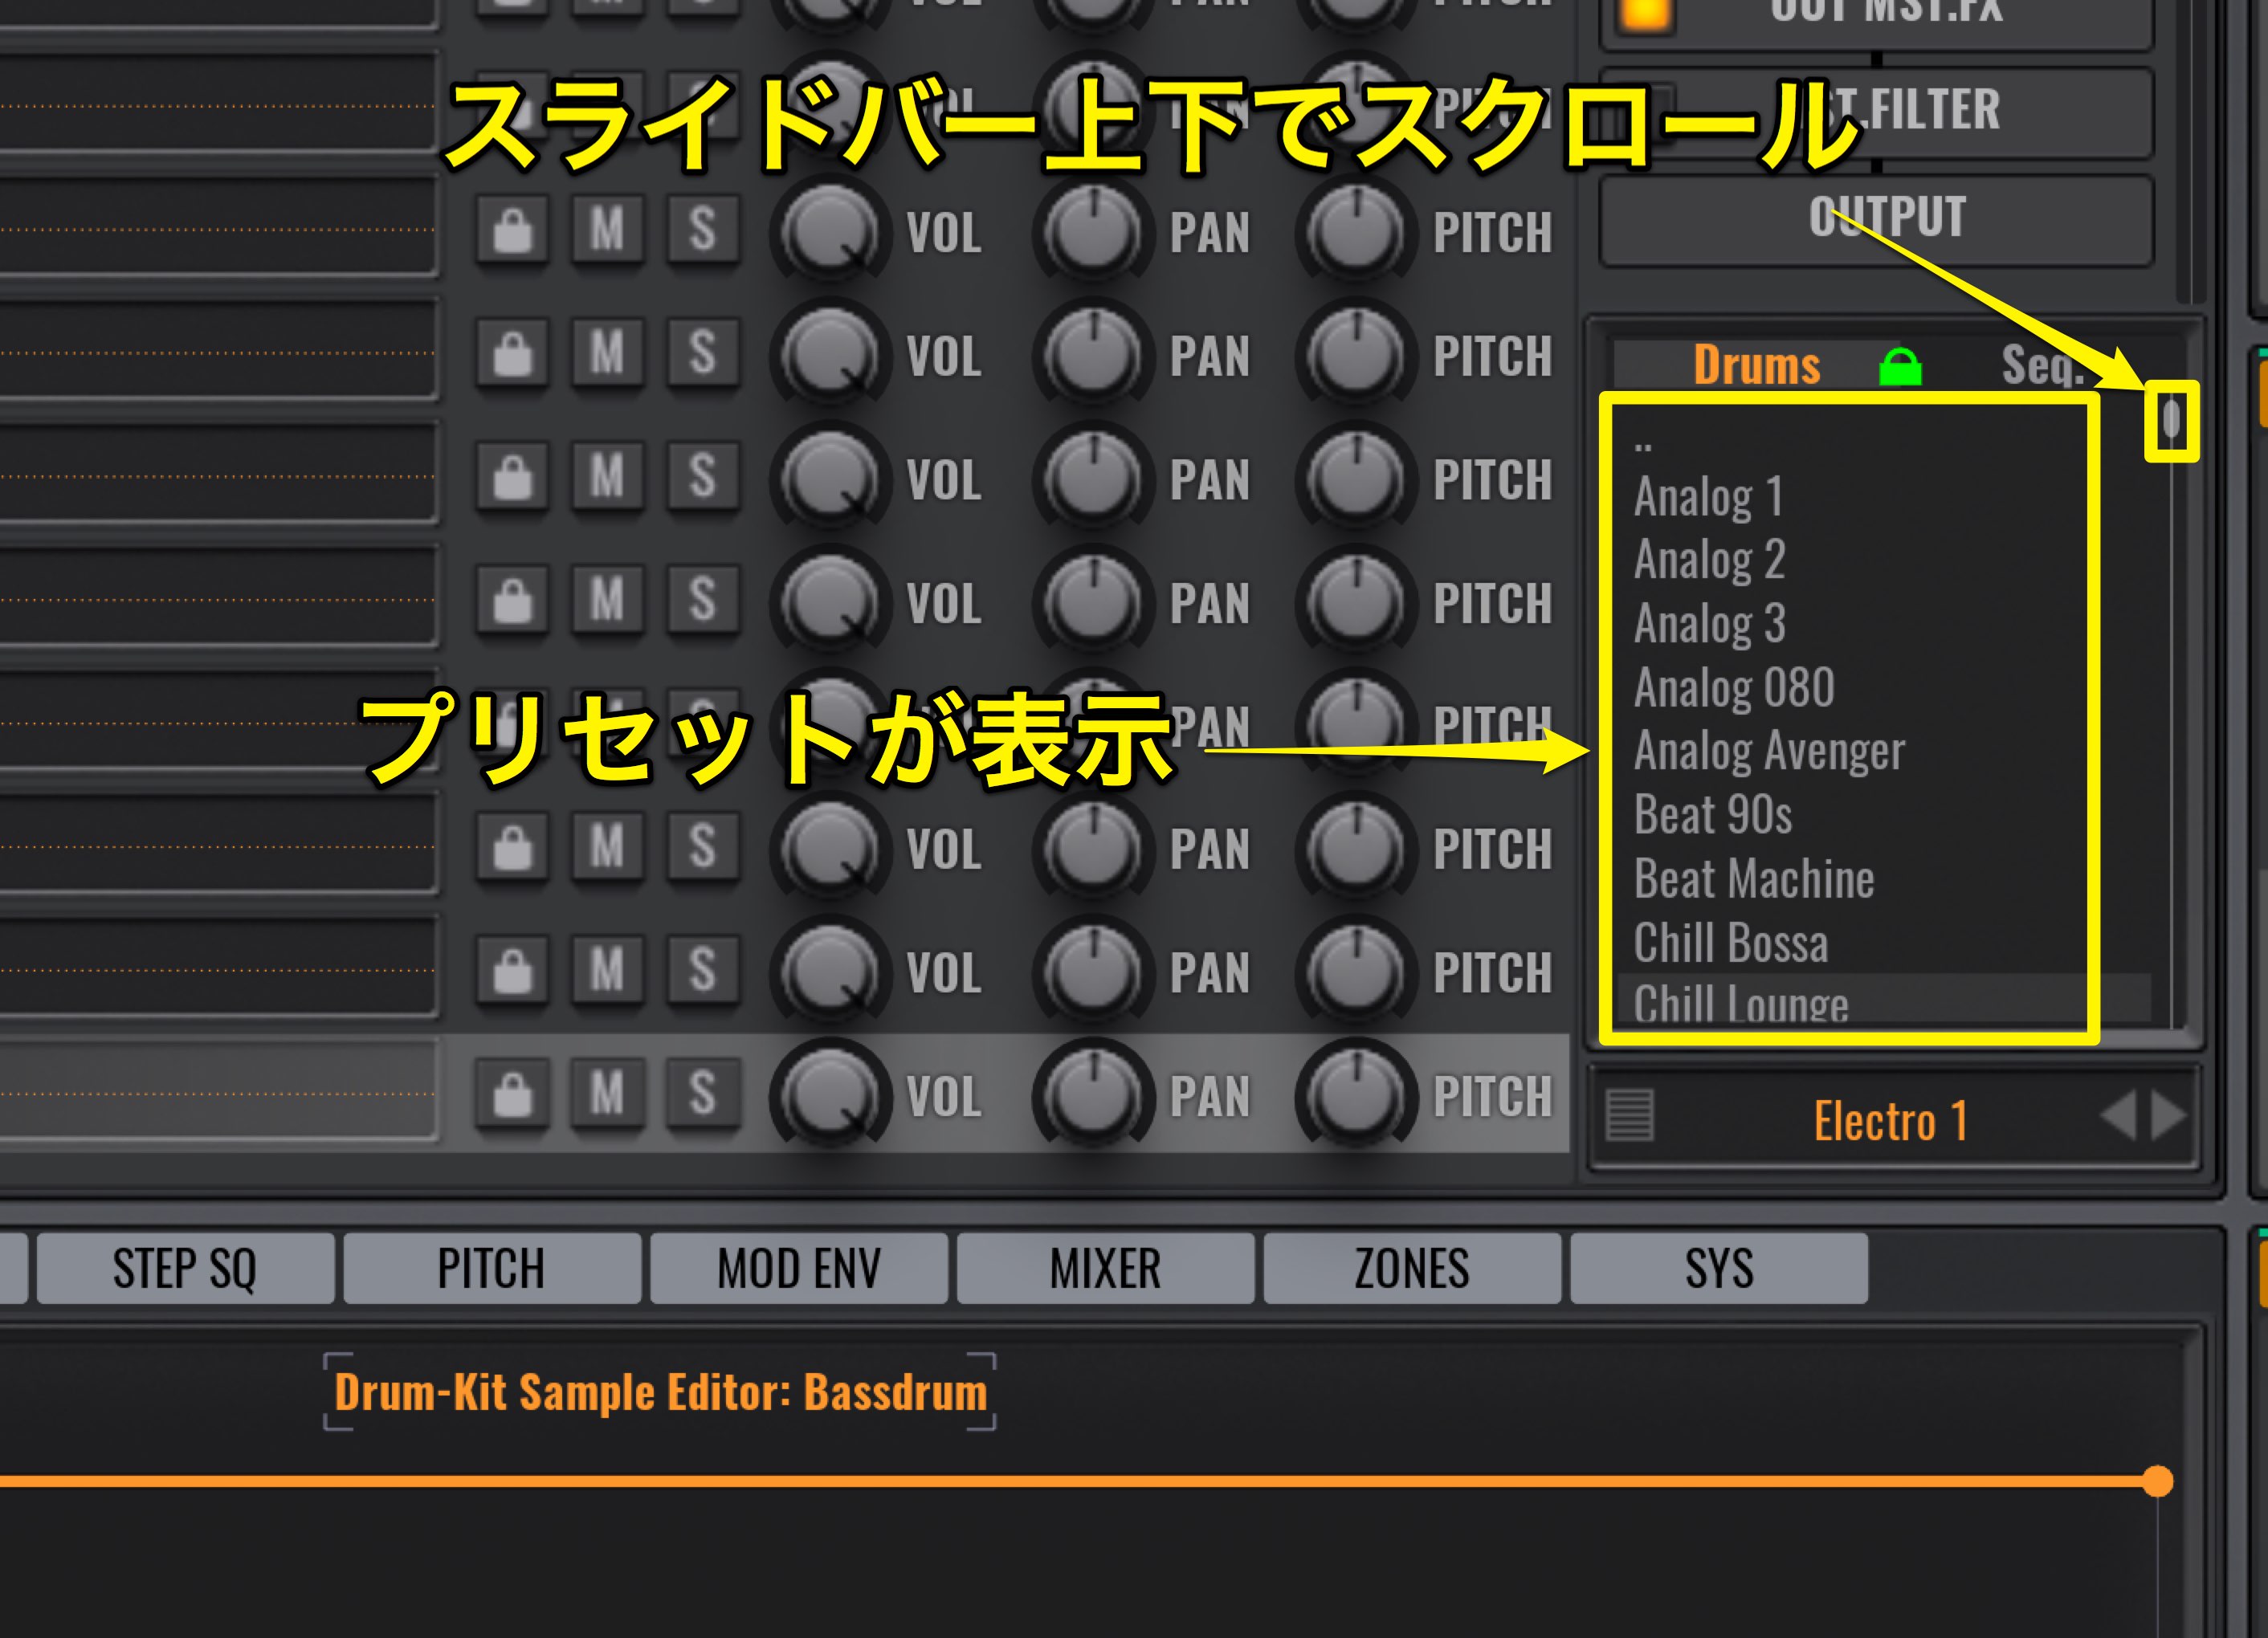
Here we will see the Drums presets.
You can scroll using the slider on the right.
As you can see, there are a vast variety to choose from.
These are all beats that can be utilized for your projects.
Choose the preset you want to you, and open it in Avenger.
You can also change just the rhythmic pattern and not the sounds.
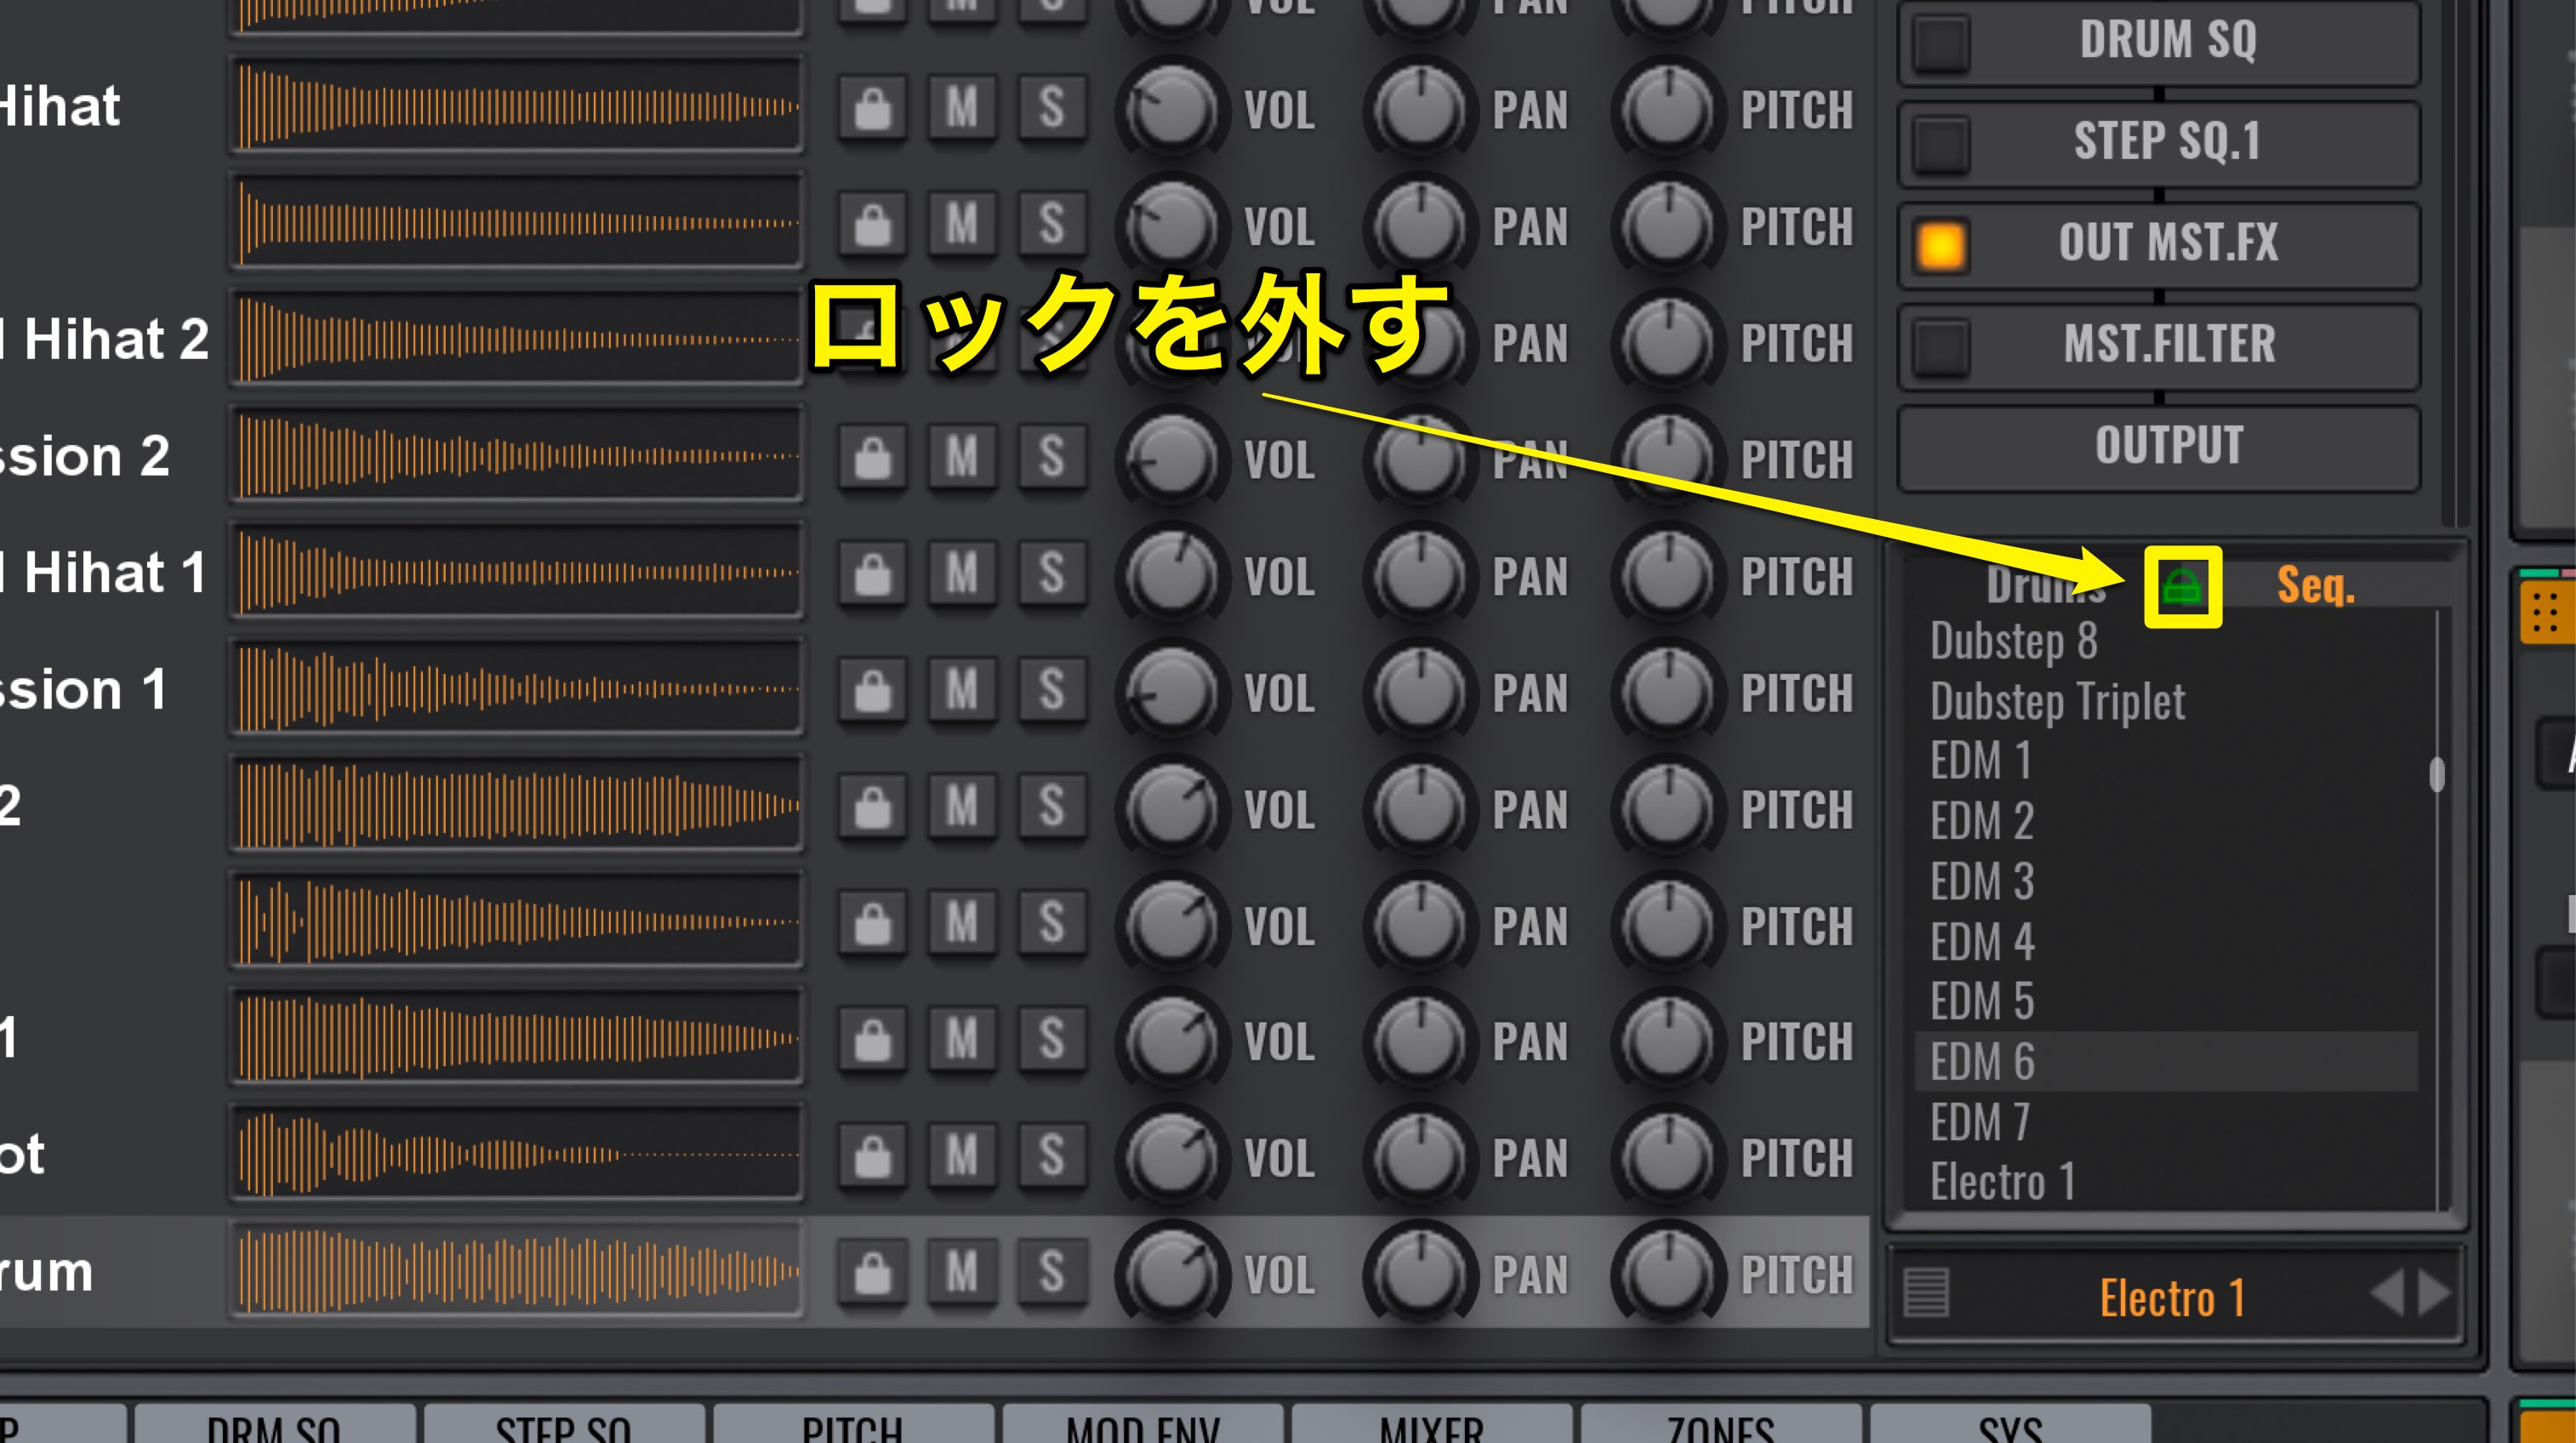
Because the sound and patterns are locked together, they both are uploaded.
By unlocking, you can choose just the sounds or sequence.
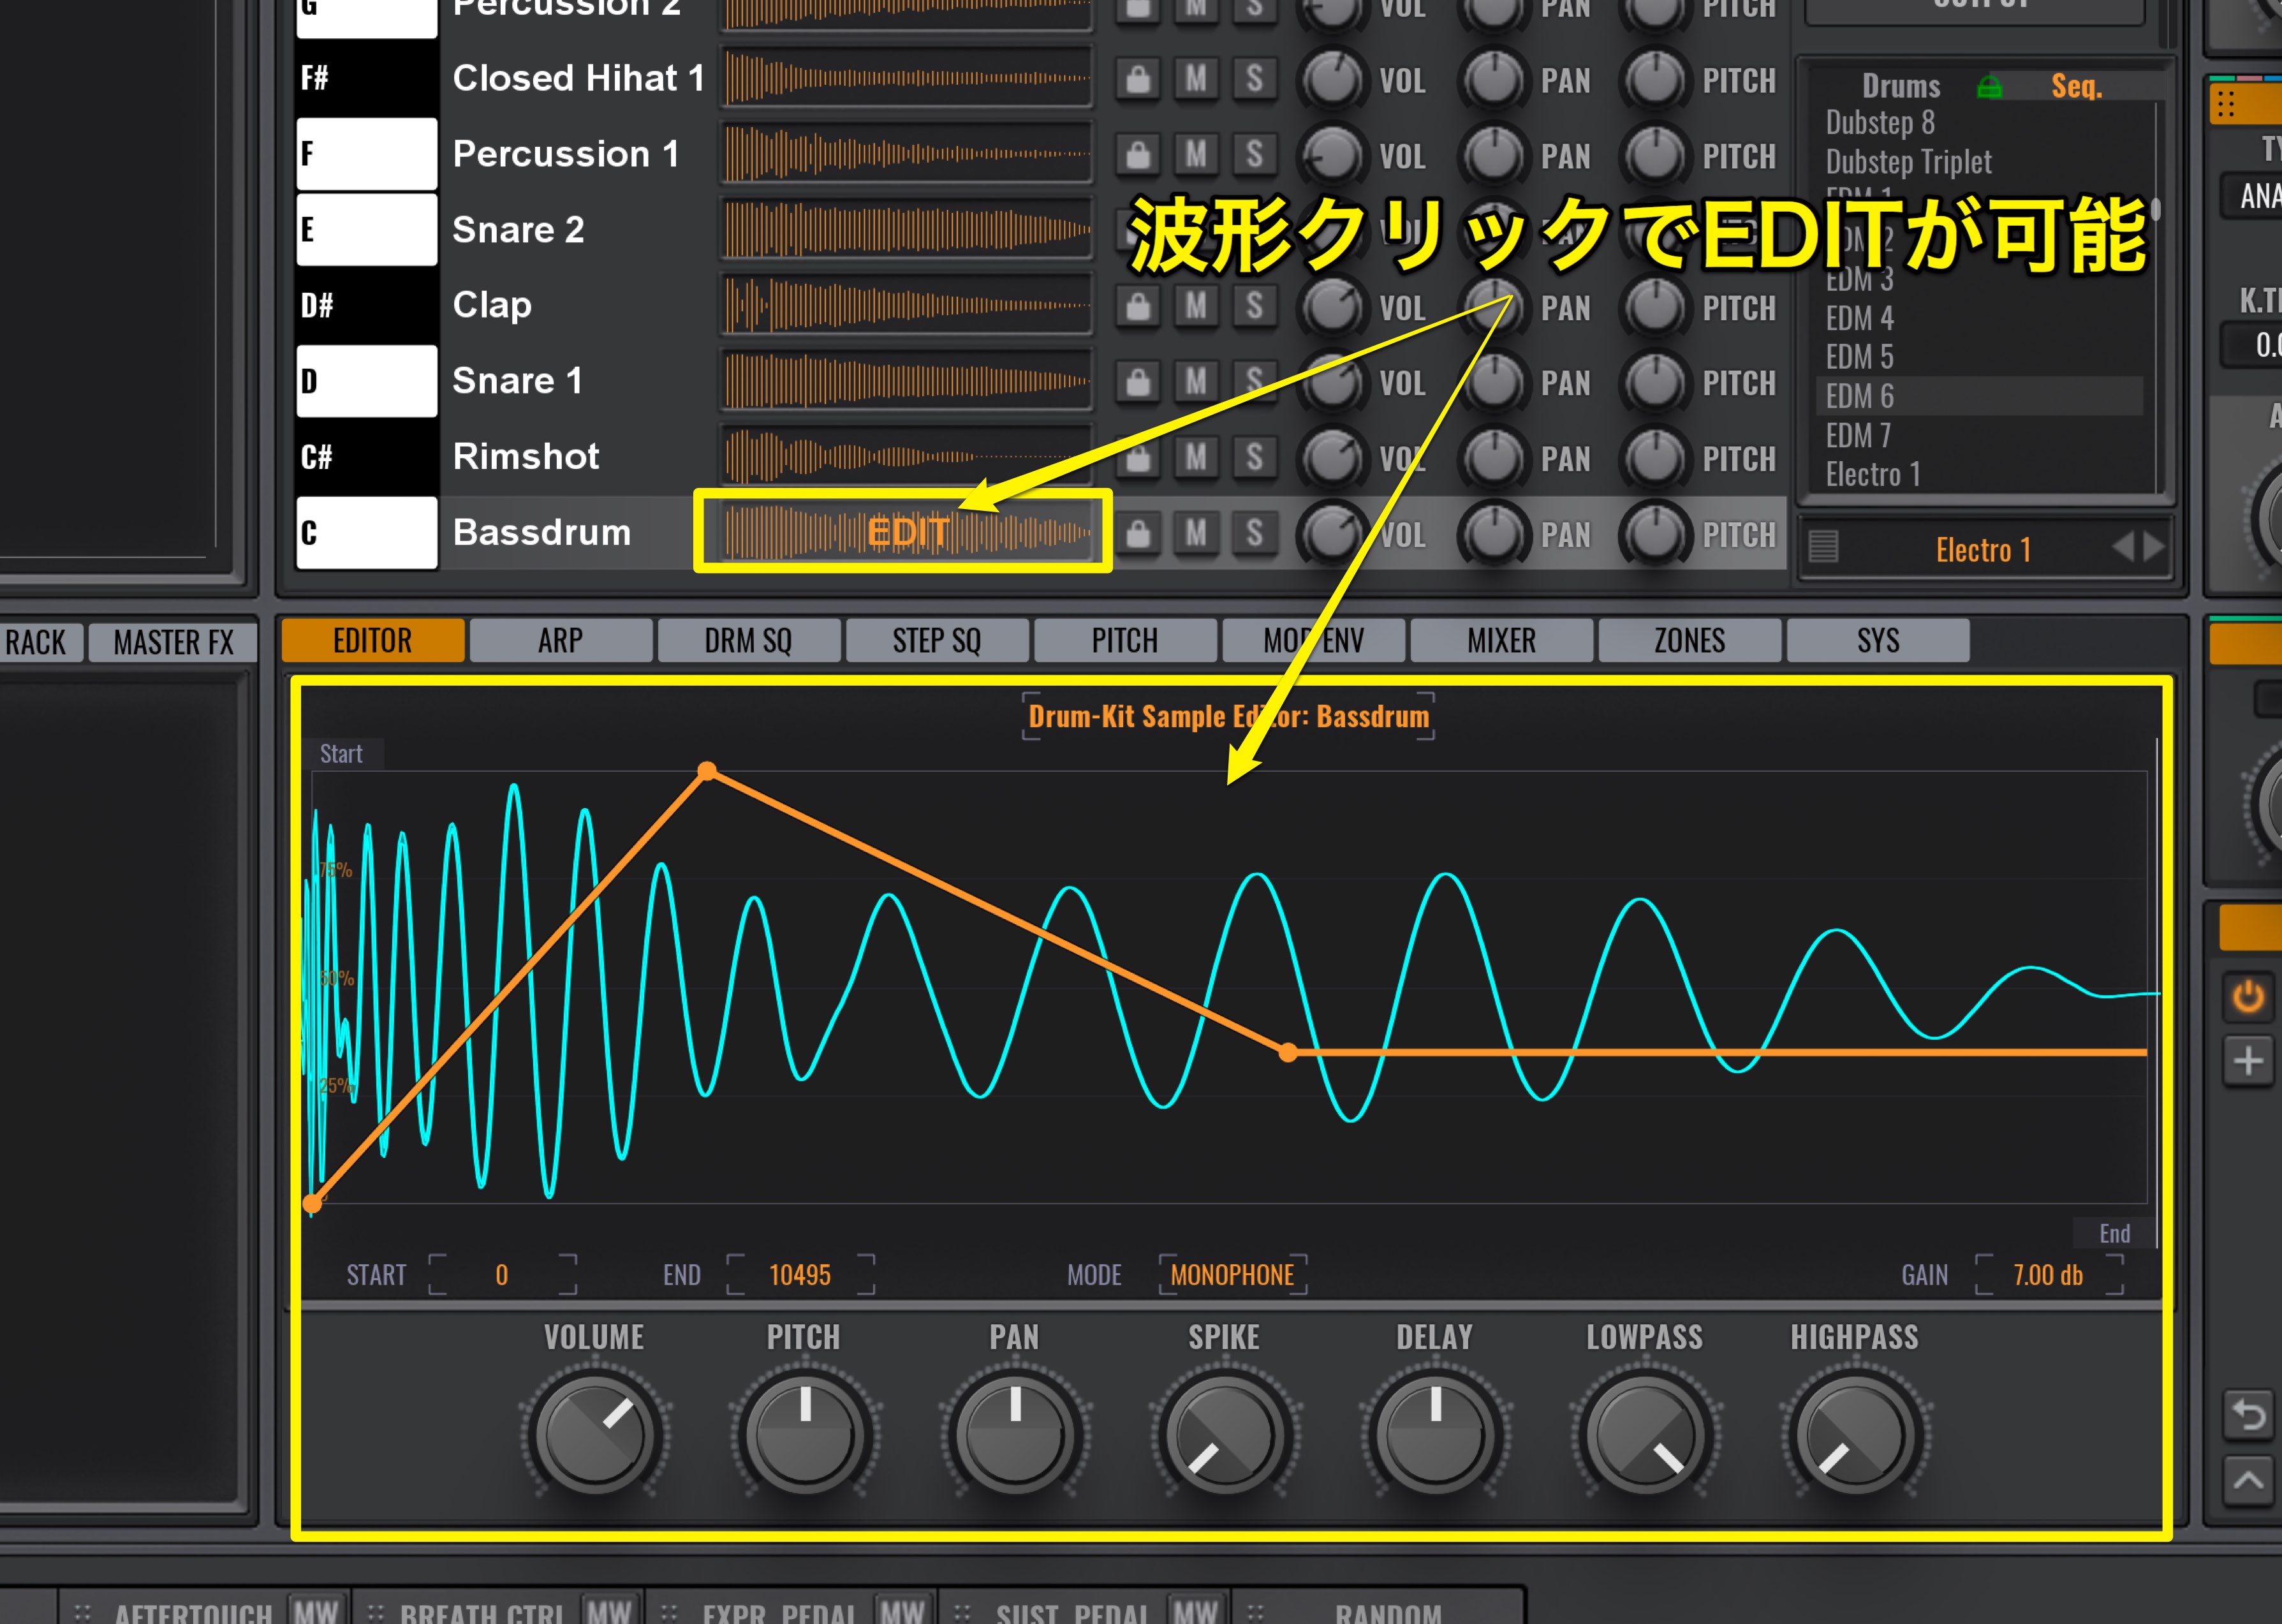
By clicking on kick, snare or other waveforms, you can edit them individually with tools such as Lowpass, HiPass, Pan, Pitch, and envelopes, allowing you to put futher detail into your beat.
Another useful function is the ability to upload Wav file samples.
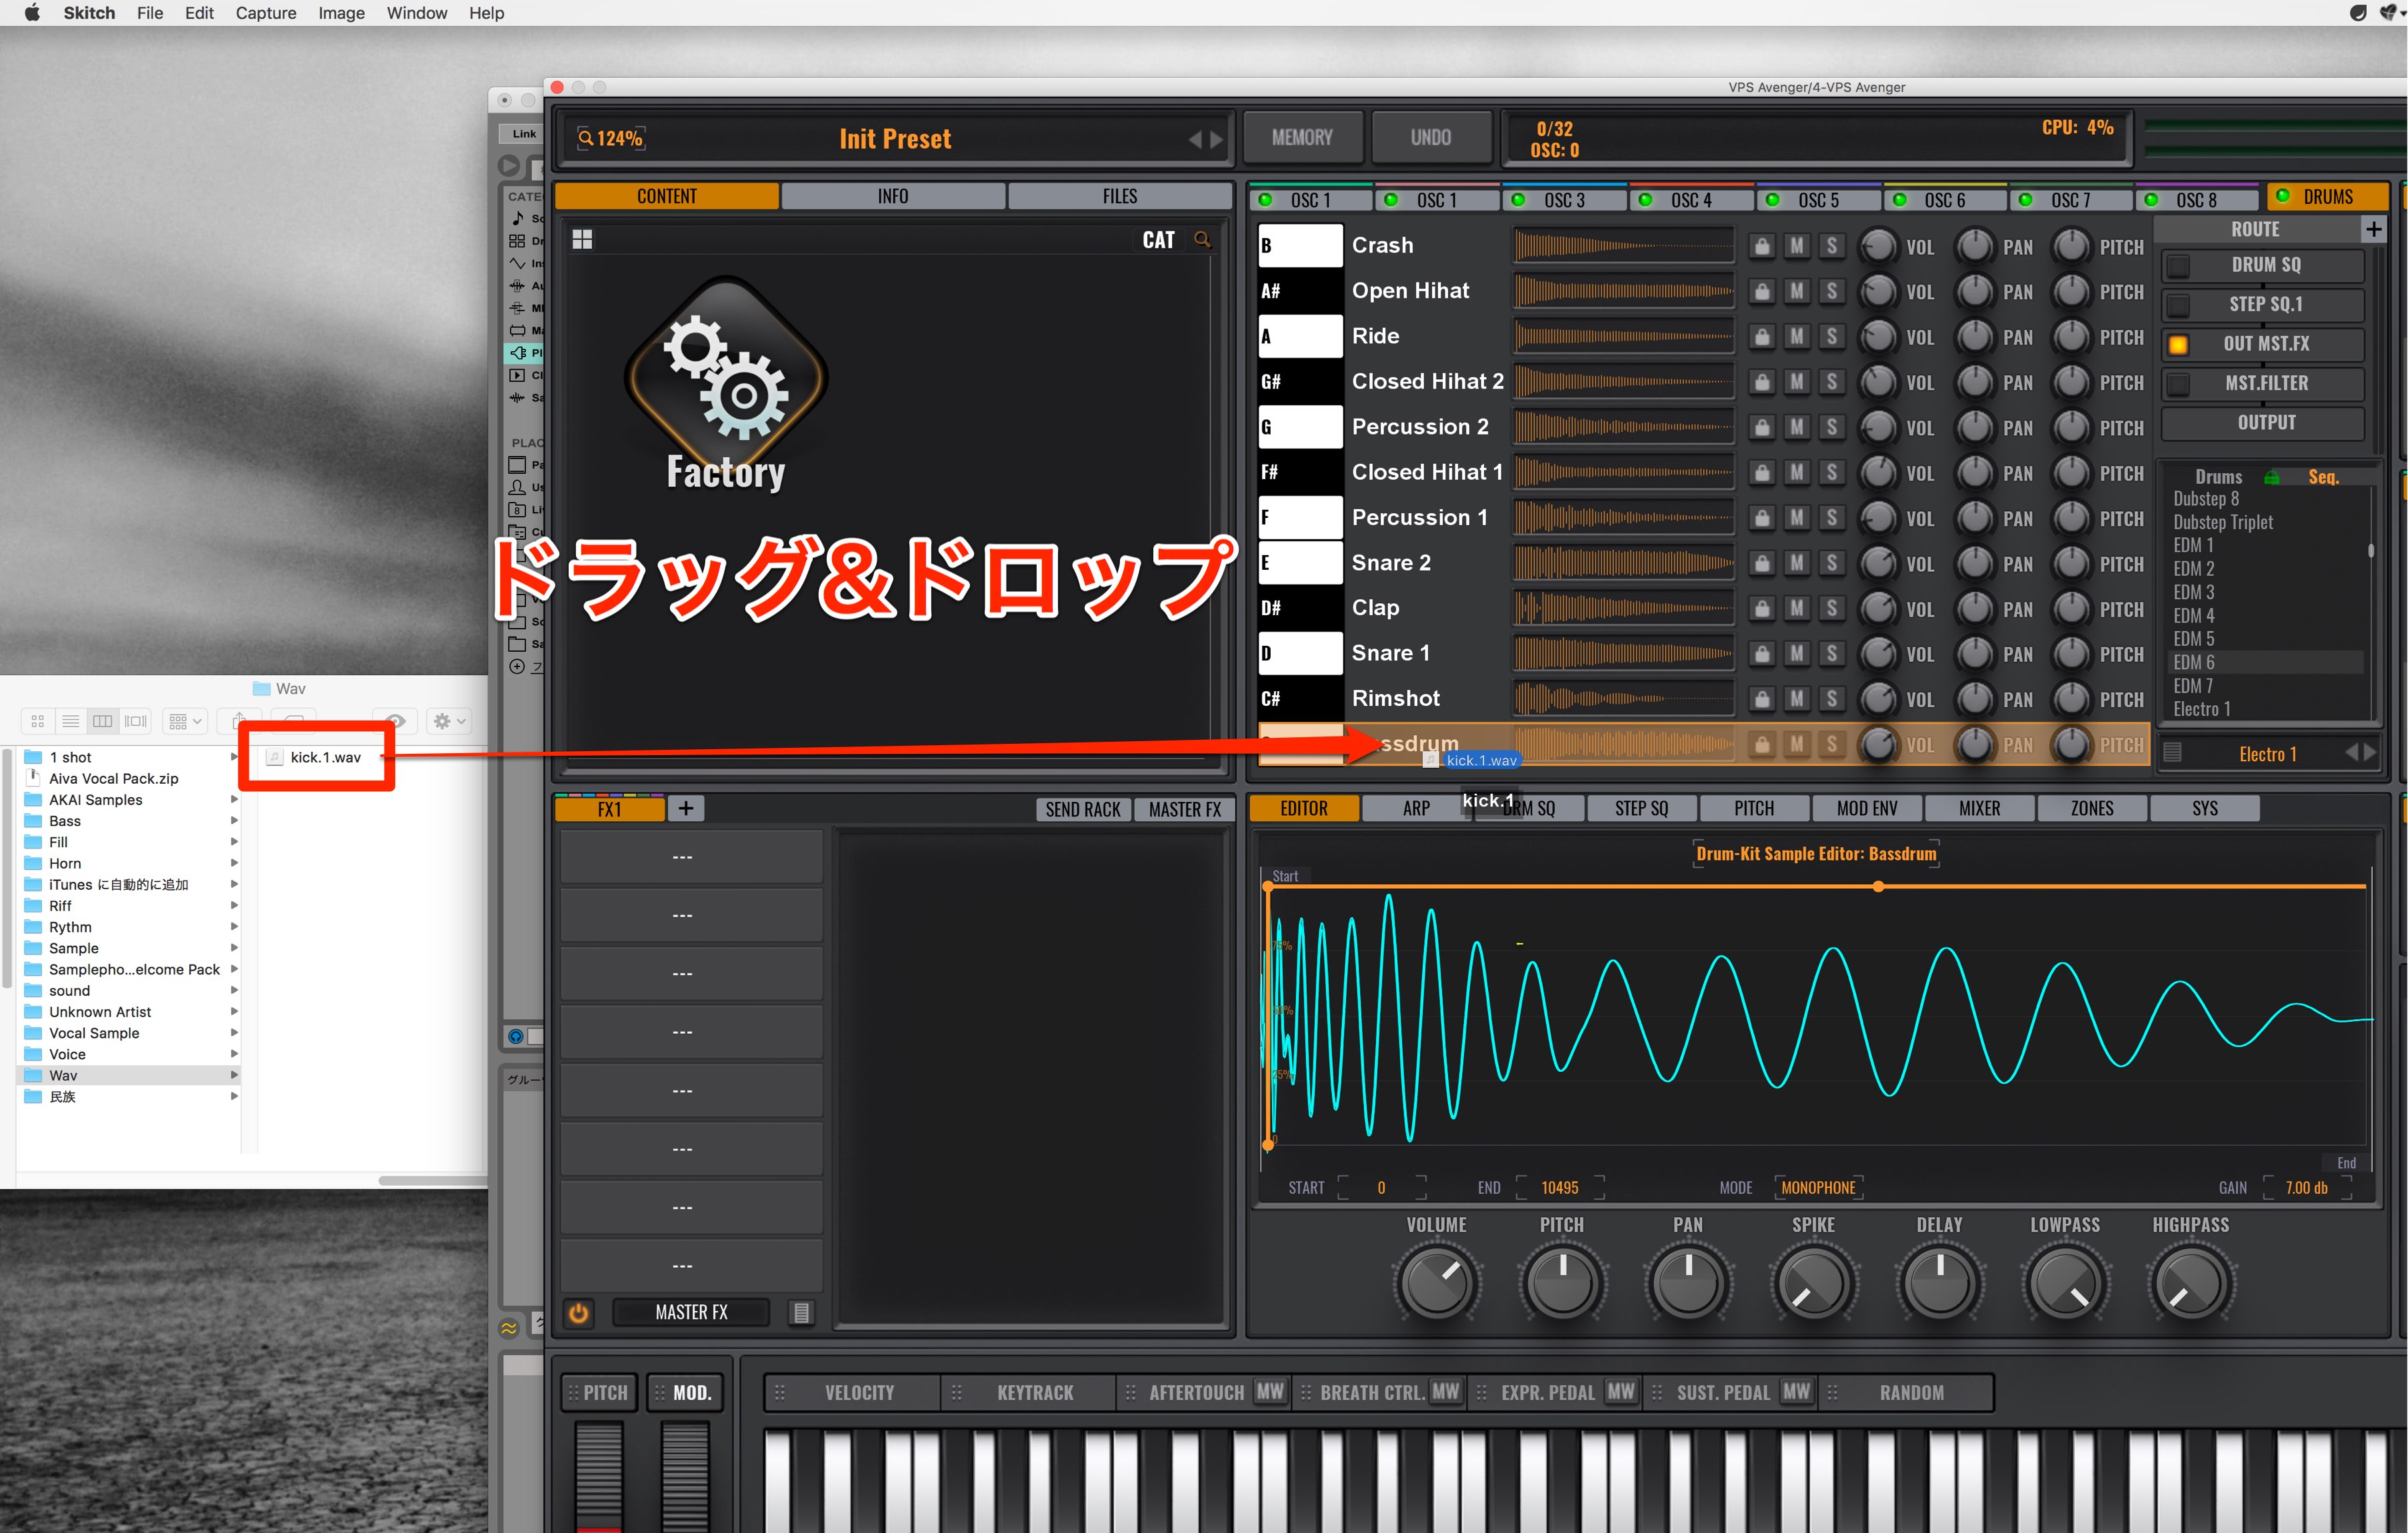
Just drag and drop the file you want to use, into Avenger.
Although the presets provided cover solid ground, you may want to change it up depending on the song.
Next we will take a look at editing the Drums sequences.
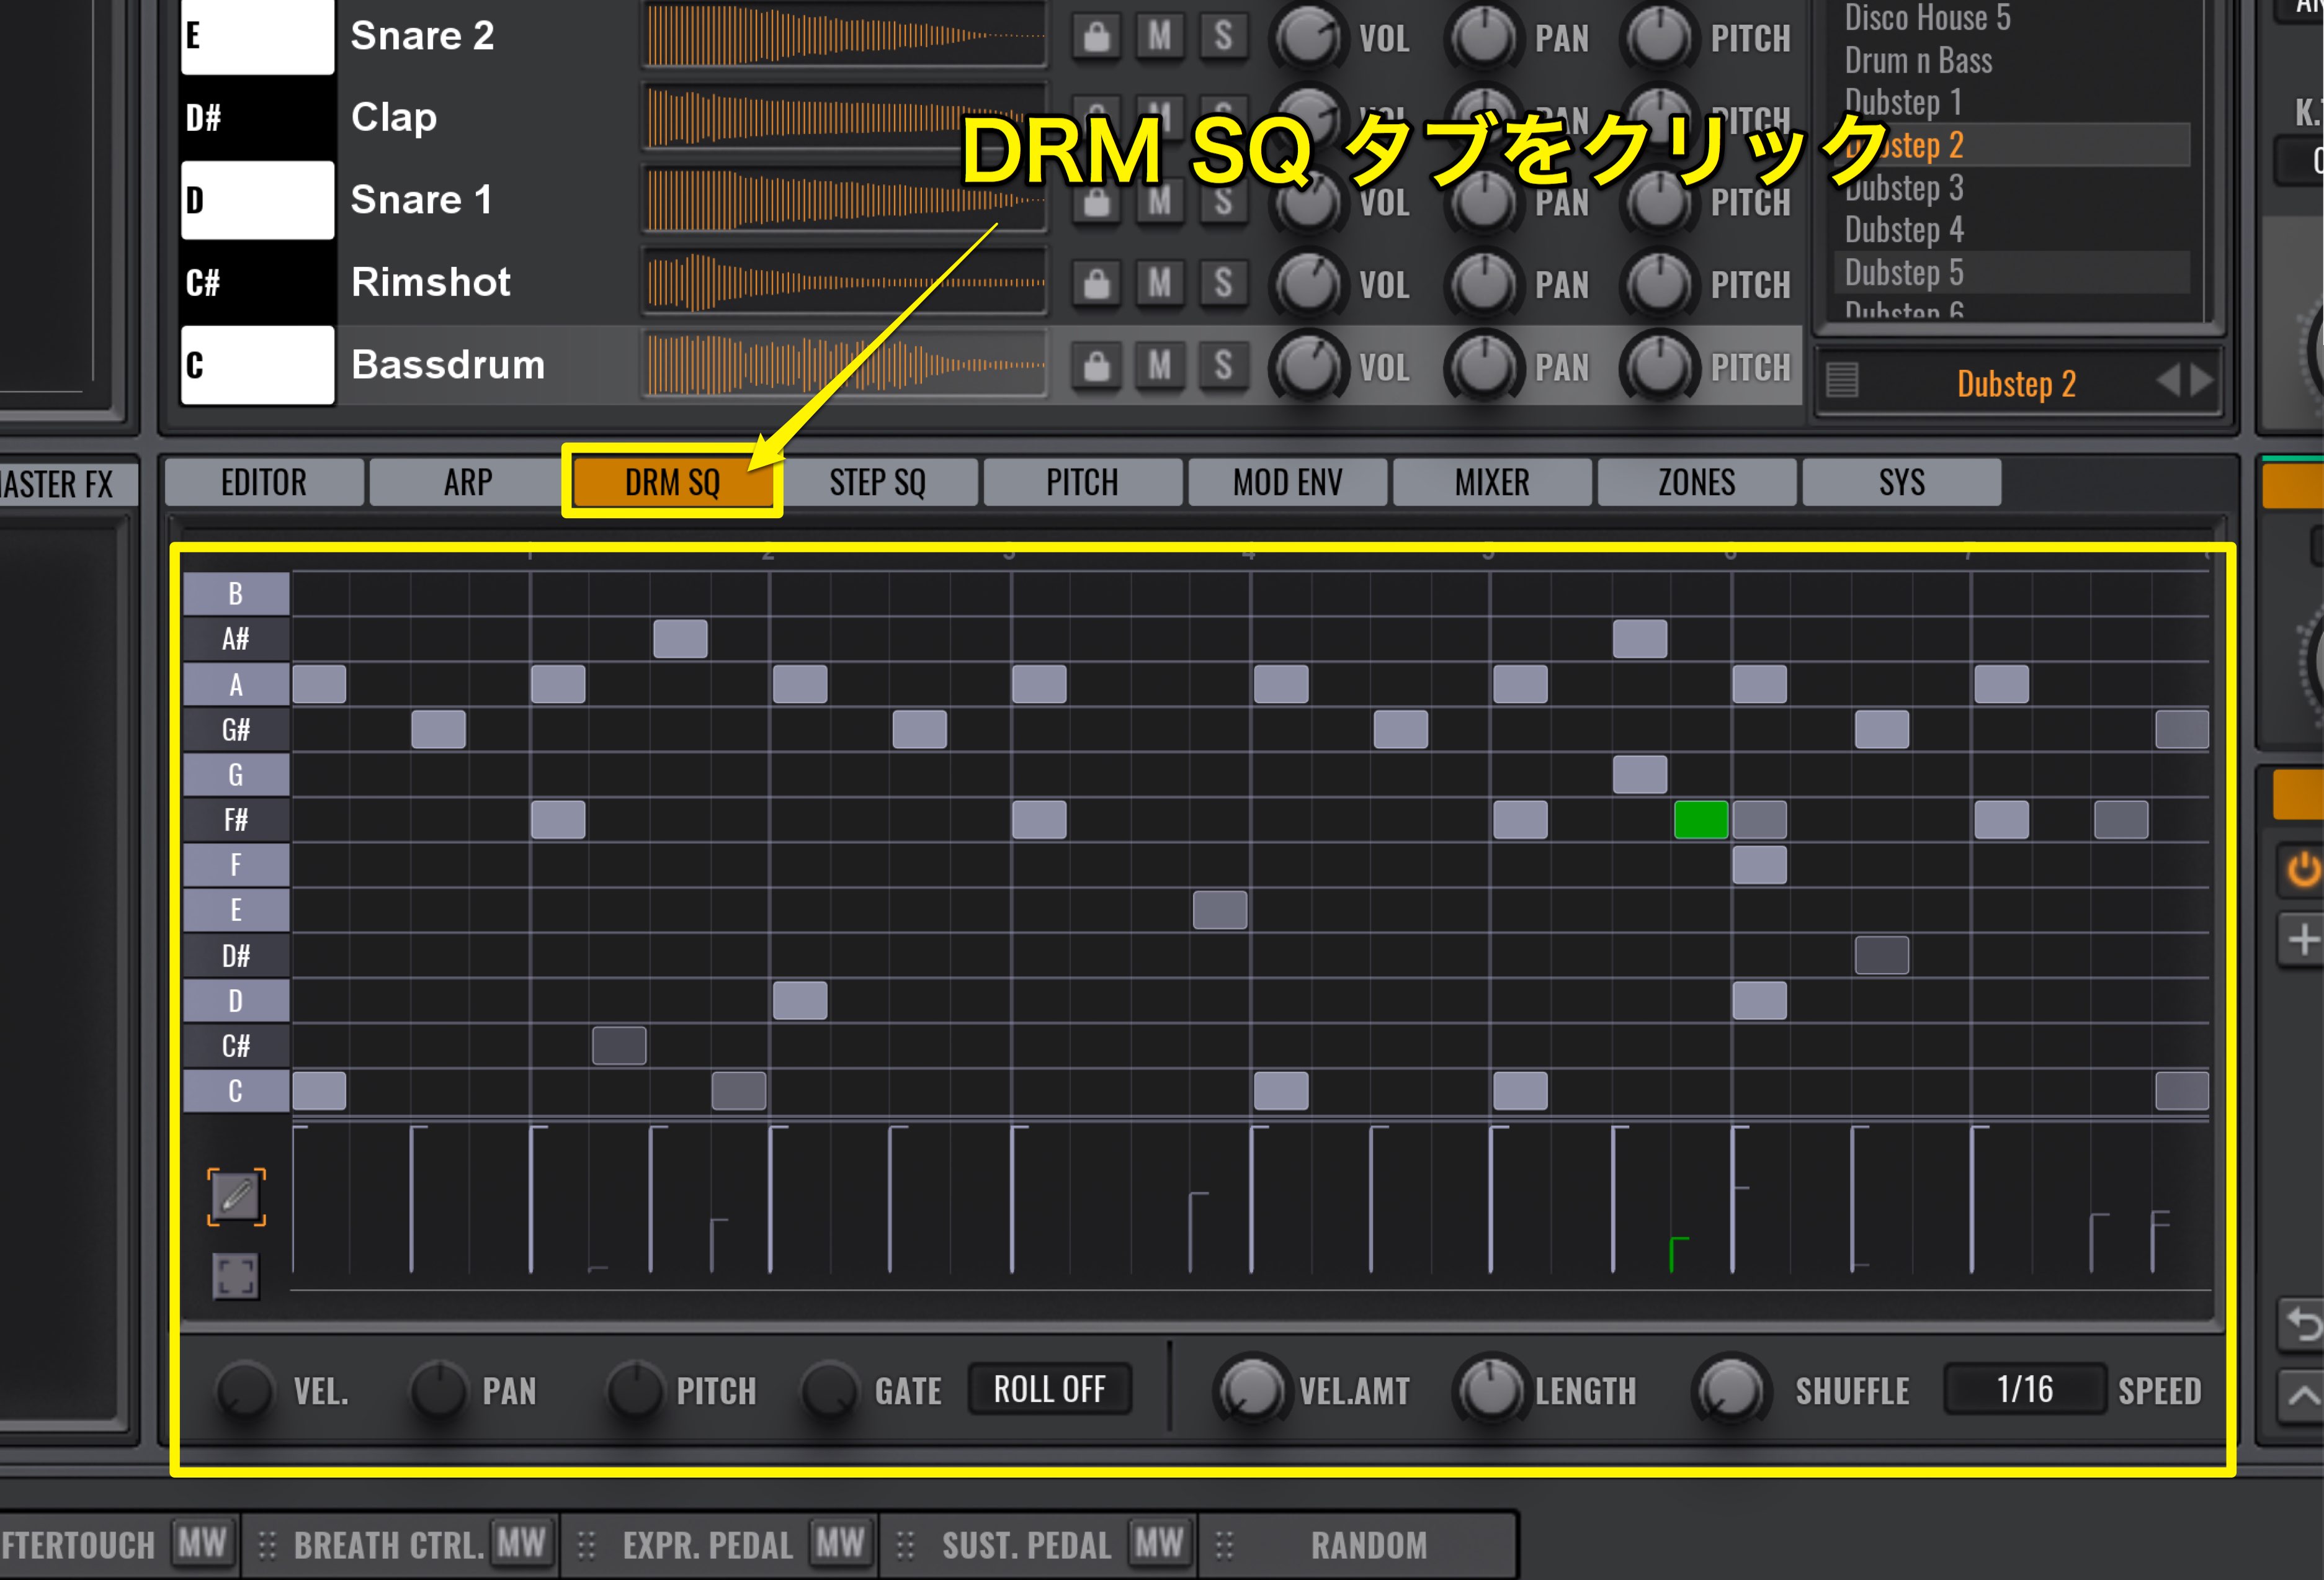
Click on the Drum sequence tab on the bottom middle.
We will check/edit the Drum sequences here.
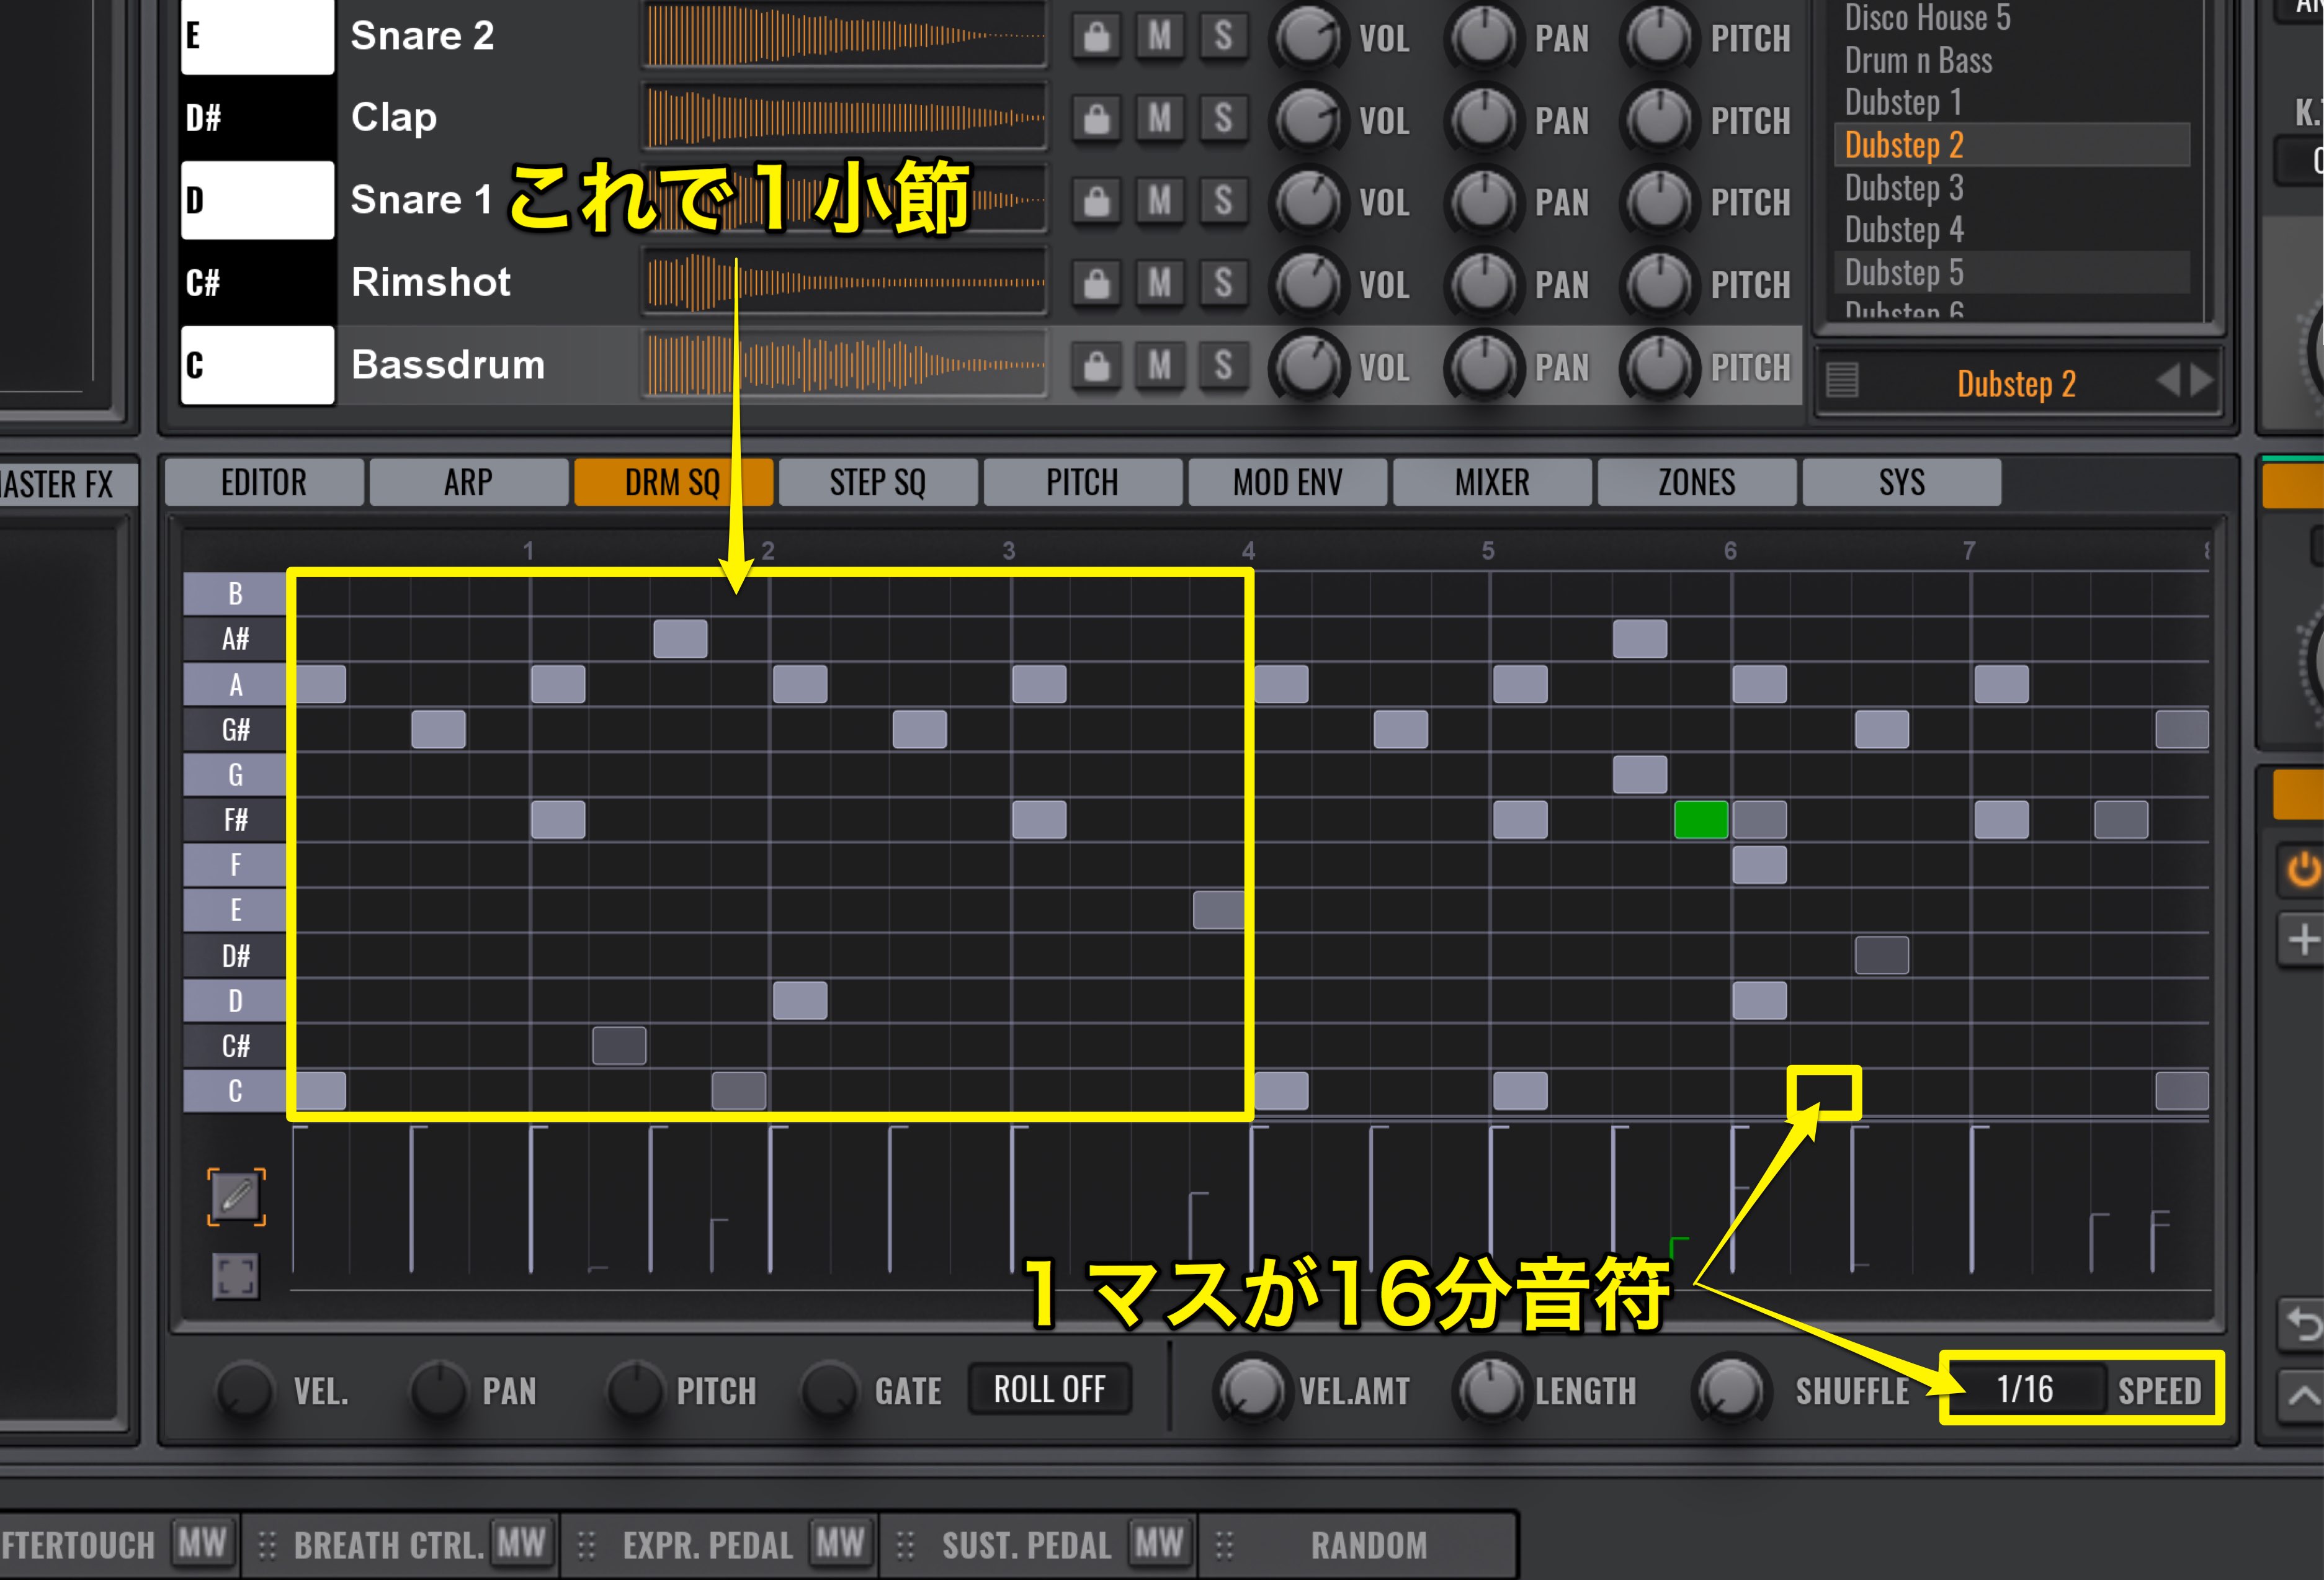
Because the Speed (bottom right) is set to 1/16 at the moment, the grid is split into 16 per bar.
You can change these parameters to your liking.
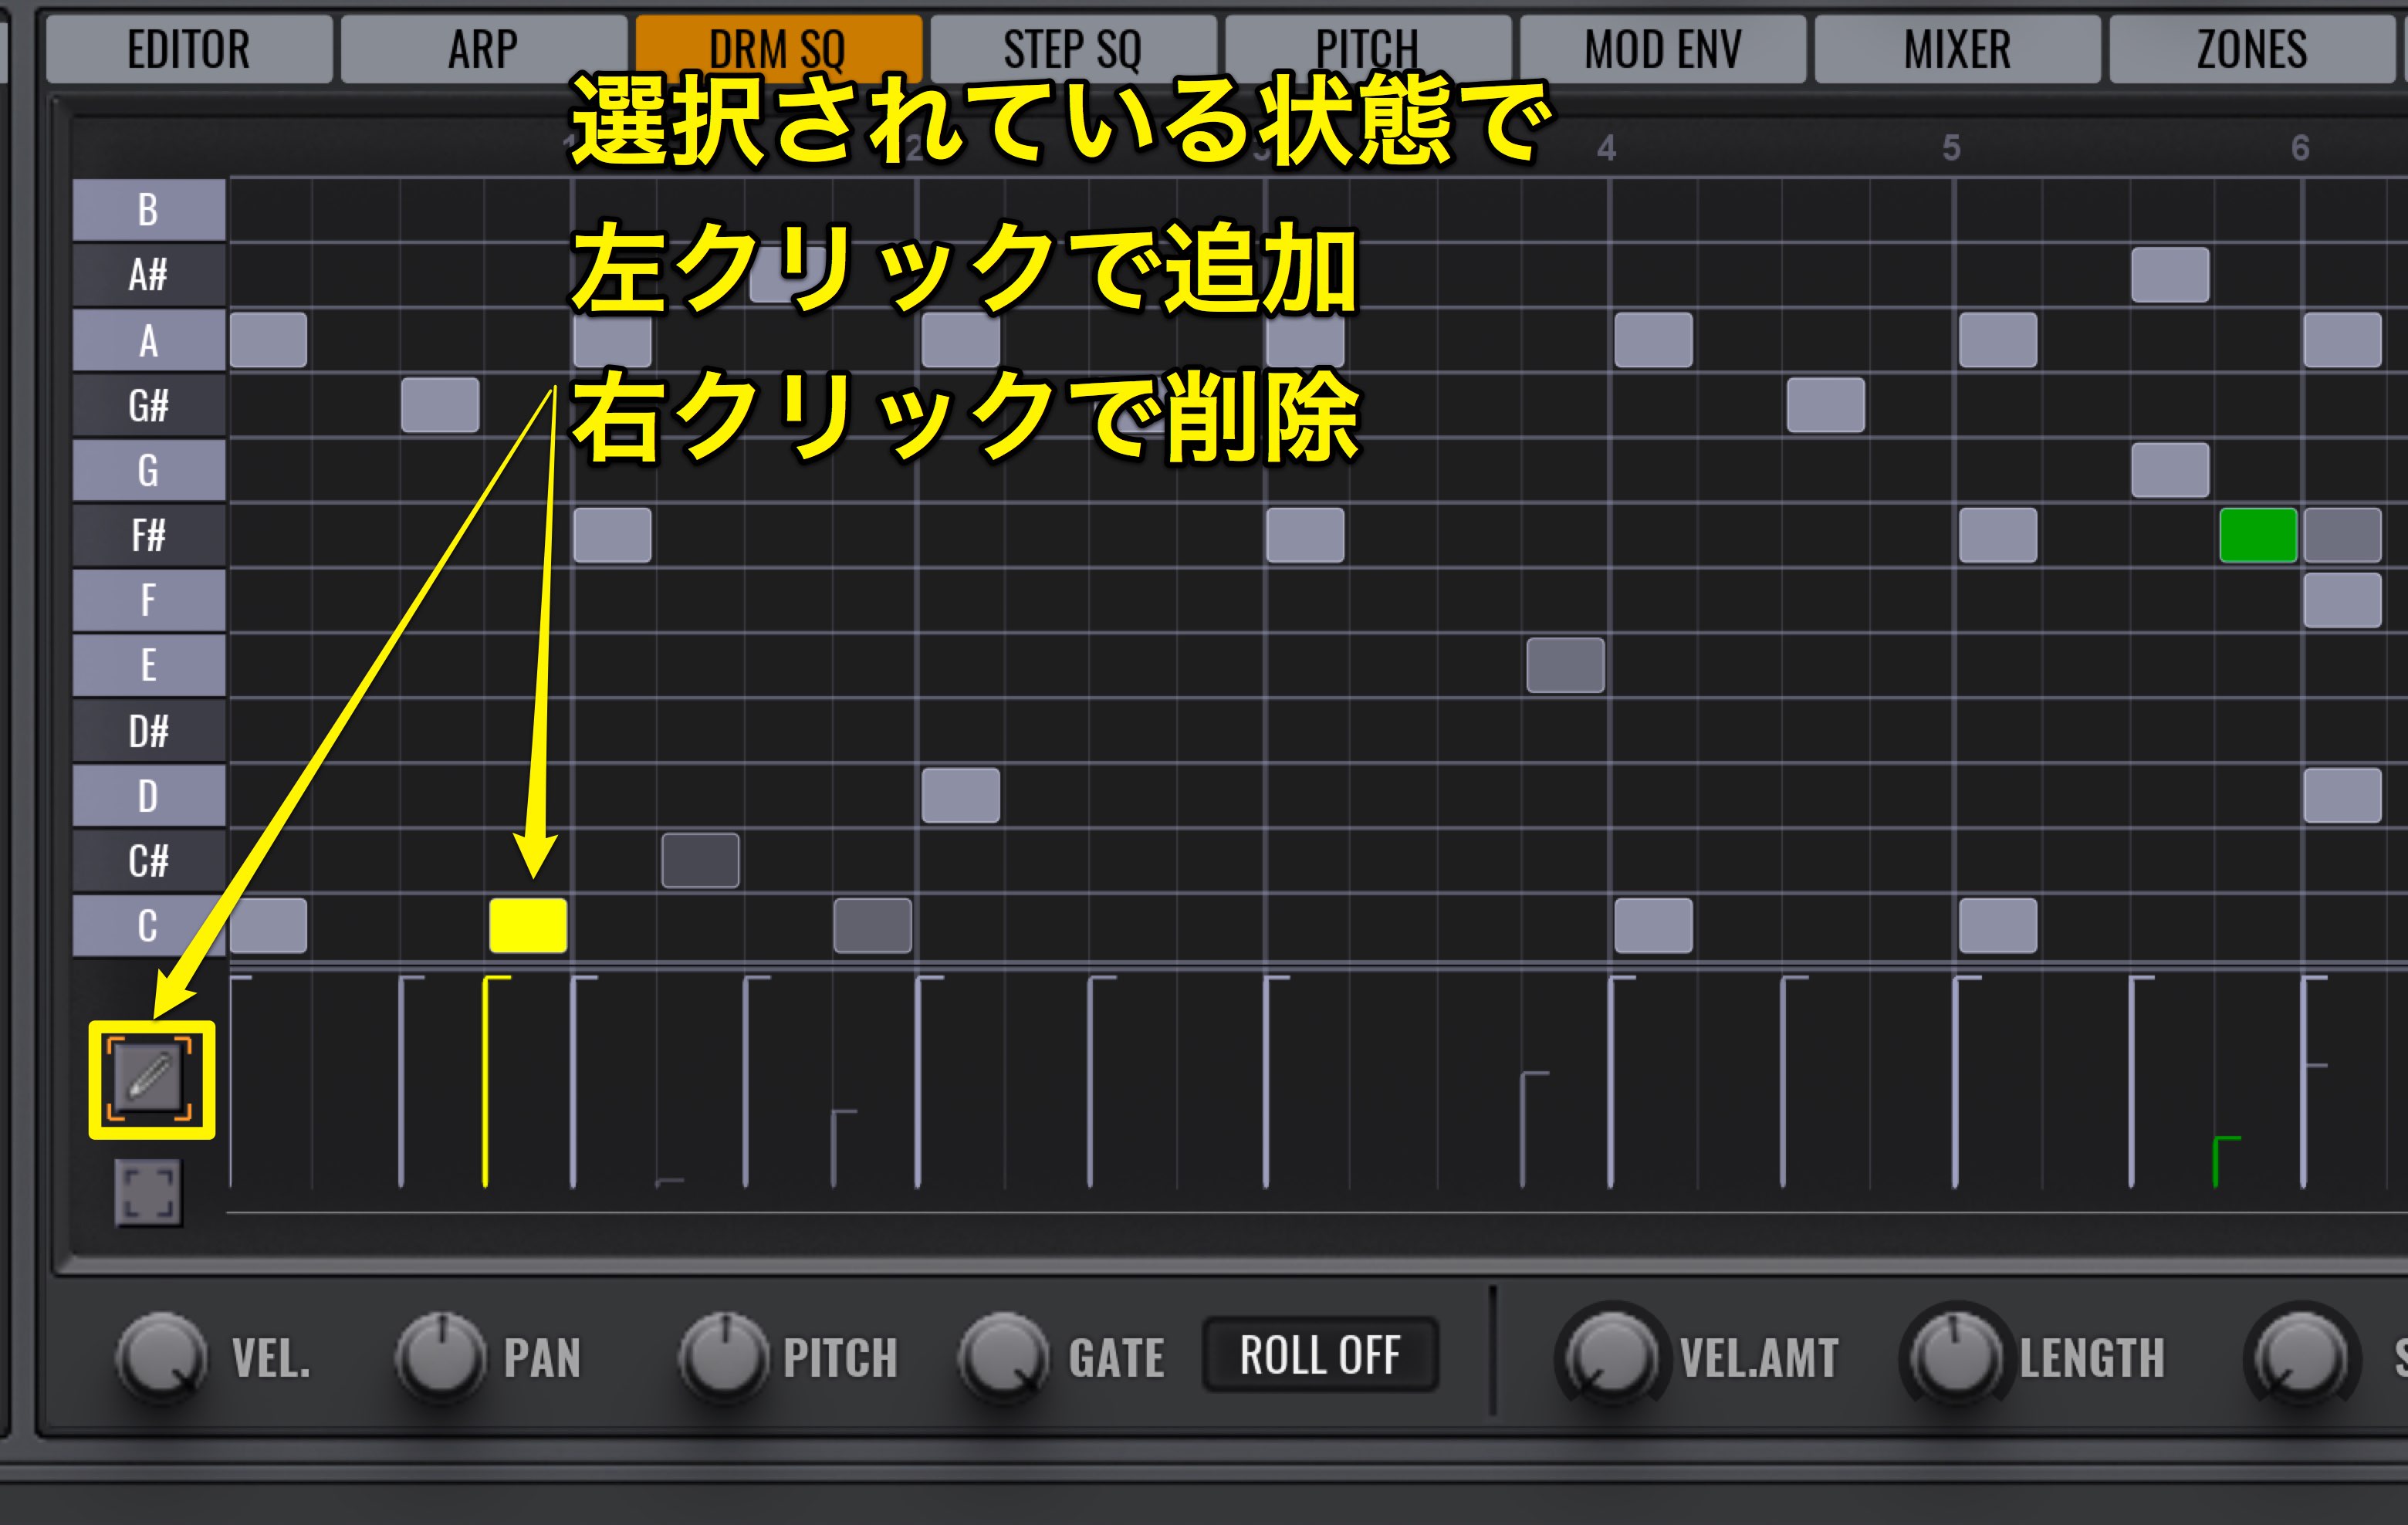
If you want to add notes, click on the pen mark underneath the keyboard and click in the notes you wish to add.
To delete, click on the note you wish to delete with the pen tool on.
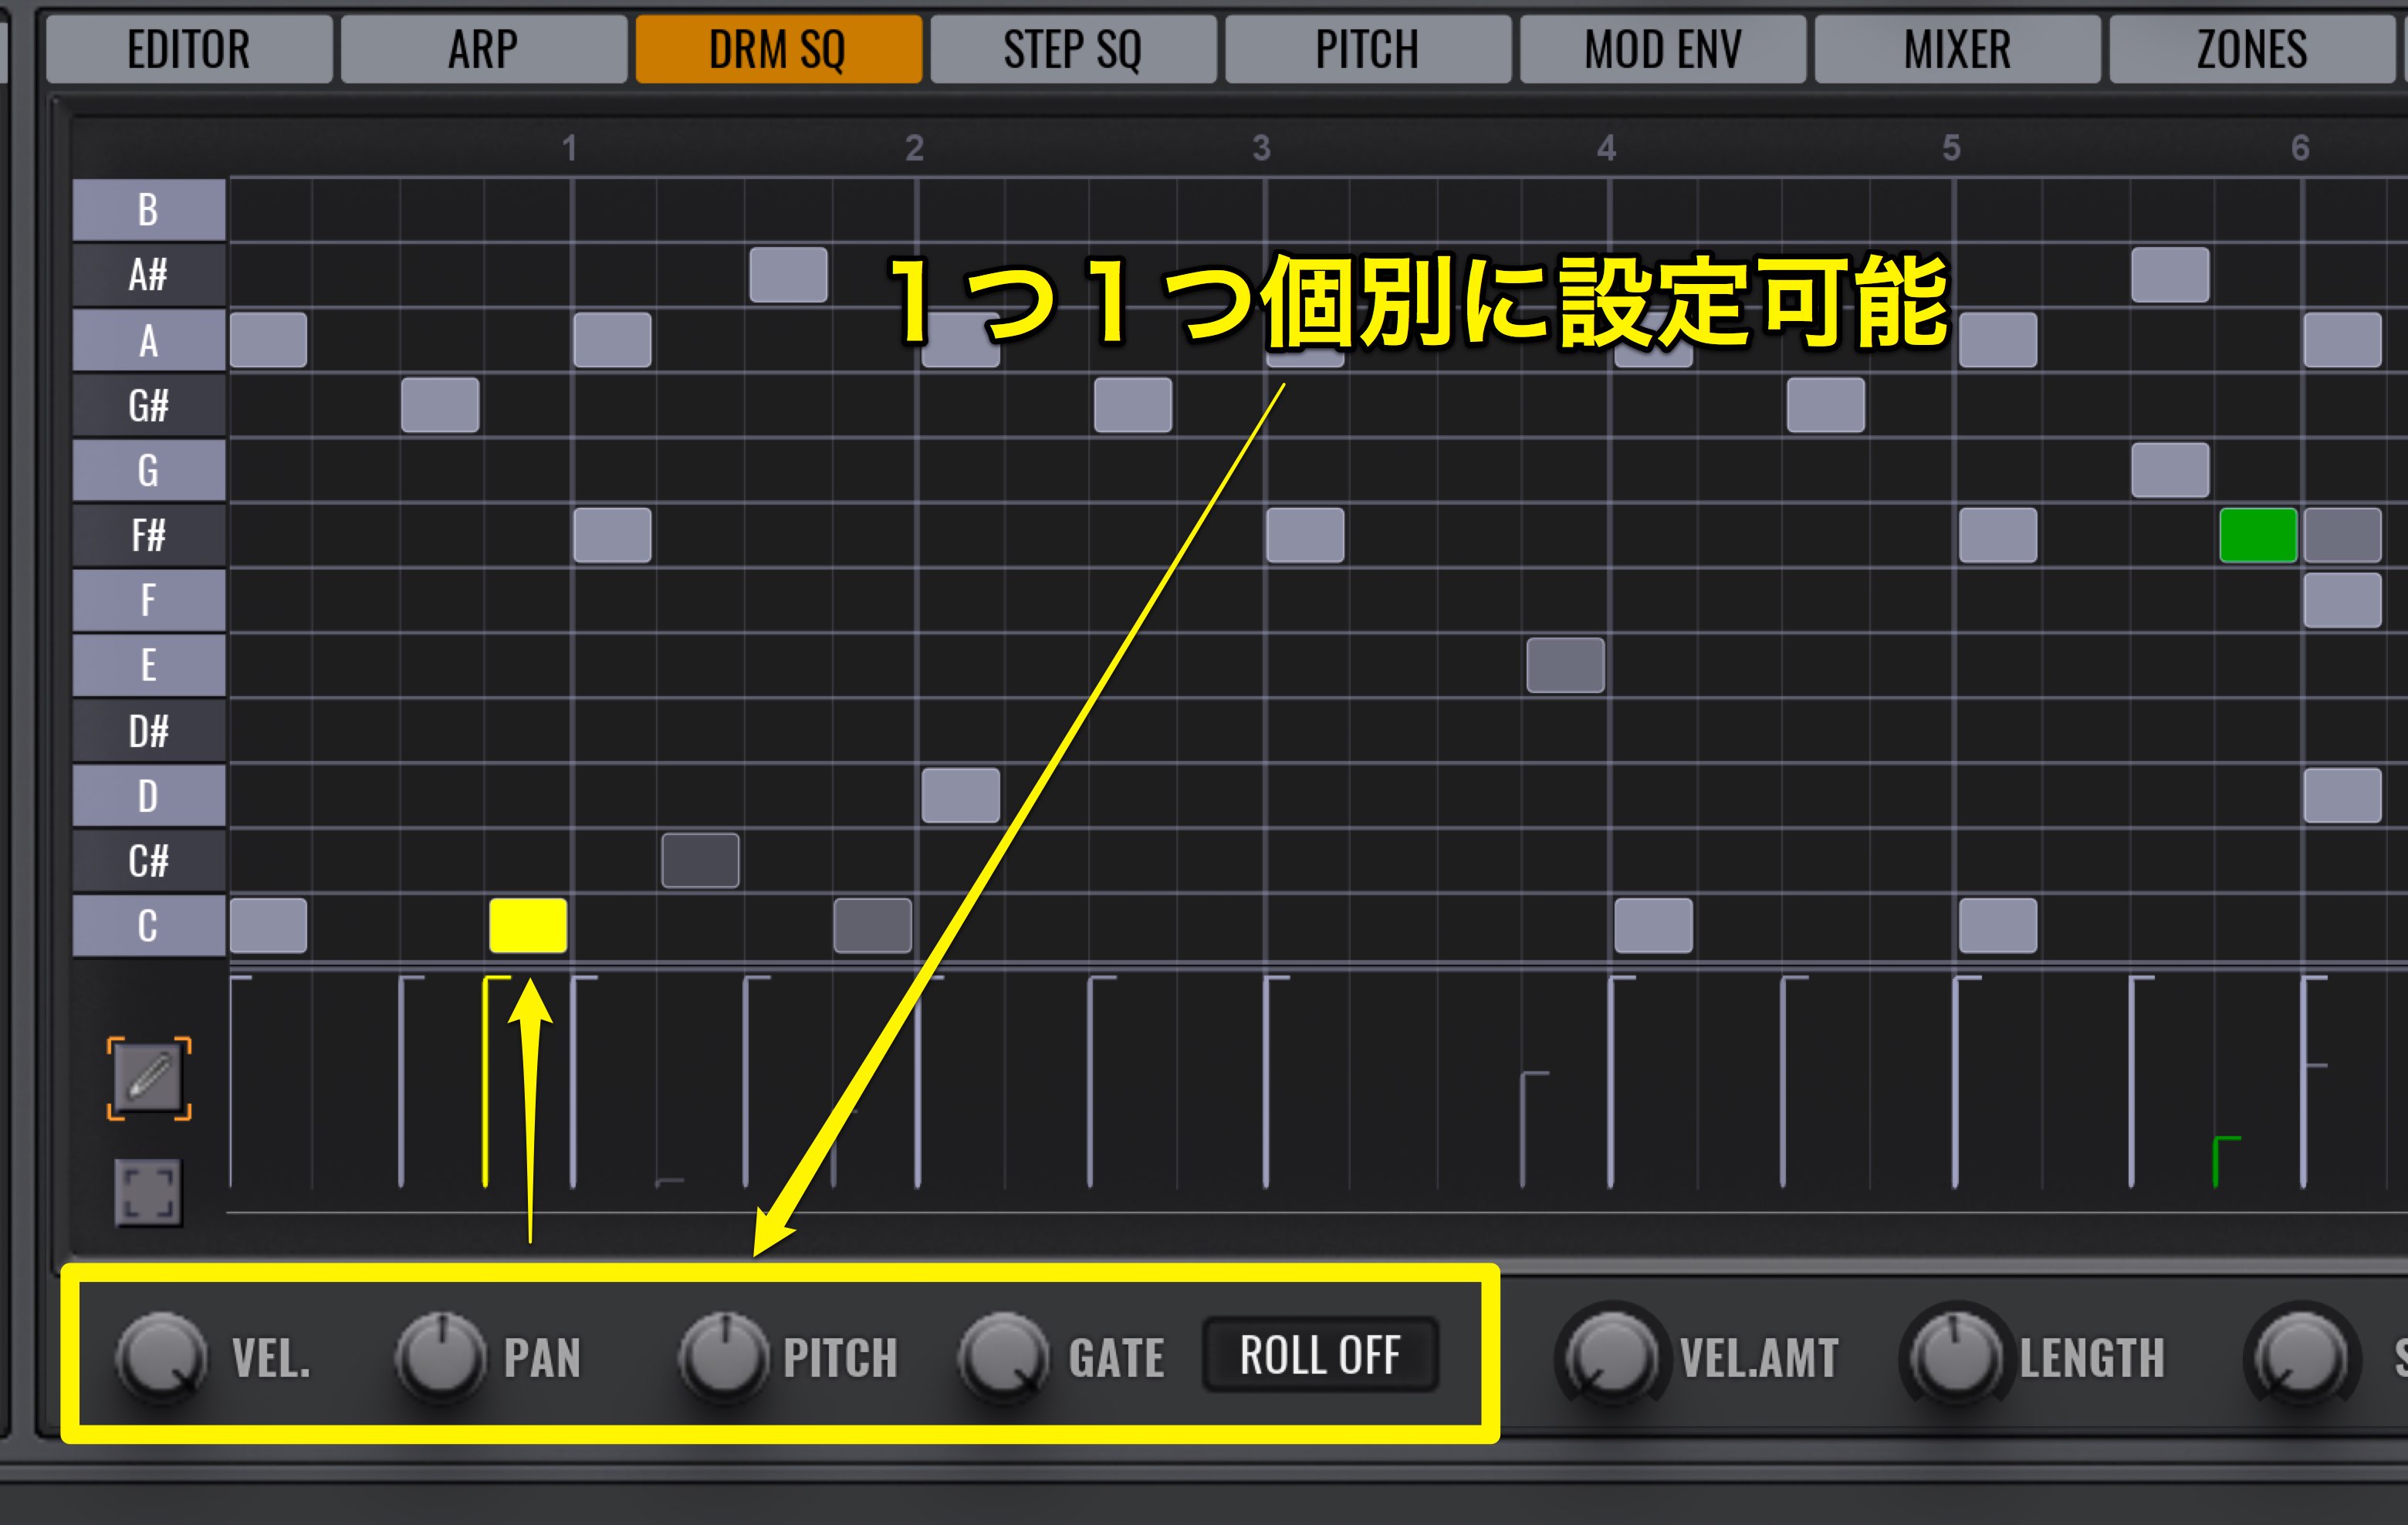
The 4 parameters on the bottom left and Roll can be adjusted to each individual note.
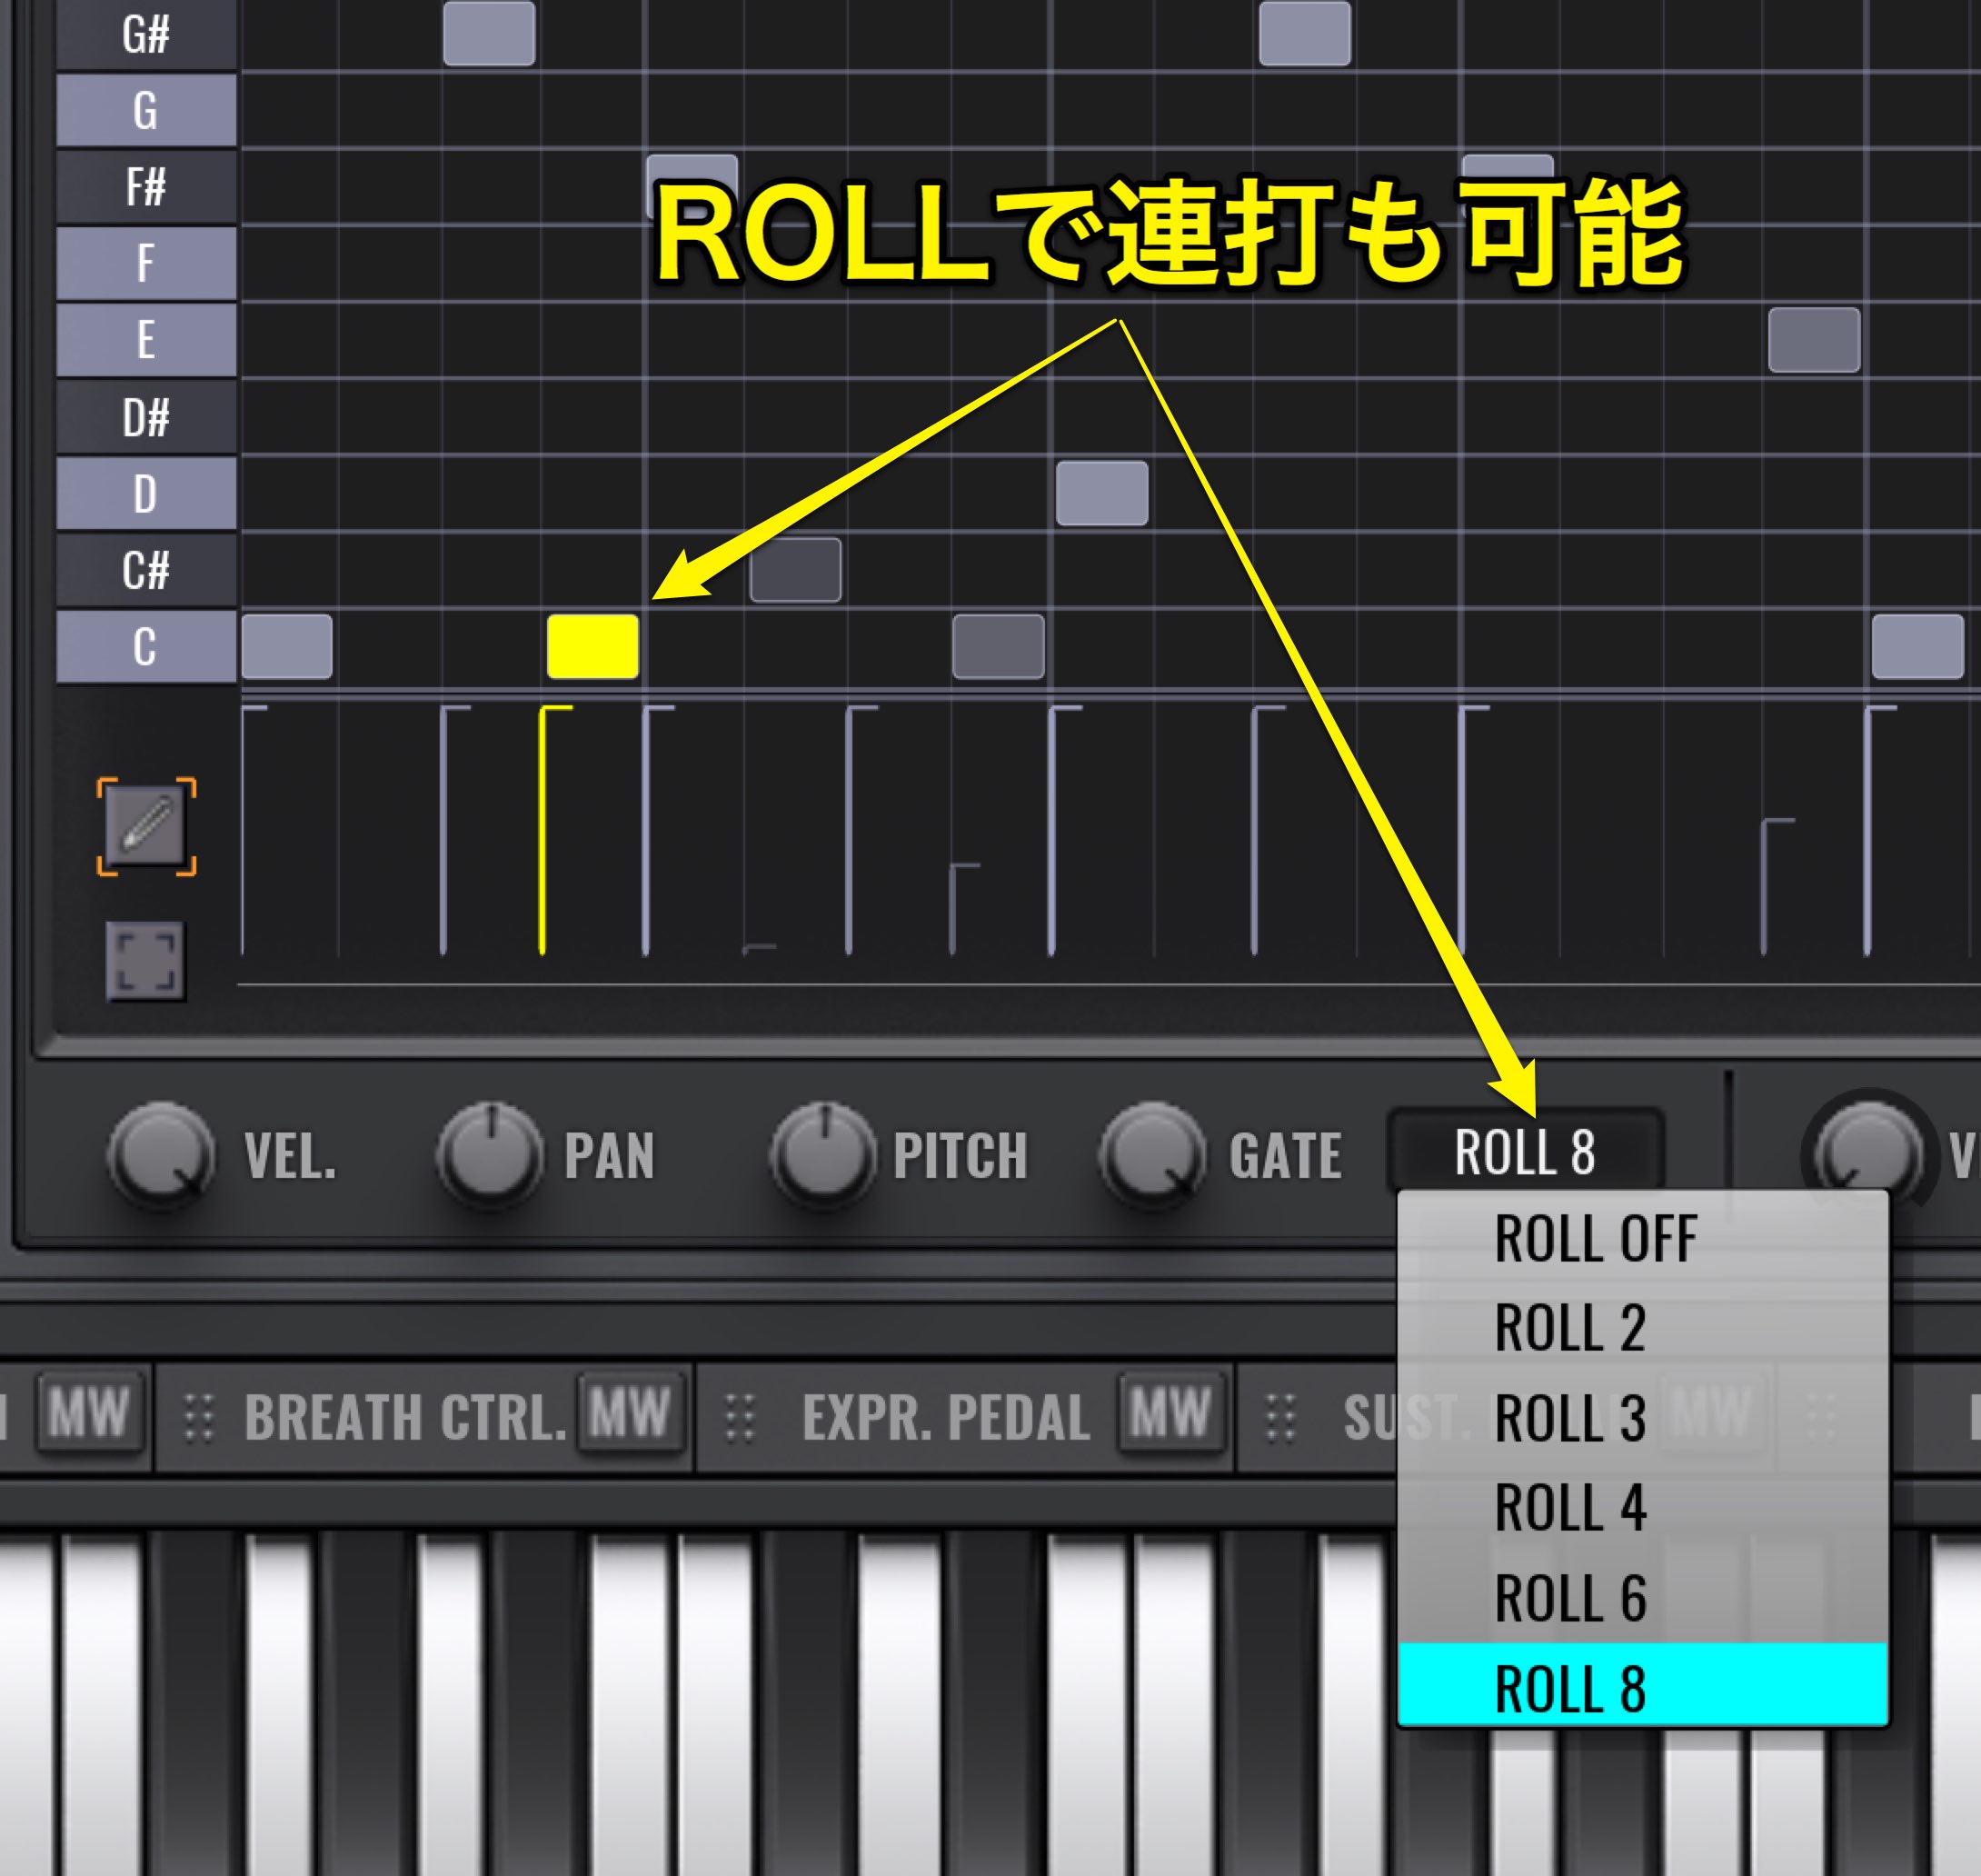
You can easily add flam/rolls with the Roll function.
You can even edit the number of rolls, and make small edits to the the nuances you want.
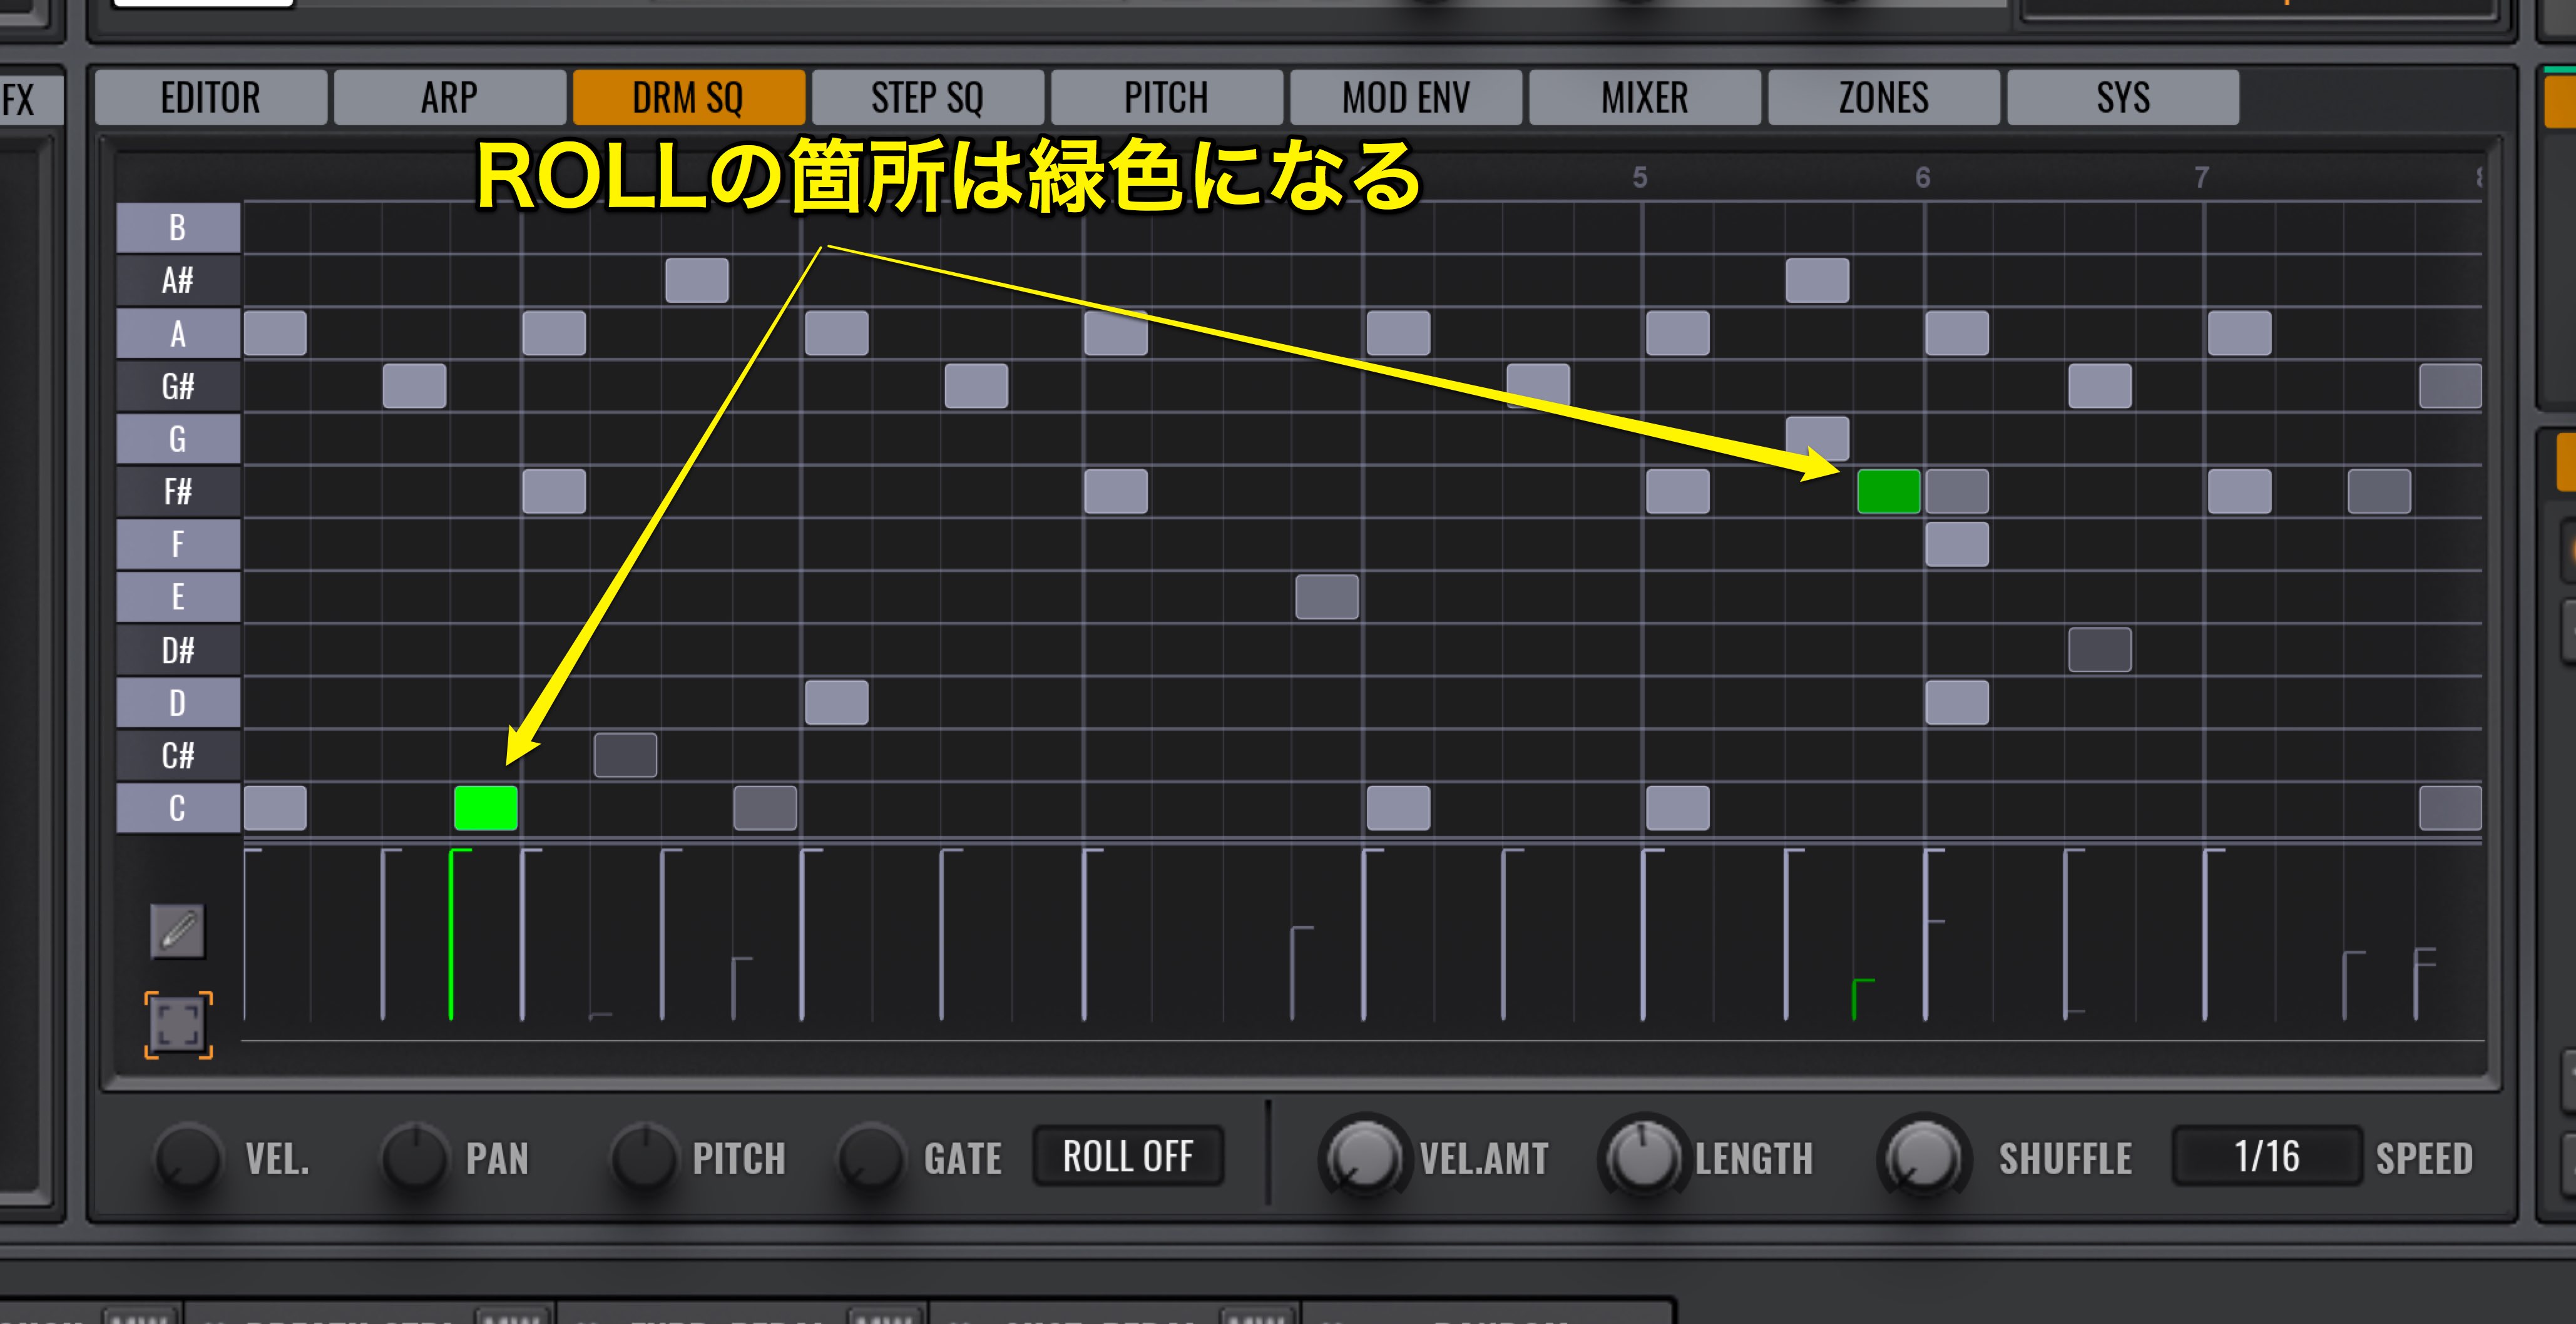
When the Roll function is on, the note will be shown green.
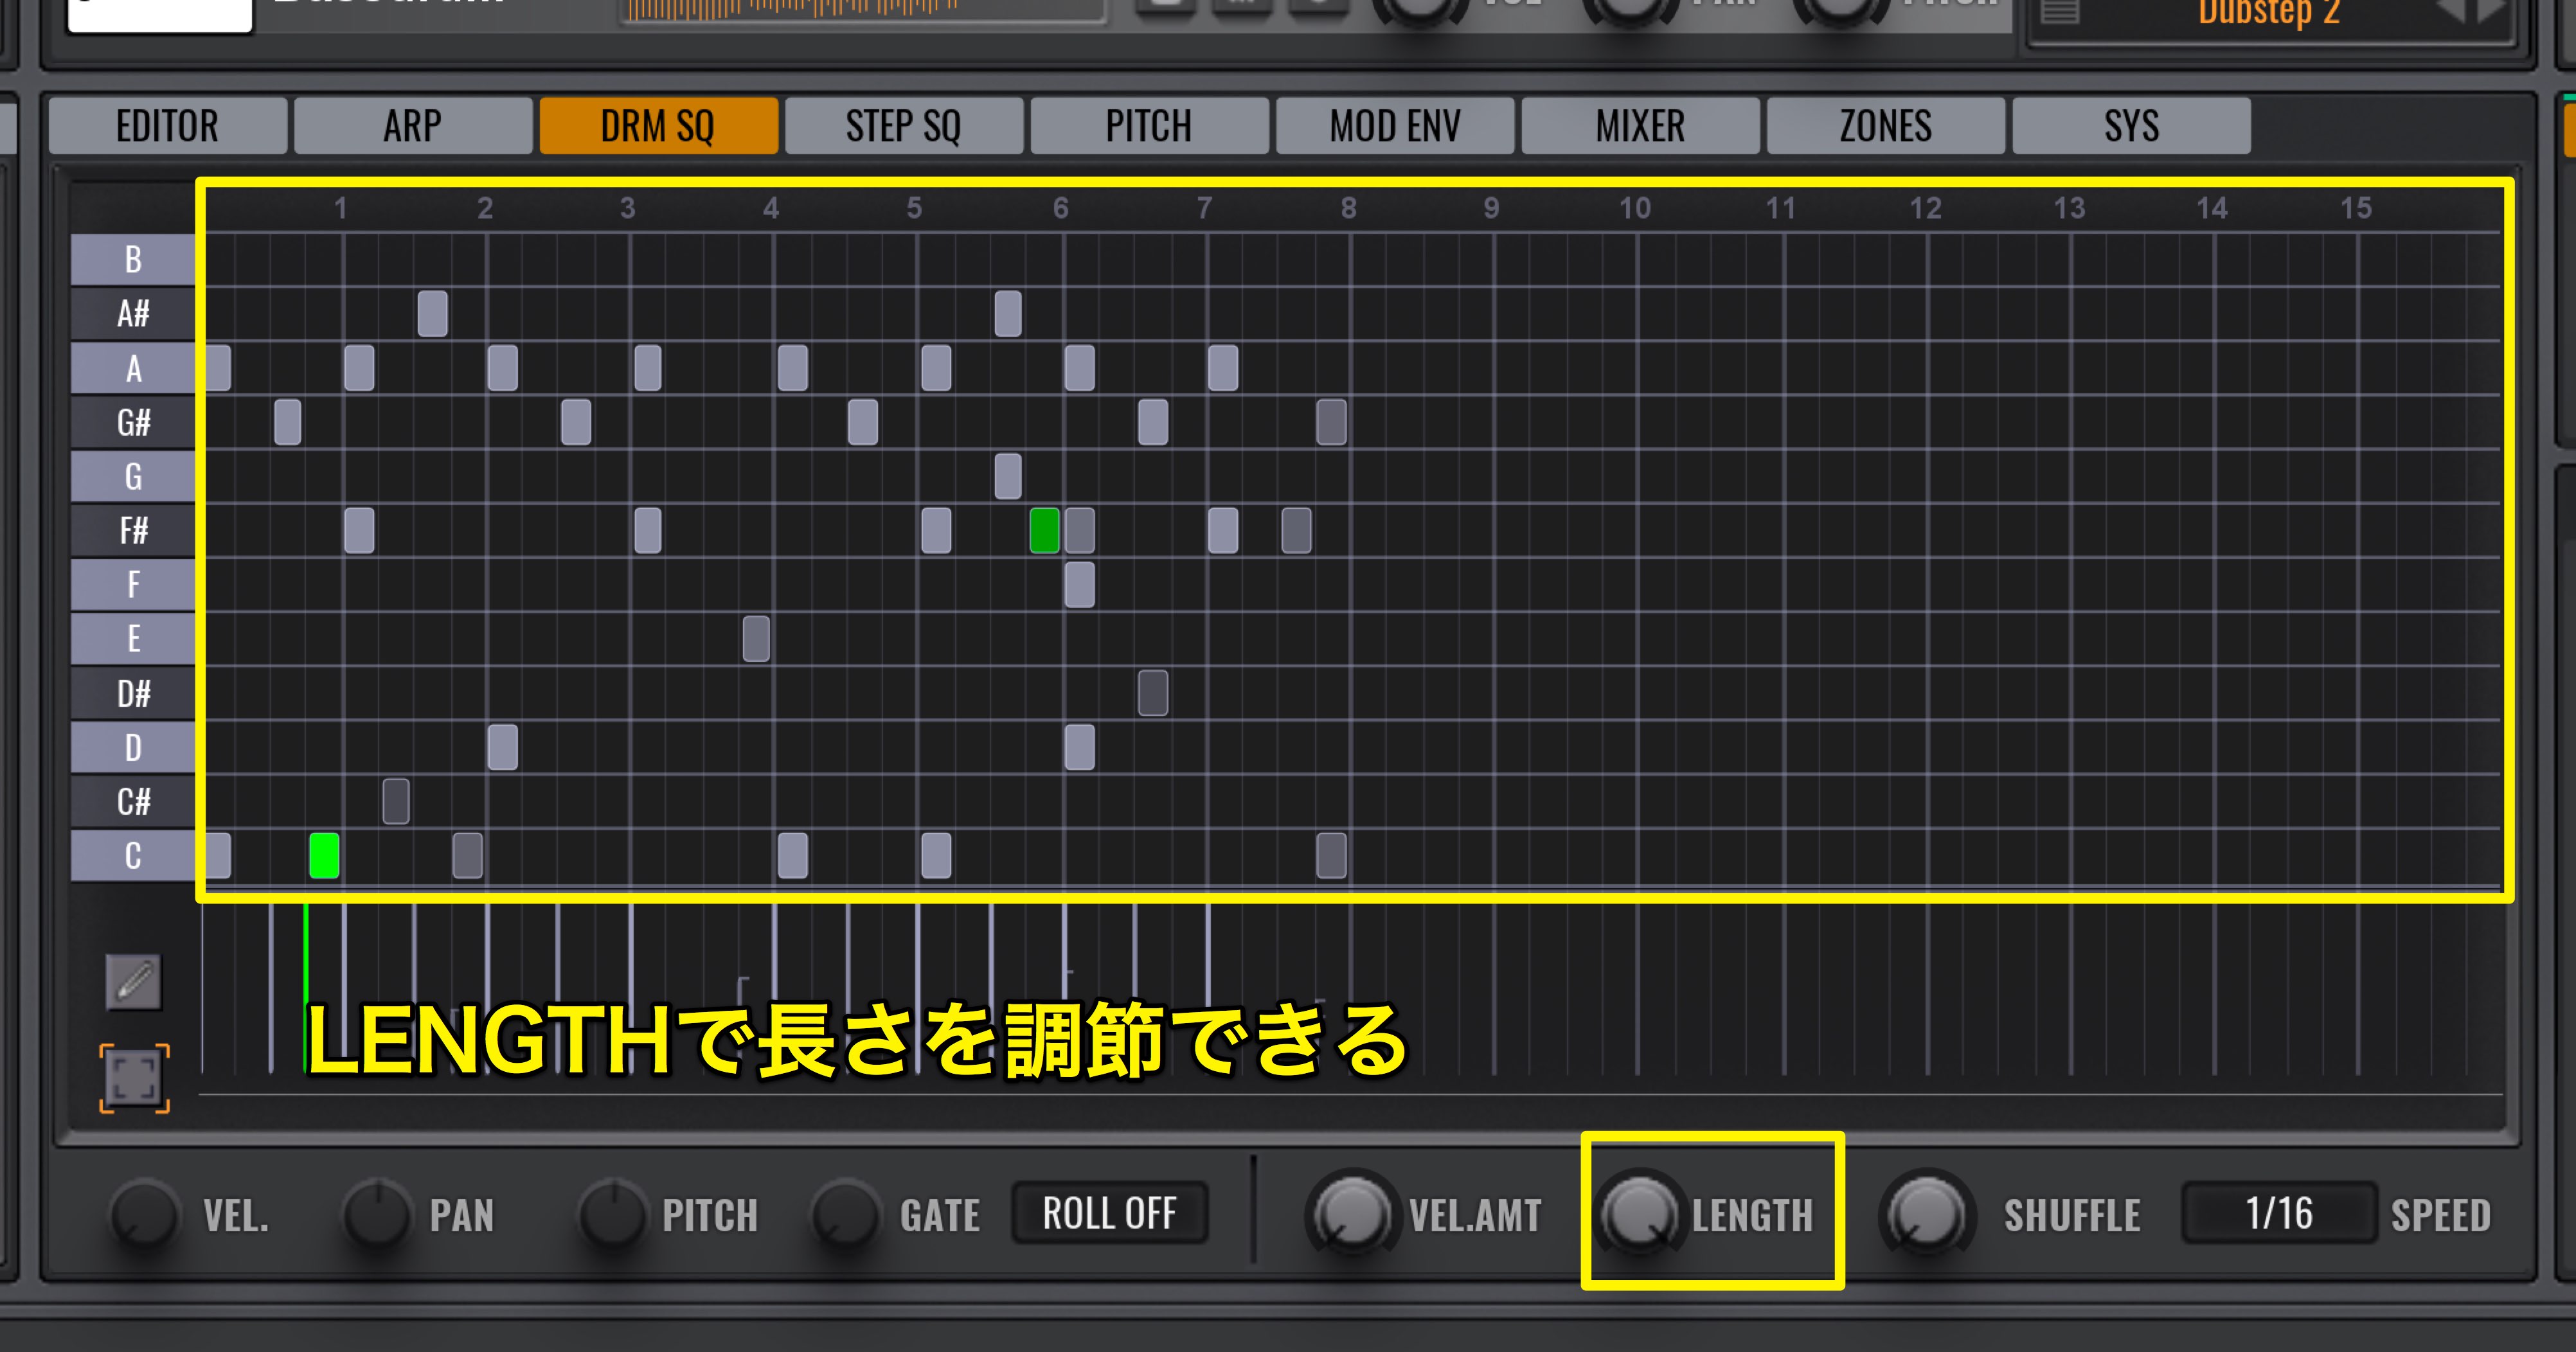
We have a 2 bar pattern shown, but you can also edit the number of bars.
This can be done with the Length function below.
You may also want to copy the pattern you created.
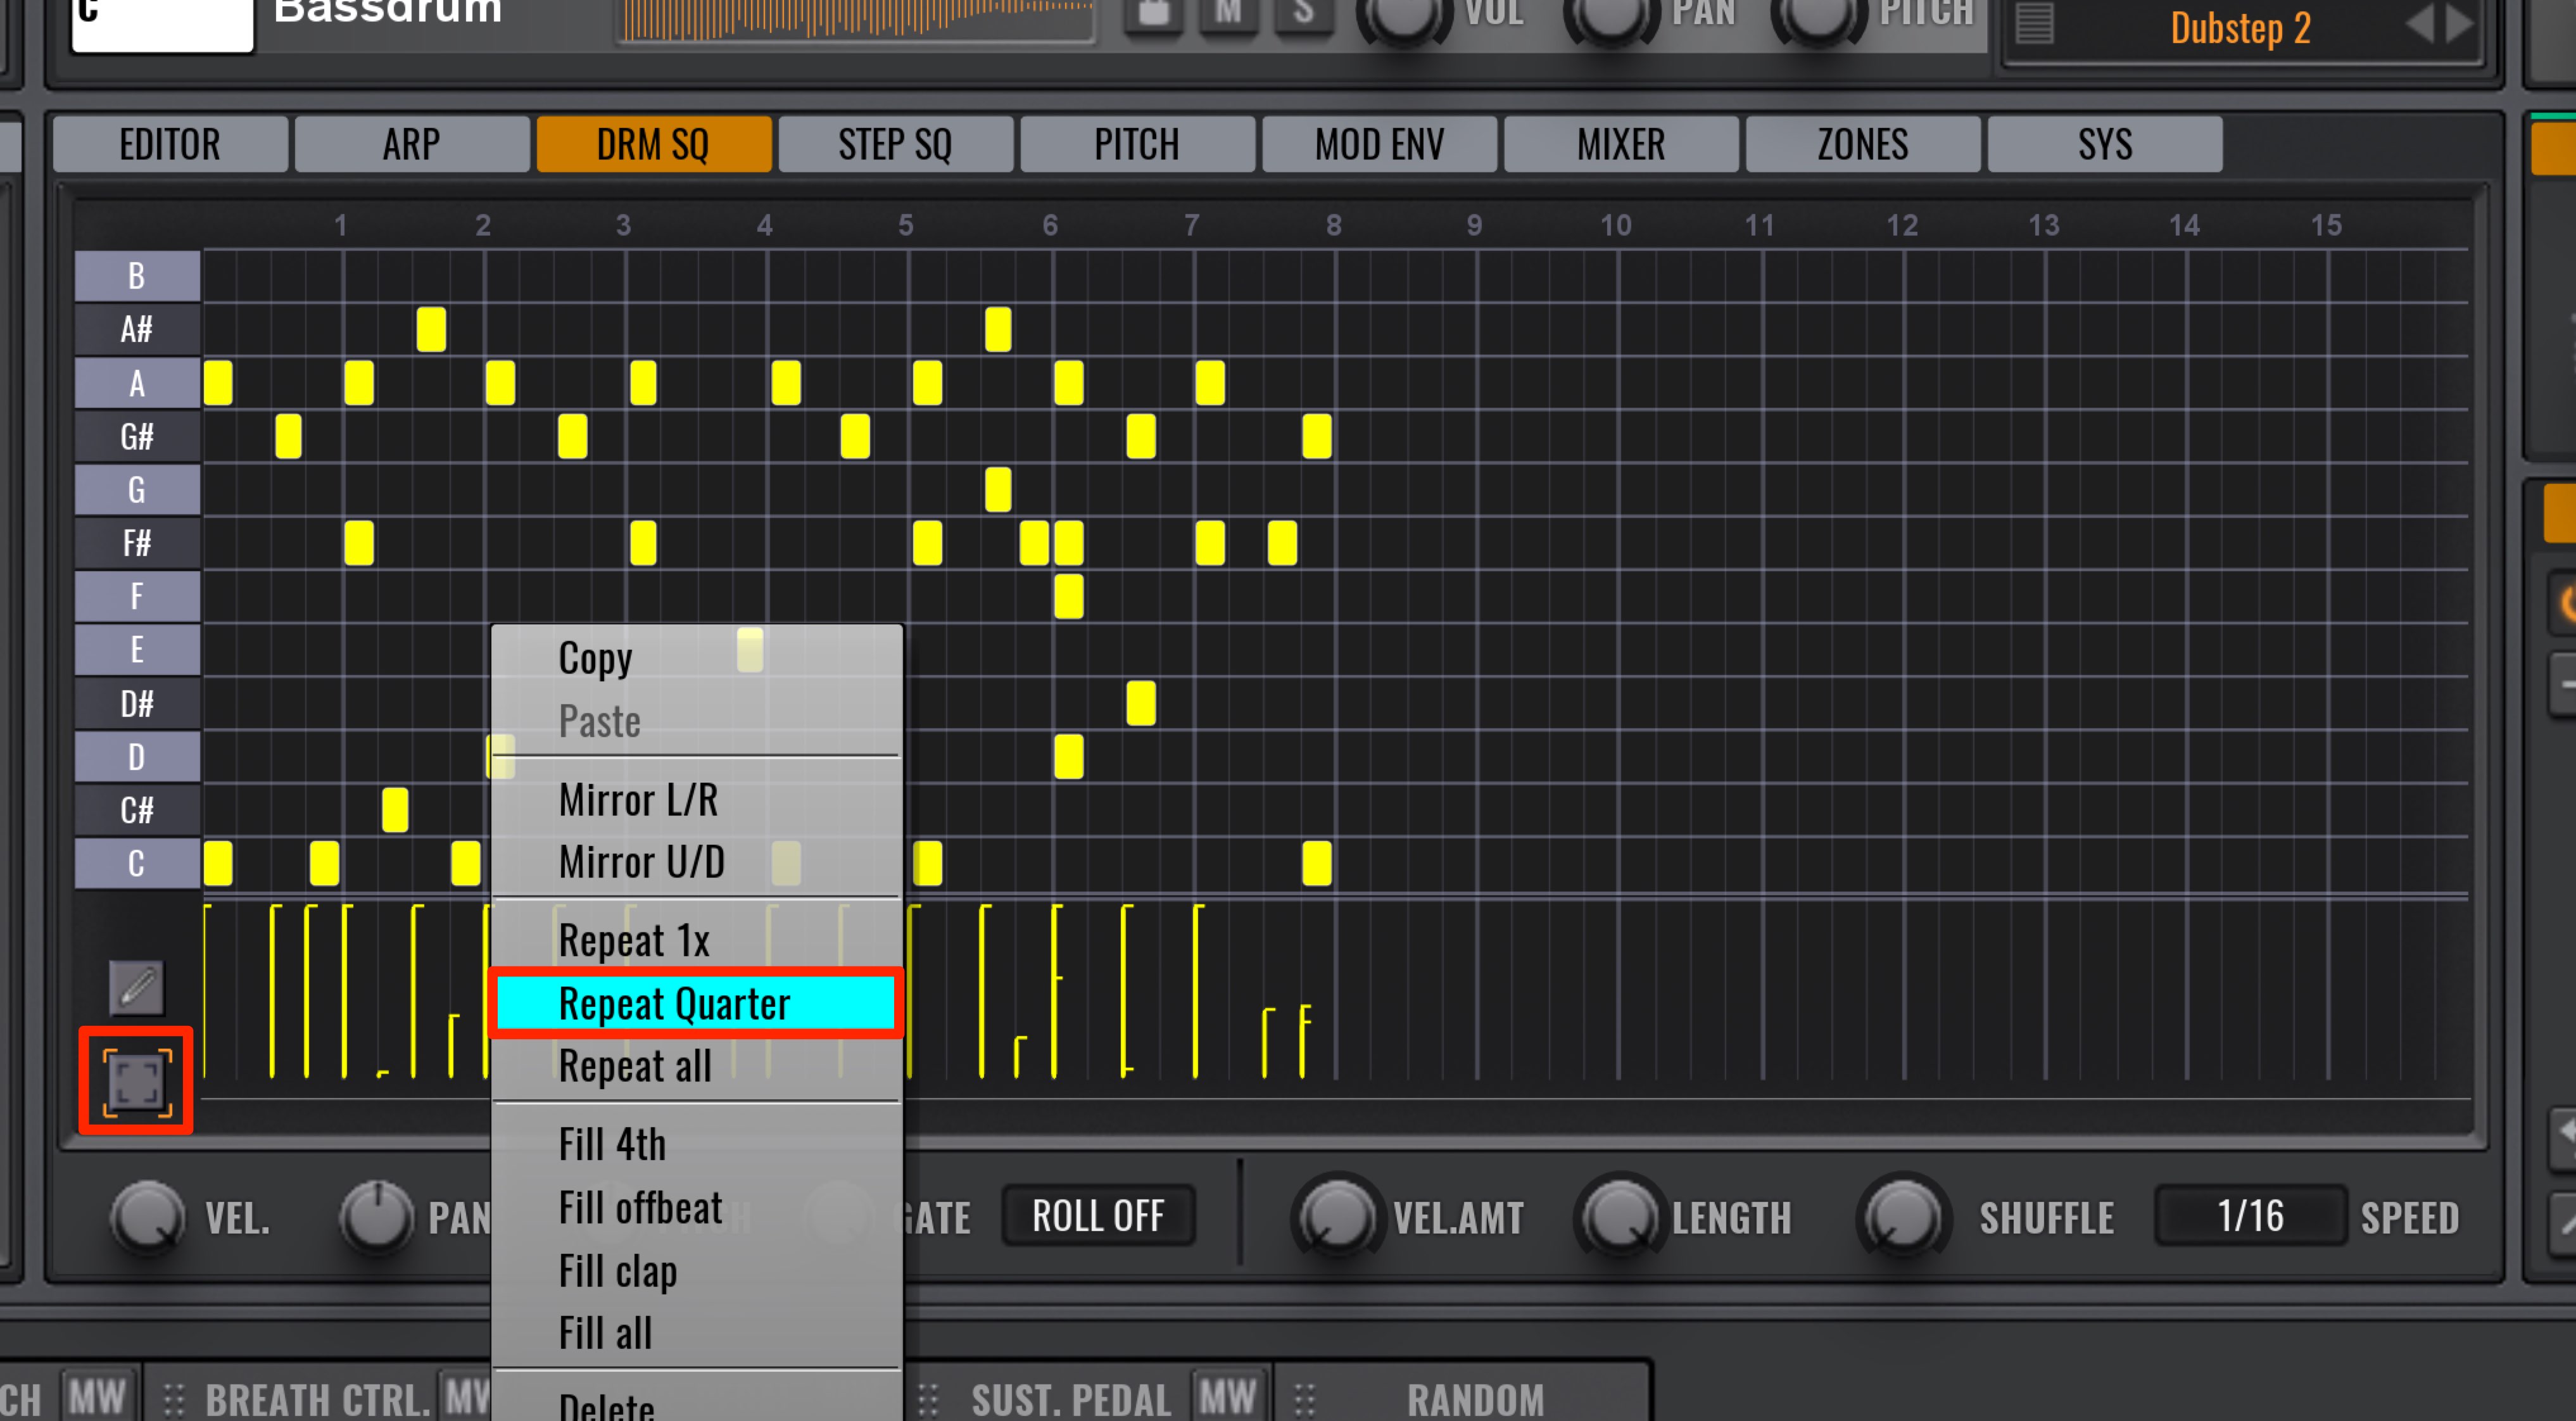
Click on the box underneath the pen tool, and drag and select the area you want to copy.
Right click anywhere and select “Repeat Quarter.”
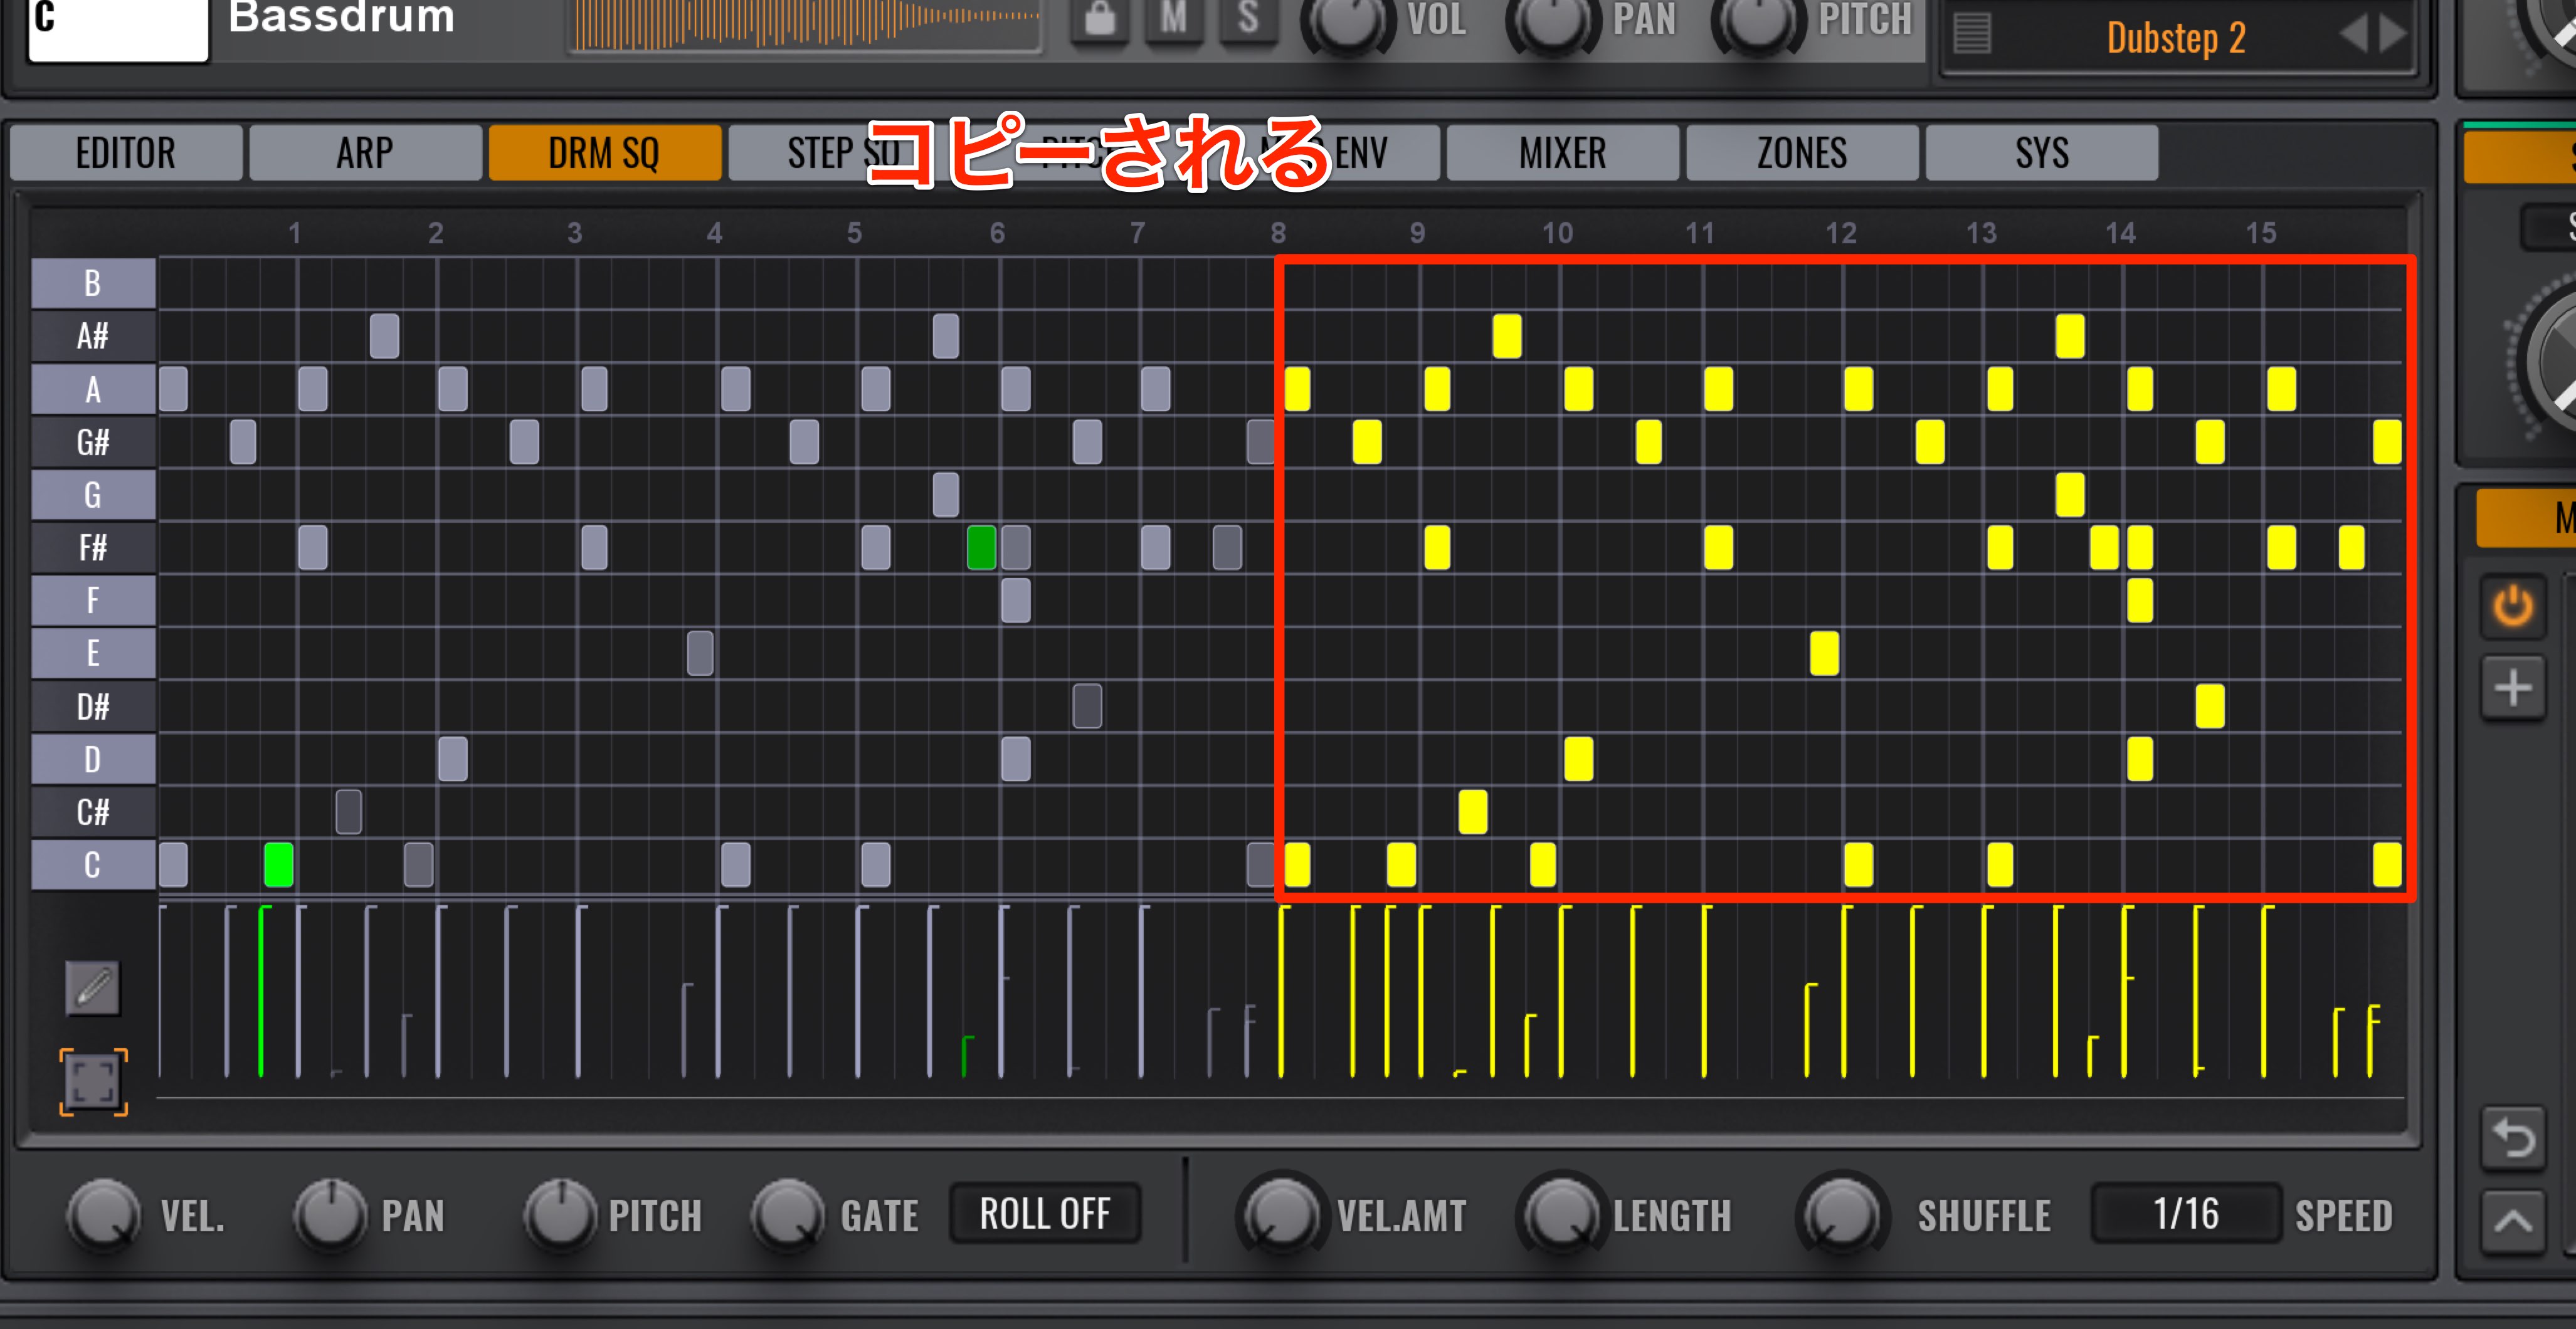
By doing so you can easily duplicate a phrase.
Please keep in mind that there are 3 types of copying.
For Repeat 1 ×
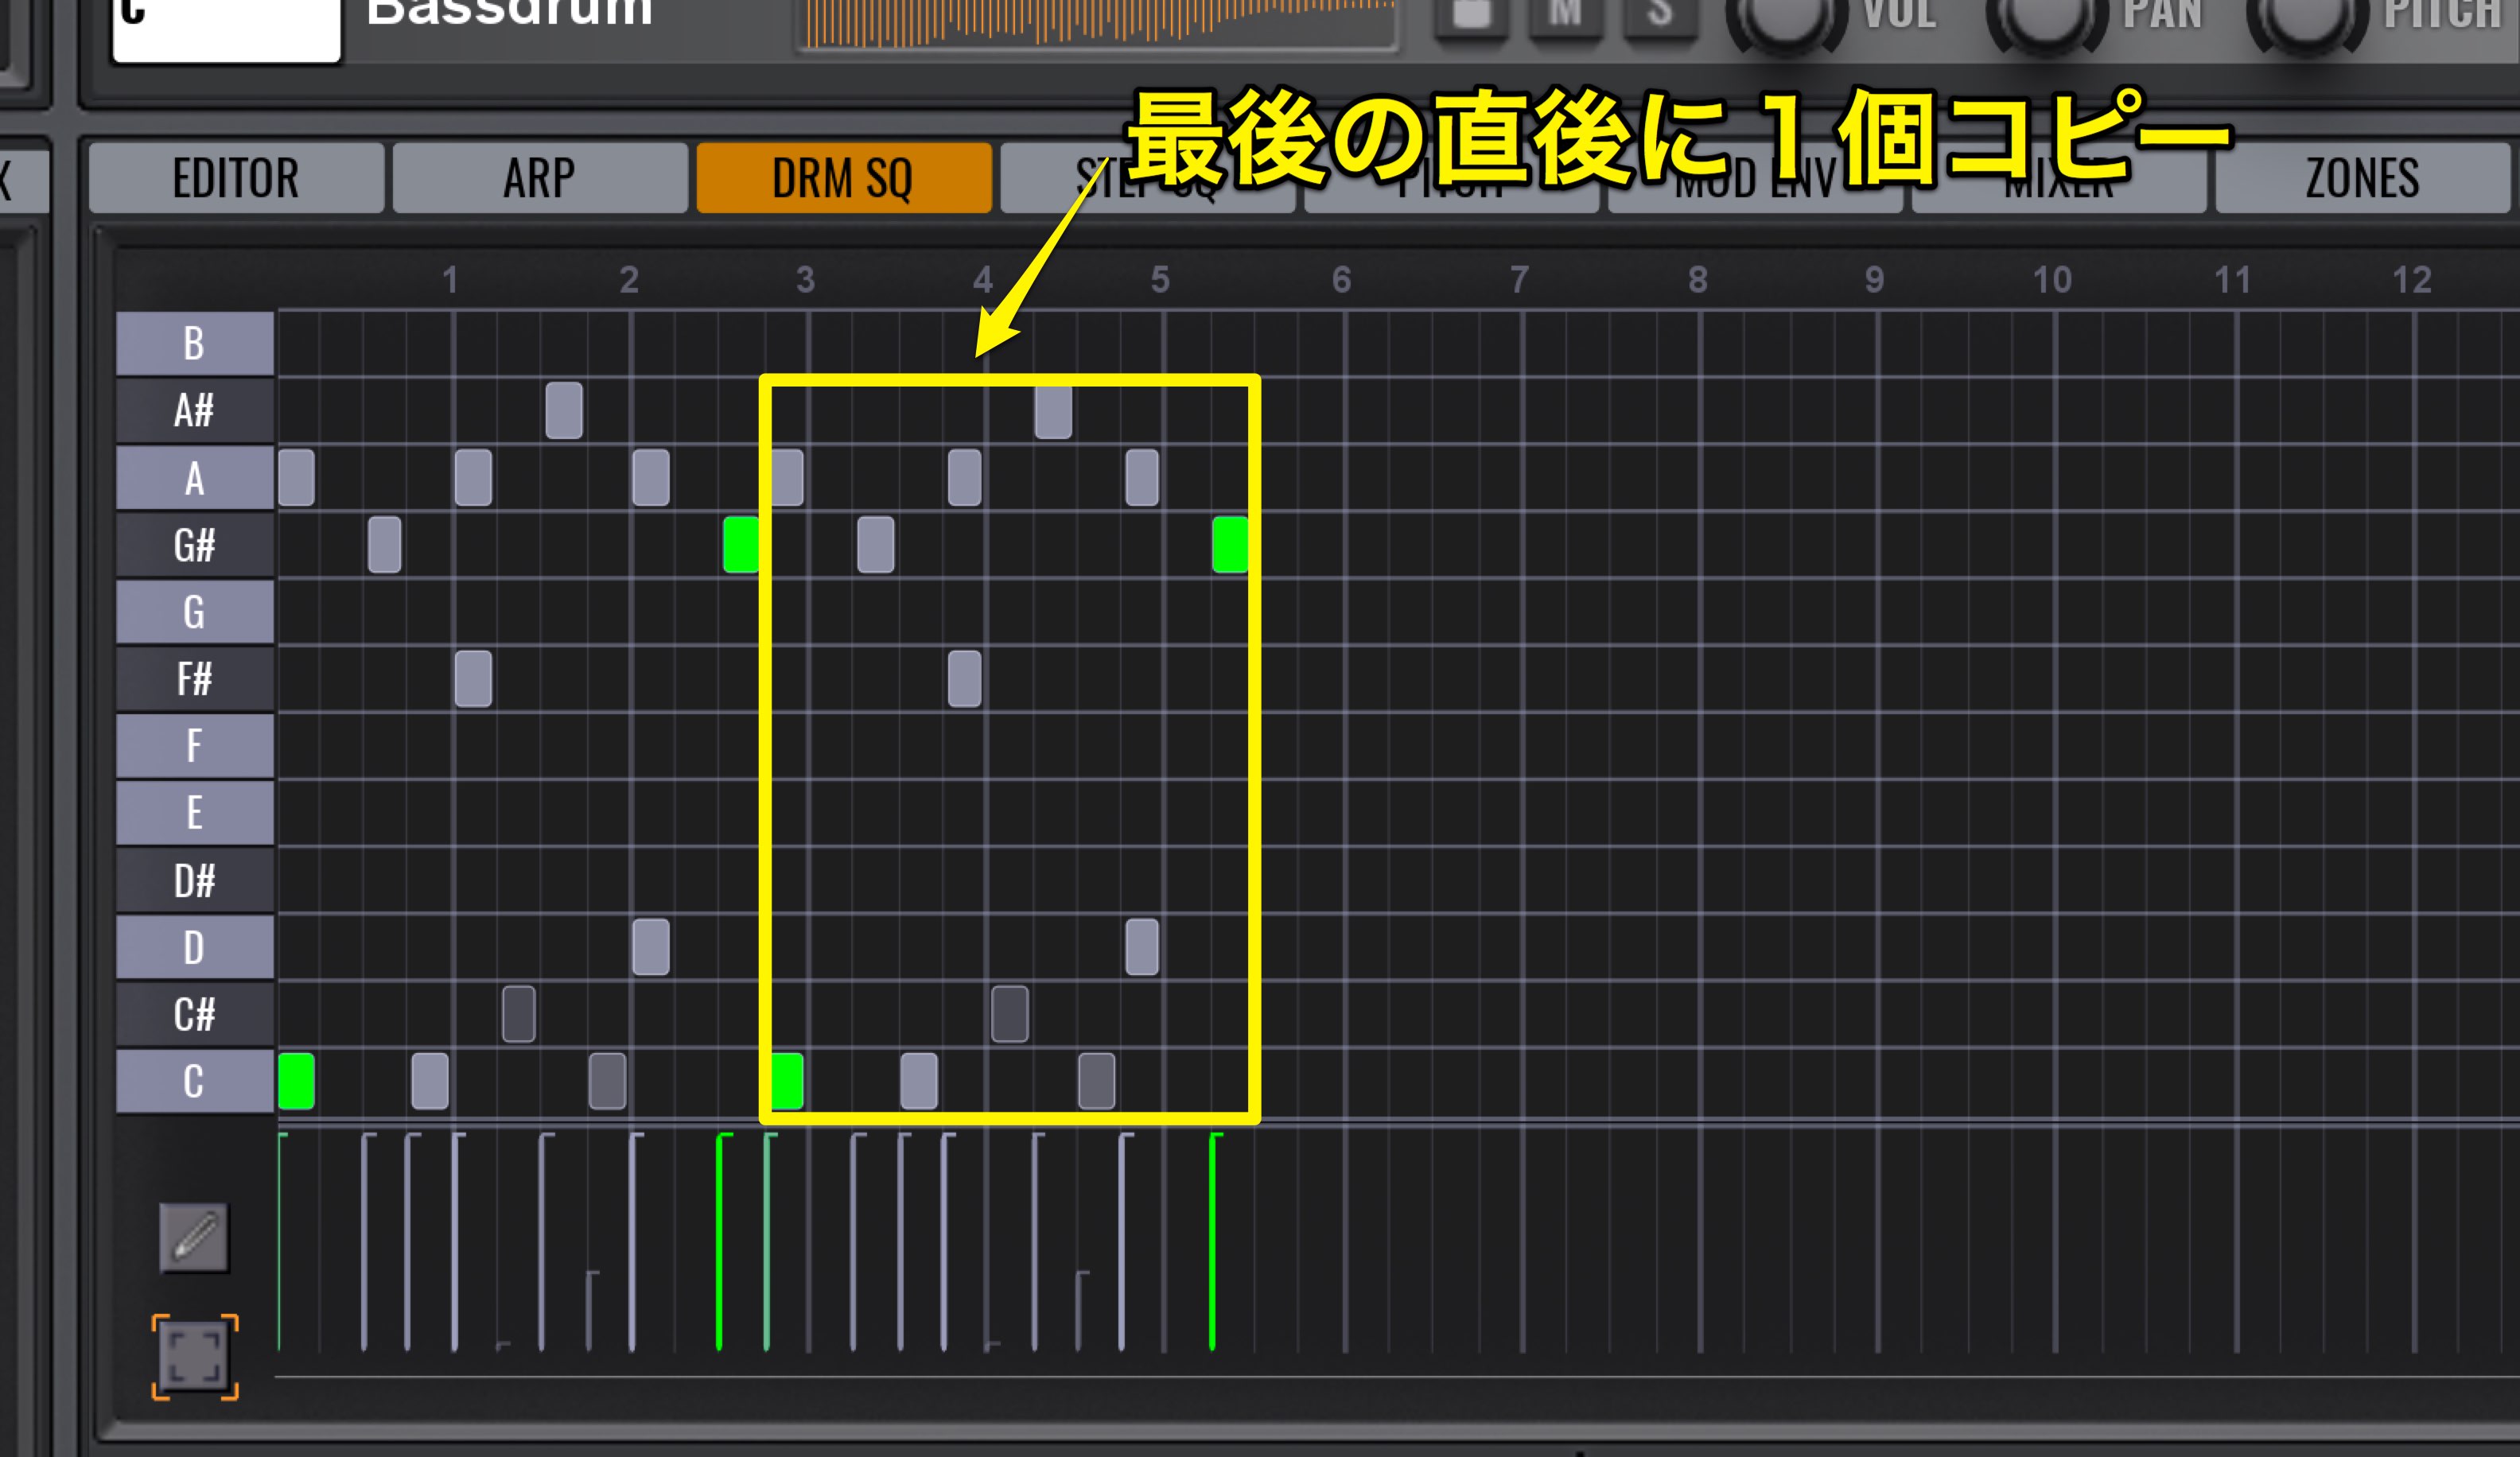
The selected area will be repeated once right after the last note of a phrase.
For Repeat All
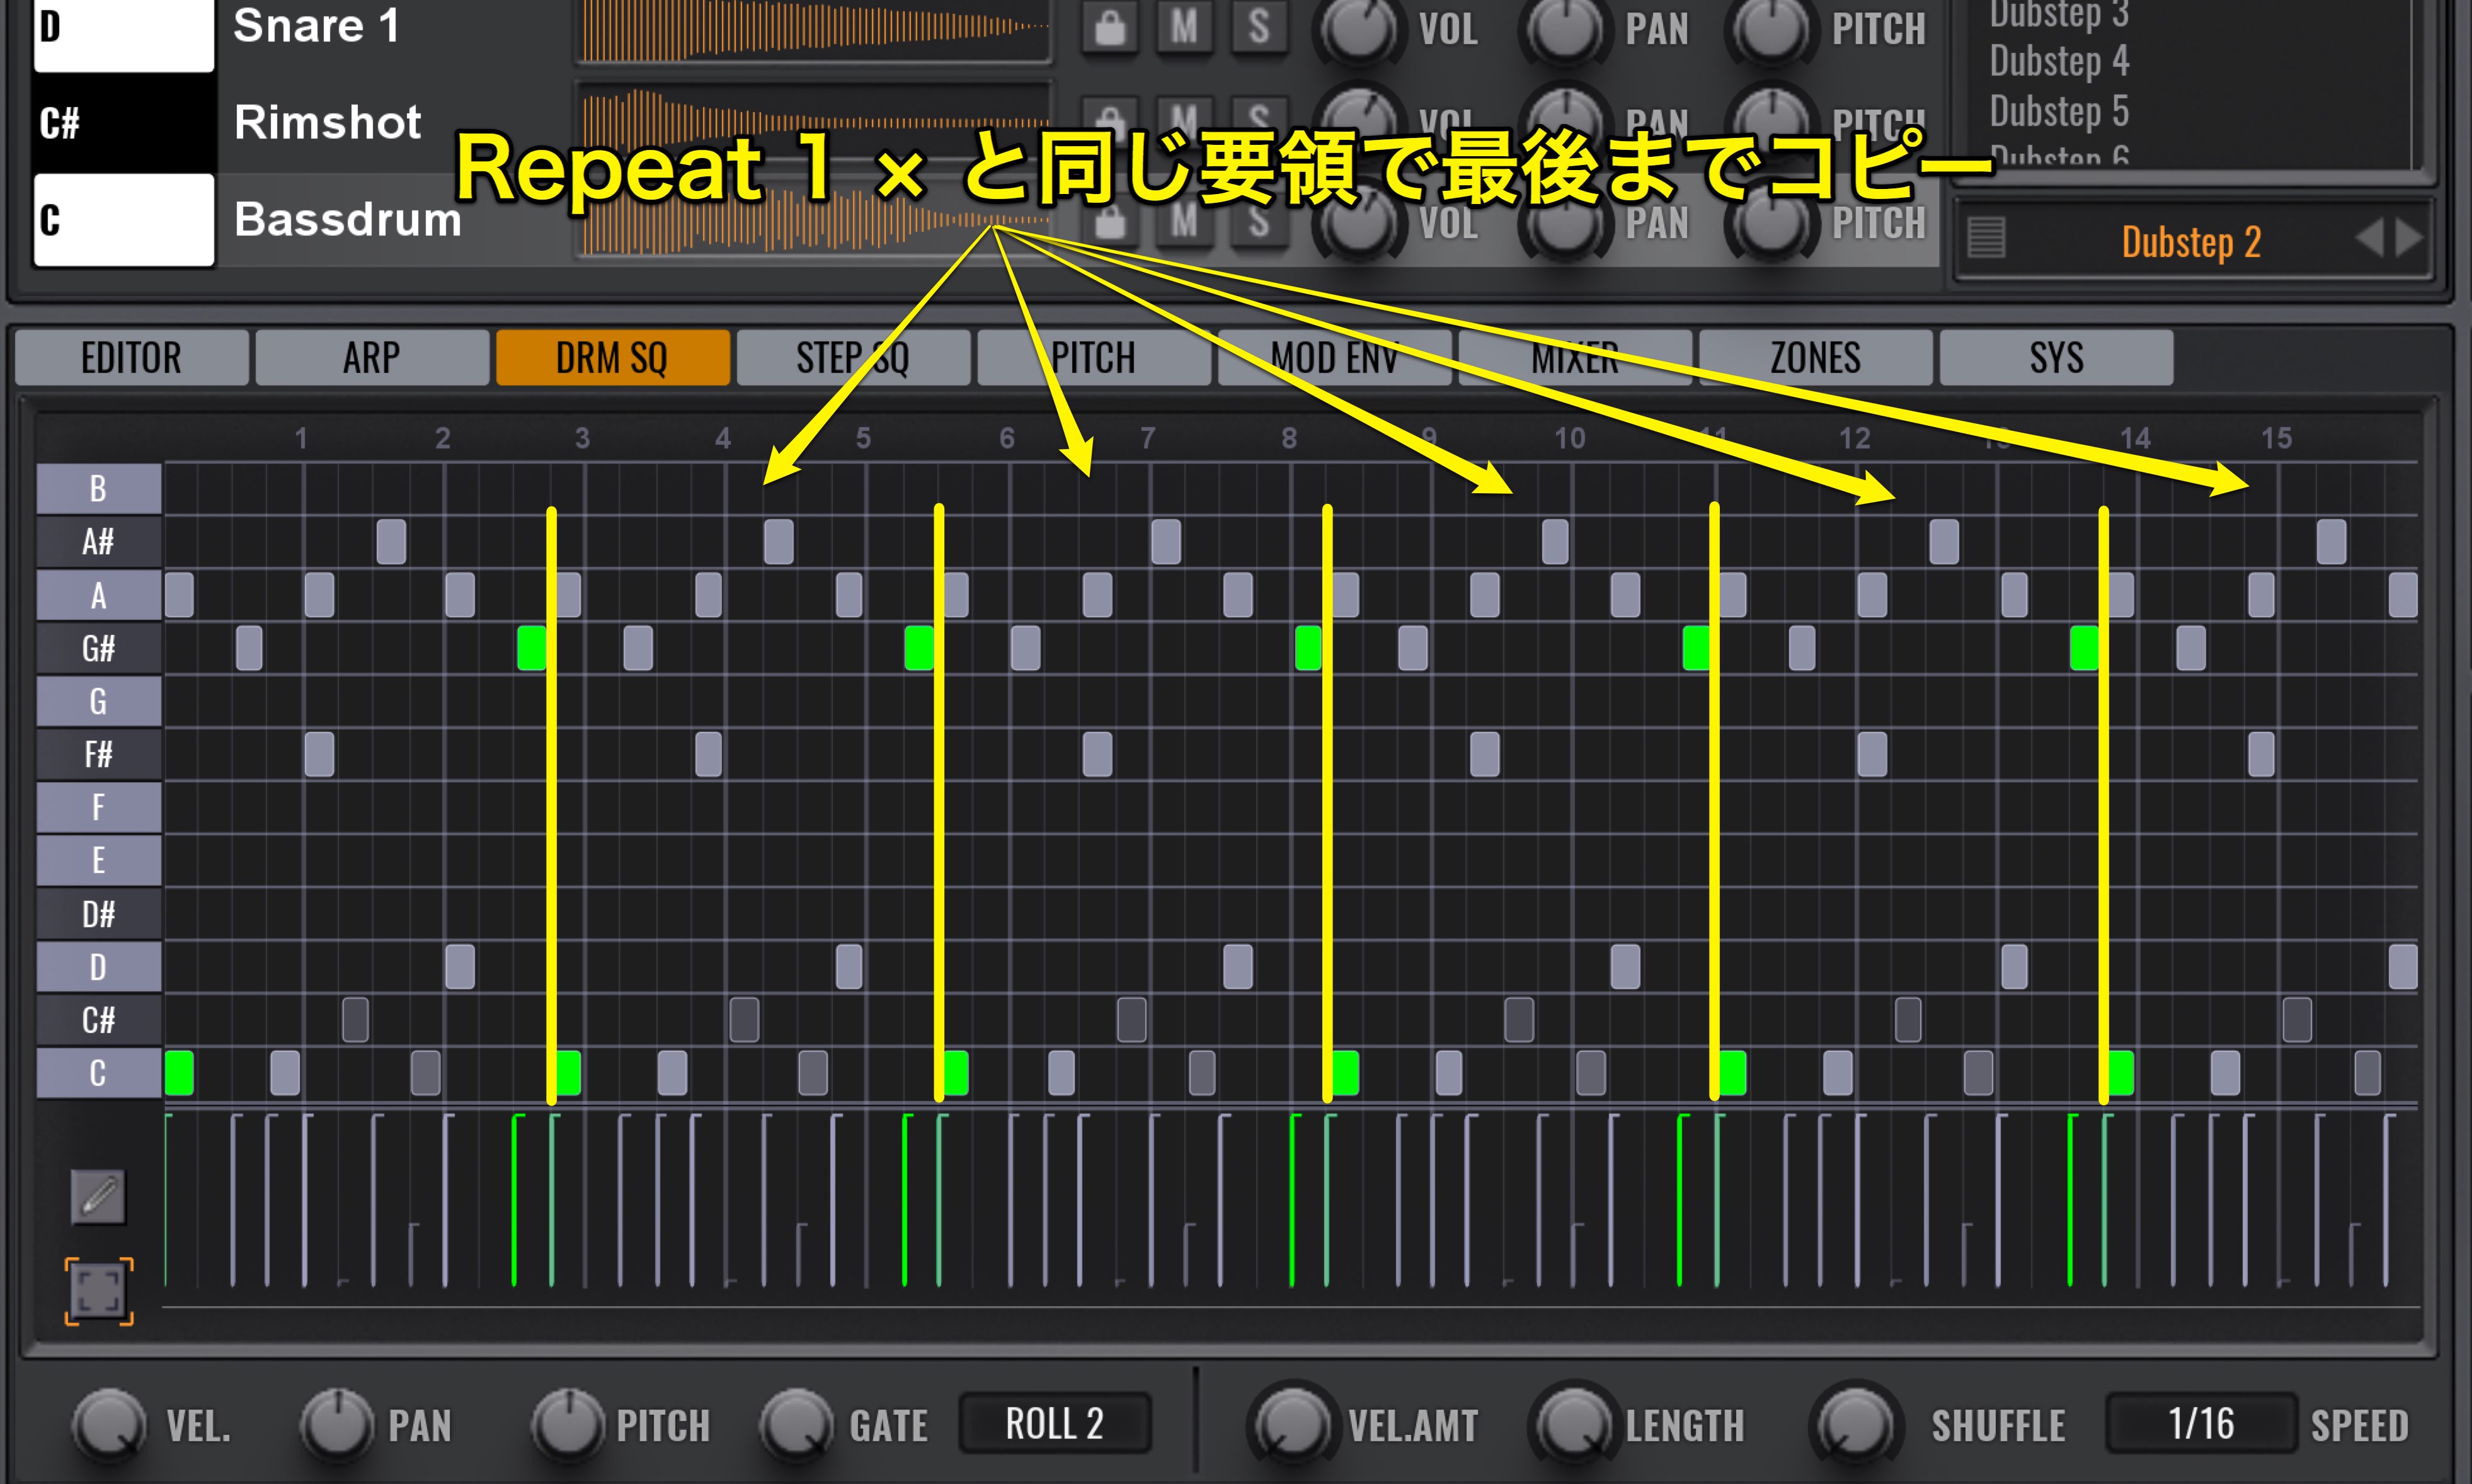
It functions in the same way as Repeat 1 x, but fills the entire length.
For Repeat Quarter
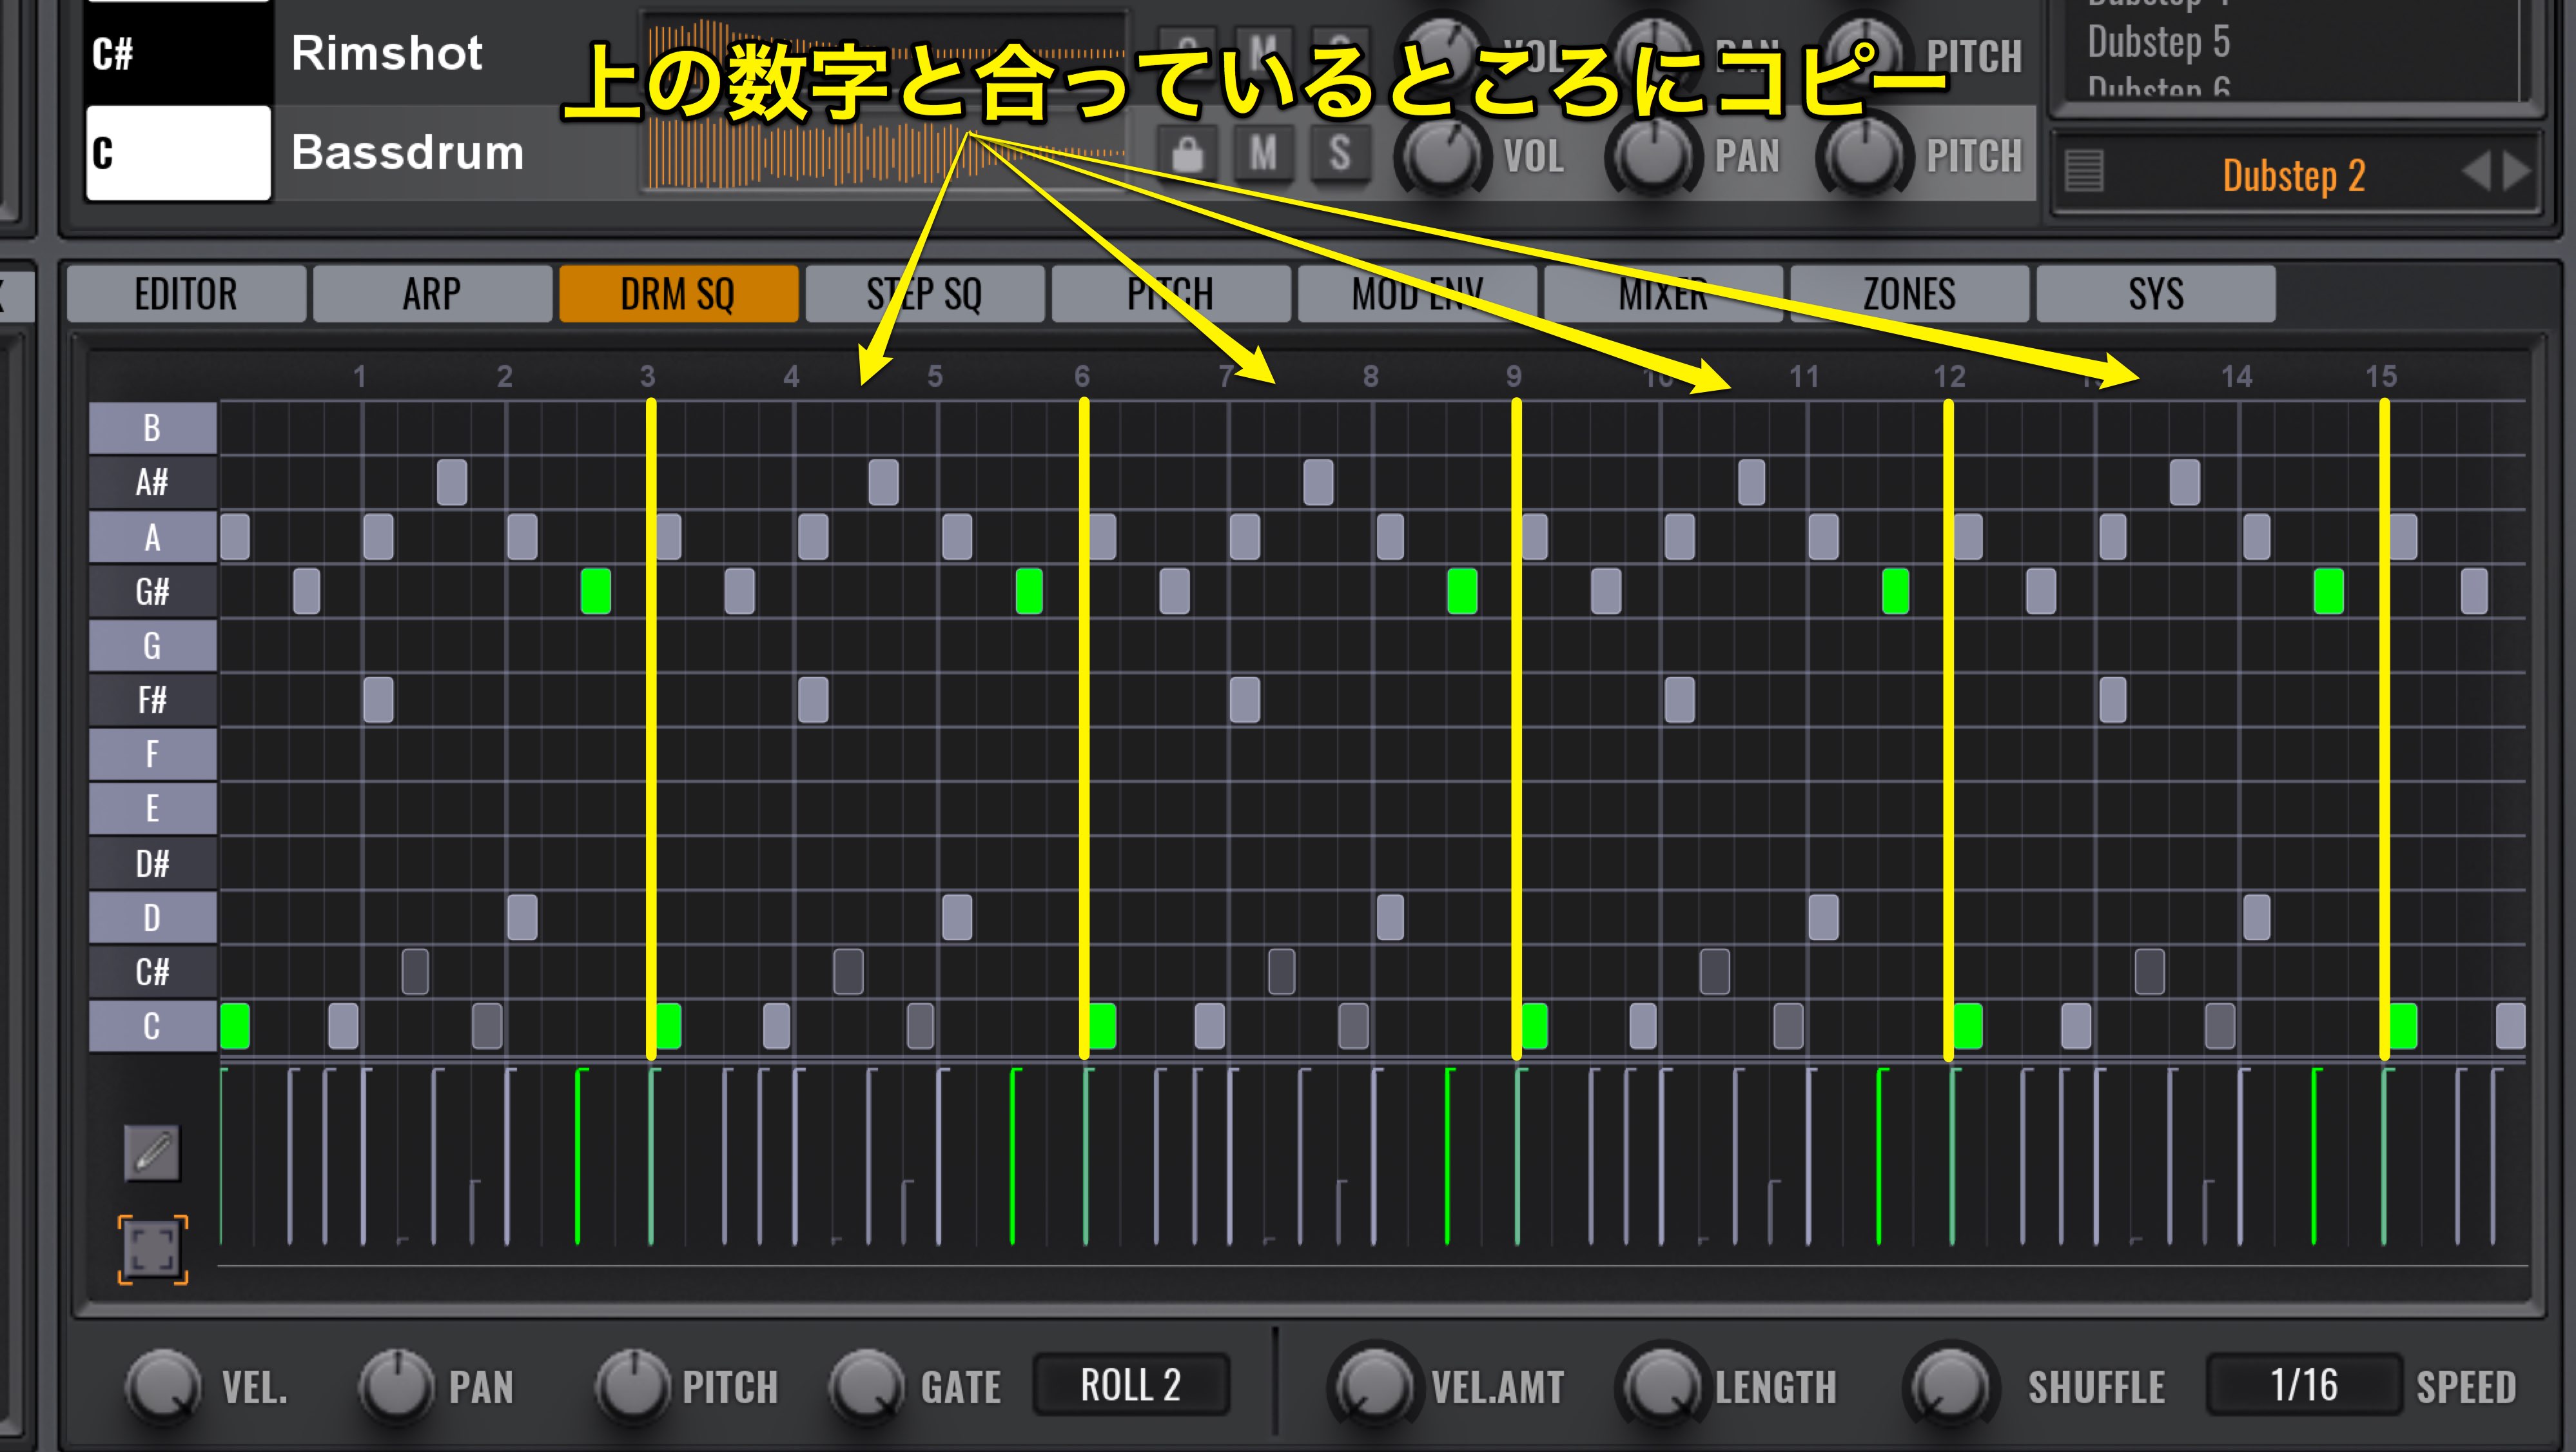
The phrase will be copied and repeat according to bar/subdivision length.
Saving sounds/patterns
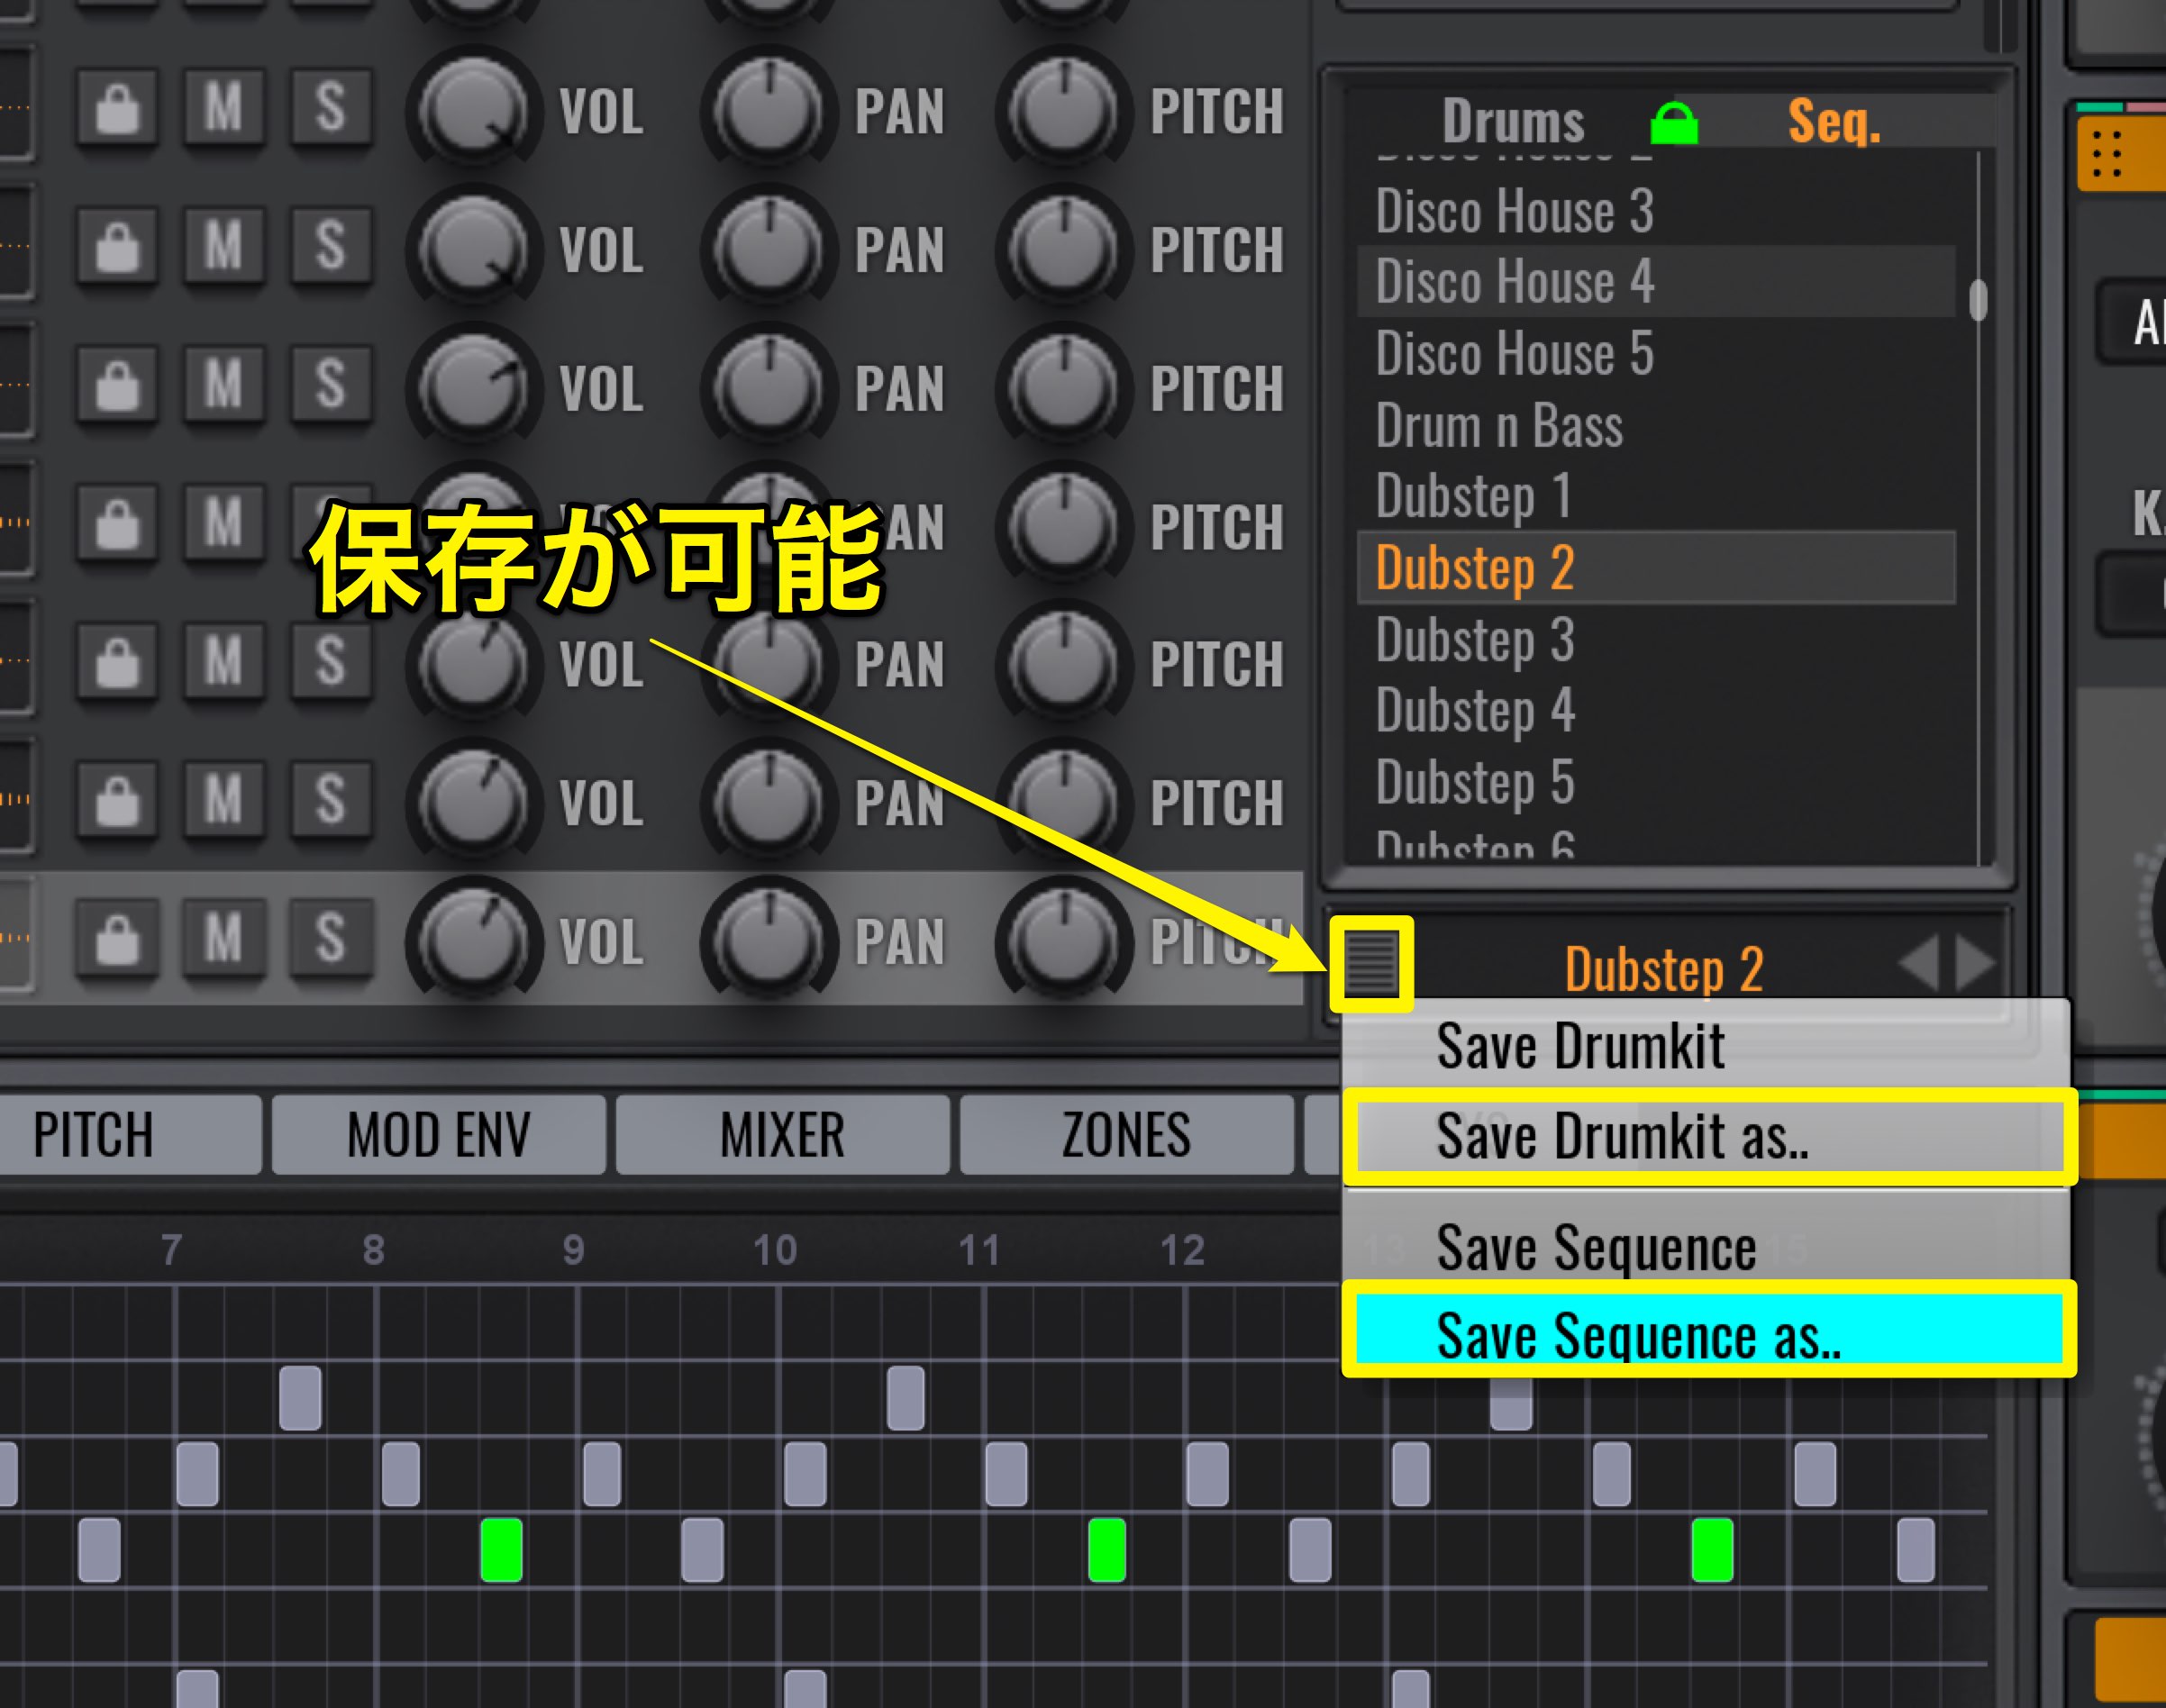
You can also save the drum sequences and sounds that you created.
“Save Drumkit as” for sounds, and “Save Sequence as” for drum pattern sequences.
Individual outputs for kits
You can use EQ and Compression on individual sounds on your own beats to polish your sounds.
This is done via individual outputs.
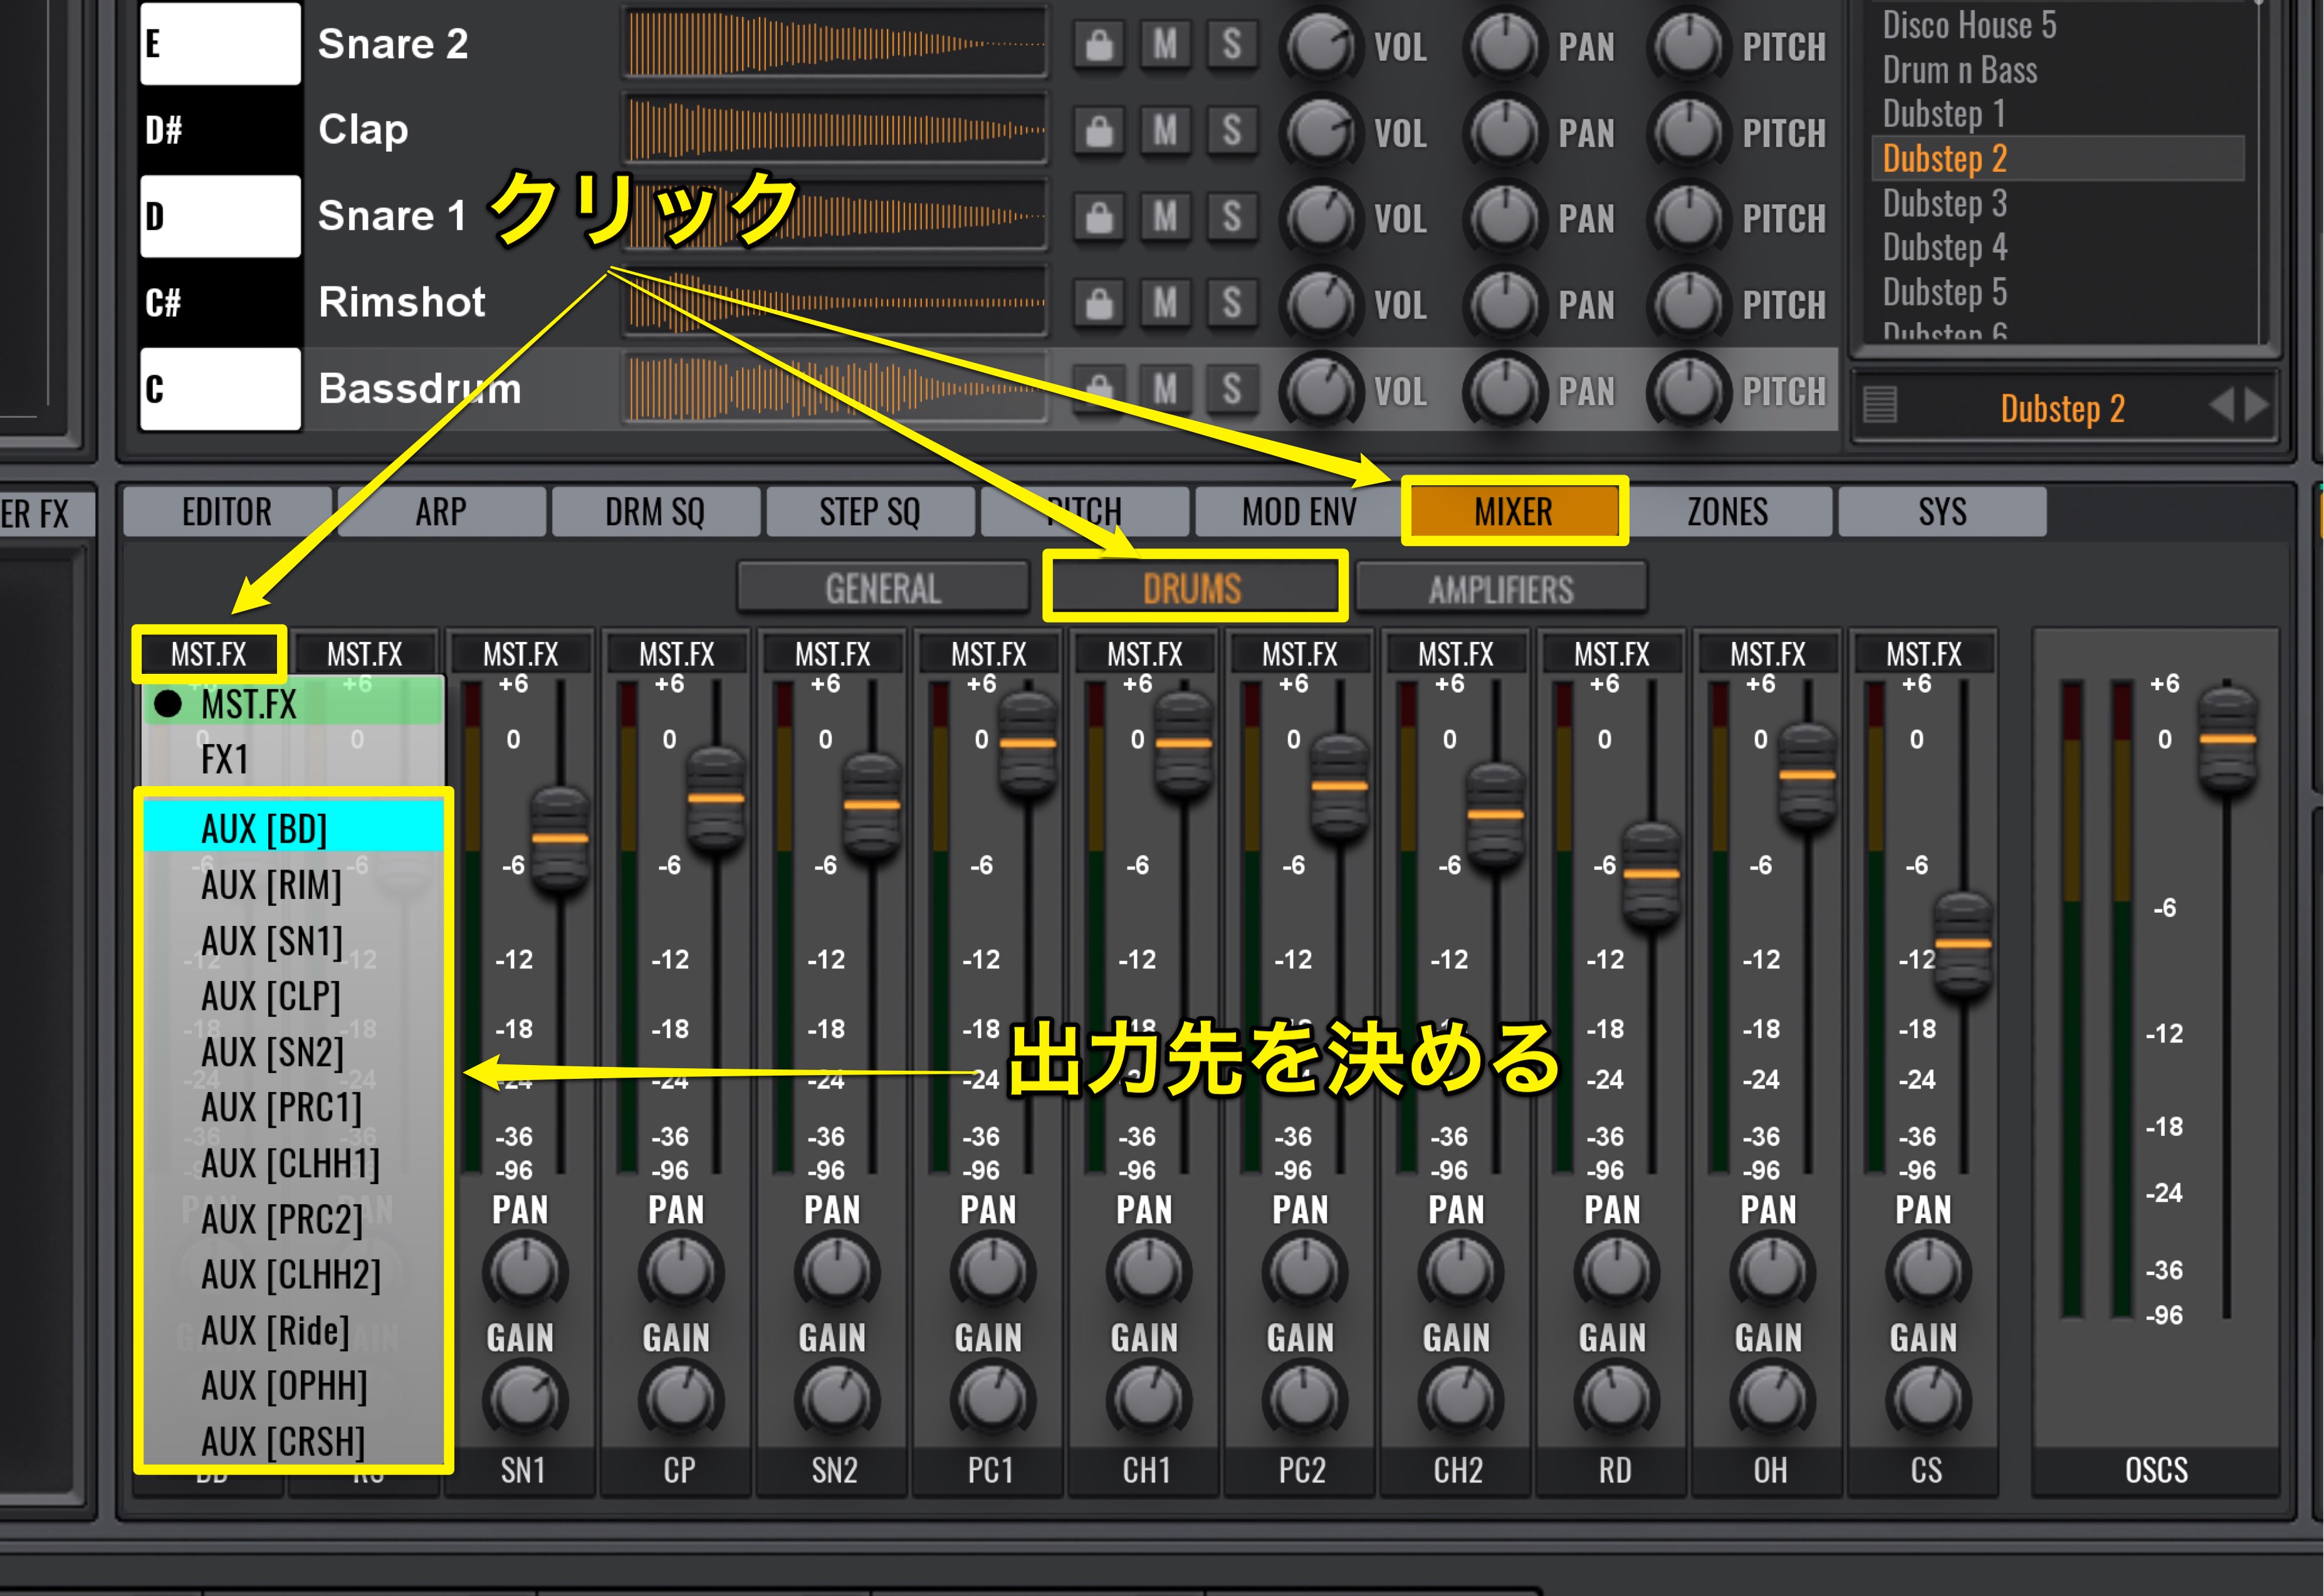
Click on the MIXER tab and select DRUMS.
The sound are split into individual channels.
By clicking above each channel, Master FX, you can change the output.
After that you can set up the individual outputs in your DAW.
Individual outputs for Softsynths

 Logic
Logic Cubase
 Ableton Live
 StudioOne
 FL_Studio
There are a variety of high quality presets, with very useful sequences on board.
By utilizing individual outputs, you can mix to your preferences too.
Loop it for an entire song, use it to accent a portion, place drums as an rough draft during the song writing process; there are a massive amount of possibilities with this synth.