

Vengeance Sound Avenger - How to use - Individual outputs for oscillators
Using individual outputs to lower CPU usage
Due to its high quality sound, Avenger also uses up a good amount of CPU.
You can use “individual outputs” for oscillators to help solve this problem.
By using individual outputs, you can use separate outputs for each OSC in Avenger.
Previously, we had mentioned DRUMS individual outputs, but individual outputs for OSC works a little differently.
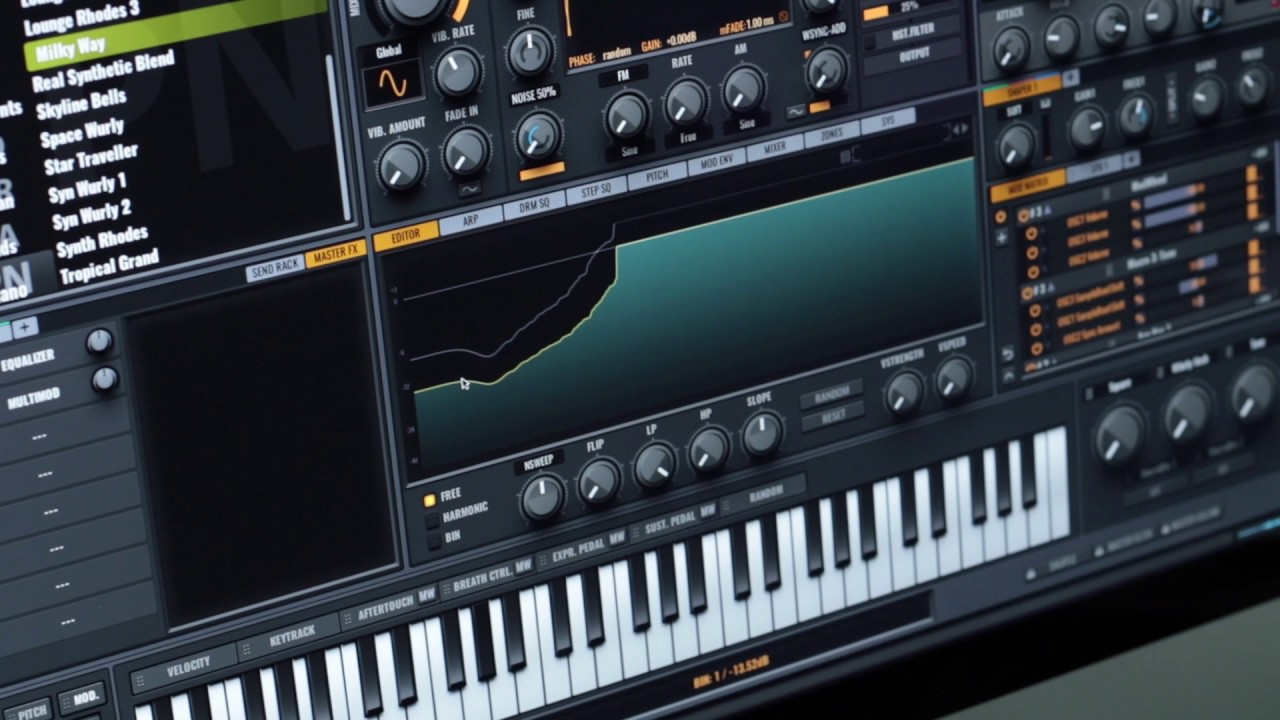
We will take a look at OSC1 and OSC2 individual output settings.
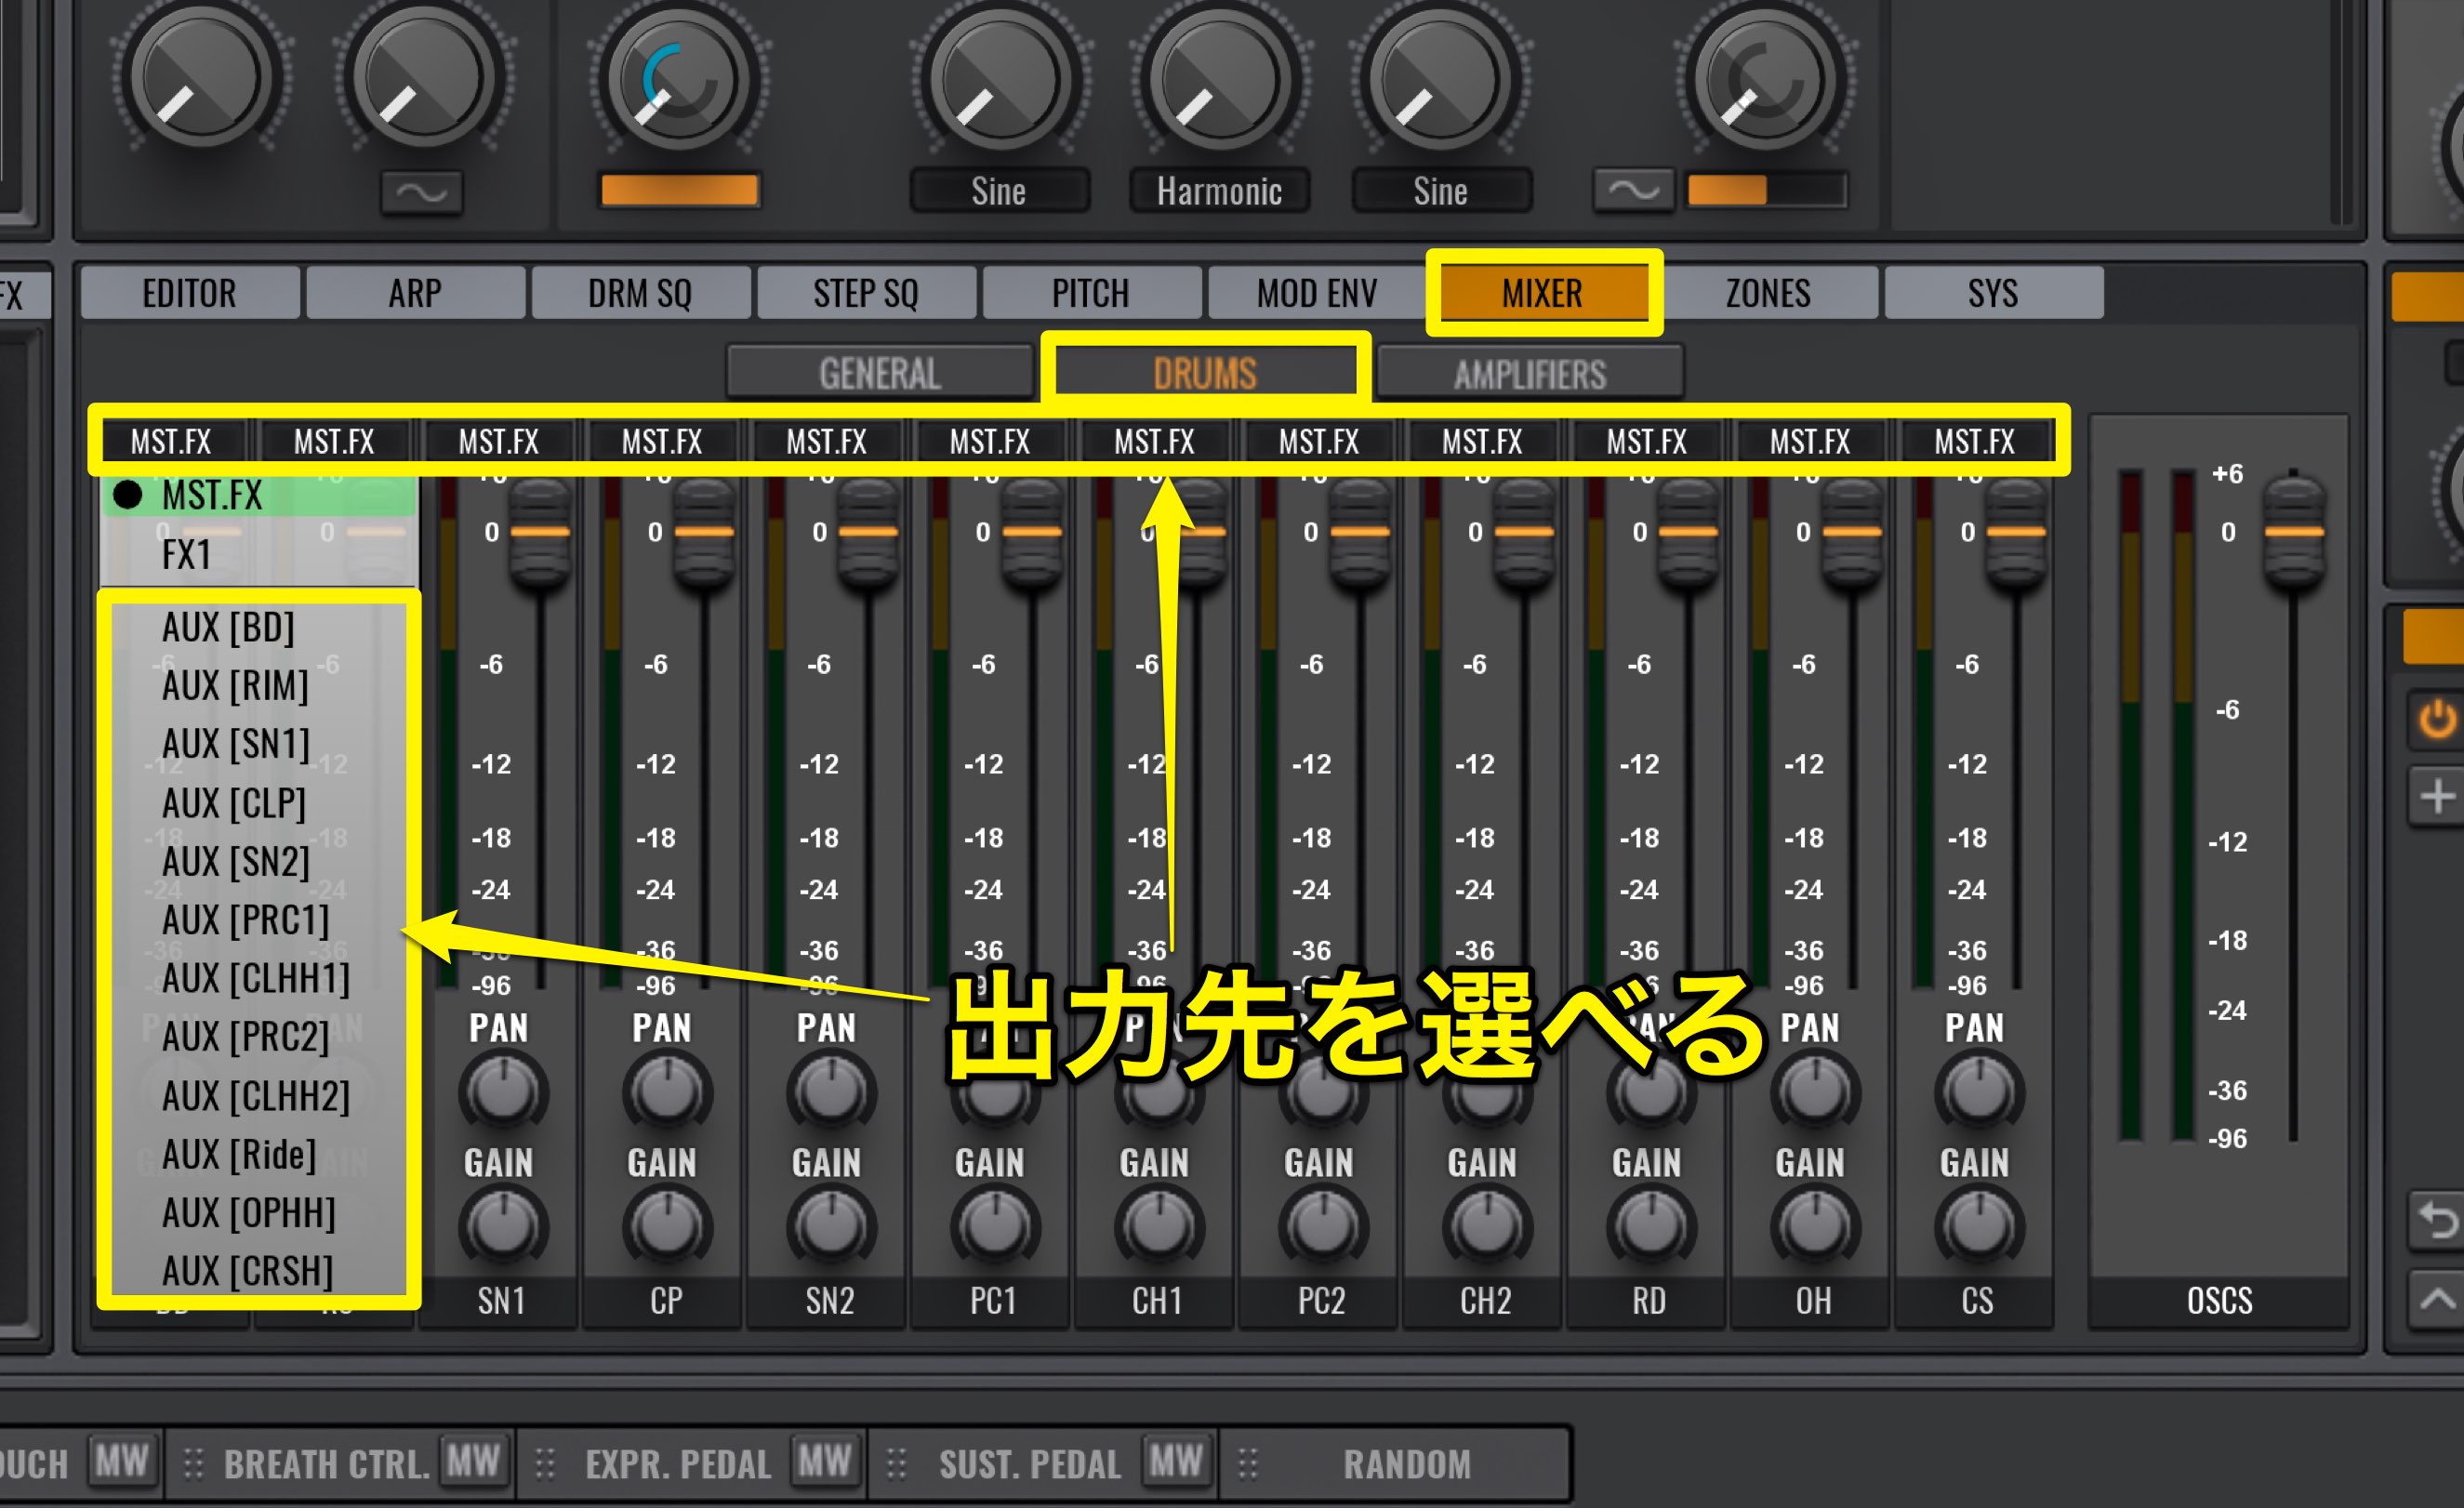 For drums you can select MIXER → DRUMS and designate the output, however –

when looking at everything with GENERAL, OSC 1/2 ‘s outputs cant be selected here.
At the moment, OSC 2’s output goes through ROUTE “OUT FX1,” and goes out of FX1 from “MASTER FX” → “AMP 1” → “MASTER.”
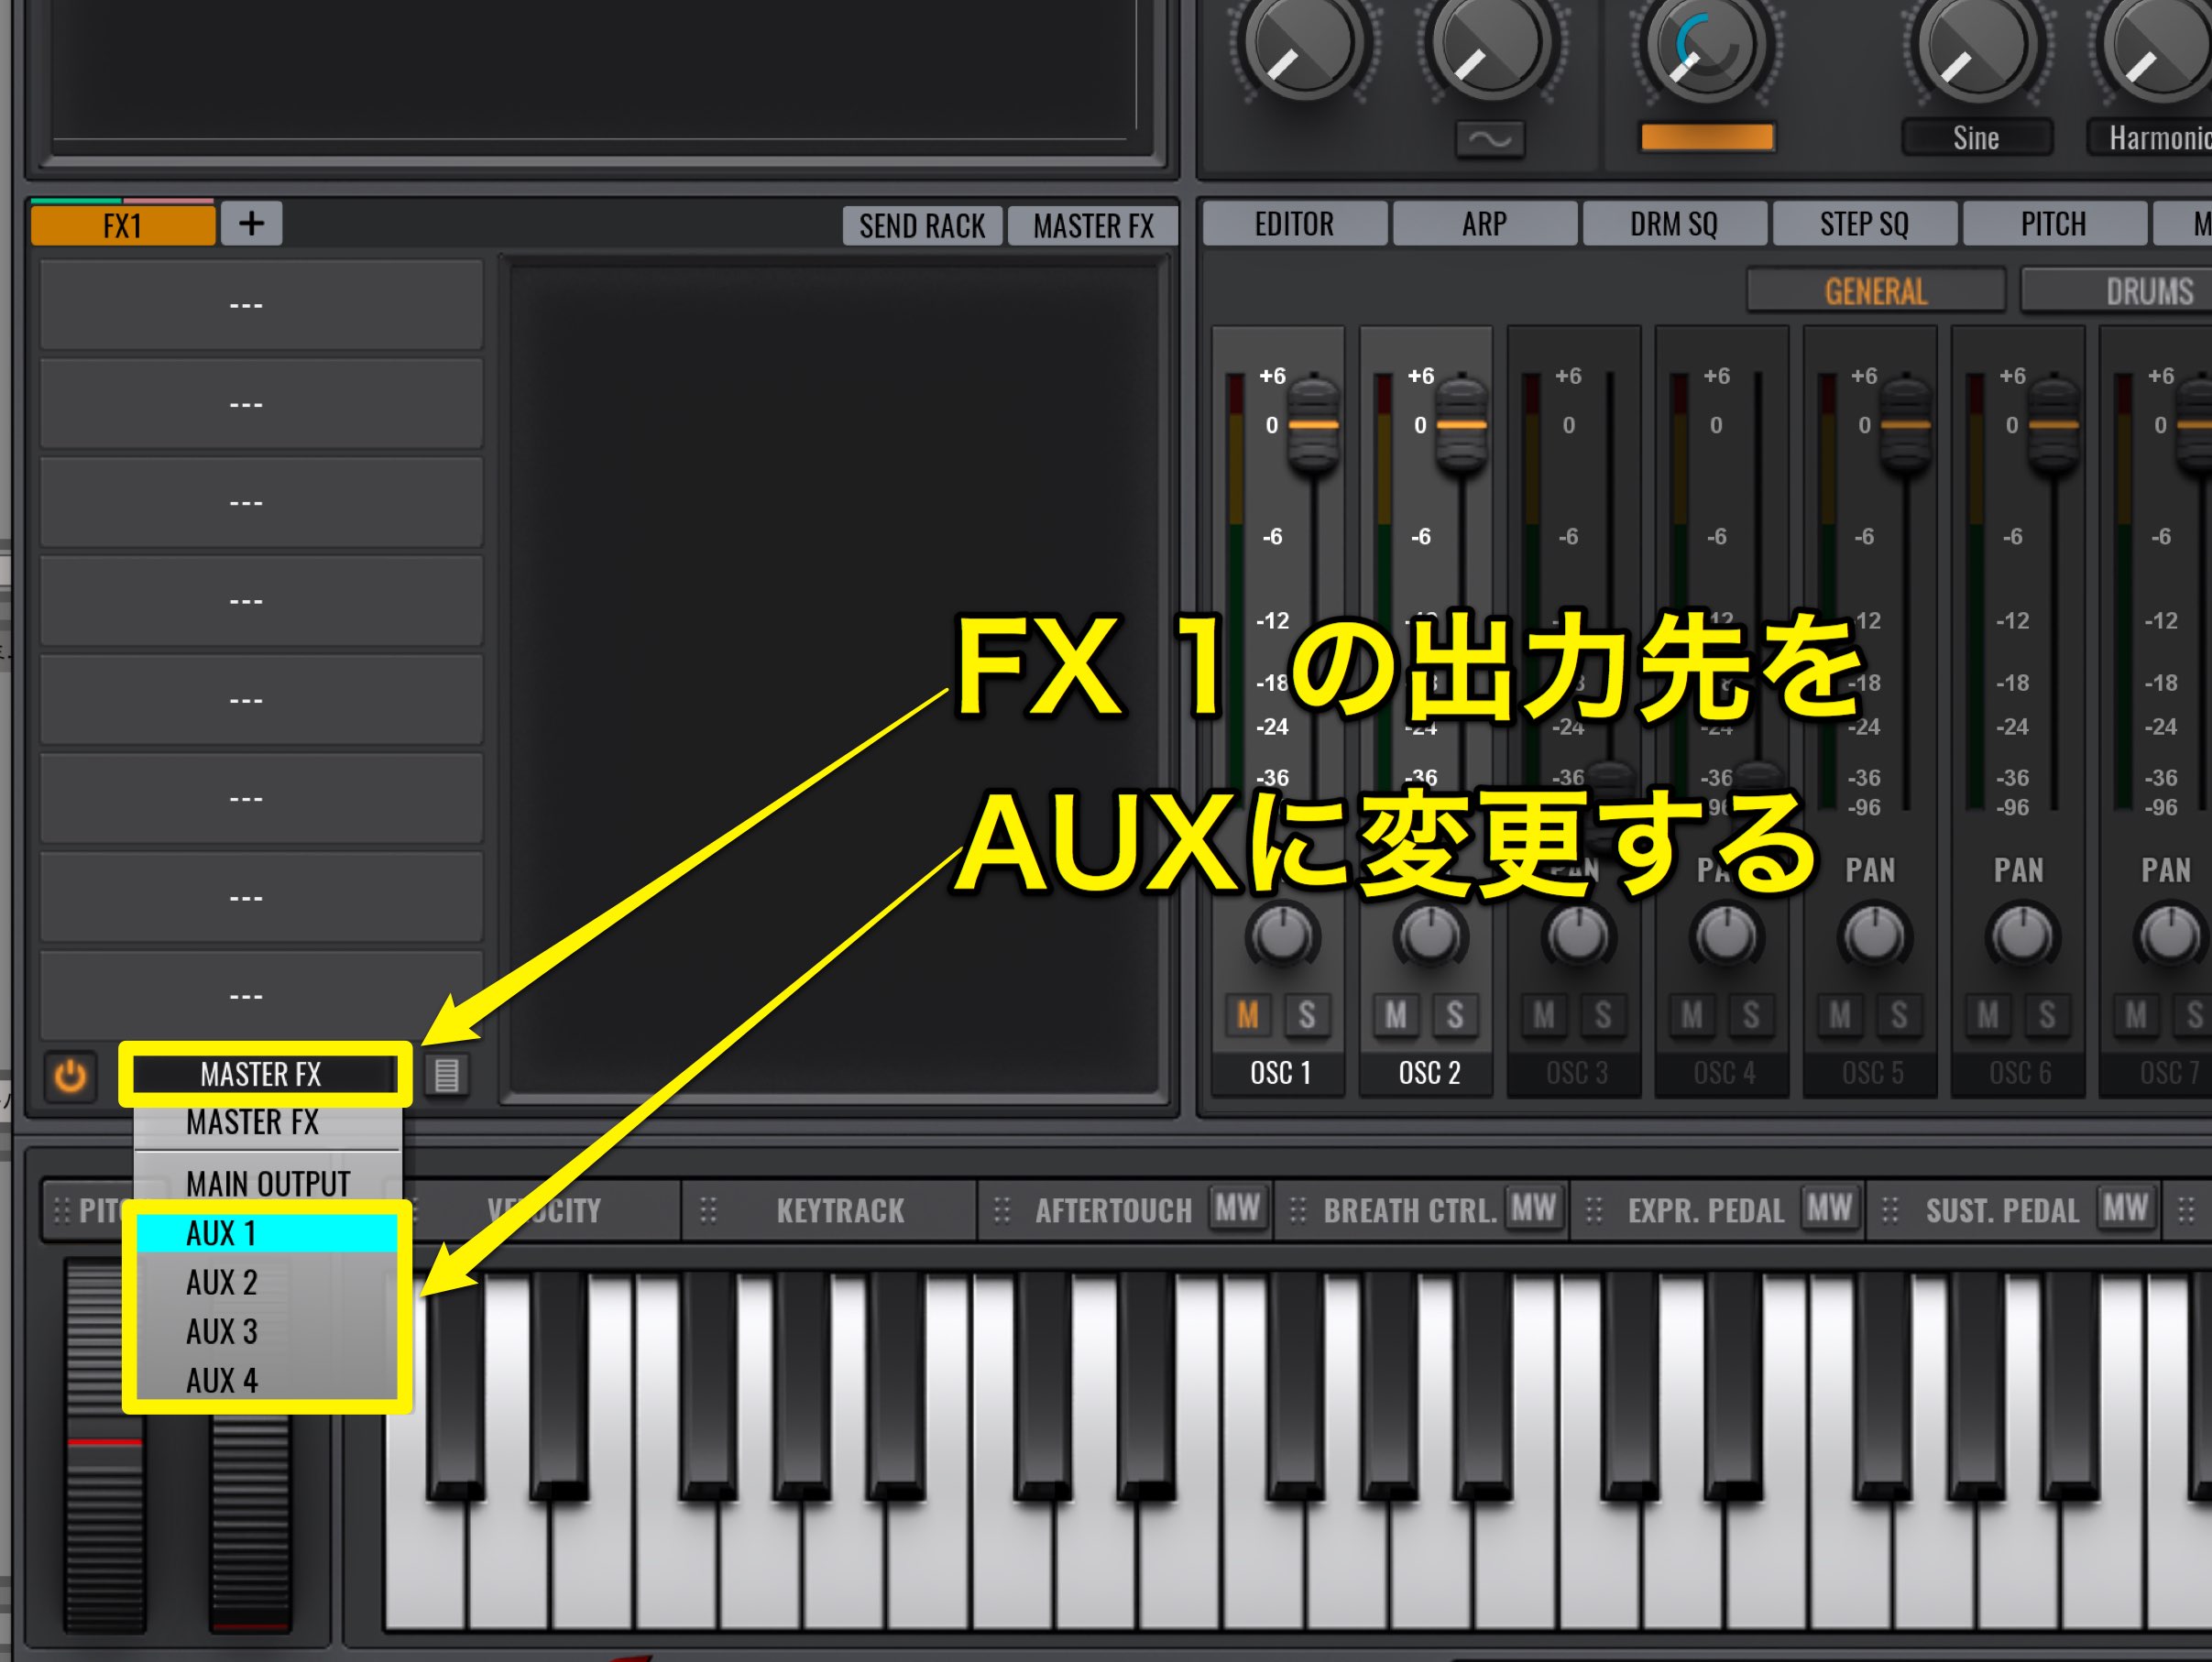
Change the FX output to AUX, allowing for individual output.

For Ableton Live
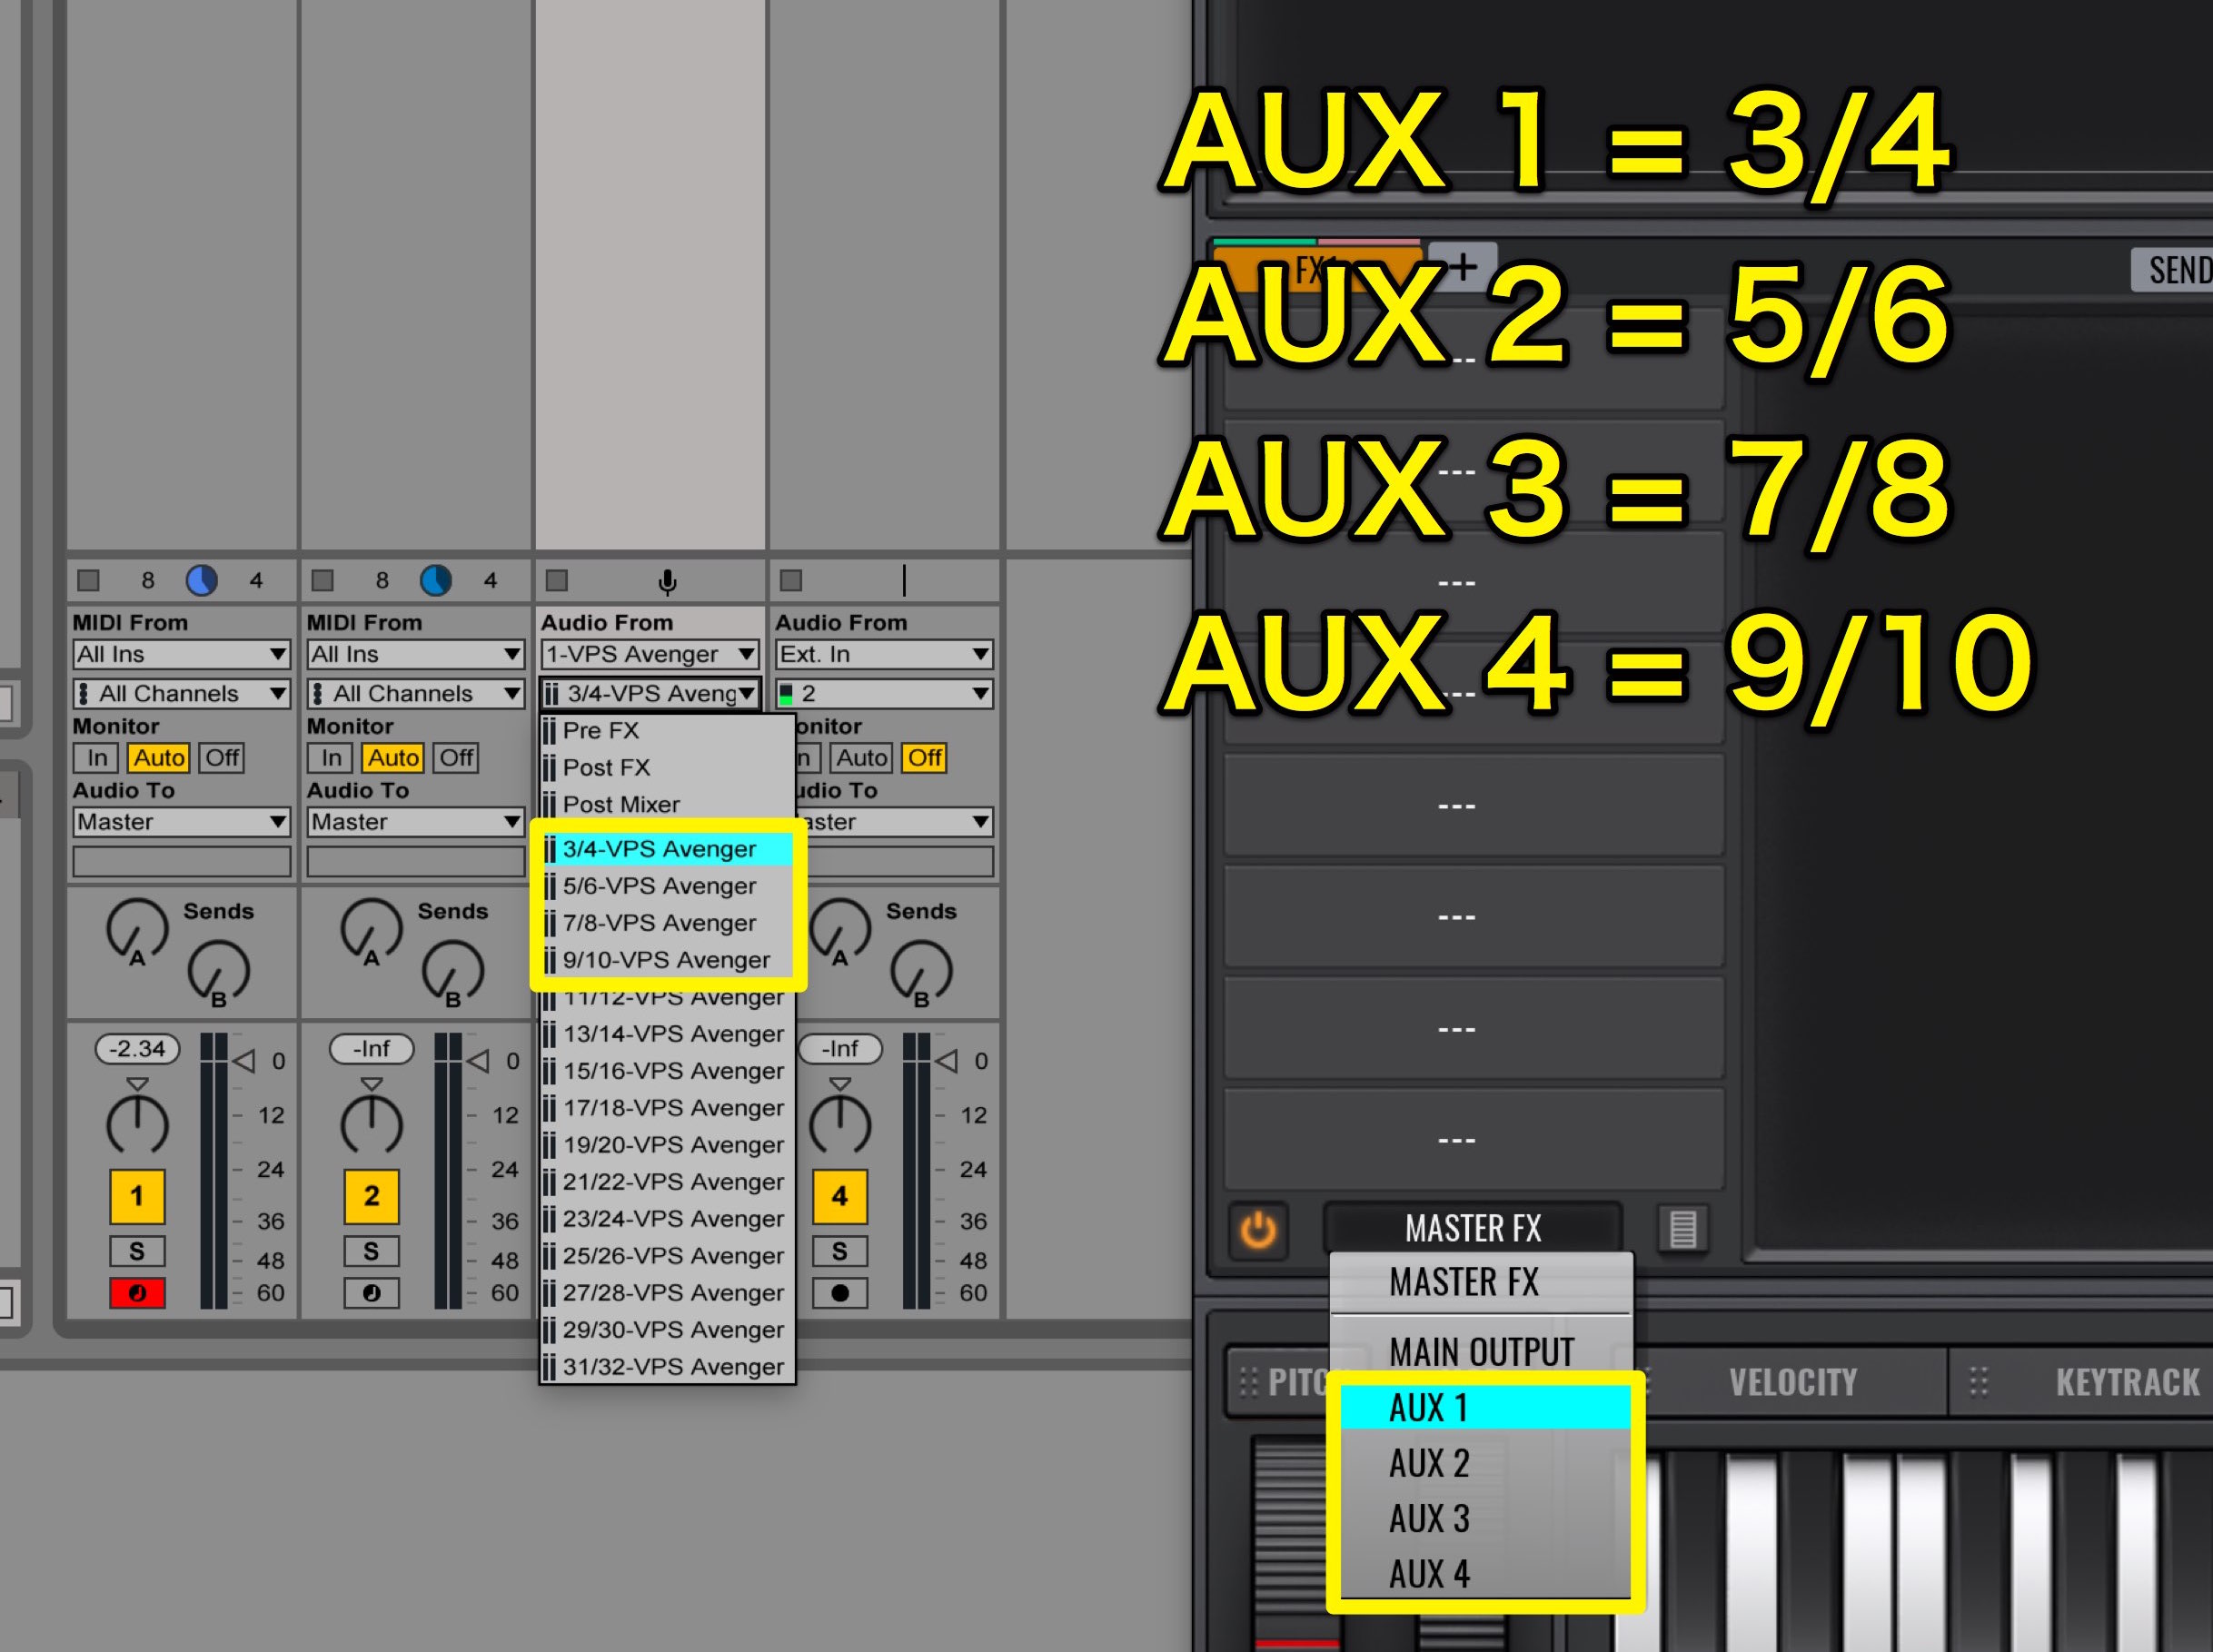
Change Audio From in Audio Track to VPS Avenger and click the settings below:
- AUX 1 = 3/4
- AUX 2 = 5/6
- AUX 3 = 7/8
- AUX 4 = 9/10
It will be assigned in this way.
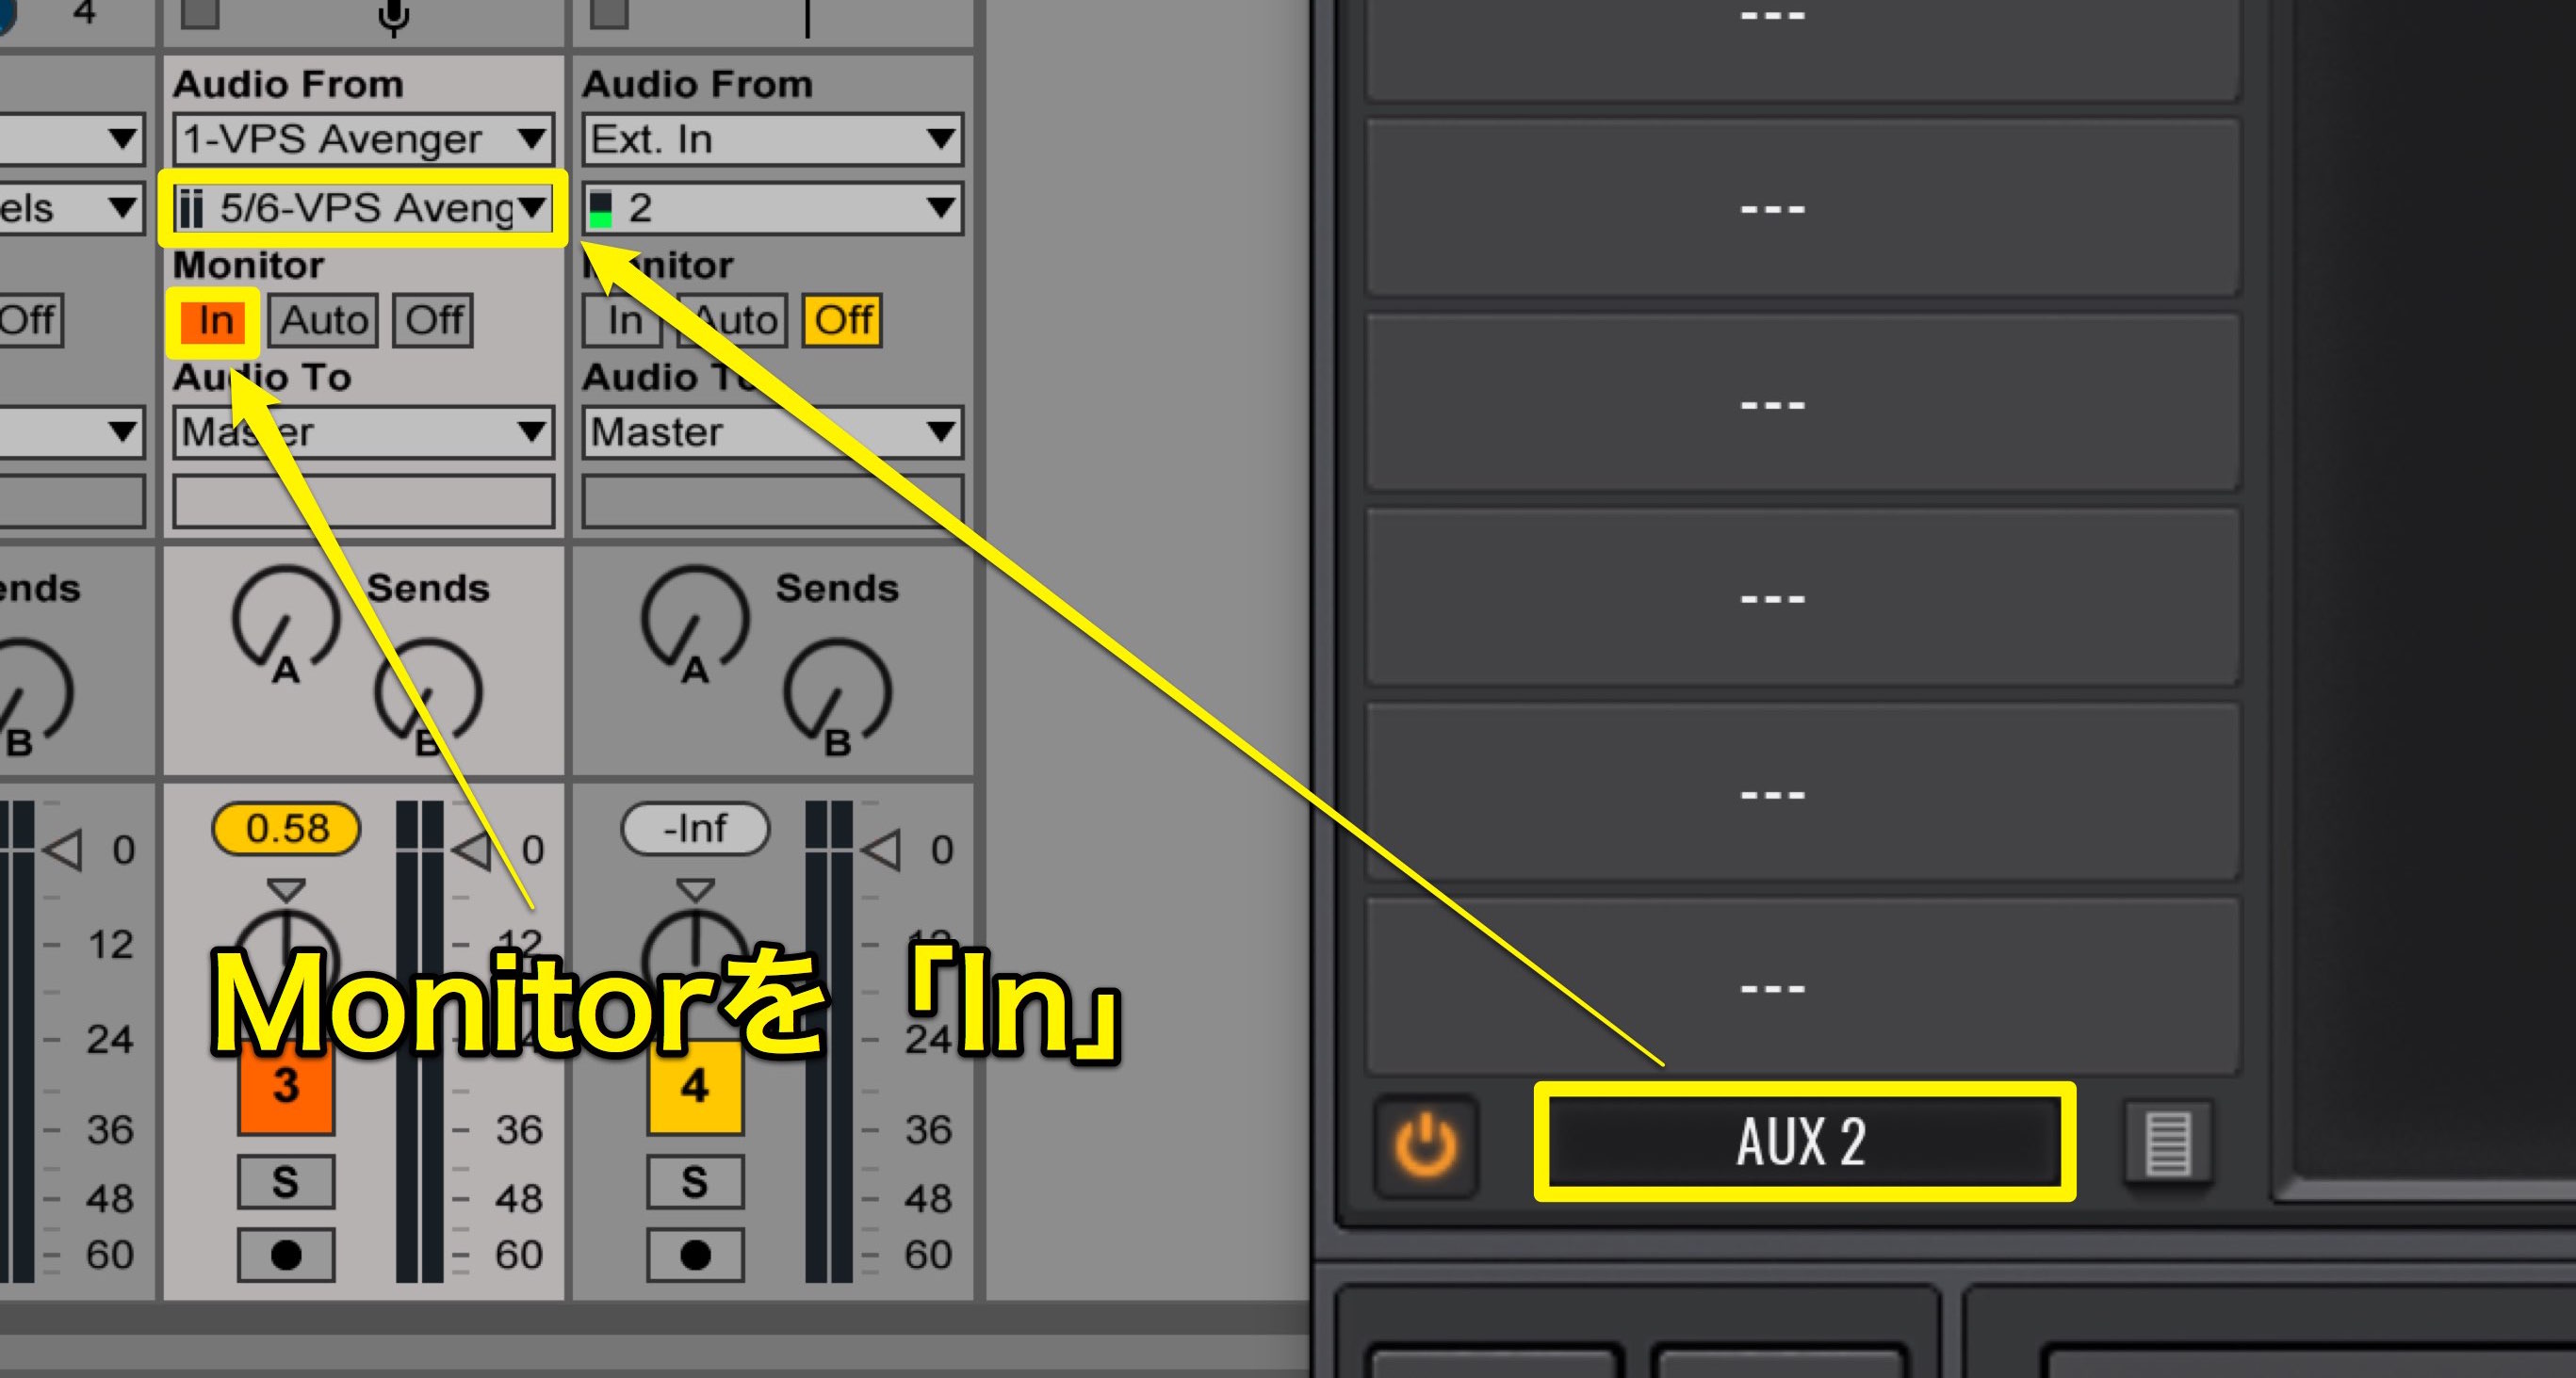
Because it’s OSC 2 lets stick with AUX 2 and set to 5/6 in Live.
Set it as “In” to allow for monitoring.
This allows for individual outputs.
Lets also set up the output for OSC 1.
Because FX 1 is being used by OSC 2, we will need to make FX2.
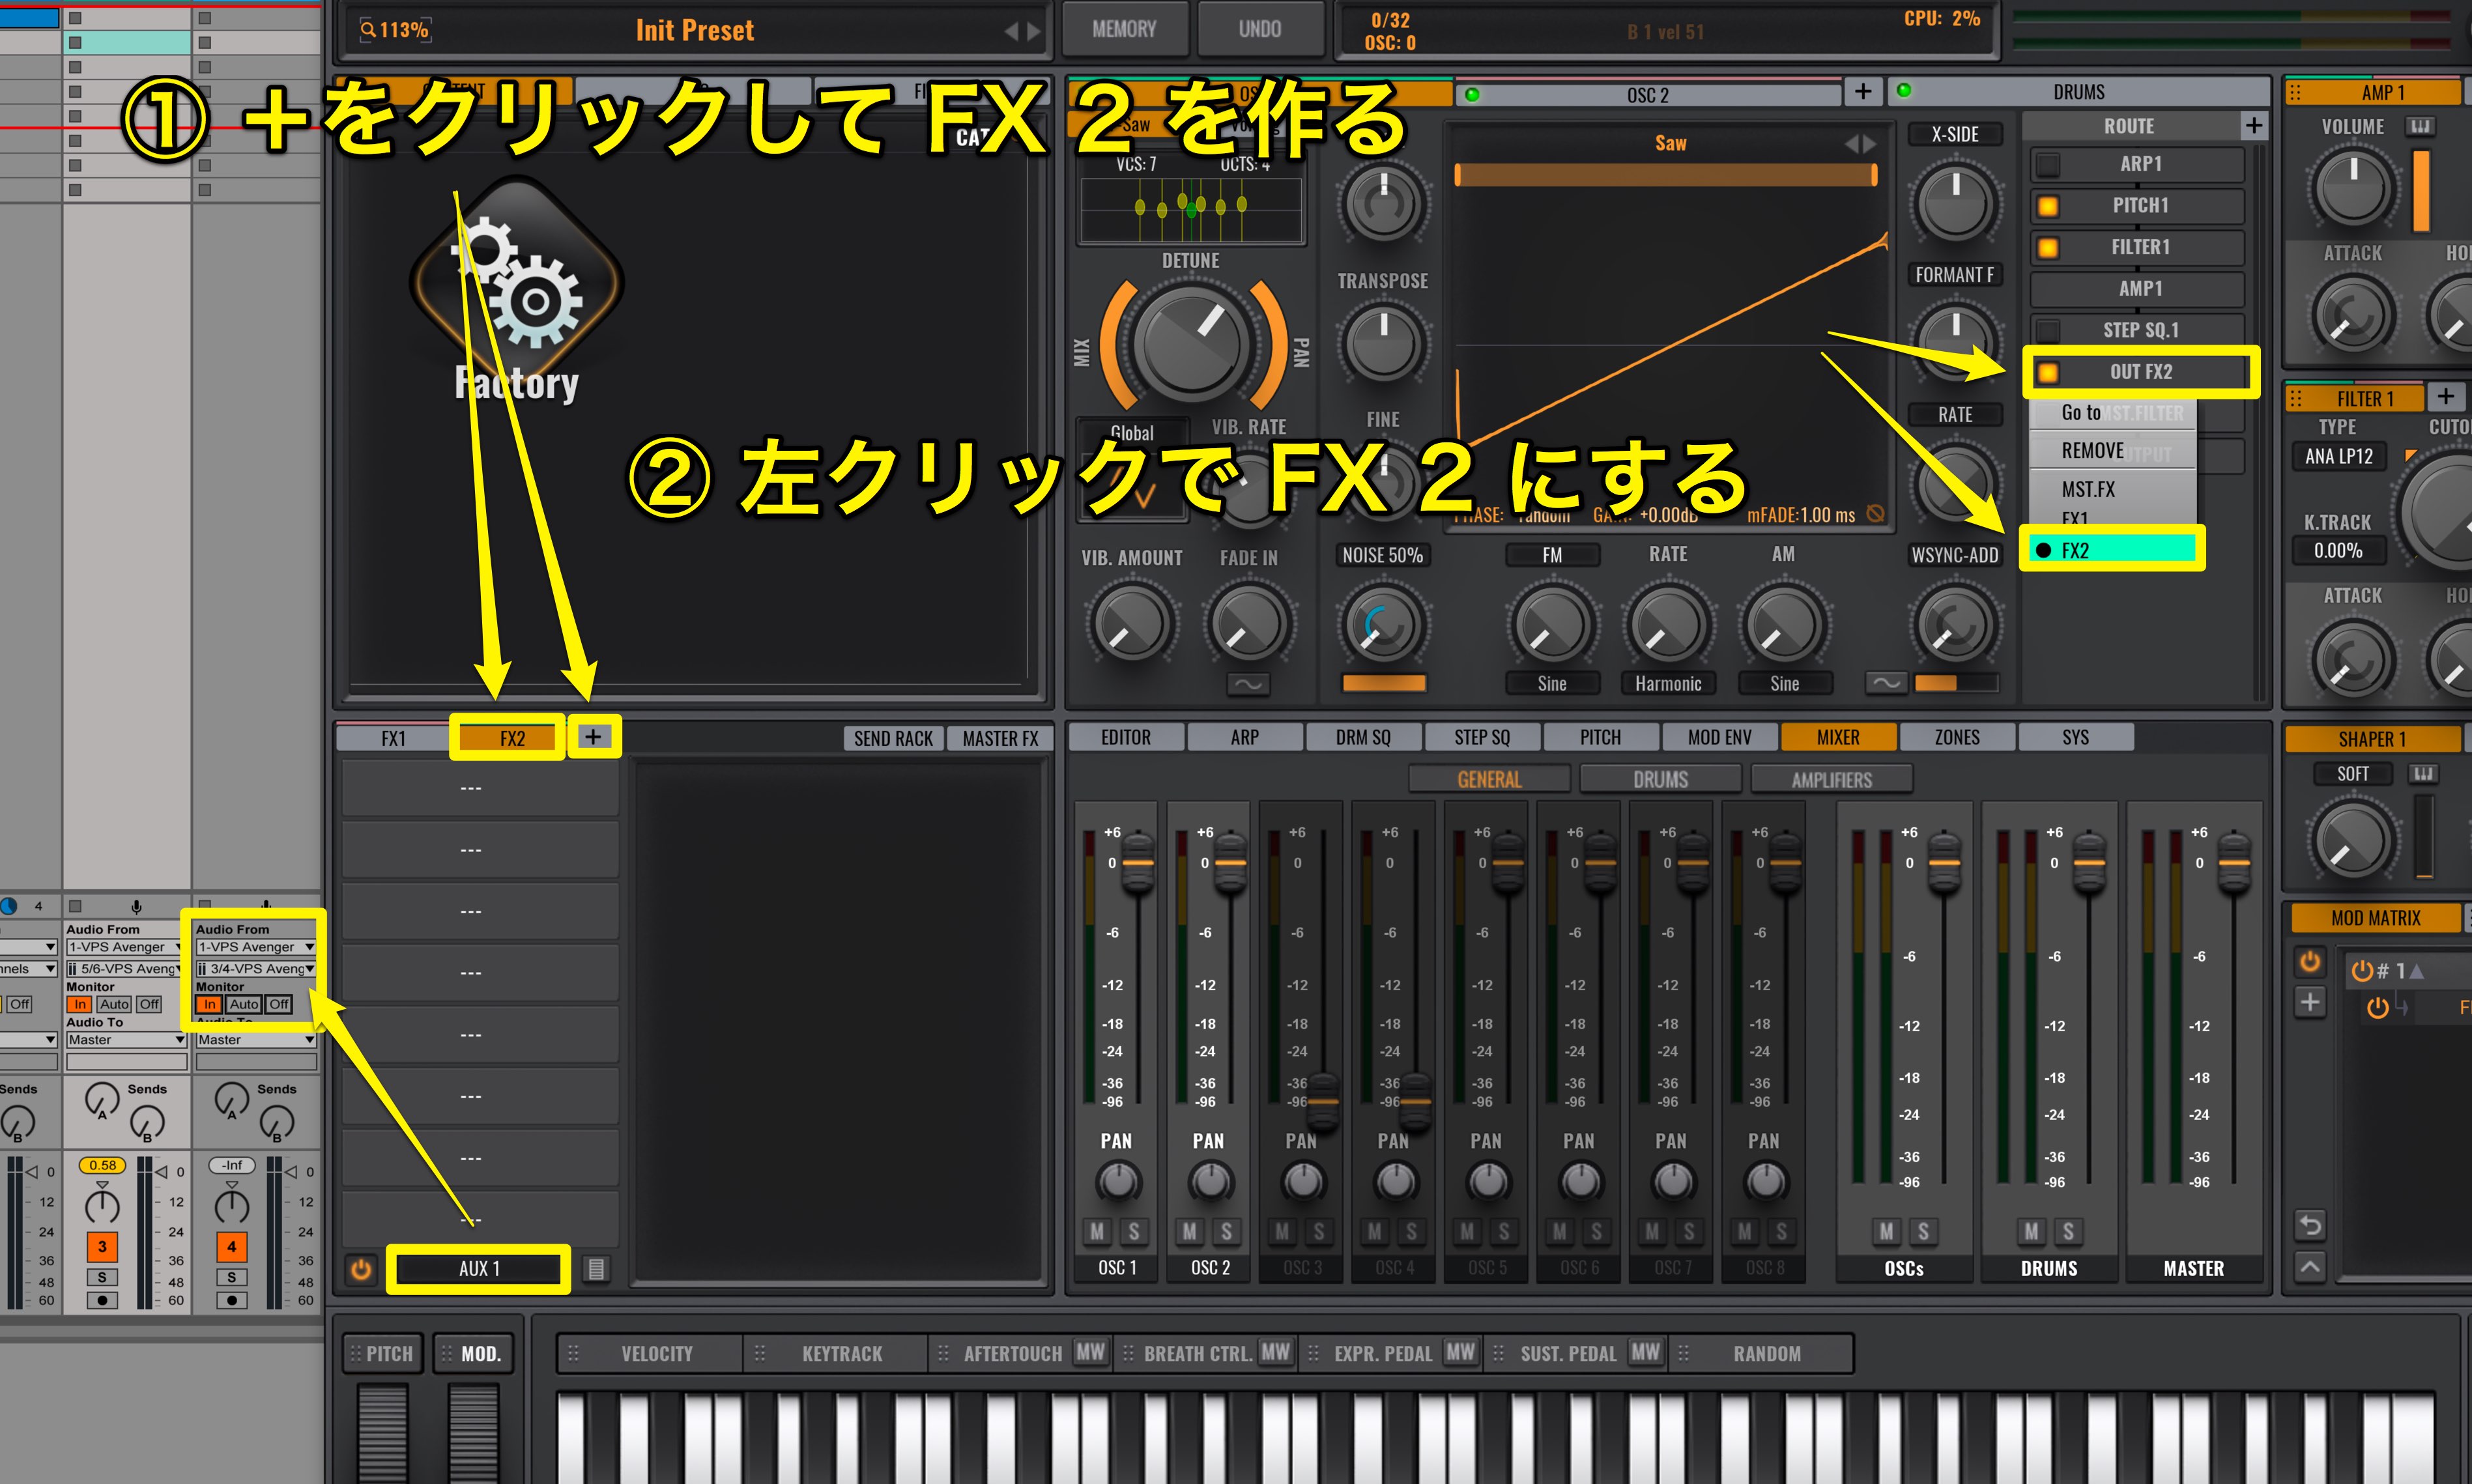
Click on the “+” next to FX 1 to create FX2.
Left click OUT FX 1 from ROUTE, and select FX 2.
Change FX 2’s output to “AUX 1,” and change Live’s Audio Track setting Audio From to Avenger.
Underneath, select “3/4.” Change the Monitor to “In” and the process is finished.
However, as of the moment, when playing the MIDI Track that contains Avenger, both sounds will play.
If you want to play both at once this isn’t a problem, but if you want OSC 1 and 2 to play differently, you will need to do some tweaking.
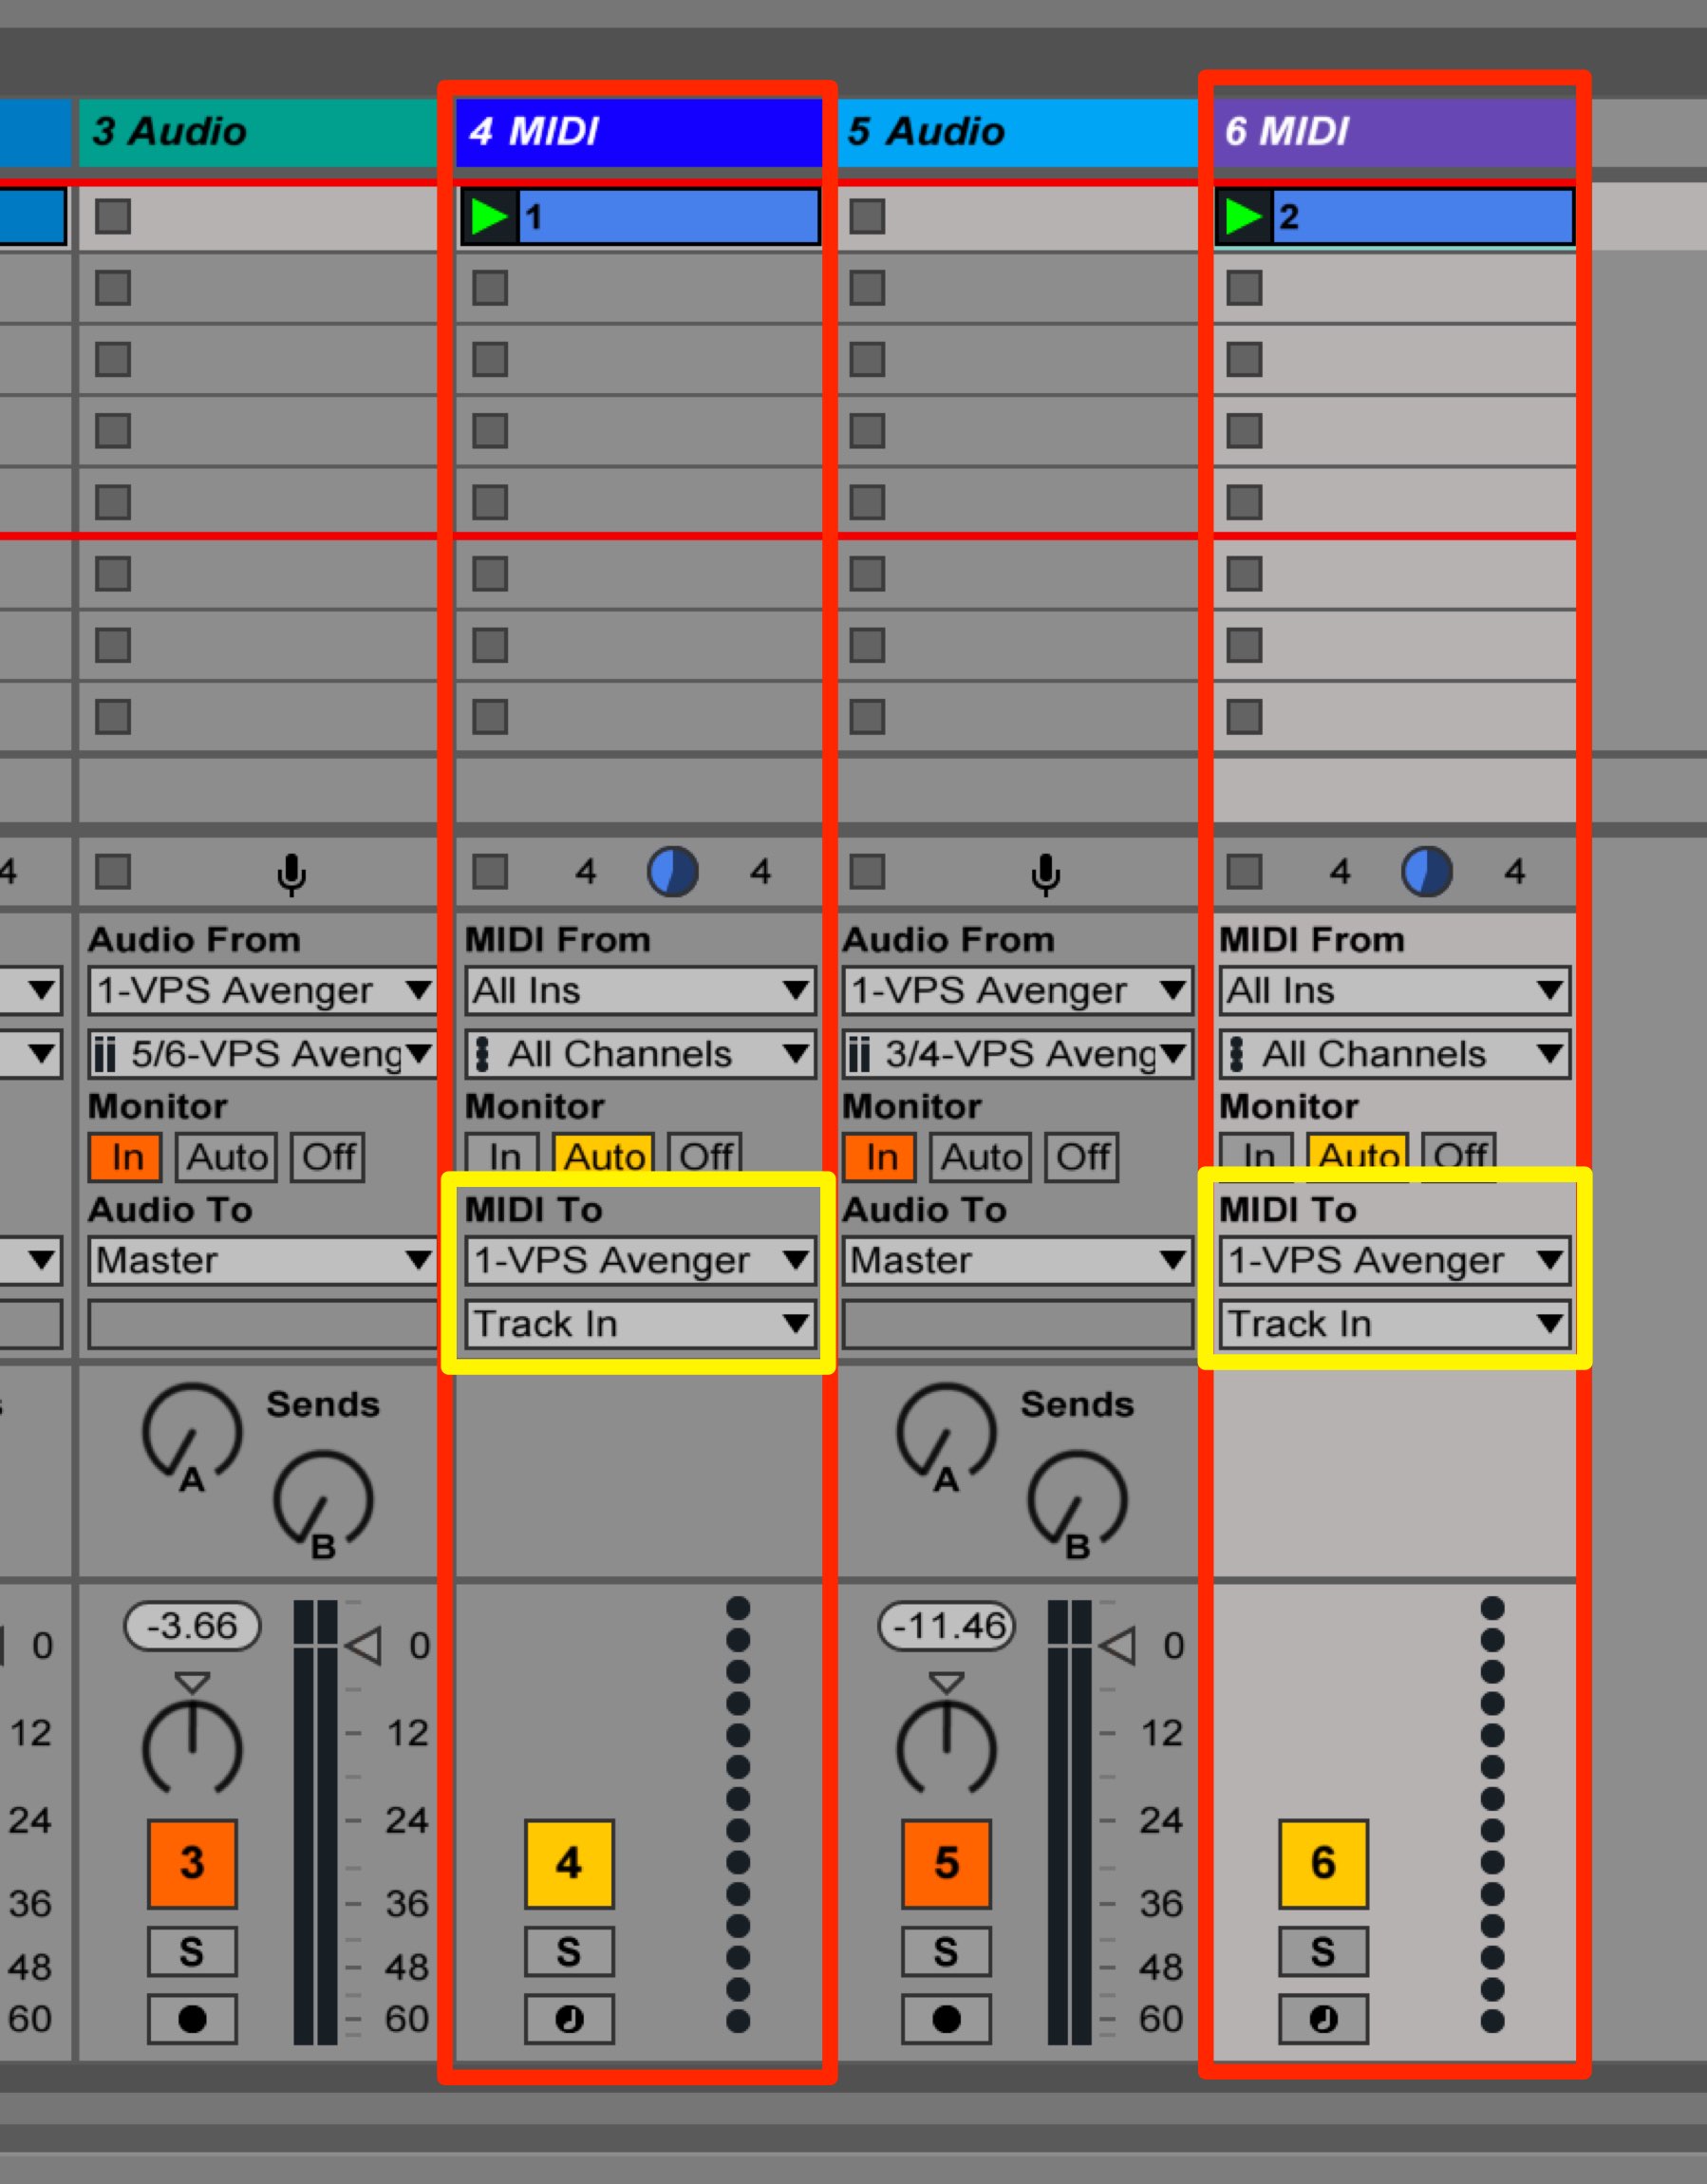
We will set up 2 MIDI tracks for convenience.
Set “MIDIaligncenter To” to “VPS Avenger.”
Next we will take a look at the settings within Avenger.

Because you can’t input MIDI data per OSC in Avenger, we will use ZONE.
Open the “ZONES” tab, and set OSC 1 above C3, and OSC 2 below B2.
For Ableton Live, ZONE is off by 1 octave.
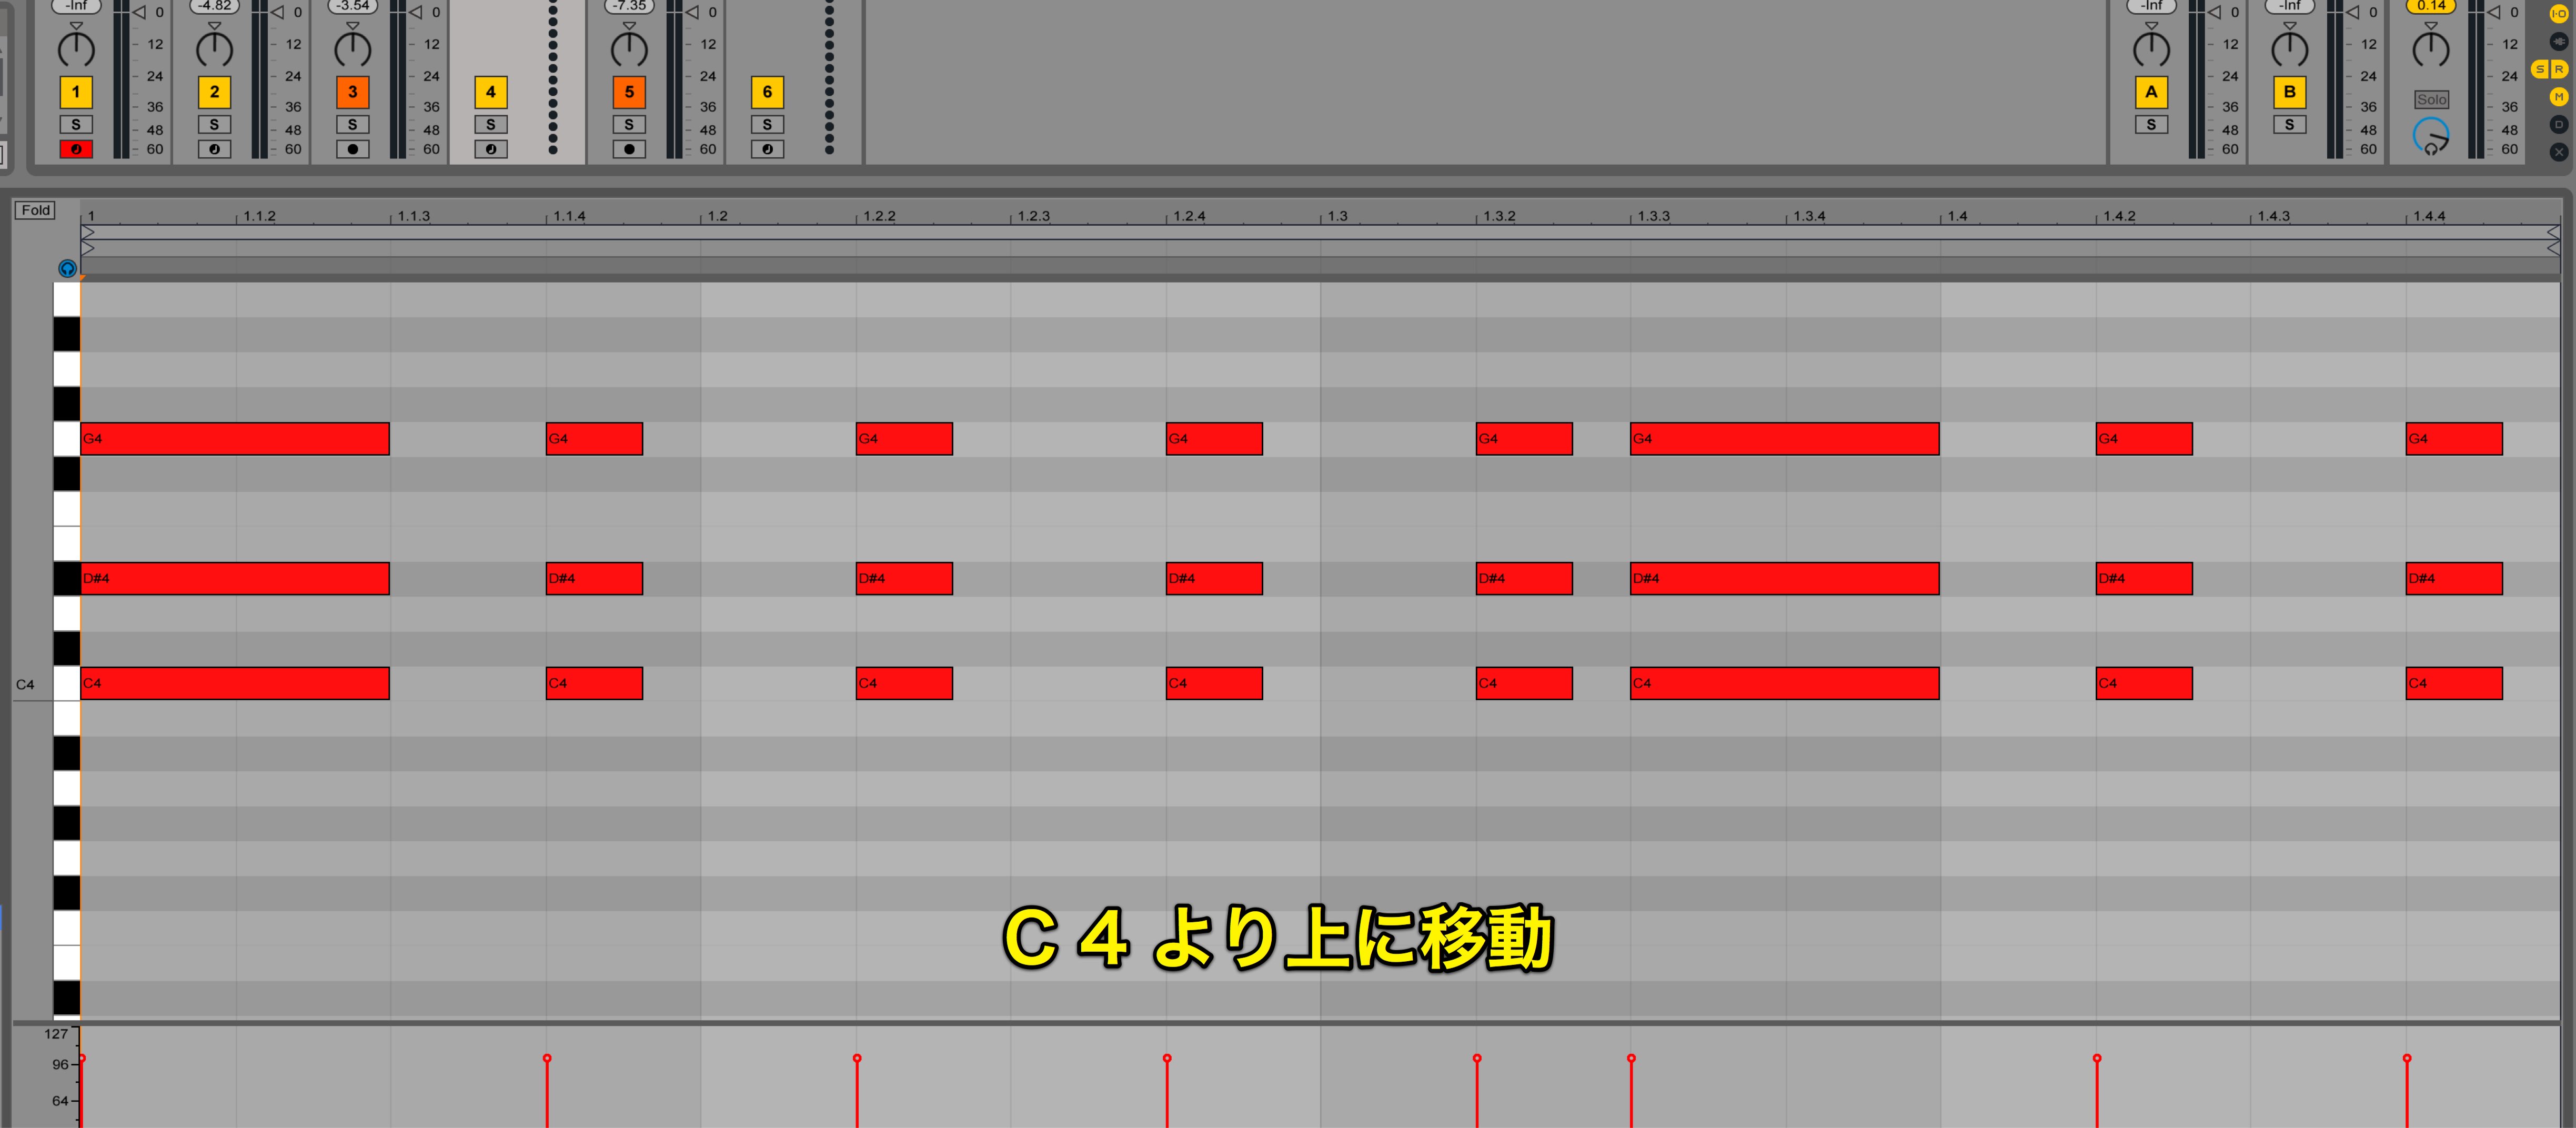
In this case, move the note you want for OSC1 above C4.
Because it was raised by an octave, lower OSC 1’s pitch by 1 octave.
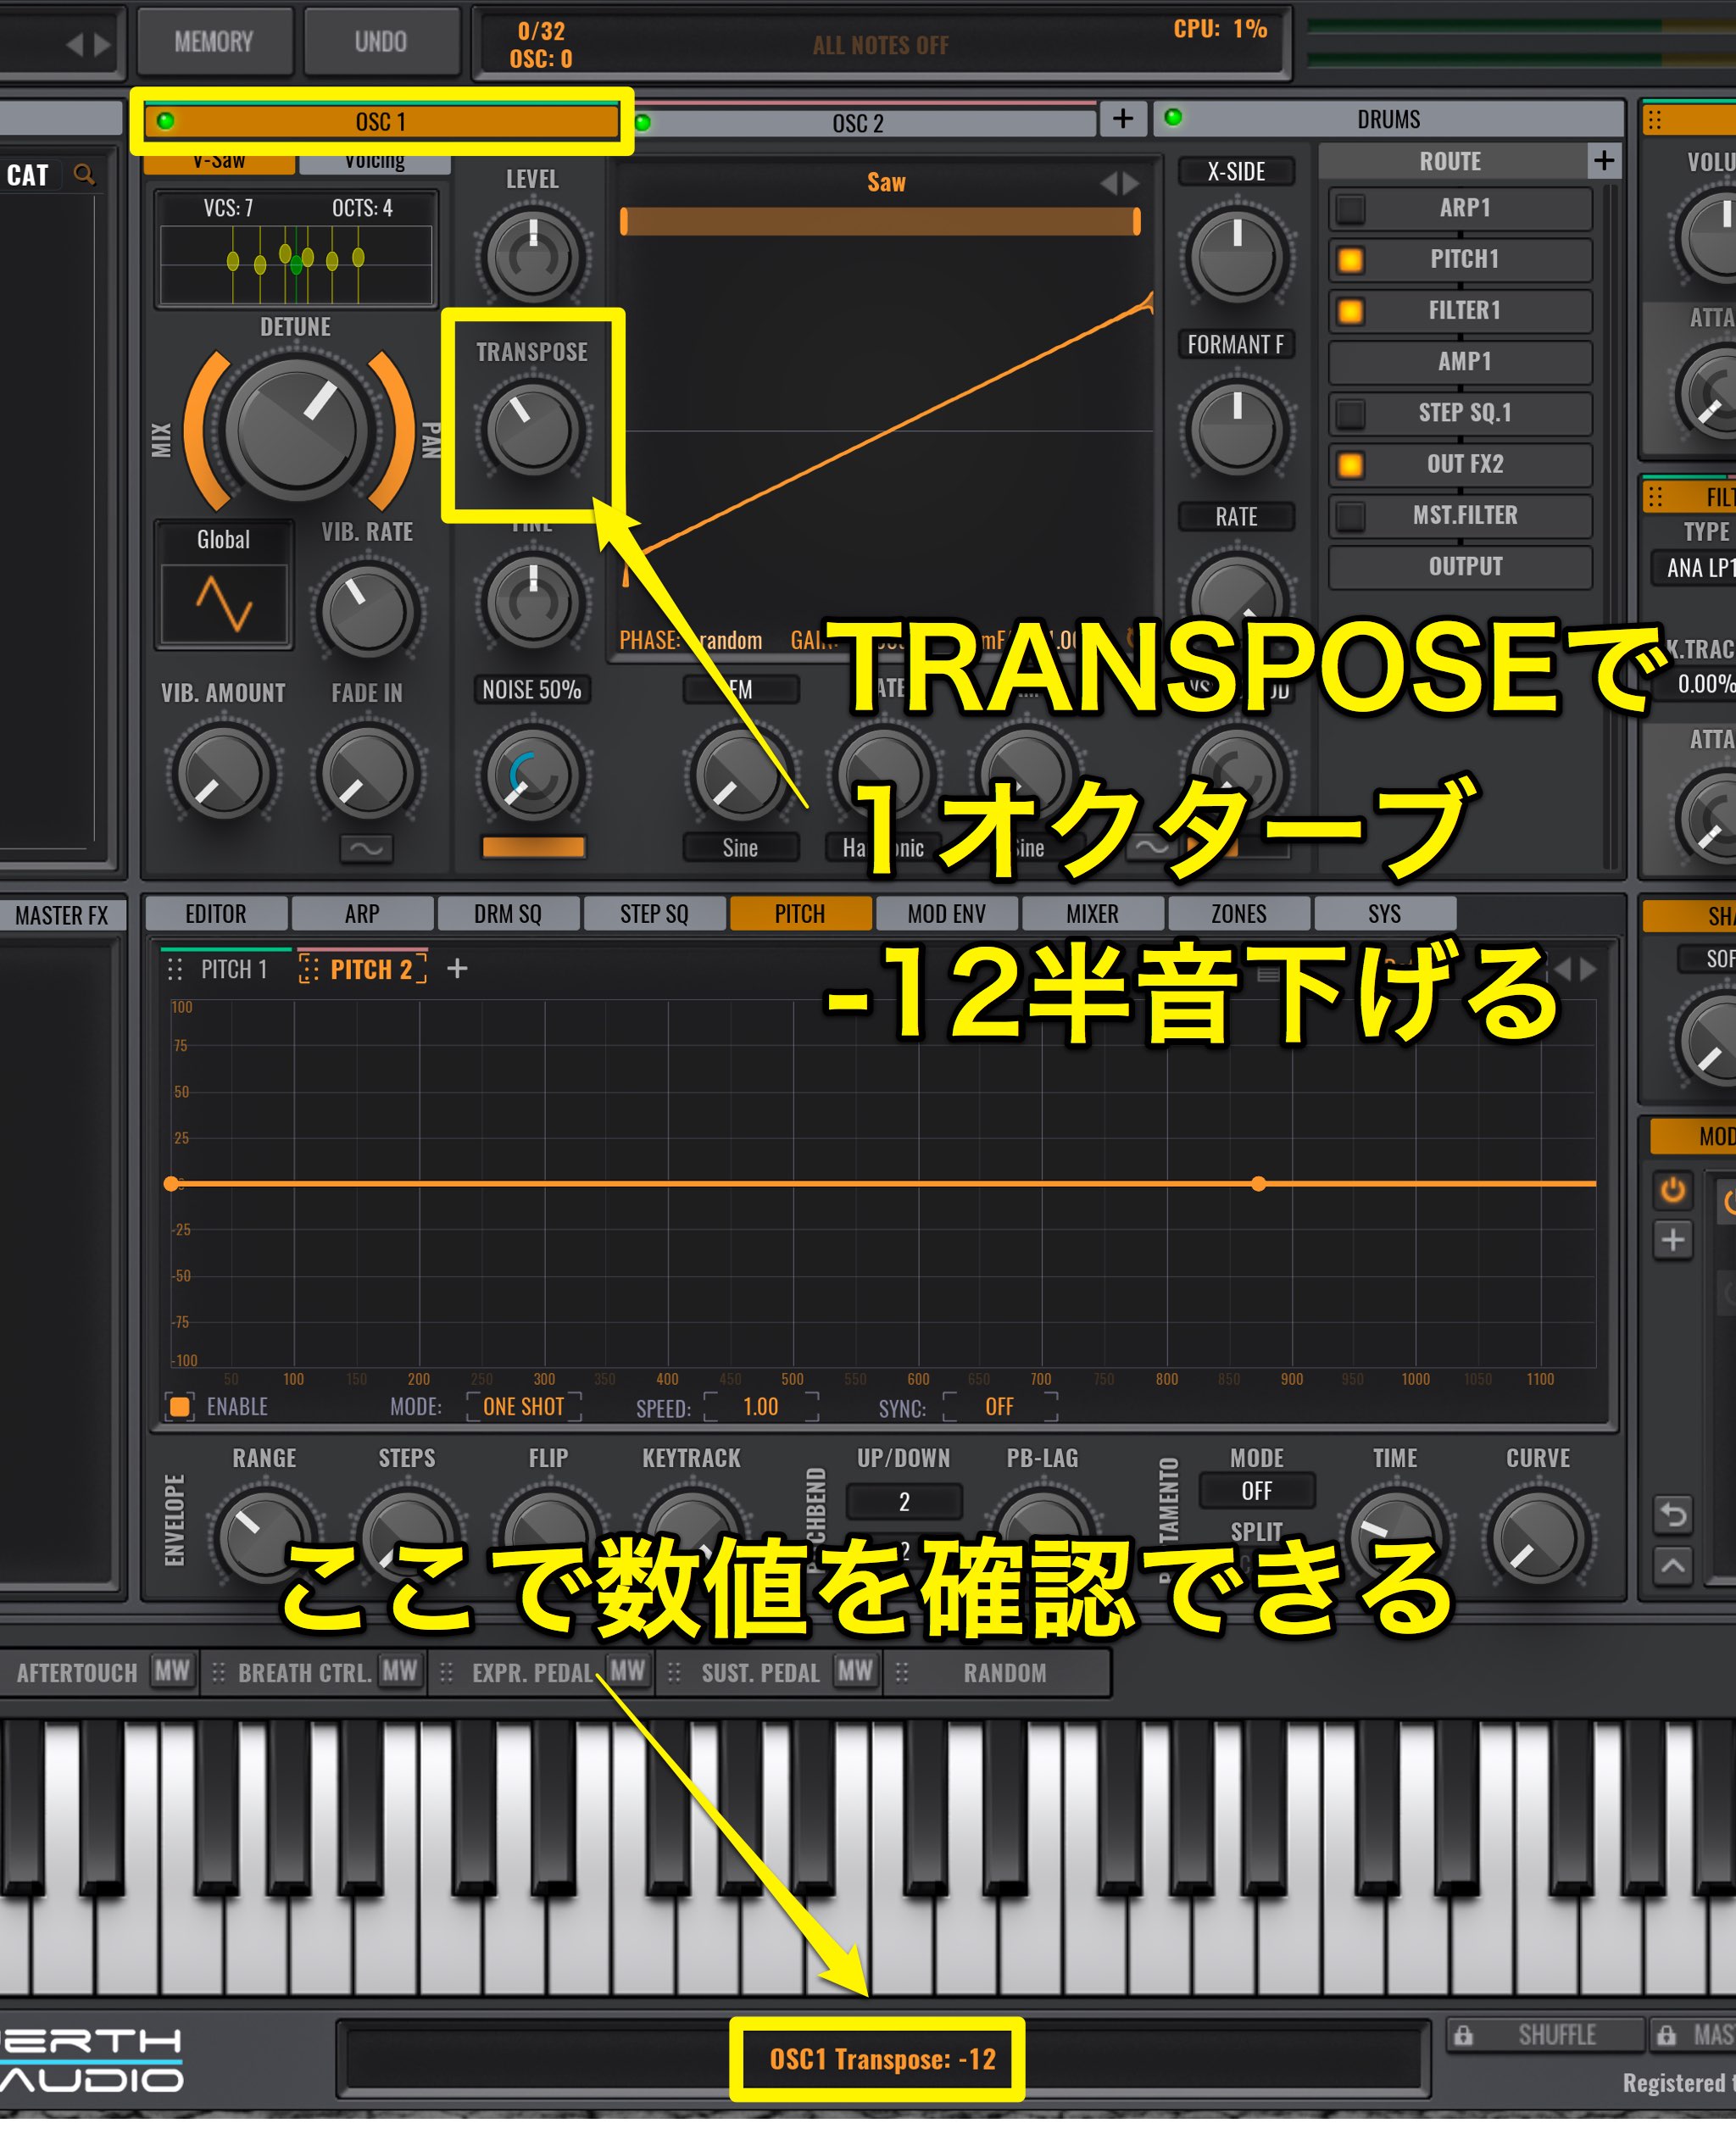
You can edit in halfnotes via TRANSPOSE.
You can confirm the amount below; we will set it to “-12.”
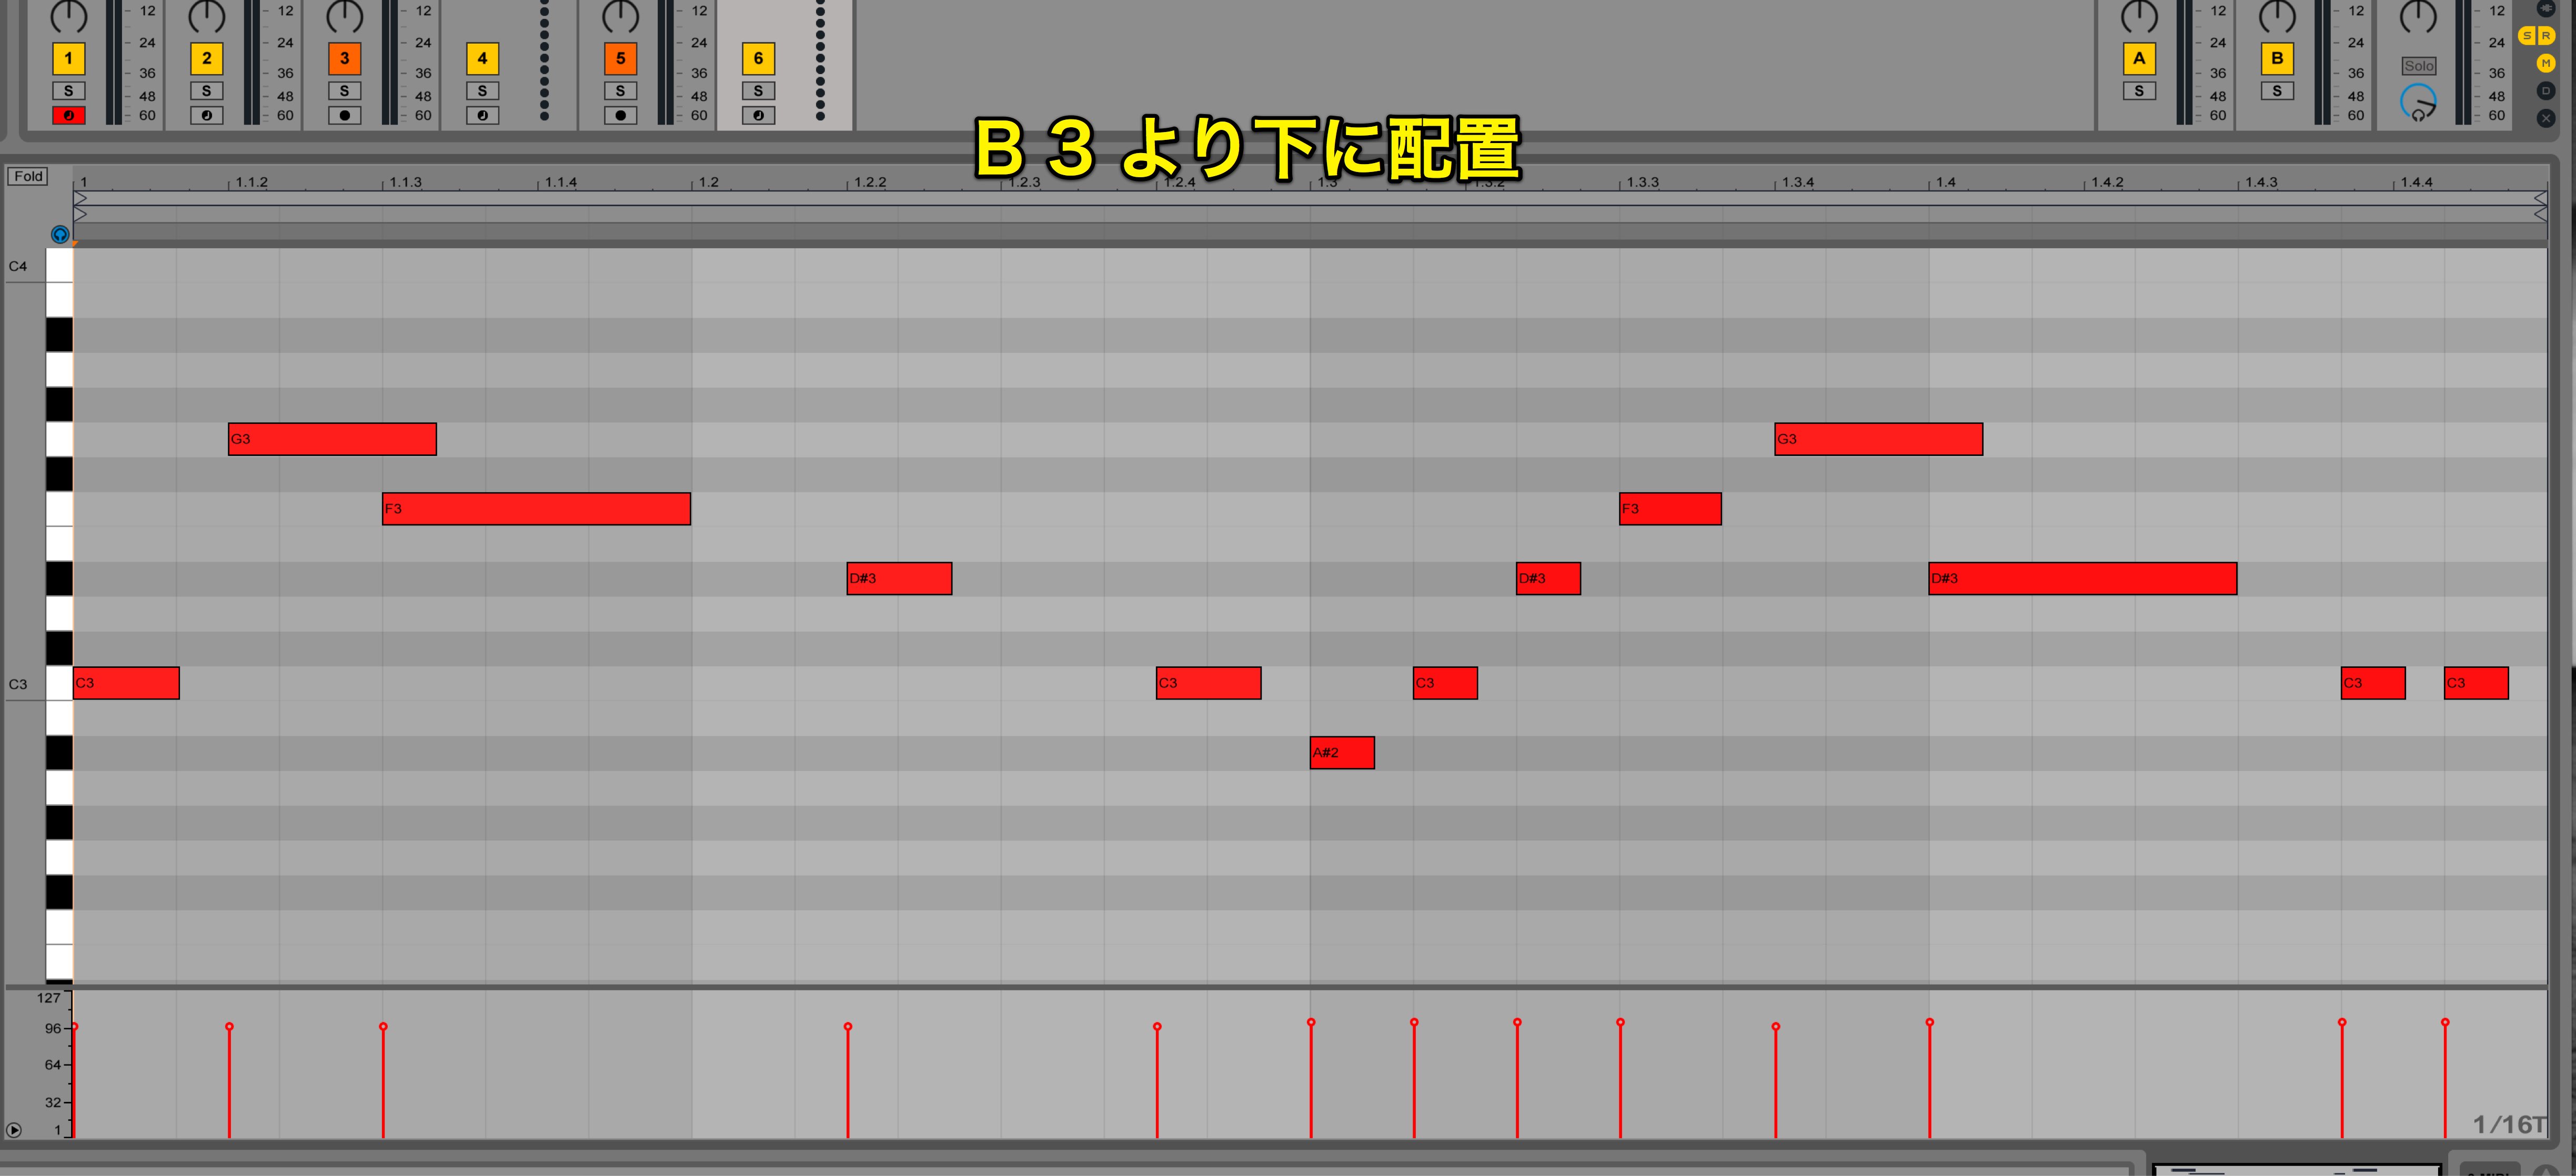
OSC 2 is set to “below B3.”
Because the note we want is exactly under B3, this works out wonderfully.
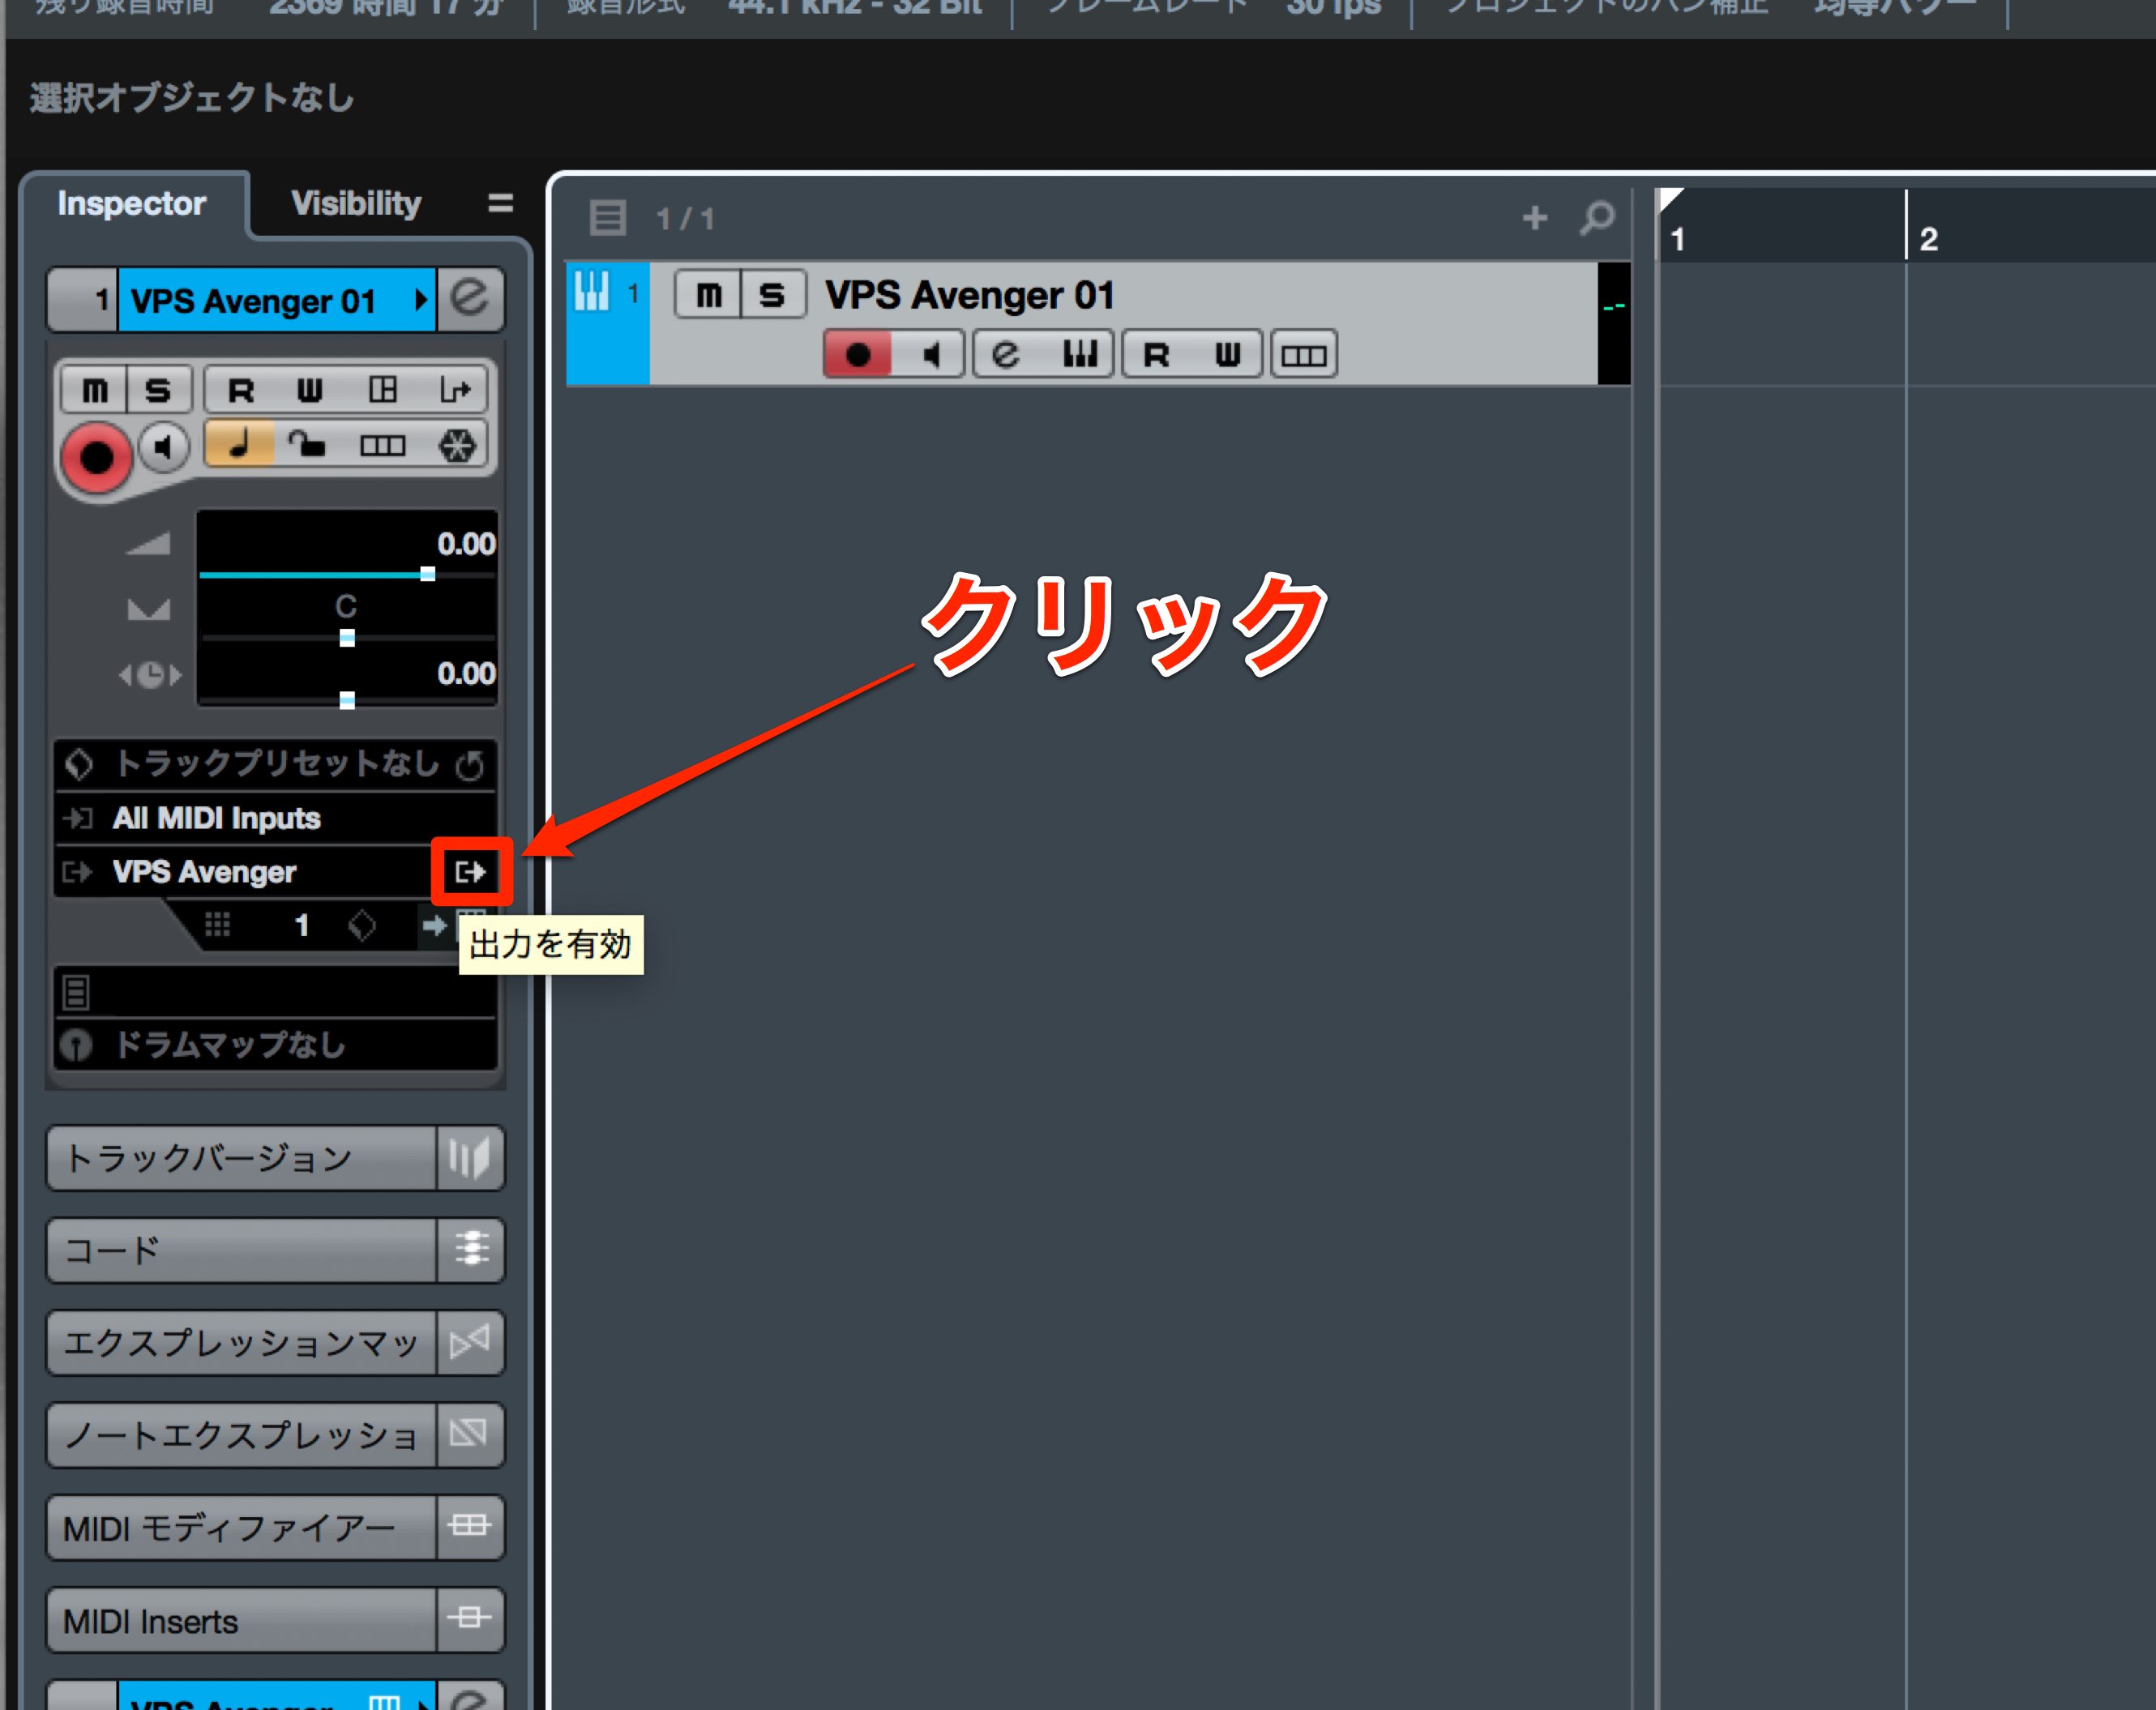
For Logic Pro
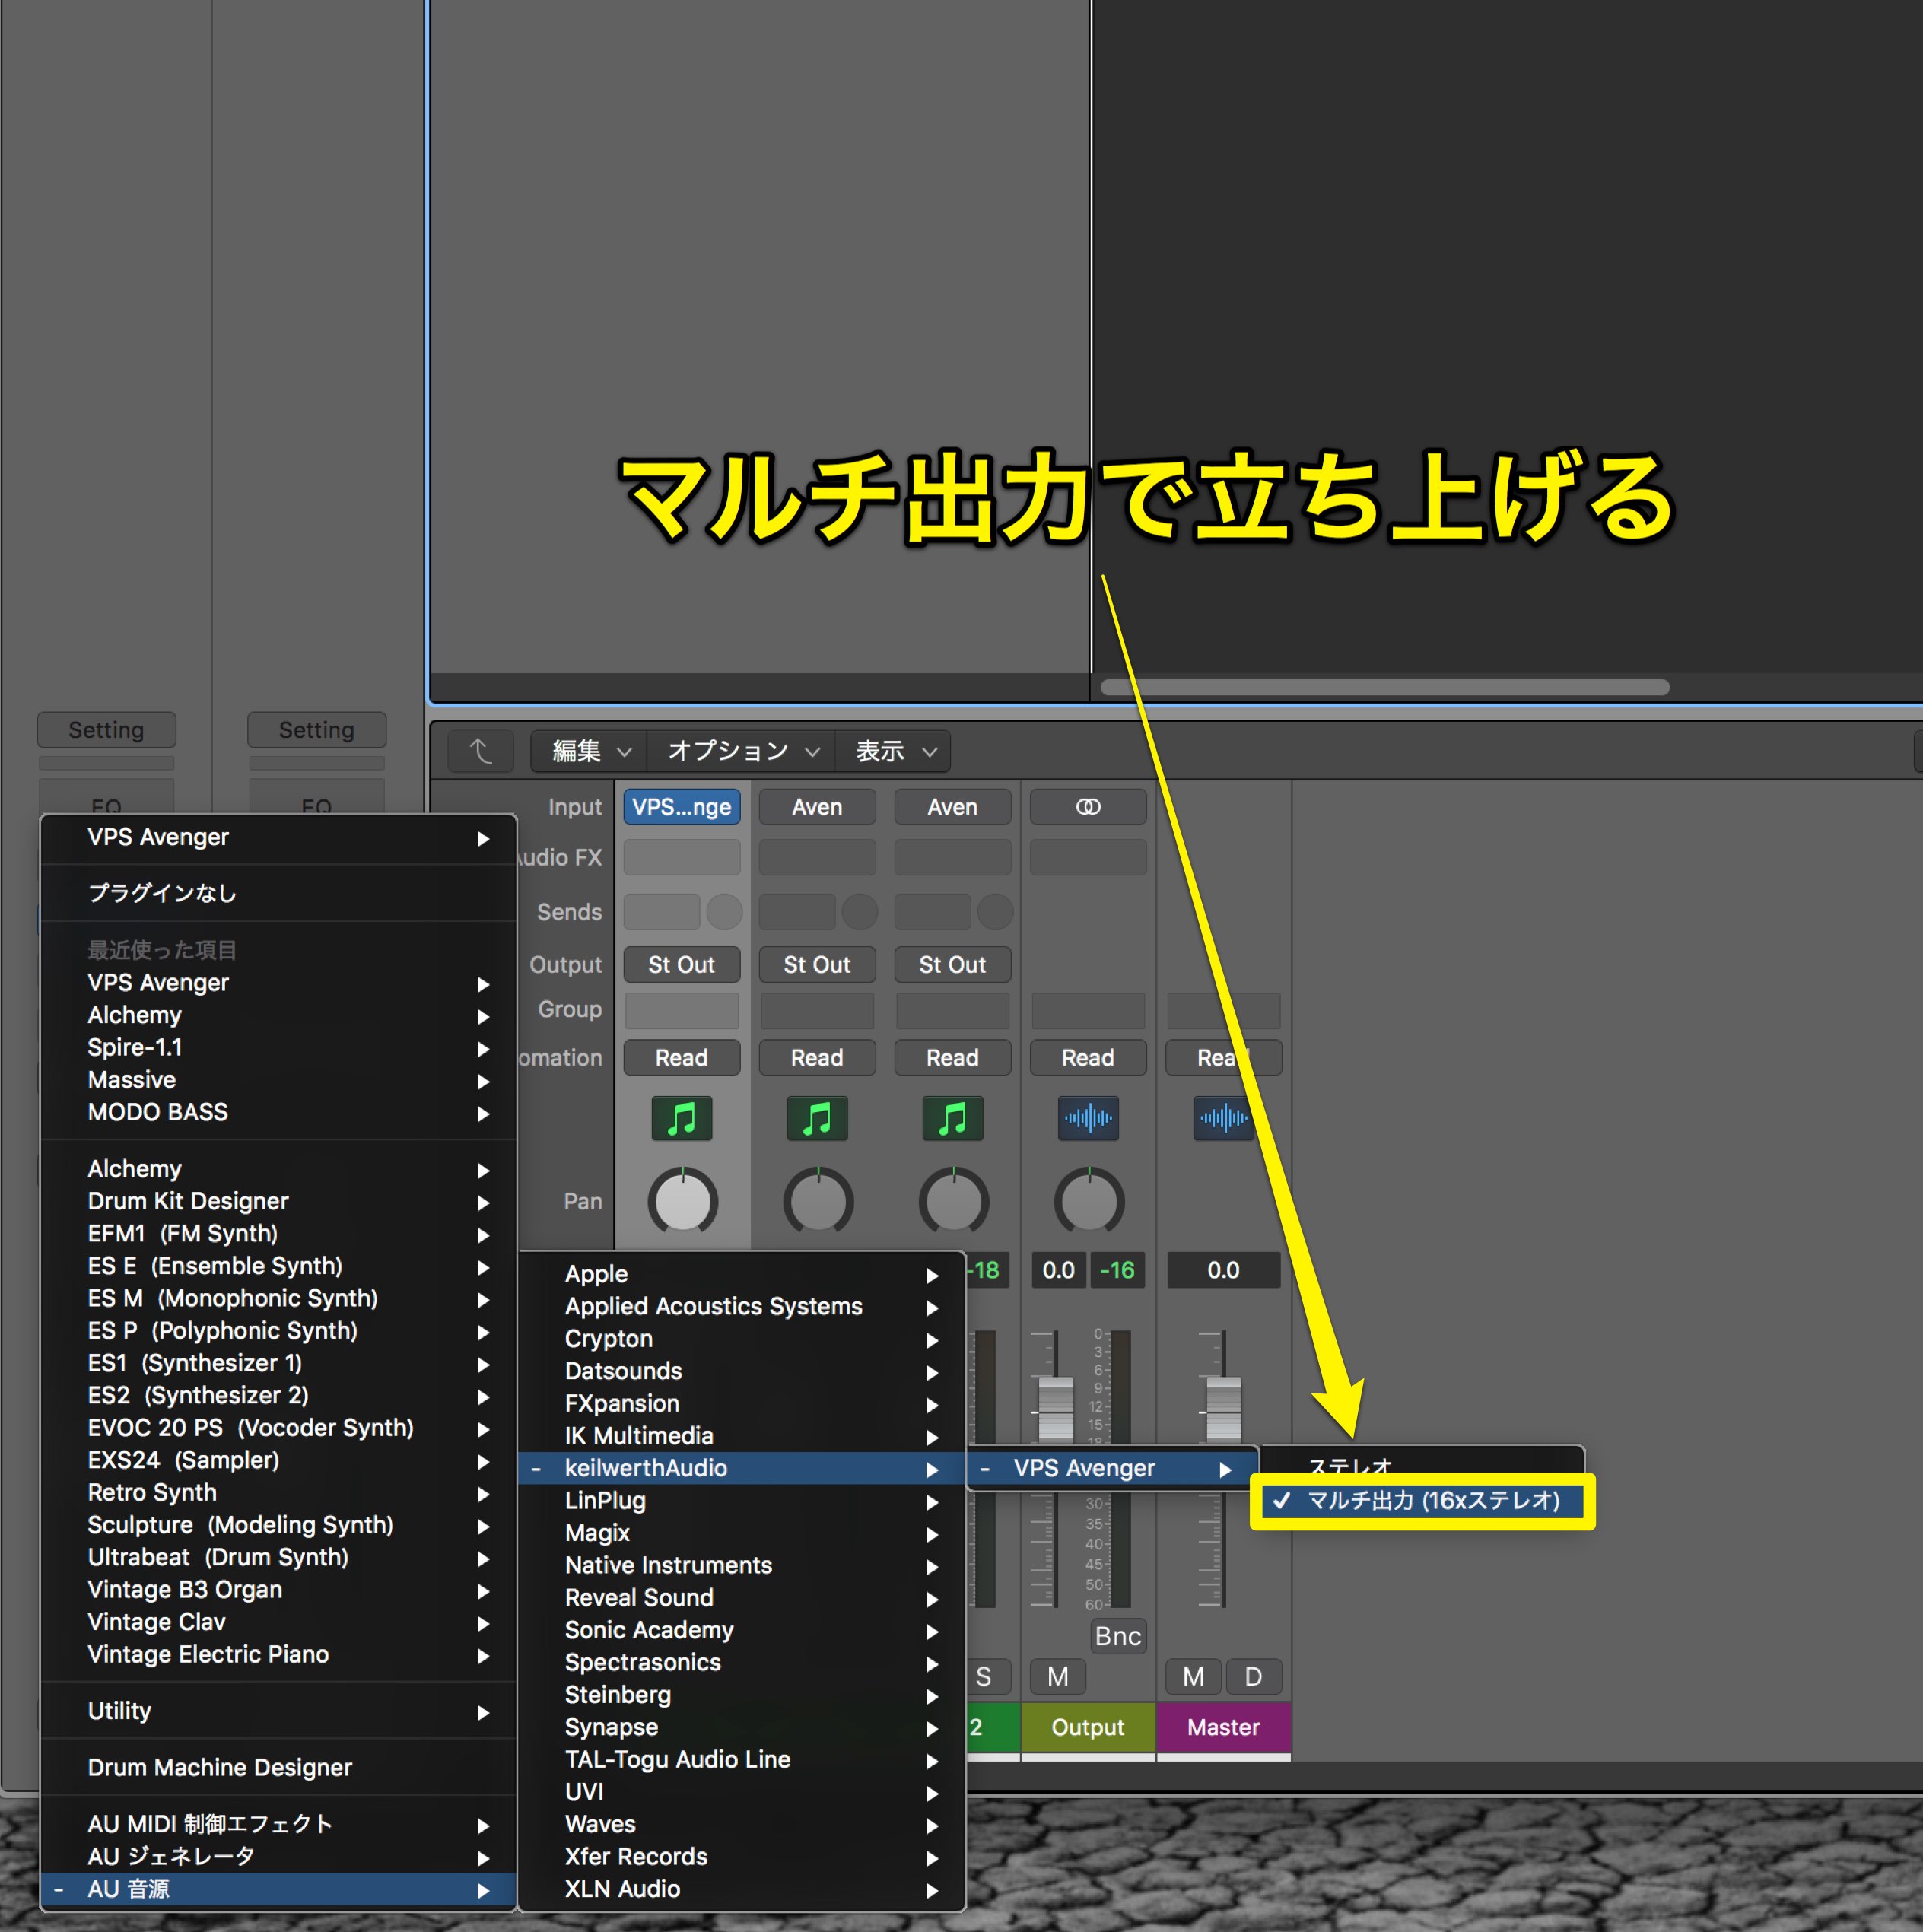
Open Avenger from multi output,
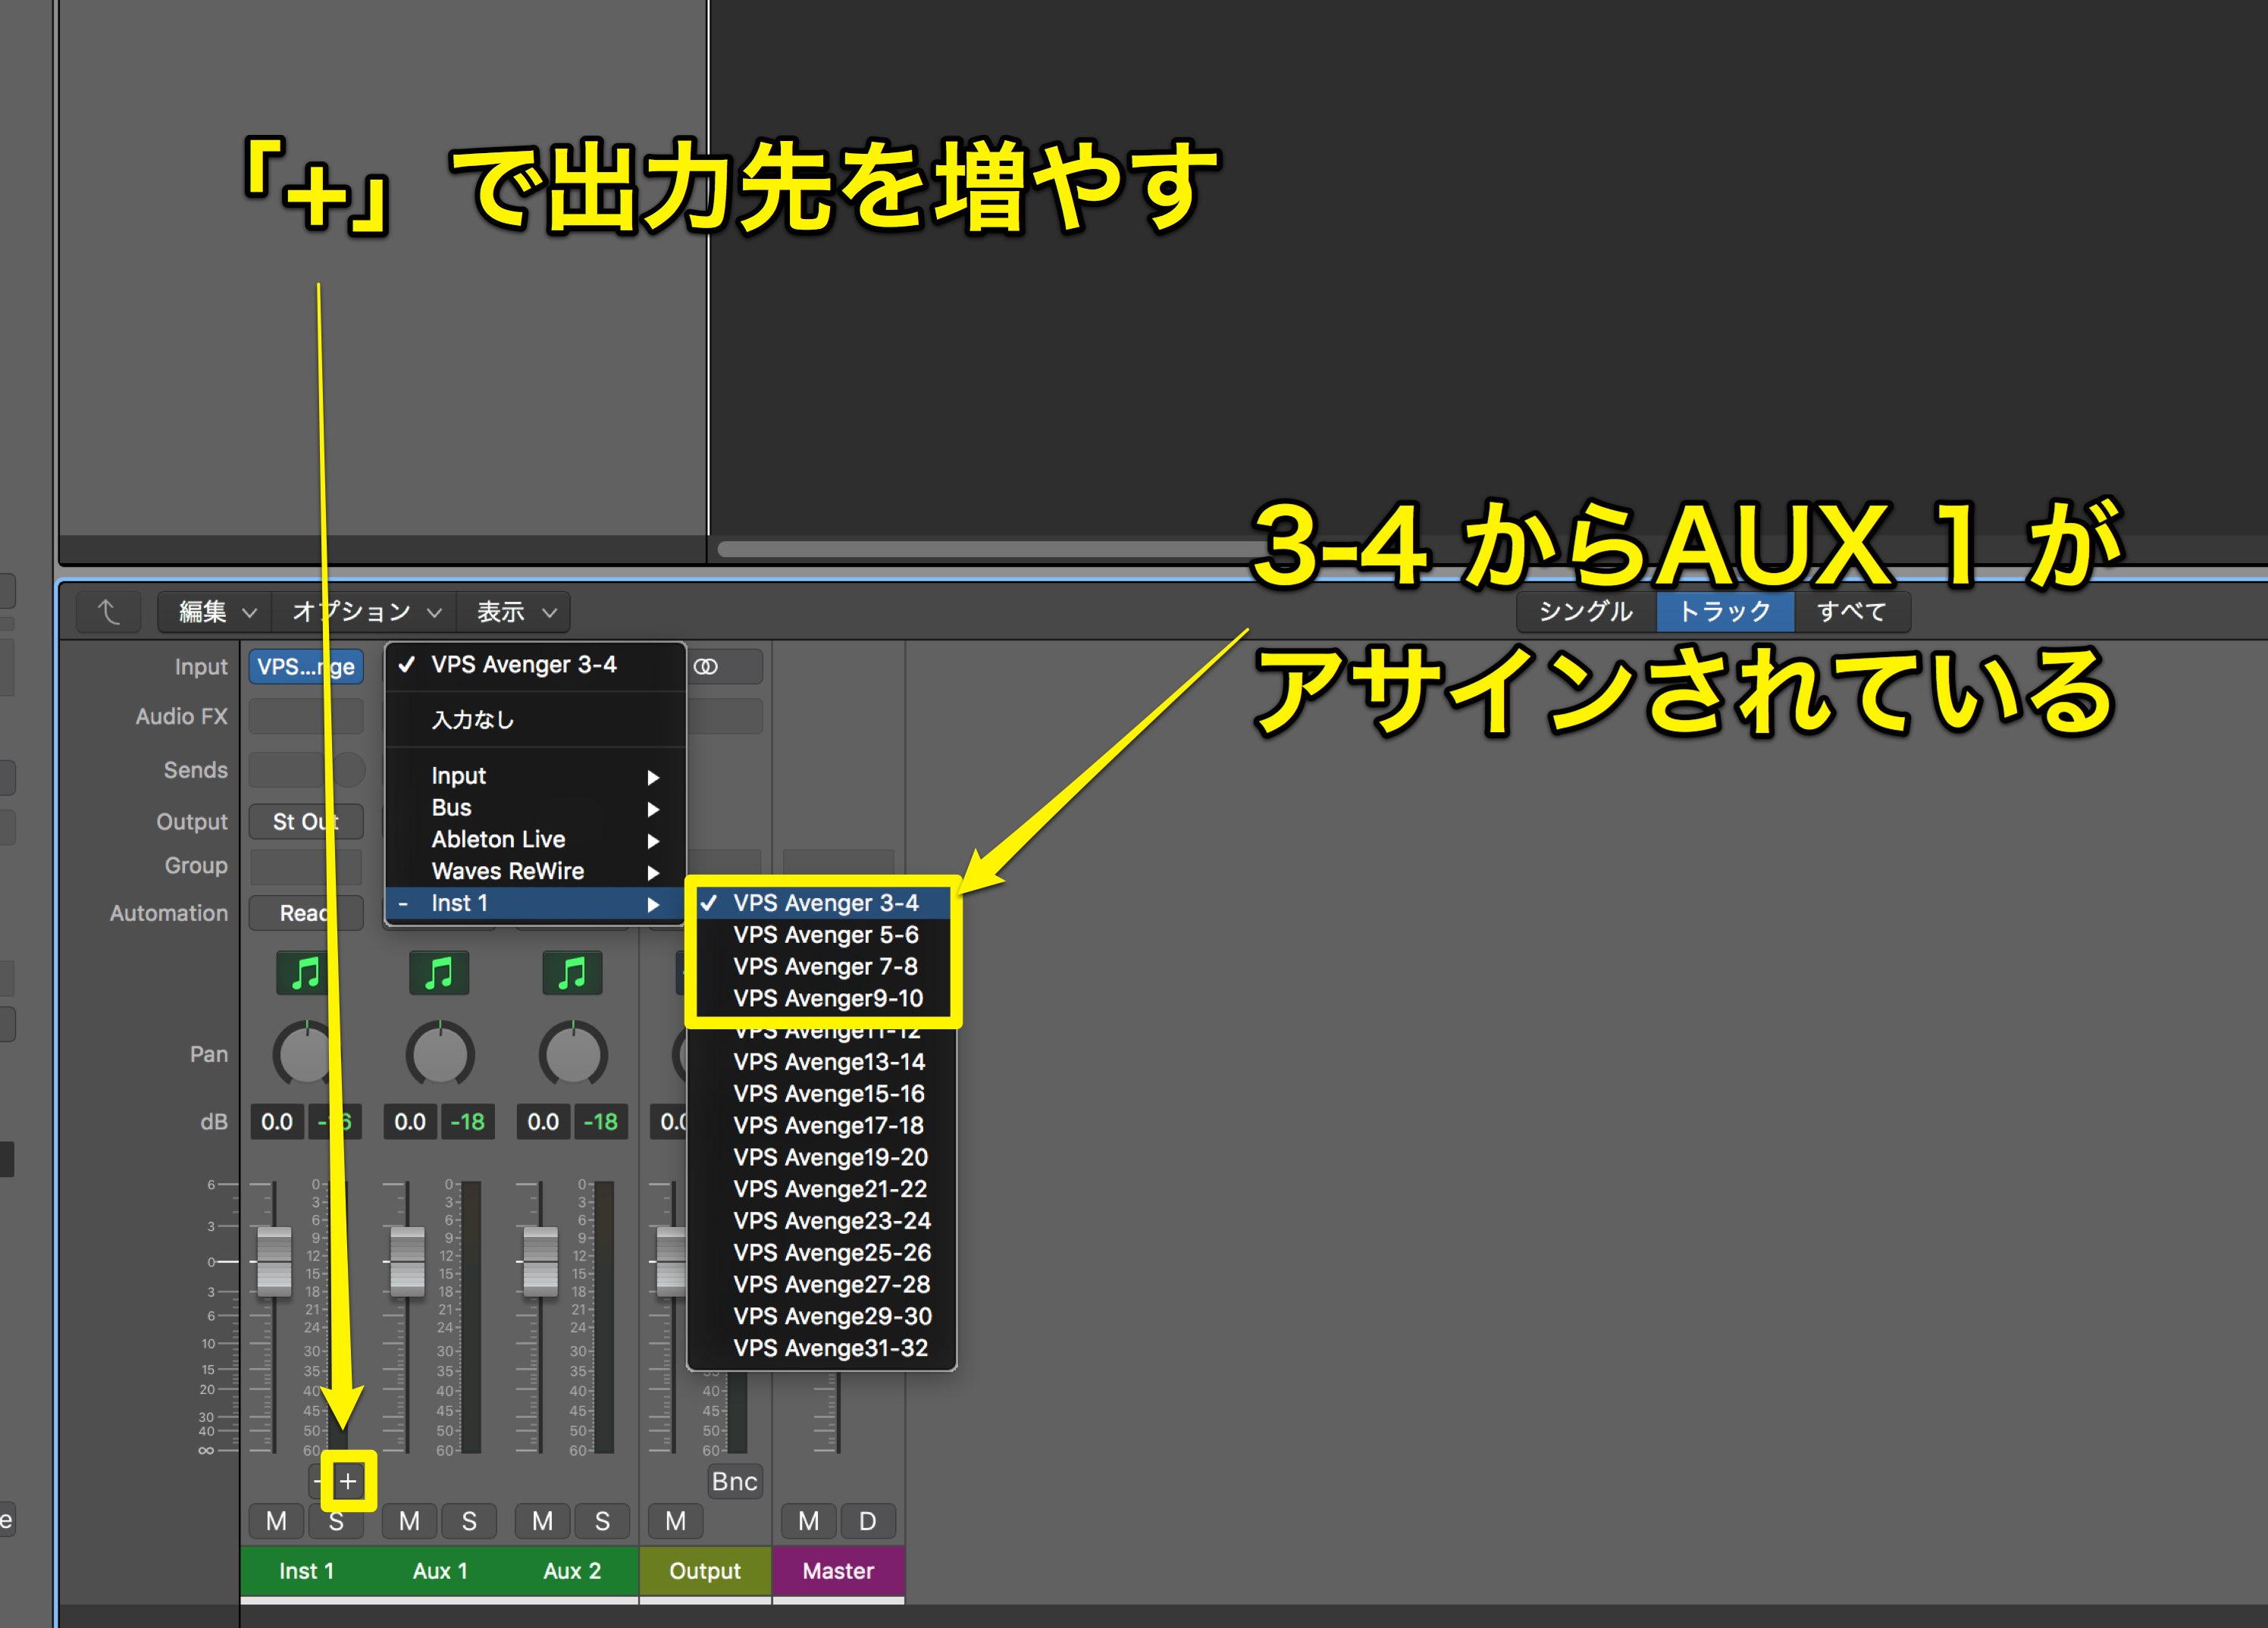
increase outputs with “+,” with “3-4” being assigned to AUX1.
To increase MIDI tracks,
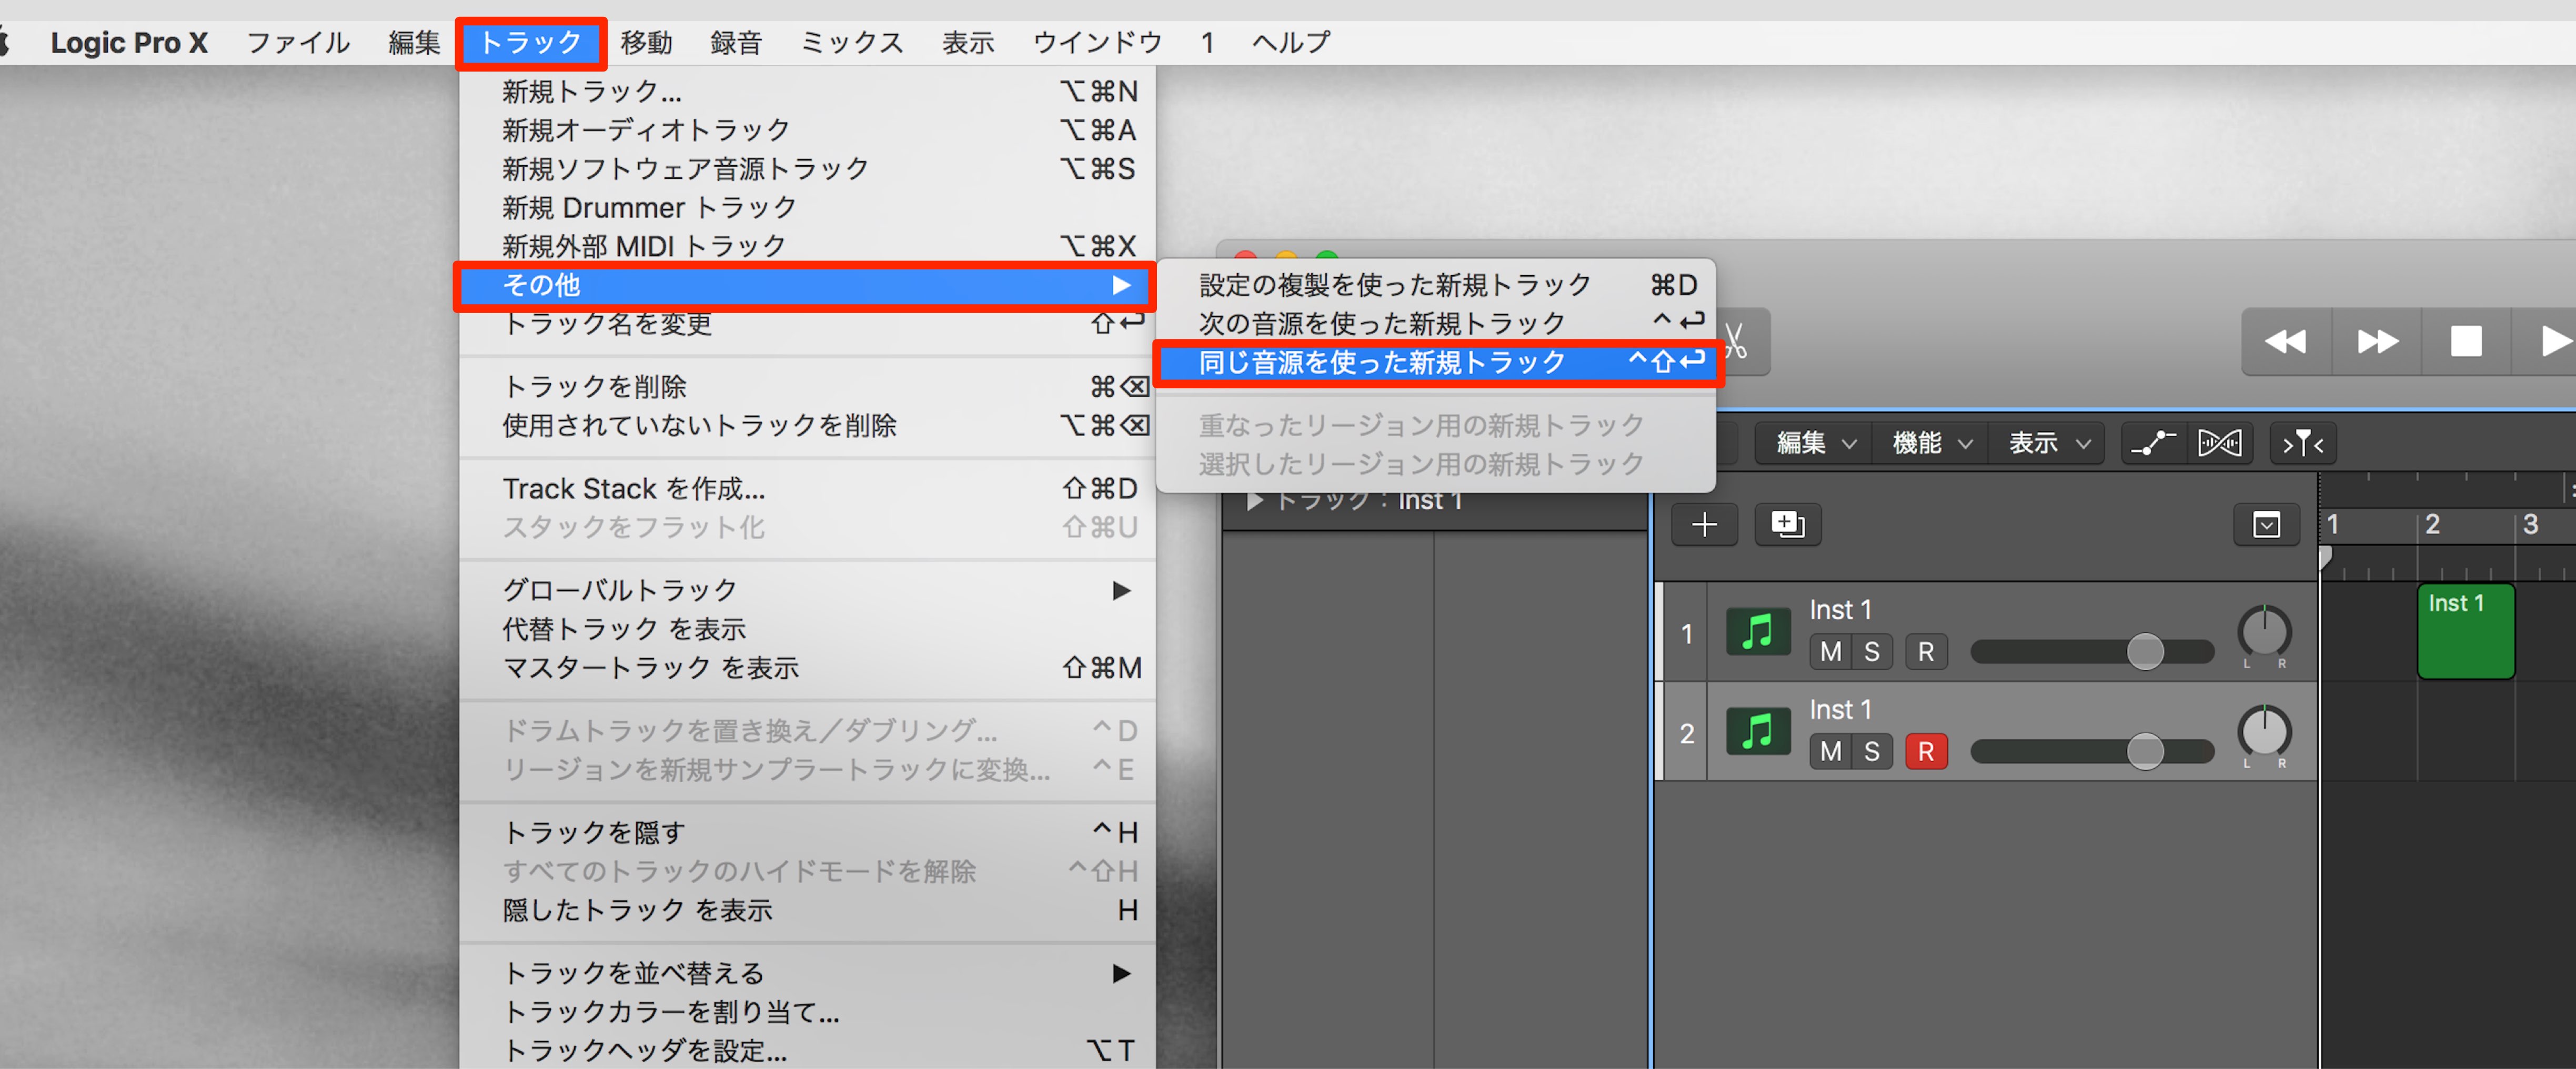
select track from Logic’s menu,
and click open a new track with the same plugin. With this we can increase our midi tracks.
For Cubase
Activate outputs by clicking the icon.

Cubase is already set up as AUX1.
Check the outputs that you want to add.
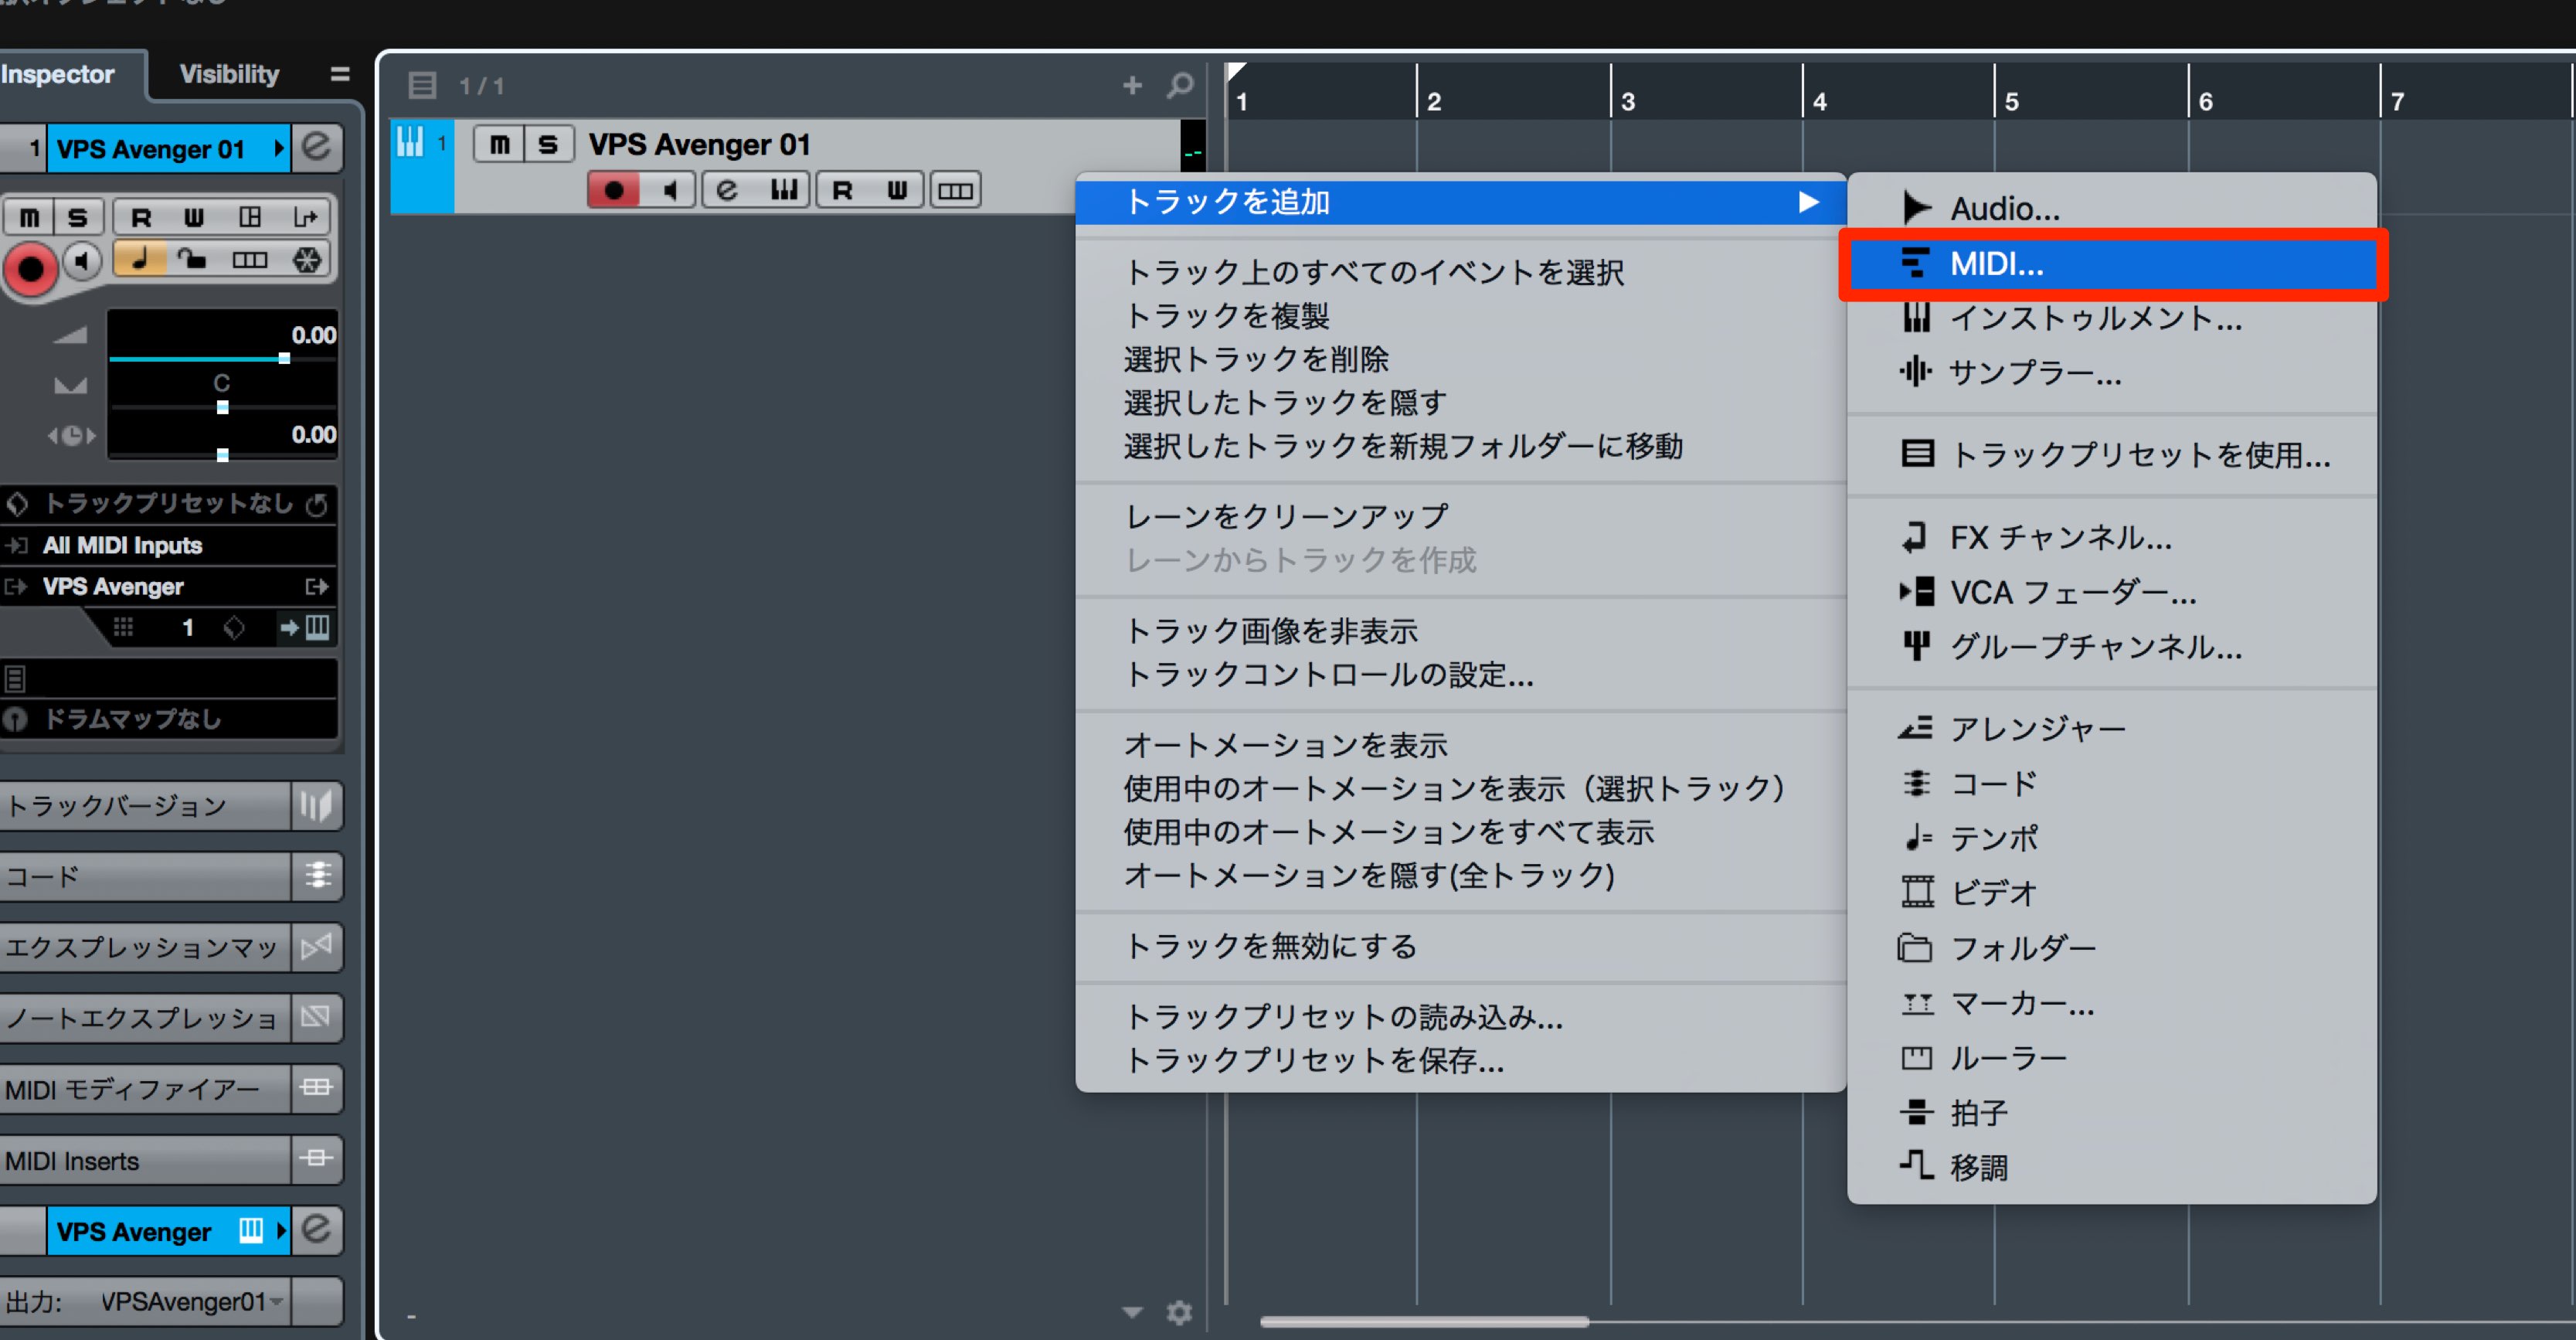
Right click the track with Avenger, and select Add track → MIDI.
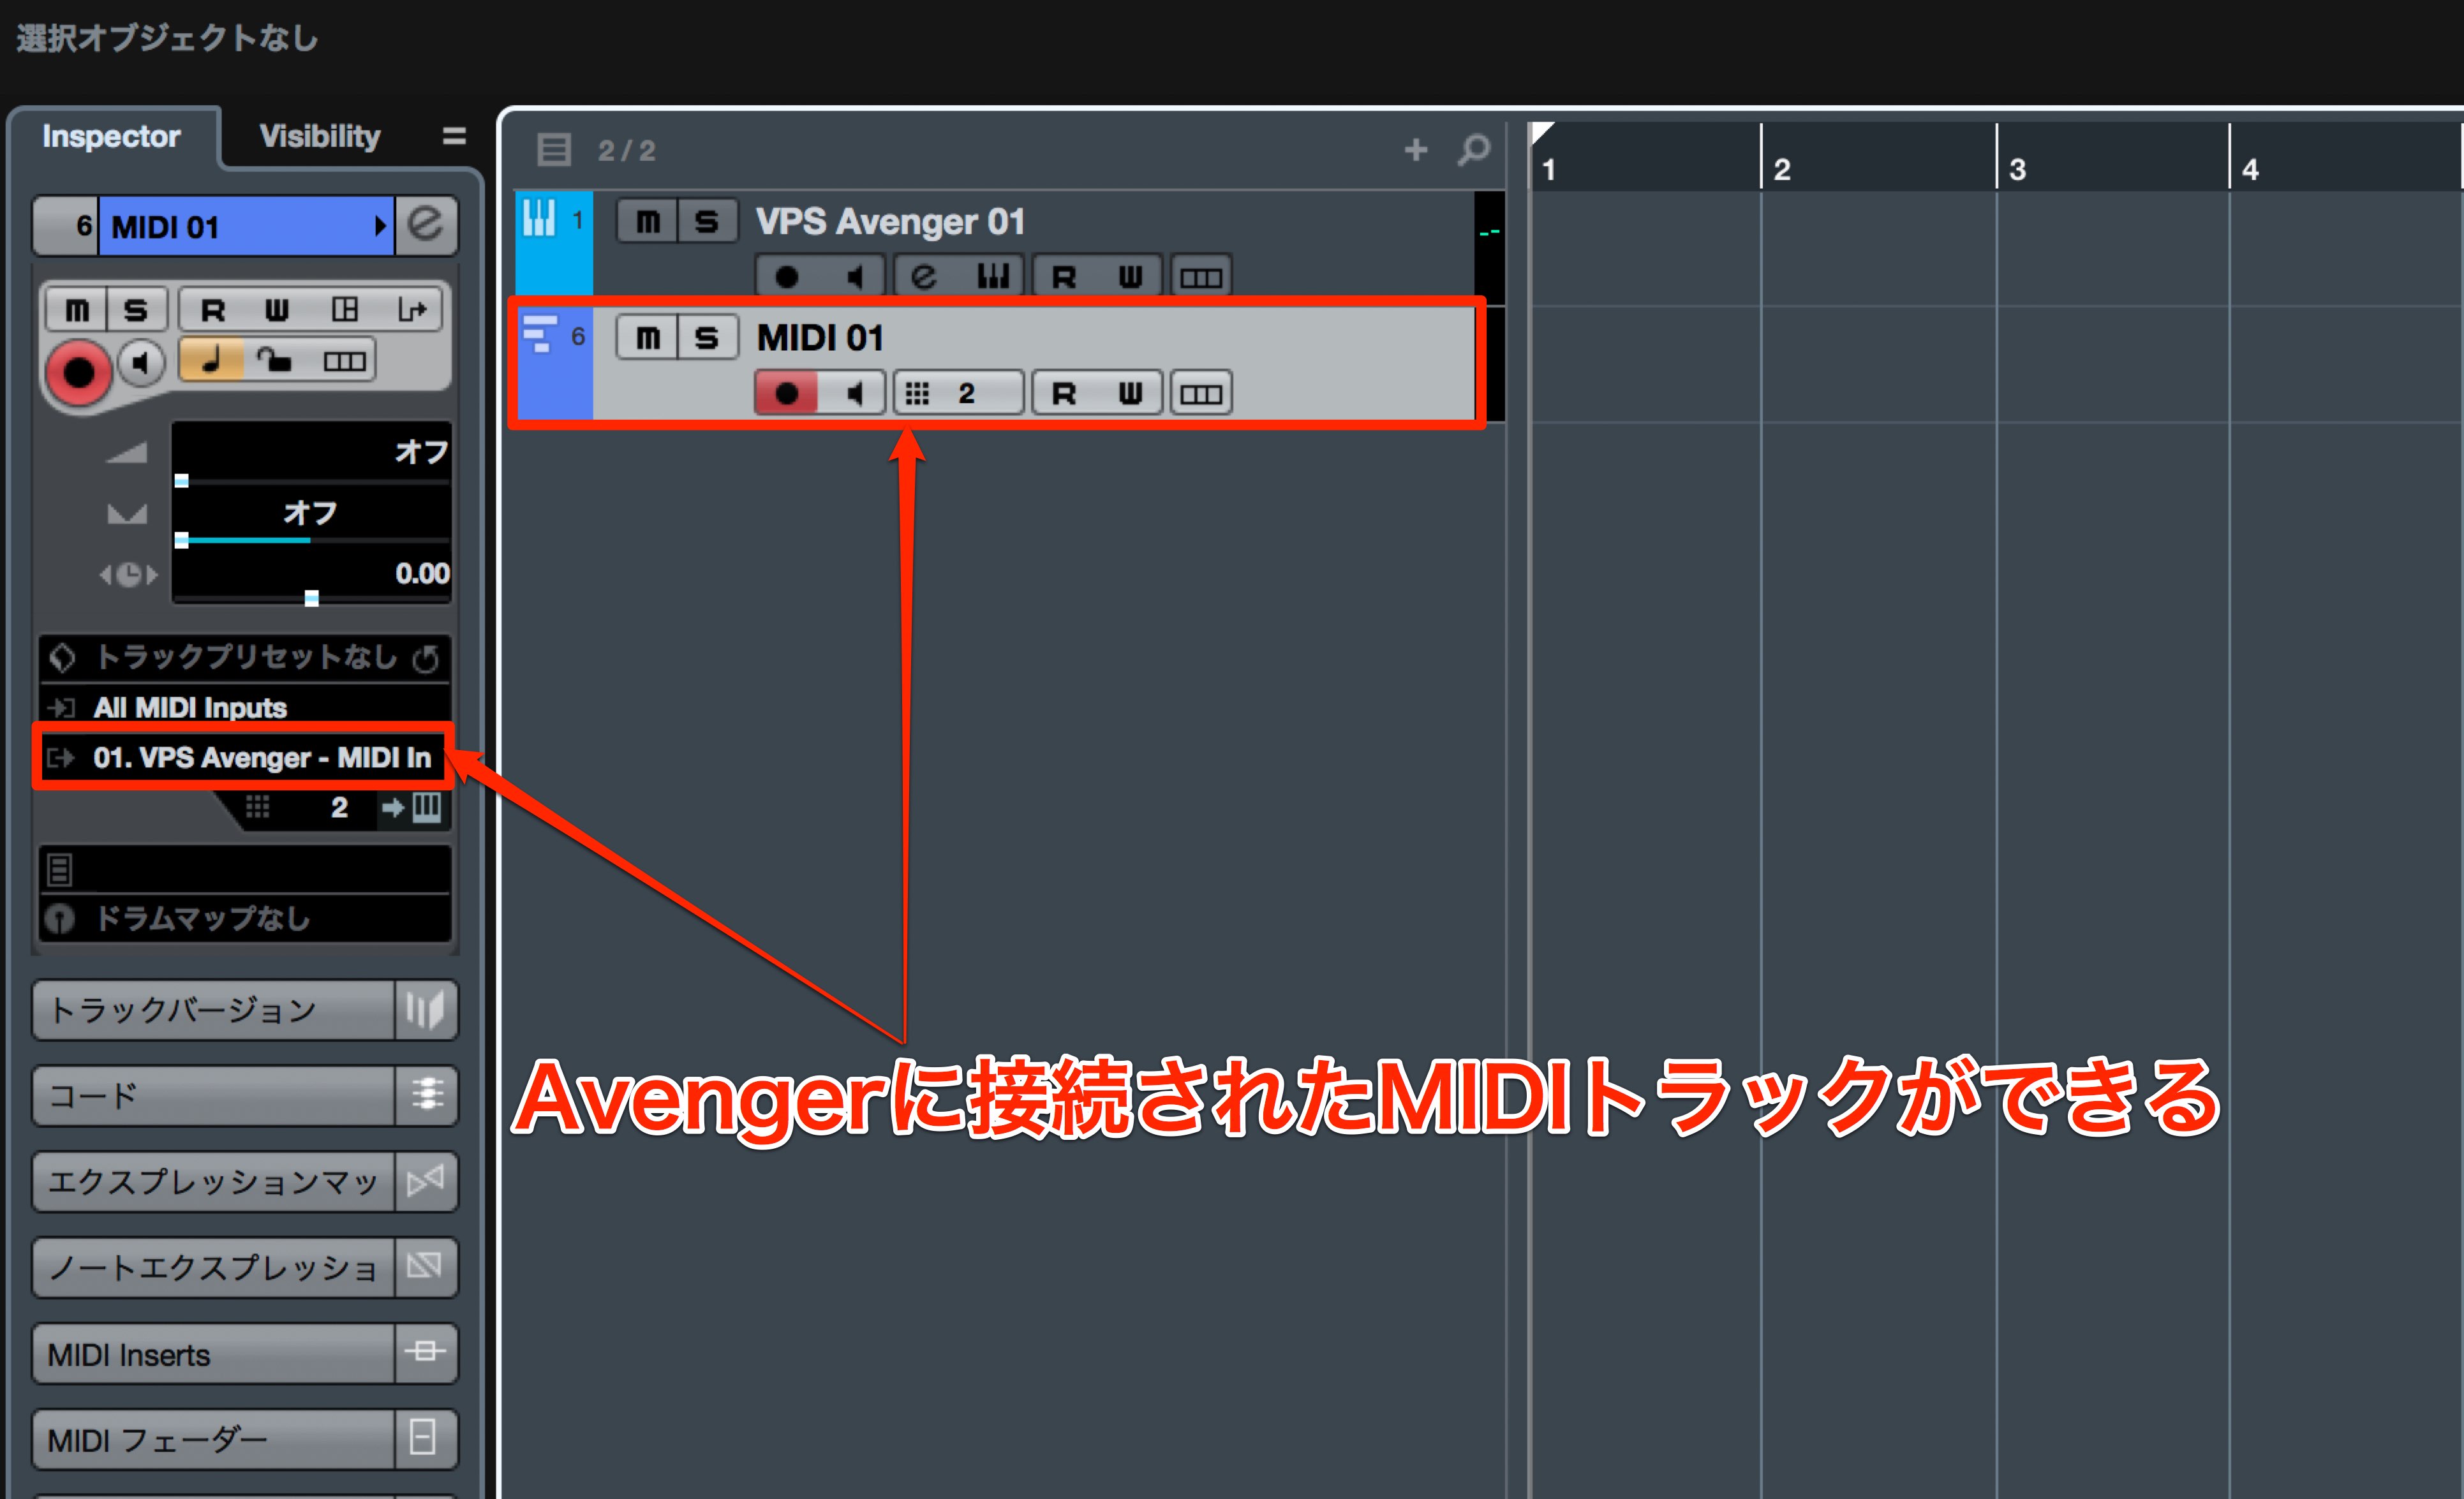
With this you will have a MIDI track connected to Avenger.
Though setting up individual outputs are slightly difficult, once done correctly, they serve as a powerful tool.
Please try it out in your next project!