iZotope RX 7 の使い方③ 各種ノイズ、リバーブ、クリップ除去
有用性の高いモジュールを紹介
iZotope社のオーディオリペアツール、RX 7の使い方第三弾となります。
前回に続き、各モジュールを用いた処理を取り上げていきたいと思います。
非常に多くのモジュールがありますが、その中でも個人的に有用性が高いと感じたものからピックアップしました。
iZotope RX 7 使い方動画③
De-hum
まずはこちらのサンプルをお聞きください。
ブーンというハムノイズと、パチパチと細かく鳴っているクラックルノイズが入っていますね。
これらを取り除いていきましょう。
ハムノイズの処理には、De-humを用います。
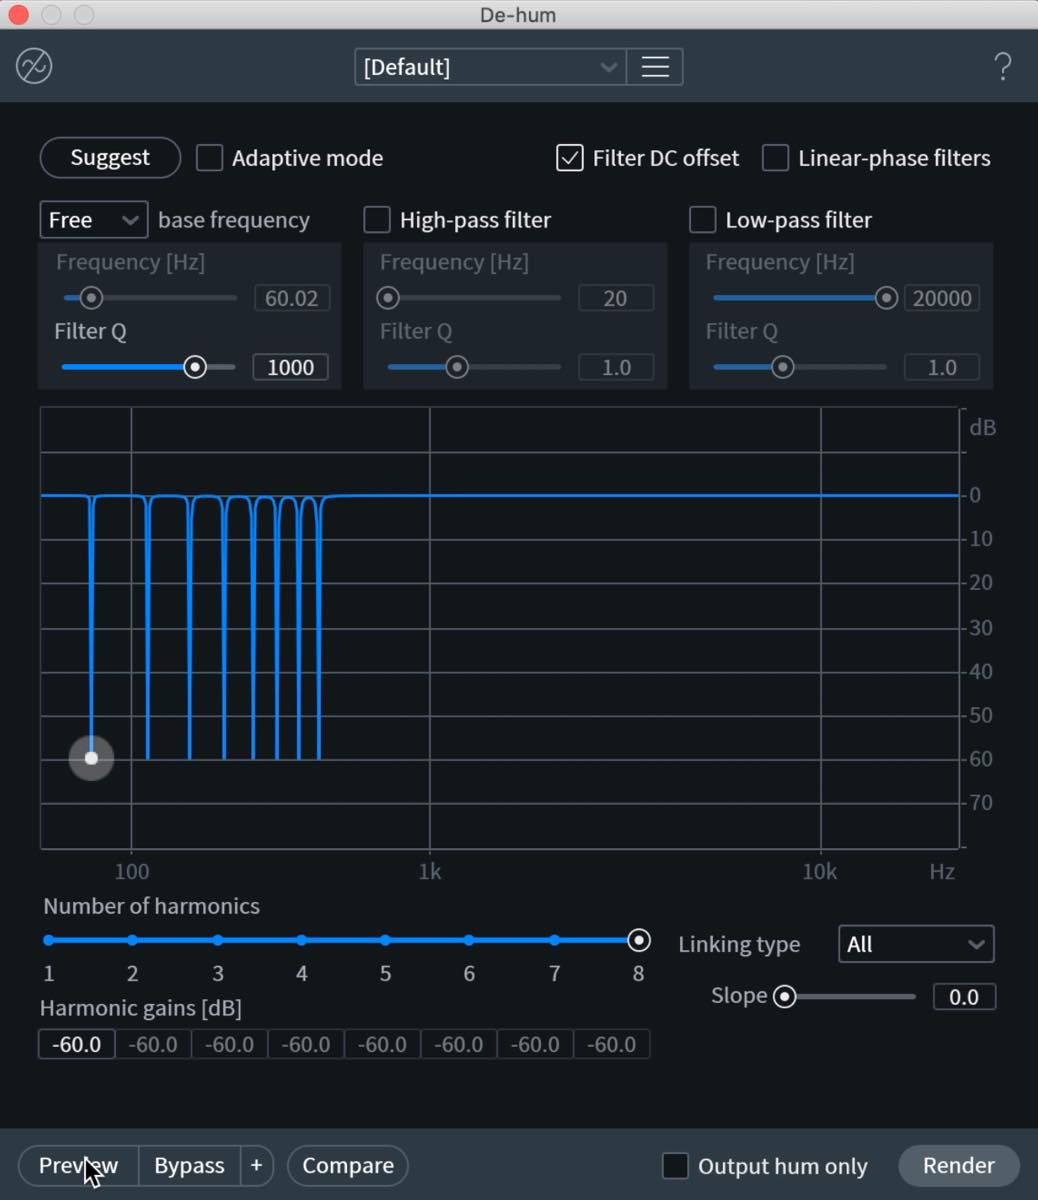
ハムノイズは一般的には50Hzもしくは60Hzの低周波をベースとして幾つかの倍音を含んだノイズとなります。
そこで、Base Frequencyで50Hzもしくは60Hzを選択してもいいのですが、この選択をAIに委ねたい場合は、上のSuggestボタンを押します。
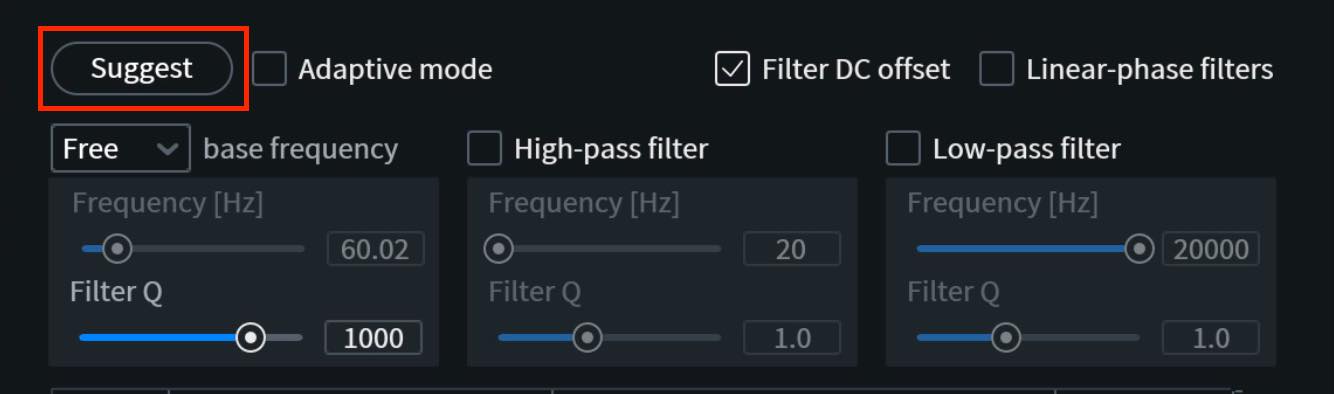
すると分析され、Freeモードでより正確な周波数を設定してくれます。
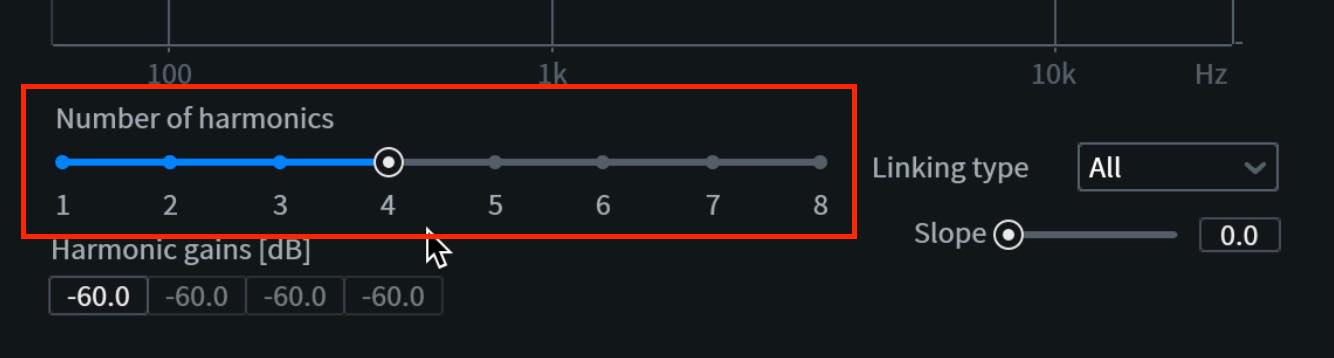
この状態で、「ハムノイズは軽減されたが声への影響が気になる」という場合は、ノイズが気にならなくなるギリギリまで、倍音数を減らしてみましょう。下のNumber of harmonicsで調整します。
次に、カットの量を調整しましょう。画面上で操作してもいいですが、Freeの場合周波数がずれてしまいますので、数値を打ち込んでいきます。
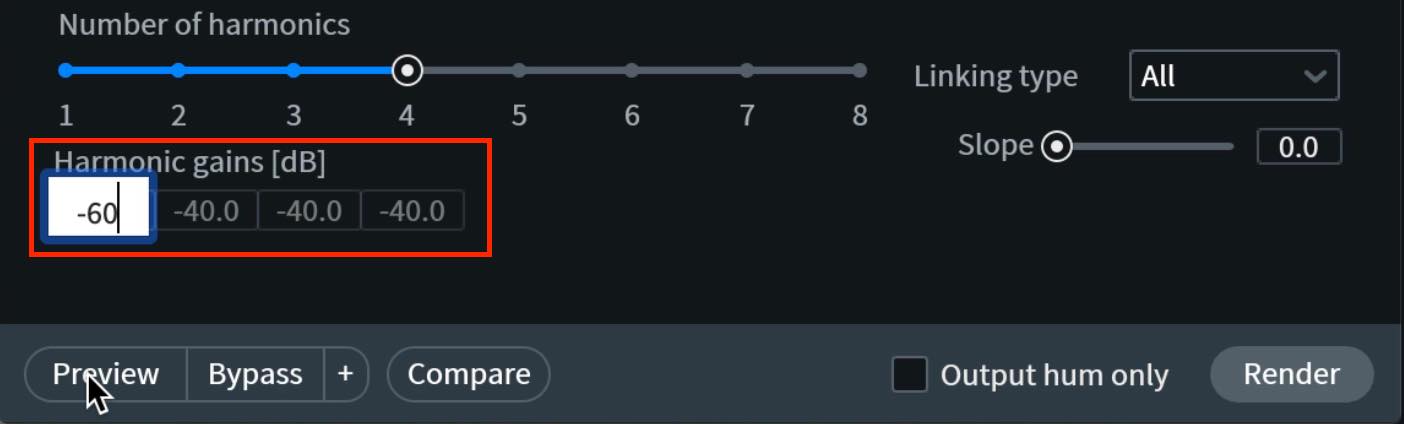
ノイズが目立たない、かつ声への影響が少ないポイントを探りましょう。
低域に関しては、声の成分と被らない部分まではカットしてもいいでしょう。High-pass-filterをオンにして、100Hz付近までカットします。
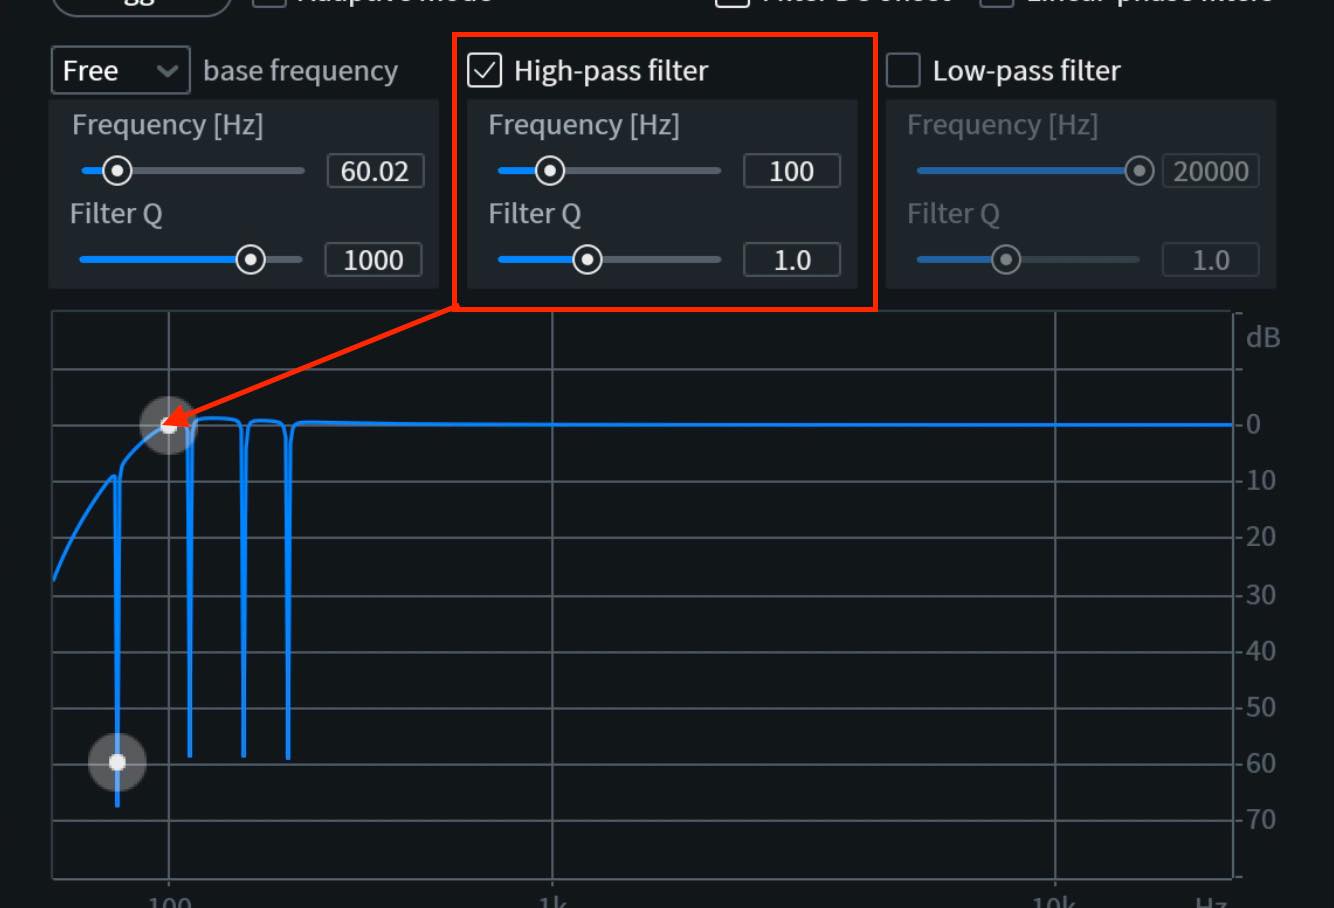
Low-pass-filterについてはあまり使用頻度は少ないと思いますが、ノイズの種類によって気になる場合は使ってみてもいいでしょう。
倍音についてさらに細かい調整を行いたい場合は、Linking Typeを変更します。
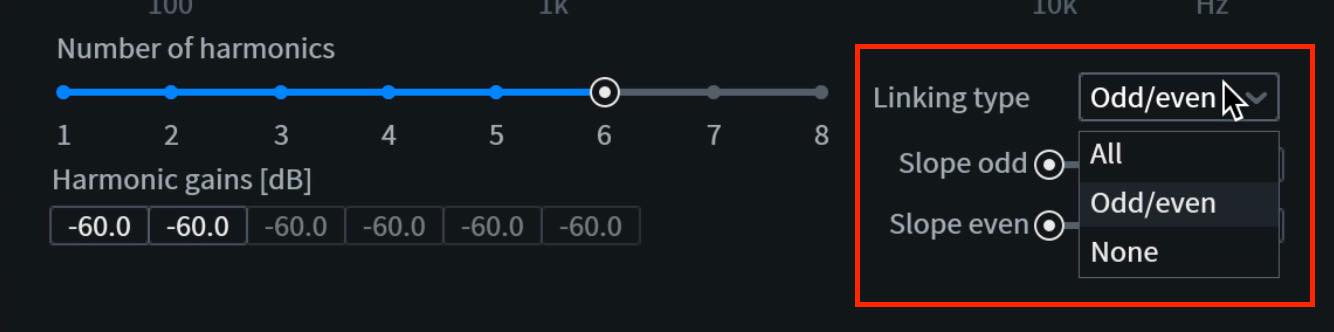
Allでは倍音全体をリンクして操作することができます。
odd/evenとすると、奇数倍音、偶数倍音をリンクさせながら操作することが可能です。
Slopeスライダーでは高域になるにつれ効果を弱める形で傾斜をつけることができます。
Noneとするとリンクが解除され、個別のGain設定となります。

De-Crackle
続いて、パチパチとしたクラックルノイズに対処していきます。
使用するのは「De-crackle」です。
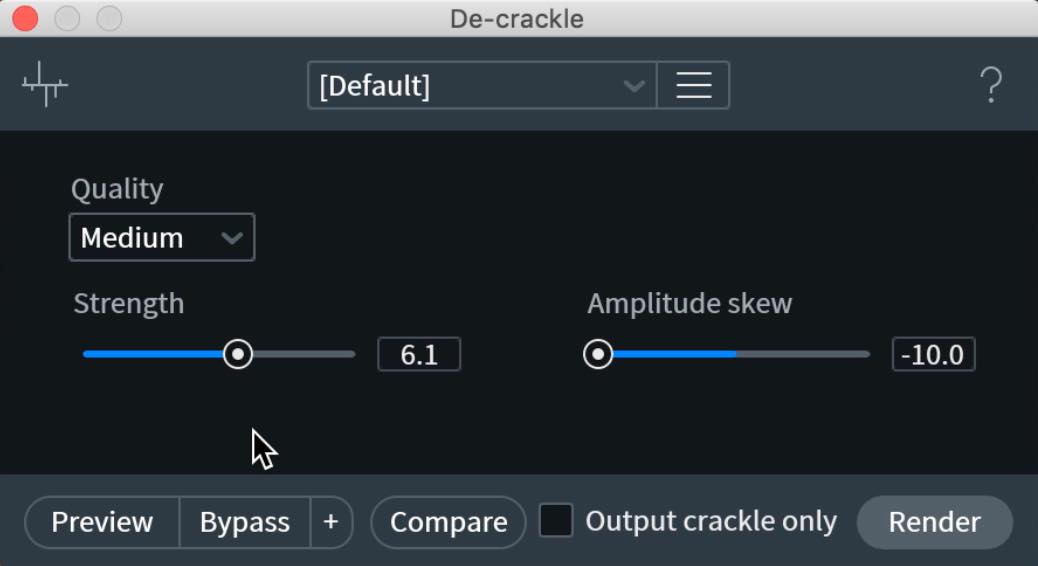
- Quality:Lowの方が処理速度重視で、Highの方が品質重視ということになります。場合によってはHighよりMediumの方が結果が良い場合もありますので、聴き比べるといいでしょう。
- Strength:効きの強さを決めるもので、なるべく上げていきたいところですが、上げすぎると若干声にも影響が出てしまいます。「Output crackle only」も活用しながら、ちょうどいいところを模索しましょう。
- Amplitude skew:信号の振幅に対する処理量を設定します。右に動かすほど振れ幅の多い部分、つまり音量が大きい部分にフォーカスし、左に動かすとその逆となります。クリップノイズなどに対処したい場合は大きくしますが、今回のようなパチパチとした細かいノイズに対しては、小さくしておいた方が結果が良くなるでしょう。
完全に除去しきれなかったノイズについては、前回ご紹介したSpectral De-noiseをかけて仕上げてみました。
このようにかなり綺麗にすることができました。
De-reverb
今度はサンプルを変えて、「De-reverb」というユニークなモジュールについてご紹介しましょう。
これはその名の通り、リバーブエフェクトや、音声に混じった部屋の反響などを取り除く際に使用します。
まずは今回の対象となるサンプルをお聞きください。
このように、しっかりとリバーブがかかっていますね。
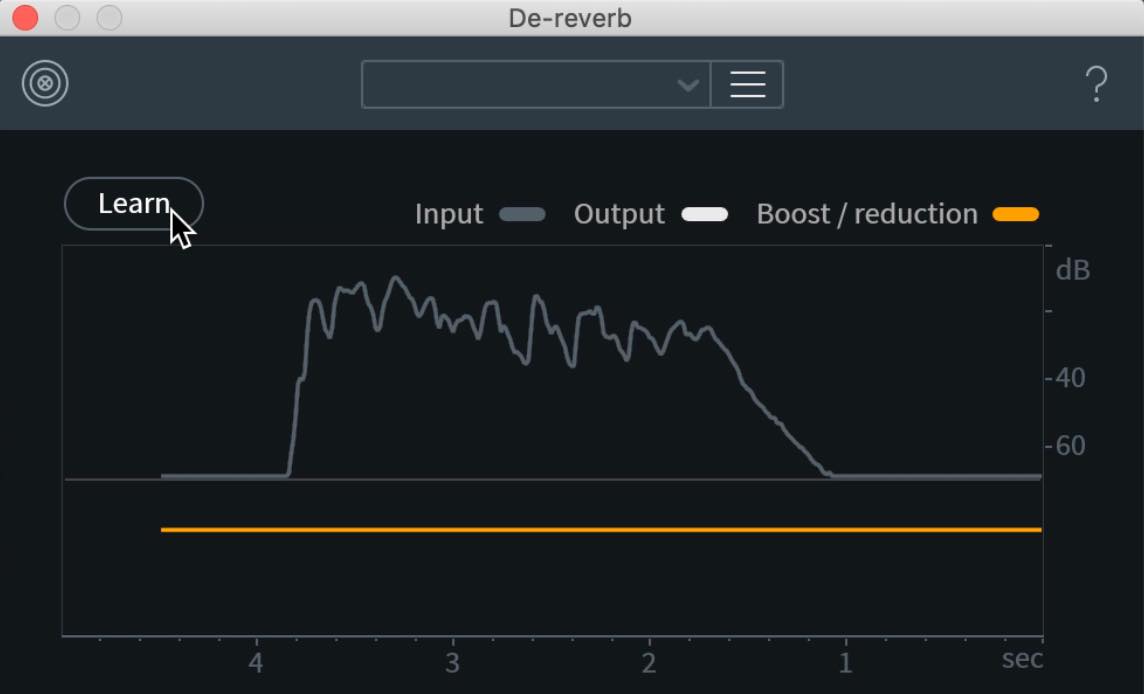
これに対してDe-reverb を適用していきます。

様々なパラメーターが並んでいて迷ってしまいますが、そこはやはりRX7ということで、Learnボタンによりある程度自動的に設定を行うことができます。
もう少し設定を追い込みたい場合、帯域ごとのリバーブ除去量を決めるReverb ProfileはLearnの結果に任せておき、Reductionやtail lengthなどをいじるだけで大きく結果を変えることができます。
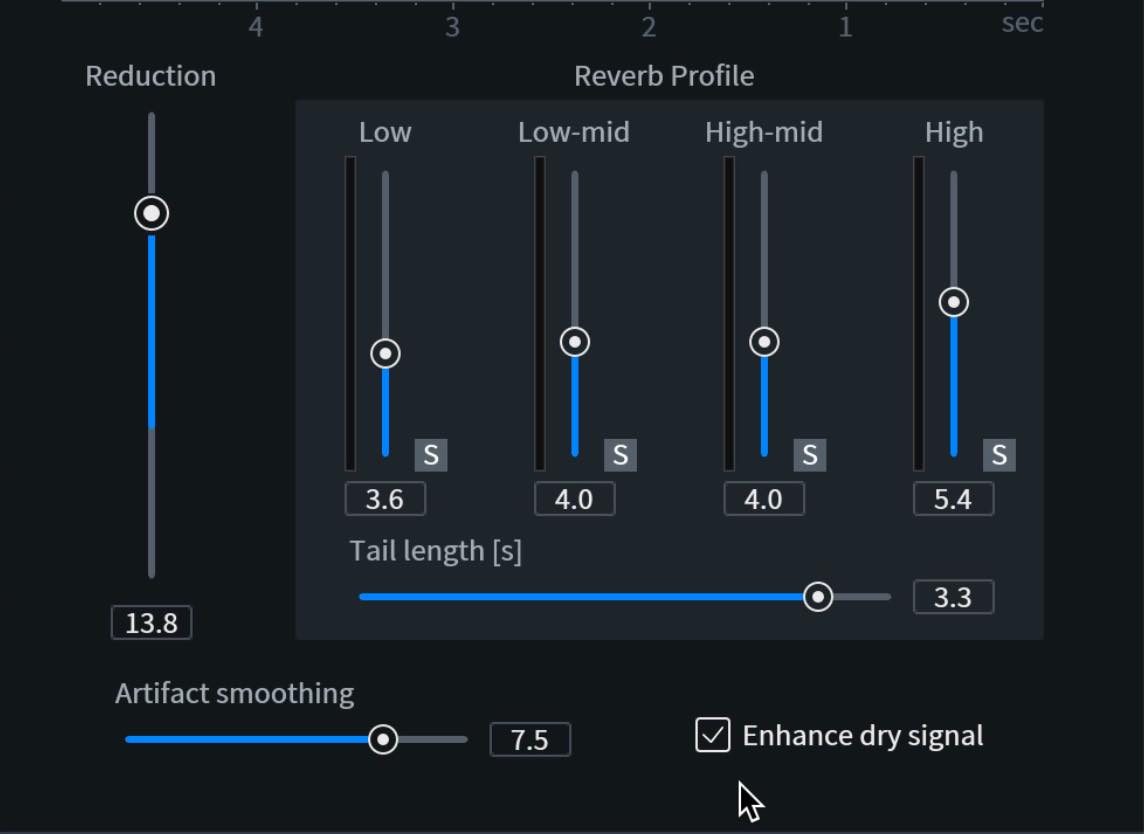
- Reduction:上げるほど削除されるリバーブ量が増加します。なるべく上げたいところですが、上げすぎると声が波打つような現象が起きますので、バランスを見極めつつ設定します。
- Tail length:右に動かすほど長い残響に対応します。一度大きく右に振ってみて、波打つような不自然な音量変化が起きたら、左に戻して対処してください。
- Artifact smoothing:リバーブ除去の周波数精度を操作するもので、小さくするとやや加工ノイズのようなものが入り混じりますが、除去量は増えるように感じます。一方で大きくすると加工ノイズのない滑らかな音声となりますが、やや残響感が増すようです。その辺りのバランスを見極めつつ設定します。
- Enhance dry signal:リバーブでないと判断された音声が増幅され、ダイナミックレンジも拡大します。歌やセリフなどの人の声には特に有効です。
各パラメーターを適切に設定した結果がこちらです。
もちろん完全なドライとまではいきませんが、かなりの制度と量で除去されていますね。
De-clip
続いては、うっかりレコーディング時に音割れを発生させてしまった際、クリップノイズを除去してくれるという「De-clip」です。
こちらもサンプルをお聞きください。
※他よりも音量が大きめなのでご注意ください
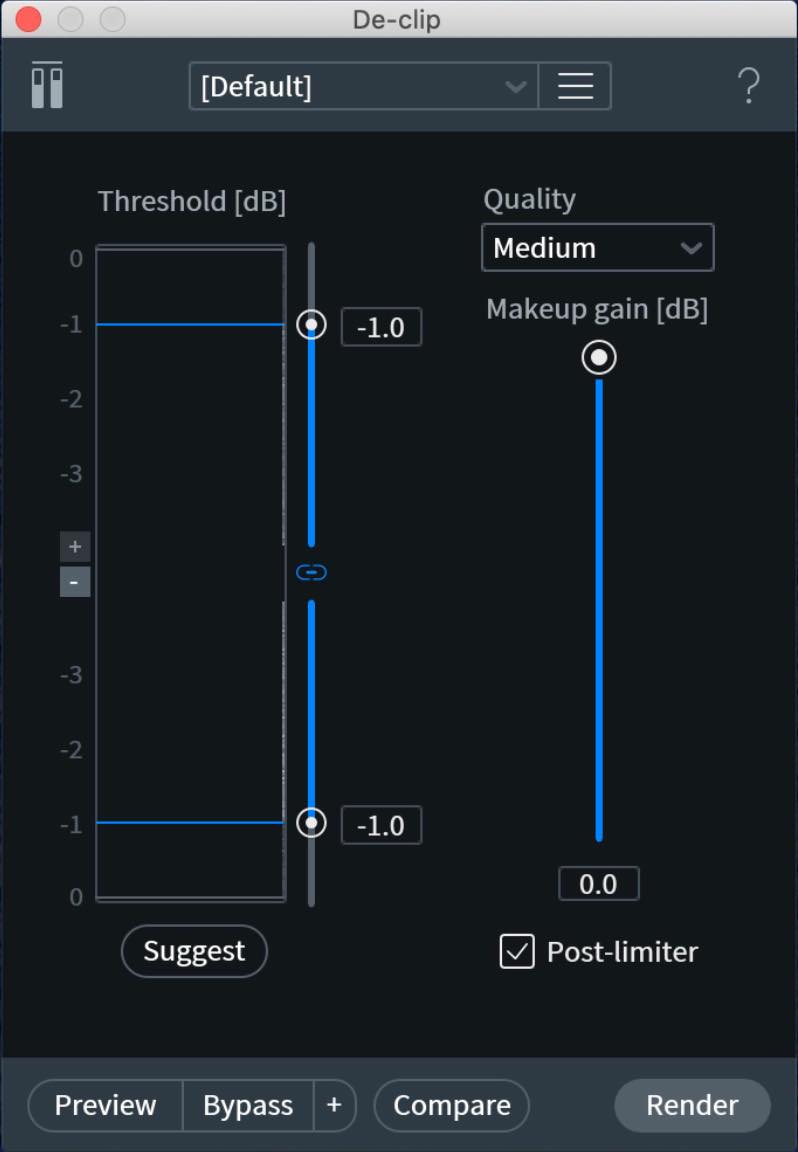
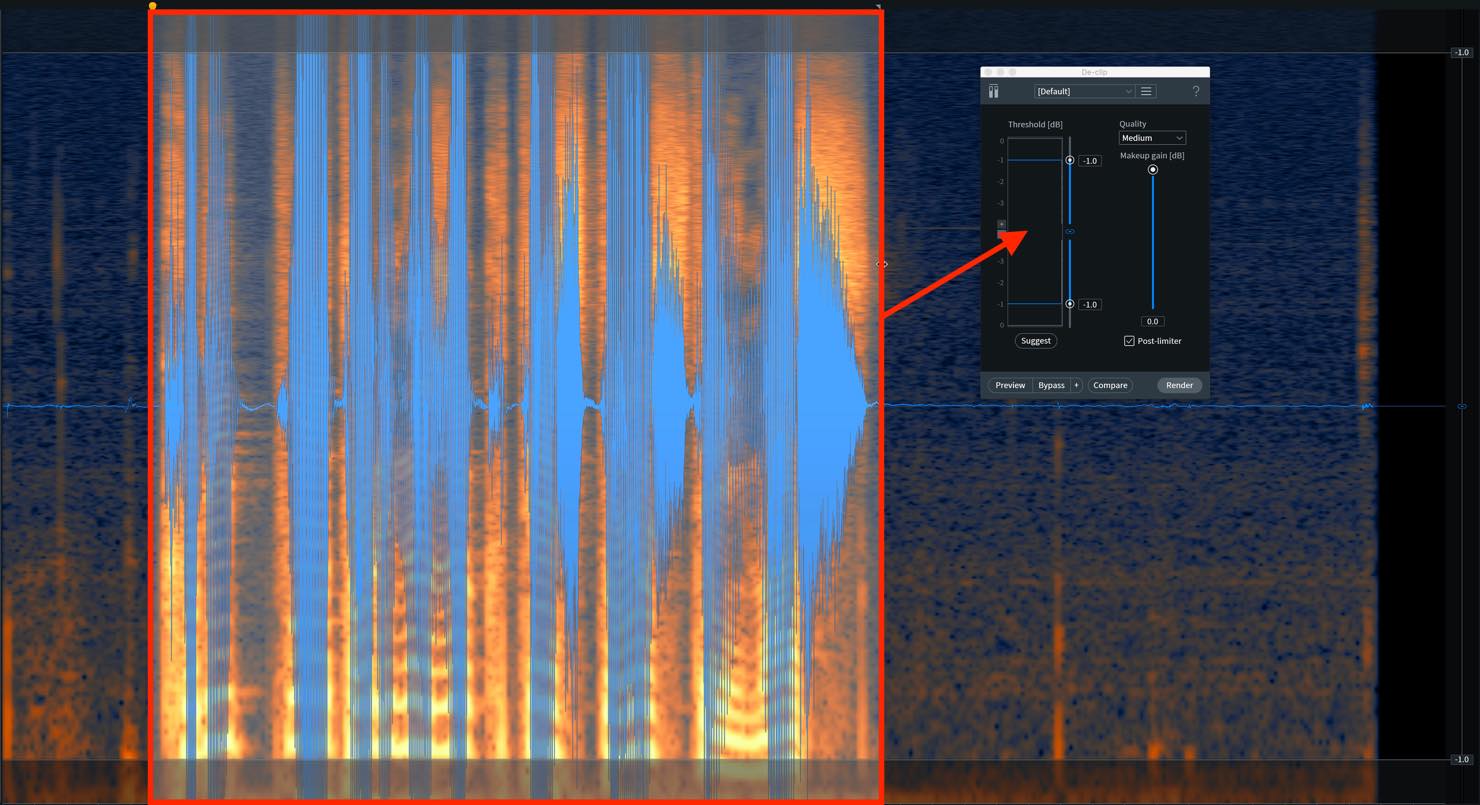
De-clipでは、まずクリップを検知するためのThresholdを設定します。その際、このヒストグラムを参考にしますが、現在は何も表示されていないように見えます。ヒストグラムは選択範囲によってアップデートされますので、まずは音声が入っている範囲を正しく選択しましょう。
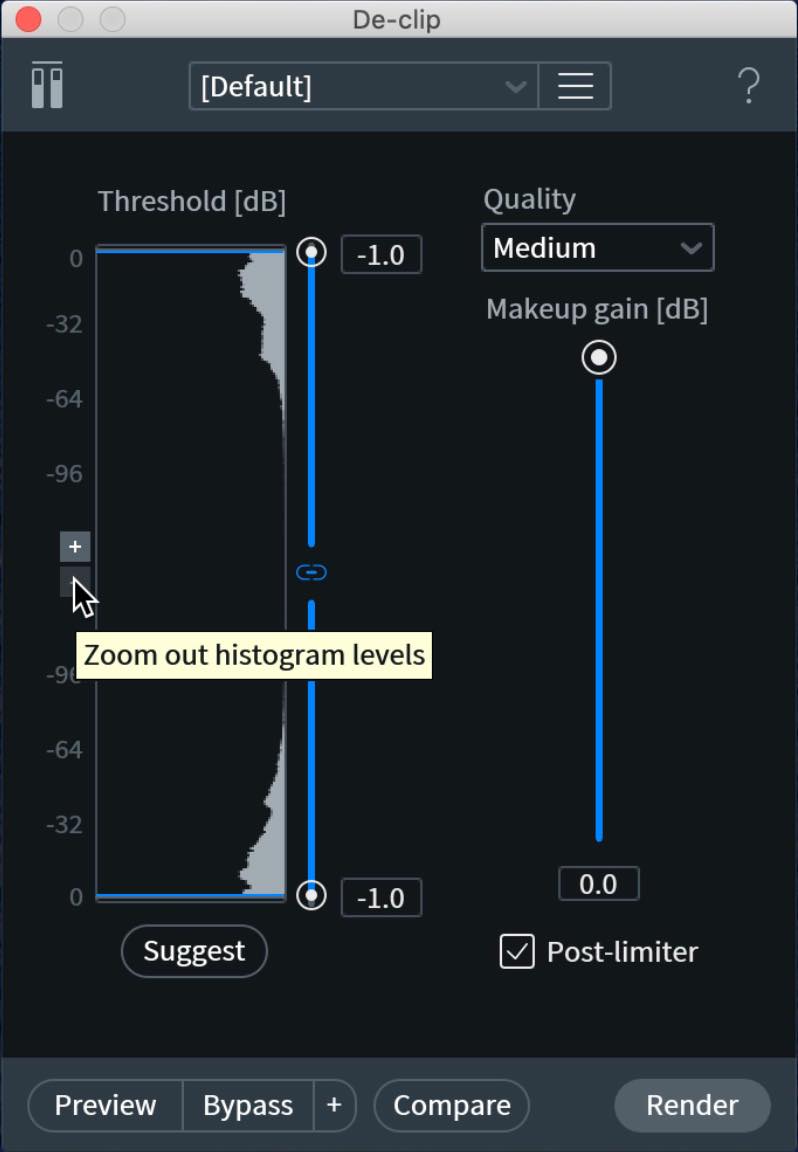
それでも見えない場合は、ヒストグラムのズームをズームアウトします。今回はほぼ音割れなので、かなり高いレベルに偏っていますね。
ここでSuggestボタンを押せば、推奨スレッショルド値を自動的に設定してくれます。
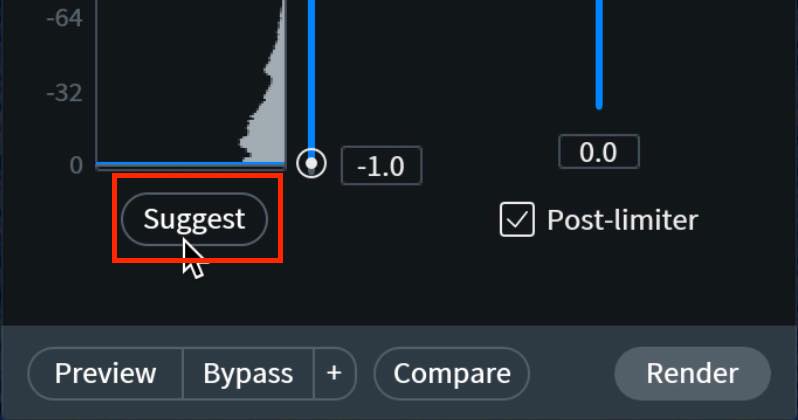
今回は先端が見えないくらい割れていますので、0dbとなりました。ここまで割れていない場合は、クリップよりもやや低い値に設定します。

その他のパラメーターについては以下の通りです。
- Quality:CPU負荷に問題がなければHighを選択して良いでしょう。プラグインで使用する際に負荷が大きすぎる場合はLowやMidiumに切り替えます。
- Makeup gain:音割れするようなレコーディングはだいたい大きすぎる場合が多いので、下げる方向で使います。ここで他のテイクと整合が取れるよう調整してしまっても良いでしょう。
- Post limitter:処理後のオーディオが再度クリップしないようにピークリミッターを適用するというものです。ここはチェックを入れておくべきでしょう。
設定後のサンプルを聴いてみましょう。
割れていたとは思えない音源になりましたね。
以上、前回に引き続き、特に有用性が高いと思われるモジュールをピックアップしてお伝えしました。
RX 7はかなり広範囲のノイズ(リバーブまで)をカバーしていますので、ぜひ活用してみてください。
iZotope「RX7」の使い方、第三弾‼️
今回も様々なモジュールを使用して、ナレーションからハムノイズやリバーブ、クリップを除去する方法をご紹介いたします。⁰
🎥YouTube:https://t.co/HwTY7Isgfy
📝記事:https://t.co/F370ddtqlO#DTM #DAW pic.twitter.com/vvyhbRMeVr
— SLEEP FREAKS (@SLEEPFREAKS_DTM) April 5, 2020
記事の担当 大鶴 暢彦/Nobuhiko Otsuru