
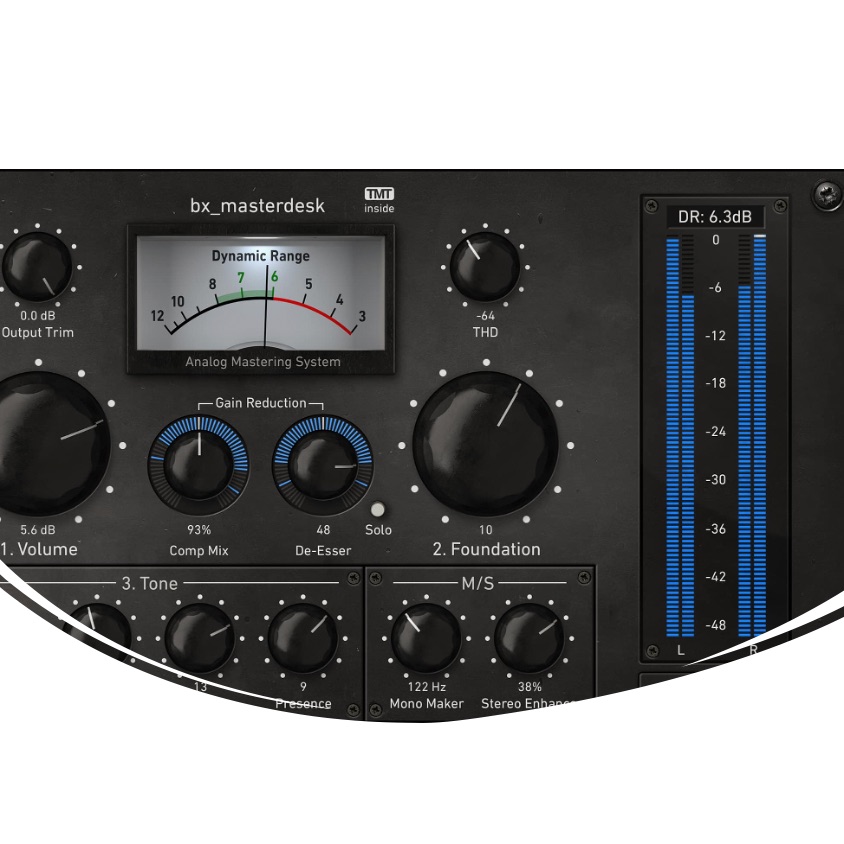
Brainworx bx_masterdesk is a UAD plug-in that provides the processes needed for mastering all in one. It integrates functions such as an equalizer, compressor, saturator, M/S processing and maximizer, letting you carry out the often complicated mastering process simply and effectively. Its beginner-friendly design enables a step-by-step mastering process: starting with selecting the TMT Compressor mode, raising loudness while referring to the Dynamic Range meter, setting the tone with the Foundation knob, adjusting EQ in the TONE section, saturation and stereo image adjustment. It is a useful plug-in for producers who want to streamline the final sound treatment of their audio.
Mastering with UAD Plug-ins
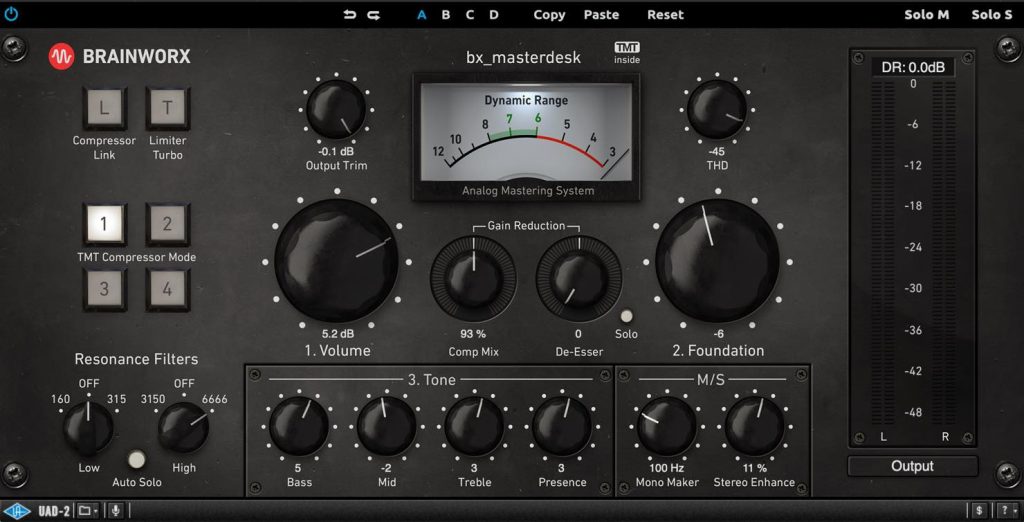
Starting with this article, we will regularly bring you a series introducing carefully selected UAD plug-ins.
The theme of this first installment is mastering.
There are many UAD plug-ins you can use for mastering, but among them we introduce a product that stands out a little: "Brainworx bx_masterdesk."
Product link: Brainworx bx_masterdesk
Note that UAD plug-ins run on dedicated DSP accelerators (or Apollo series audio interfaces). For details, see this article.

What Mastering Involves
Before introducing the product, let's first cover what mastering is.
Originally, mastering referred to all the work done when producing a CD album or similar: matching the texture of individually mixed songs, adjusting the gaps between songs, embedding song information and so on. Today, however, its meaning has changed.
Many music producers mix and master each song themselves.
In this case, mastering means the final sound treatment applied to the master track or to the audio file exported as a 2-mix.
There are various mastering methods, but the main steps include the following.
- Adjusting tone with an equalizer
- Adjusting dynamics with a compressor
- Coloring with analog gear or a saturator
- Adjusting the stereo image with an imager, M/S processing and so on
- Adjusting loudness with a maximizer
Making an Often Complicated Process Simple and Effective
Brainworx bx_masterdesk, introduced here, provides almost all the functions needed for mastering in one.
Of course, each function is simplified to some extent, and some fine adjustments are not possible, but it feels like the core parts have been extracted and packaged, so you can get precise results while streamlining your work. It could also be called a beginner-friendly plug-in.
Seeing is believing, so first let's check what mastering with bx_masterdesk sounds like.
Mastering Steps with bx_masterdesk
bx_masterdesk has the following functions, which we will introduce in order following the mastering process.
- 1Selecting the TMT Compressor Mode and Fine-Tuning with Comp Mix
- 2Raising Loudness with the Volume Knob and Limiter Turbo
- 3Setting the Basic Tone with the Foundation Knob
- 4Adjusting EQ in the TONE Section
- 5Adjusting Saturation with THD
- 6Adjusting the Stereo Image in the M/S Section
- 7Adjusting the Resonance Filter and De-Esser
- 8About Compressor Link
(1) Selecting the TMT Compressor Mode and Fine-Tuning with Comp Mix
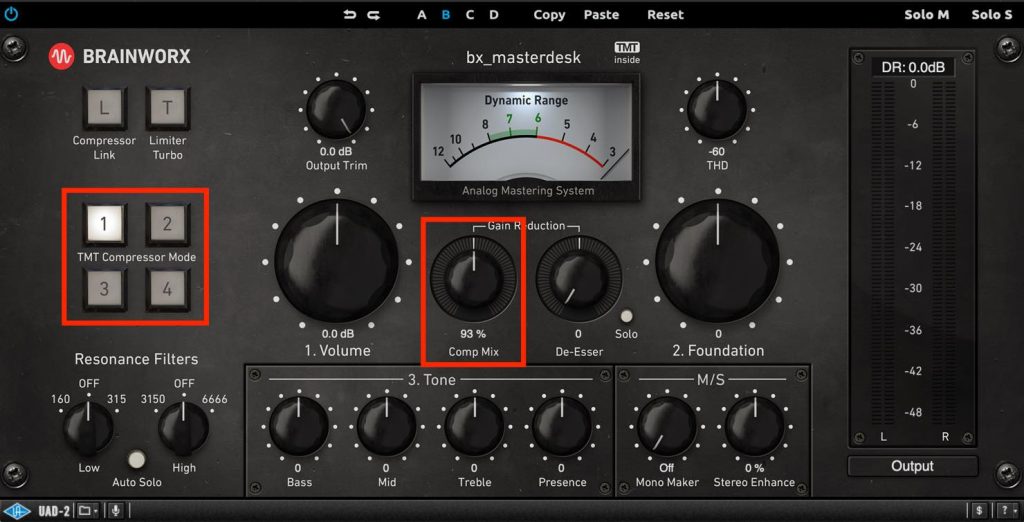
The first item I recommend setting is the TMT Compressor Mode. It is like choosing a different unit of the same compressor, and the key is that each also has different parameter settings.
Mode 1 compresses the most, giving a punchy sound. The higher the number, the lighter the compression setting. None of them is extreme enough to break the sound, though, so you can simply choose by sonic preference.
If you want to make just a slight adjustment, you can use the Comp Mix knob at the center left. Its range is 86% to 100%, letting you fine-tune the effect with what is known as parallel compression. You can also set it to OFF for "no compression," so be sure to compare how the master bus compression changes the sound.
(2) Raising Loudness with the Volume Knob and Limiter Turbo
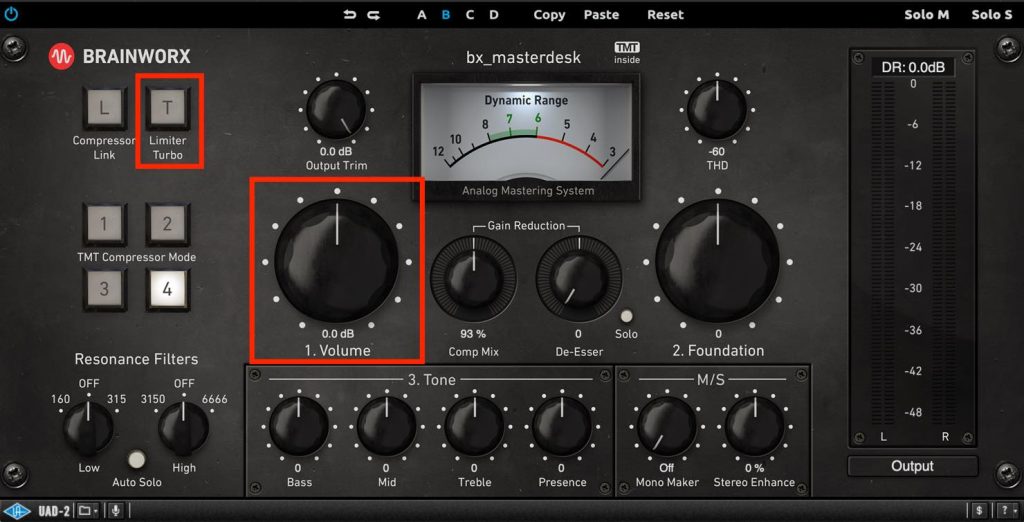
Next, roughly raise the loudness with the Volume knob.
Before that, lower the Output Trim slightly. This prevents clipping during file compression after export or during D/A conversion. About -0.1 to -0.3 is a guideline.
Then, turning the Volume knob to the right raises the loudness. Normally you would refer to a gain reduction meter or RMS values here, but in bx_masterdesk you use the large Dynamic Range meter in the center. This original meter, found nowhere else, shows the difference between the volume peaks and the body (the dense volume range).
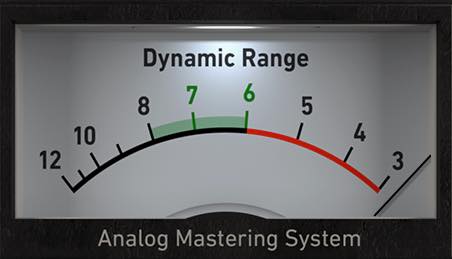
The green area of the meter, between 8 dB and 6 dB, is the general target. 6 dB is the limit of loudness you can gain without musically breaking the sound, the so-called traditional "CD master" level. 8 dB is a loudness level that preserves a certain amount of dynamics, for media streaming with loudness normalization. Strictly speaking it needs to be measured with a loudness meter, but if you don't hear excessive compression, it won't be much of a problem even if loudness normalization turns the volume down. Of course, this sense will also vary by genre. (Incidentally, turning this Volume knob in the negative direction does not widen the dynamic range.)
If you want to crush the dynamics more aggressively for loudness, use the Limiter Turbo button. It is not recommended for normal mastering, but it may give good results in certain genres such as EDM and heavy metal.
(3) Setting the Basic Tone with the Foundation Knob
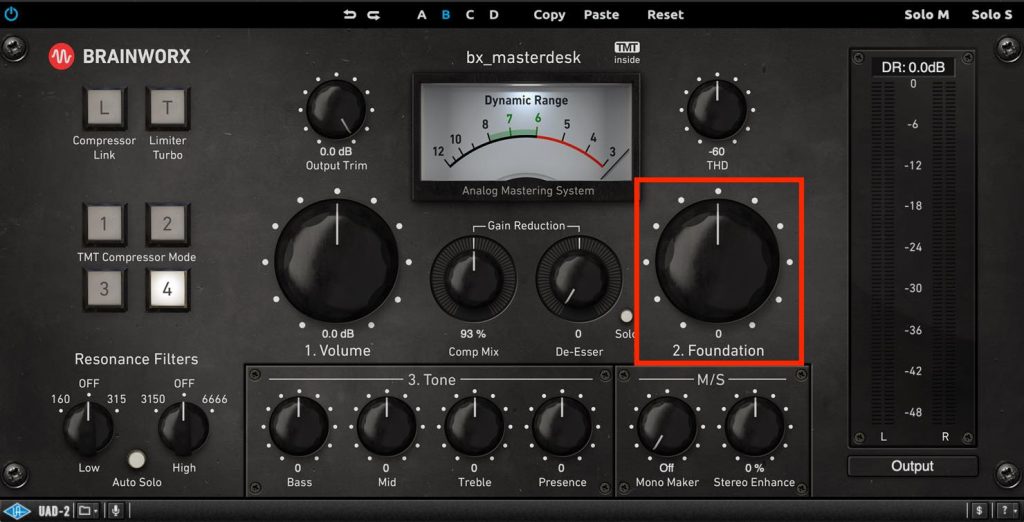
Next, roughly decide the tone of the sound with the Foundation knob. Raising the loudness can make the mix sound different from your image during mixing, so this addresses that.
Turning it in the negative direction shifts it toward the highs for a brighter, lighter sound. Turning it in the positive direction shifts it toward the lows for a calmer, weightier sound.
Since this is mastering, drastically changing the impression here is not desirable. I think it is fine to treat it as preparation before adjusting with the four-band EQ that follows, making just light fine-tuning.
(4) Adjusting EQ in the TONE Section
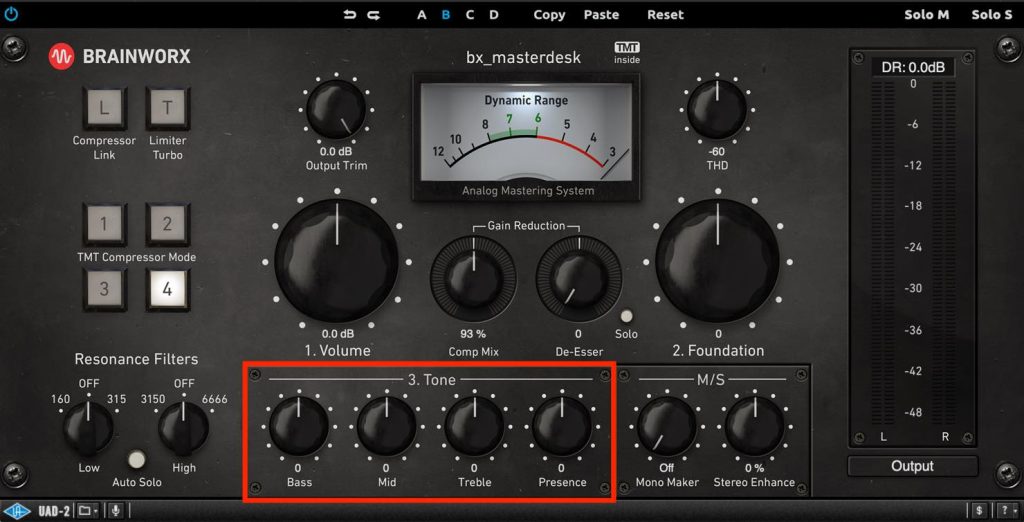
From the tone set with Foundation, make finer adjustments with EQ. Even so, it has only four bands, and its hallmark is that you can shape the sound much like a guitar amp.
These knobs take values from -30 to +30, which in gain is ±3 dB for Bass through Treble and ±6 dB only for Presence, so you cannot make settings extreme enough to break the music in the first place. It is truly an EQ suited to mastering, allowing delicate adjustments.
For example, you might set it a little bright with Foundation but boost Bass because only the low end is lacking, or cut Presence because the sizzle in the highs bothers you. To bring the vocal one step forward, raising Treble is another option. Cutting Mid tightens the bass, but it can also thin out the vocal, so adjust carefully.
If you cannot get a satisfactory result with these adjustments, go back to the mix if possible and review the track balance. Think of it as an EQ for final adjustments after a solid mix.
(5) Adjusting Saturation with THD
THD (total harmonic distortion) simulates a kind of distortion (saturation) present in analog gear, adding moderate harmonics to the sound to make it glamorous and cohesive.
The default is -60, but in modern pop and rock/metal music, you can raise it to around -45 dB for more impact. Even raised a lot, this THD does not produce unpleasant distortion; it simply adds harmonics musically.
(6) Adjusting the Stereo Image in the M/S Section
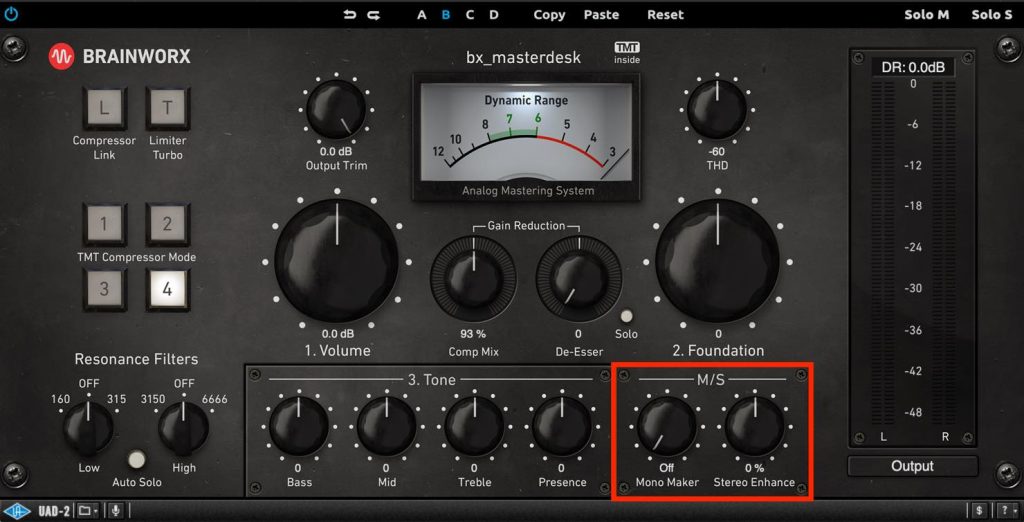
The M/S section has two knobs, Mono Maker and Stereo Enhance, letting you easily apply M/S processing.
Mono Maker narrows the stereo image, mainly in the 20 Hz to 300 Hz range, targeting the lows. In fact, lows closer to mono are tighter and easier to hear. Making frequencies too high mono can upset the panning balance of guitars, synths, toms and so on, but a setting around 100 Hz improves the separation of kick and bass in many cases.
Stereo Enhance, as its name suggests, is a knob that widens or narrows the stereo image. In many mastering cases, it is used to widen the image slightly for more impact. However, widening it too much makes important center-panned parts (vocals, bass, kick and so on) relatively recede, so operate it carefully. From my experience, a value of about 10 to 20% gives a nice boost in impact.
(7) Adjusting the Resonance Filter and De-Esser
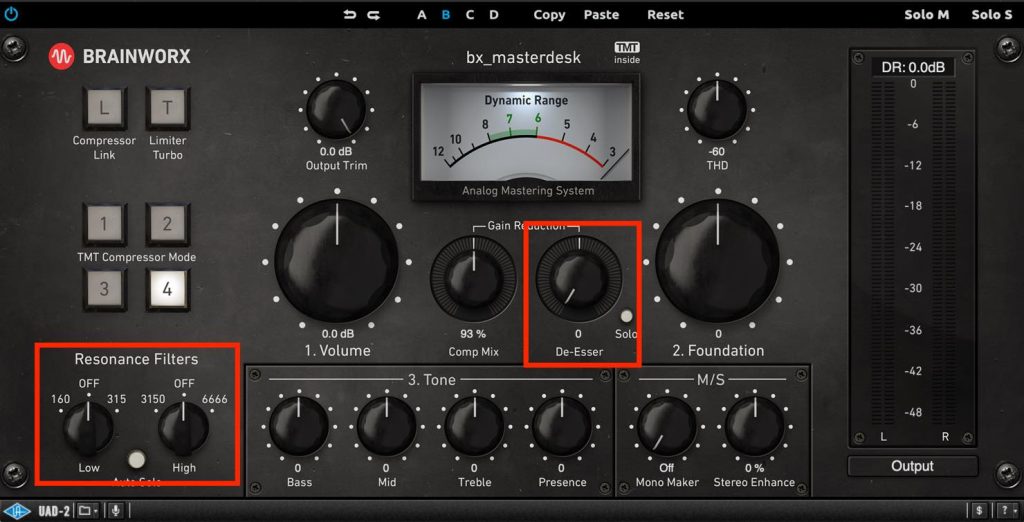
Sounds have areas where unpleasant tones tend to build up, and the Resonance Filter cuts them. The bands are fixed at 160 Hz and 315 Hz for Low and 3150 Hz and 6666 Hz for High, but they are narrowed down to points that are effective in many cases. Try it casually, and if the result is good, use it.
The De-Esser is in principle an effect applied to vocals to reduce unpleasant sibilance, but if sibilance becomes noticeable after raising the loudness in mastering, you can adjust it here. Applying it is simple: turning the knob right turns it on, and the higher the value, the greater the De-Esser's gain reduction.
You cannot set details such as the frequency, so I think it is fine to use it if it fits well and you can set it without overdoing it. If you want to dial in the settings, it is best to go back to the mix and adjust individual tracks.
(8) About Compressor Link
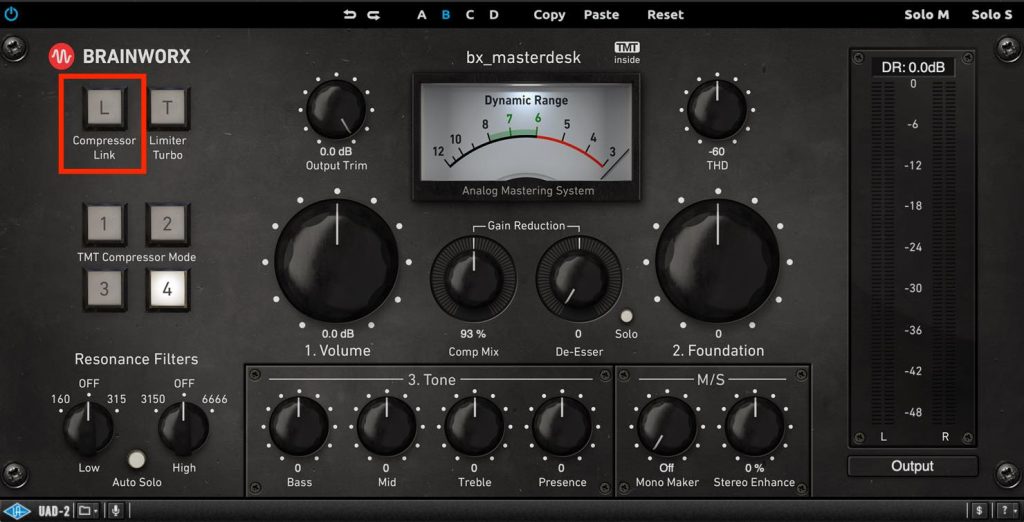
Compressor Link is off by default, and off is basically recommended.
When on, left and right are no longer compressed independently, and if either channel exceeds the internal threshold level, the same amount of gain reduction occurs on both sides. This usually contributes to pumping, but in sections of a song without drums, for example, turning the link on to avoid upsetting the stereo image is an option. In that case, make use of your DAW's automation.
The Simplified "bx_masterdesk Classic"
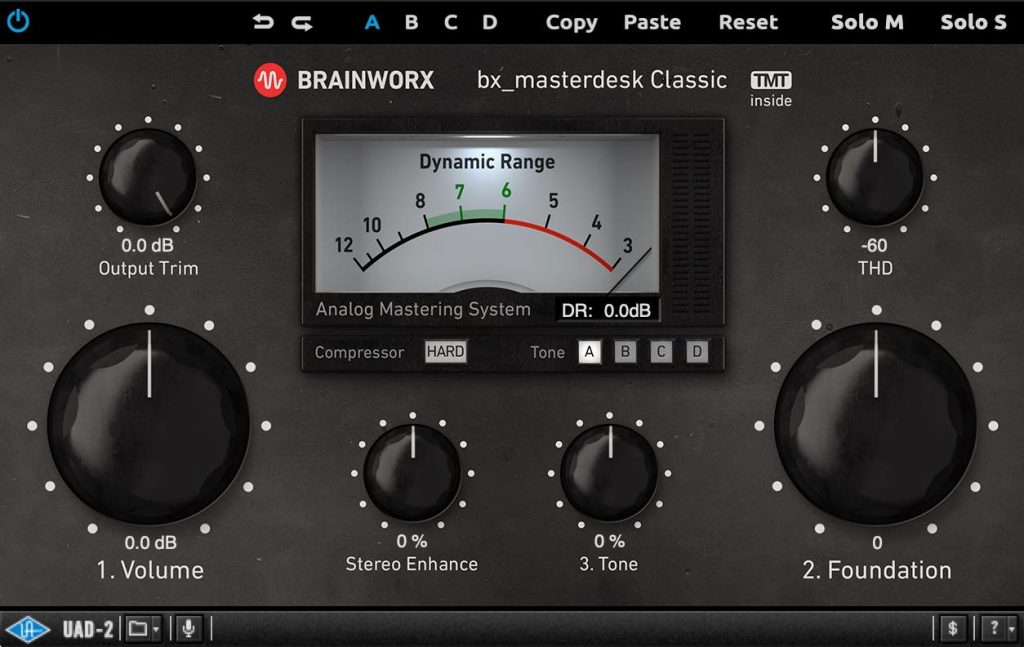
The bx_masterdesk series also includes "bx_masterdesk Classic," which has a narrower set of functions and is even easier to use.
Its price is also about half, so it will suit those for whom its functions are enough.
Product link: Brainworx bx_masterdesk Classic
That concludes our introduction to UAD's integrated mastering tool "bx_masterdesk."
Beyond its excellent sound quality, I felt it stands out for how intuitively it can be operated. Please try mastering your own songs with it.
Product link: Brainworx bx_masterdesk
Frequently Asked Questions
Q1. What system environment does bx_masterdesk run in?
UAD plug-ins require a Universal Audio DSP accelerator or an Apollo series audio interface. Combined with this dedicated hardware, they deliver their best performance.
Q2. Can mastering beginners master bx_masterdesk?
Yes. bx_masterdesk is designed with beginners in mind, simplifying complex parameters while providing the core functions needed for mastering step by step. Visual aids such as the Dynamic Range meter are also beginner-friendly.
Q3. What target should I set on the Dynamic Range meter?
The general target is the 8 dB to 6 dB range. 6 dB is considered the maximum loudness level, and 8 dB a level for streaming with loudness normalization. Adjust according to the genre and purpose.
Q4. Should Limiter Turbo always be used?
It is not recommended for normal mastering. It is a function to consider when aggressive dynamics compression is needed in certain genres such as EDM and heavy metal.
NEW ARTICLES
Latest English Articles











