
This is a complete guide to recording and editing electric guitar in Logic Pro 11. From audio interface settings and track creation to recording multiple takes, choosing the best takes with take comping, partial fixes with punch-in, fades and timing adjustment with Flex Time, you can learn every method needed to produce professional guitar parts. These techniques can also be applied to other parts such as vocal recording, giving you practical skills for achieving a full sound across the whole song.
Recording and Editing Guitar on an Audio Track

Miyakawa
This time, to add depth to the song, we record a live "electric guitar," a familiar sound in pop music, and add it as a track.
The steps and techniques explained here can also be applied when recording other parts such as vocals, so be sure to learn them well!
Guitar Recording, Comping and Flex Time Video
Setting Up the Audio Input
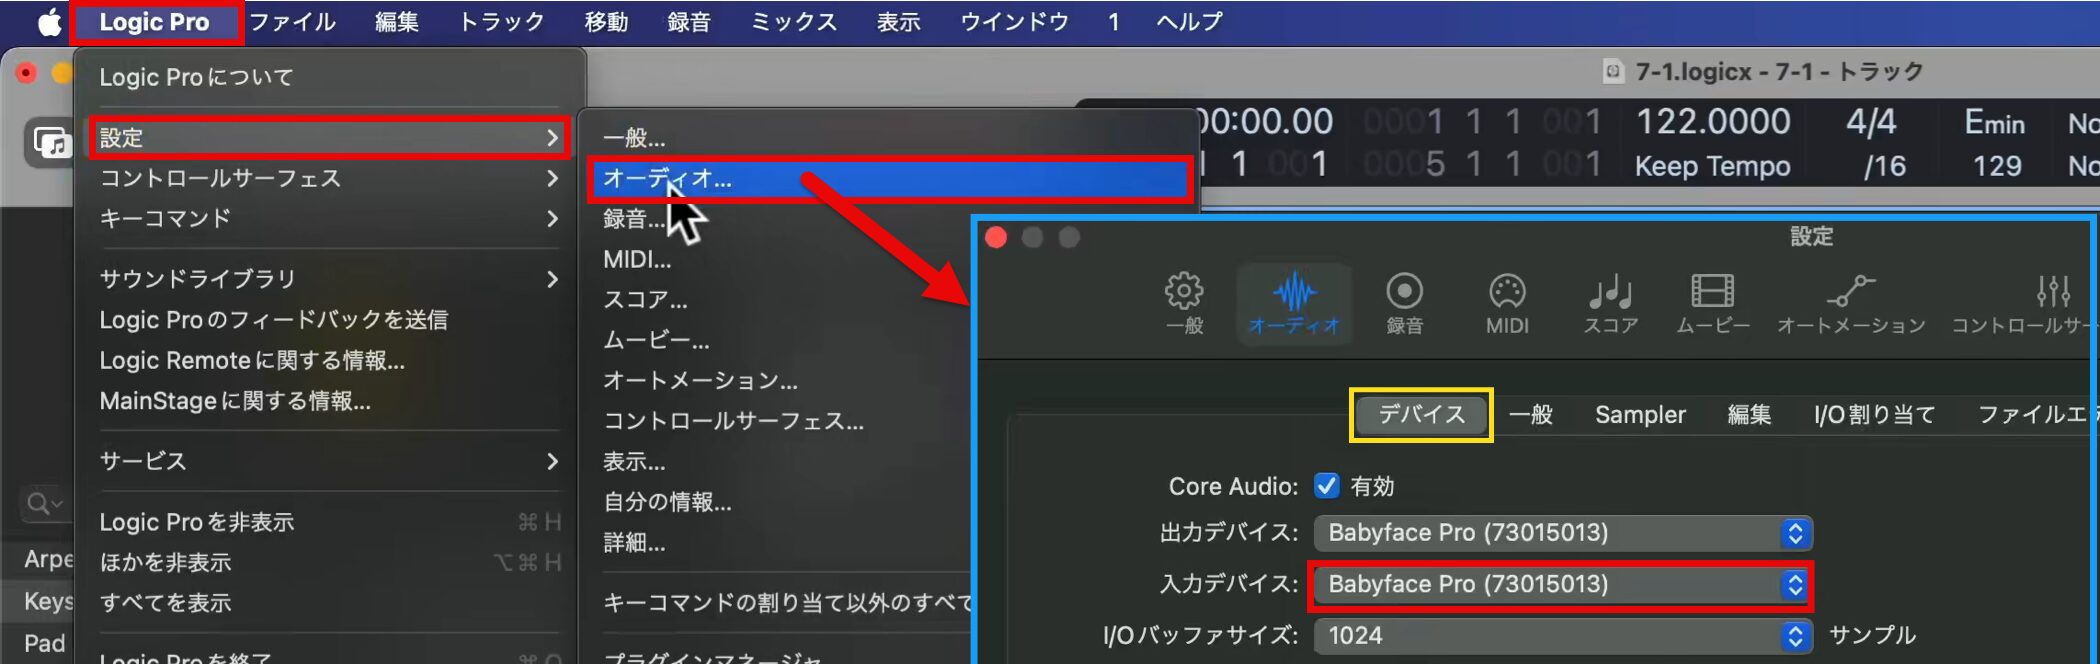
First, as preparation for recording, set up Logic Pro to receive the guitar connected to your audio interface.
Open "Audio" in Settings, and under Devices, select the audio interface the guitar is connected to as the "Input Device."
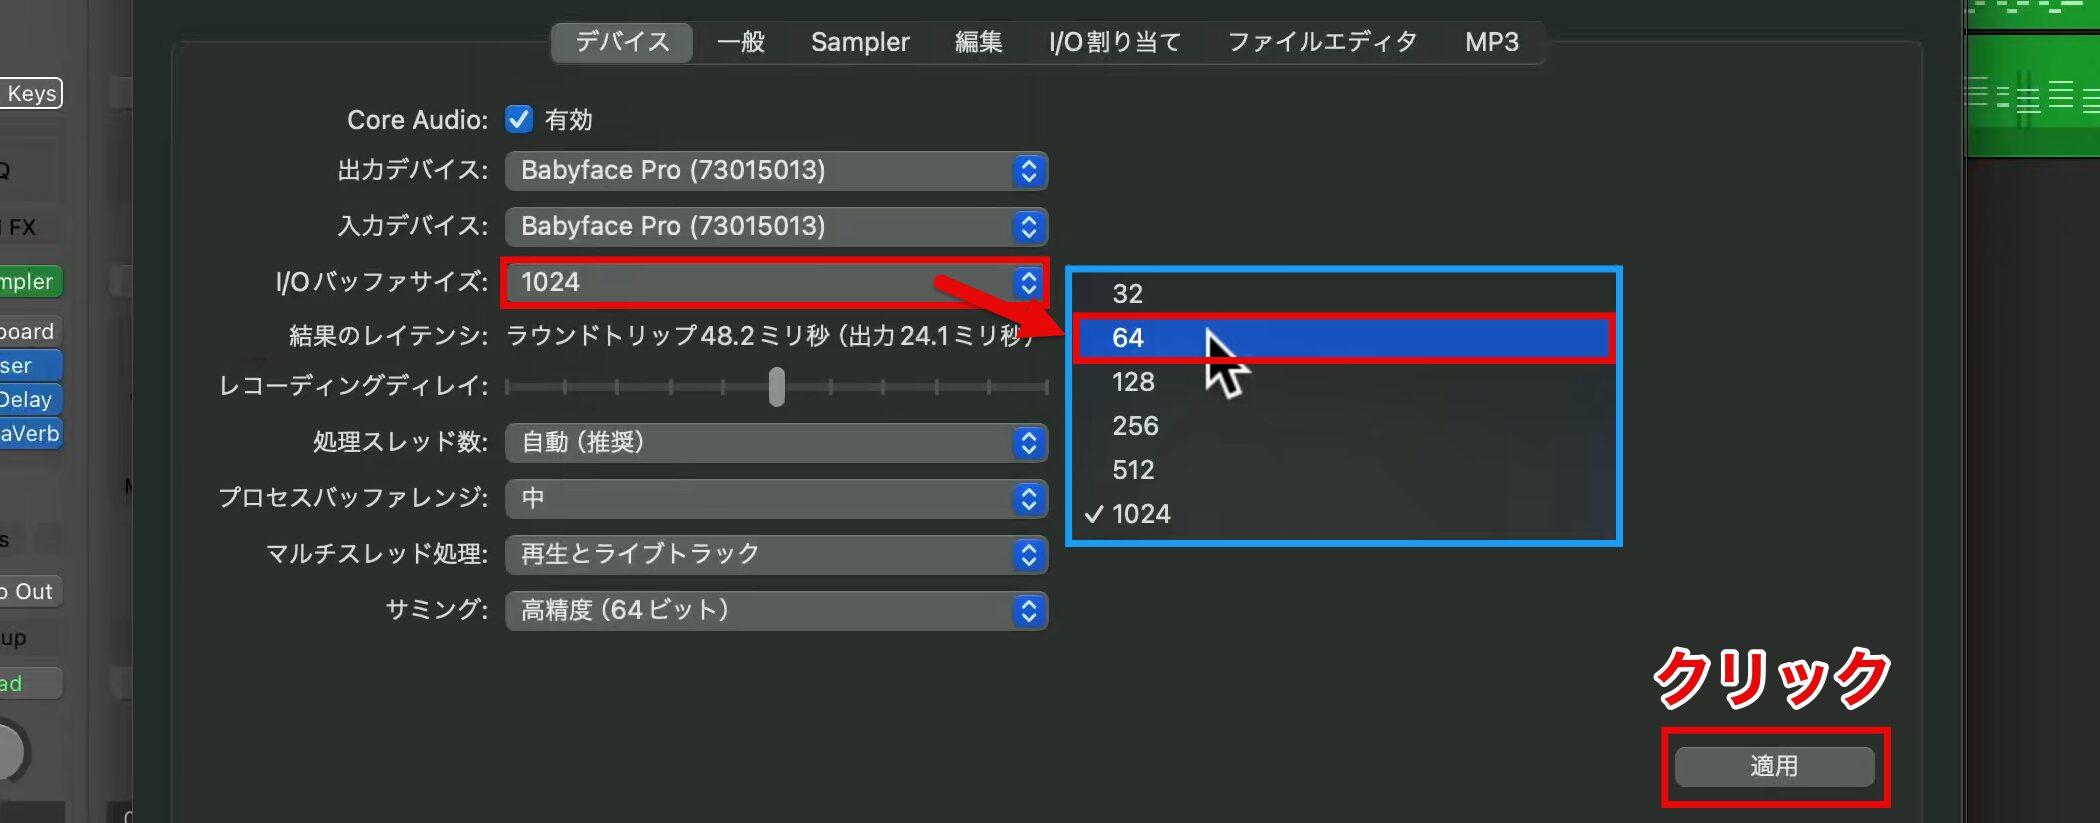
The "I/O Buffer Size" below it is an important setting that adjusts the amount of latency while playing.
For live playing, set it to a small value to minimize latency. This time we chose "64."
However, a smaller buffer size increases the load on your computer, so we recommend raising the value when you are not recording.
When the settings are complete, click "Apply."
Creating an Audio Track to Record On
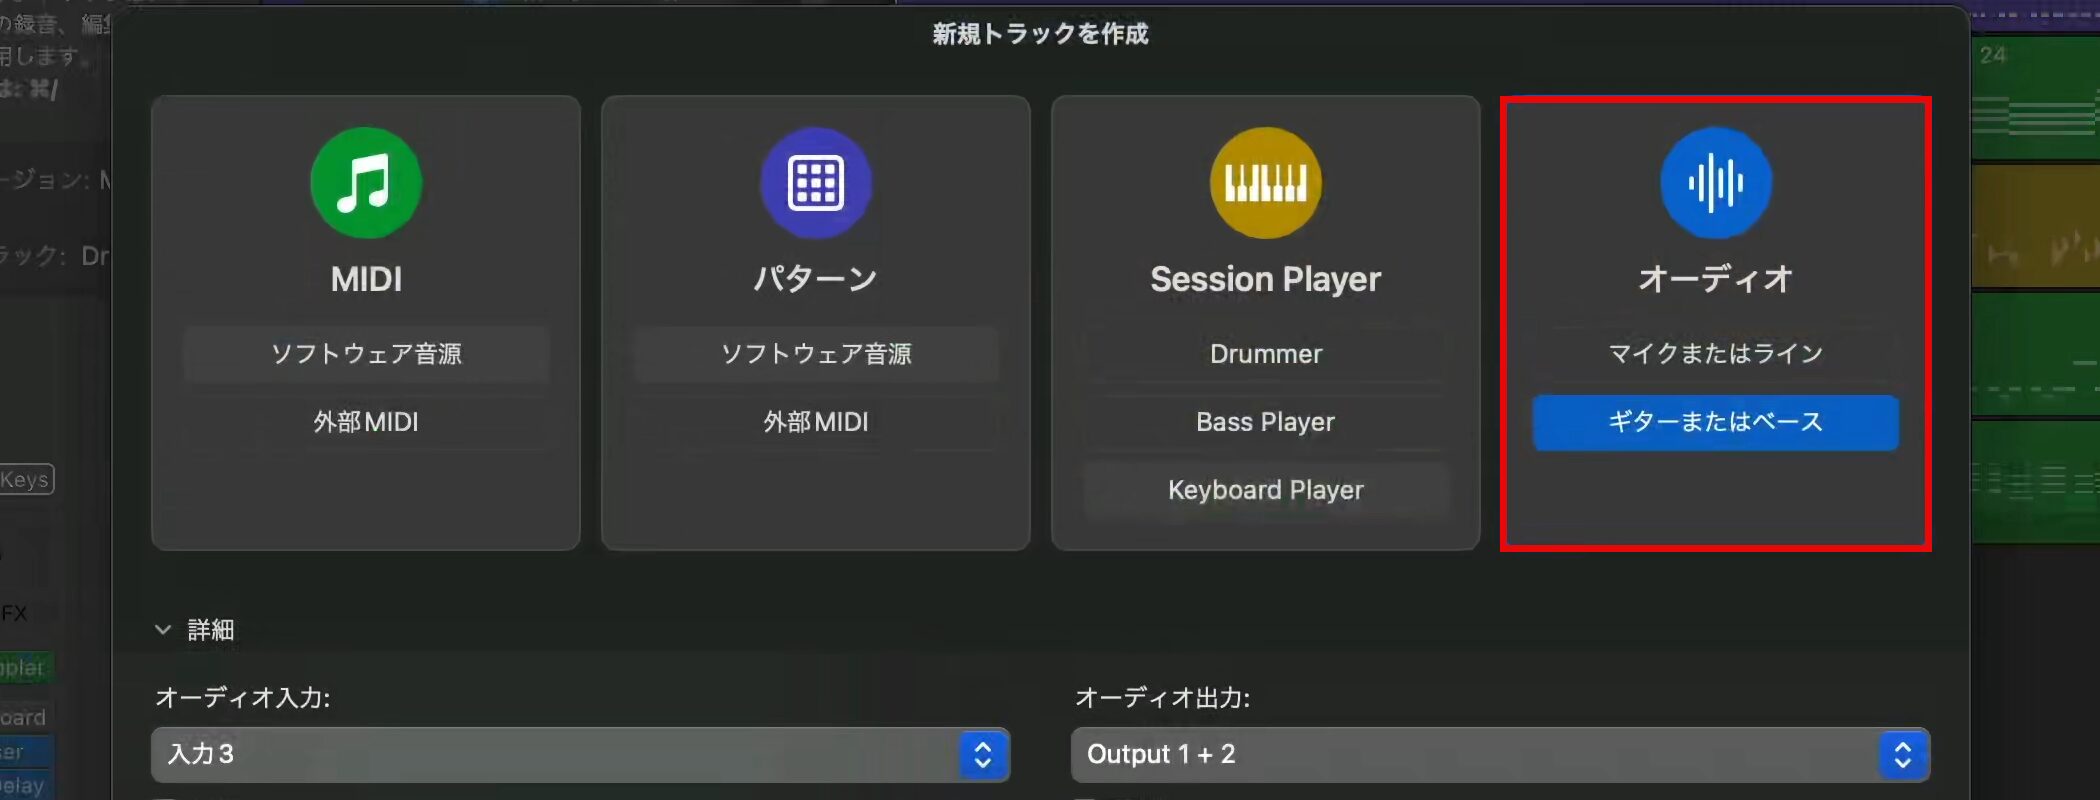
Choose "Guitar or Bass" for the audio track.
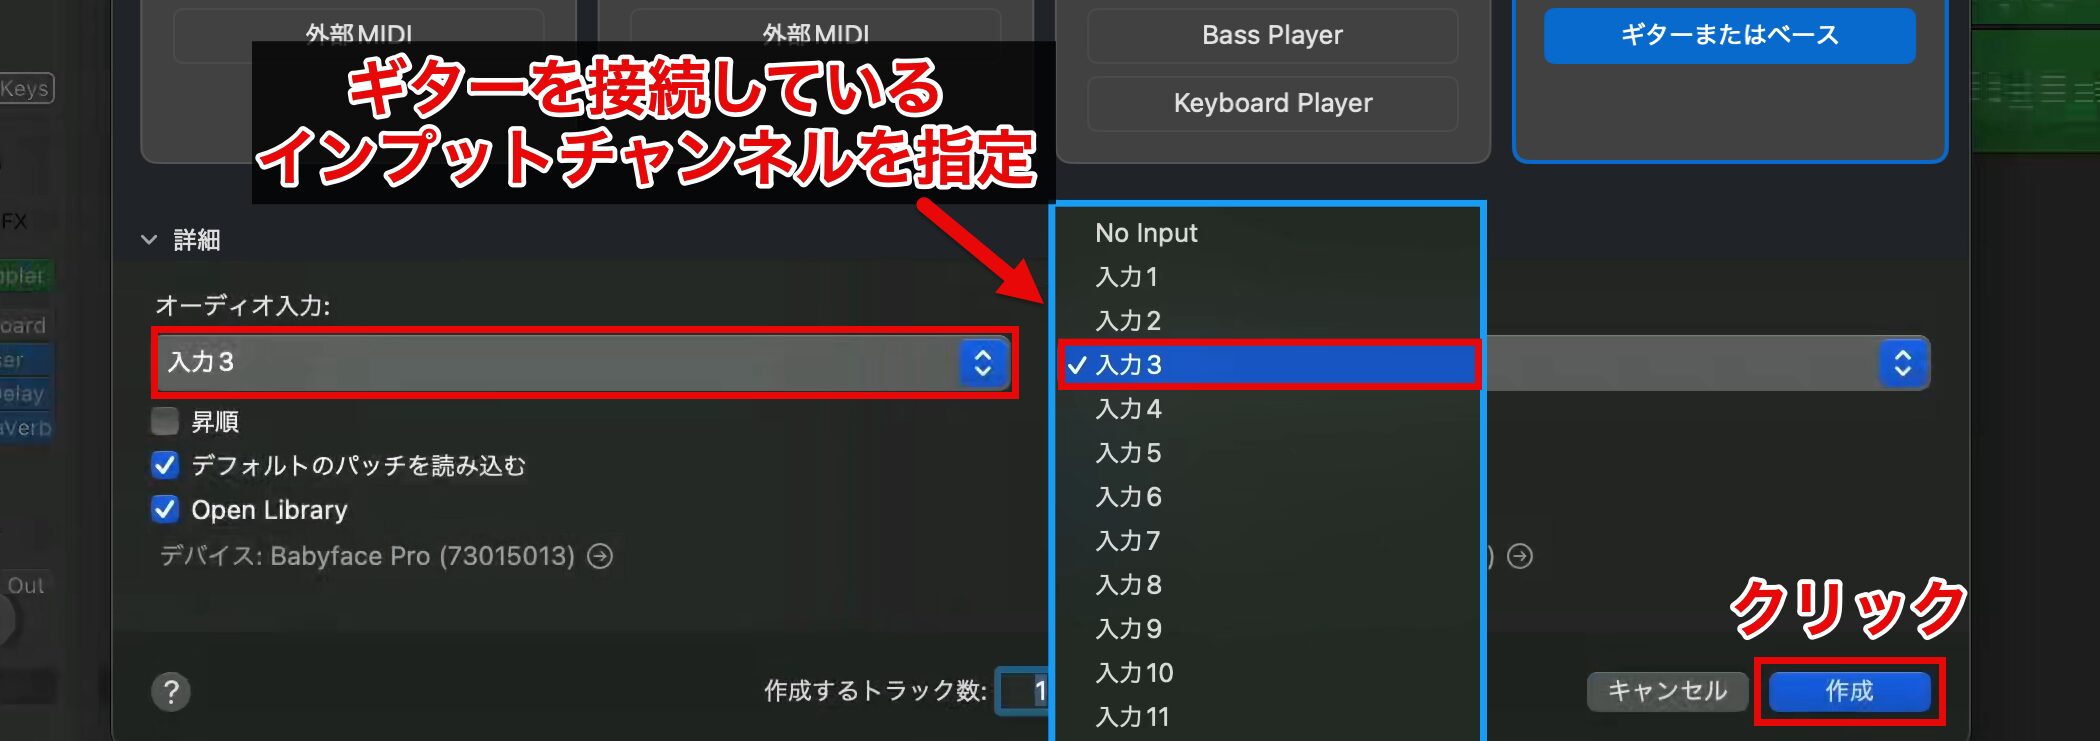
Under "Audio Input," specify the input channel the guitar is connected to.
Here we select "Input 3," but most audio interfaces number each connection, so check the number of the input the guitar is connected to, select the corresponding input and click "Create."
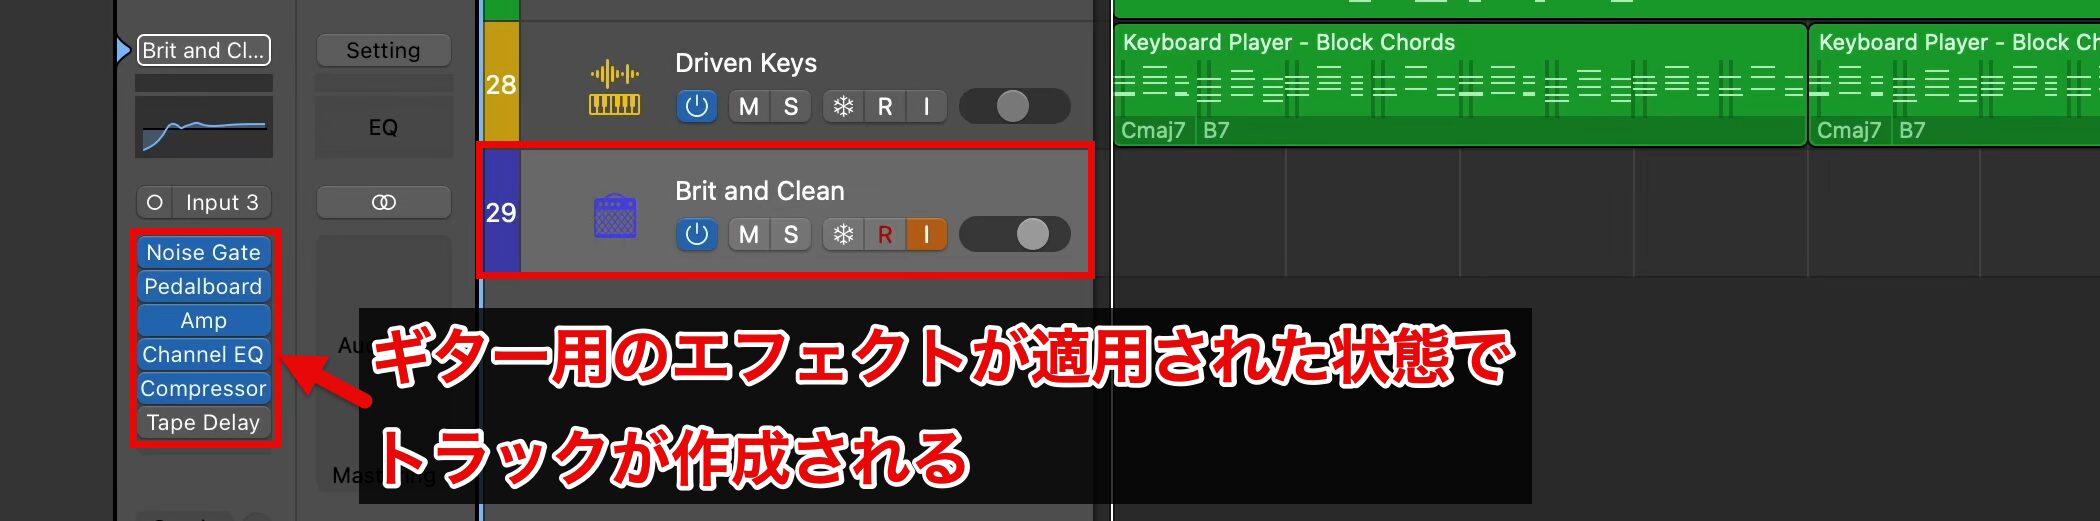
The track is created with guitar effects already applied.

Enable the Input Monitoring button to hear your guitar playing in real time.
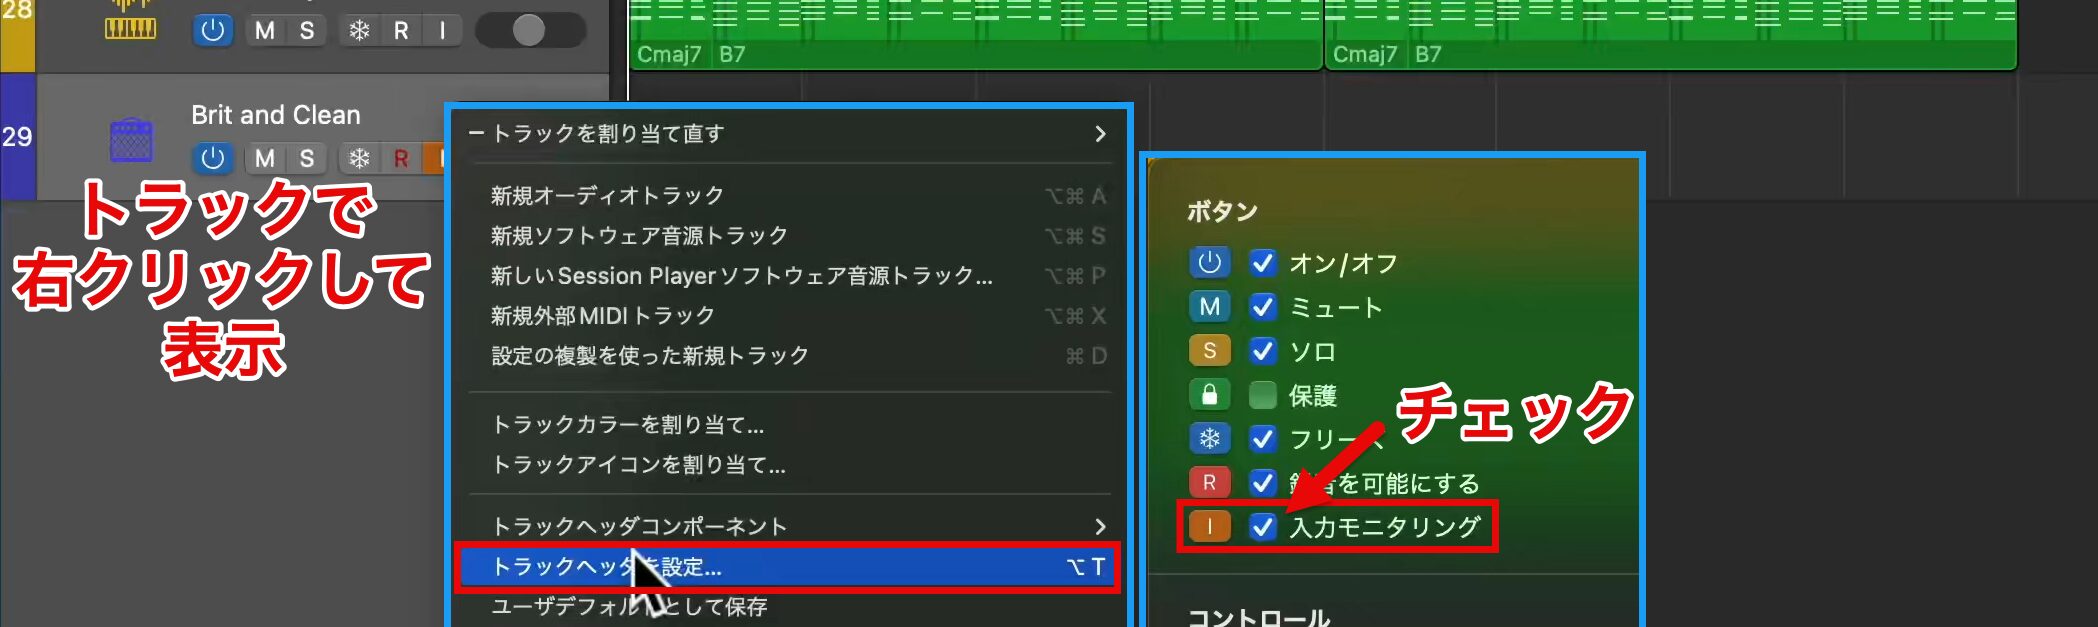
If the Input Monitoring button is not shown, right-click the track, open "Track Header Configuration," and check "Input Monitoring."
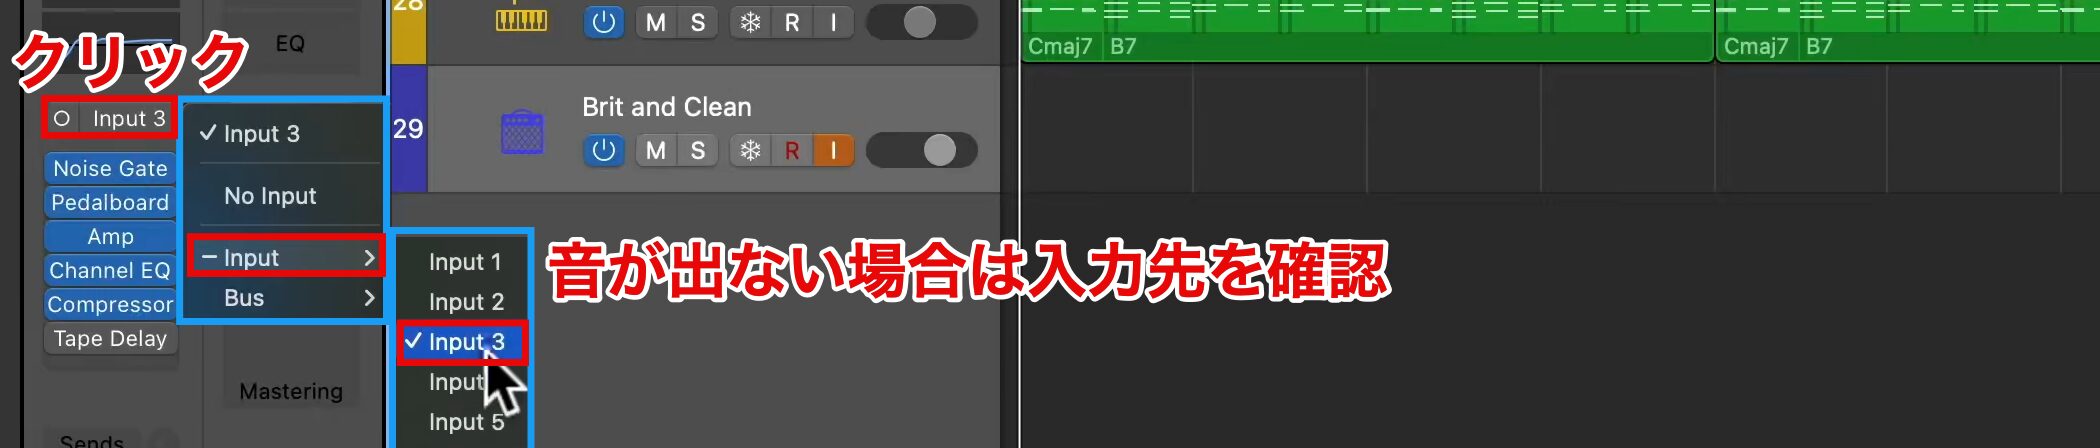
If you cannot hear anything, check in the Inspector's audio input setting that the correct input is selected.
Adding Guitar Amps and Effects from the Library
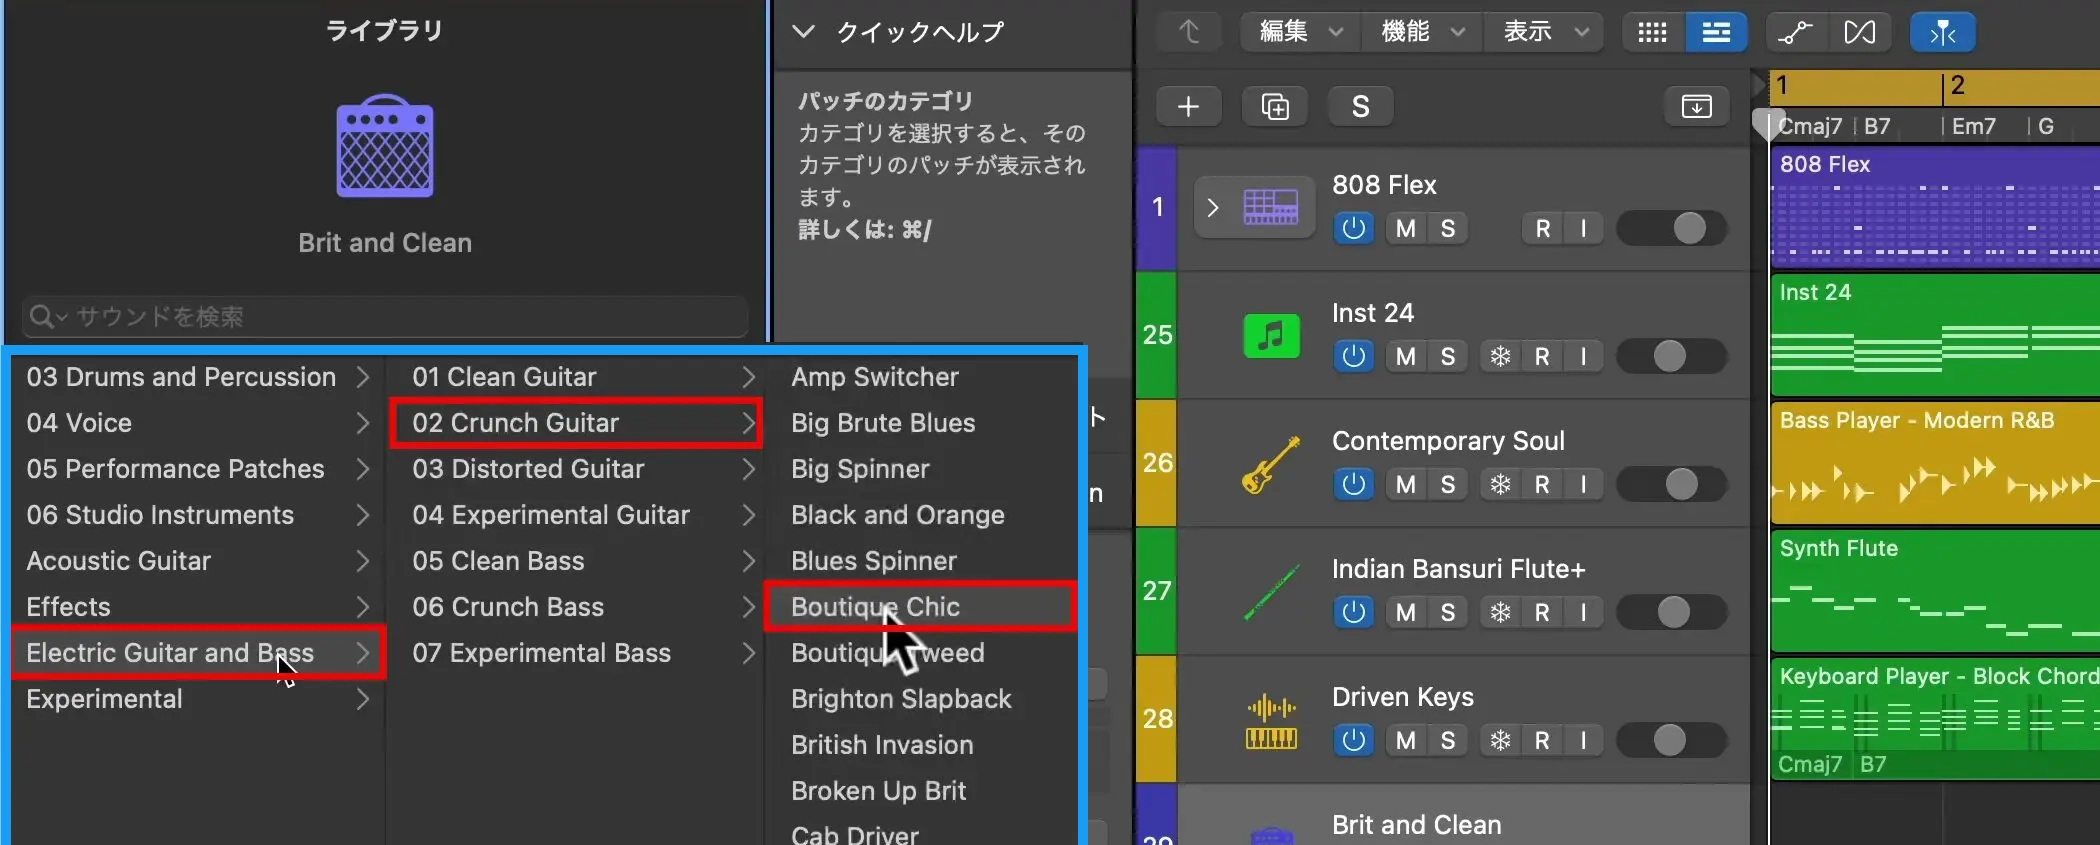
Open "Electric Guitar and Bass" in the Library and look for a guitar preset you like.
This time, we chose "Boutique Chic" from "Crunch Guitar."
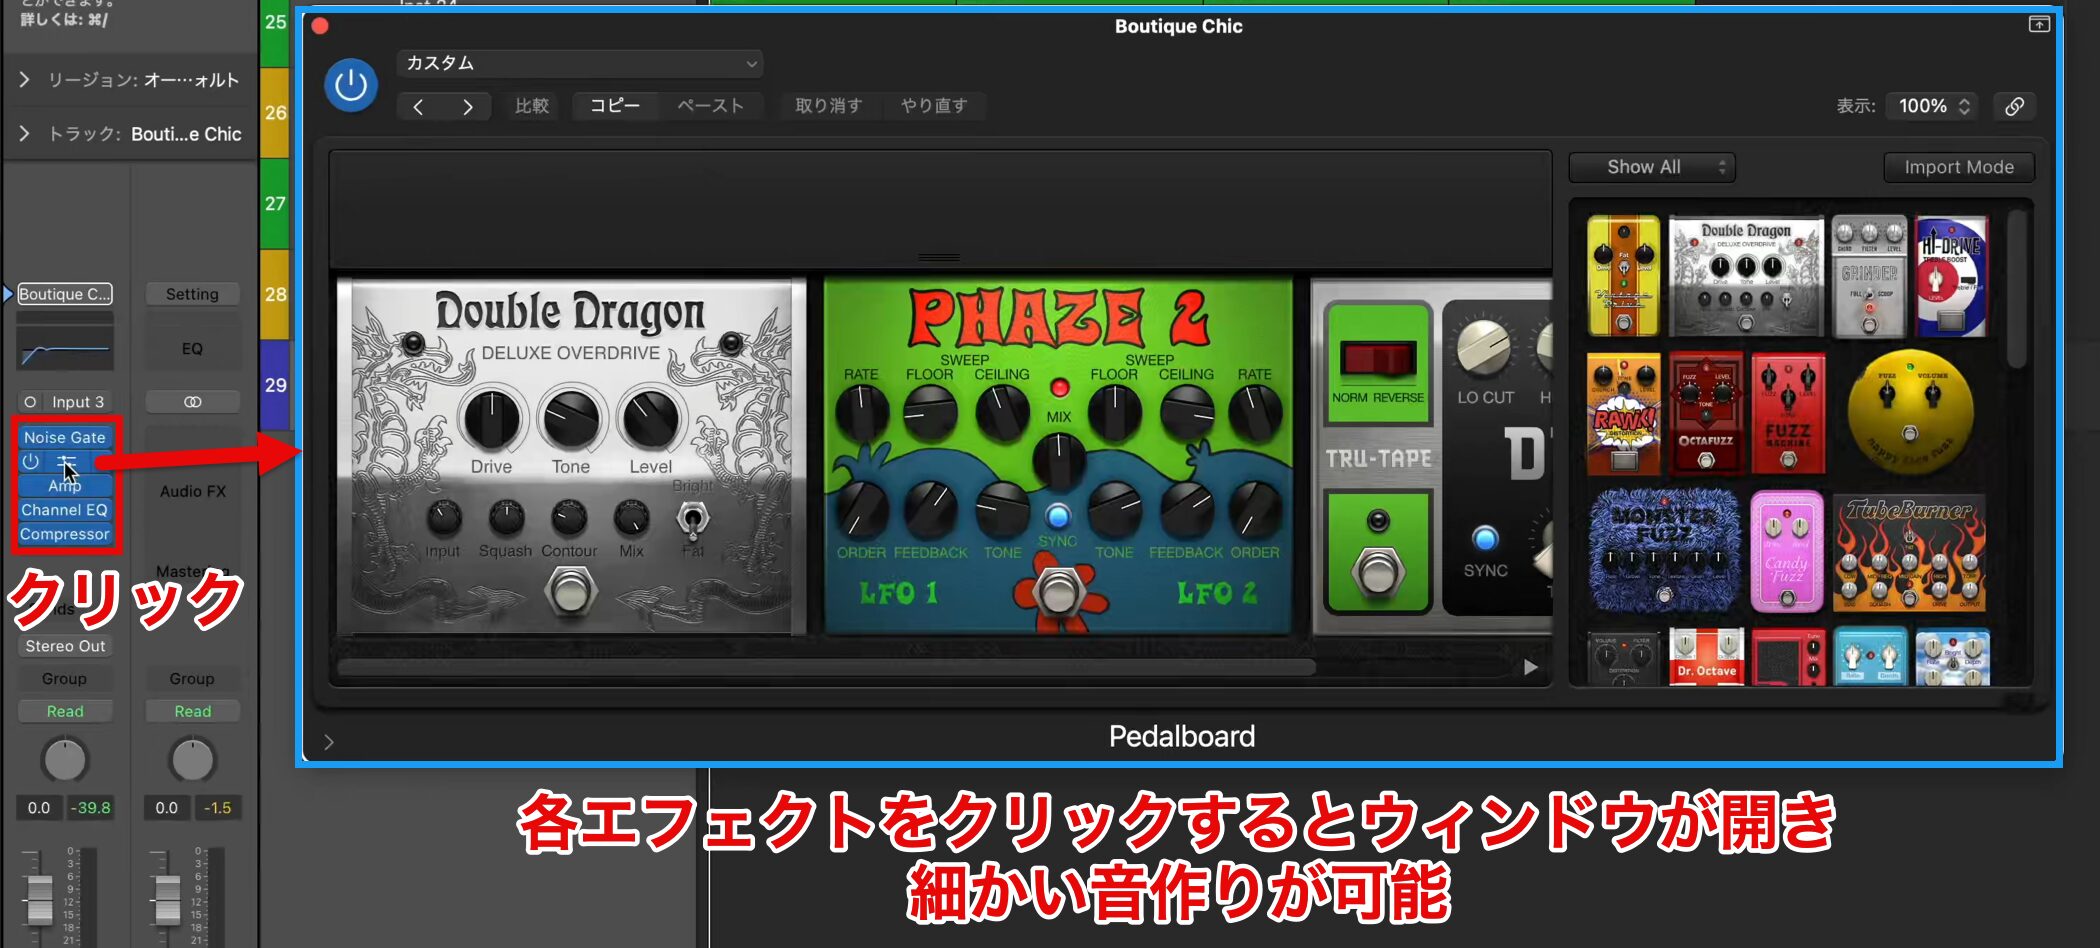
You can use the preset as is, but if you want to shape the sound in detail, click the amp or pedalboard below Input and change the settings in the window.
Recording
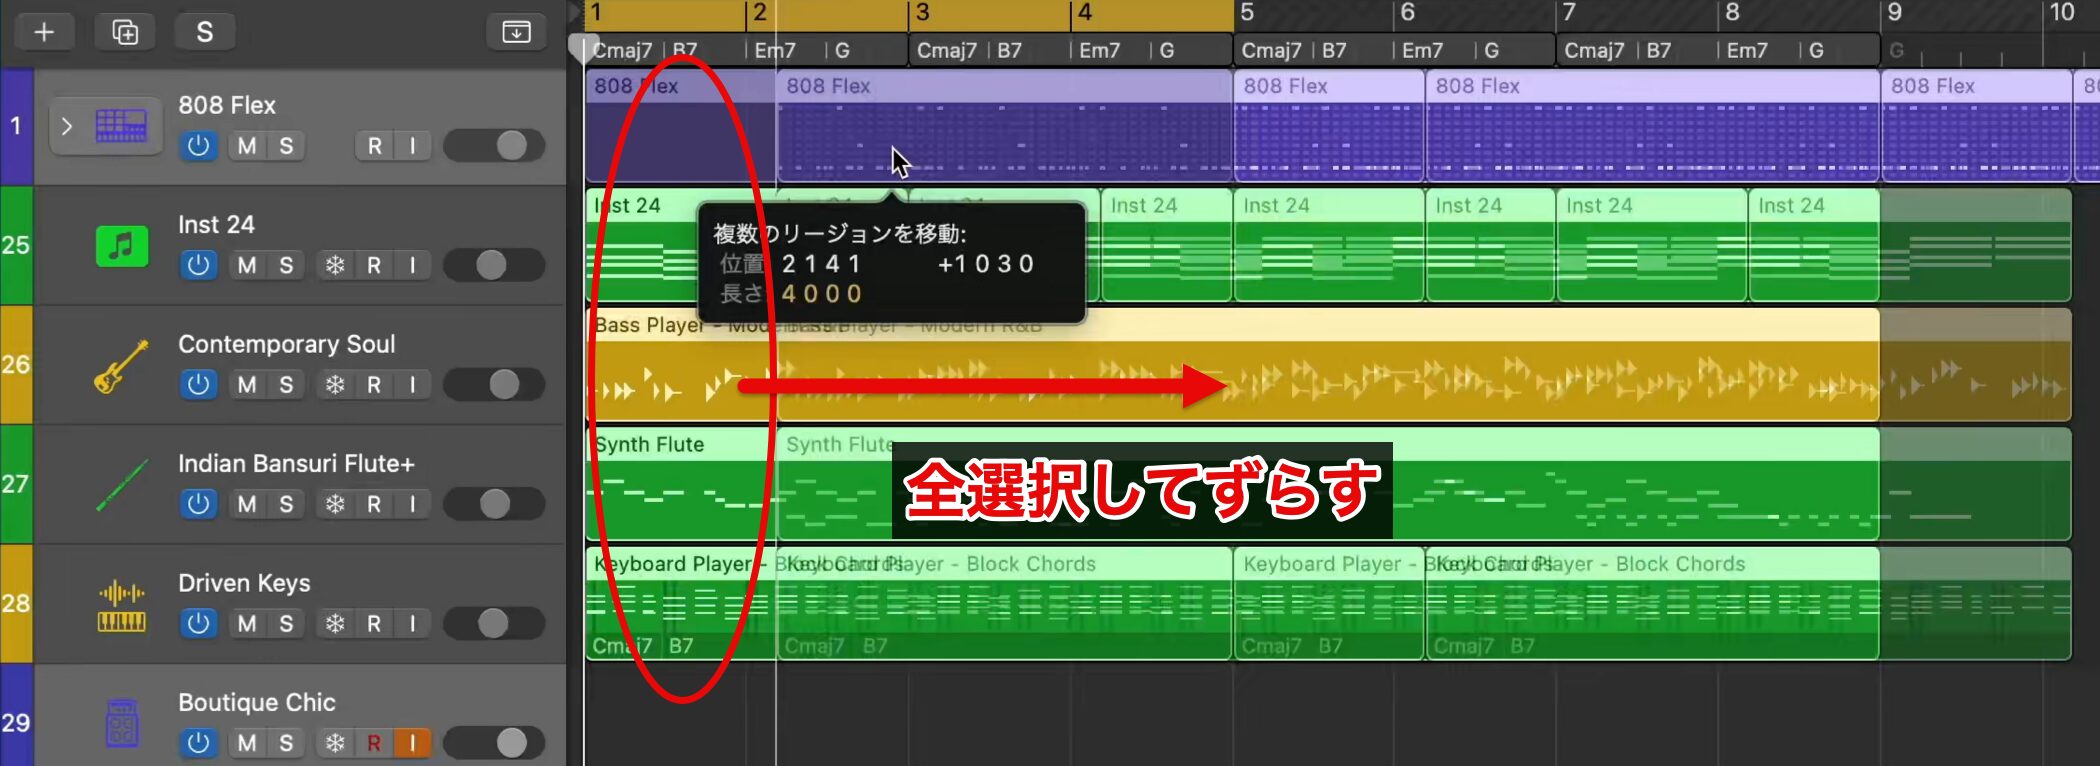
Recording preparation is complete, so let's record along with the song right away.
If you want to start recording before bar 1, you could select everything entered so far and shift it, but there is a way to create space.
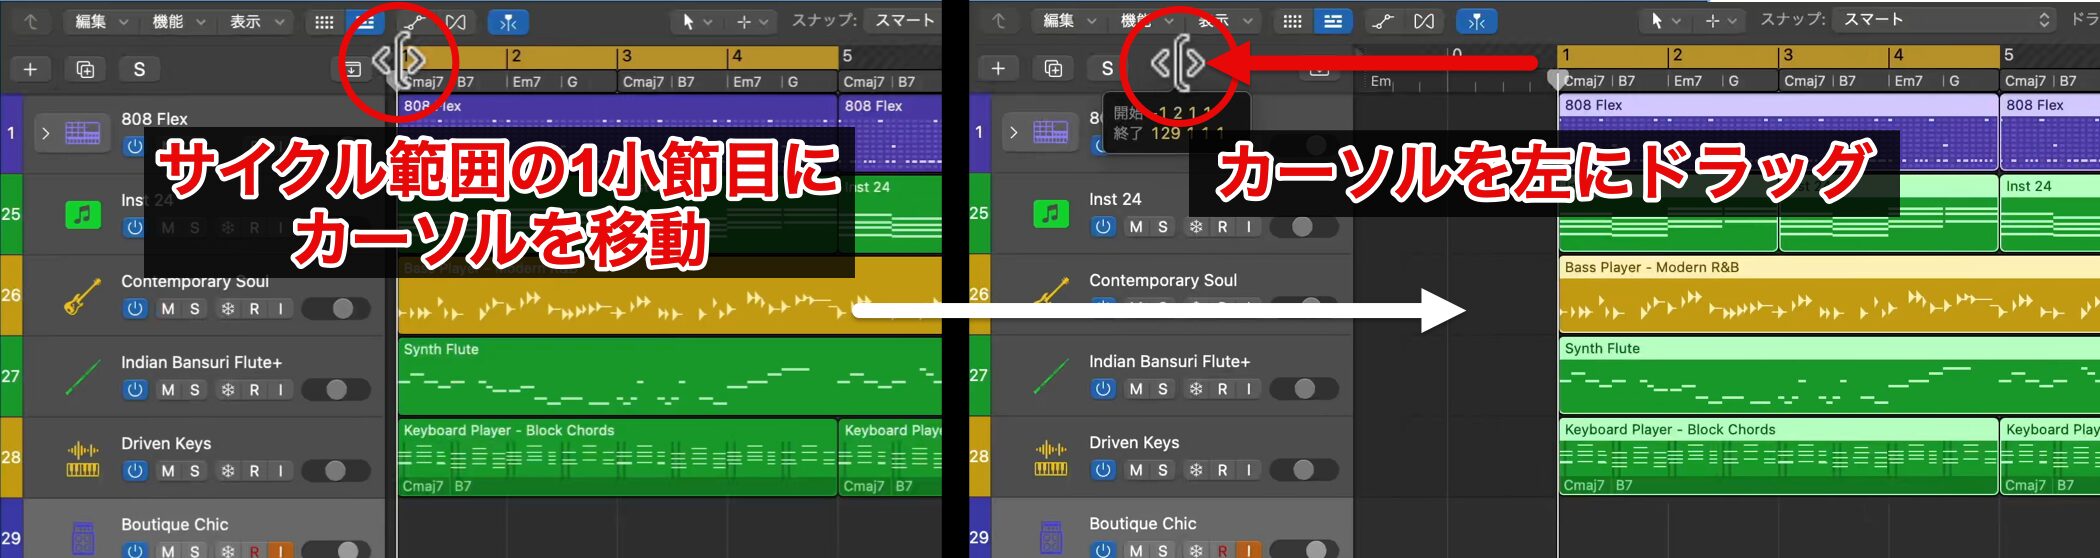
Move the cursor to the cycle area at the start of bar 1 and drag left to add bars in the negative direction.
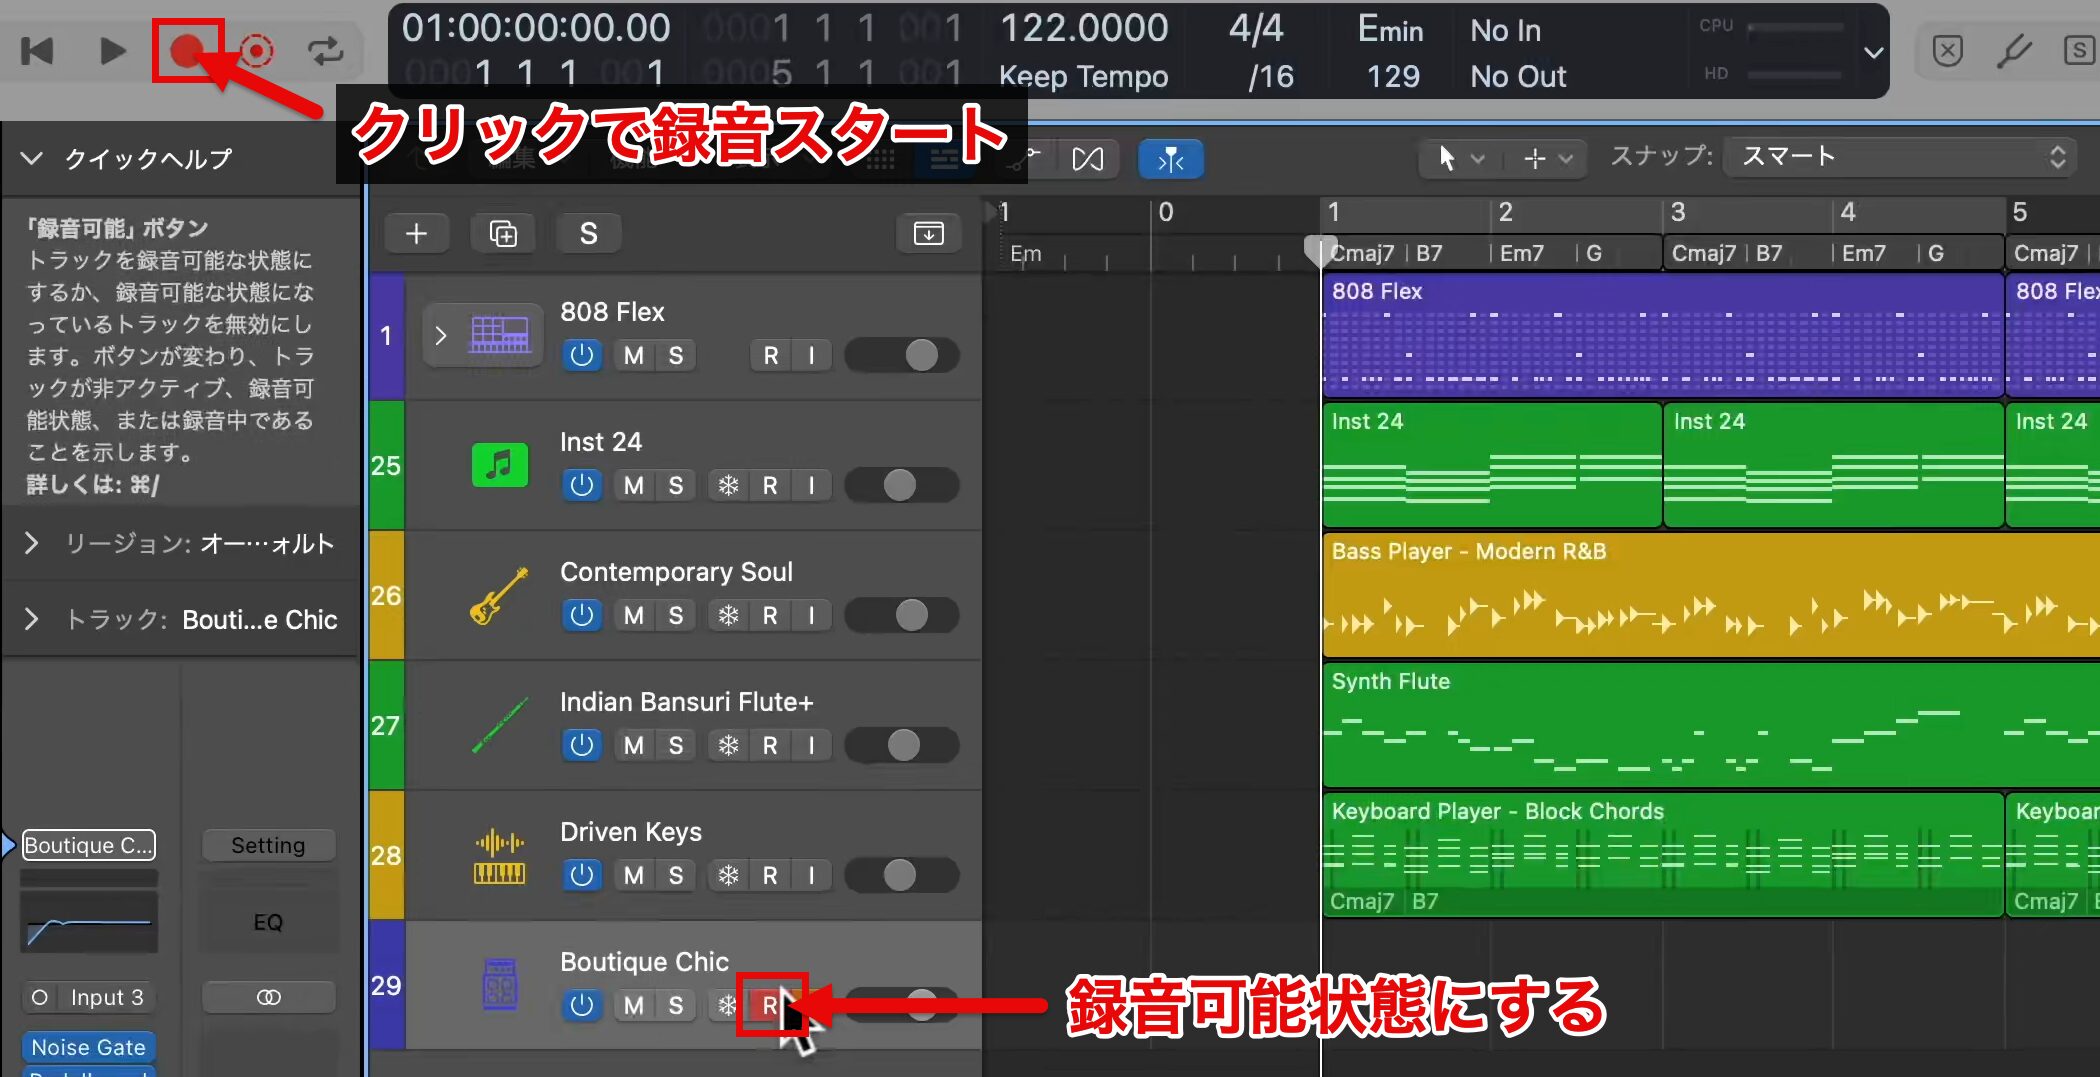
To record, record-enable the track, then start with the Record button or the shortcut key R, and stop with the Stop button or the Space bar.
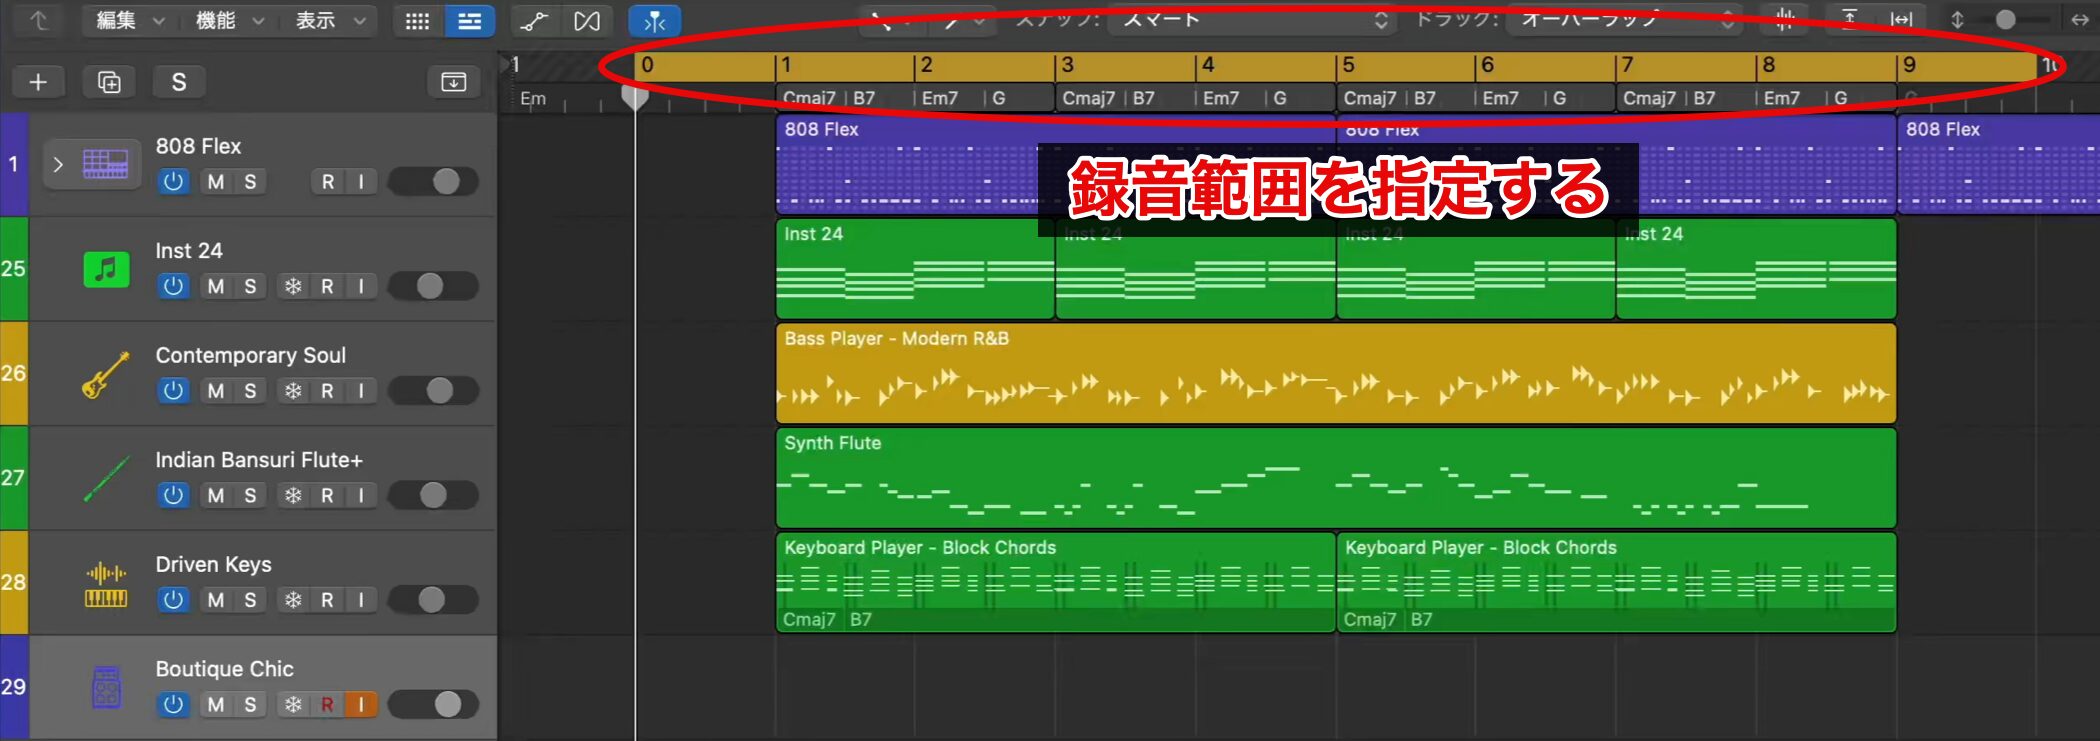
If you make a mistake, re-recording over and over is tedious.
So specify a recording range and use cycle recording, playing repeatedly until you get a take you are happy with.
Take Comping
When you record multiple takes, each take will have good sections and not-so-good sections.
In such cases, the take comping function lets you choose only the good sections and join them together.
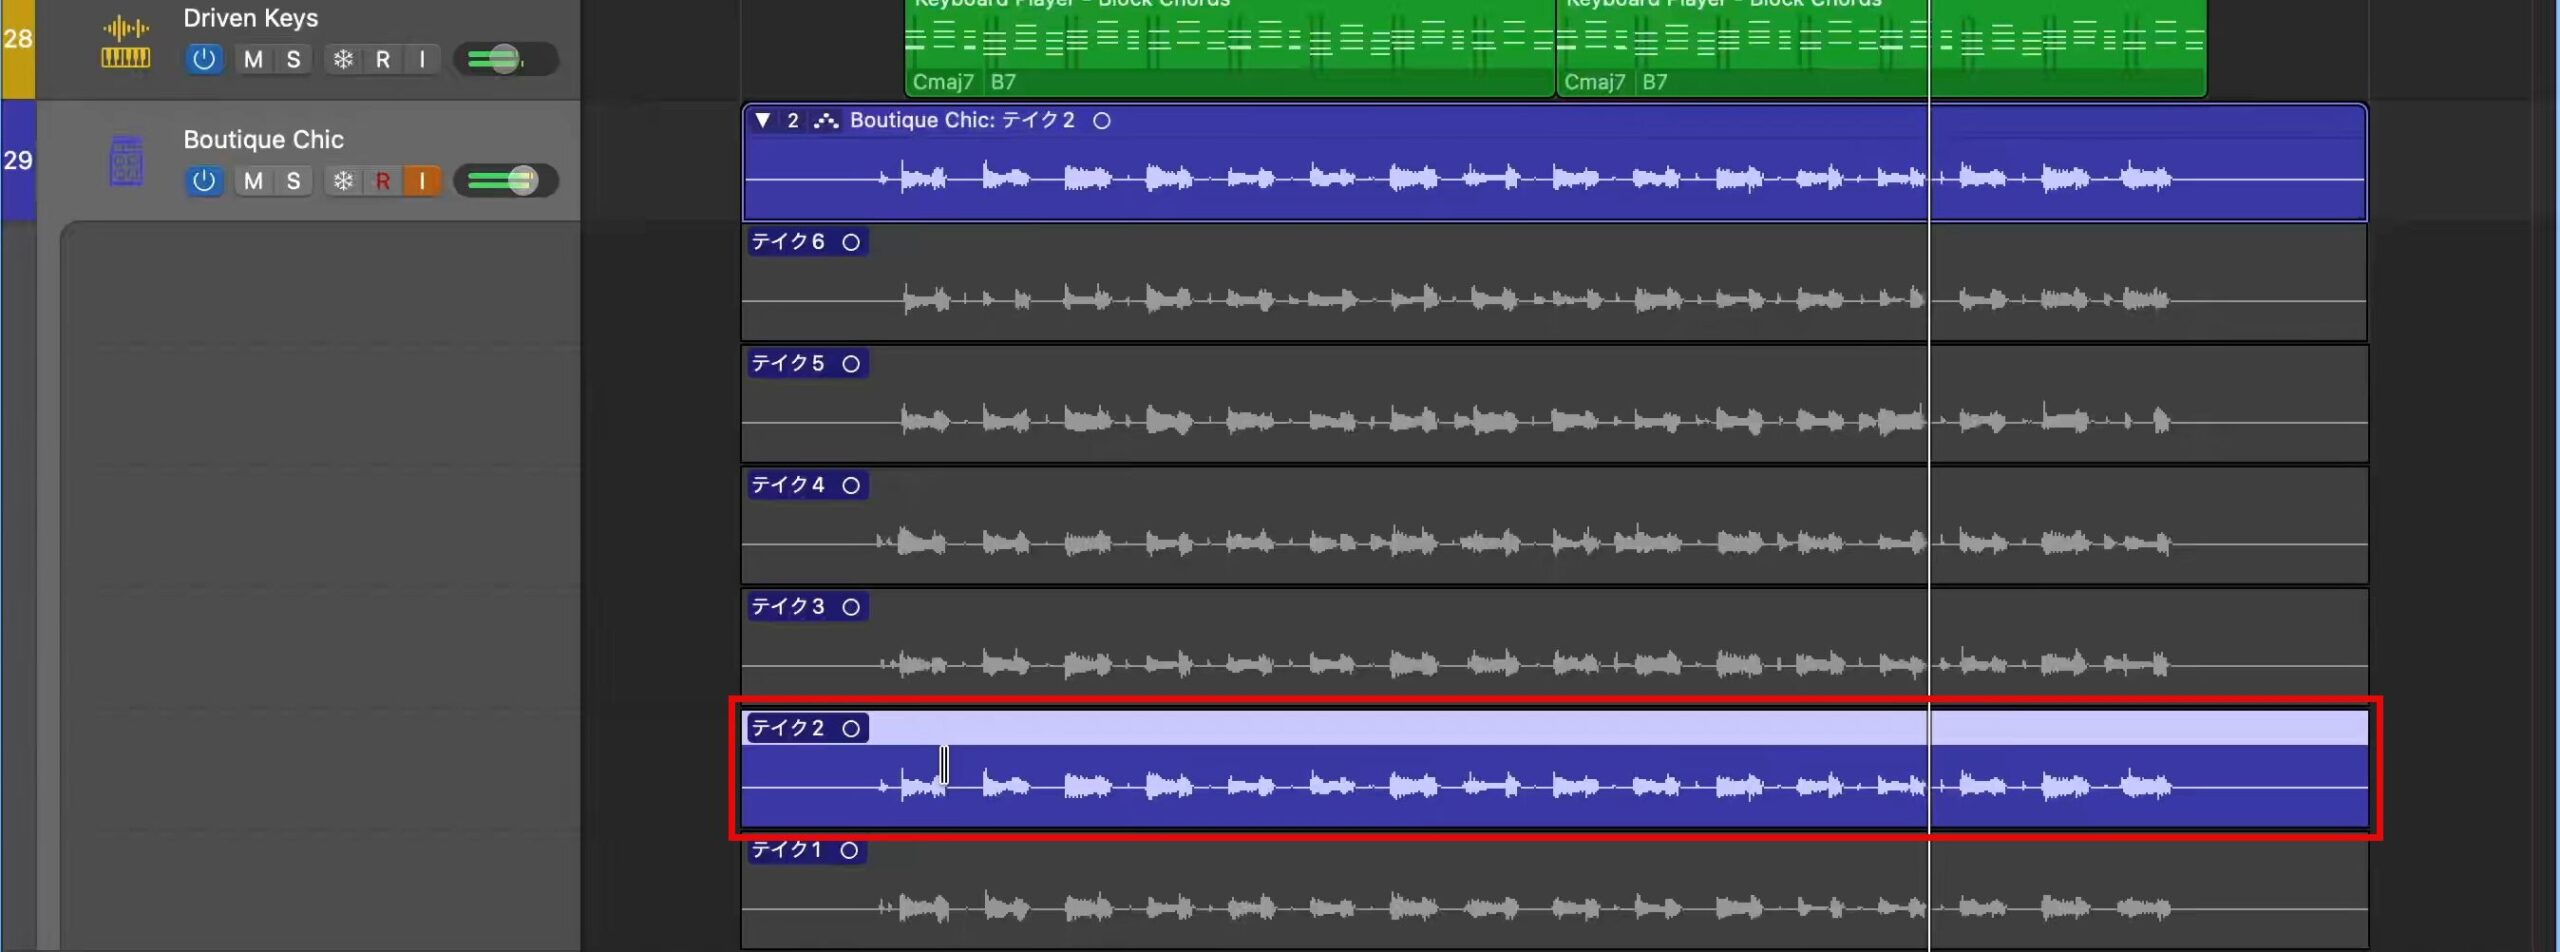
First, choose the take you want as the main one. This time we use "Take 2."
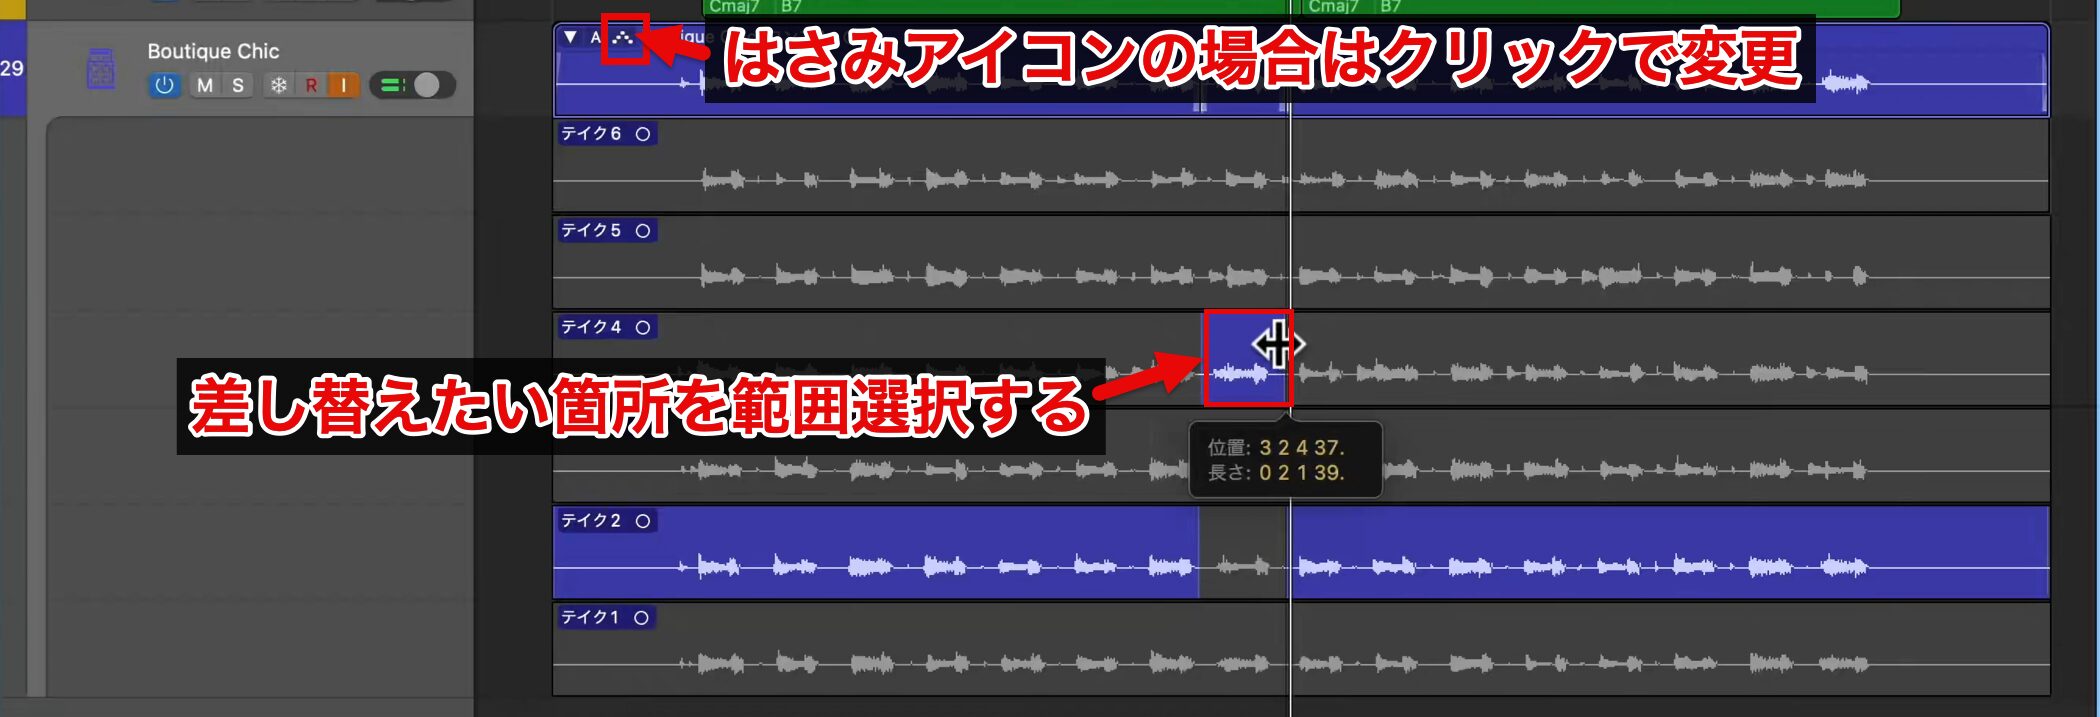
Check that the mark to the left of the region name is "^."
If it is a scissors icon, click it to change it to the "^" mark.
Next, find the parts of the main take whose playing bothers you, and find better playing for those parts in other takes.
Simply select the range you want to replace, and you can switch that part to a different performance.
Duplicating Comps
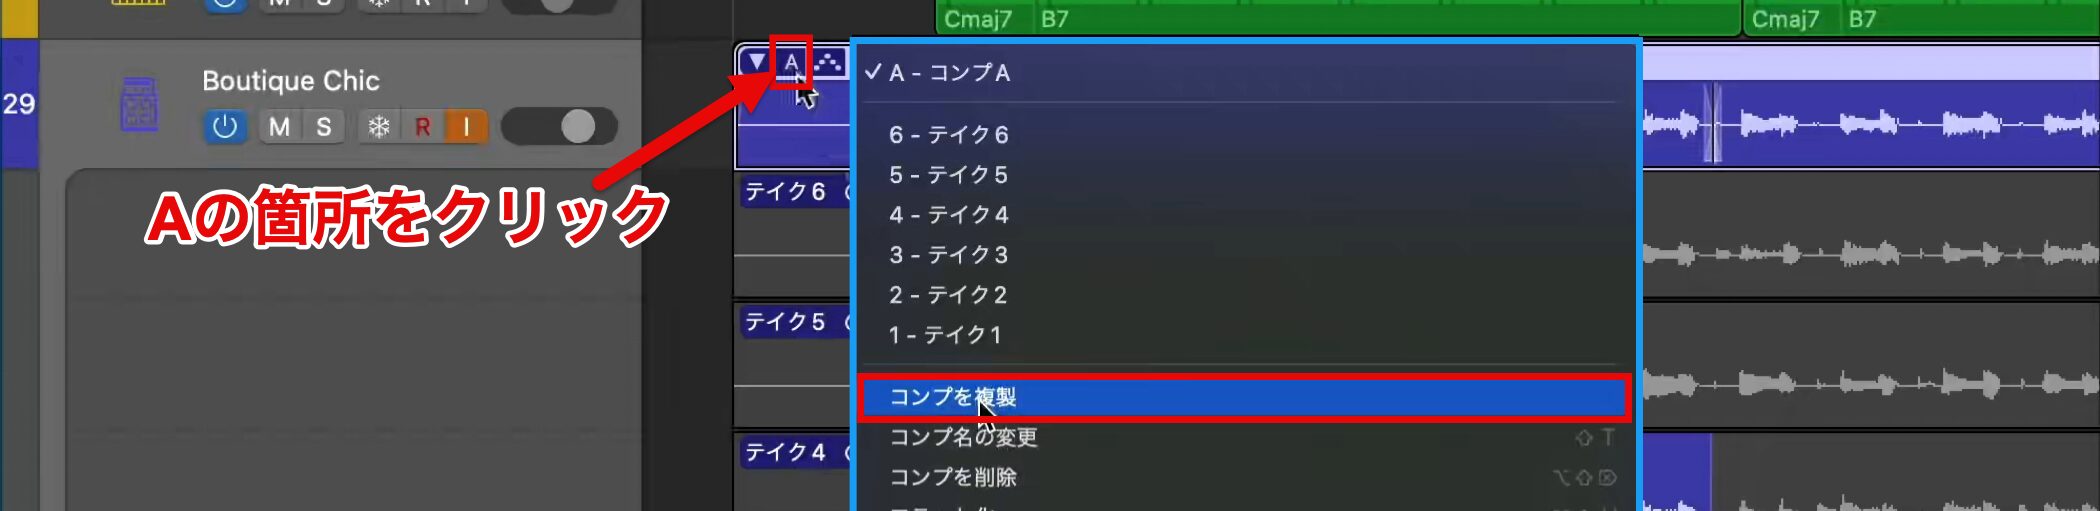
You can create multiple comps and switch between them to compare.
Click the area marked "A" and choose "Duplicate Comp."
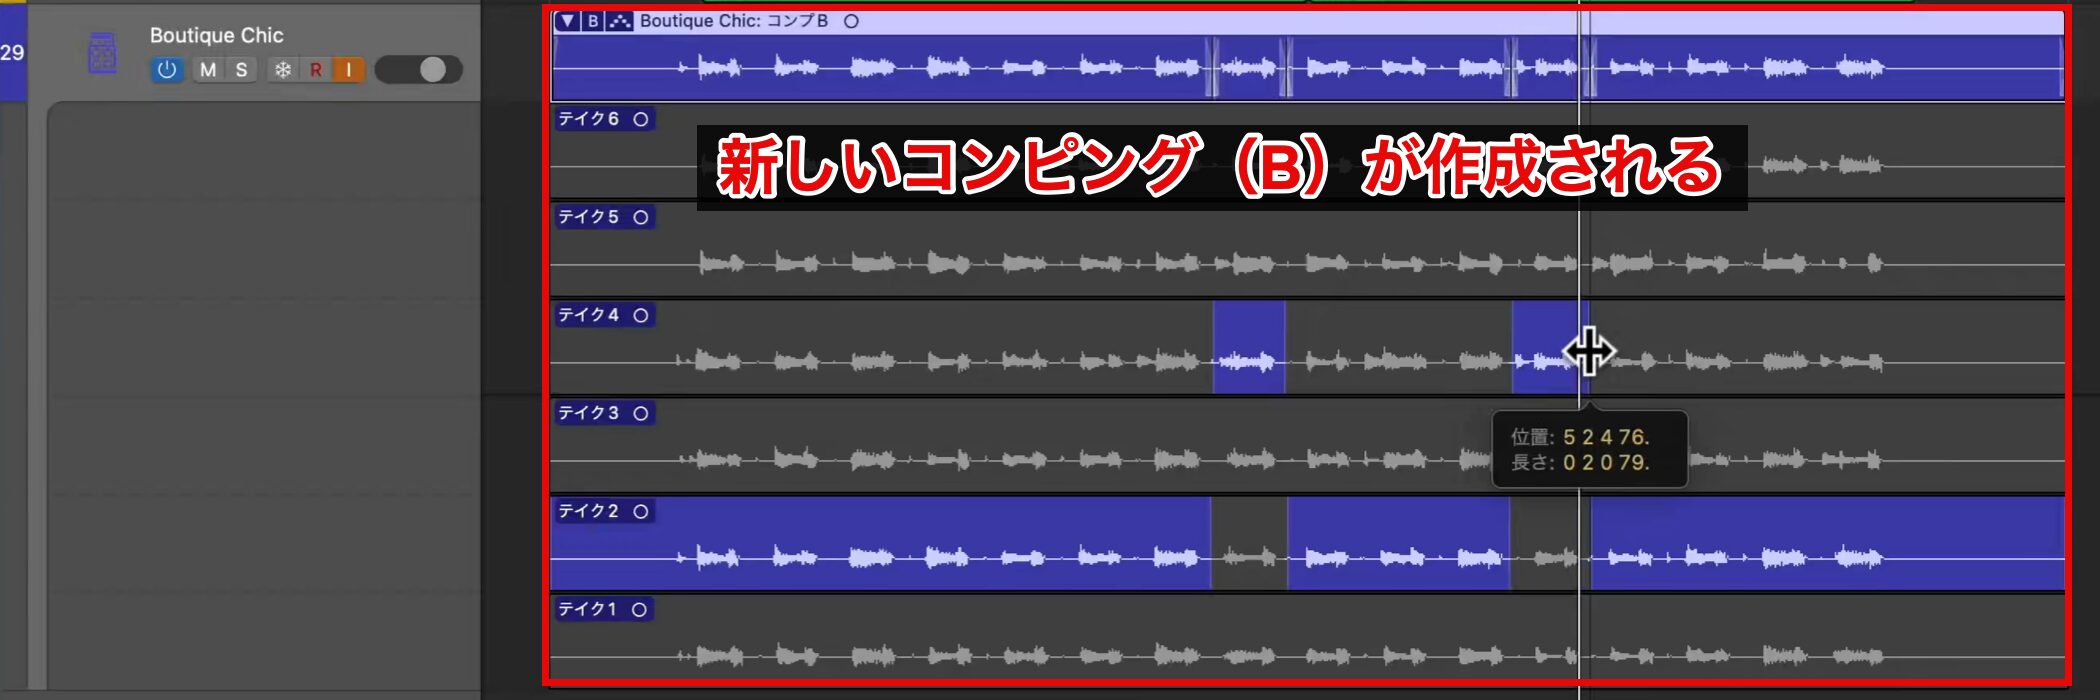
A new comp, "B," is created, and you can edit it as a separate version.
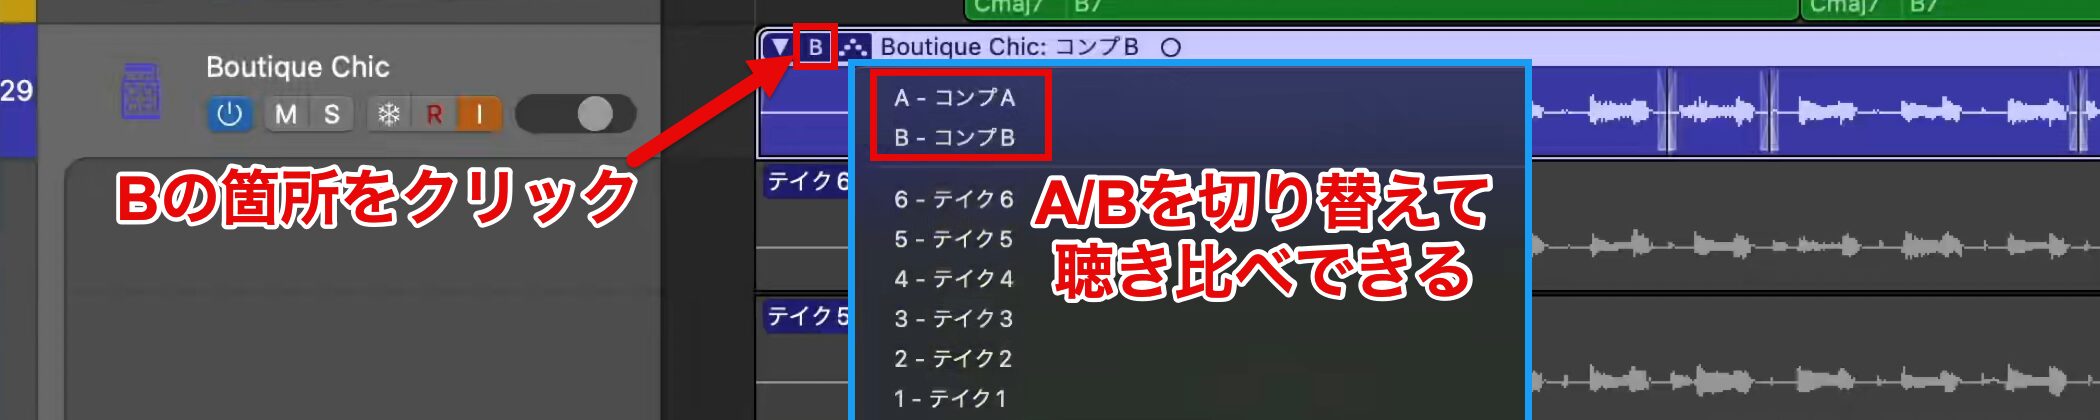
Click the area marked "B" to show "Comp A" and "Comp B," and you can easily switch between them to compare.
Merging Regions
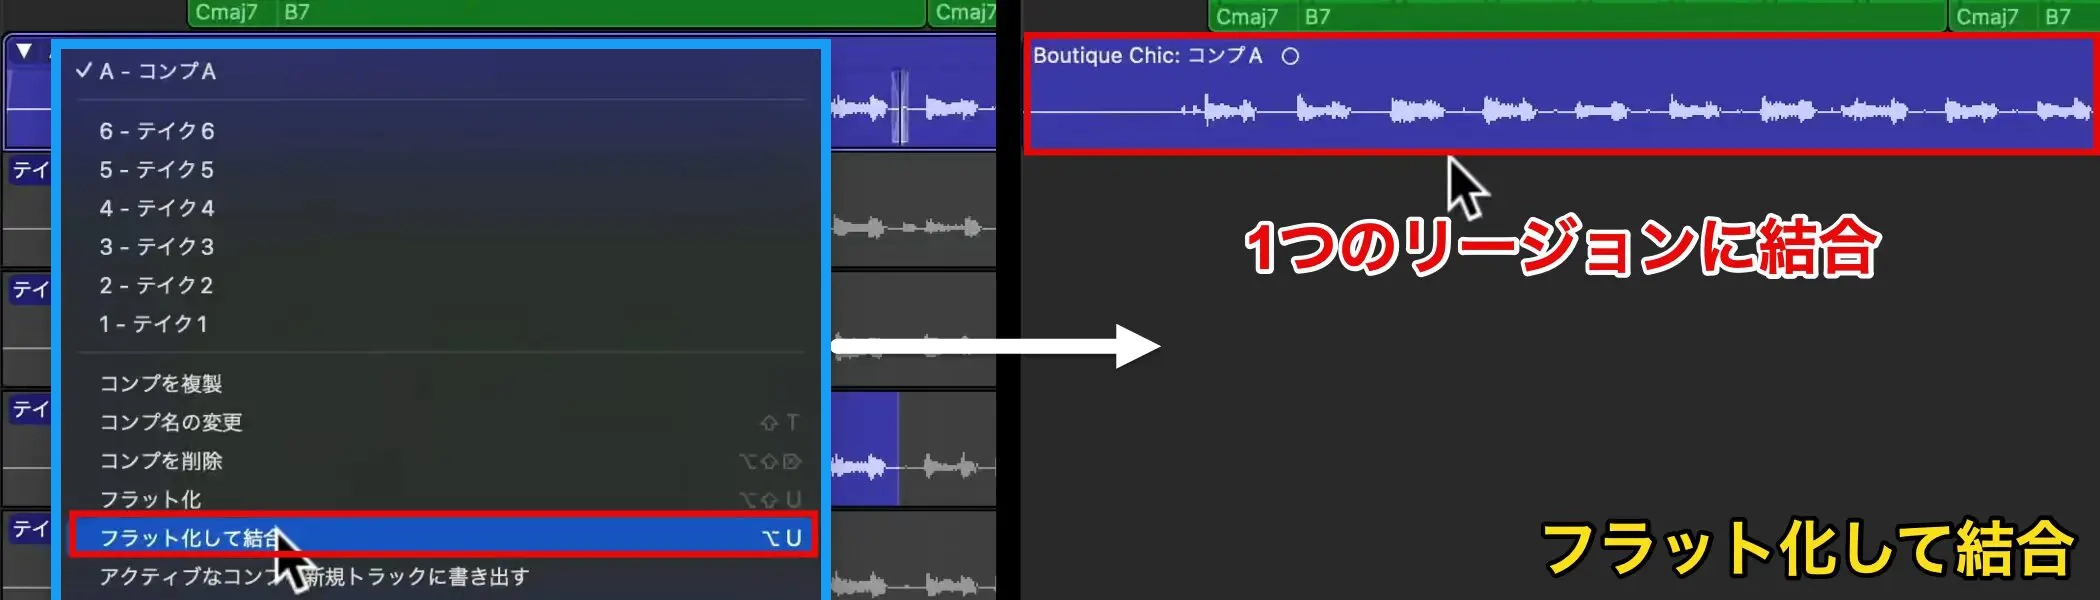
Once the takes to use are decided, you can lock them in so they are not changed by mistake.
Choose "Flatten and Merge" from the same menu, and all takes are combined into a single region.
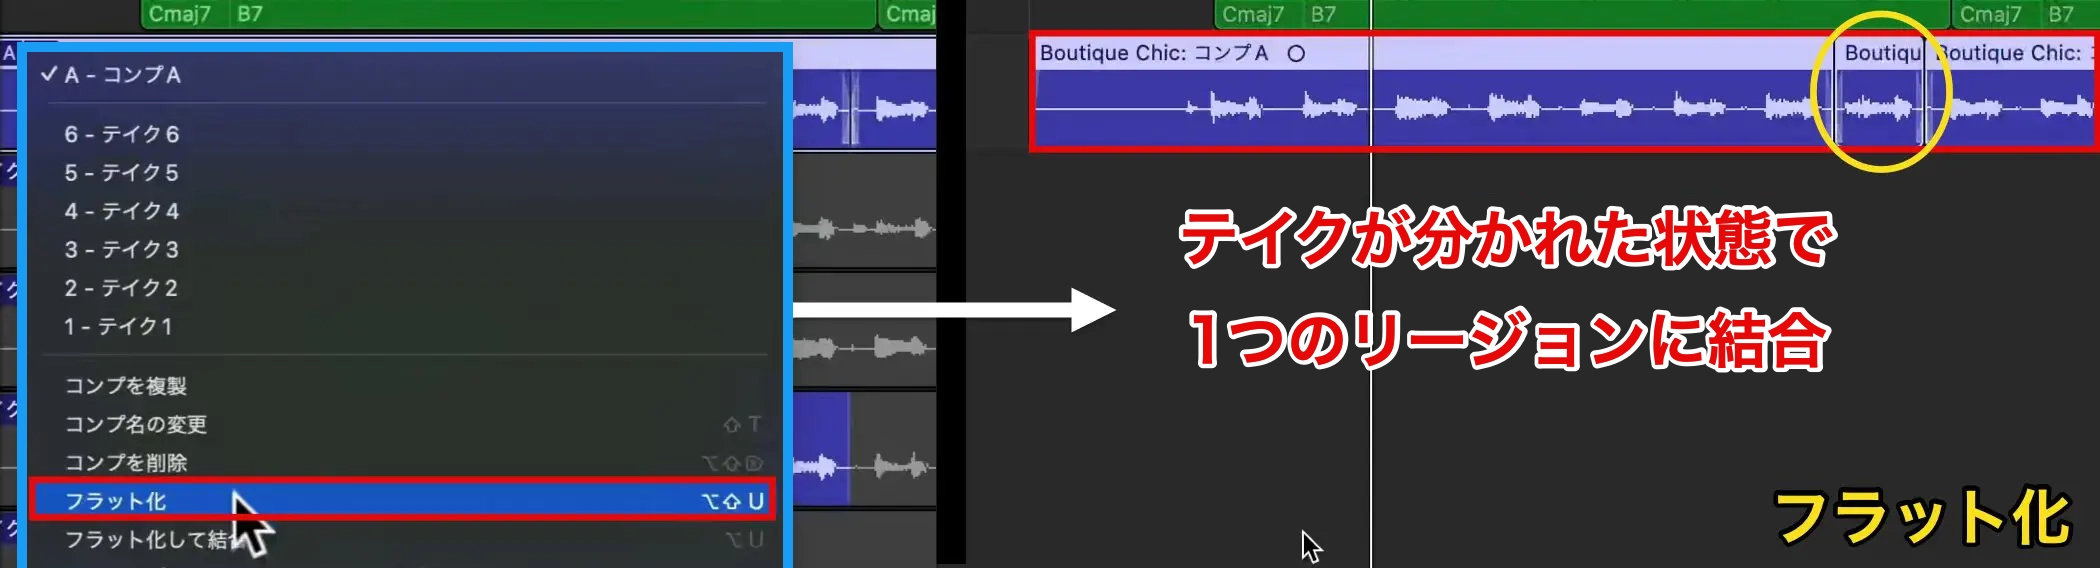
If you choose "Flatten" instead, the takes are combined with the regions kept separate for each take.
Punch-In
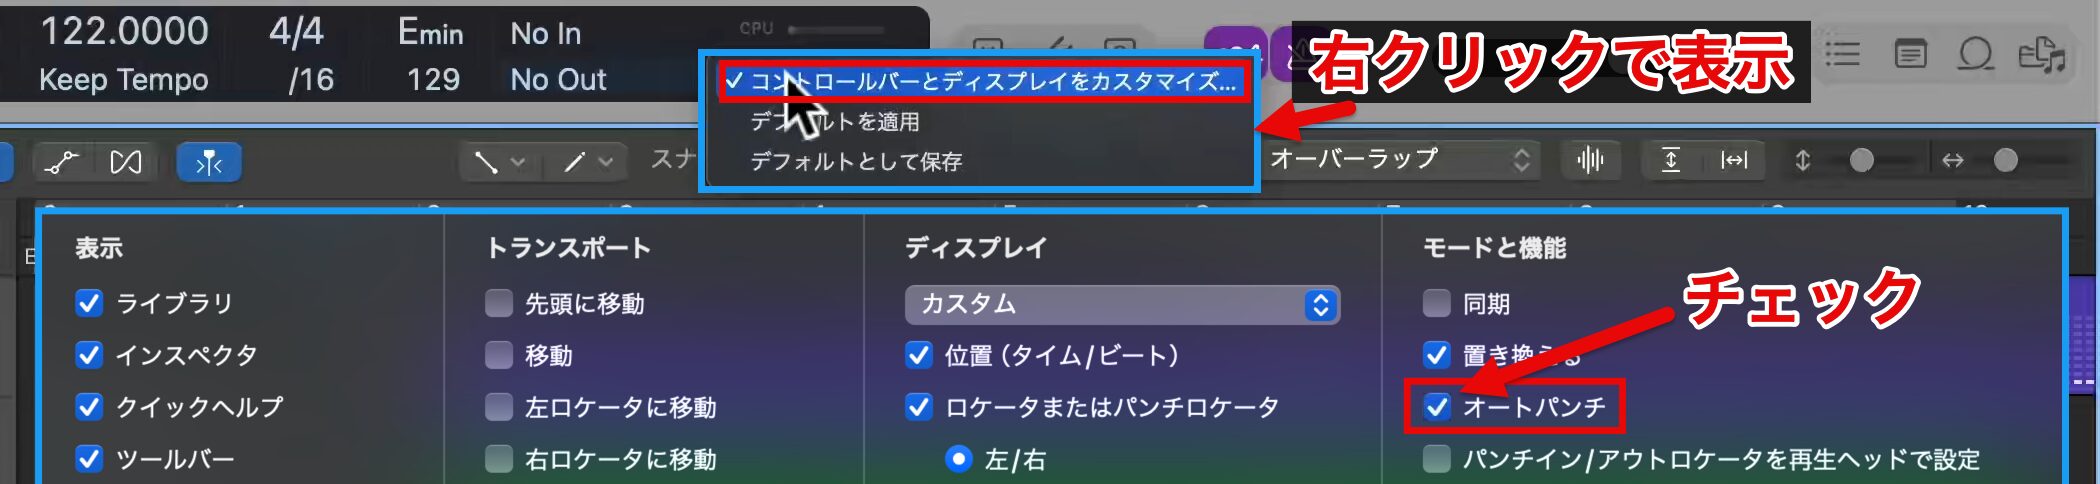
If you want to re-record part of a phrase, the punch function, which automatically records a specific section, is convenient.
Enable "Autopunch" from "Customize Control Bar and Display."
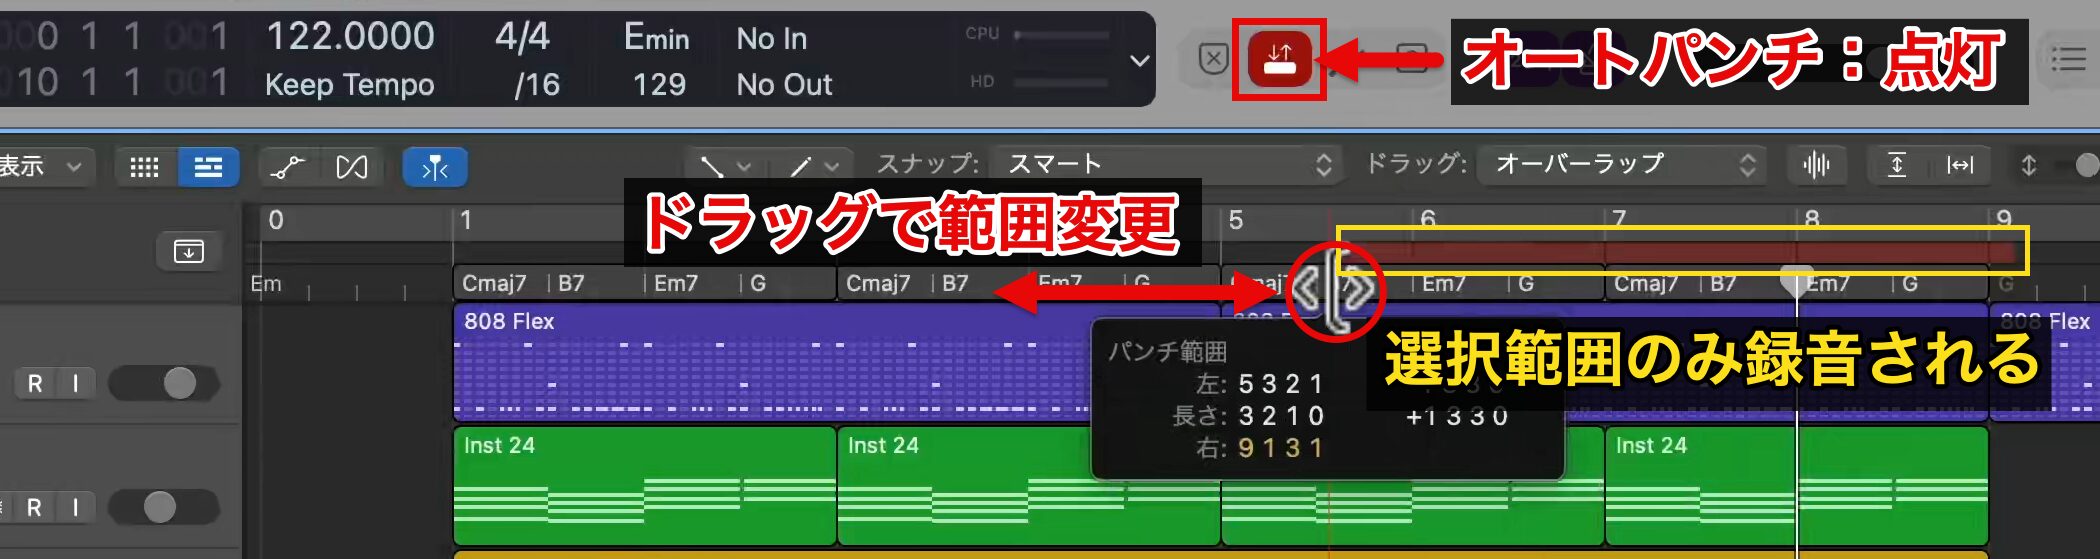
Turn on the Autopunch button, and a red range appears.
By setting the recording range, no matter where you start playback, only the specified range is recorded.
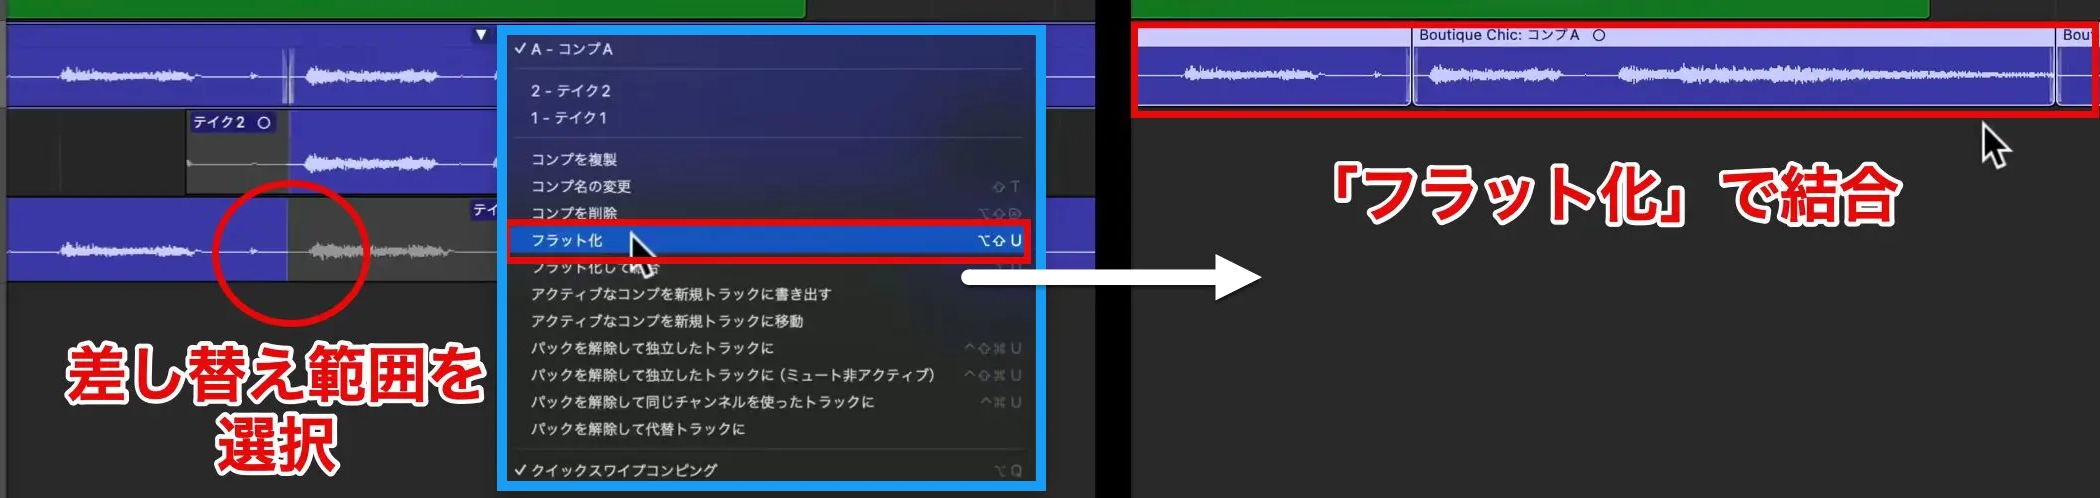
After recording, the result is stored as a new take, so select the range you want to replace and combine the takes into one with Flatten.
Setting Fades
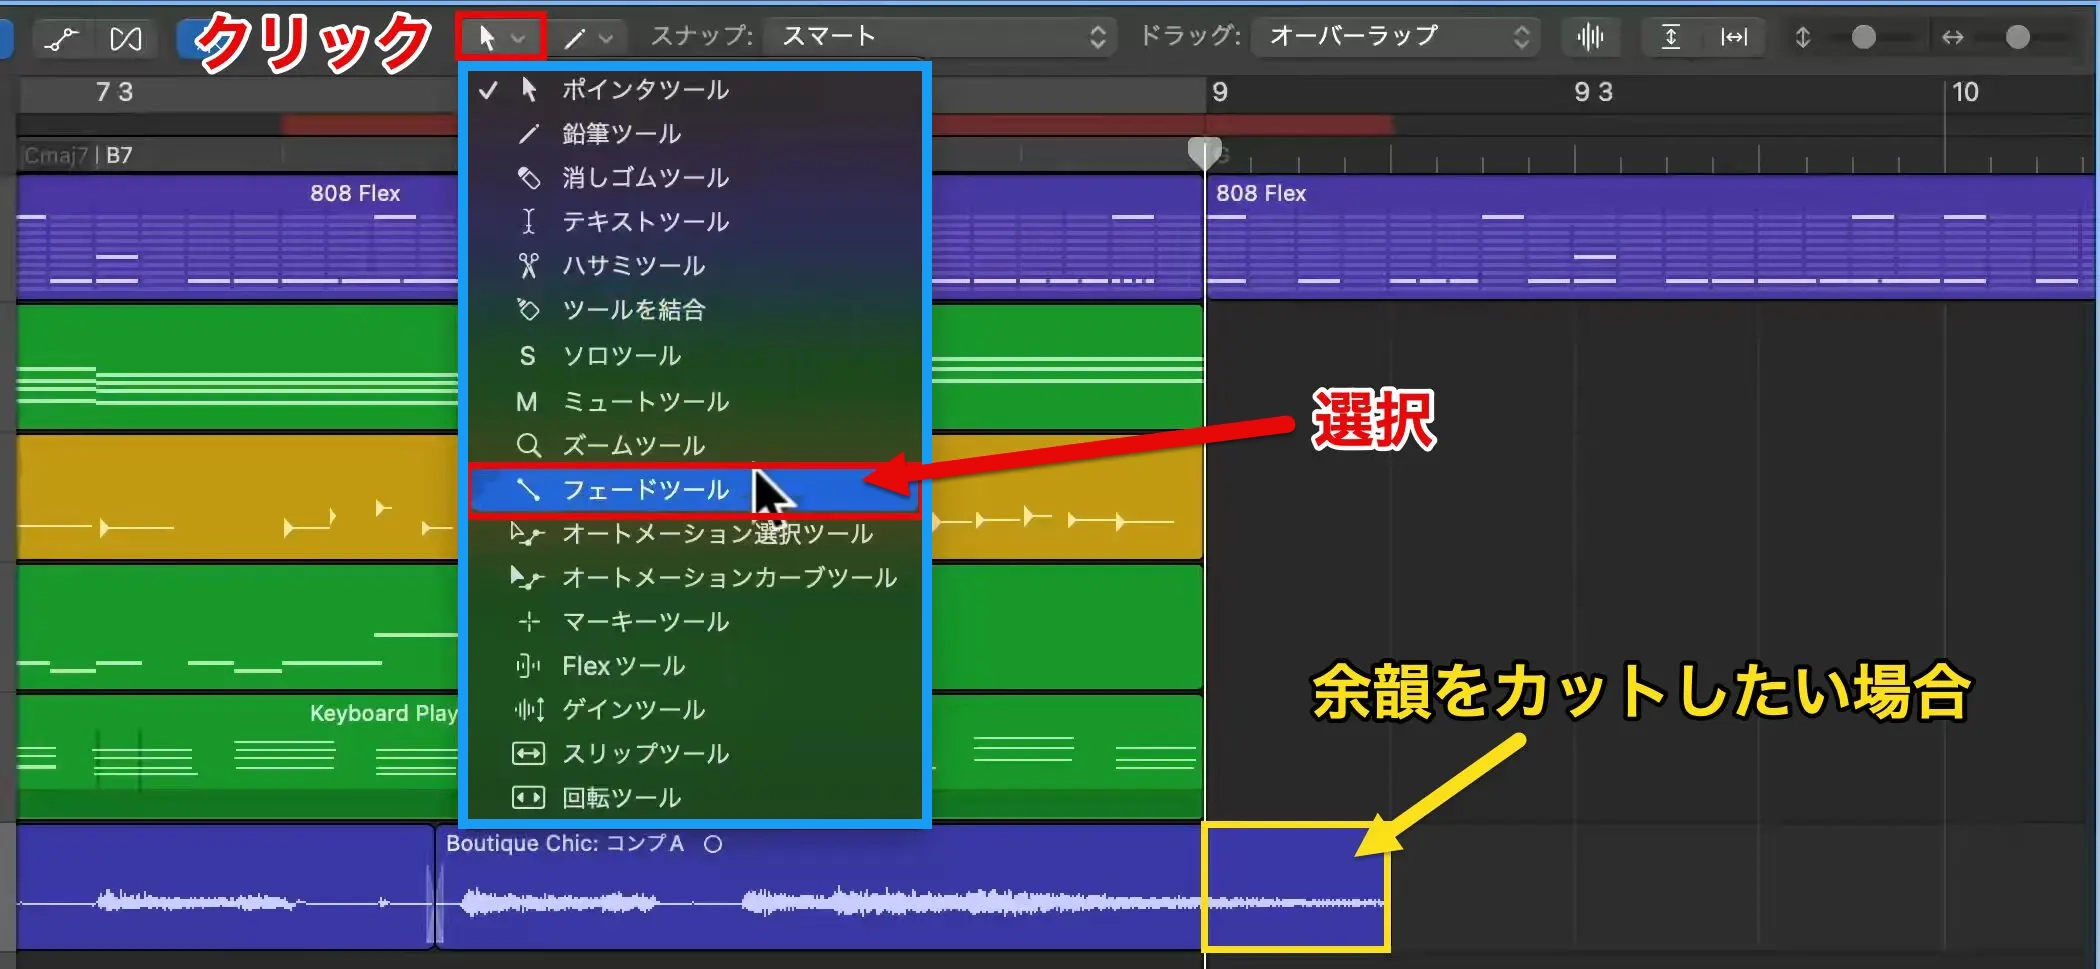
If the end of the re-recorded phrase is too long, you can fade out the tail.
Choose the "Fade Tool" from the Tool menu.
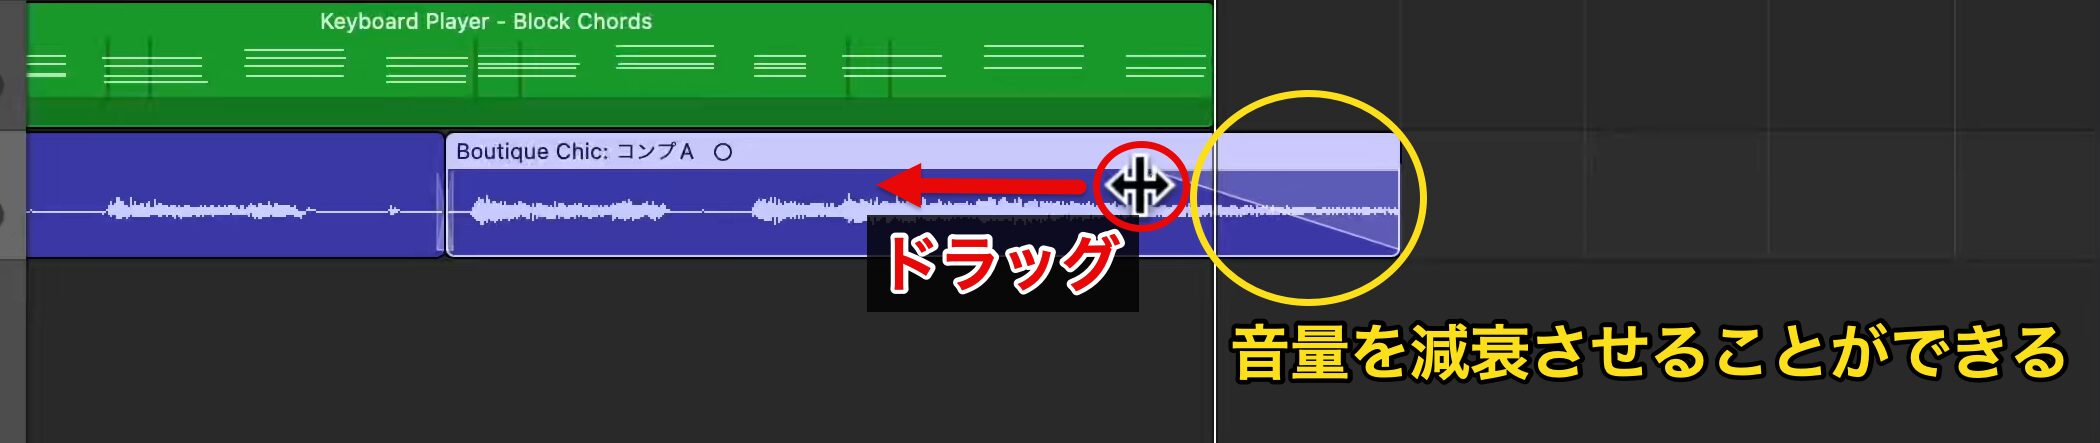
Drag the edge of the region to draw a volume curve that fades the sound out, as shown in the image.
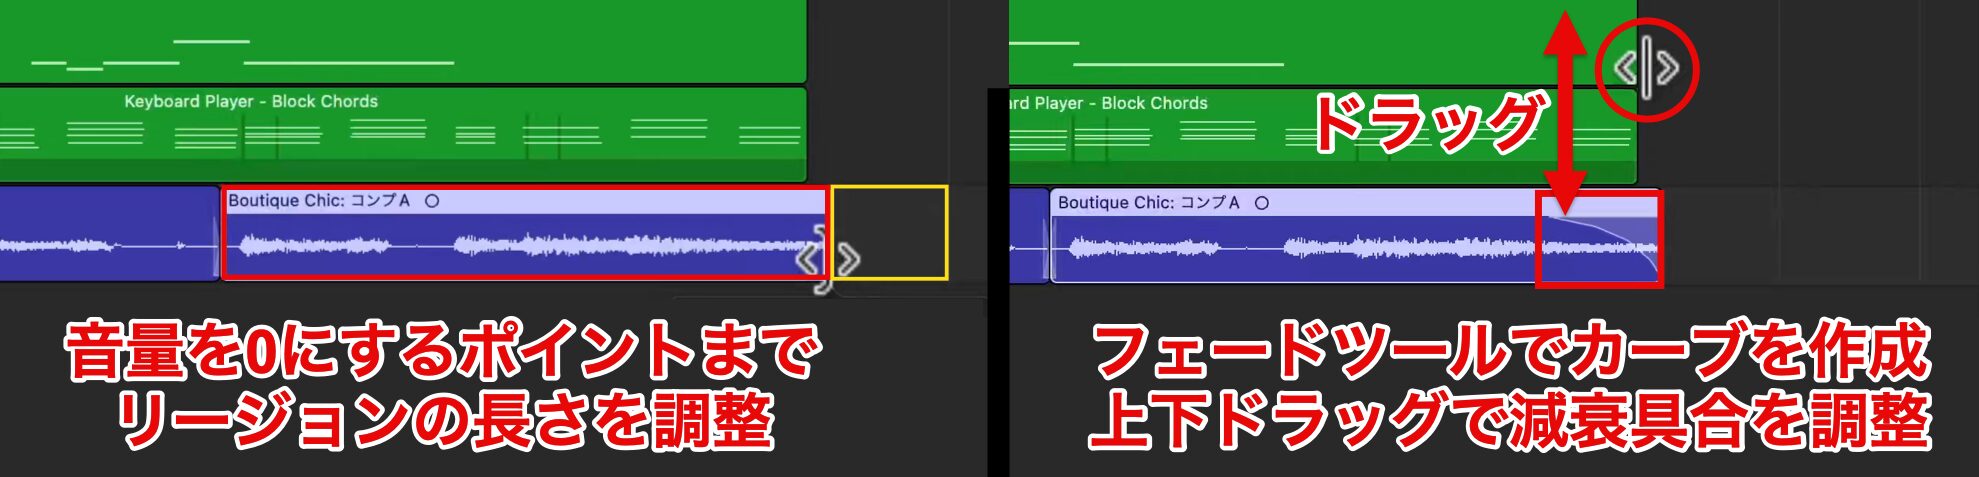
If you want to cut the tail completely, shorten the region to the point where you want the volume to reach 0, then use the Fade tool.
You can drag the volume curve up or down to adjust the shape of the fade.
Flex Time
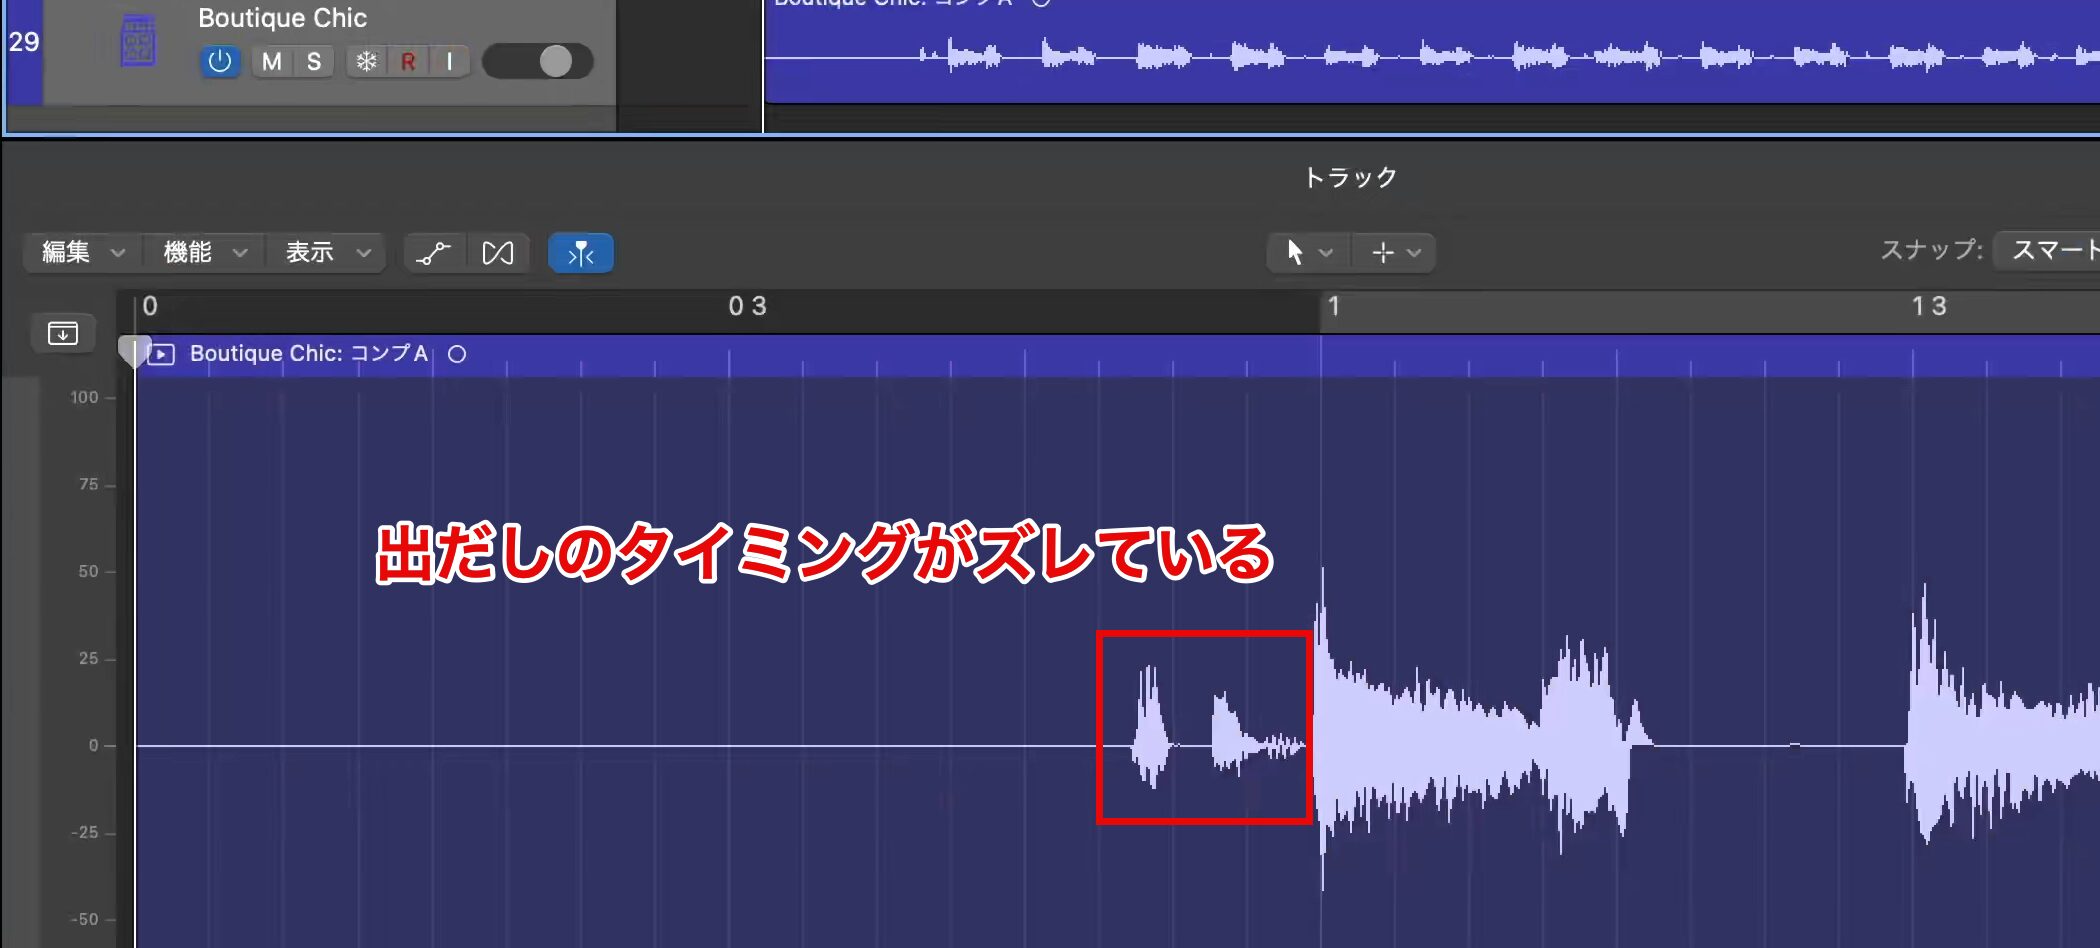
The song is gradually taking shape, but we noticed that the timing at the start is off.
To correct the timing of an audio region, use the Flex Time function.
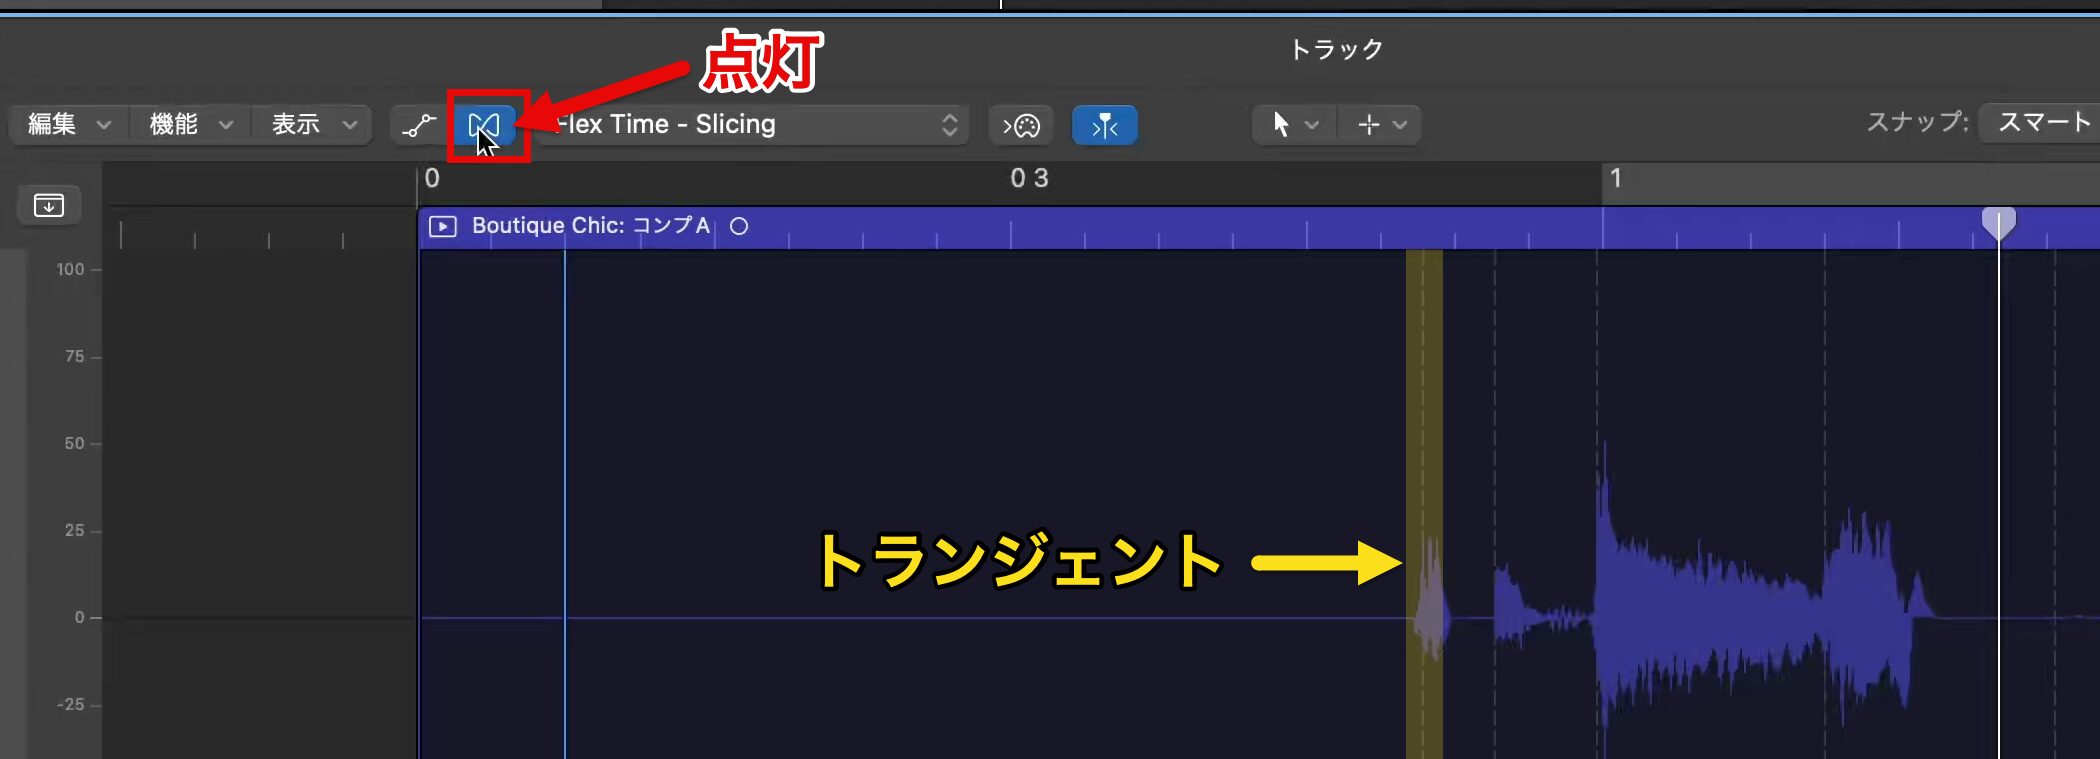
First, enable the Flex button in the editor.
Dotted lines called transients then appear at the start of each note.
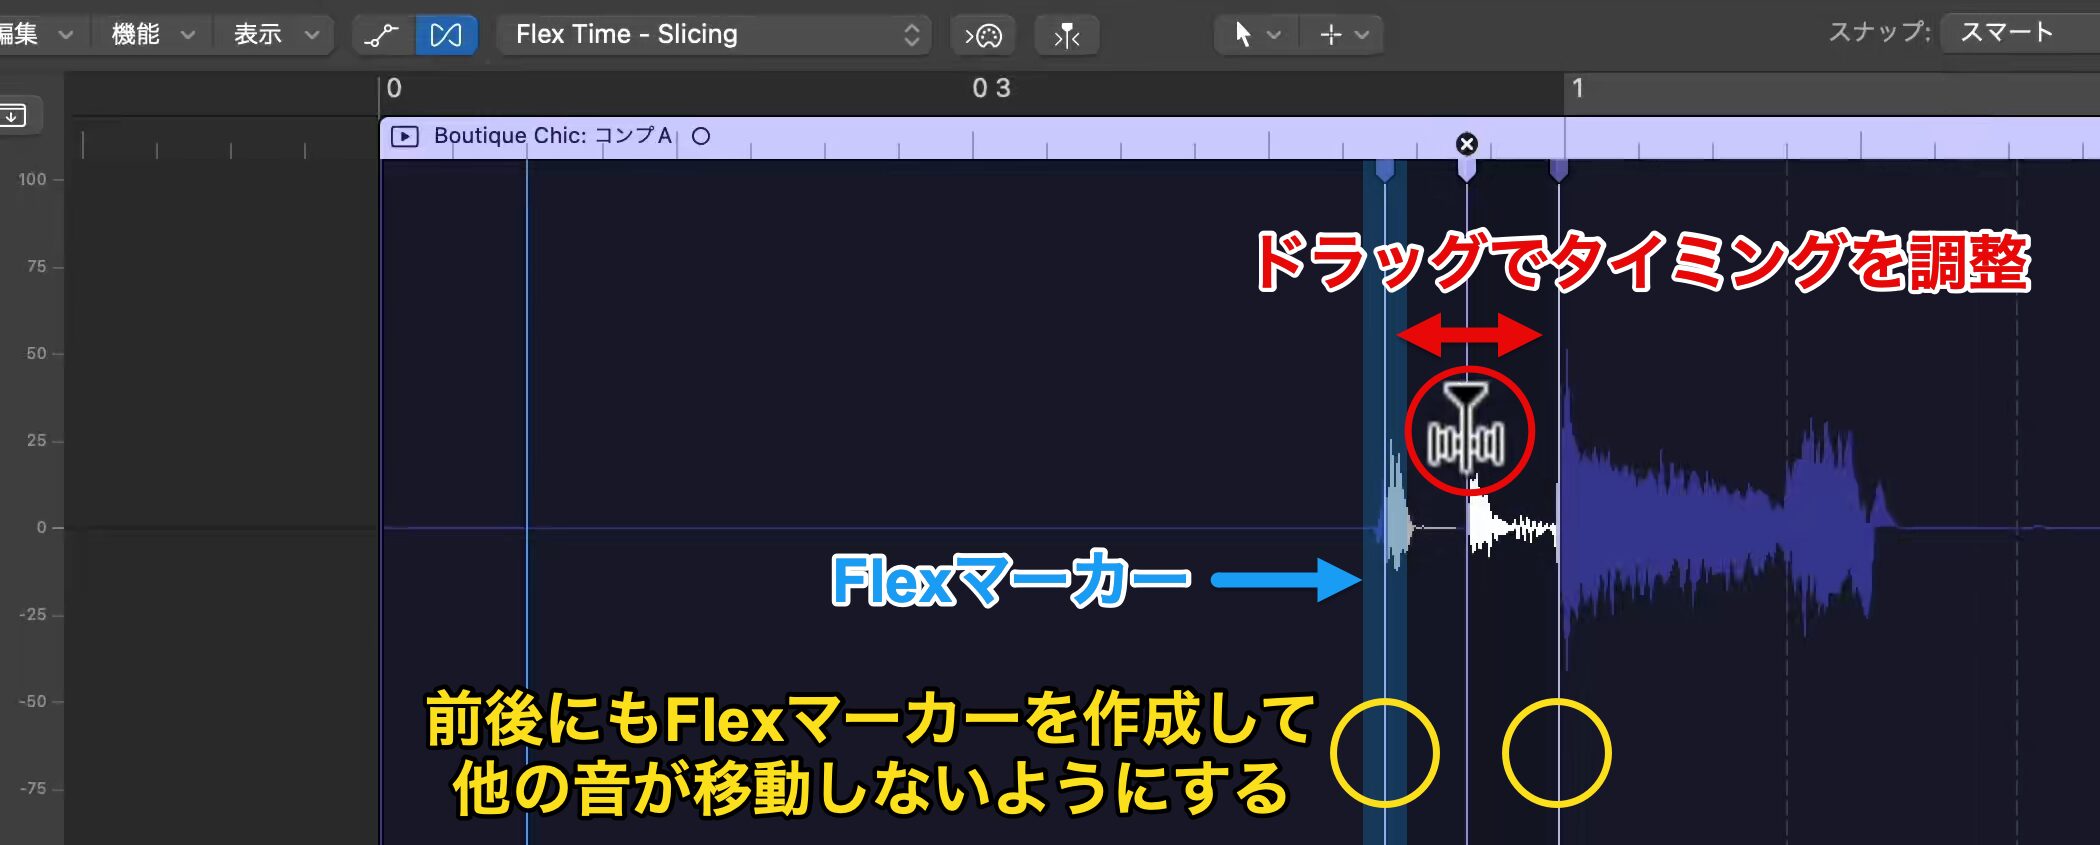
Click a transient, and it changes into a solid Flex marker.
Then simply drag this marker left or right to adjust the timing.
However, dragging the target note also shifts the neighboring notes, so create Flex markers before and after it as well to keep the other notes from moving.
Let's compare the sound before and after timing correction.
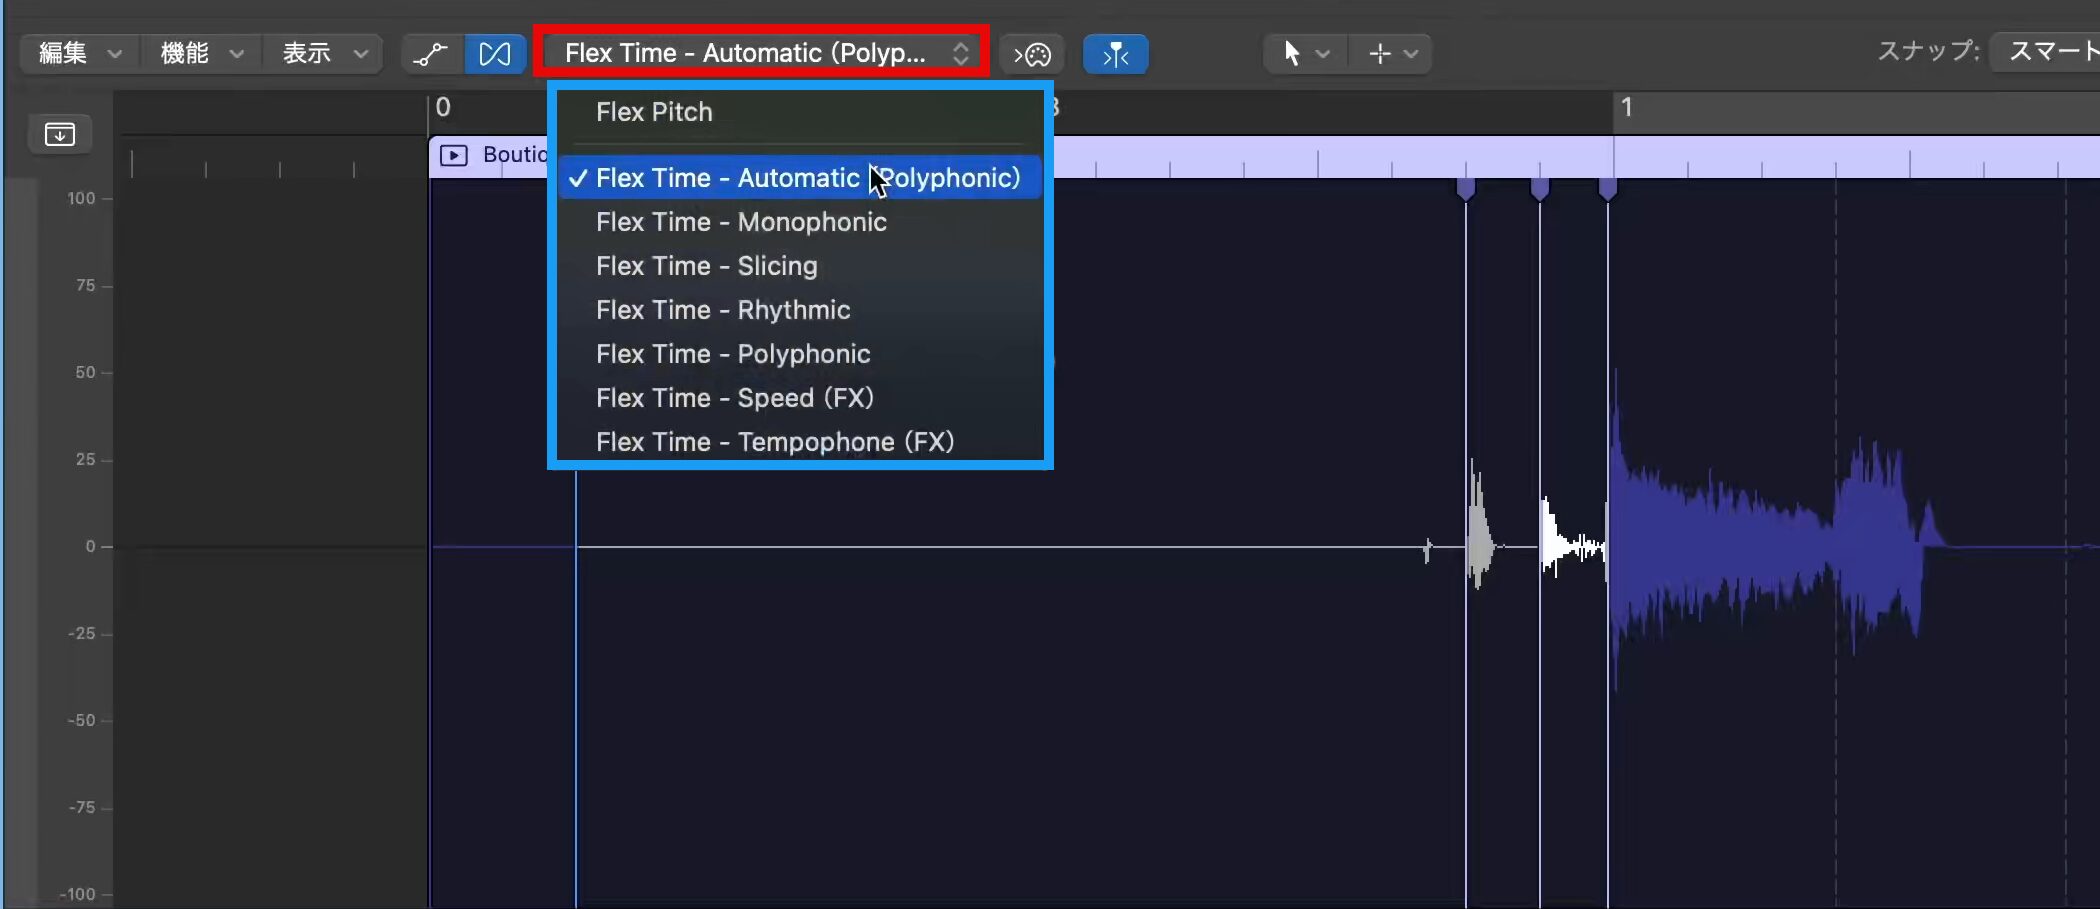
Flex Time provides "Flex modes" that let you set how the sound changes when timing is adjusted.
The default "Automatic" is fine, but if timing correction seems to degrade the sound, switching to another mode may improve it.
Frequently Asked Questions
Q1. How should I set the I/O Buffer Size to minimize latency when recording guitar in Logic Pro?
To minimize latency during live playing, set the I/O Buffer Size to a small value (for example, 64). However, this increases the load on your computer, so we recommend raising the value for work other than recording.
Q2. What are the benefits of using take comping?
From multiple recorded takes, you can choose only the best sections of each take and join them together. You do not need to record a perfect take in one go, so you can produce high-quality parts efficiently.
Q3. What can I do with Flex Time?
You can precisely correct the timing of audio regions. Just place Flex markers on transients (the starts of notes) and drag them to adjust timing and tighten the groove.
Q4. When is punch-in useful?
It is convenient when you want to re-record only a specific phrase. If you specify a range with Autopunch, only that section is recorded automatically, so partial fixes can be made efficiently.
Q5. When are fades needed?
Use them when the end of a re-recorded phrase is too long or when you want to cut an unwanted tail. Adjusting the volume curve with the Fade tool gives a natural decay.
NEW ARTICLES
Latest English Articles











