シンボリックリンクでHDDのファイル容量を賢く管理
ファイルの置き場所を自由に変更可能
DTMソフトで使用される音源や素材は日々進化し、とてもリアルで高品質なサウンドとなっています。
DAWソフト自体にも標準で高品質な音源やループが搭載されていますし、
追加音源を使用しているという方も多くいらっしゃると思います。
音源や素材が増えるのは嬉しいことですが、それらの容量は数ギガ〜数十ギガ単位ということも多く、
段々とハードディスク容量が圧迫されてきます。

- ノートパソコンで作業を行っている
- 高速なSSDハードディスクを使用している
この様な方は特に、
システムハードディスクの空き容量を気にしている頻度が高いのではないでしょうか?
DAWソフトや音源の中には、ライブラリーを外付けのハードディスクに保存できる製品も存在しますが、
インストール後の移動が難しいものや、そもそも場所を指定できないものもあります。
ここで役立つのが「シンボリックリンク」です。
メインのシステムディスク容量を圧迫しているファイルを、
外付けのハードディスクへ移動し、メインディスクと同様に認識させることができます。
この方法をMac/Windows別に解説していきます。
※以下の作業では重要なデータの操作を伴います。
作業を行う前にバックアップをとり、自己責任で行っていただくようお願いします。
※一度設定した後にDAWソフト等のアップデートをインストールすると、
うまくアップデートされない場合があります。
その際は、一旦元の場所にフォルダを戻し、アップデート完了後に再度リンクを設定して下さい。


- Macの設定
- Windowsの設定
ここではDAWソフトLogicを例に進めていきます。
Logicをインストールすると、大量の音源、ループがインストールされます。
インストール時に、それらの保存場所を指定することはできません。
「シンボリックリンク」を使用して場所を移動してみましょう。
まず、容量が大きいLogicの音源フォルダを外付けHDD等へコピーします。
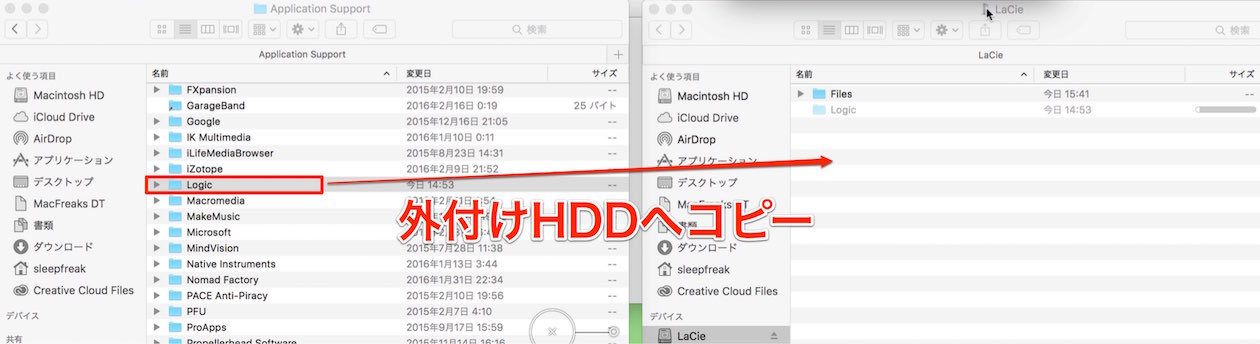
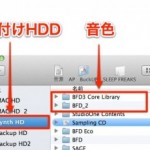
「ライブラリ」→「Application Support」→「Logic」フォルダを
外付けの「LaCie」の第一階層へコピーしました。
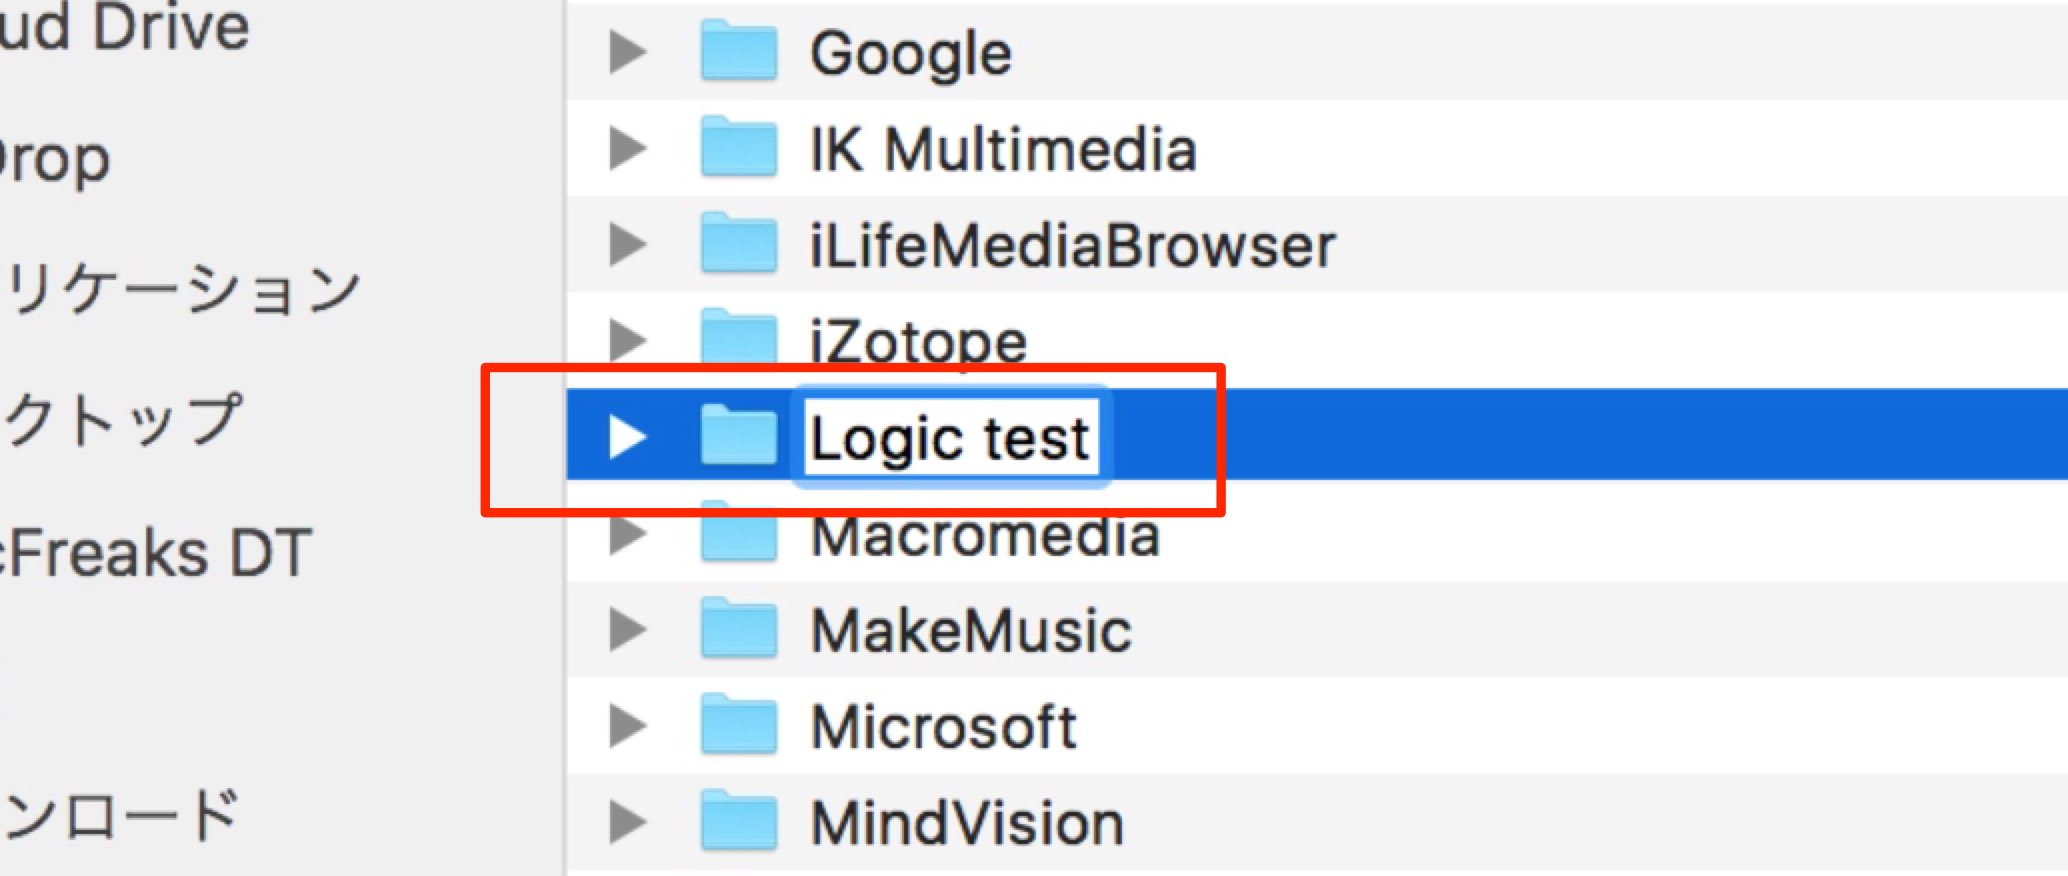
コピーした後は、元フォルダ(メインHDD側)を捨ててもOKですが、
念のためのバックアップとして、名前を変更して残しておきましょう。
次に「ターミナル」を起動します。
アプリケーションウィンドウ → ユーティリティ に格納されています。
ターミナルに以下のコマンドを打ち込み、リンクを作成します。
sudo ln -s /移動したいフォルダの場所 /現在のフォルダの場所
黒字部分は決まり文句です。
赤字部分はご自身の環境に合わせて設定して下さい。
今回のケースを上記のコマンドに割り当ててみるとこうなります。
sudo ln -s /Volumes/LaCie/Logic /Library/Application\ Support/Logic
- メインハードディスク以外のデバイス名の前には「Volumes」と名前がつきます。
- 「Application Support」のようにフォルダの間にスペースがある場合、
「Application\ Support」と「\ 」を記載します。 - 移動元と移動先の間には半角スペースが必要です。
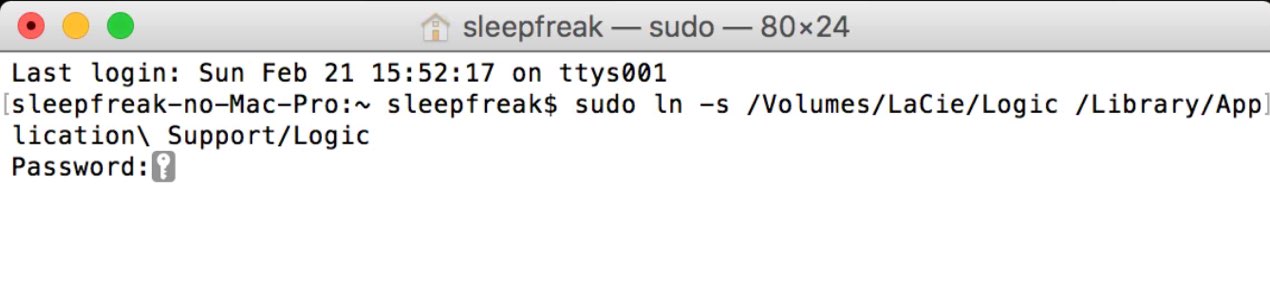
上記をターミナルに入力し「Returnキー」を押します。
パスワードを尋ねられるため、OSのユーザーパスワードを入力してください。
特にエラーメッセージ等が出なければ成功です。
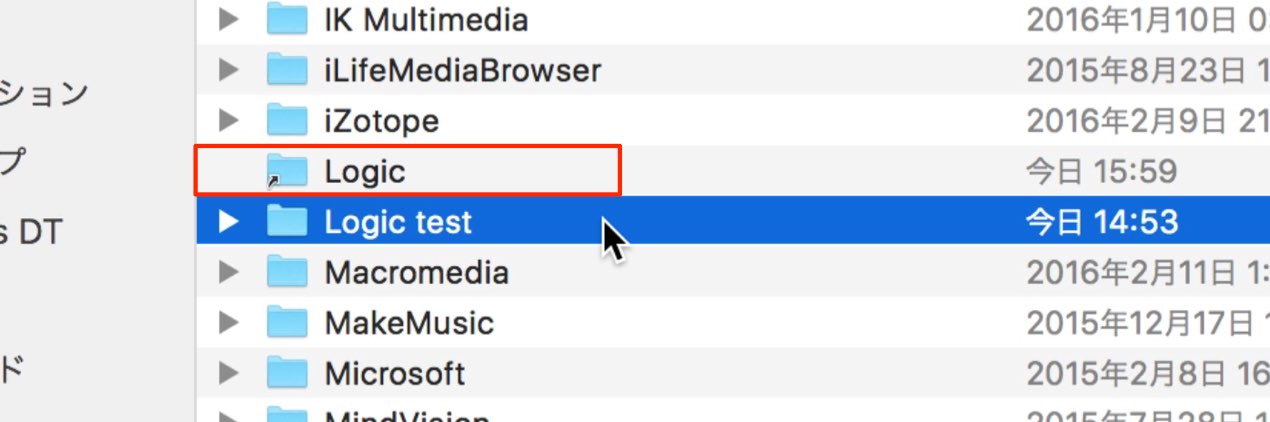
このように「Logic」というフォルダが作成され、
アイコンの左下に矢印が表示されます。
Logicの起動テストを行って問題なければ、バックアップ(名前を変更したLogic Test)は捨ててOKです。
この結果、メインHDDの容量が軽減されたことになります。
この他にも、様々な音源・動画フォルダ・画像フォルダ等で使用できますので、
是非ご活用ください。

ここではDAWソフトCubaseを例に進めていきます。
Cubaseをインストールすると、大量の音源、ループがインストールされます。
インストール時に、それらの保存場所を指定することができますが、
今回はインストール後にファイルを移動したいというケースを想定し、
「シンボリックリンク」を活用してみます。
事前準備として、Cubaseの音色や設定関連のフォルダは隠しフォルダとなっているため、
表示する設定としておいて下さい。
上記の設定が済んだら、容量が大きいCubaseの音源/設定フォルダを外付けHDD等へコピーします。
デフォルトでは「User」→「ユーザー名」→「AppData」→「Roaming」の中に存在する
「Steinberg」が容量の大きなフォルダです。
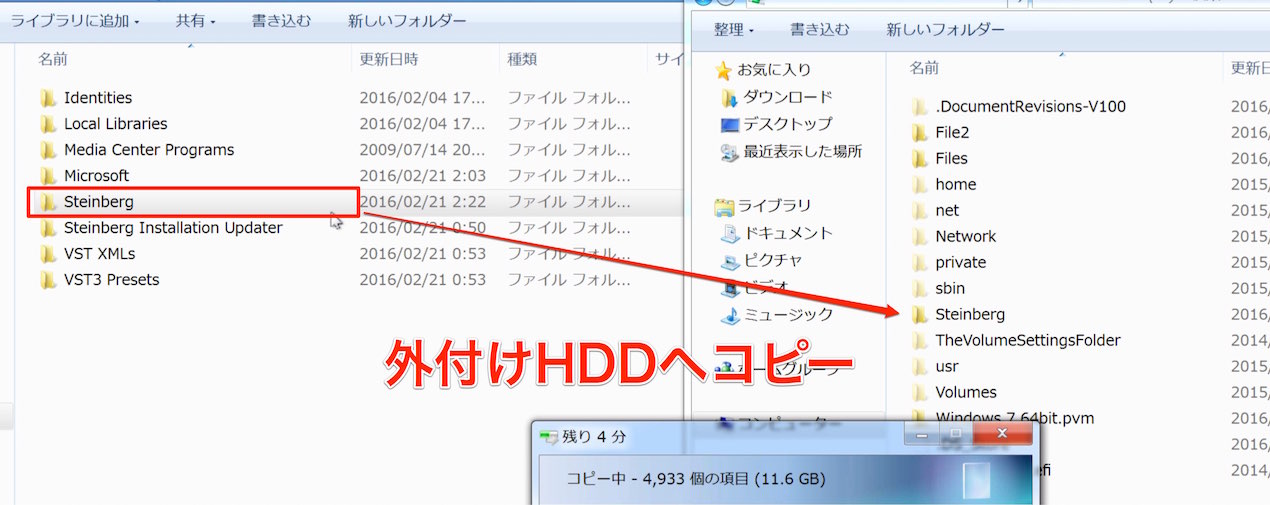
「Steinberg」をYディスクの直下にコピーしました。
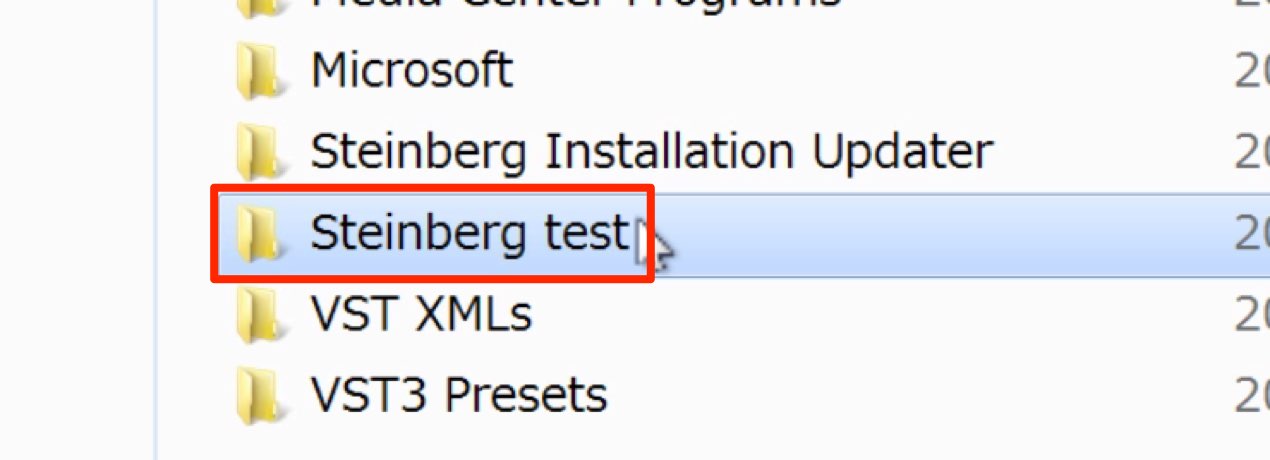
コピーした後は、元ファイル(メインHDD側)を捨ててもOKですが、
念のためのバックアップとして、名前を変更して残しておきましょう。
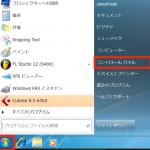
次に、Windowsに標準装備されている「コマンドプロンプト」を立ち上げます。
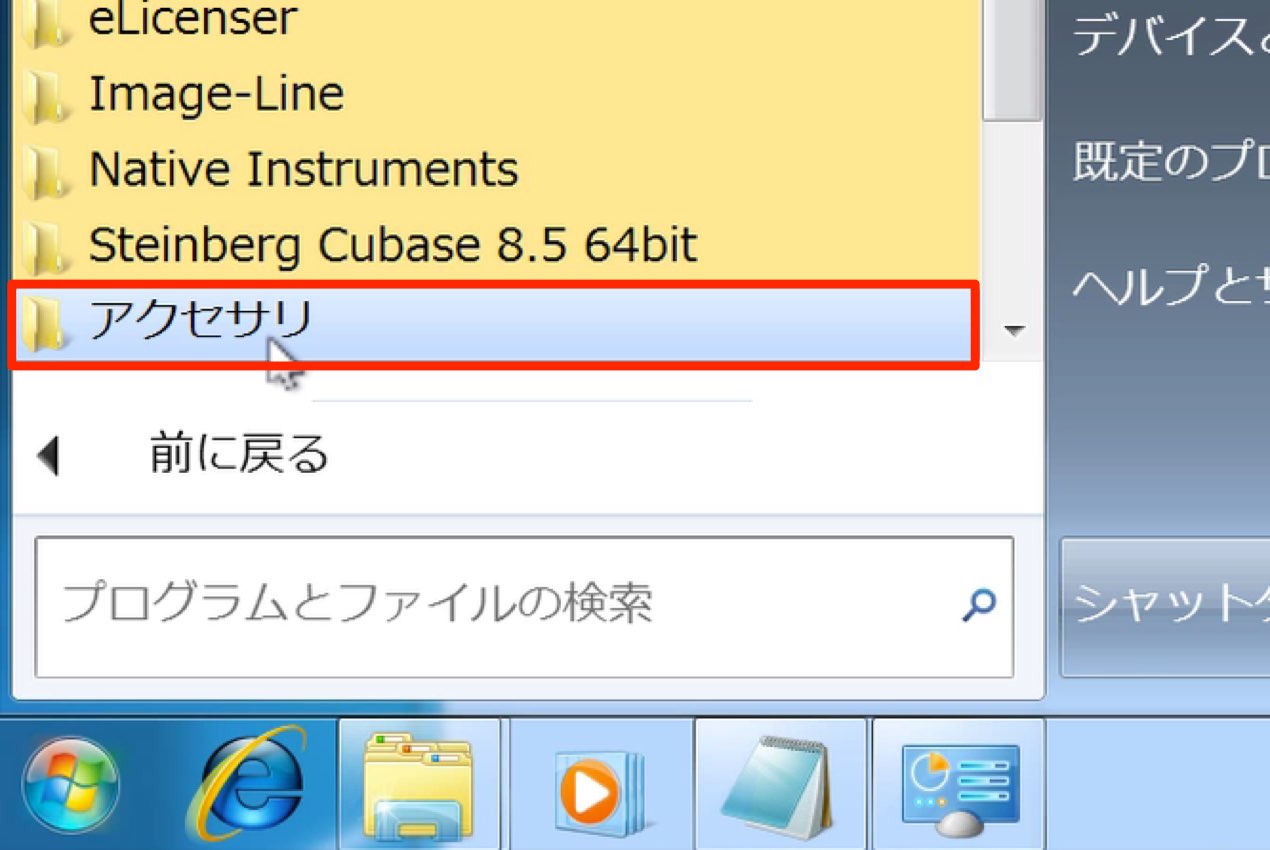
スタートメニューを開き「アクセサリ」を開きます。
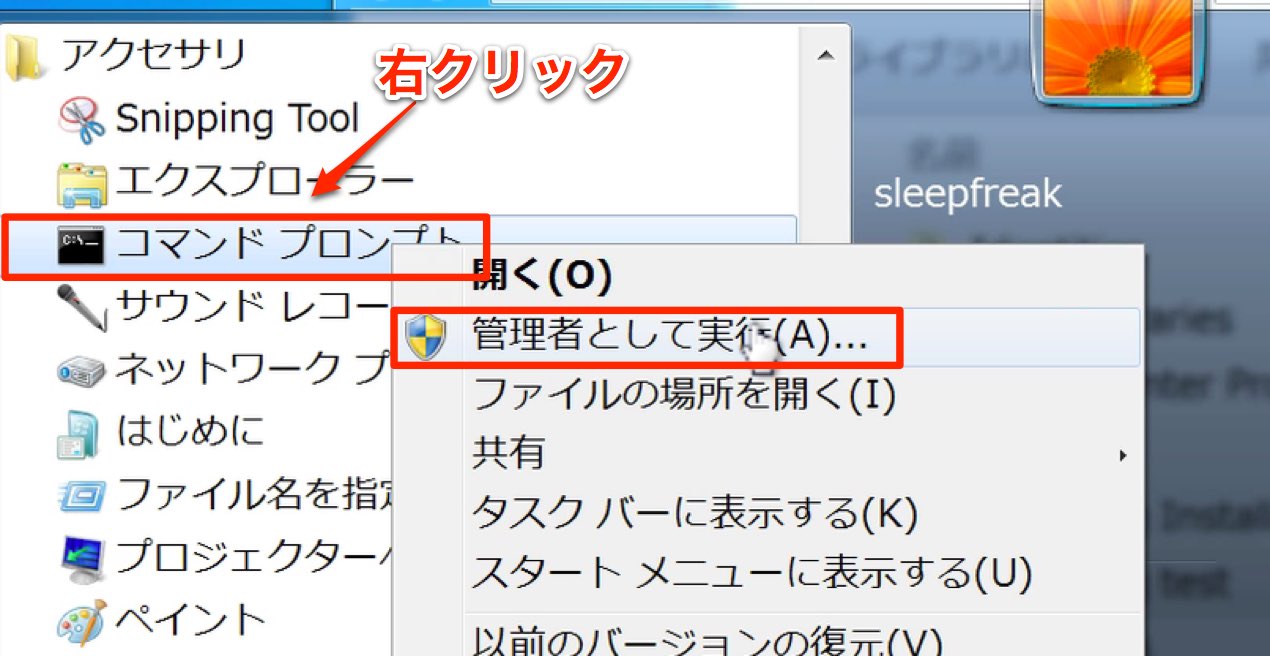
その中の「コマンドプロンプト」を右クリックし、
「管理者として実行」を選択します。

「コマンドプロンプト」が開きます。
この画面に以下のコマンドを入力していきます。
mklink /d “現在のフォルダの場所” “移動したいフォルダの場所”
黒字部分は決まり文句です。
赤字部分はご自身の環境に合わせて設定して下さい。
※コマンドは、先にメモ帳などで打っておいて、コマンドプロンプトに貼り付けるとやりやすいでしょう。
フォルダの場所を取得する方法は簡単です。
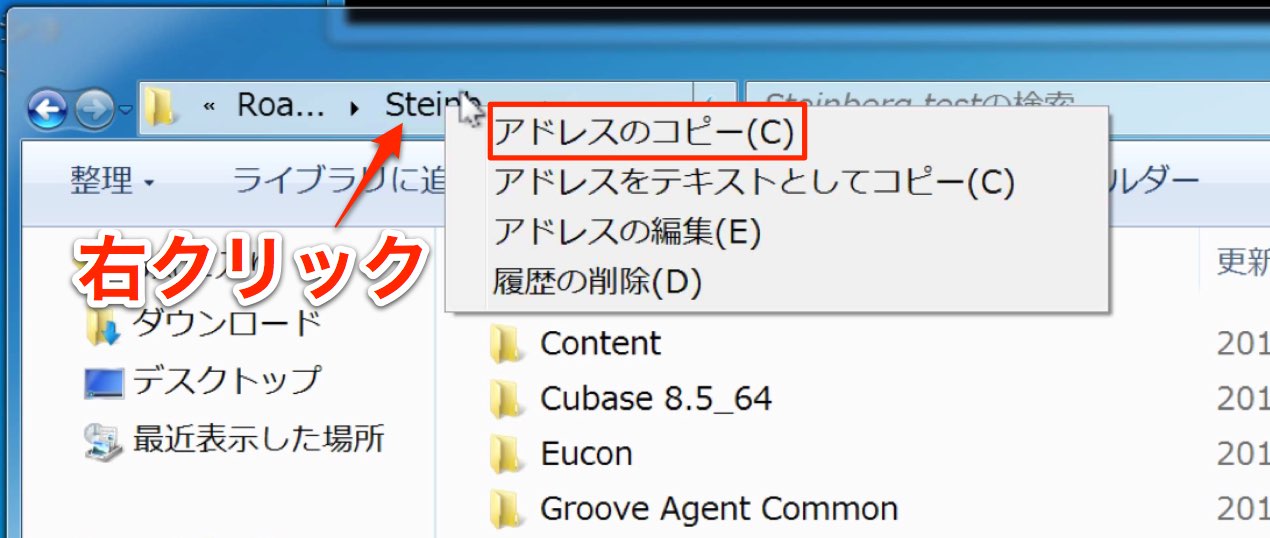
エクスプローラー上部のフォルダ名を右クリックし、
「アドレスのコピー」を選択します。
この方法で場所を取得し、上記のコマンドにペーストするとこうなります。
mklink /d “C:\Users\sleepfreak\AppData\Roaming\Steinberg” “Y:\Steinberg”
コマンドが完成したら、コマンドプロンプトに貼り付けましょう。
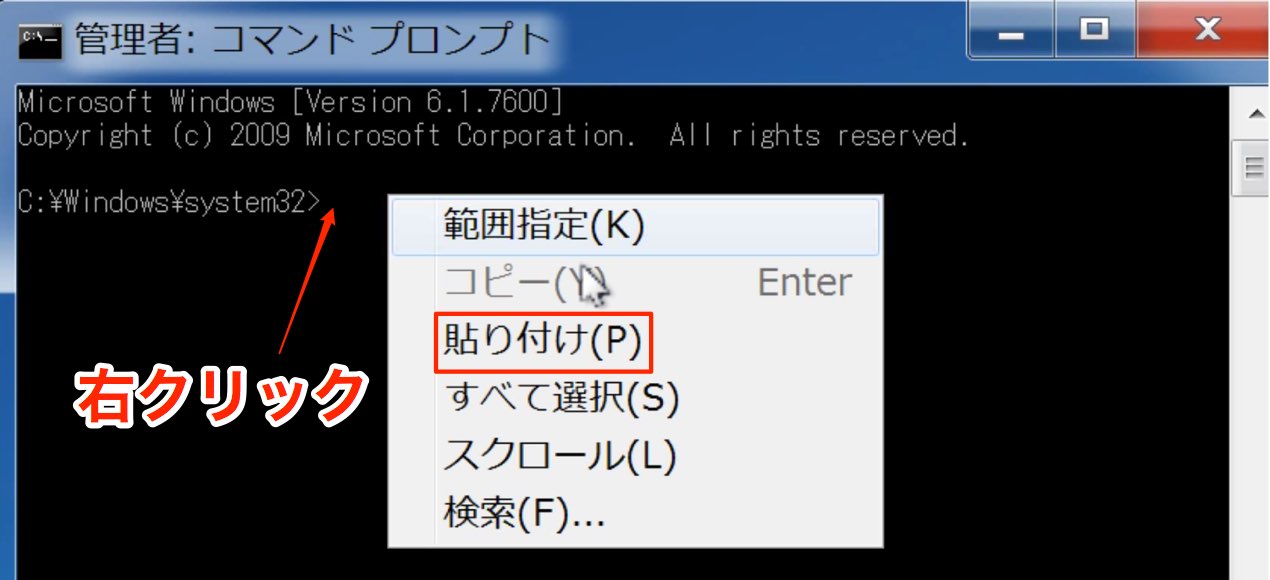
コマンドプロンプト部分を右クリックし、「貼り付け」を選択します。
貼り付け後に「enter」を押します。
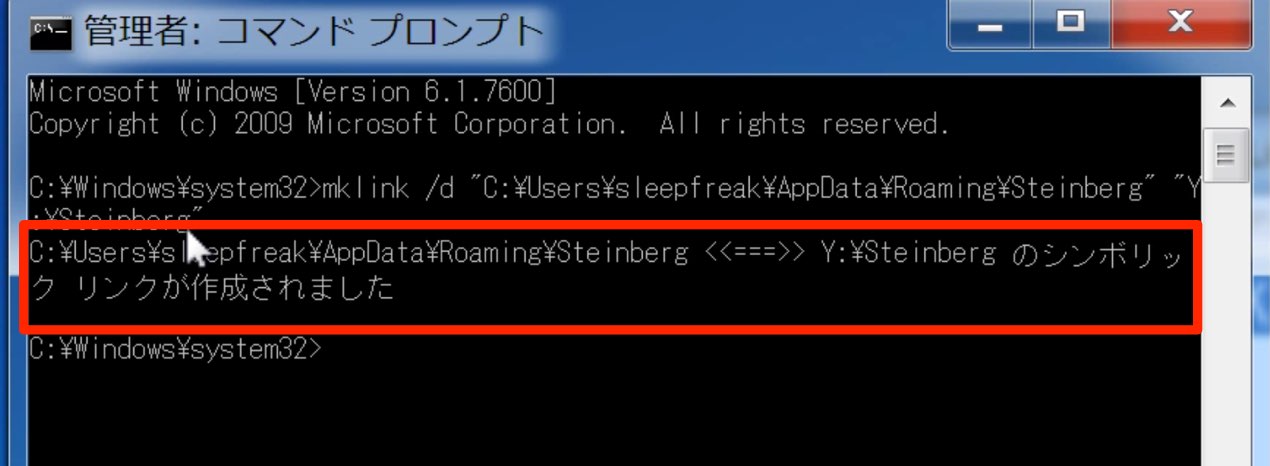
このようなメッセージが出れば成功です。
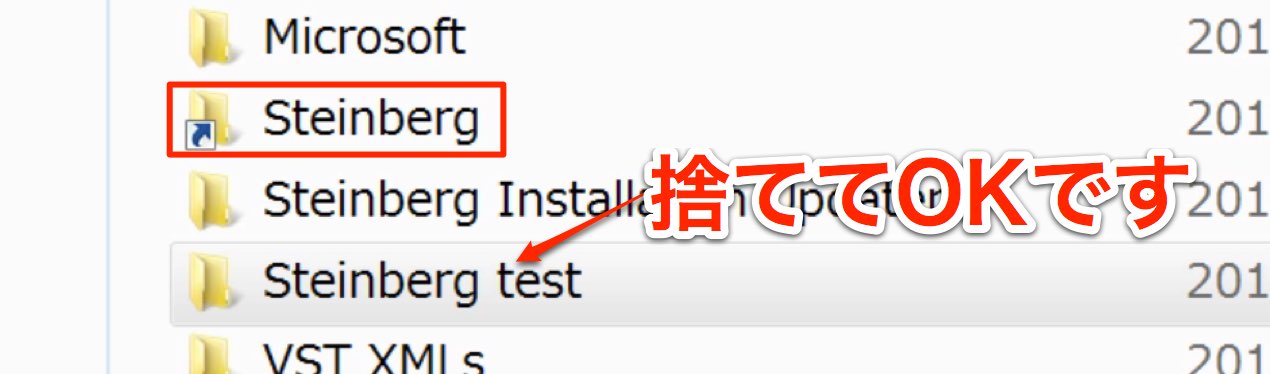
このように「Steinberg」というフォルダが作成され、アイコンの左下に矢印が表示されます。
Cubaseの起動テストを行って問題なければ、バックアップ(名前を変更した Steinberg Test)は捨ててOKです。
この結果、システムHDDの容量が軽減されたことになります。
この他にも、様々な音源・動画フォルダ・画像フォルダ等で使用できますので、
是非、ご活用ください。
- Macの設定
- Windowsの設定
シンボリックリンクを応用してHDDを整理する
先日、ライブ配信を行った内容に編集を加えてまとめました。
画像/文字も加え、ポイントとなる部分を抽出してあります!
このような記事も読まれています

パソコンのバックアップ
Mac、Windowに備わっている便利なバックアップ機能。これら使用方法を解説していきます。
PC再インストールの際、音色ライブラリを使いまわす
PC再インストールの際に、ソフトシンセライブラリを再インストールせずに進める方法を解説していきます。
ハードディスクのフォーマット_MAC
新しく購入したハードディスクを接続すると、「読み取ることができない」とうメッセージが出る場合があります。その解決方法をご紹介します。
WIndows_インストールしたソフトシンセ/プラグインが表示されない
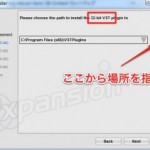
せっかく購入したソフトシンセ/プラグインがCubaseに表示されない。大半はインストール時に「VST(Cubaseのプラグイン形式)」の場所を誤っています。