
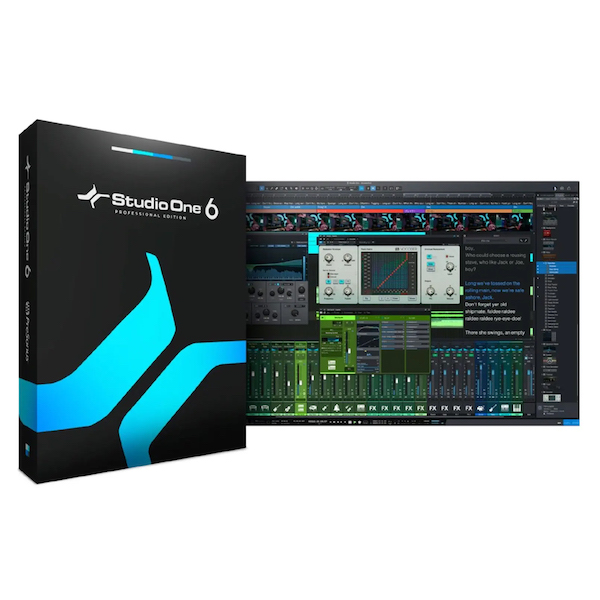
Studio One 6 is the latest version of a popular DAW supported by a wide range of DTM users, from beginners to professionals. Interface customization lets you show only the functions you use often, improving work efficiency. Smart Templates and Track Presets shorten preparation time when starting a project, and favoriting presets streamlines production. Limited to the Professional edition, the Console channel overview and Fader Flip make advanced mixing intuitive. It also includes industry-first new features such as the added Dual pan mode and the global Lyrics track, achieving both quality and speed in music production.
An Attractive Major Update That Includes Industry-First Features
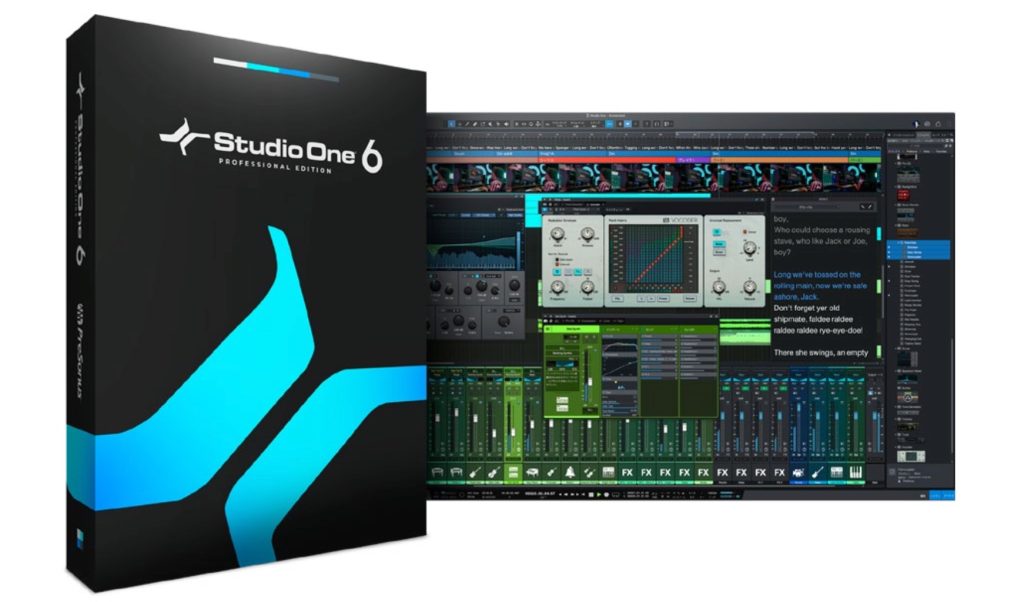
The popular DAW supported by a wide range of DTM users, from beginners to professionals, Studio One 6, has been released.
Studio One updates surprise us every time, and this time too, many new features have been added that do not disappoint.
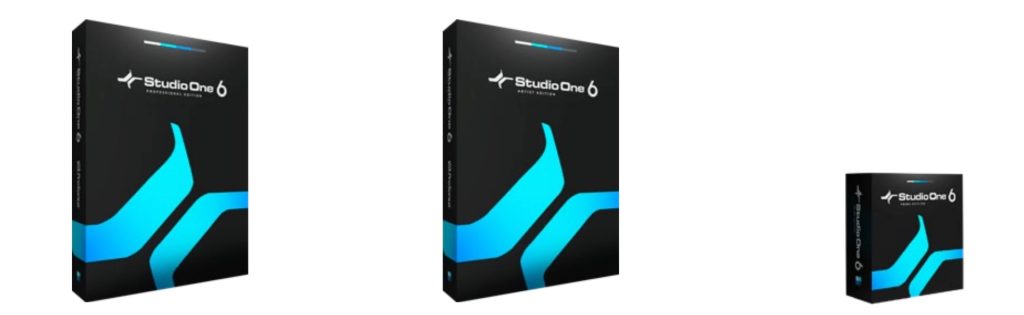
As before, the product lineup consists of three editions: Professional, Artist and Prime (free version).
Of course, crossgrade and academic editions are also available.
With this release, the "Professional demo version" and "Prime (free version)" have been temporarily suspended, and they are scheduled to return around October to November, we are told.
Here, we bring you a carefully selected set of the new features and additions we found especially attractive.
Customizing the Interface Display
When you make songs with a DAW, it becomes clear which functions you use often and which you never use.
You can now finely customize which items are shown or hidden.
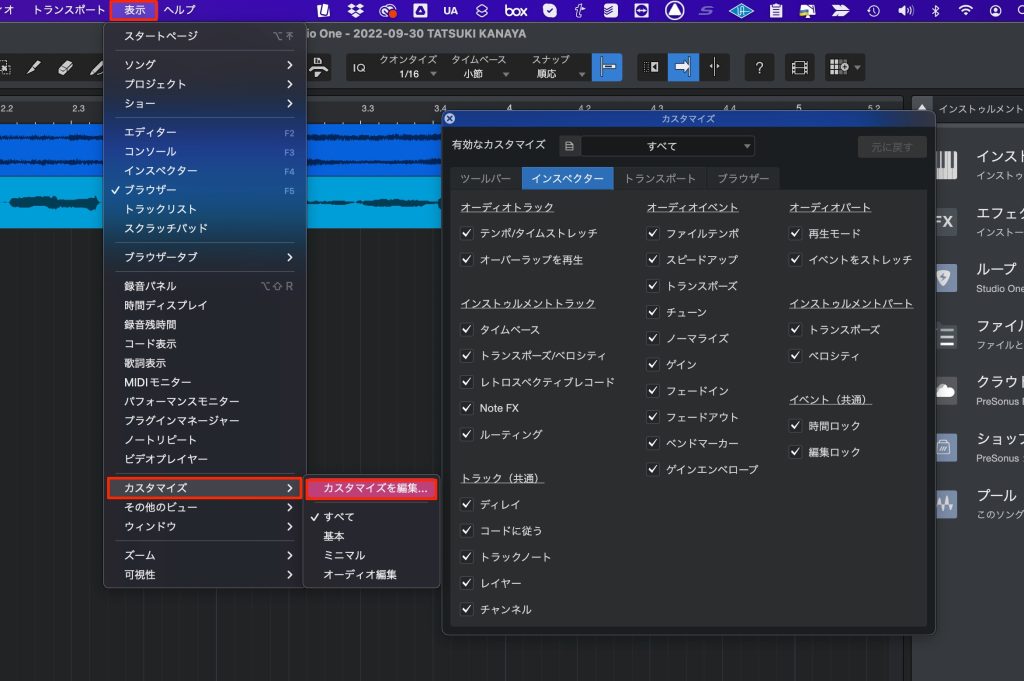
Select "View" → "Customization" → "Edit Customization" from the top menu.
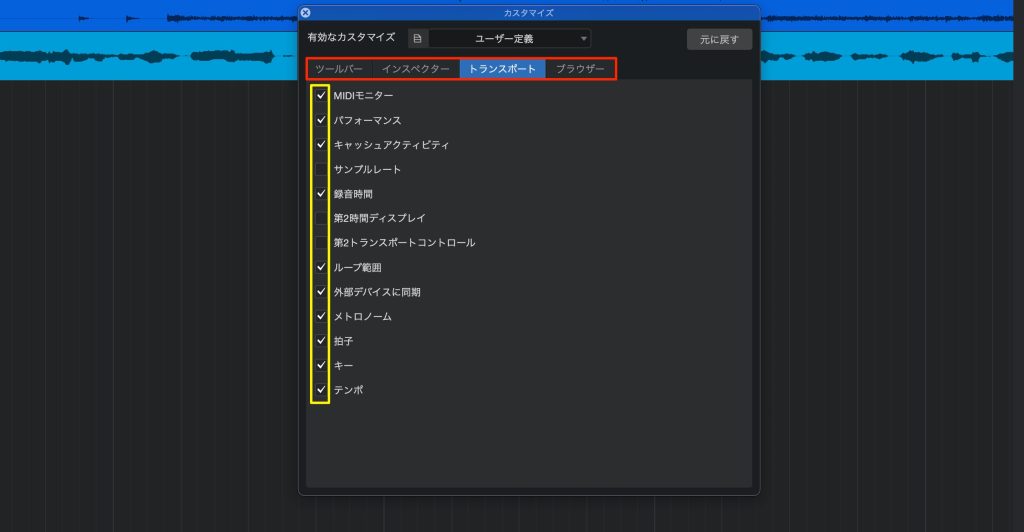
- Red: select the area whose display you want to customize
- Yellow: specify whether items are shown or hidden with checkboxes
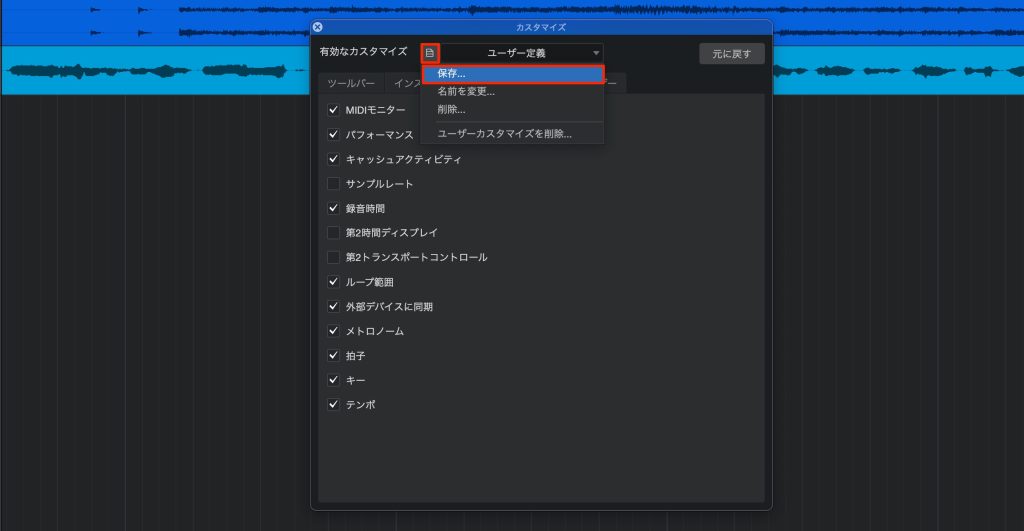
You can also save this display state.
Select "Save" from the menu icon and give it a name.
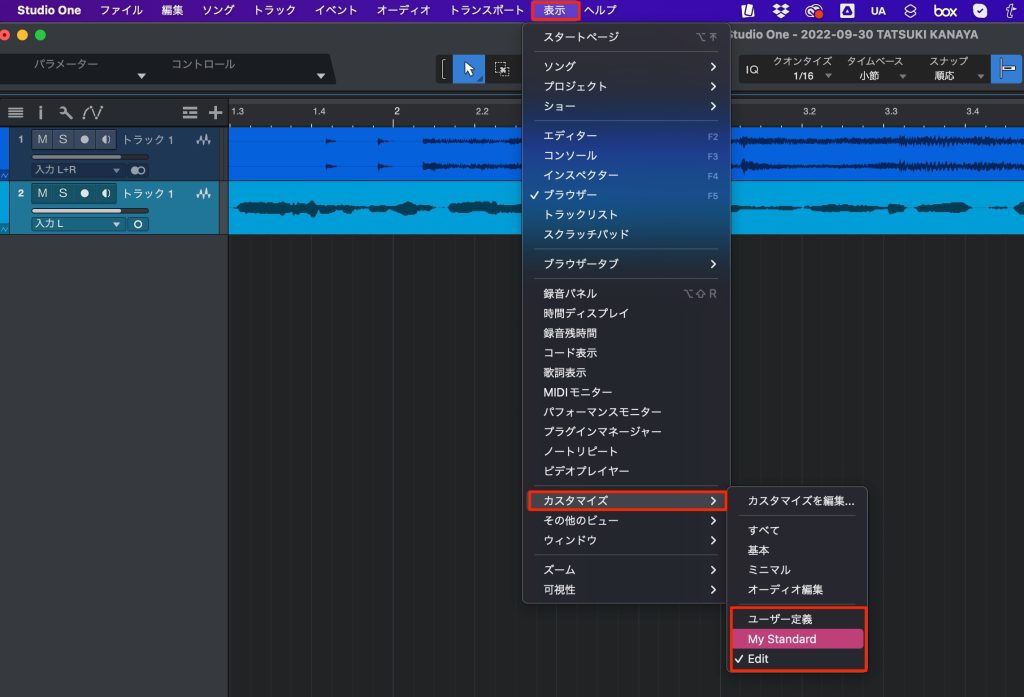
I also felt it was excellent that you can save multiple display patterns and switch between them to suit the situation.
It is a wonderful feature that lets you concentrate fully on production.
Smart Templates Added
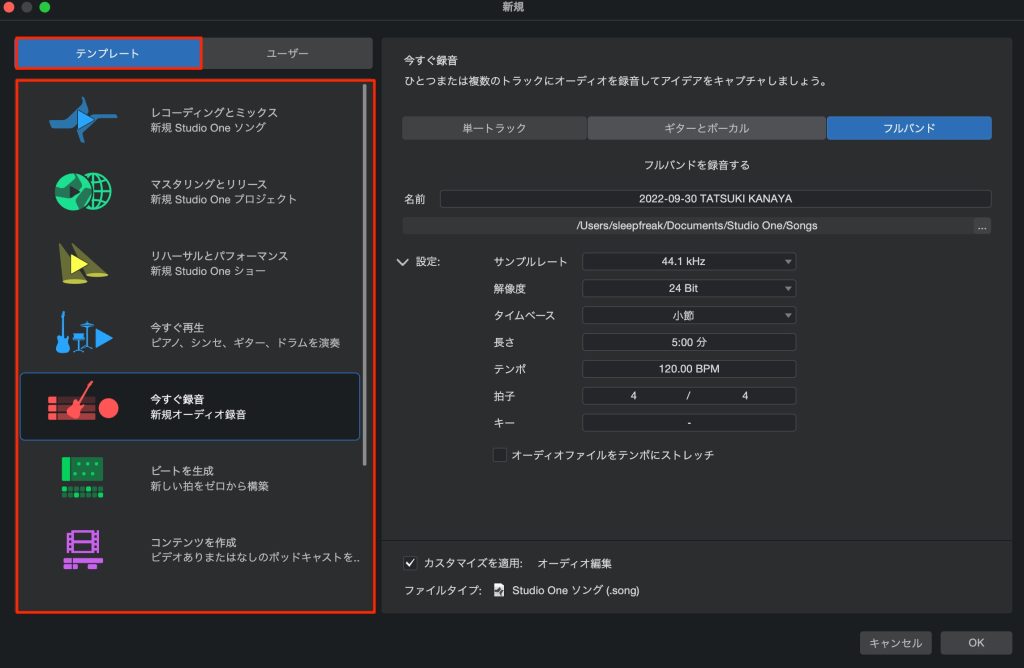
When creating a new song or project, you can call up template settings tailored to your purpose or use.
Depending on the template, you can load files to use in advance or specify display customization beforehand.
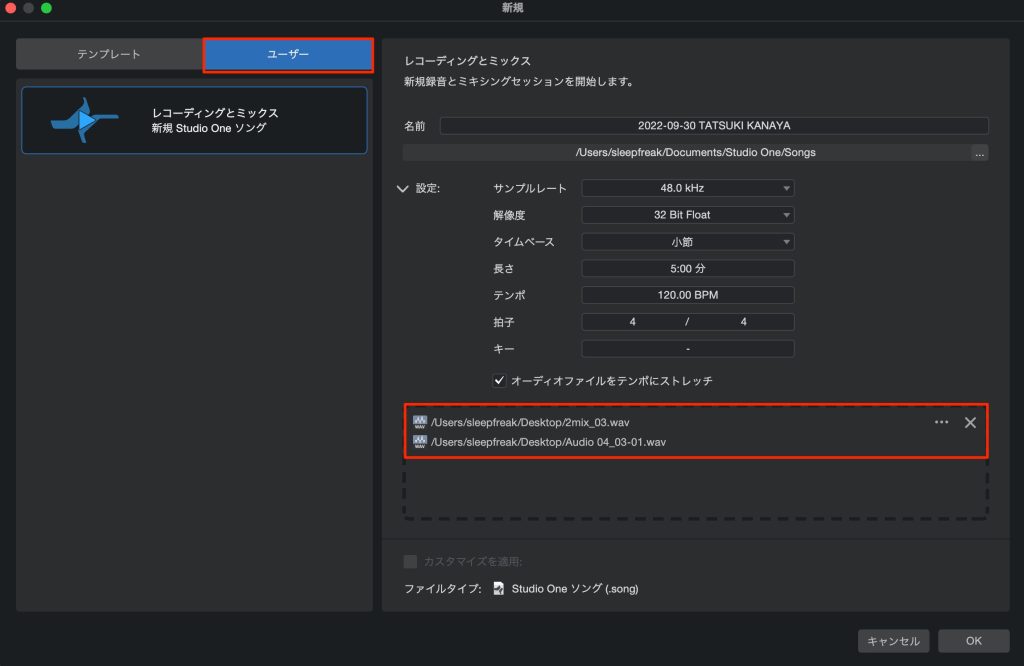
From "User," you can launch your own original templates to suit your preferences, and you can also add audio files and so on in advance.
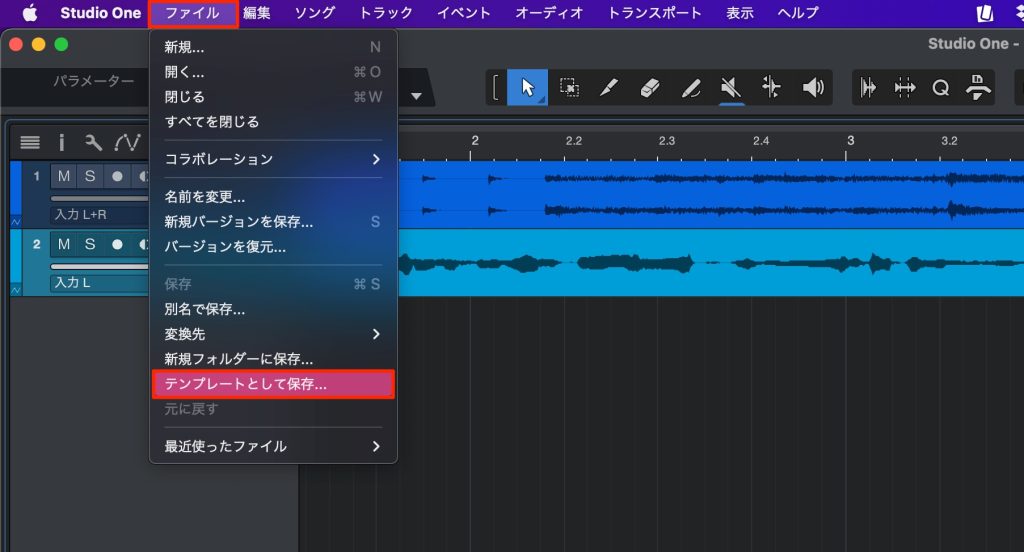
You can also create multiple templates: with a song open in settings you like, choose "File" → "Save as Template"
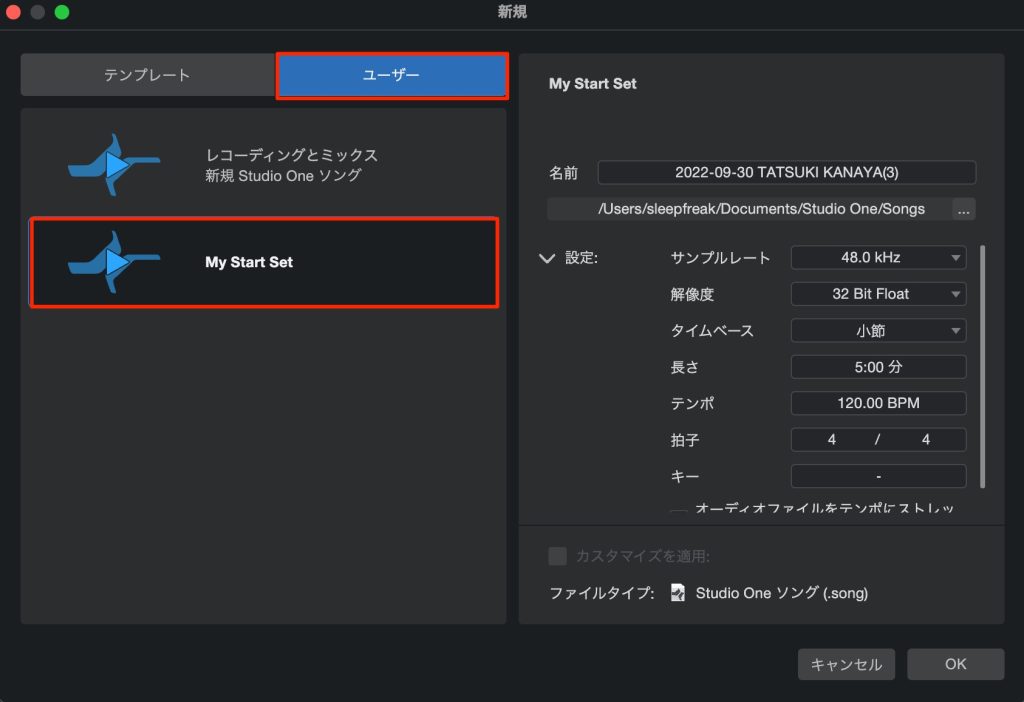
and it will appear in the user templates.
It is a perfect feature for getting off to a quick start in song production.
Presets Can Now Be Favorited from the Browser
Previous versions could also add plug-ins to favorites, but from this version, you can register instrument and effect presets as "Favorites".
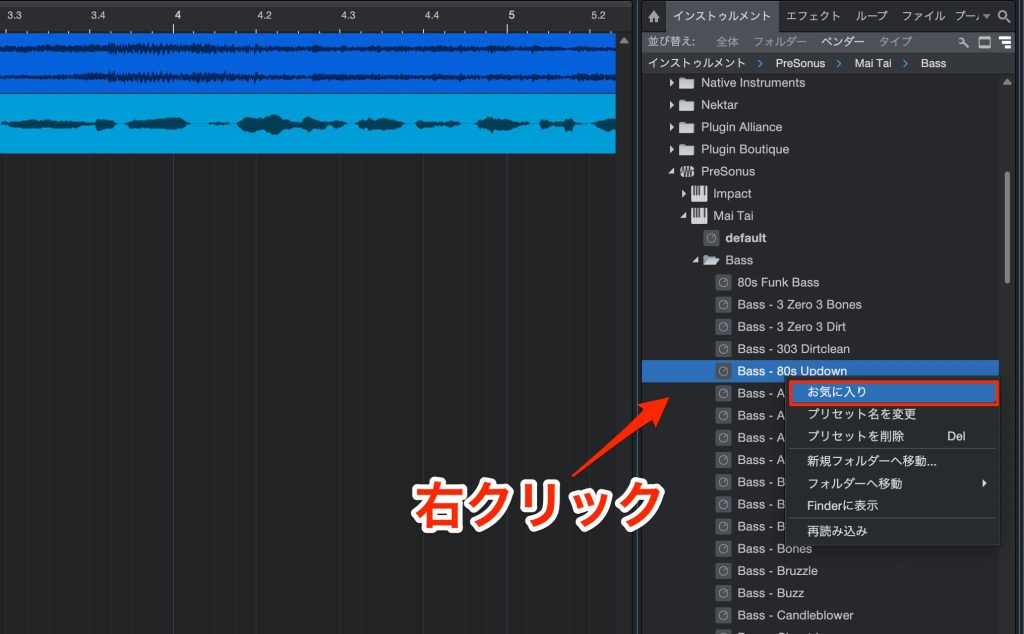
Just right-click the name of the preset you want to favorite and select "Favorite."
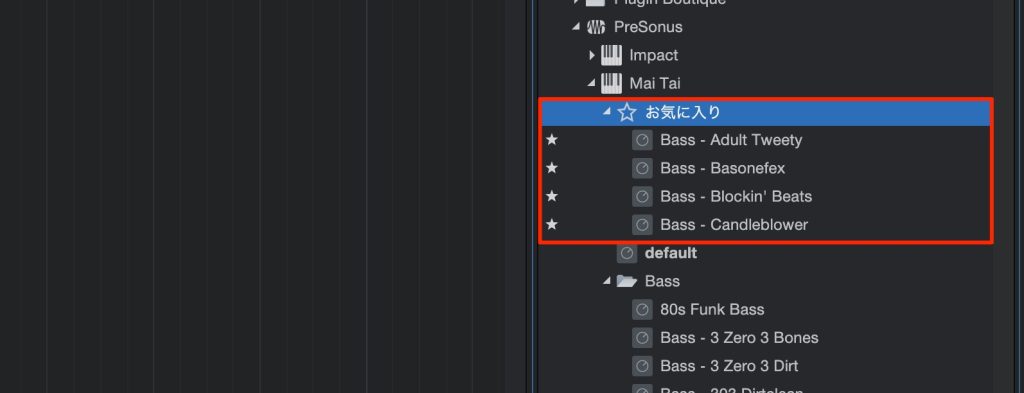
A Favorites folder is created under the instruments/effects, and the preset appears there.
Of course, presets from third-party products can be handled the same way.
Just registering the presets you use often improves production efficiency.
Track Presets Added
This feature is for the Professional edition only.
It lets you instantly recall the entire state of a track, including pan, volume and sends, as well as combinations of software instruments and effects.
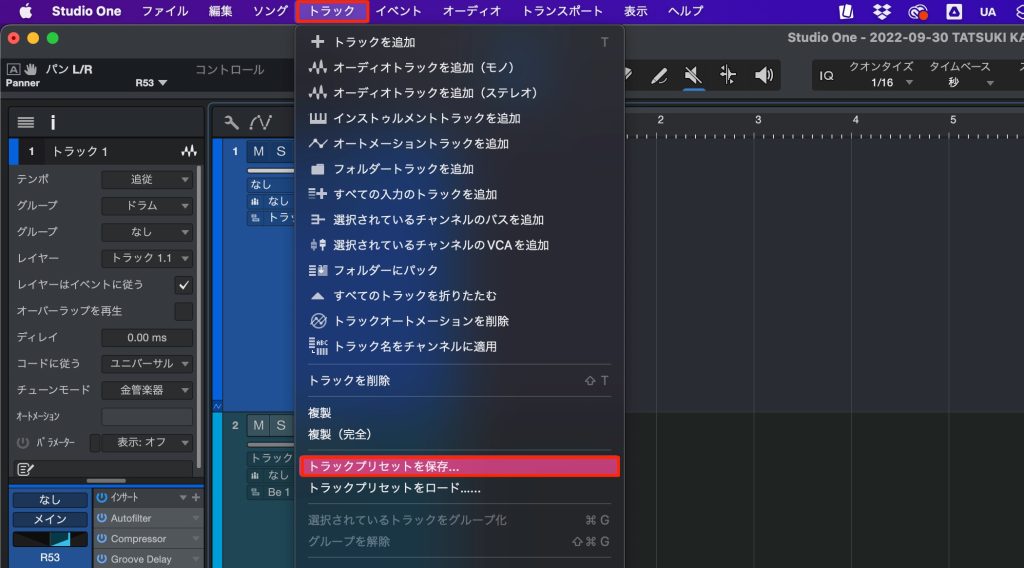
Select the track you want to save and choose "Track" → "Save Track Preset" from the top menu.
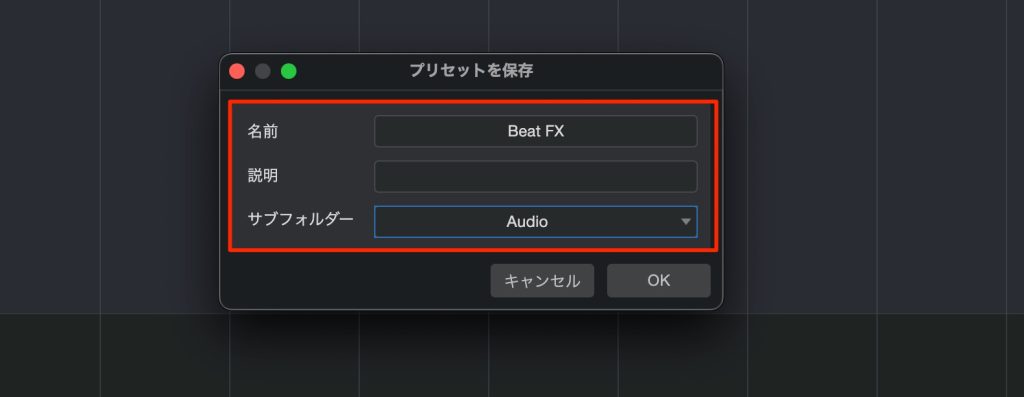
- Name: enter any preset name
- Description: enter any notes about the track
- Subfolder: specifying Audio, Instrument or Hybrid (both) makes presets easier to keep track of and manage
Let's create a new track from the saved preset.
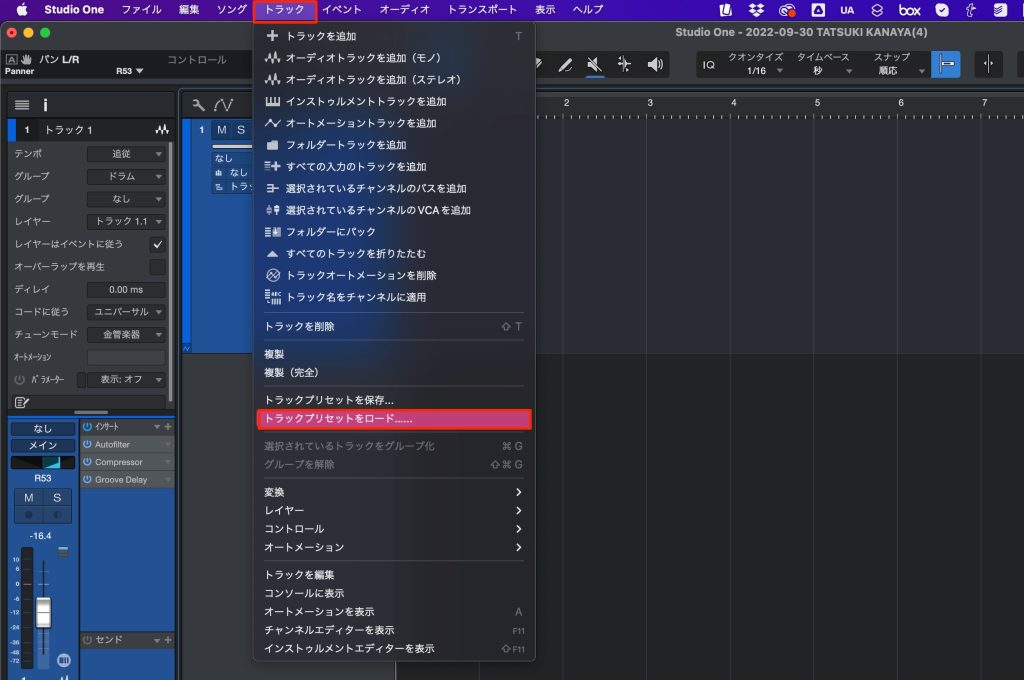
Select "Load Track Preset."
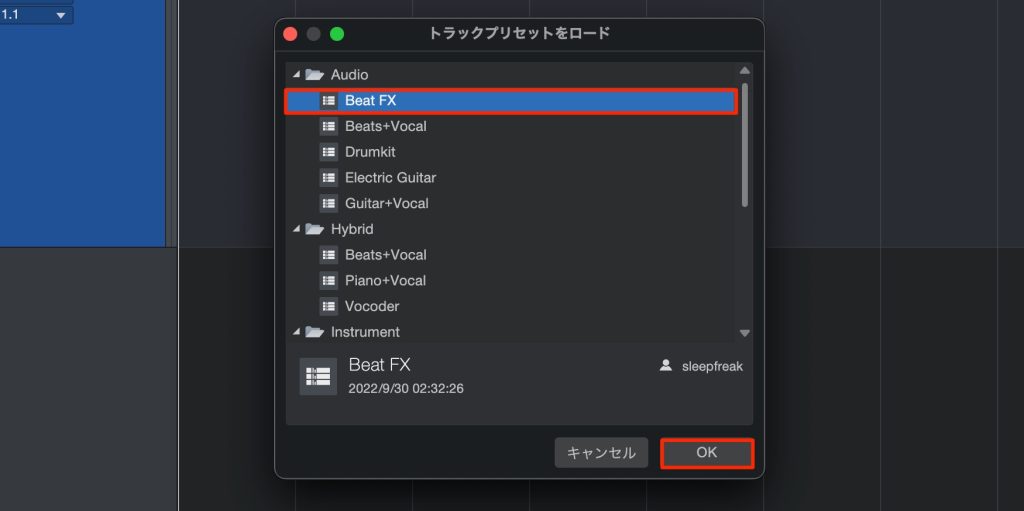
Just select the saved track preset and press "OK."
You can also apply a preset to an existing track.
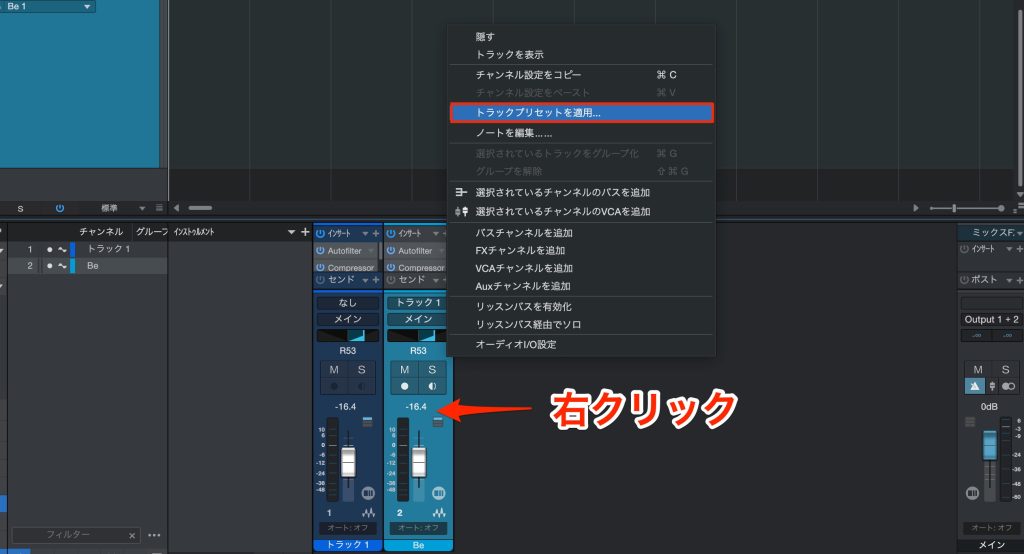
Select the target track in the Console window and choose "Apply Track Preset."
This applies the track preset to the specified track.
Console Channel Overview
This feature is for the Professional edition only.
You can display all the information for a specified track, such as its input, inserts and sends.
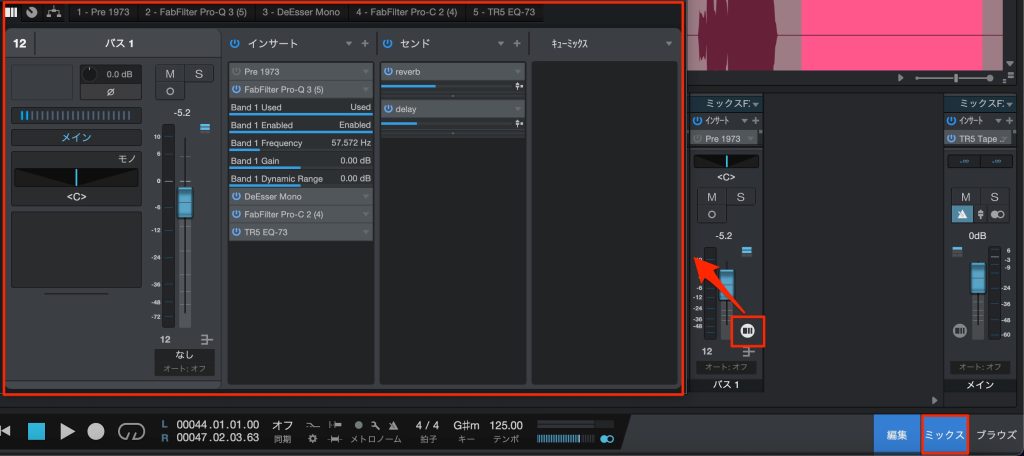
Press the track's overview button in the Console window.
The interface is easy to read, which I really like.
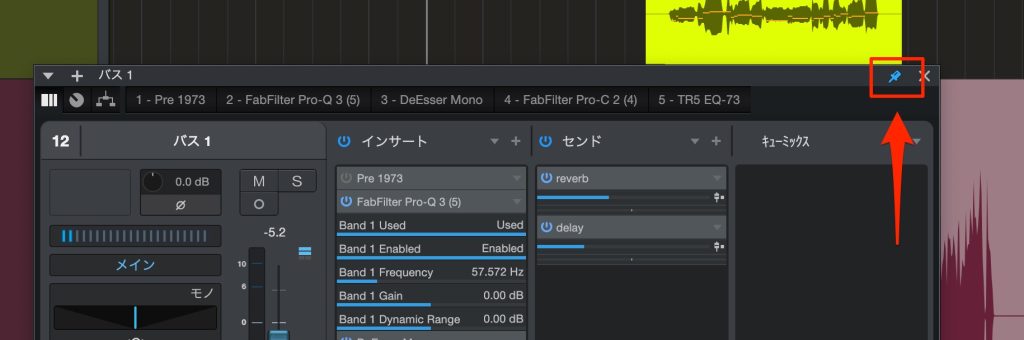
Pinning it keeps the overview displayed at all times.
New Pan Modes
This is another long-awaited feature. Two modes have been added to the pan of stereo tracks.
You can switch between three modes in total: Balance (the traditional mode), Dual and Binaural.
The newly added "Dual" makes it easy to fine-tune the sound, and we recommend it.
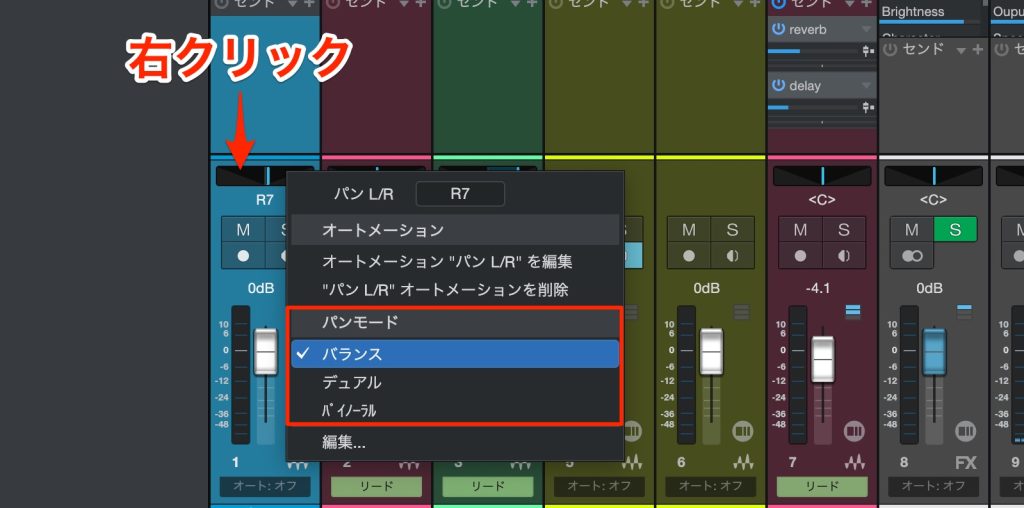
Right-click the pan area of a track and select the mode.
Let's select the newly added "Dual."
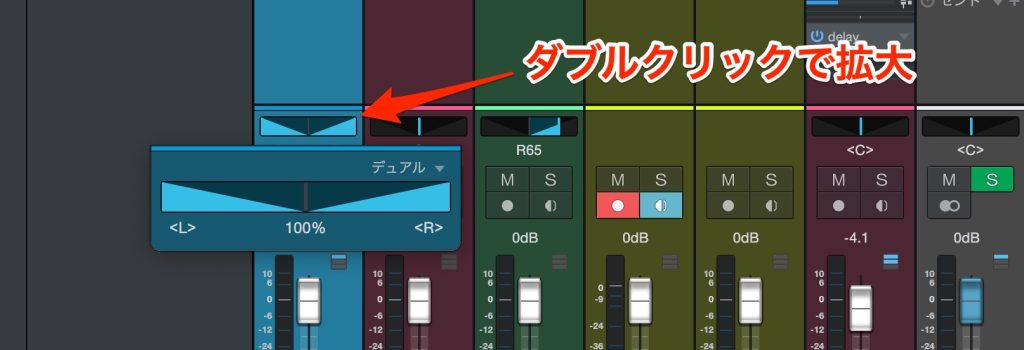
Double-clicking the pan area enlarges it.
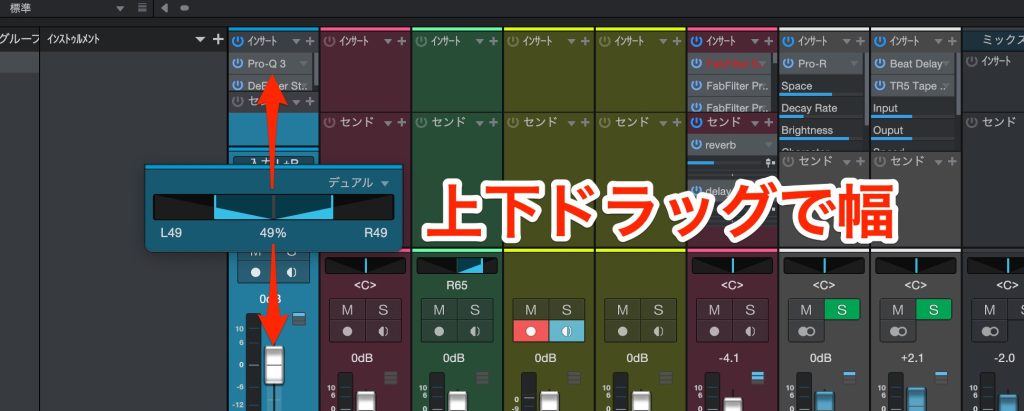
In Dual mode, you can specify the width by dragging the pan up and down.
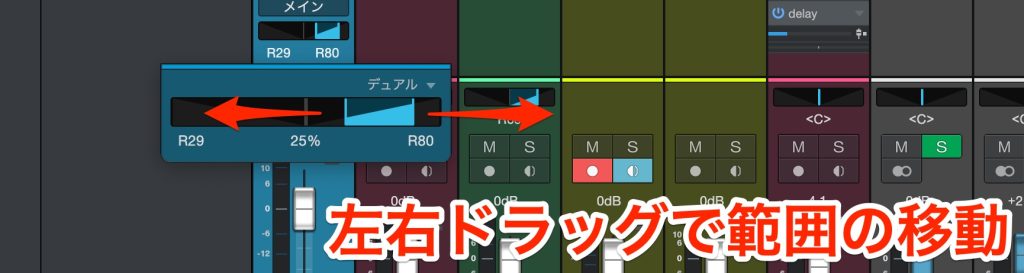
Dragging left or right inside the width moves it left or right while keeping the width.
It is very intuitive and convenient.
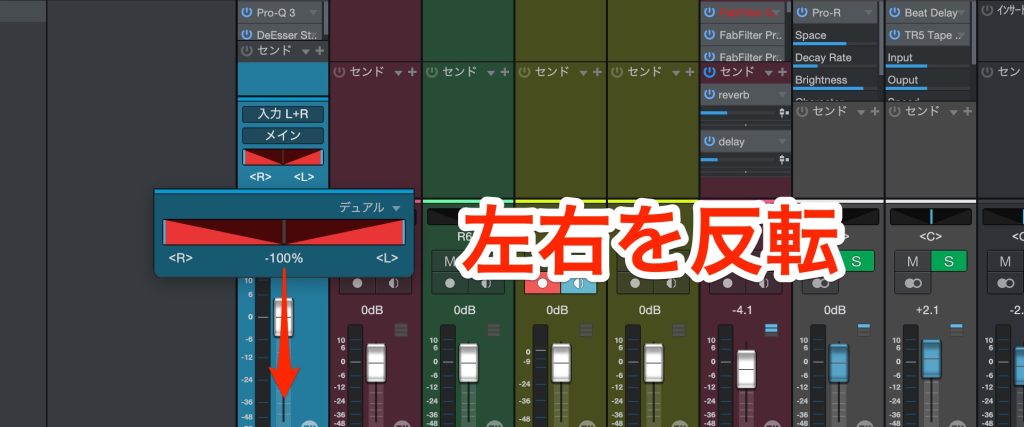
If you keep dragging the pan downward, it turns red.
This indicates that the left and right positions have been swapped.
For example, you can use it to move percussion placed on the right in an audio loop to the left.
Fader Flip in the Console
This feature is for the Professional edition only.
It is a very unique and highly practical feature that lets you control send returns, sidechains, sends and more with the main faders.
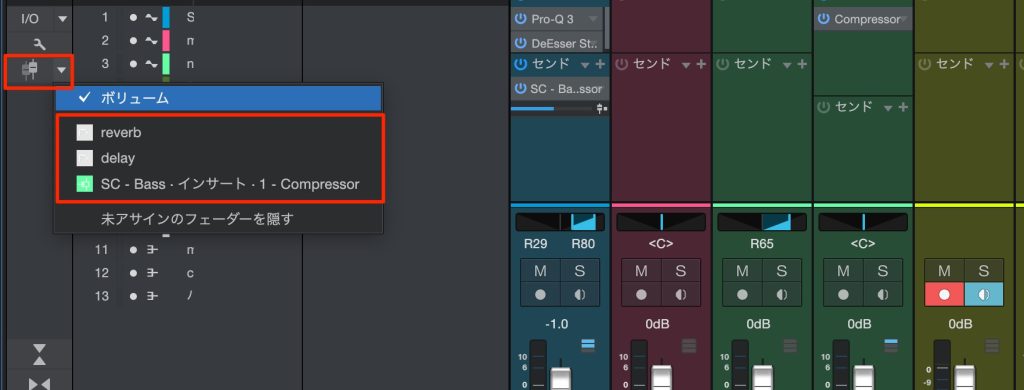
Click the "Enable Fader Flip" button in the Console window.
The items you can control are displayed.
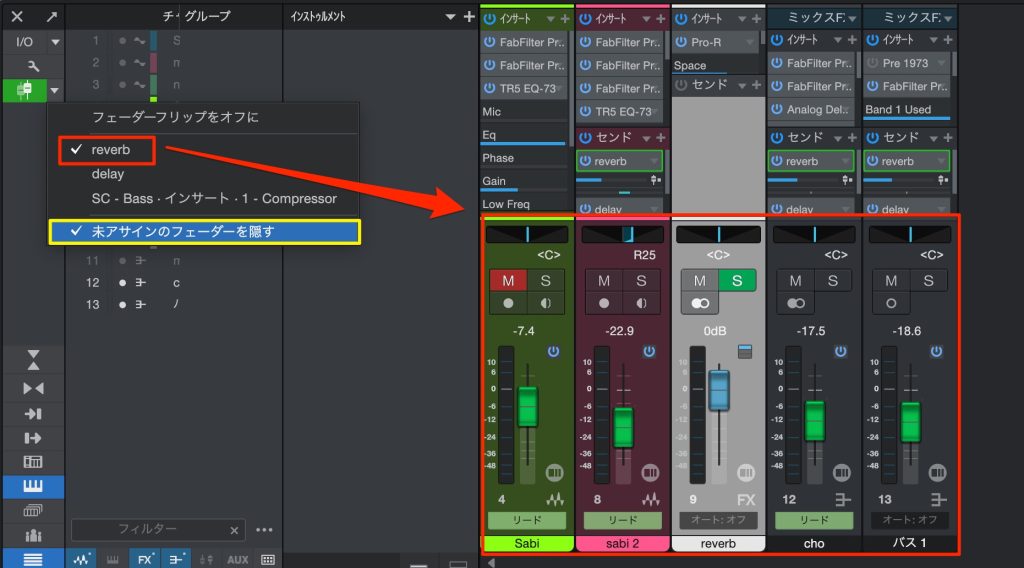
Here, we selected the FX channel "Reverb."
At this point, checking "Hide unassigned faders" lets you display only the relevant tracks, excluding those that are not targets (here, tracks without the reverb FX), which is convenient.
The color of the main faders changes, indicating that Fader Flip is enabled.
Then adjust while listening to the sound. Other effects and sidechains can be controlled in the same way.
Global Lyrics Track Added
This feature is for the Professional edition only.
You can now add and display lyrics for songs and MIDI.
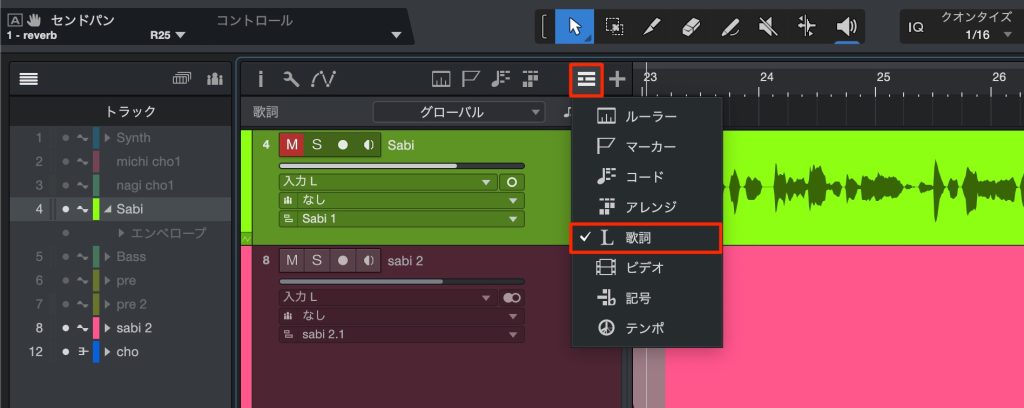
Select "Lyrics" in the global tracks to enable it.
* It has been reported that Japanese text may currently display incorrectly, but this is scheduled to be fixed in a later minor update
Let's try entering lyrics in Japanese.
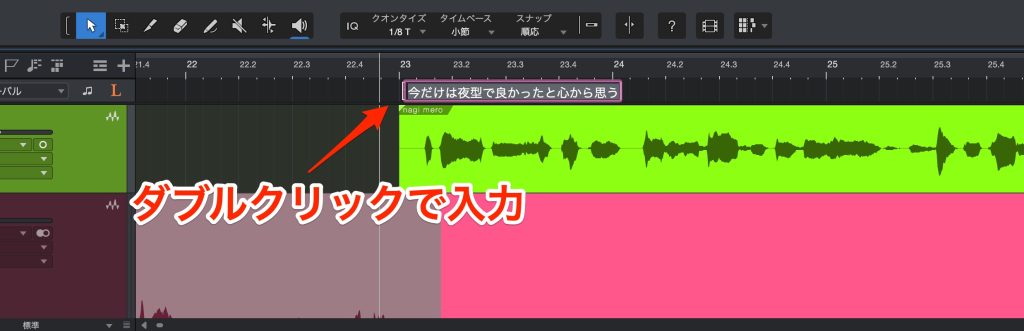
Double-click where you want to enter lyrics and type the text.
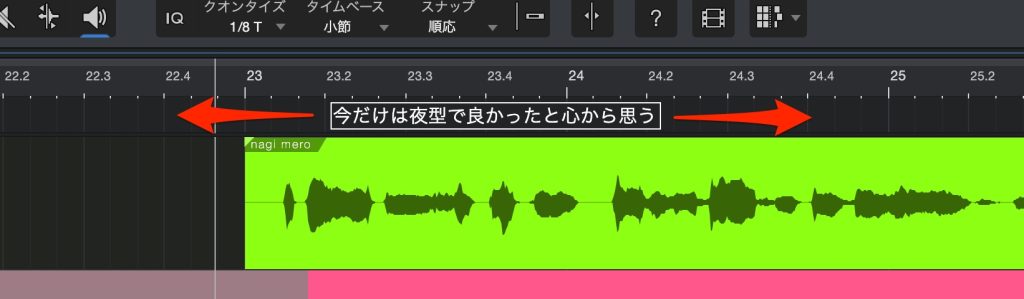
You can also move the lyrics intuitively by dragging left or right.
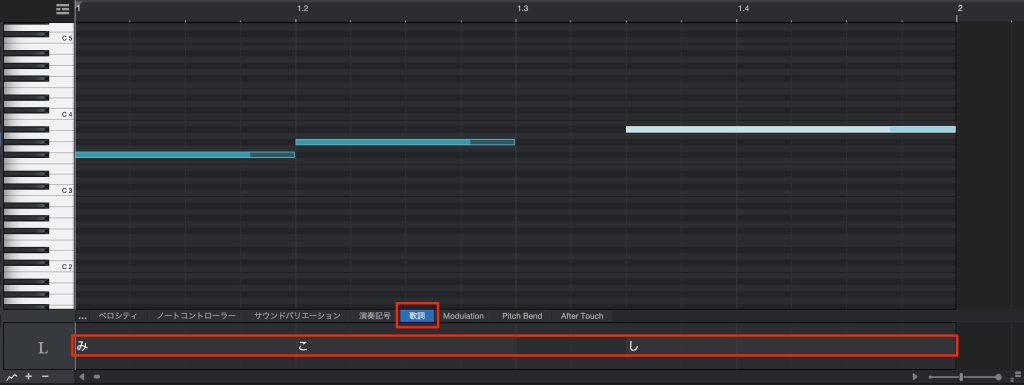
You can also enter lyrics for MIDI notes.
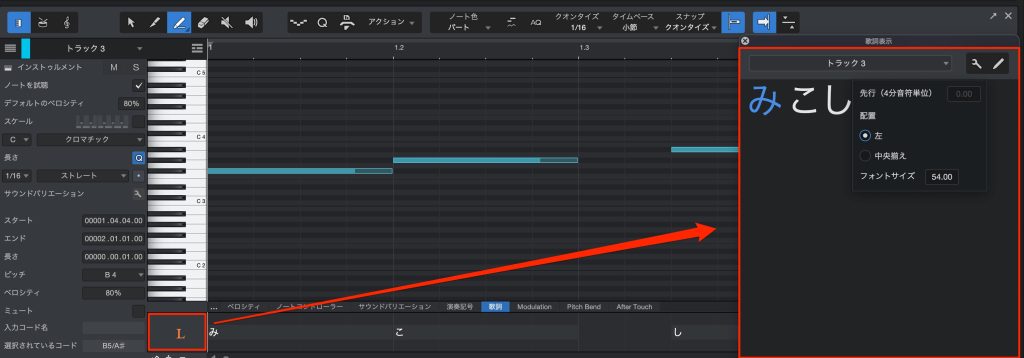
Click the "L" area to enter the editor.
You can change the lyrics' font, size, alignment and more, so it looks useful in many situations, such as directing vocals during recording and on live stages.
Video Track Added
This feature is for the Professional edition only.
Recently, more and more people handle not only music production but also video editing and processing.
To keep up with the times, this version adds a video track for handling video.
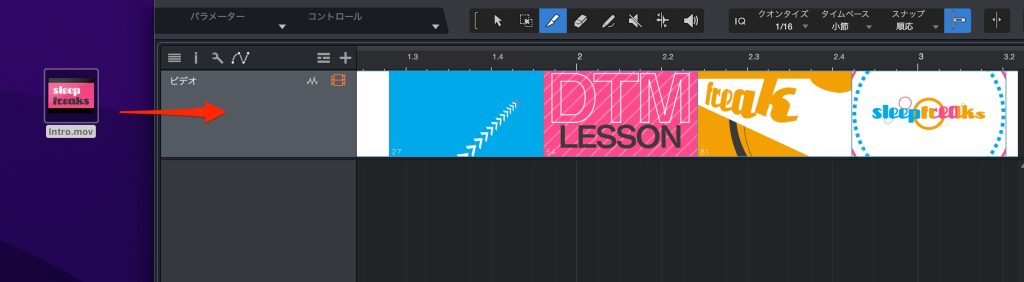
Just drag a video file into the sequence, and a track is created automatically.
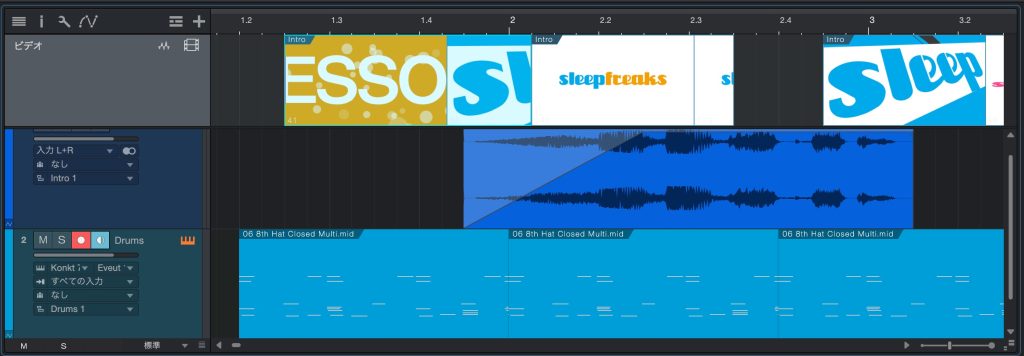
As with audio tracks, you can freely edit it, such as moving, cutting, copying and duplicating.
This also improves the efficiency of adding sound to video.
Additions and Improvements to Effects and Instruments
Effects and instruments have also been added and improved.
Pro EQ3
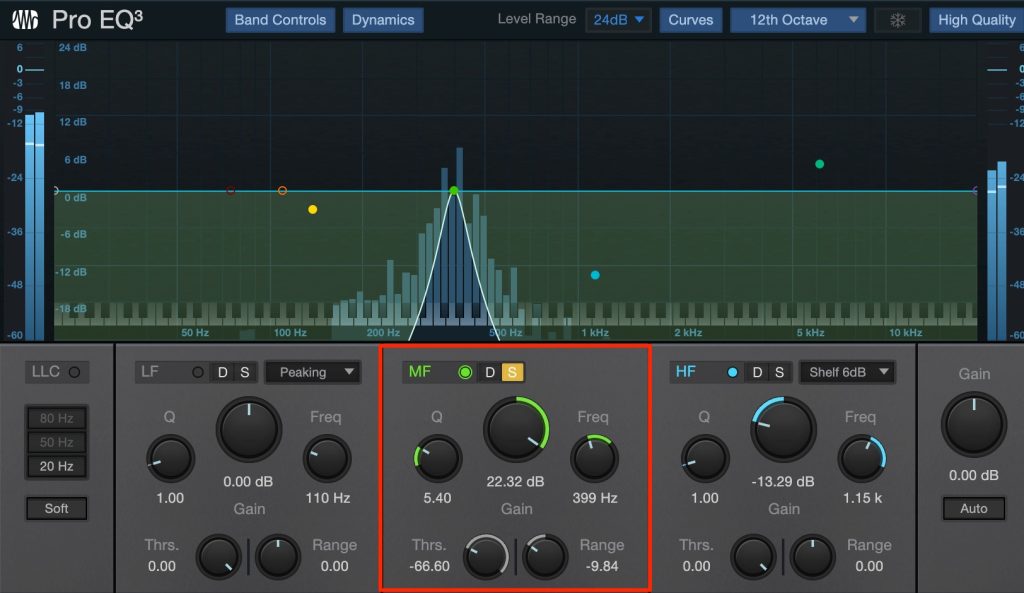
You can now solo and listen to the band of an EQ point (light up the S button).
You can check only the sound of that band, which should make adjustment far easier.
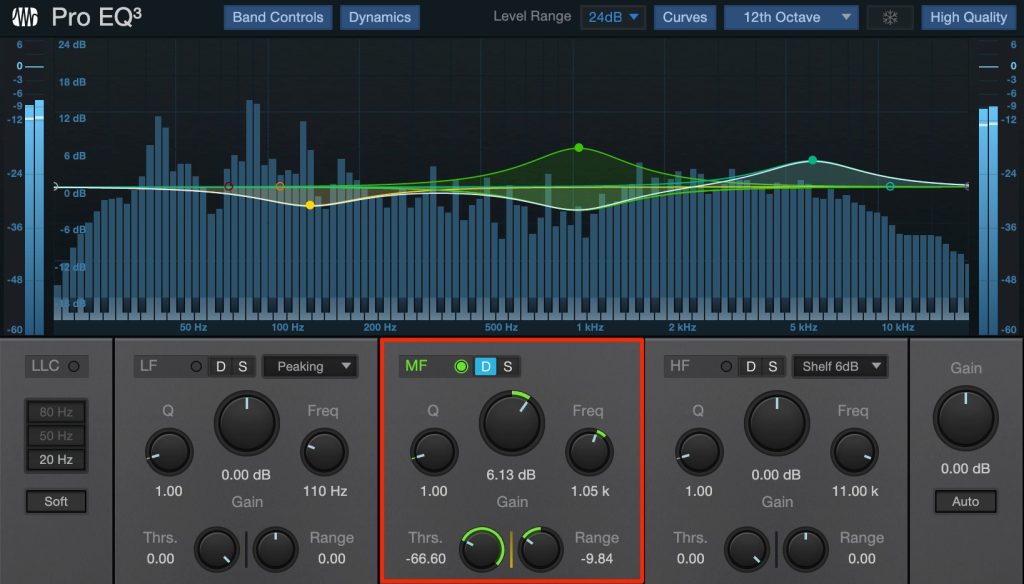
Dynamic EQ is also included (light up the D button).
The freedom of equalizing has greatly improved.
Autofilter
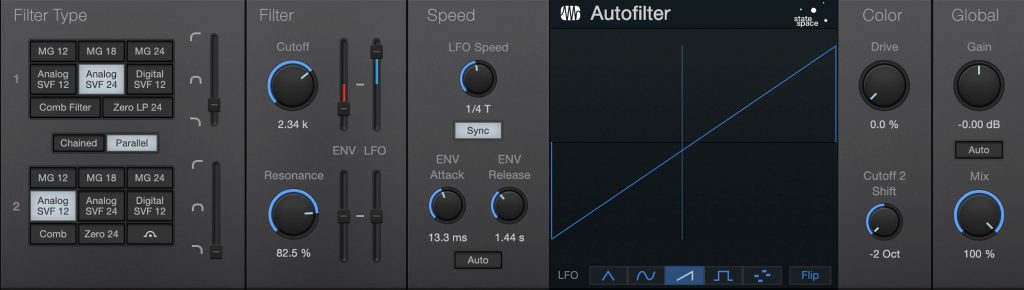
More attack/release options from the envelope and more LFO phase variations make the sound more flexible.
De-Esser
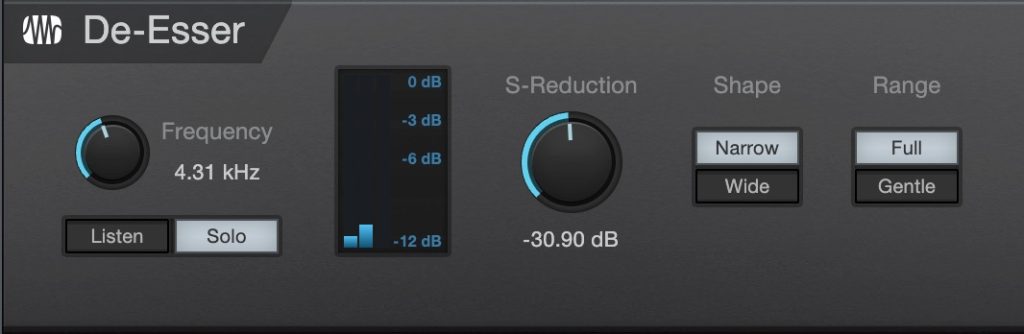
A de-esser plug-in that controls the volume of the highs for a milder sound has also been added.
It is also useful for reducing sibilance in vocal tracks and helping them blend with the backing track.
Vocoder
This feature is for the Professional edition only.
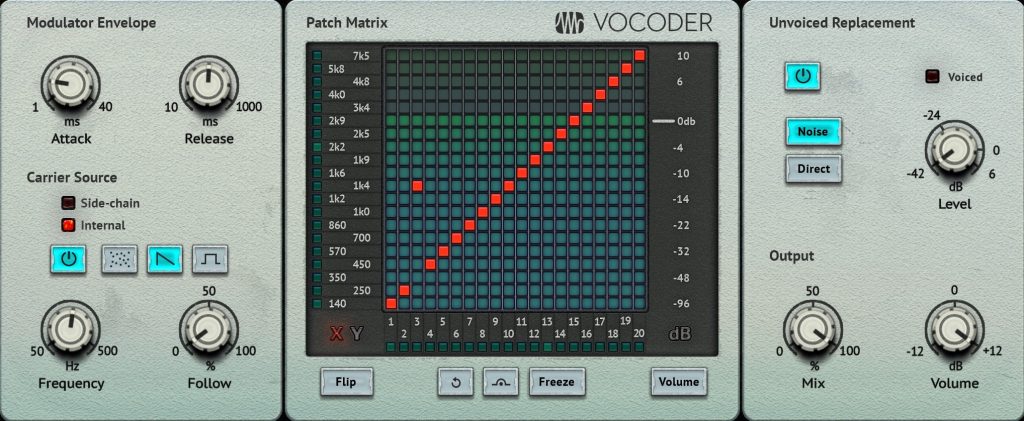
A long-awaited plug-in that Studio One seemed like it would have but didn't. It also looks charming.
It enables completely new sound approaches for voices and instrument sounds.
Software Synths Now Support Sidechain Input
Software synths that need track sound from outside can now use sidechain input.
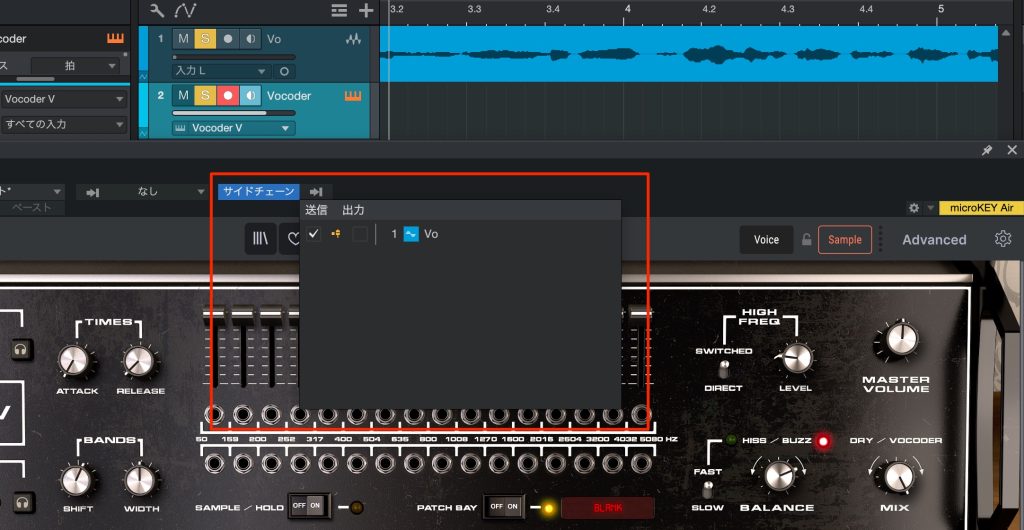
The sidechain button, which was not shown before, is now clearly displayed.
You can quickly finish sound routing that used to be tedious.
Mai Tai, Sample One XT and Presence XT Now Support MPE
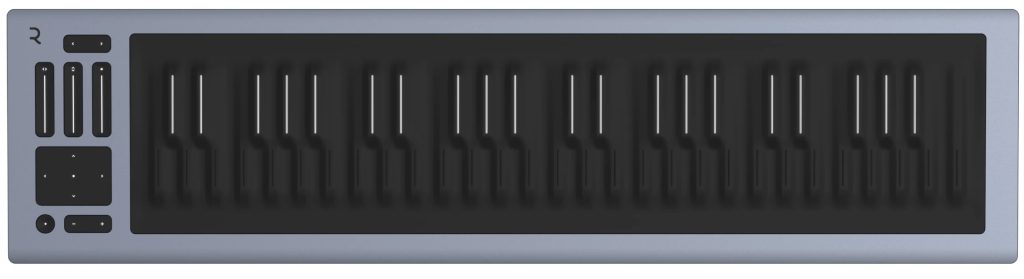
The software synths included with Studio One, "Mai Tai," "Sample One XT" and "Presence XT," now support MPE-compatible controllers.
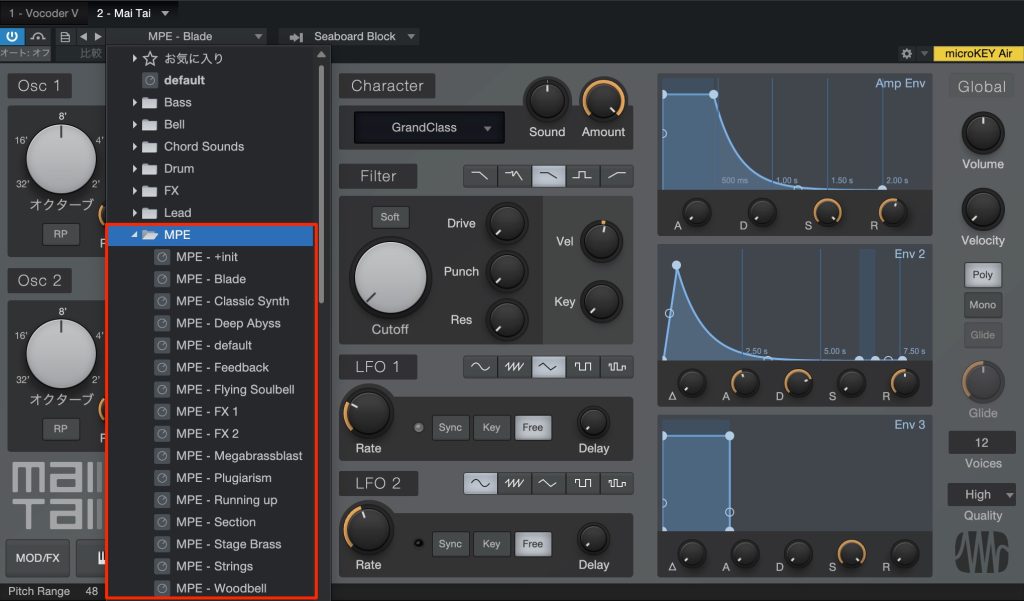
Presets have also been added.
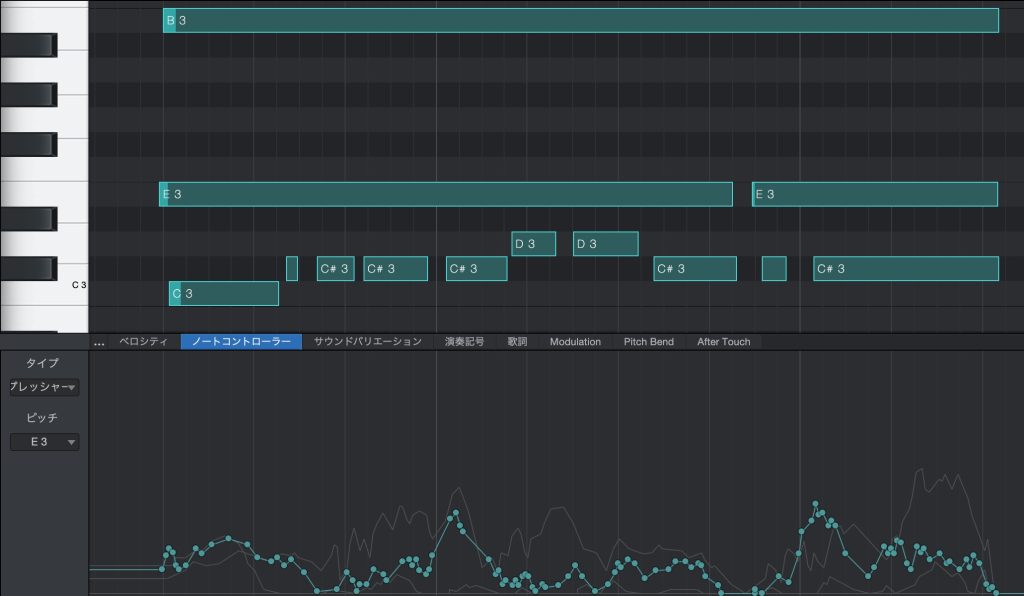
You can play different modulation for each note of a chord (polyphonic).
That's all.
My impression is that this time there are many features that support production efficiency, and the Professional edition's features are especially strong.
I felt that Artist edition users might want to consider upgrading on this occasion.
Also, since the product has only just been released, I predict there may be no customary Black Friday sale.
Now, while it is hot news, may be the time to buy.
Please make full use of the new features and enjoy fulfilling music production!
Frequently Asked Questions
Q1. Which edition of Studio One 6 should I choose?
The Professional edition has advanced mixing features, but we recommend beginners start with the Artist edition. Learning the basics with the free Prime edition and then upgrading is also a good option.
Q2. Does the preset favorites feature support third-party plug-ins?
Yes. Just right-click the name of an instrument or effect preset and select "Favorite," and presets from third-party plug-ins can also be added to the Favorites folder.
Q3. In what situations is the Dual pan mode useful?
It is ideal for fine-tuning the stereo image. Because you specify a width and control the position within that range, it is convenient for refining the sound and adjusting the placement of specific instruments within an audio loop.
Q4. Can Japanese be used in the global Lyrics track?
Currently, Japanese text displaying incorrectly has been reported, but this is scheduled to be fixed in a future minor update. The feature itself can be used, so basic use is possible while waiting for the fix.
Q5. Can I save and manage multiple Track Presets?
Yes, you can create and save multiple Track Presets. Specifying the subfolder as Audio, Instrument or Hybrid makes presets easier to keep track of and manage.
NEW ARTICLES
Latest English Articles











