
Customizing Logic Pro's preferences greatly improves the efficiency of DTM production. This article explains practical and important settings in detail, such as project handling in General, choosing the audio device, specifying the file format and setting up shortcuts in the Editing tab. Fine adjustments such as the I/O buffer size, automatic compensation for plug-in latency and optimizing the number of undo steps let you build a comfortable and efficient music production environment. Because these settings directly affect the responsiveness and sound of the whole production process, setting them up early is very important.
Adjust Logic's preferences for a more efficient workflow
Customizing Logic's preferences to suit the way you work is very important.
Smoother operation may even change the songs you produce.
Here I introduce the preference settings I recommend.
Opening the preferences
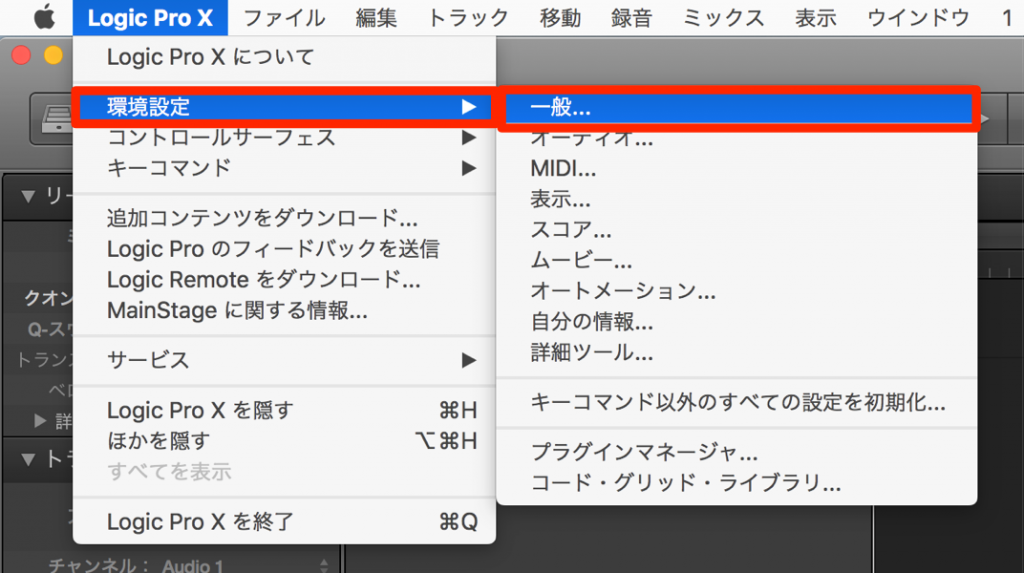
Access them from the top menu → "Logic Pro" → "Preferences".
General → Project Handling
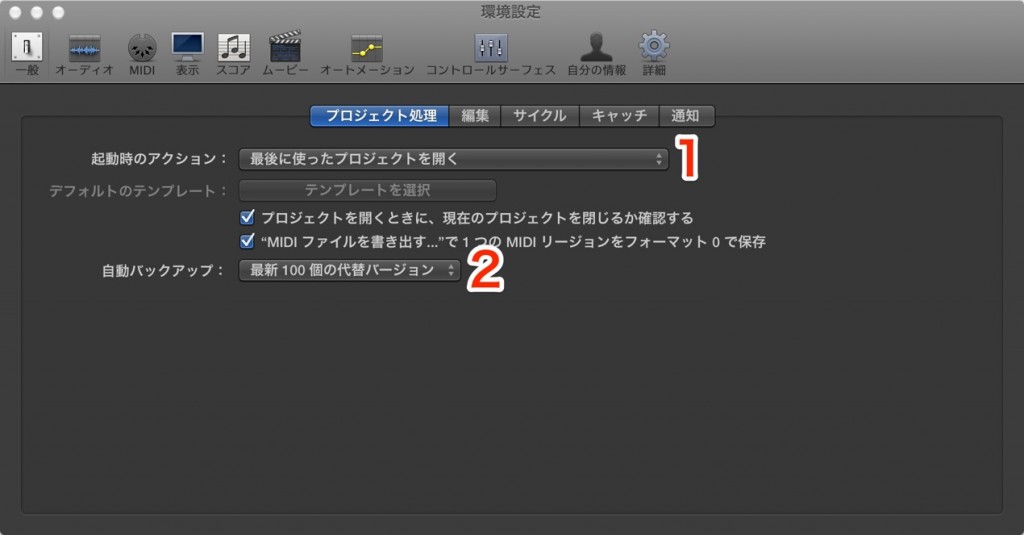
1. Choose what happens when Logic launches.
You can set it flexibly, such as reopening your last session
or starting from a favorite template.
2. The automatic backup function that saves the session regularly.
You can decide the maximum number of automatically saved files to keep.
The saved projects are stored in
"song project folder" → "Project File Backups".
Audio → Devices
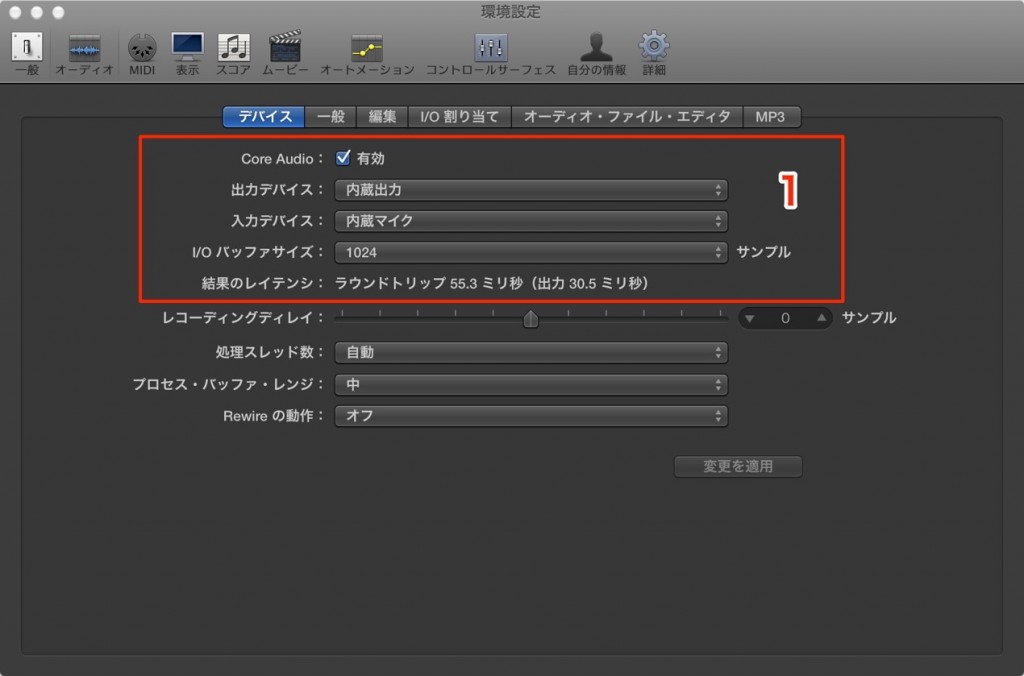
1. Here you set which device Logic's sound plays from.
Normally you select the audio interface you use.
The "I/O Buffer Size" lets you set how quickly the keyboard and audio recording respond.
A smaller number gives faster response but puts more load on the computer,
and a larger number does the opposite.
Audio → General tab
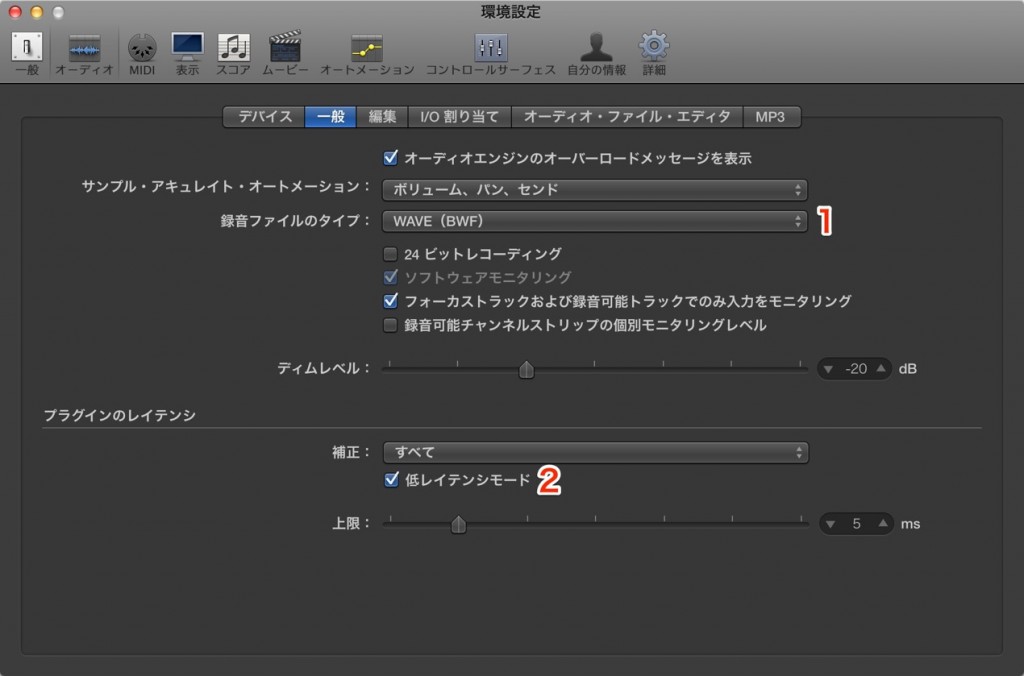
1. You can change the file format used when recording audio.
Considering compatibility with Windows, it is a good idea to use "WAV" format.
2. When you apply plug-ins such as EQ and compression, a very slight
latency (sound delay) occurs. That delay can sometimes have a big effect on the sound.
Checking this option automatically compensates for that delay.
General → Editing tab
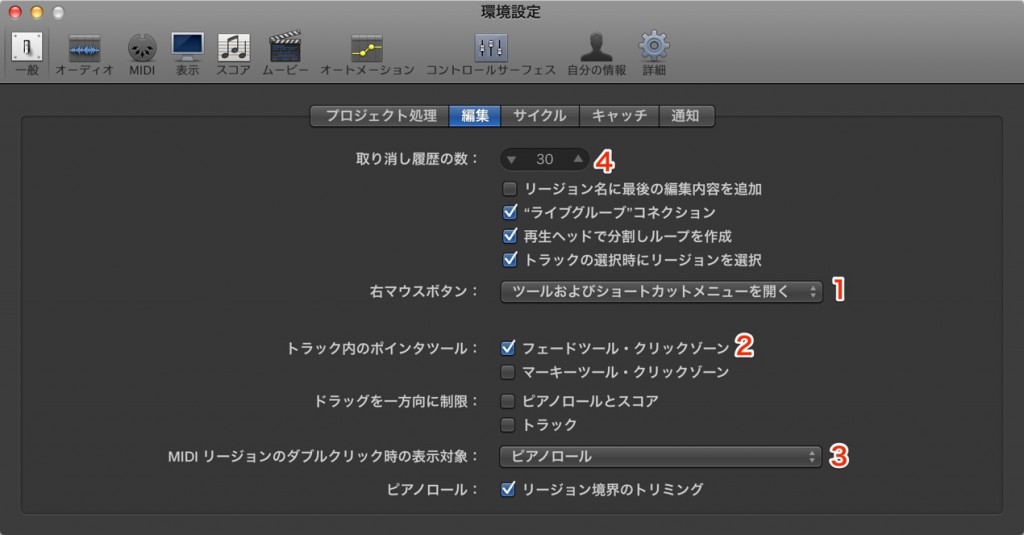
1. You can choose which menu appears when you right-click.
By selecting "Opens Tool and Shortcut Menu",
a menu suited to the situation is displayed automatically, which is very convenient.
2. When checked, you can fade in and out without using the "Fade tool"
just by dragging the edges of an audio region.
3. You can choose which editor is shown when you click a MIDI region.
It can also be displayed as a score, so change it to suit your purpose.
4. This sets how many times the "Undo" function, which returns to the previous step, can be used.
It is currently set to 30, so you can go back up to 30 steps.
You can set more undo steps, but more memory will be used.
Frequently Asked Questions
Q1. How can I improve response latency in Logic Pro?
Setting a smaller I/O buffer size in the audio settings makes the response faster. However, it puts load on the computer, so adjust it while balancing it against your machine's specs.
Q2. What file format do you recommend for audio recording?
We recommend WAV format. It maintains high sound quality while also ensuring compatibility with Windows, and it is widely supported as an industry standard.
Q3. How do I set up latency compensation when using plug-ins?
Simply check the latency compensation option in the Audio General tab, and the tiny delays caused by plug-ins such as EQ and compression are compensated automatically.
Q4. How many undo steps should I set?
The default of 30 is usually enough, but you can increase it if you have memory to spare. Decide while considering the balance with your computer's memory usage.
Q5. Can I change the editor used when opening MIDI regions?
Yes. In the MIDI settings of the Editing tab, you can choose between Piano Roll and Score display. Using them to suit your working style improves efficiency.
NEW ARTICLES
Latest English Articles











