FL Studio's normalize function is an important tool for optimizing the volume of audio files that are too quiet. By automatically raising the loudest part of the waveform up to "0 dB," just before the sound clips, it efficiently fixes volume that is still lacking even with the track volume at maximum. Just select the target channel in the Channel Rack and apply Normalize from the waveform icon in the editor; it's applied to all instances of the same clip in the playlist at once, saving time in mixing.
Optimizing Quiet Audio Files
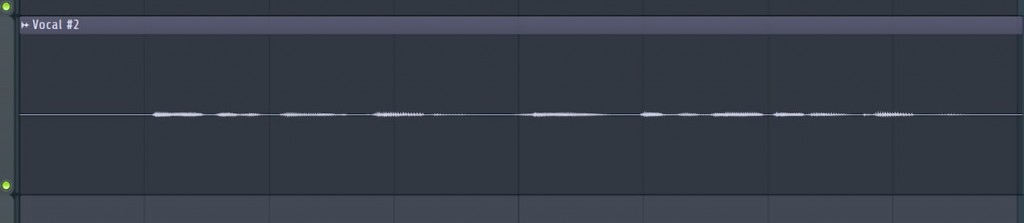
Normalize is a function used when an audio waveform is too small,
raising the loudest part of the waveform right up to "0," just before it clips.
It comes in handy when the volume is still too low even with the track volume at maximum.
Normalize Explained
How to Apply Normalize in FL Studio
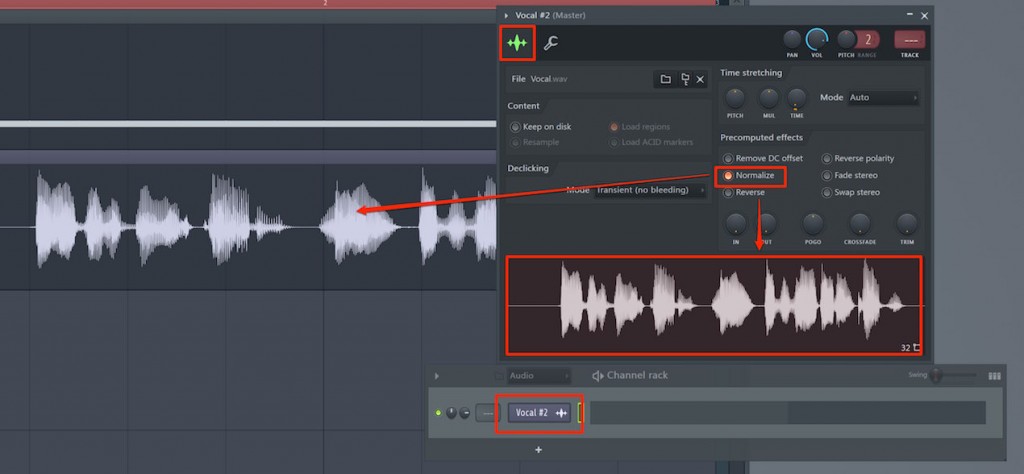
Select the channel you want to normalize in the Channel Rack and open the editor.
Select the waveform icon and choose "Normalize" from it to apply it.
It's applied to all instances of the same clip placed in the playlist at once, which is very convenient.

Frequently Asked Questions
Q1. What is the difference between normalizing and simply adjusting the volume?
Normalize automatically raises the audio to the optimal level based on the waveform's highest peak, while volume adjustment means setting the value manually. Normalize can optimize volume uniformly without degrading audio quality, so it is more effective.
Q2. Should I normalize every audio track?
Not every track needs it. Applying it to tracks that are already loud enough may cause clipping. We recommend applying it selectively only to tracks that are too quiet.
Q3. What should I do if the sound clips after normalizing?
Adjust with a compressor or limiter at the mastering stage, or fine-tune the volume of individual tracks. Using the 32-bit float format also lets you adjust volume more safely.
NEW ARTICLES
Latest English Articles