
Ableton Live's recording features go beyond the loop-based approach of Session View: by using Arrangement View, you can record freely to fit complex song structures such as verses, pre-choruses, and choruses. This article explains in detail the whole process, from creating a new track and setting the input channel to starting recording, so you can learn the basic operations for recording both MIDI and audio. It is a practical guide for beginner and intermediate users to establish an accurate, efficient recording workflow.
Recording That Isn't Tied to Loops
Recording in Session View was based on loops.
It is excellent for working with material,
but it is not suited to recording songs with a structure such as verse, pre-chorus, and chorus.
In such cases, use Arrangement View.
You can record without range limits to fit the song's structure.
Recording Step 1_Creating a Track
Basically, the operations are the same for both MIDI and audio.
If you need a new track for recording,
right-click in the track list area.

You can add a track from the menu that appears.
*For a MIDI track, you need to assign an instrument.
Recording Step 2_Setting Up the Track

Turn on "I/O" and "M" at the lower right of the track list.
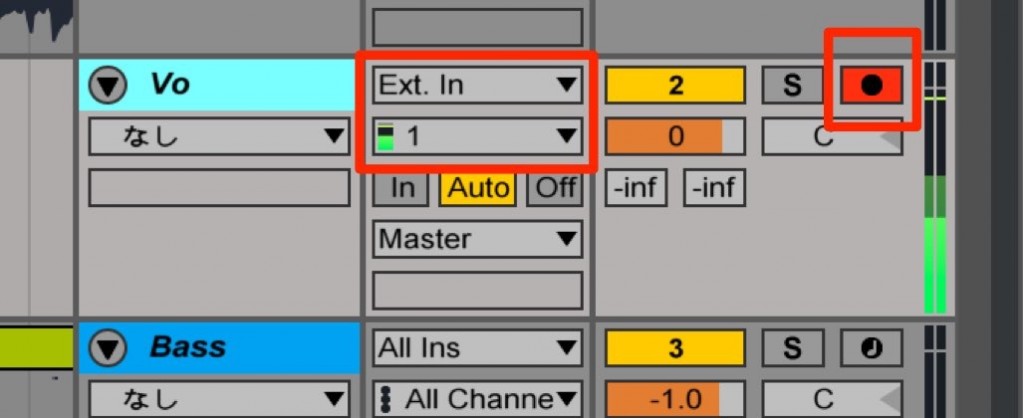
Check the input channel of your audio interface
and turn on the track's record button.
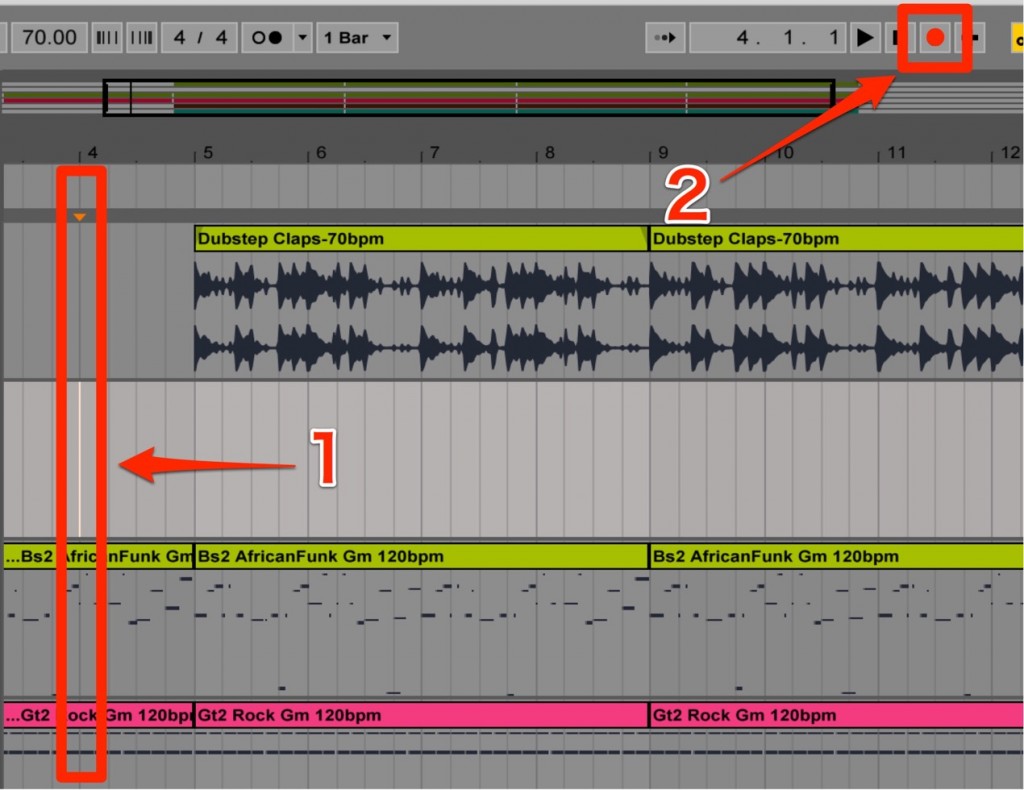
Move the playback cursor to where you want to record,
and turn on the record button.
Recording Step 3_Starting to Record

Take a breath, and once you are mentally ready,
click the play button to start recording.
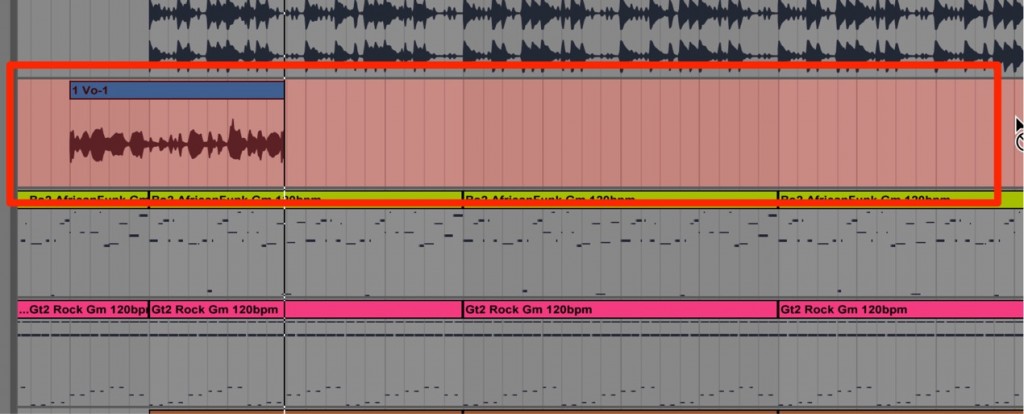
The track background turns red.
When you finish playing, stop playback.
Frequently asked questions
Q1. What is the difference between recording in Session View and Arrangement View?
Session View is suited to recording loop-based material, while Arrangement View lets you record without range limits to fit the song's structure (verse, pre-chorus, chorus, etc.), making it suitable for regular songwriting.
Q2. Is there a difference in how MIDI and audio tracks are created?
The basic operation of right-clicking in the track list to add a track is the same, but for a MIDI track you need to assign an instrument after adding it.
Q3. Why does the background turn red while recording?
Ableton Live lights the track background red to show visually that recording is in progress.
Q4. What settings should I check before starting to record?
It is important to check your audio interface's input channel, turn on "I/O" and "M" at the lower right of the track list, and enable the record button.
NEW ARTICLES
Latest English Articles











