
Ableton Live's fade and crossfade functions are an important technique for fixing the noise and unnatural joins that occur when connecting different takes with punch-in recording. Fade-ins and fade-outs change the volume gradually, and crossfades overlap the volume of the preceding and following takes, giving you smooth, natural joins. The trick is to keep the fade range short and to listen and adjust repeatedly. It is a basic skill you can also use in arranging whole songs.
Fades for Adjusting Volume Within a Clip
In the previous article, we explained the very useful punch-in recording.
However, with punch-in recording,
the takes sometimes do not join smoothly.
Noise also often appears at the join.
This happens because two different takes are being forced together.
As a way to solve this problem,
we will explain the
fade and crossfade functions, which change the volume of the takes so that they join cleanly.
About Fade-Ins and Fade-Outs
Setting aside the joins between takes for a moment,
let's look at fade-ins and fade-outs, which are also used in regular arrangements and song structures.
Please listen to the following audio.
The volume gradually gets louder,
and at the end, the volume gradually gets quieter.
These are fade-ins and fade-outs.
- Volume gradually getting louder: fade-in
- Volume gradually getting quieter: fade-out
That's all there is to it.
They look useful for arranging, too.
Setting Fade-Ins and Fade-Outs
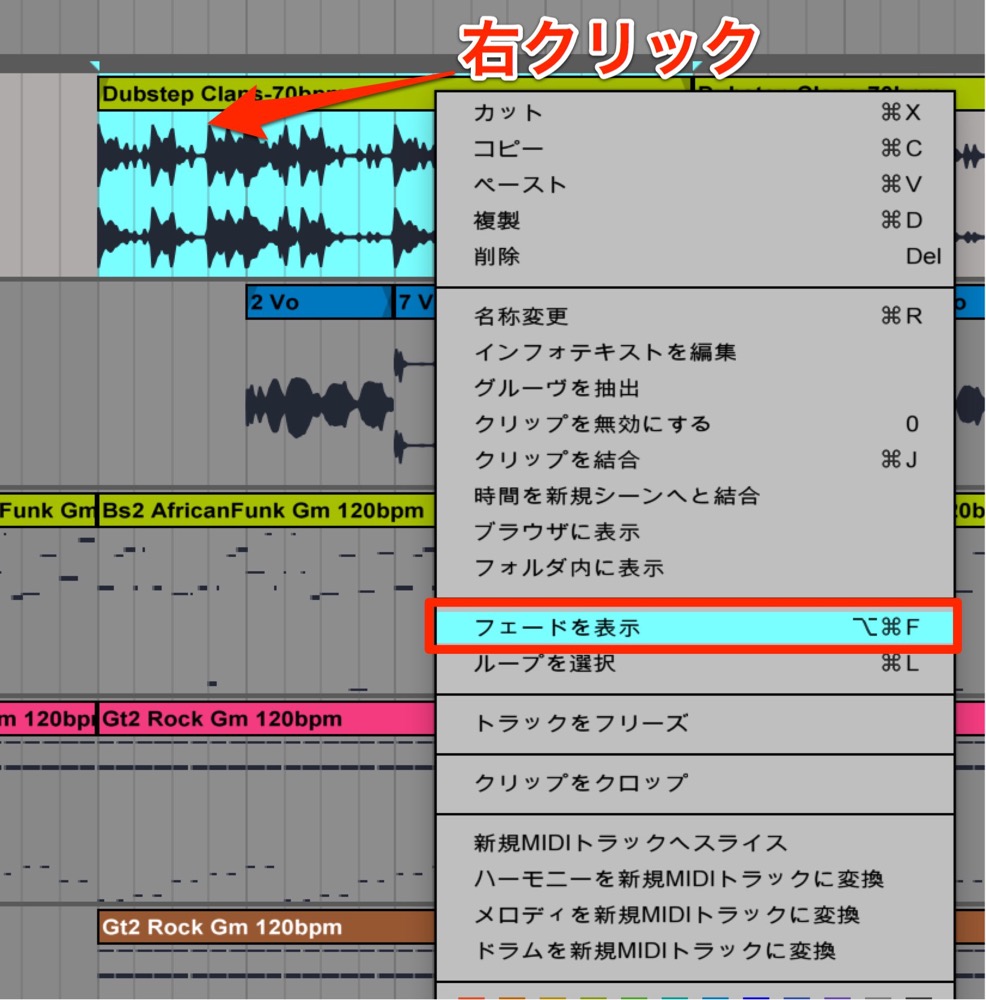
Right-click the clip you want to apply a fade to
and select "Show Fades" from the menu.
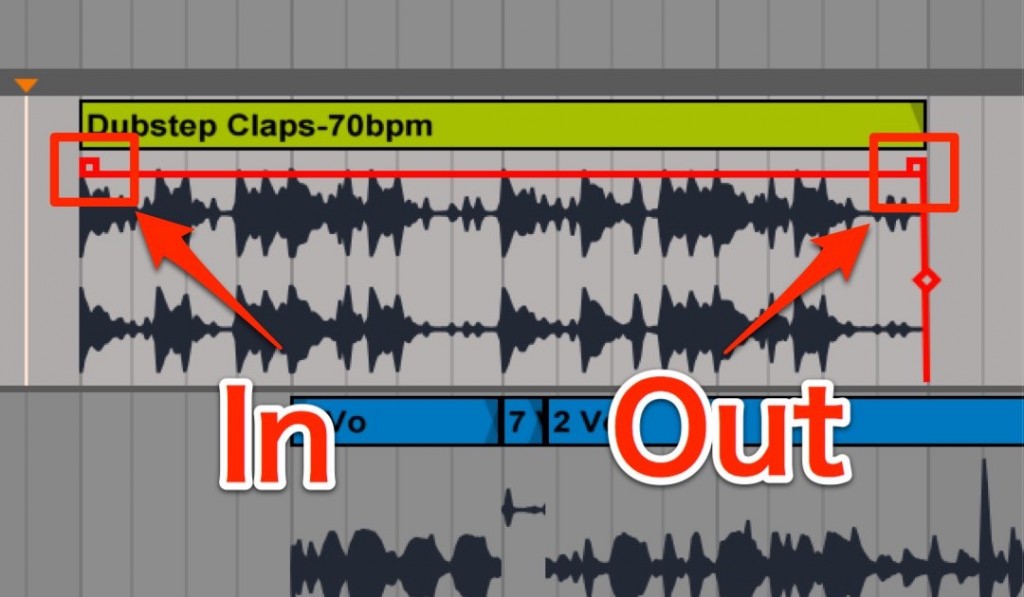
The clip display changes,
and the fade handles outlined in red appear.
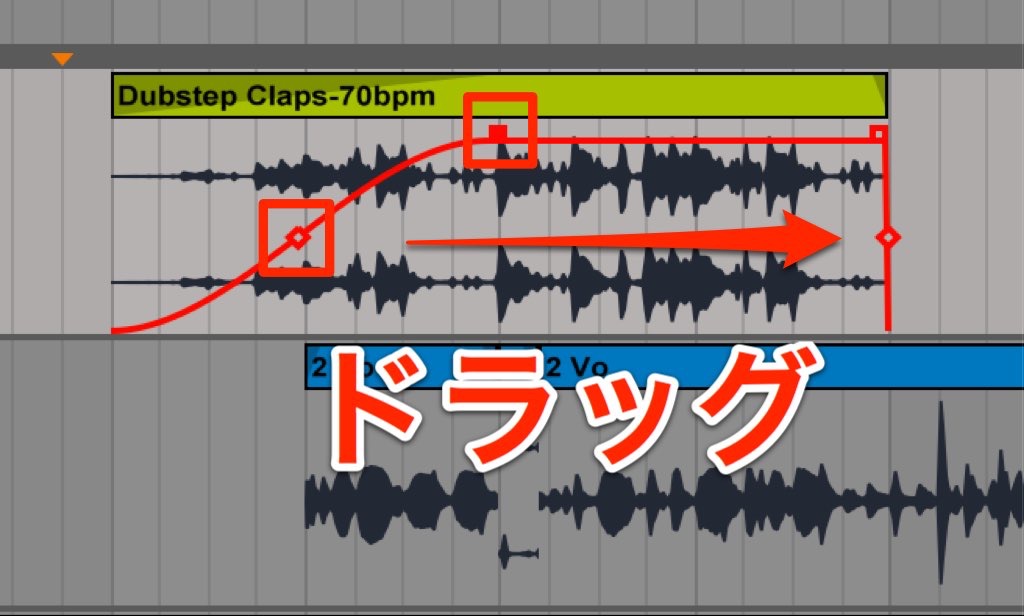
Drag the handles to adjust the effect.
The upper handle sets the fade length
, and the lower handle sets the fade curve.
Setting Crossfades
Now we come back to joining takes.
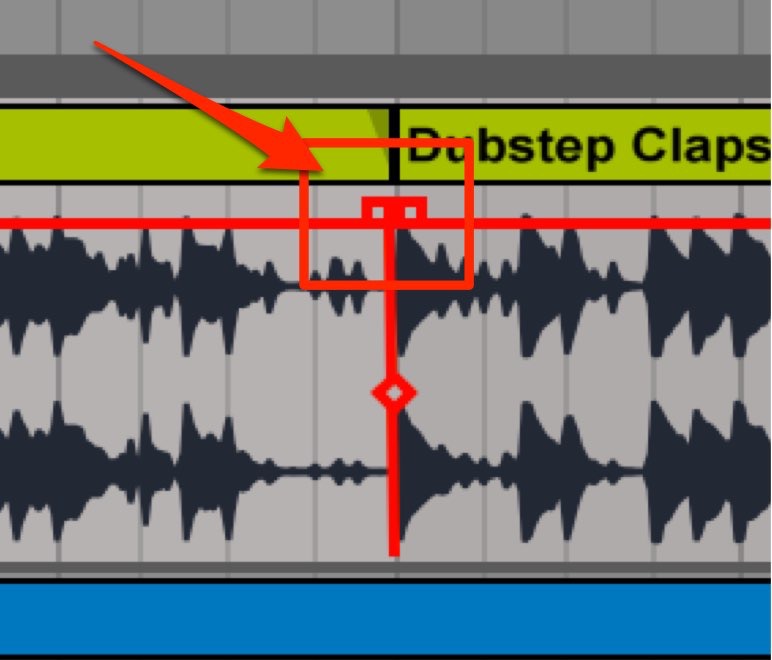
If you look at the boundary between takes that do not join well with fades shown,
you will see a fade handle between them.
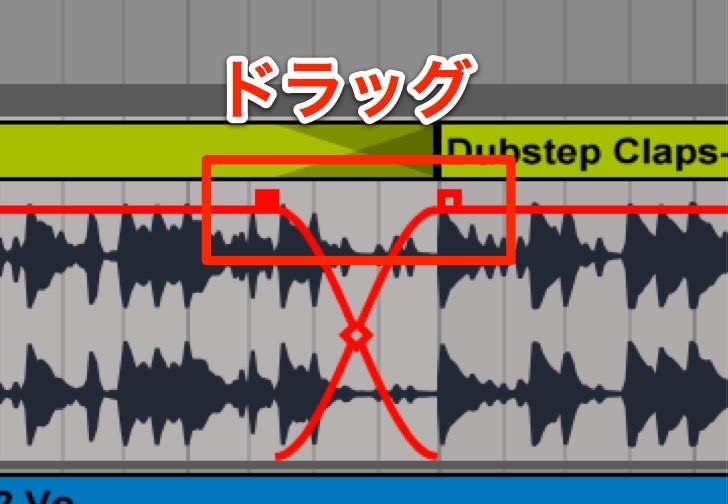
Just like the fades above,
dragging it applies a crossfade.
The earlier take gradually gets quieter,
while the later take gradually gets louder, overlapping it.
This is how you get a natural join.
The trick is to keep the fade length a little short.
If it is too long, the join actually becomes more noticeable.
Listen and adjust repeatedly to find the fade position that feels right.
Frequently asked questions
Q1. How do I show fades in Ableton Live?
Right-click the clip you want to apply a fade to and select "Show Fades" from the menu, and fade handles appear on the clip. Use the upper handle to adjust the fade length and the lower handle to adjust the fade curve.
Q2. What is the difference between fade-ins/outs and crossfades?
A fade-in or fade-out gradually raises or lowers the volume of a single clip. A crossfade, on the other hand, works between two different takes: the earlier take gets quieter while the later take gets louder, creating a natural join.
Q3. What is the trick to setting crossfades?
It is important to keep the fade length short. If it is too long, the join becomes more noticeable. We recommend listening and adjusting repeatedly to find the best fade position.
NEW ARTICLES
Latest English Articles











