
This article is a complete guide to Ableton Live 12, from installation to initial setup. It explains in detail every step beginners need to start making music: basic setup such as creating an account and registering the serial number, installing on both Mac and Windows, and authorization, as well as downloading additional sound Packs and setting up an audio interface and MIDI keyboard. With practical guidance from an Ableton Certified Trainer, using the production of a chill house-flavored pop song as an example, you can learn how to set up your production environment smoothly.
Introduction

I am Okamoto, a Sleepfreaks instructor
and Ableton Certified Trainer, and I will explain how to use Live 12.
We aimed for content that even beginners can try while making a song, so please read to the end.
The song we will make is a pop song with a chill, house flavor. Apart from a few elements, it is made using only what is included in Live 12 Suite.
Now, let's start by listening to the song.
Demo song, finished version
Live 12 Installation and Setup Video Explanation
Authorizing and Downloading Live 12
First, we explain the steps up to installing Live 12.
If you have already completed installation and the various settings, skip ahead to the relevant section.
We will show it on a Mac, but the basic method is the same on Windows.
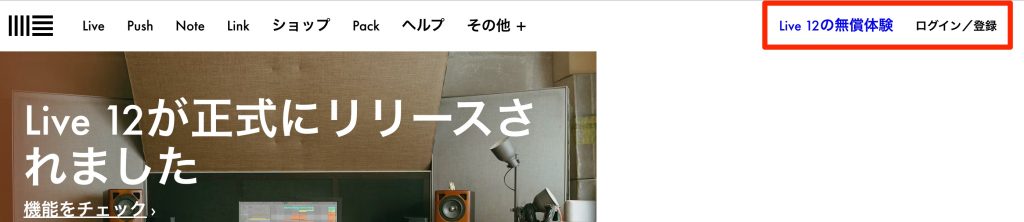
Go to the Ableton website and proceed to the login/registration screen.
Ableton website
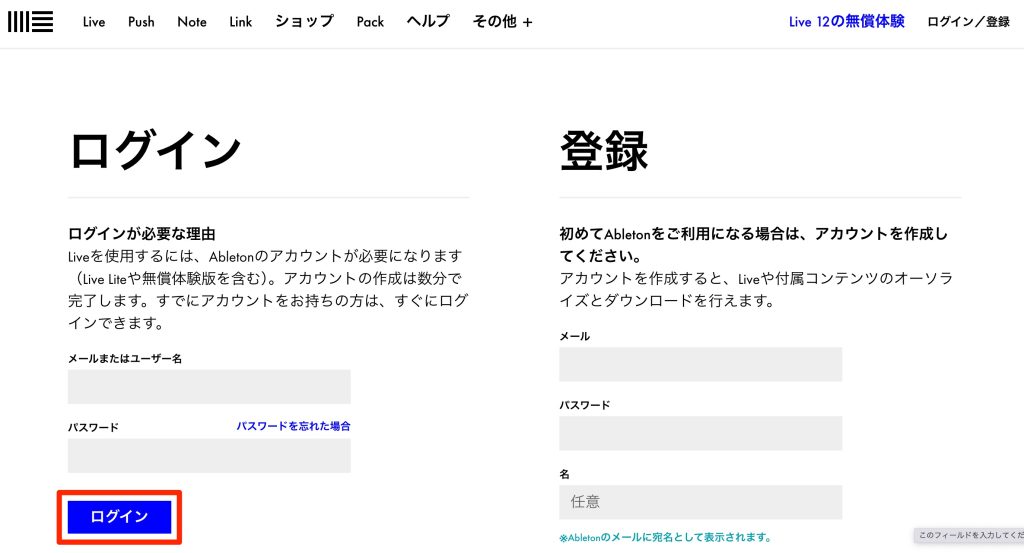
If you already have an account, log in with the form on the left; if you are a new user, enter your information in the form on the right to create an account, then log in.
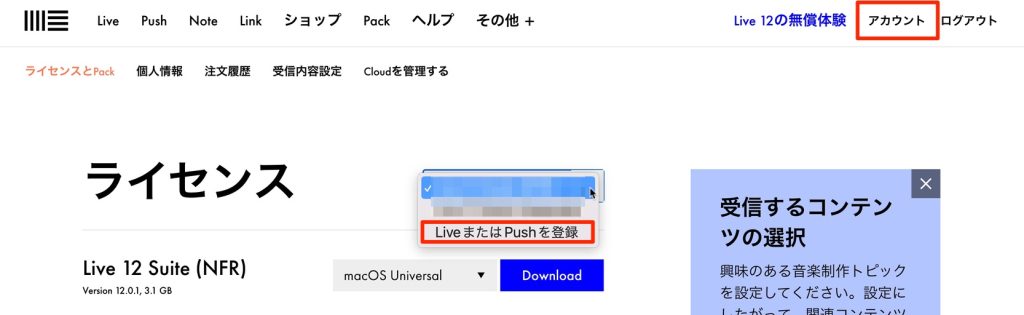
Go to your account page and select "Register Live or Push."
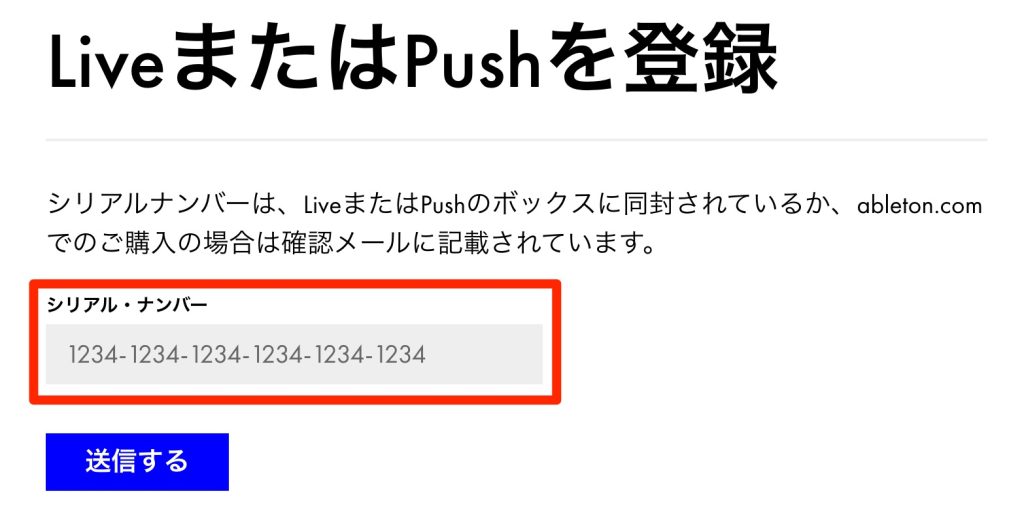
The screen switches to one for entering the serial number, so enter it and submit.
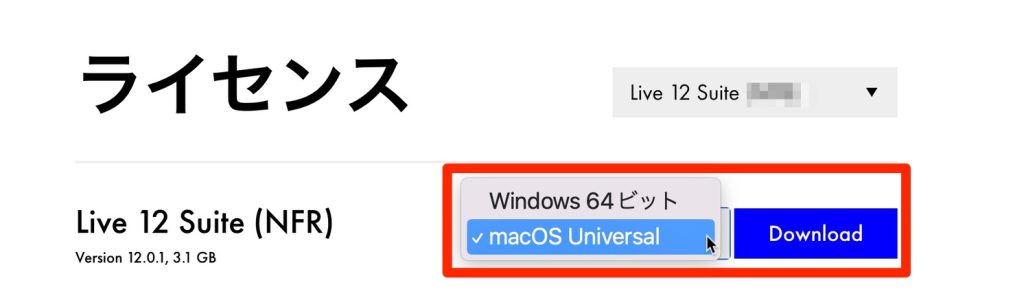
The license for the registered product appears on the account page from earlier, so select your OS and download.
How to Install Live 12
Next, let's install the downloaded file.
Installing on Mac

Open the downloaded Live installer and drag and drop the software into "Applications".
That completes the installation.
The software is created in the "Applications" folder.
You can delete the installer after installation.
Installing on Windows

After unzipping the download, open the Live installer and follow the prompts to install it.
Here too, you can delete the installer after installation.
Launching and Authorizing Live 12
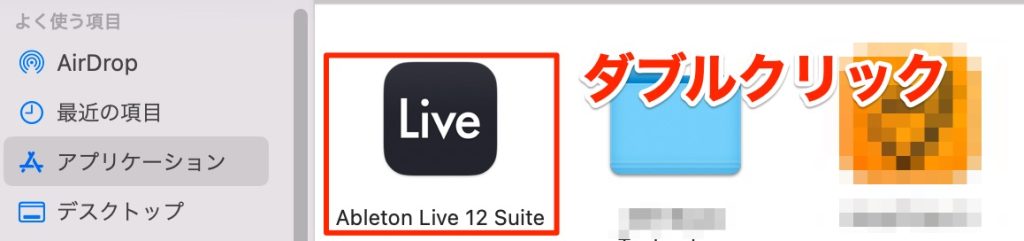
It is created in the "Applications" folder, so double-click it to launch.
On Windows, double-click it in the app list to launch.

On the first launch only, a dialog opens, so select "Authorize at ableton.com."
It connects to the account you created above and is authorized automatically.
If you are asked for an ID and password, enter the information you used when creating your account and log in.
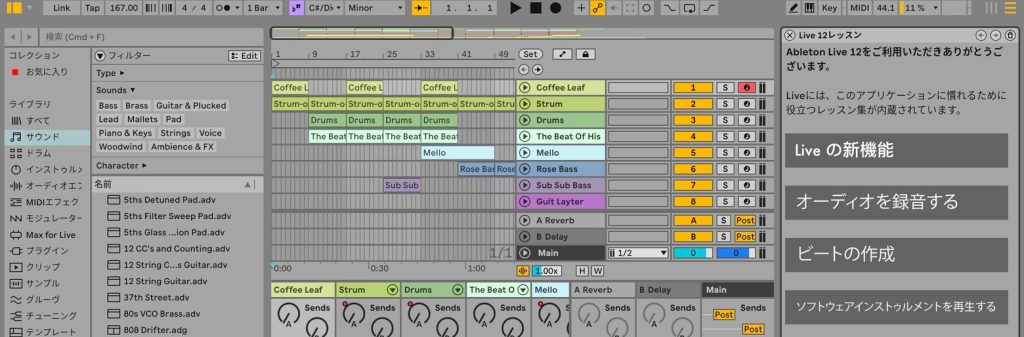
Live's authorization is complete, and on the first launch only, a demo song opens.
It is now ready to use.
Installing Additional Sound Packs
You can use it as it is, but Live comes with Packs, in which various sounds and instruments are packaged by genre and category.
They are ready to use and broaden your sound variations, so let's download them.
There are two ways to download them.
Adding Packs from the Ableton Website
The first is from the Ableton website.

While logged in, open the Packs page.
You can preview each Pack, so it is a good idea to use this as a reference when downloading.
Products you can download show Download, so click it to download.

The downloaded file has the extension ".alp," and this is the Pack installer.
Double-clicking this file installs it into Live automatically.
Here too, you can delete the installer after installation.
Adding Packs from Within Live

Launch Live, open the browser with the button at the top left and select "Places: Packs," and the available Packs are displayed.

Clicking one starts the download, and when it finishes the label changes to Install, so click it again to install.
Including those installed via the web, installed sounds appear in Packs.
Setting Up the Audio Interface
An audio interface is a device that converts analog input signals such as vocals and guitar into digital signals so they can be brought into the computer, and conversely converts the computer's digital signals into analog signals to output them to speakers or headphones.
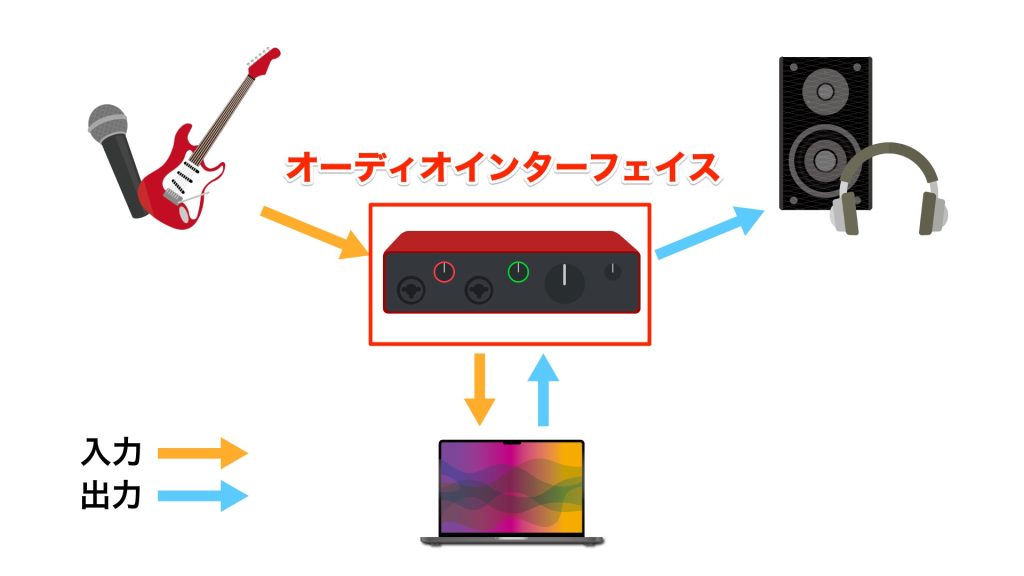
If your computer has speakers, you can output sound without an audio interface, but you will definitely need one to record vocals or guitar.
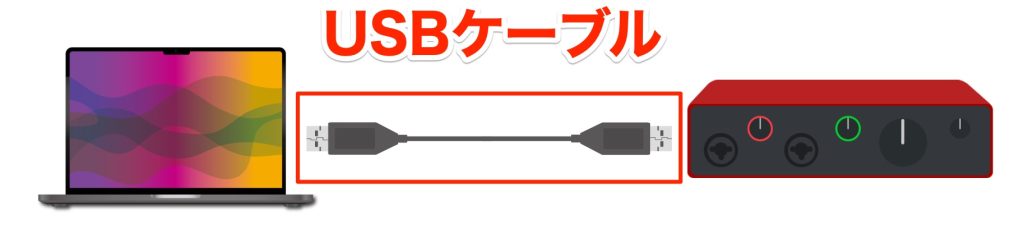
First, connect the computer and the device with a USB cable.
If your model requires a driver, install it in advance.
Searching the internet for "model name + driver" will usually bring up the information, so use that as a reference.
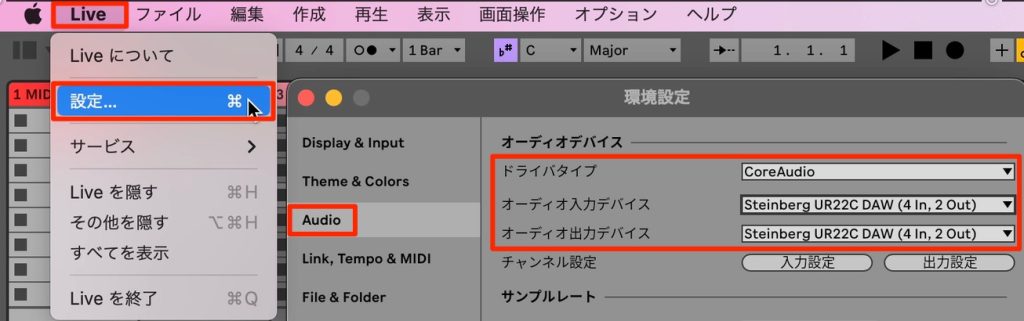
Open the preferences with "Settings" in Live ("Options" on Windows), select "CoreAudio" (ASIO on Windows) for "Driver Type" in the "Audio" section, and select your audio interface for both "Audio Input Device" and "Audio Output Device."
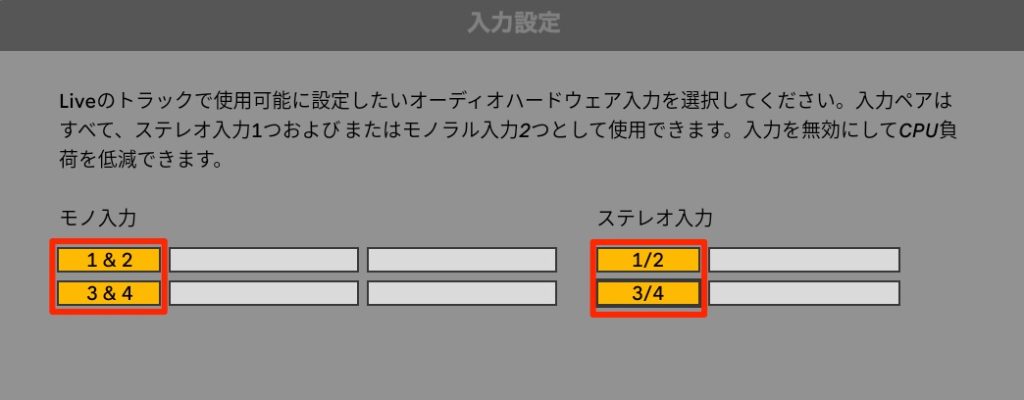
Next, configure the input/output channels of the audio interface used in Live.
Inputs are where sound comes in, where you connect mics and guitars, and outputs are where sound goes out, where you connect speakers and headphones.
Open "Input Config" and "Output Config" under "Channel Configuration" in the "Audio" section, and light up the channels you will use.
If you are not sure, lighting up everything shown is fine.
You are now ready to record vocals and guitar and to output sound from speakers or headphones connected to the audio interface.
Setting Up a MIDI Keyboard
A MIDI keyboard is a device without built-in sounds that sends performance information called MIDI, including note length and strength, to Live to play its instruments.
It is useful for checking sounds and for real-time recording, so we recommend having one, even a small one.
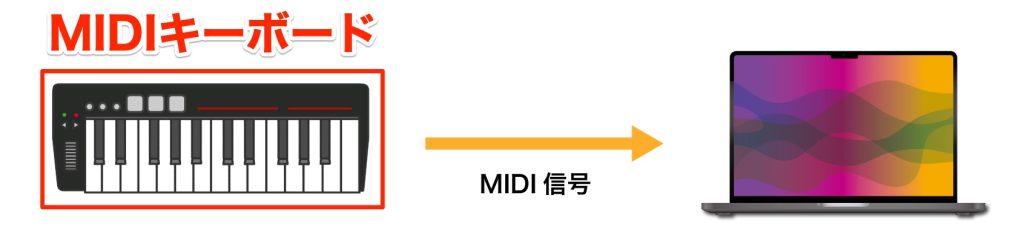
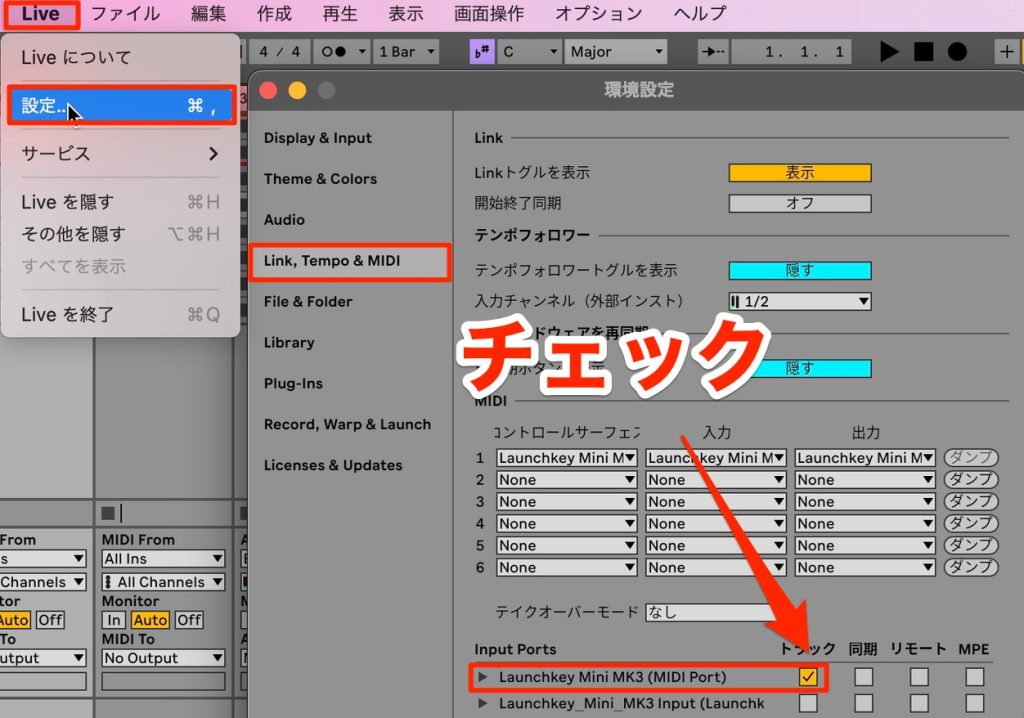
Connect it to the computer with a USB cable.
Here too, if your model requires a driver, install it in advance.
Open the "Settings" screen and go to "Link, Tempo & MIDI," where the connected MIDI devices are shown, then check "Track" for your keyboard.

You can check whether MIDI signals are being received at the top right.
If this lights up when you press a key, it is being received successfully.
If it does not respond, try reconnecting, checking the driver, restarting and so on.
The MIDI keyboard is ready, and you are now ready to play and record Live's instruments.
Managing Song Data
Next, we explain how to save and manage the song data you produce.
The key is to remember "one project folder per song."
How to Save Data in Live 12
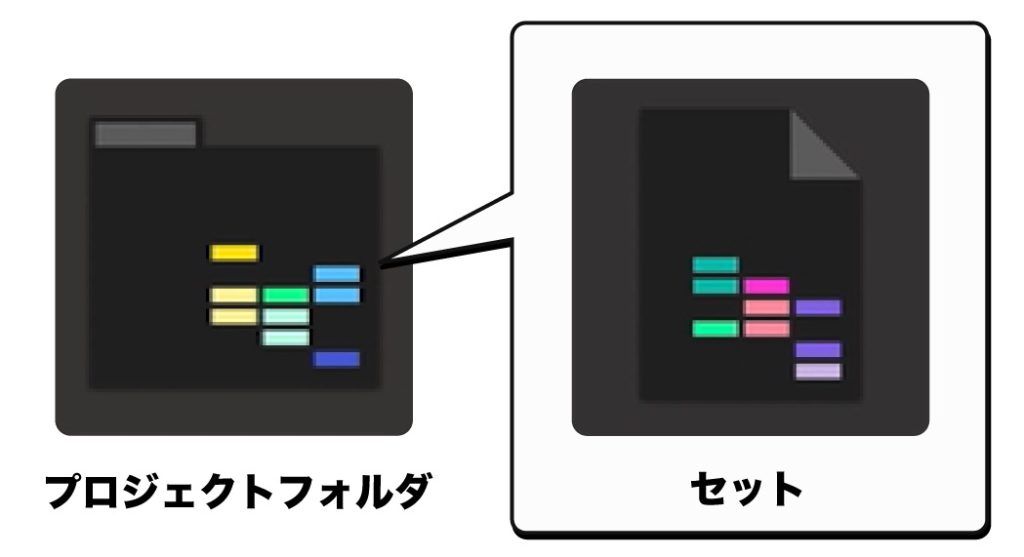
Live has two concepts: project folders and Sets.
A project folder is a folder that stores the material related to a song.
A Set is the song data placed inside the project folder.

Let's proceed assuming we are making a song called sleepfreaks.
When you launch Live, the Set name is shown at the top.
The song data has not been saved yet, so it says "Untitled."
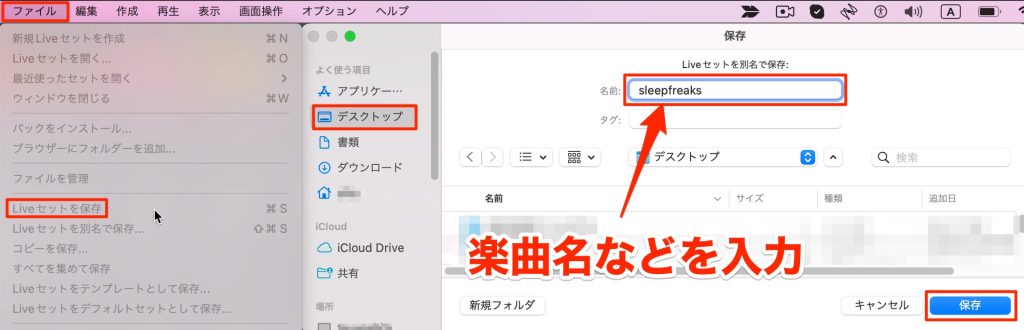
Go to "Save Live Set" from the "File" menu at the top, and a pop-up appears for specifying where to save the Set, so specify any location and enter the song name and so on.
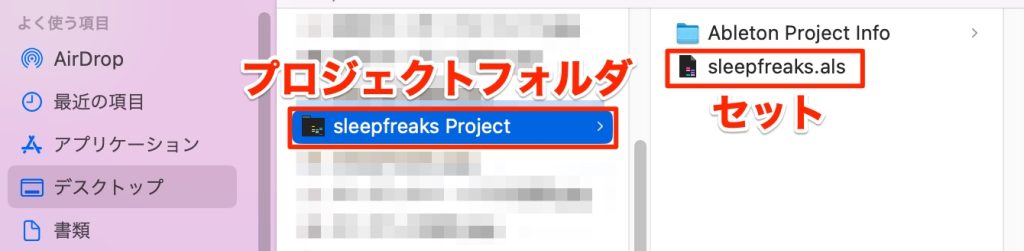
A project folder with the same name is created automatically, and the Set is saved inside it.

You can see that the Set name at the top of Live has changed.
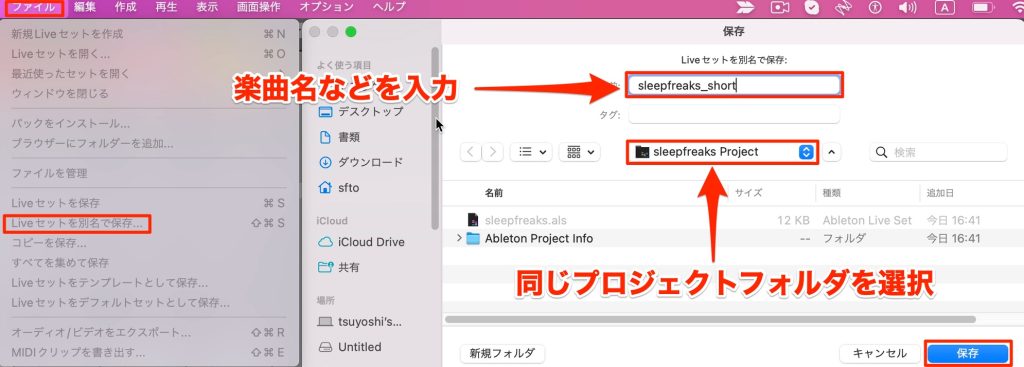
Now suppose we need to make a short version of this song.
Only the length is shorter; the material used is the same.
In that case, rather than creating a new, separate project folder, save it as a different Set in the same project folder.
Go to "Save Live Set As" from "File," and a pop-up for specifying the save location appears, so select the same project folder as before, enter the name sleepfreaks_short and save.
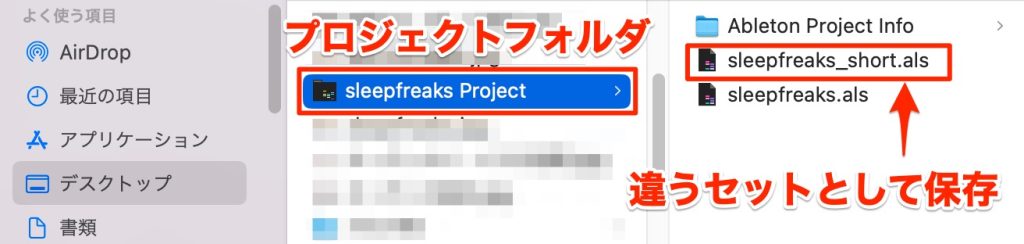
You can see that it was saved as a different Set in the same project folder.
Managing it this way is efficient: you can manage the song data separately for the original and short versions while sharing the material used.
Points to Note When Saving Data
The first is getting into the habit of saving over your work.
There is a shortcut: [Cmd+S] on Mac and [Ctrl+S] on Windows.
Using it prevents mistakes in saving important song data.
There are several shortcuts, but this can be called one of the most important.
Use the shortcut as you work and get into the habit of saving.

The second is running "Collect All and Save" regularly.
Due to how Live works, audio data imported from other locations, such as the desktop, is not automatically copied into the project folder.
Live simply reads it from that location.
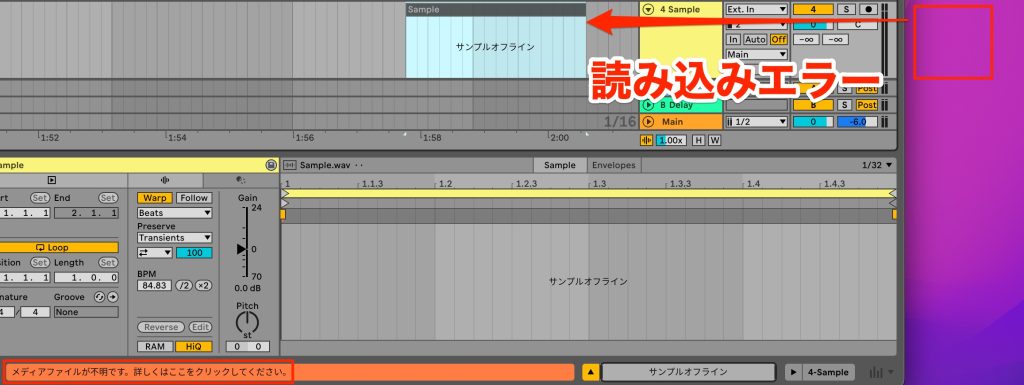
If the data is deleted or moved from that location, Live loses track of it.
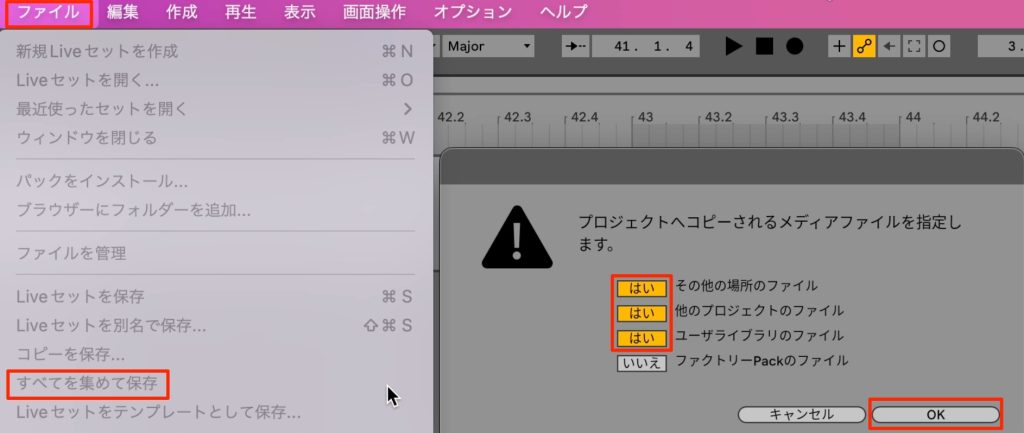
Running "Collect All and Save" means the data is copied into the project folder, so you can rest assured.
Go to "Collect All and Save" from "File," and a pop-up appears.
We will skip the detailed explanation, but if you light up everything except the bottom item, there will almost never be a problem.
How did you find it?
Some parts may have been difficult for beginners. If things do not work well, review the video and article and keep at it a little longer.
Next time, we will explain an overview of Live 12.
Frequently Asked Questions
Q1. Is account registration required before installing Ableton Live 12?
Yes, it is required. You cannot download or authorize it until you create an account on Ableton's official website, log in and register your serial number.
Q2. Are the installation steps very different on Mac and Windows?
The basic flow is the same, but on Mac you drag and drop into Applications, while on Windows you run an installer. Also, in the audio driver settings, choose "CoreAudio" on Mac and "ASIO" on Windows.
Q3. Can I use Live 12 without an audio interface?
It is possible if you only need speaker output, but you will definitely need one to record analog sources such as vocals and guitar.
Q4. Where do I download additional sound Packs?
You can download them directly from Ableton's official website, or get them by selecting "Places: Packs" in the browser after launching Live. Either method can be used to install them.
Q5. Is a MIDI keyboard essential for music production?
You can produce with the mouse, but a MIDI keyboard makes checking sounds and real-time recording smoother, greatly improving production efficiency.
NEW ARTICLES
Latest English Articles











