
Ableton Live 12 is an innovative DAW with two different screens: Session View and Arrangement View. Session View features intuitive operation suited to live performance and generating ideas, and its hierarchical structure of tracks, slots, clips and scenes allows free combinations. Arrangement View, on the other hand, is suited to detailed song editing along a timeline, like a conventional DAW. Being able to move seamlessly between these two views is a big advantage of Live, and by mastering basic operations such as the grid and transport, you can produce music efficiently.
Understanding the Main Screens

Let's start by getting an overall picture of Live 12 so you can learn efficiently.
Live 12 Overview Video Explanation from 10:35
Session View and Arrangement View Explained
Live has two screens based on different concepts.
One is Session View, Live's most distinctive feature, and the other is Arrangement View, the orthodox type also found in other DAWs.
Let's look at each.
How to Switch Screens
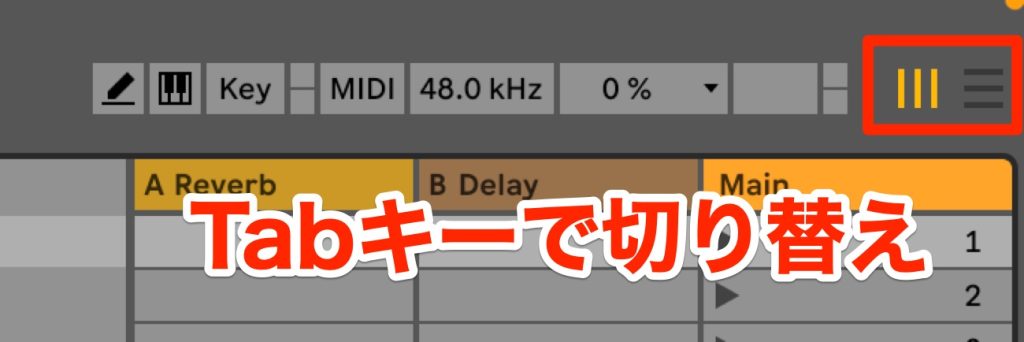
Switch between the two views with the selector at the top right of the screen.
The [Tab key] is the shortcut, letting you switch efficiently.
Session View
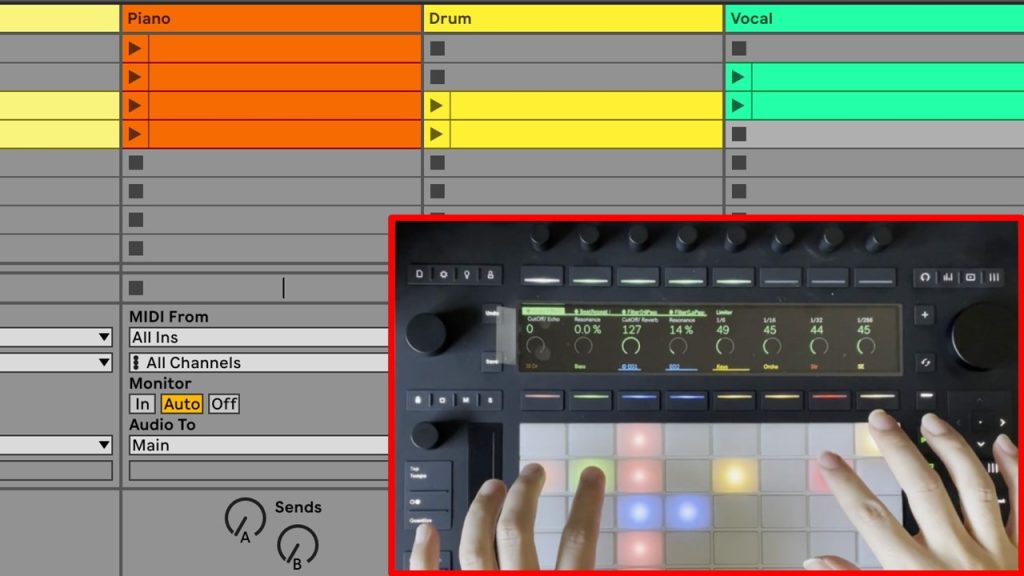
Session View, with its creative and intuitive operation, is a view suited to live performance and developing song ideas.
You may have seen DJs and track makers performing with controllers such as Push 3.
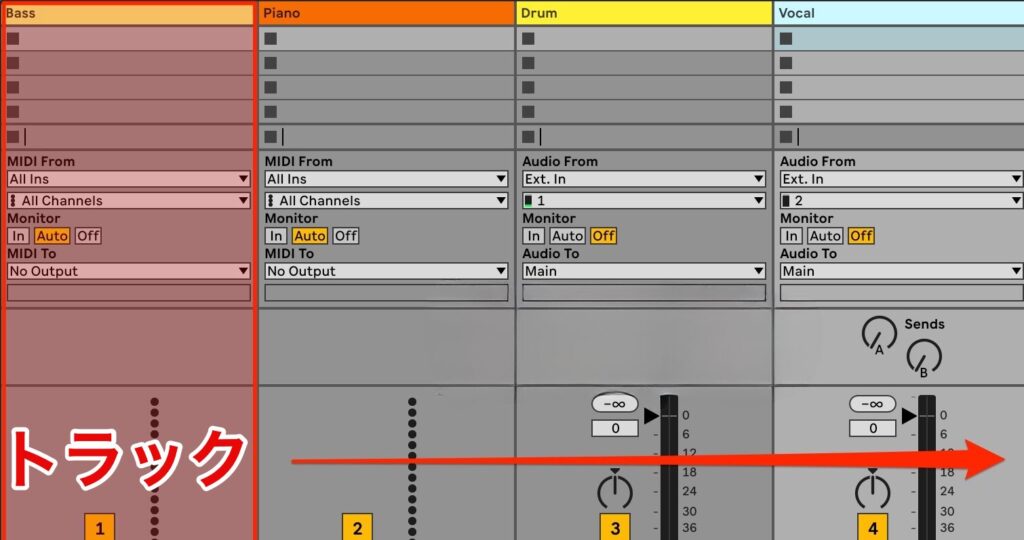
The area outlined in red in the image is called a track, and each new track you add is lined up side by side.
You can also assign a different instrument or sound to each track.
For example, a drum track, a vocal track and so on.

The vertical row of cells within a track is called slots.
You place clips in the slot spaces.
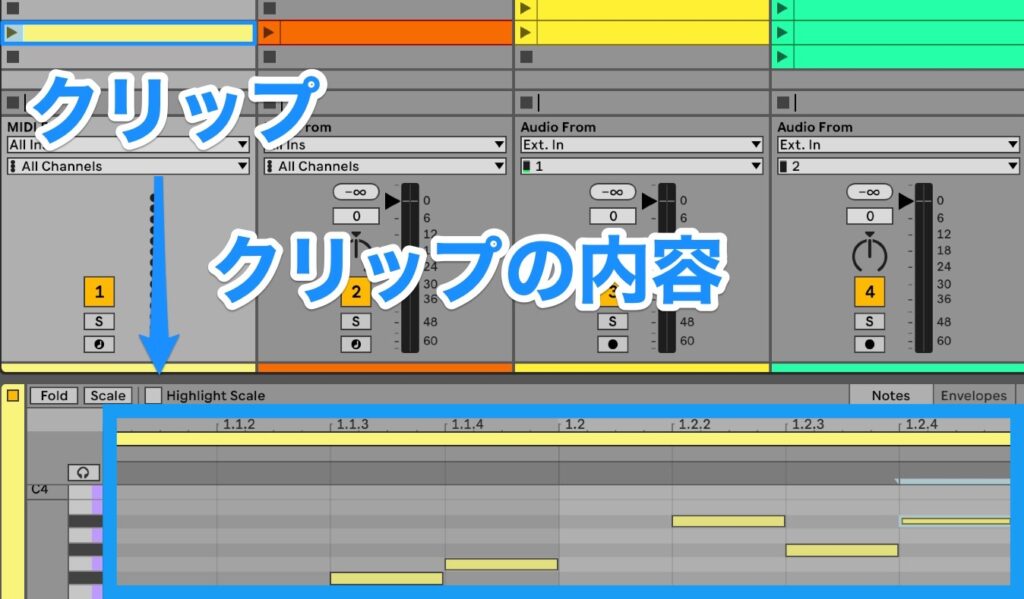
A clip is a fragment of sound containing a performance such as drums or a melody.
Slots containing clips are colored, so you can check them at a glance.
(In the image above, the yellow, orange and green areas are slots that already contain clips.)
You build a song by arranging these clips.
Each slot can hold only one clip.

Click the "▶ mark" in a clip to play it.
A group that brings together multiple clips and slots in a horizontal row is called a scene.
Scenes are provided at the far right of the tracks, and clicking a scene's "▶ mark" plays all the clips in that row at the same time.
For example, you can assign the intro, verse and chorus to each scene and play them in order to build the song structure.

Clips can be played individually as well, regardless of scenes.
You can combine them freely, as if in a jam session, enabling real-time live performance and generating song ideas.
In this way, intuitive operation like a live performance is the hallmark of Session View.
Arrangement View
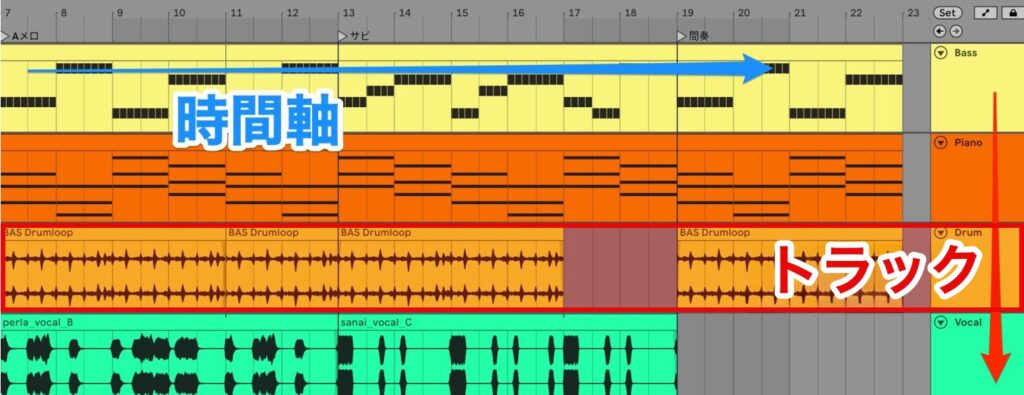
Arrangement View is a view for editing the song structure in detail.
Tracks that were lined up left to right in Session View are arranged top to bottom in Arrangement View.
You can place clips along a timeline that flows from left to right to build the song structure.
It makes the flow of the song easy to grasp visually, and it is a view suited to arranging and developing songs and recording vocals through an entire song.
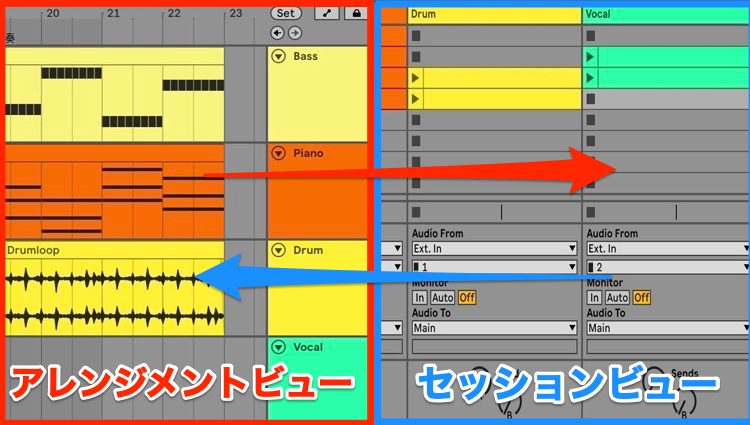
What is amazing about Live is that you can move seamlessly between the two views.
For example, you can sketch in Session View and then refine the details in Arrangement View.
Or, conversely, you can use a song made in Arrangement View for live performance in Session View.
This can be called a big advantage that other DAWs cannot replicate.
Screen Layout and Basic Operations Such as Playback and Zoom
Next, we explain the overall screen layout and basic operations.
From here on, we mainly use Arrangement View.
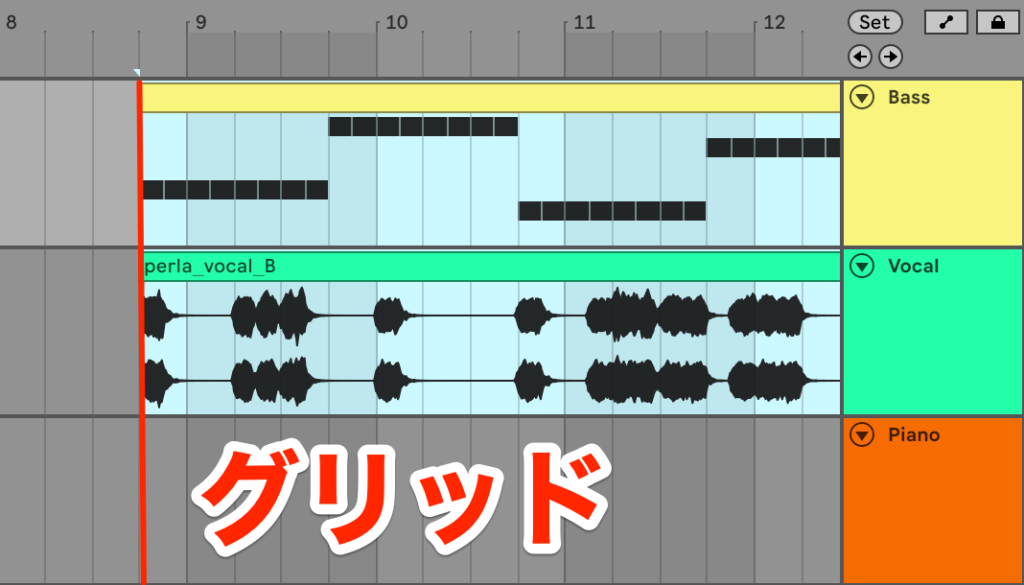
The main lanes are in the center of the screen.
This is the main screen where you build the song structure by arranging clips.
However, if clips are not placed at accurate positions relative to the rhythm, the performance will not line up.
The vertical lines drawn to align the timeline are called the grid.
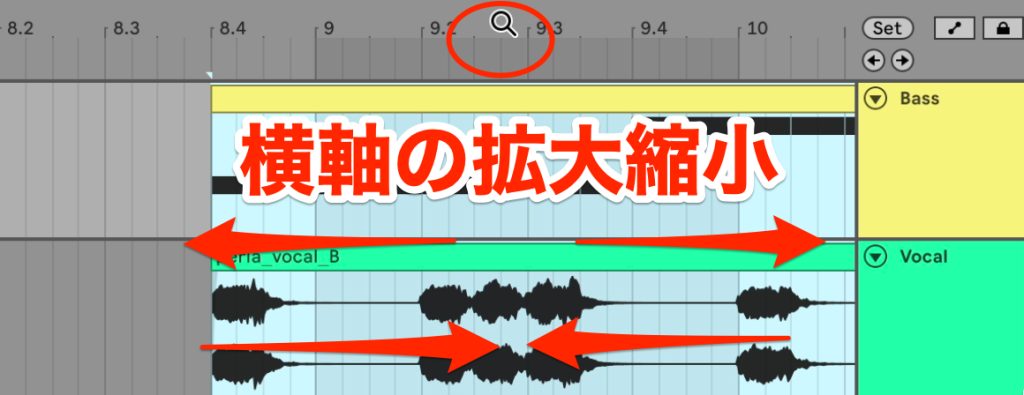
When you move the cursor to the top, it changes to a "magnifying glass."
Drag up, down, left or right to zoom in and out and move horizontally.
You can also zoom with the shortcut [+/- keys].
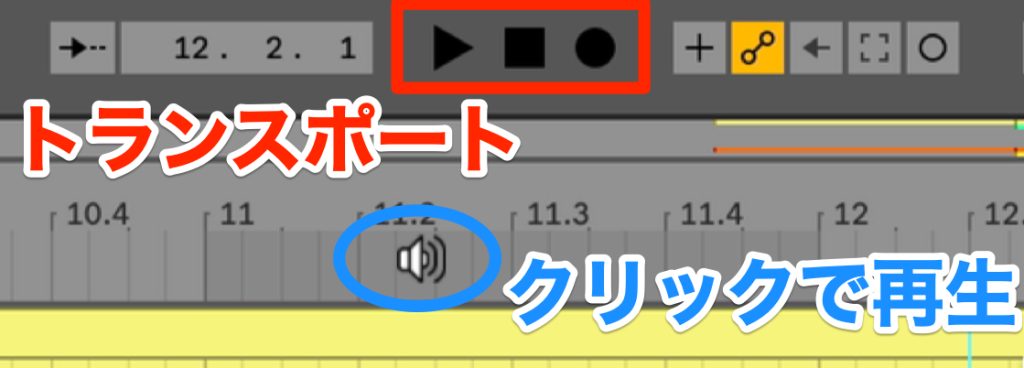
At the top of the screen, functions for controlling playback, recording and so on are grouped together in what is called the transport.
"▶" plays, "■" stops and "●" records.
Play and stop are the most frequently used, so controlling them with the shortcut [Space bar] is smooth.
It toggles between play and stop.
If you move the cursor slightly down from the "magnifying glass" mentioned earlier, it changes to a "speaker."
Clicking with the "speaker" lets you play from that point.
This is also handy to remember.
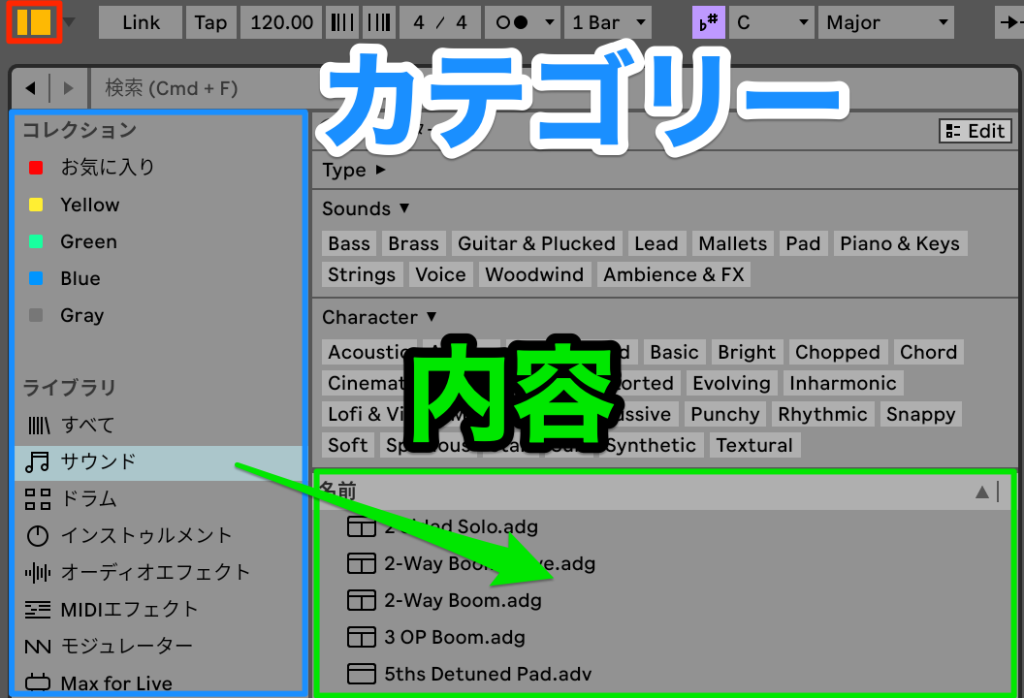
The button at the top left of the screen toggles showing and hiding the Browser.
The left side of the Browser shows the main categories, and the right side shows their contents.
It also has filtering and similar-sound search functions, so you can efficiently access the sounds you have in mind.
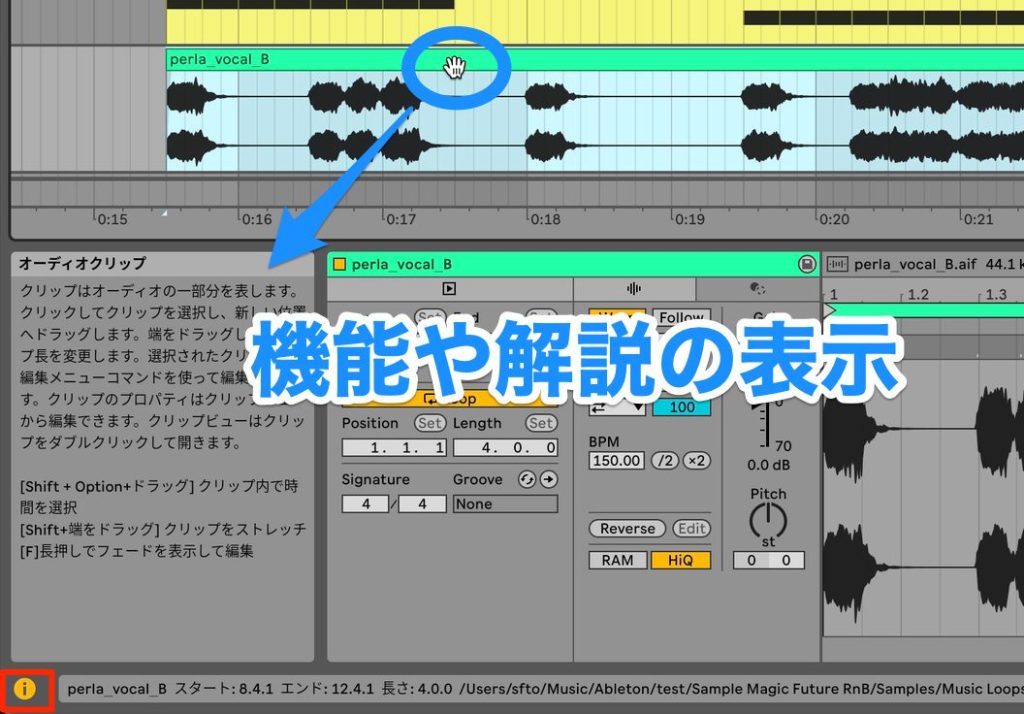
The button at the bottom left toggles showing and hiding the Info View.
The Info View shows explanations of functions and more.
It appears when you hover the cursor over the part you want to check, which is convenient because you do not need to refer to the manual.
However, when open it narrows the display area, so it is best to show it when needed.
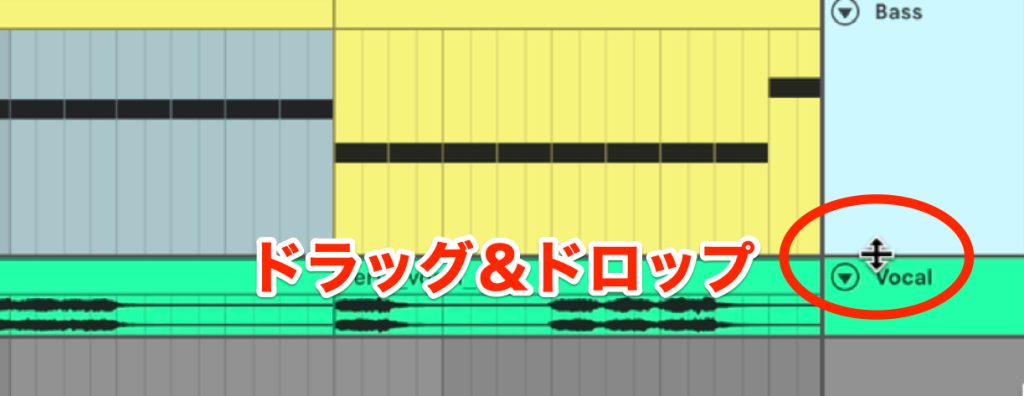
The display width of each screen and track can be adjusted by hovering the cursor over the border and dragging and dropping.
Adjusting these as appropriate along with showing and hiding each screen makes better use of the screen and keeps production running smoothly.
Live is a very intuitive DAW: when you try something thinking "maybe this will work," it usually responds as you expect.
Its appeal is its simple feel, which lets you handle it casually, in a good way, like an instrument.
What did you think?
We will explain detailed functions through song production in future installments, so you do not need to memorize them at first. Through practice, let's "get used to it" rather than "learn it"!
Frequently Asked Questions
Q1. How should I use Session View and Arrangement View differently?
Session View is suited to live performance and generating song ideas, while Arrangement View is suited to detailed song editing. You get the most out of them by combining the two, for example by developing ideas in Session View and producing the details in Arrangement View.
Q2. Can you briefly explain the relationship between clips and slots?
A slot is a placement space within a track, and a clip is audio data such as drums or a melody. Each slot can hold one clip, and you build a song by combining multiple clips.
Q3. The screen operations seem complicated. Can beginners master them?
Live 12 is an intuitive DAW that is easy to operate. You do not need to learn every function at first; what matters is getting used to it through practice. Its simple feel is appealing, and you can learn through trial and error.
NEW ARTICLES
Latest English Articles











