
This article explains four practical techniques for raising the quality of drum programming in Ableton Live. It introduces adding groove with triplets, expressing dynamics by editing velocity, using Live's own Groove feature, and creating depth by layering multiple sounds. Combining these techniques gives a monotonous four-on-the-floor beat a human feel and thickness, letting you achieve a much more professional sound when producing dance music, techno and more.
Techniques for Adding Groove and Depth to a Monotonous Beat
[Four-on-the-floor], used in many music genres such as house and techno.
As a drum pattern it is deep precisely because it is simple, and many of you have probably found that just programming it on the grid makes it monotonous and it never quite grooves.
This time, from techniques you can try in any DAW to ones that use features unique to Ableton Live, we introduce "drum programming techniques you can try right away".
Four Techniques to Raise the Quality of Your Rhythm Parts: Video Explanation
Listening to the Demo Track
First, please compare a demo track with a monotonous rhythm track against one using the four techniques that follow.
Comparing the two, you can probably feel that the latter has more of "a groove that makes you want to move".
The only differences between these two tracks are how the hi-hat is programmed and the clap sound; all the other tracks are exactly the same.
These are techniques where even small changes can have a big effect, so please read to the end.
Use Triplets
The first technique we introduce changes the groove using triplets.
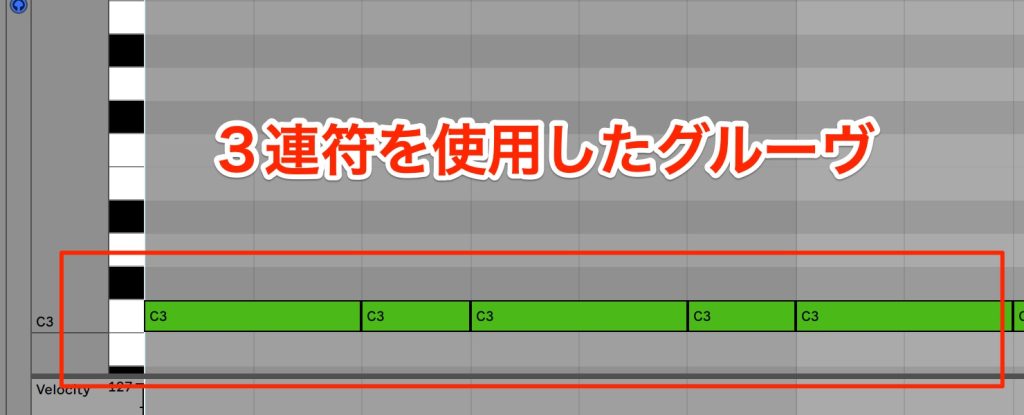
The overall feel of this demo track is not a so-called [bouncy] song with swing, but an [even] rhythm in which every track is quantized exactly to 16th notes.
However, tracks in which everything is programmed exactly on the grid lines feel mechanical and lacking in groove.
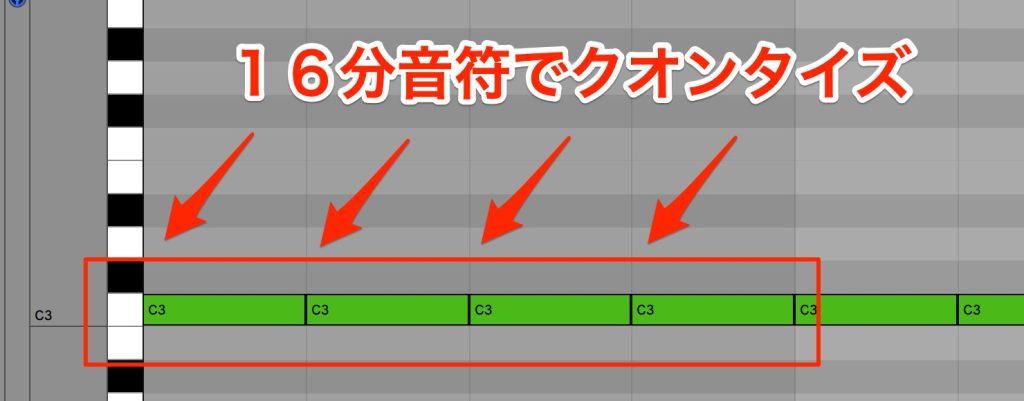
So, for the hi-hat only, which plays at regular intervals, we change it to a bouncy triplet rhythm to add movement.
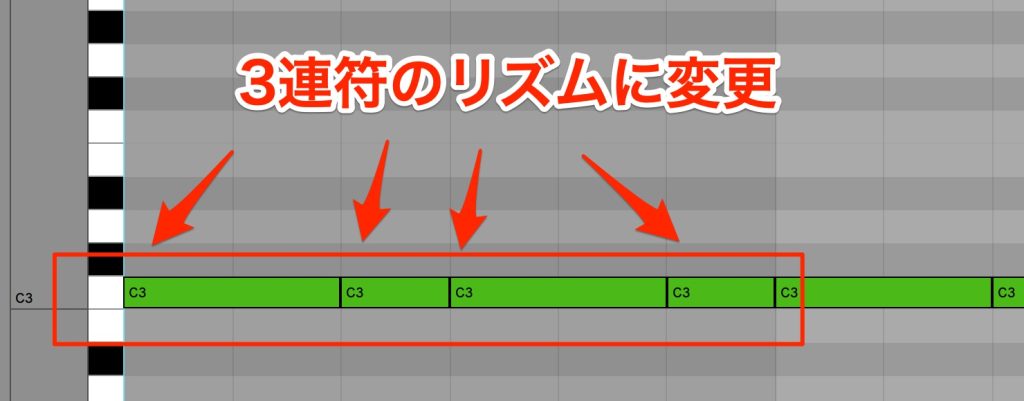
At this point, some of you may wonder, "Is it okay to play a rhythm that is out of step with the other tracks?"
For parts that decorate the beat, like the hi-hat, rather than tracks that form the backbone of the beat, like the kick and snare, even if the timing is off from other parts, it is felt as groove.
Here is a comparison of the sound with an even hi-hat rhythm and with triplets.
We only shifted the timing of one track, but you can hear that the impression has changed greatly.
This technique is used in a great many four-on-the-floor songs, so please make use of it.
Add Dynamics to the Rhythm
The second technique is a way of editing velocity to add groove.
Not only the timing we adjusted earlier but also the expression of dynamics is a very important point in creating groove.
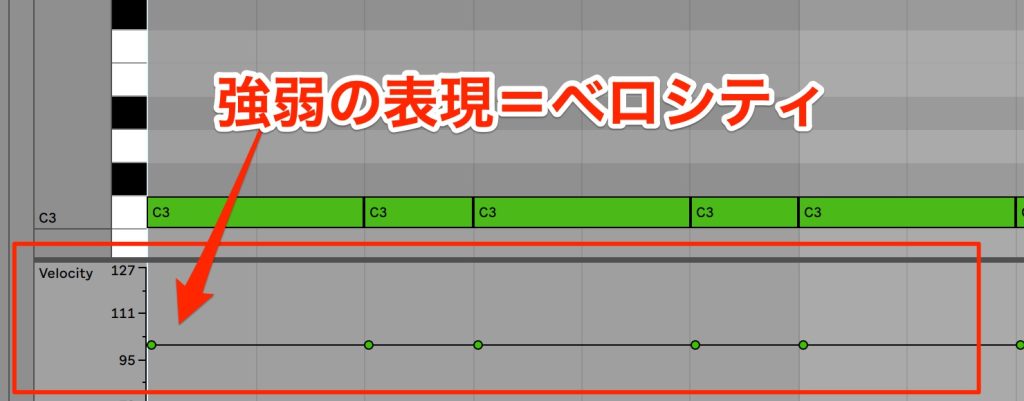
Expressing dynamics on tracks that play the main beat, such as the kick and clap, would undermine the stability of the rhythm, so here too we change only the hi-hat.
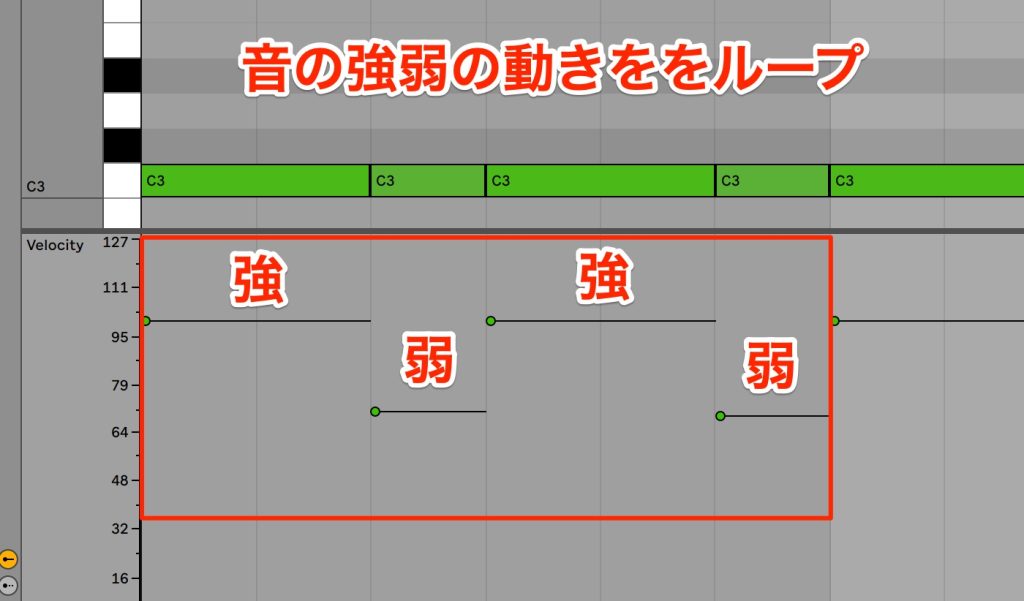
There is no rule for adding dynamics, but dance music drums, starting with four-on-the-floor, are basically looped, so looping the dynamic movement in units of one or two beats lets you create a stable pattern.
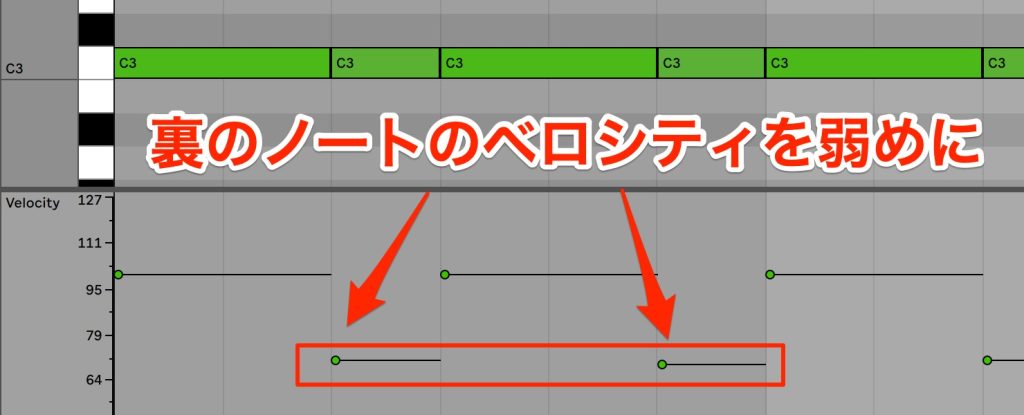
This time, the notes on the 8th-note downbeats are played with stronger velocity, and the 16th-note offbeat notes (shifted with triplets) are played softer.
The mechanical feel has changed to a human feel close to live drums, and it now grooves.
In this way, by shifting the rhythm of notes and adjusting the volume of each note, you can create groove for the whole drum part.
Use Live's Groove Feature
So far we have changed two things, rhythm and dynamics, but Ableton Live has a feature called [Groove] that lets you change both more quickly and easily.
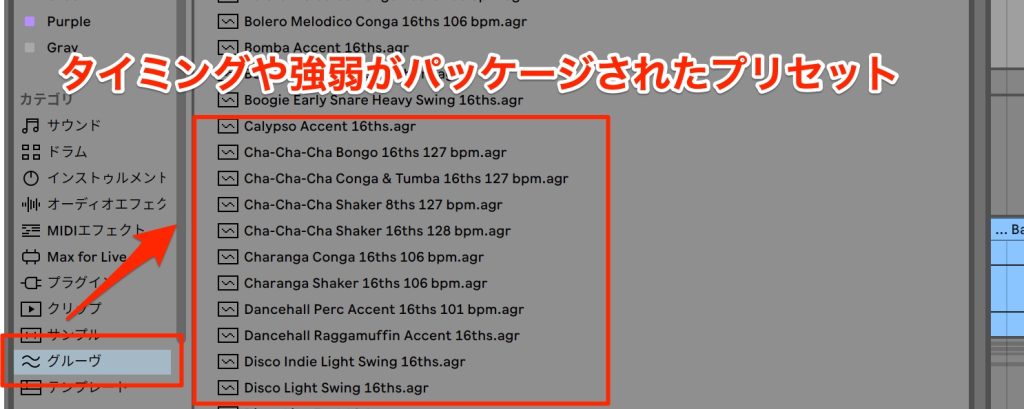
[Grooves], shown in Live's browser, contains presets that package timing and dynamics suited to various music genres and styles.
Selecting a preset lets you preview its rhythmic feel, so you can look for one you like while listening.
Once you have found one you like, let's apply it to the hi-hat as before.
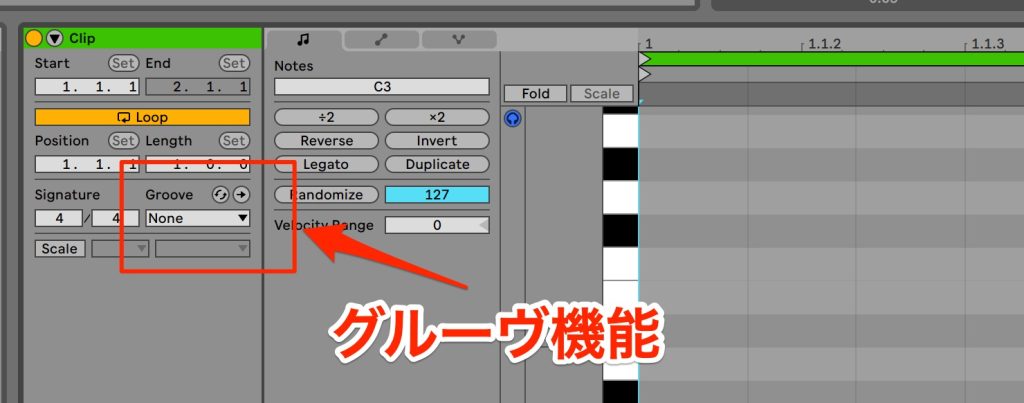
Select the MIDI clip to show the editing view.
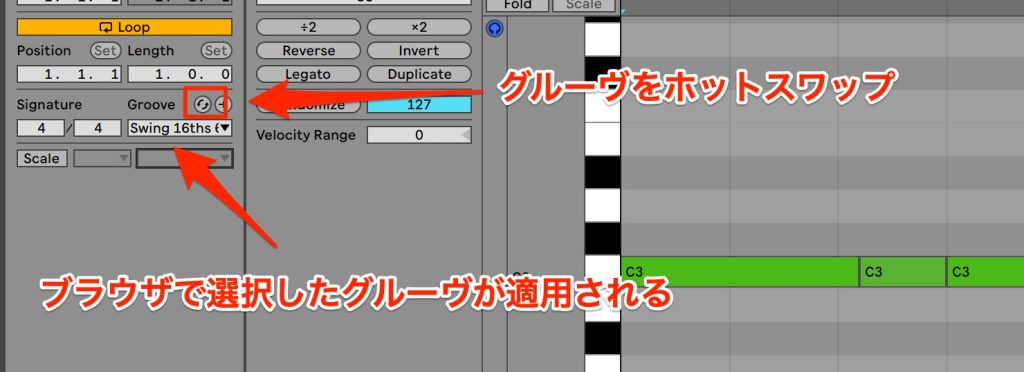
Next, press the [Hot-Swap Groove] button and double-click any groove preset, and the groove is applied to the hi-hat.
With the groove applied, the programmed notes do not change; you check the changes in timing and dynamics by listening.
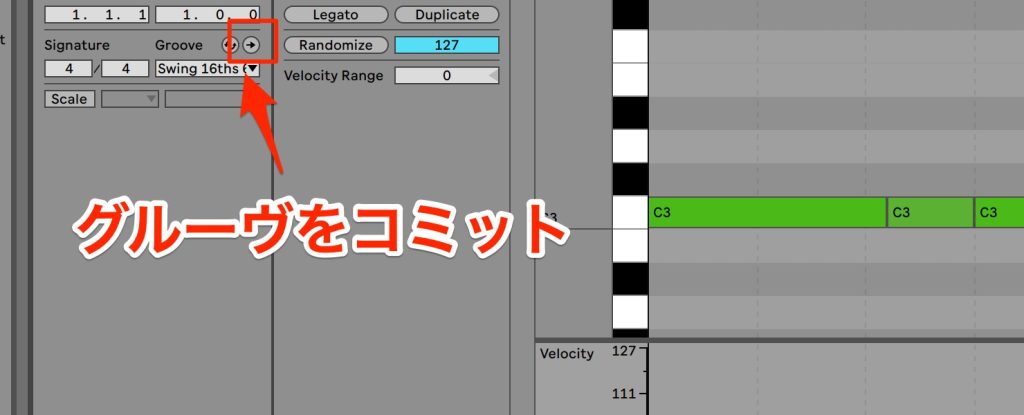
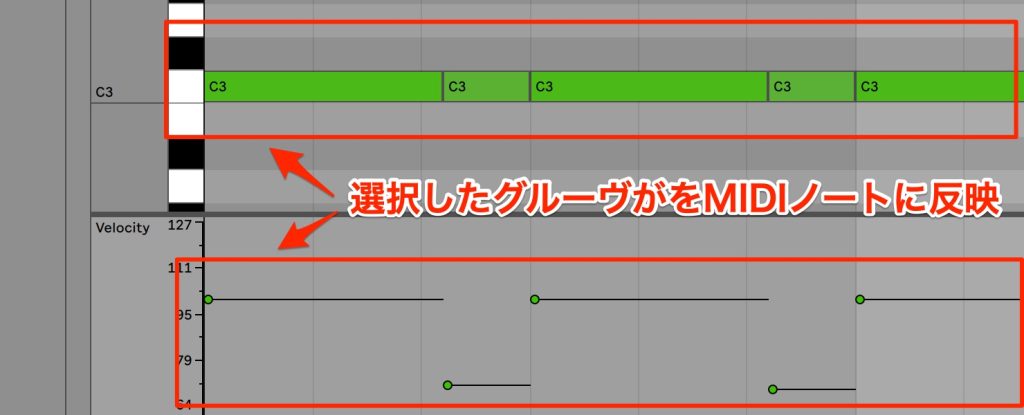
To reflect the applied groove in the programmed MIDI notes, press the [Commit Groove] button.
After committing the groove, you can make further detailed edits note by note.
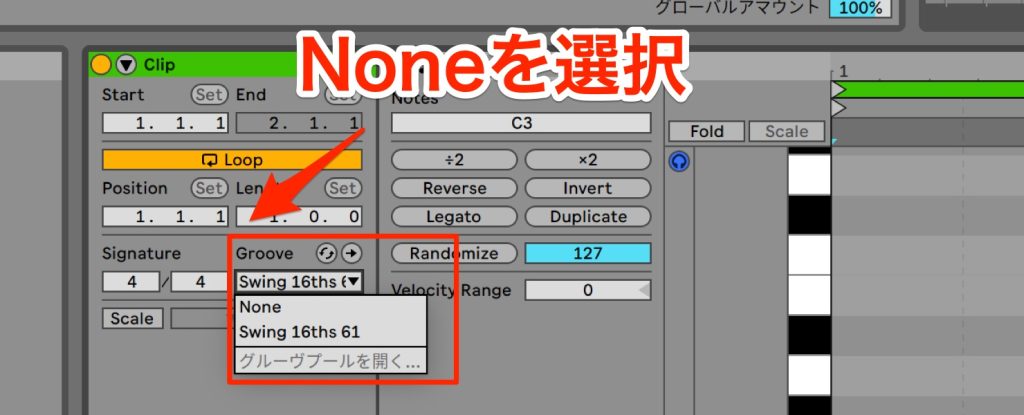
If you want to undo the applied groove, select [None] from this selection pool, and the groove is disabled.
Layer Sounds to Add Depth
The fourth technique we introduce is "layering sounds."
So far we have dealt with the performance, but changing the sound itself is also an important element in raising the quality of rhythm tracks.
Please listen to the current track once, paying attention to the clap.
The clap sound feels slightly buried among the other parts.
In this case, you could simply raise the volume of the buried track to solve the problem, but in many cases it does not blend with the other parts and just sounds loud.
In such cases, layering sounds to add thickness and stereo width to raise the presence of the buried track is more effective.
The reasons the clap sound is buried in the song this time are that
"the tone is dark and does not cut through,"
"the position is centered and overlaps with other parts,"
so we layer a sound that can make up for these two points.
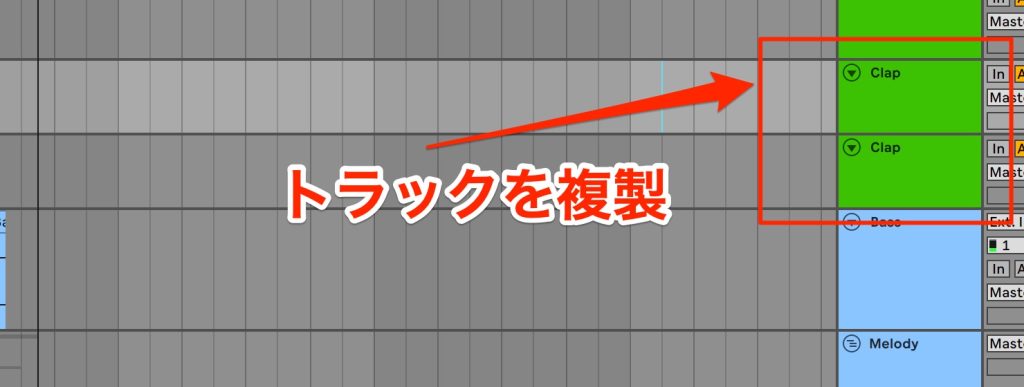
Duplicate the track and load a new clap sound.
Adjust the volume and check the sound once.
Layering a bright sample that cuts through has made the whole clap sound thicker.
However, the position has not changed, so next let's add stereo width to this clap sound to make it more striking.
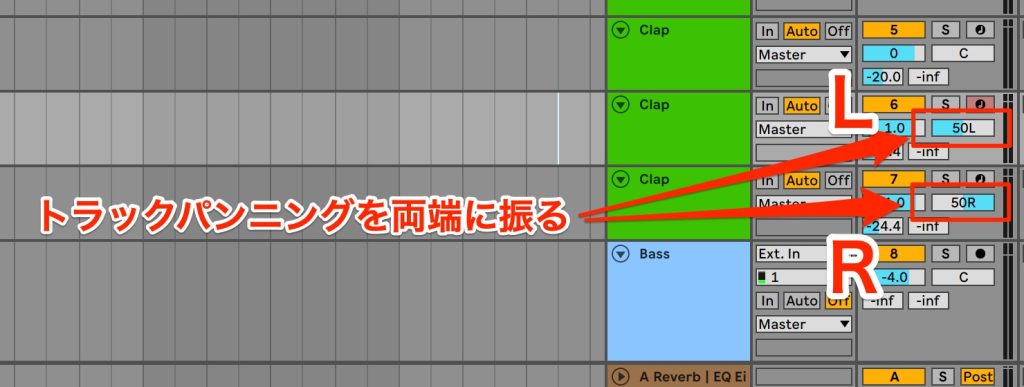
Duplicate the clap track you just added, and pan the two tracks hard to L and R respectively.
You might think this would feel stereo, but simply panning the same sound left and right does not change the position, which stays in the center by the principles of stereo.
Stereo width cannot be created unless there is some difference between the tracks panned left and right, so here we use a feature called track delay to shift the timing.
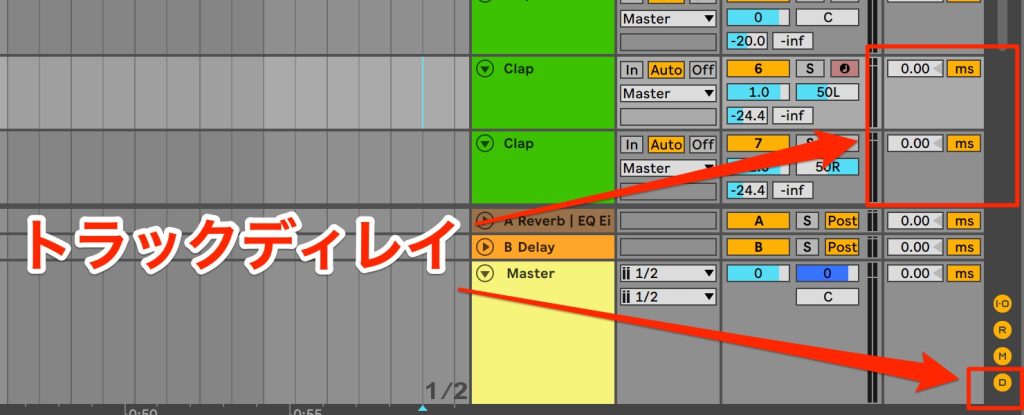
In Ableton Live, pressing the [D] button shows the track delay.
Then set how much to shift it numerically.
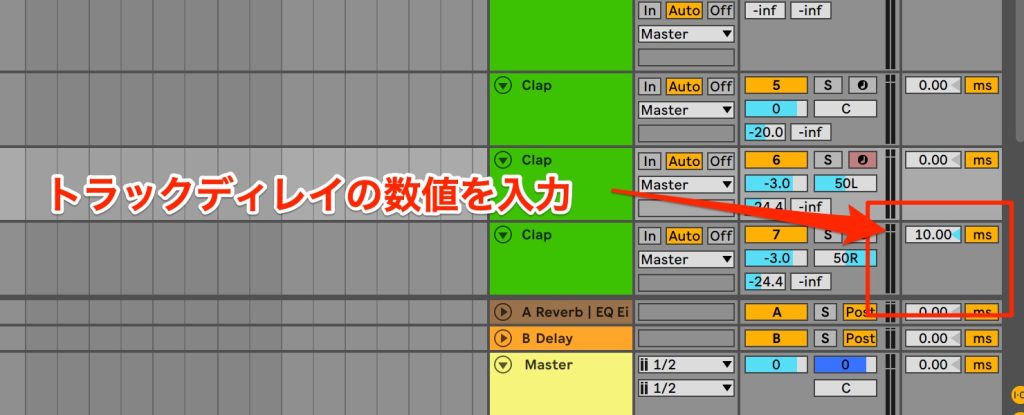
If the value is too large, it simply sounds like the timing is off, so we entered a value that delays the track's playback by 10 milliseconds.
Adjust the volume and compare the sound before and after adding stereo width.
Compared with the original, it has more presence and the whole song sounds more brilliant.
These techniques can be used on various tracks, such as other drum parts like the snare and hi-hat, synths and vocals.
Please try them on all kinds of tracks.
Frequently Asked Questions
Q1. What is the difference between triplets and an even rhythm?
An even rhythm is a mechanical rhythm in which every note lines up exactly on the grid. Triplets, on the other hand, divide the same time into three equal parts, and using them on decorative parts such as the hi-hat creates groove for a more human, lively sound.
Q2. Why change only the hi-hat?
Changing the timing of tracks that form the backbone of the beat, such as the kick and clap, makes the rhythm unstable. The hi-hat is a decorative part, so even if its timing shifts, it works naturally as groove, making it effective to change.
Q3. In what situations is Ableton Live's Groove feature useful?
Just selecting a groove preset applies changes in timing and dynamics at once. It saves the time of detailed manual editing, and you can choose and customize templates suited to various genres, greatly improving production efficiency.
Four techniques to raise the quality of your rhythm parts
This time, from techniques you can try in any DAW to ones that use features unique to Ableton Live, we introduce "drum programming techniques you can try right away."
Video: https://t.co/hON0P7RGr7Article: https://t.co/ytsFr5DYew#DTM pic.twitter.com/40QIBtDiuU
— SLEEP FREAKS (@SLEEPFREAKS_DTM) December 5, 2022
NEW ARTICLES
Latest English Articles











