トラック調整とミキサーウィンドウ Logic Pro の使い方
※最新のLogic Pro 11 解説はコチラから
各トラックのバランスを調整して聴きやすく
ここでは楽曲を仕上げる上でとても重要となる、
ボリューム、パンニング、エフェクトなどのトラックコントロールを解説していきます。
ミキサーウィンドウを使用することで、各トラックを一望し調整も可能です。
- Logic X
- Logic 8/9
Logic内で各トラックを調整し楽曲を整える
各トラックの「ボリューム」や「パン」を調整することで、
互いのバランスや楽曲クオリティを向上させることができます。
チャンネルストリップの解説


ミキシングに使用される「チャンネルストリップ」という用語解説です。
頻繁に出てくる言葉ですので、ここでしっかりと確認してください。

まずは「インスペクタ」をクリックし、トラック情報を表示します。
現在選択しているトラックの情報が表示されます。
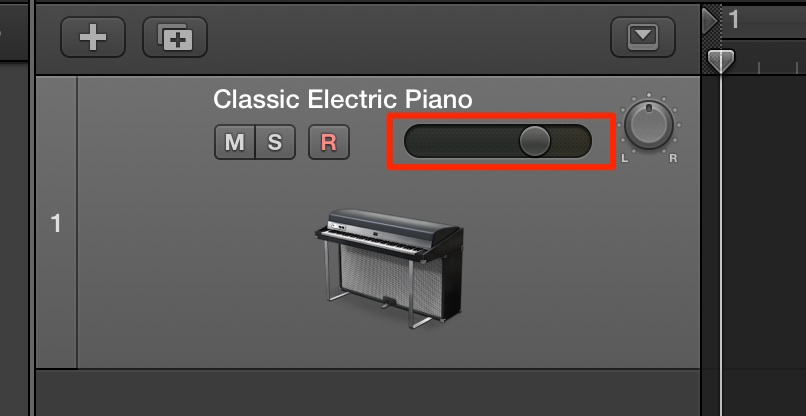
ボリューム
ドラムが大きすぎてベースが聞こえないなどの問題を解消します。
これを行うだけでも、楽曲が一気に整うことが確認できるはずです。

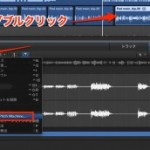
トラックの赤囲み部分スライダーを上下にドラッグすることで
ボリュームを調整することができます。
この部分からも同じ調整を行えます。
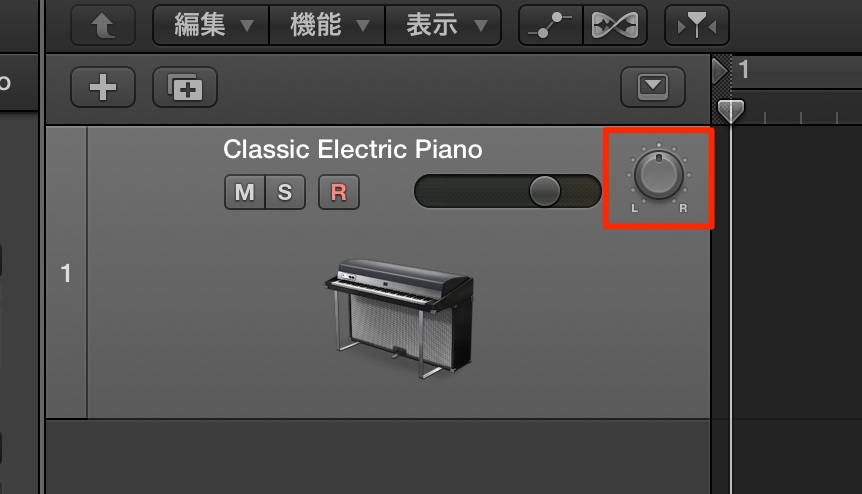
パン
音が出る場所を「左〜右」の間で調整することができます。
これにより楽器の被りを防ぎスッキリとした作品に仕上げることができます。

赤囲み部分を上下ドラッグし調整します。
「L : −の値は左 R : +の値は右」を表します。
この部分からも同じ調整を行えます。
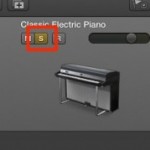
ミュート/ソロ

トラックの再生を決定します。
例えば「ドラムのみのサウンドを確認したい」「ギターを抜いたサウンドを聴きたい」などに役立ちます。
ミュート
特定トラックを一時的に鳴らないようにします。

赤囲み部分「ミュートボタン」を点灯させます。
これにより楽曲再生からミュートされたトラックが除外されます
ソロ
ソロにされたトラックのみを再生します。
他のトラックはミュート扱いとなるため、再生されません。
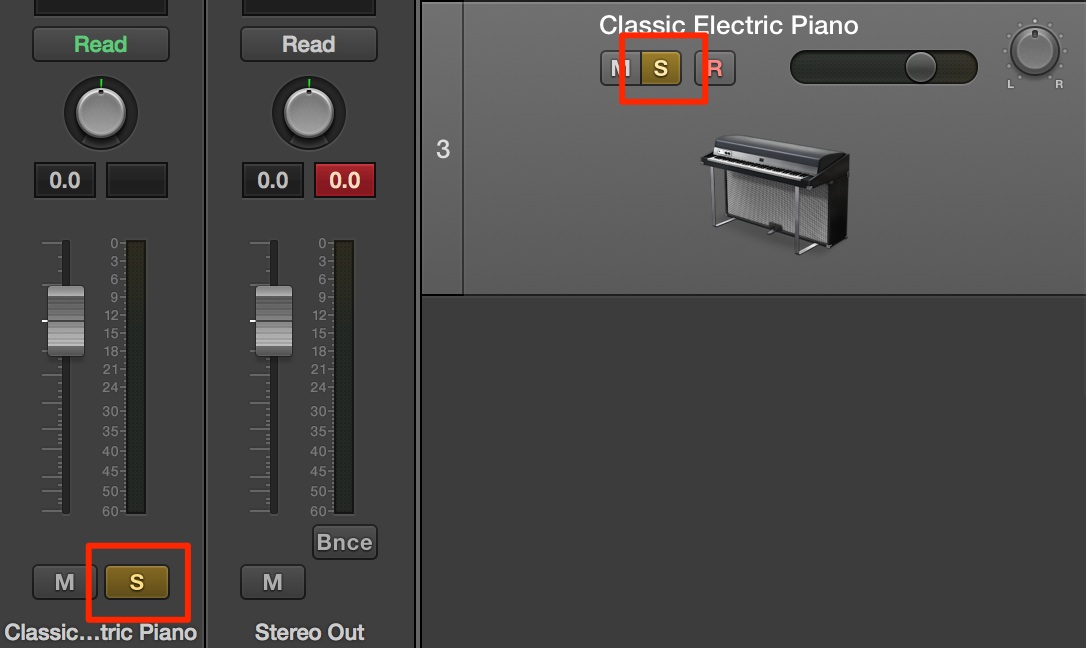
赤囲み部分「ソロボタン」を点灯させます。
これによりそのトラックのみが単独で再生されます
※「ミュート/ソロ」ともに再度ボタンを押すことで、解除を行なうことができます
各トラックを調整し楽曲を完成へ
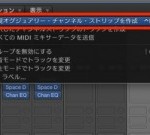
ミキサーウィンドウを使用師、各トラックの音量調整、PANなどを行い、楽曲を完成させます。
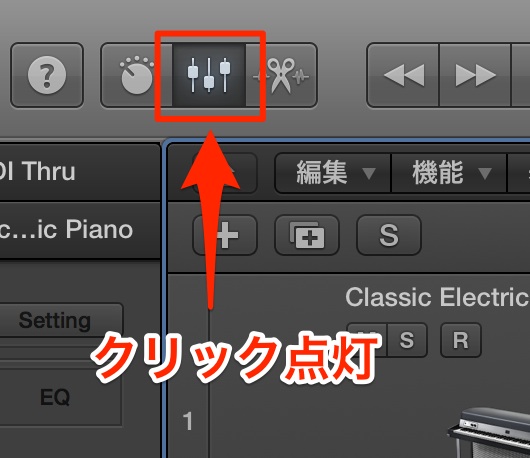
赤囲み部分の「ミキサーウィンドウ」アイコンをクリックし点灯させ、
ミキサーウィンドウを表示します。
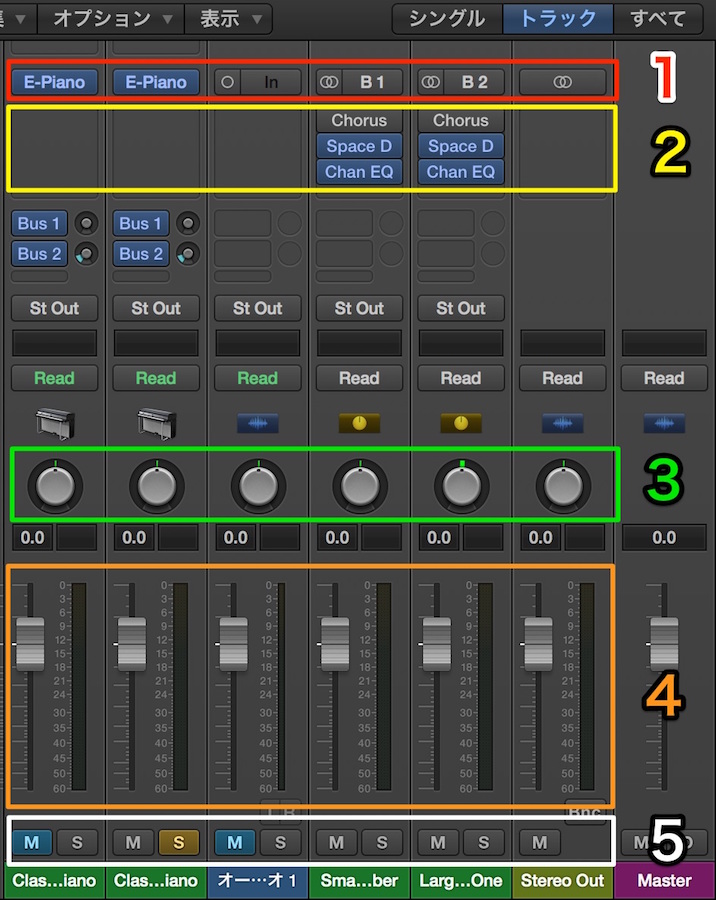
1_「入力チャンネル」
マイクの入力チャンネル/使用インストゥルメント音源を確認、変更することができます。
2_「インサート」
ここをクリックし「EQ」「コンプレッサー」などのエフェクトを適用することができます。
3_「PAN」
PAN(音の位置)を変更することができ、初期値では全て中央に設定されています。
ツマミを右左に振ることで、実際の音もその位置にリンクします。
4_「ボリュームフェーダー」
各トラックのボリュームを調整することができます。
フェーダーが下へいくほど音が小さくなり、逆に上は音が大きくなります。
5_「ソロ、ミュートモード切り替え」
トラックをミュート、ソロモードにすることができます。
「M」ミュート 点灯している間、指定したトラック音を完全に消します。
「S」ソロ 点灯している間、指定したトラックのみの音がモニターされます。
Logic内で各トラックを調整し楽曲を整える
各トラックの「ボリューム」や「パン」を調整することで、
互いのバランスや楽曲クオリティを向上させることができます。
チャンネルストリップの解説

↑ はじめに「インスペクタ」をクリックし、トラック情報を表示します。
現在、選択しているトラックの情報が表示されます。
ボリューム
ドラムが大きすぎてベースが聞こえないなどの問題を解消します。
楽曲が一気に整います。

トラックの赤囲み部分スライダーを上下にドラッグすることで
ボリュームを調整することができます。
パン
音が出る場所を「左〜右」の間で調整することができます。
これにより楽器の被りを防ぎスッキリとした作品に仕上げることができます。

赤囲み部分を上下ドラッグし調整します。
「L : −の値は左 R : +の値は右」を表します。
ミュート/ソロ
トラックの再生を決定します。
例えば「ドラムのみのサウンドを確認したい」「ギターを抜いたサウンドを聴きたい」などに役立ちます。
ミュート
特定トラックを一時的に鳴らなくします。

赤囲み部分「ミュートボタン」を点灯させます。
これにより楽曲再生からミュートされたトラックが除外されます
また赤囲み部分のどちらからも操作を行なえます。
ソロ
ソロにされたトラックのみを再生します。
他のトラックはミュート扱いになり再生されません。

赤囲み部分「ソロボタン」を点灯させます。
これによりそのトラックのみが単独で再生されます
こちらも赤囲み部分のどちらからも操作を行なえます。
※「ミュート/ソロ」ともに再度ボタンを押すことで、解除を行なうことができます
各トラックを調整し楽曲を完成へ
ミキサーウィンドウを使用師、各トラックの音量調整、PANなどを行い、楽曲を完成させます。
上メニュー→「ウィンドウ」→「ミキサー」を選択し、ミキサーウィンドウを表示します。

1_「インサート」
ここをクリックし「EQ」「コンプレッサー」などのエフェクトを適用することができます。
2_「入力チャンネル」
マイクの入力チャンネルを確認、変更することができます。
3_「PAN」
PAN(音の位置)を変更することができ、初期値では全て中央に設定されています。
ツマミを右左に振ることで、実際の音もその位置にリンクします。
4_「ボリュームフェーダー」
各トラックのボリュームを調整することができます。
フェーダーが下へいくほど音が小さくなり、逆に上は音が大きくなります。
5_「ソロ、ミュートモード切り替え」
トラックをミュート、ソロモードにすることができます。
「M」ミュート 点灯している間、指定したトラック音を完全に消します。
「S」ソロ 点灯している間、指定したトラックのみの音がモニターされます。
- Logic X
- Logic 8/9
様々なミキシング操作/テクニック
このカテゴリーではミキシングのテクニックを詳しく解説しています。
https://sleepfreaks-dtm.com/wordpress/category/dtm-mix-technique/
このような記事も読まれています

セーフソロを機能を使用する
「セーフソロ」は他トラックに影響を与えず(ミュートせず)他トラックが「ソロ」になった時、自動的にそのトラックも「ソロ」になるという機能です。特にミキシング時に重宝します。
便利なリージョンミュート/ソロ機能
トラック単位ではなく、一部分のリージョンに対し、ミュートを適用できます。「楽器が途中で抜けた場合は?」などの構成シミュレートに役立ちます。
オーディオトラックをトランスポーズする
オーディオの音程を変化させることができる機能です。これにより、異なるキーへ演奏ピッチを最適化することが可能です。
センドリターンで「リバーブ」を共有
リバーブはプラグインの中でもCPUの負担が高いものです。そこで活躍するのがこの「センドリターン」です。「1つのリバーブ」を各トラックで共有するとい概念です。