
Xfer Records SERUM - How to use 4. Easy sound design Tips
Sound design with SERUM
Up until now, we had focused on SEREM’s functions and basics, but in this article we will look more into its uses in sound design, and give some Tips for this process.
Complicated sounding patches can be made easier than you realize, using SEREM’s useful functions.
Let’s take a look at the sounds one by one.
Product site : http://sonicwire.com/product/99927
SERUM – Tutorial video

- 1SERUM How to use ① Basics and customizing presets
- 2SERUM How to use ② Oscillator controls
- 3SERUM How to use ③ Modulation controls
- 4SERUM How to use ④ Easy sound design Tips
Bouncy bass sound
We created a rather hard/bouncy bass sound for this song.
Lets start by taking a look at the waveform.
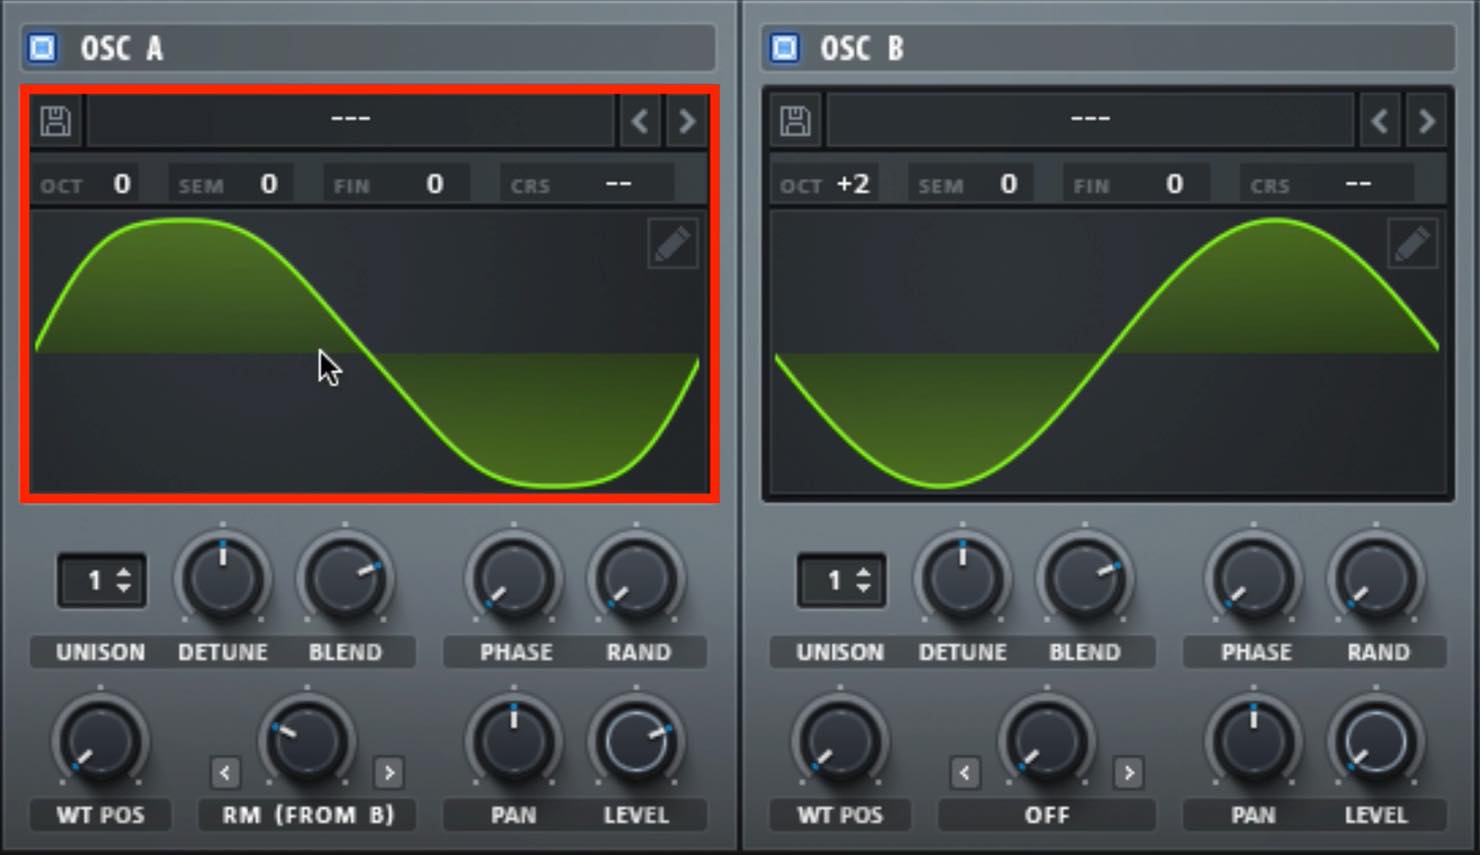
For oscillator A/B, we used sine waves, but OSC A’s shape is slightly different.
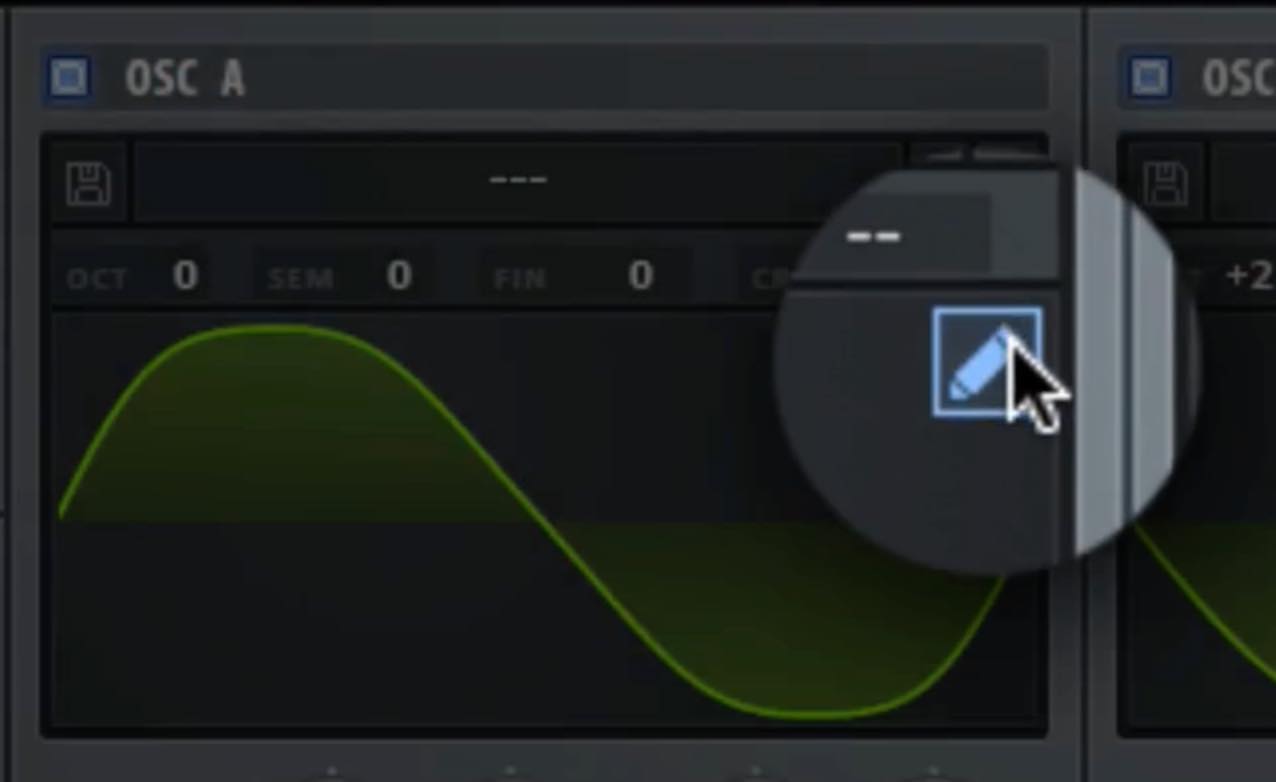
Sine waves can’t be selected from the normal waveform menu.
Click on the pencil icon on the upper right.
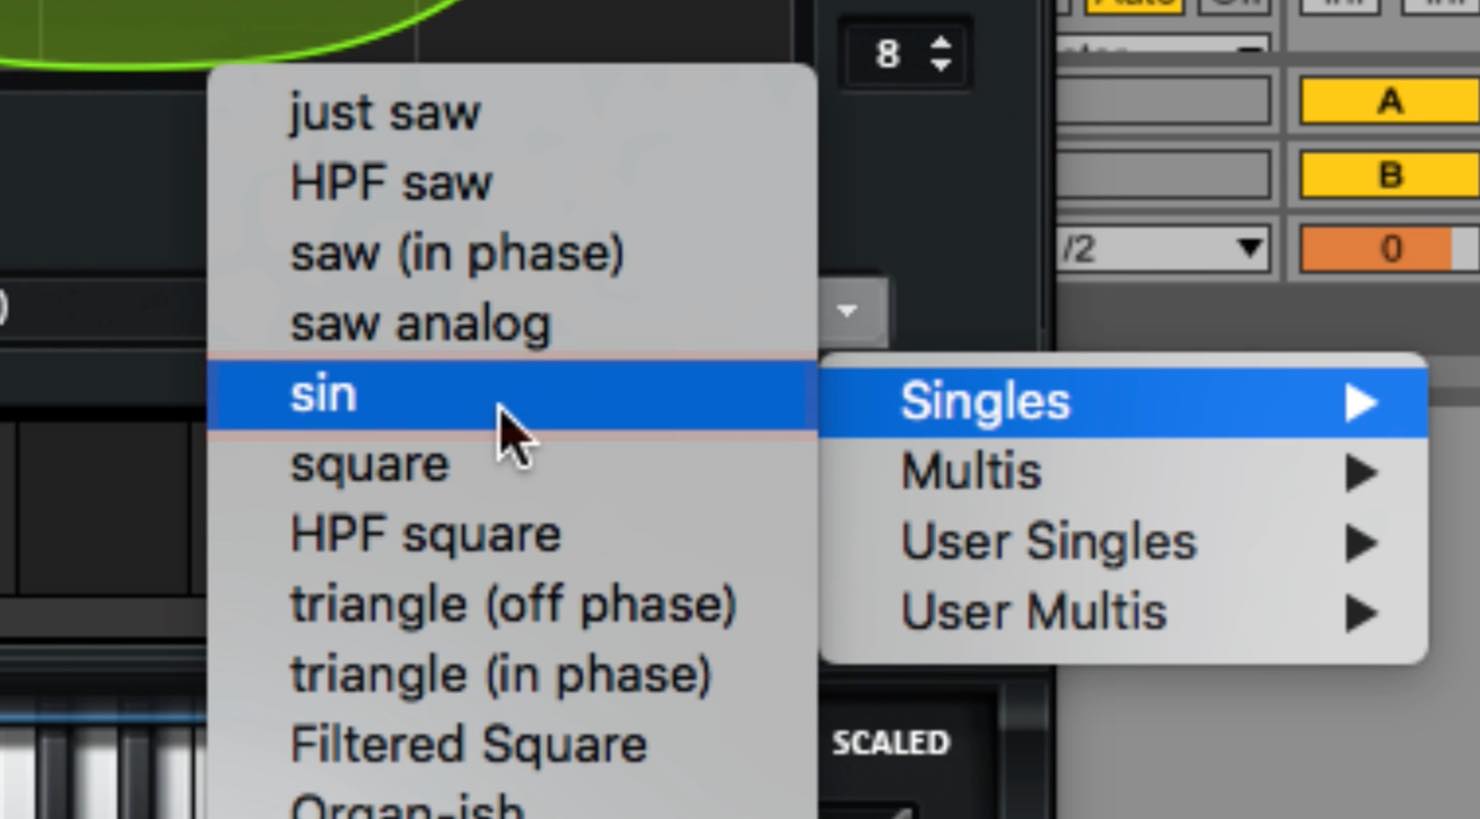
Next, by selecting “Single” from the bottom right menu, you can select Sine and other basic waveforms.
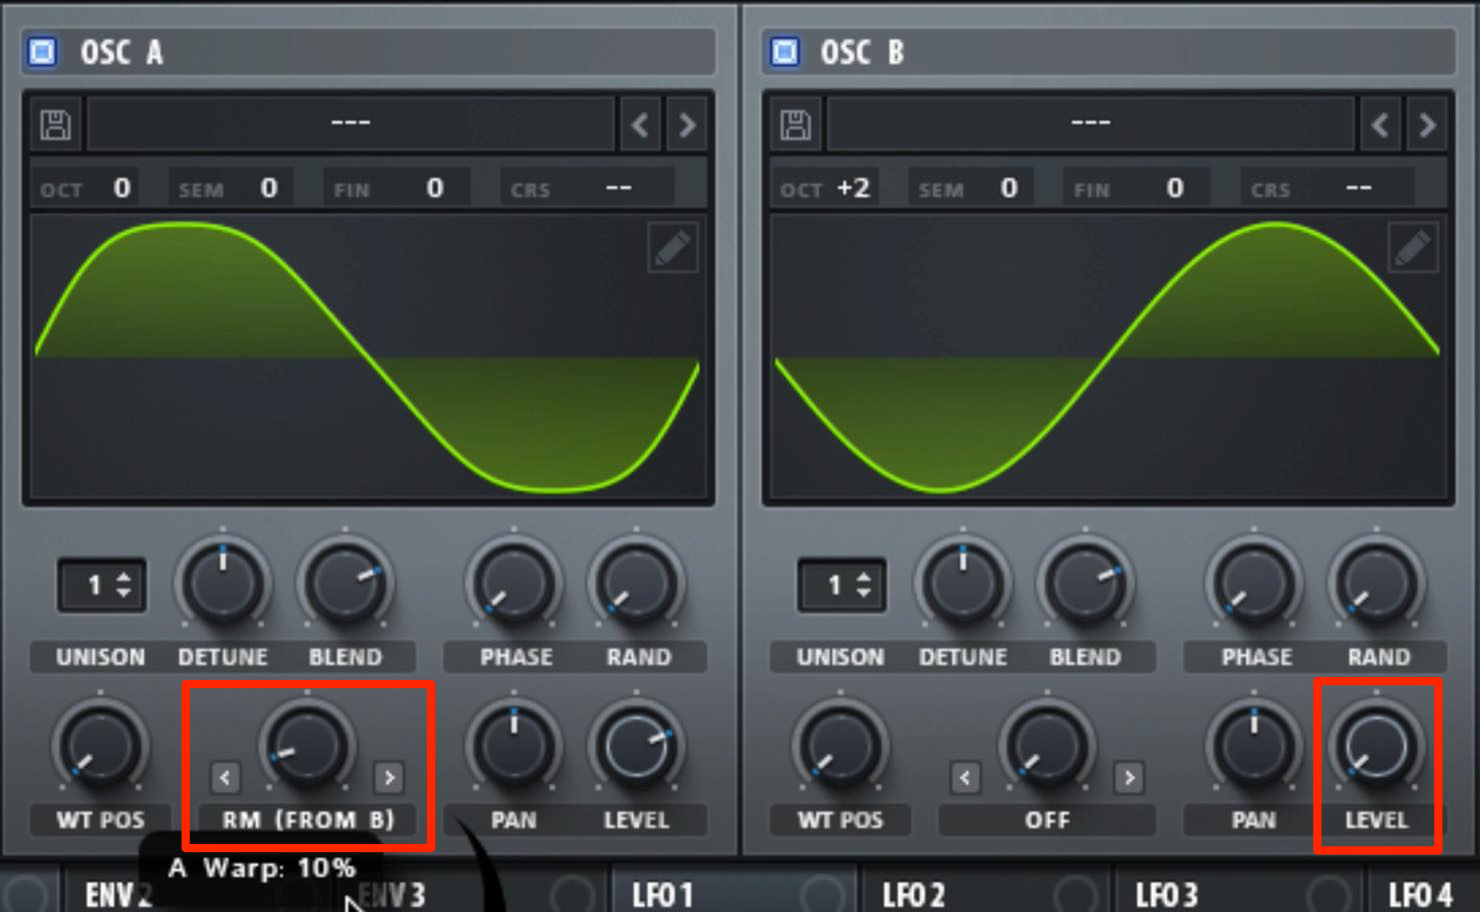
For this sound, rather than simply playing OSC A and B, we use OSC B to apply a ring modulation to OSC A.
Because of this, OSC B is set to a low volume, with OSC A’s WARP being set to “RM (FROM B).”
Last, we added a little bit of release on the master envelope, and some compression FX to complete the sound.
Sidechain style backing synth
Sidechain is generally applied from an external track’s input and uses a compressor on the sound, but this effect can be achieved within SERUM.
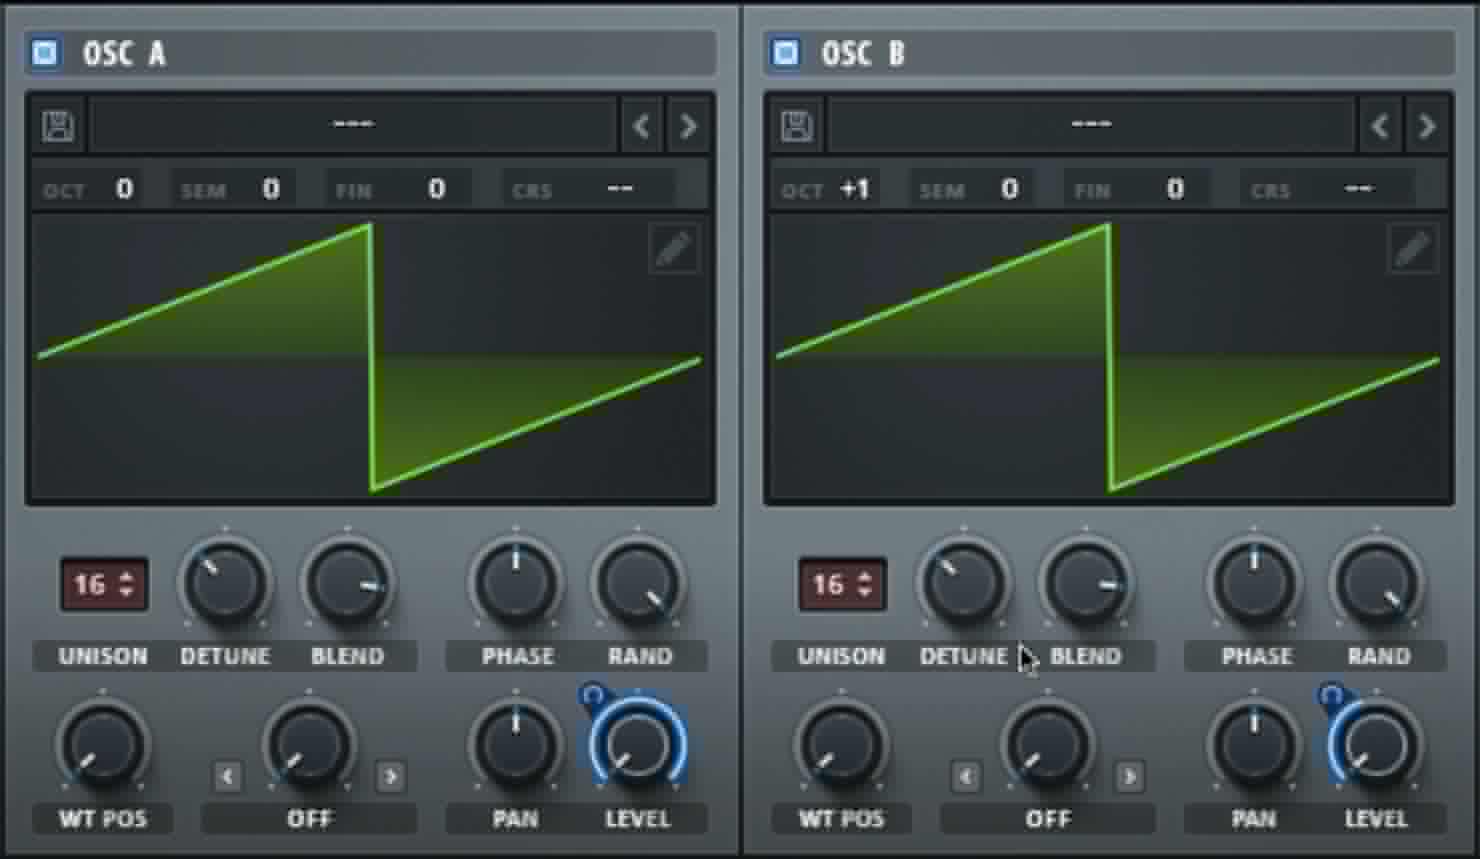
First we create a SAW wave with unison, DETUNE, BLEND, and create a SUPER SAW type sound.
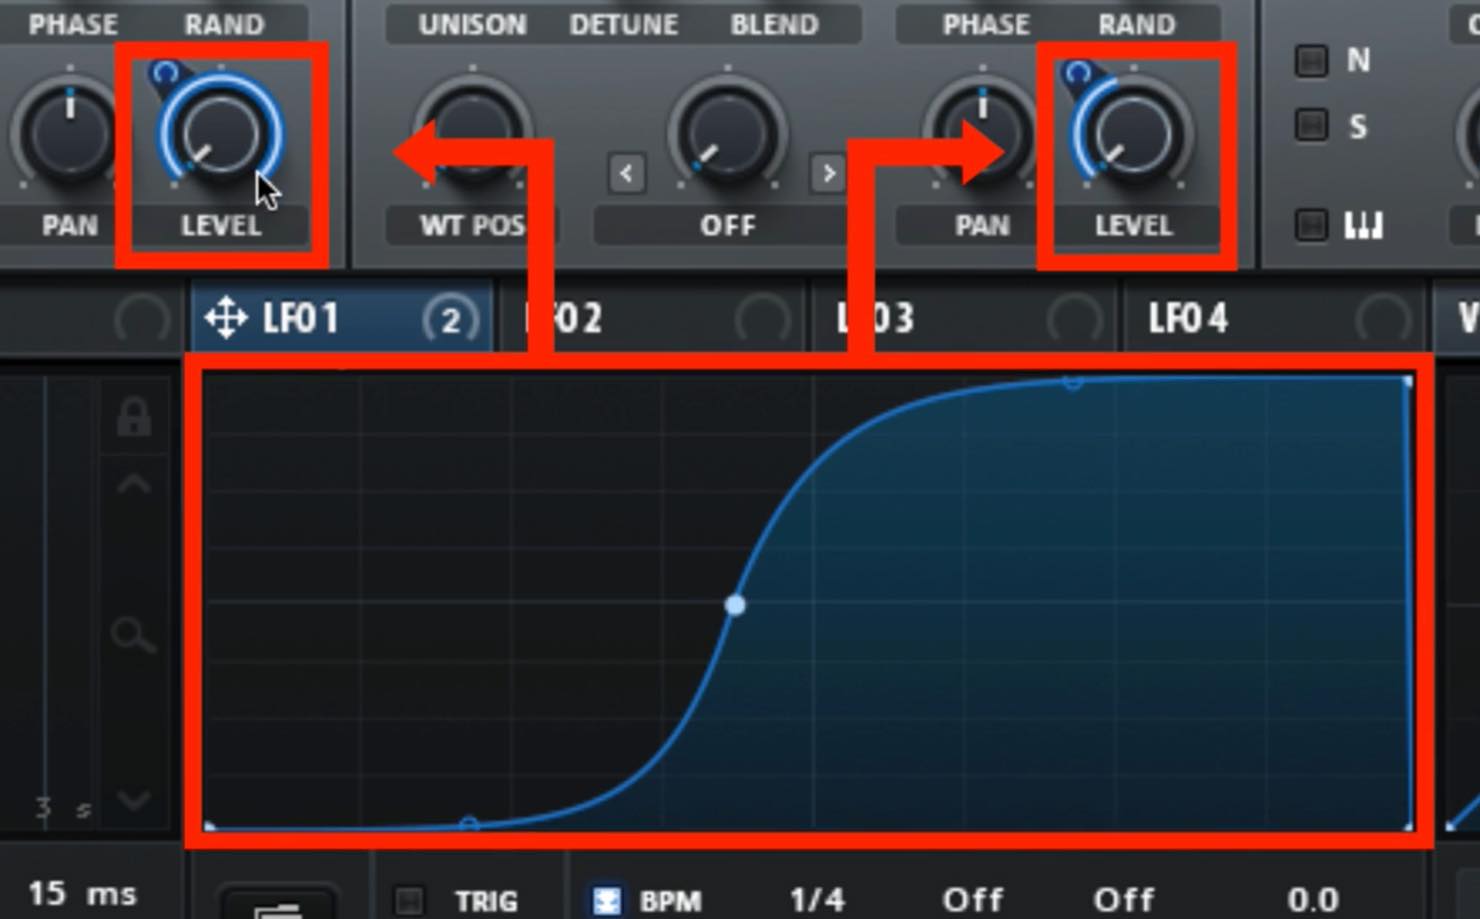
SEREM’s sidechain-like sound can be created with an LFO.
Have LFO2 applied to each OSC LEVEL, turn BPM on, and set the RATE to 1/4.
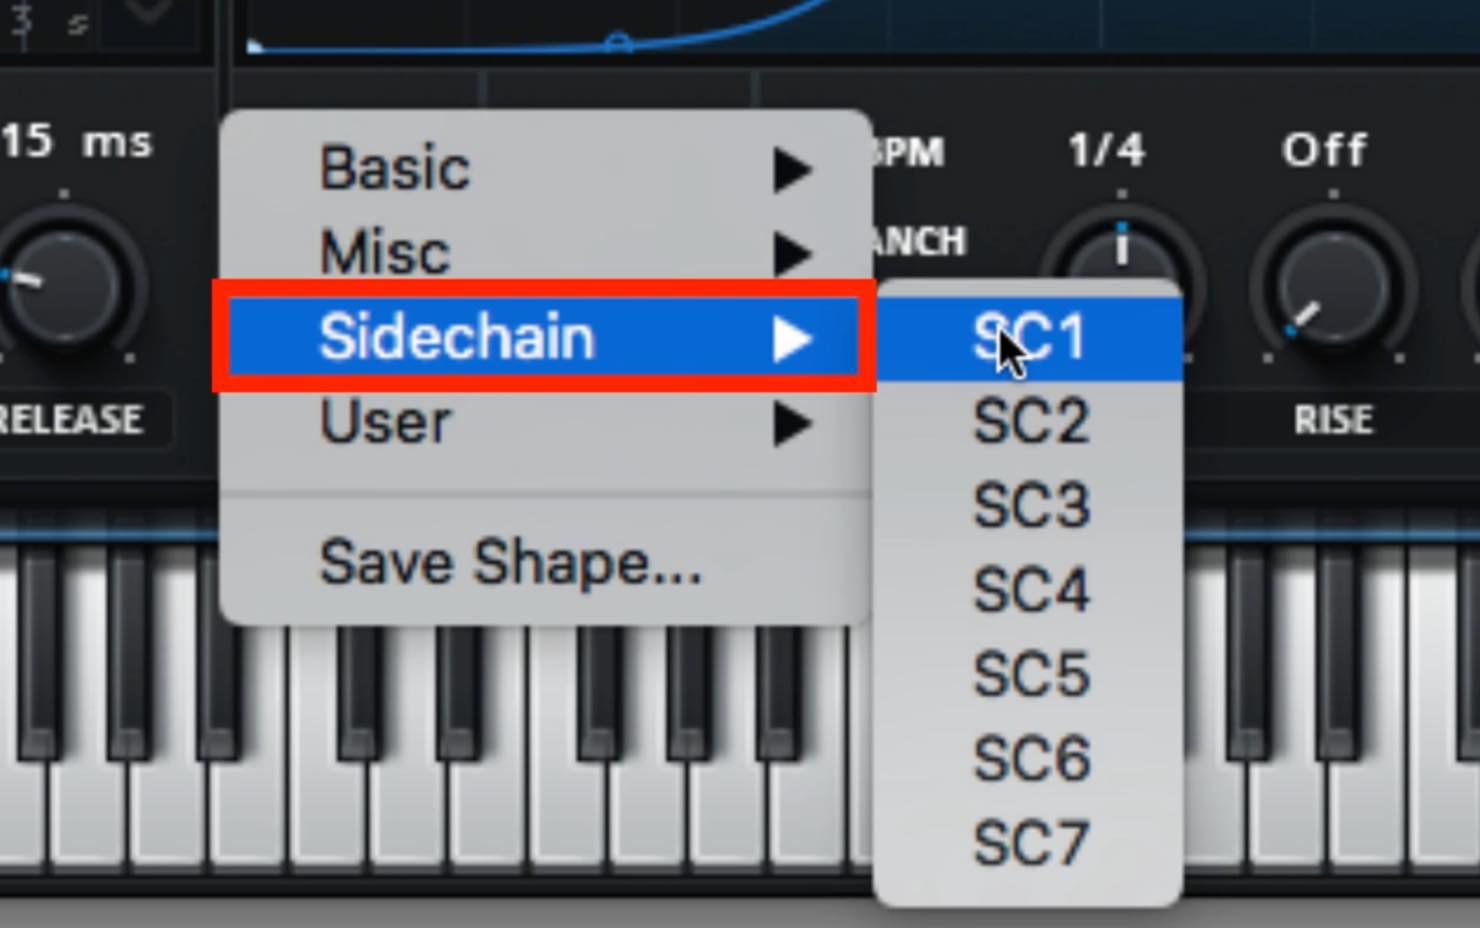
Lastly, select Sidechain from the folder, and select a curve style of your choice.
For this sound we added HYPER DIMENTION, PHASER, and REVERB to complete the sound.
Slightly wobbly pad sound
Lets create a shimmery pad sound that wobbles slightly via LFO.
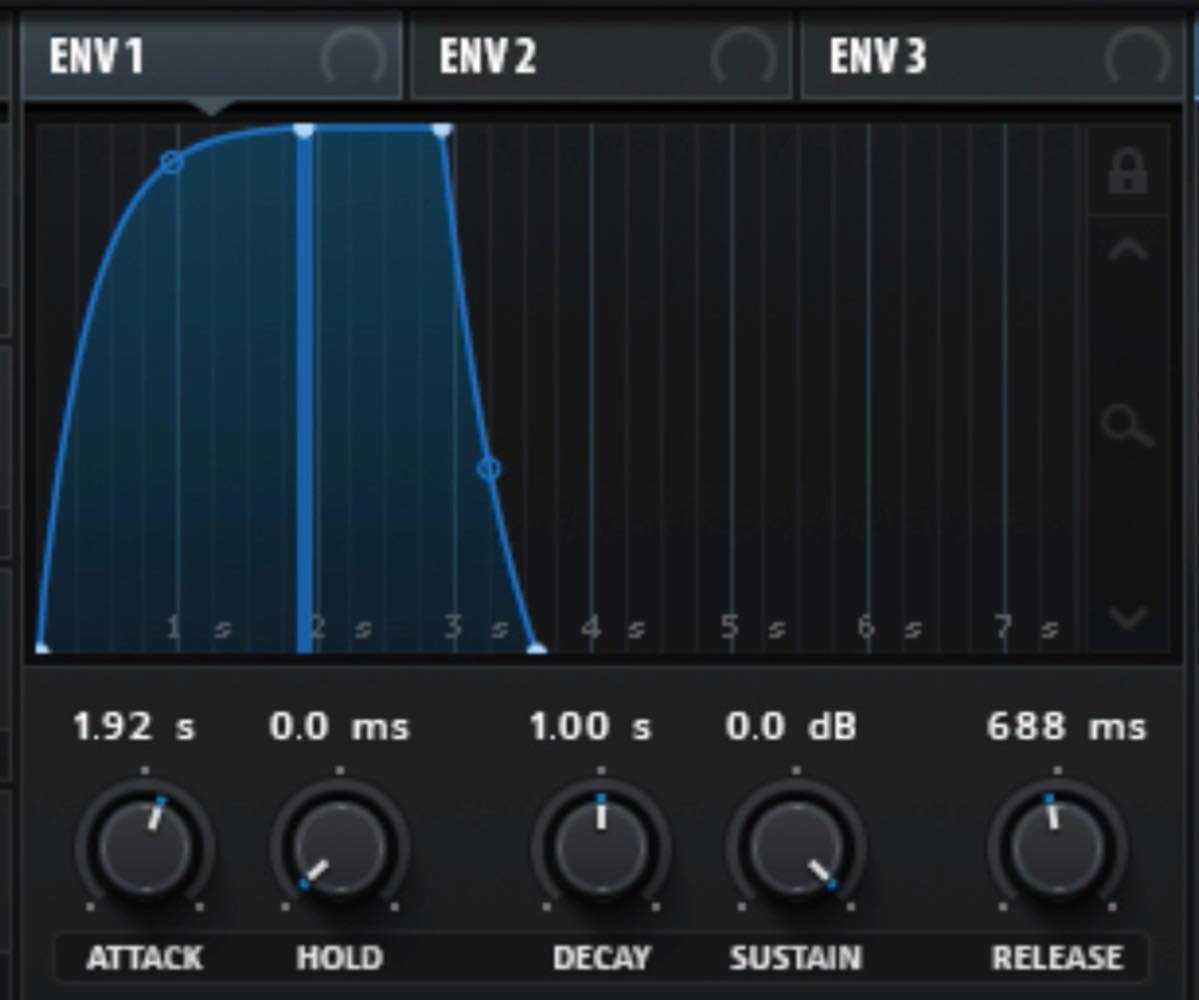
Set the attack on the master envelope to slightly slow.
Keep the release a little long as well.
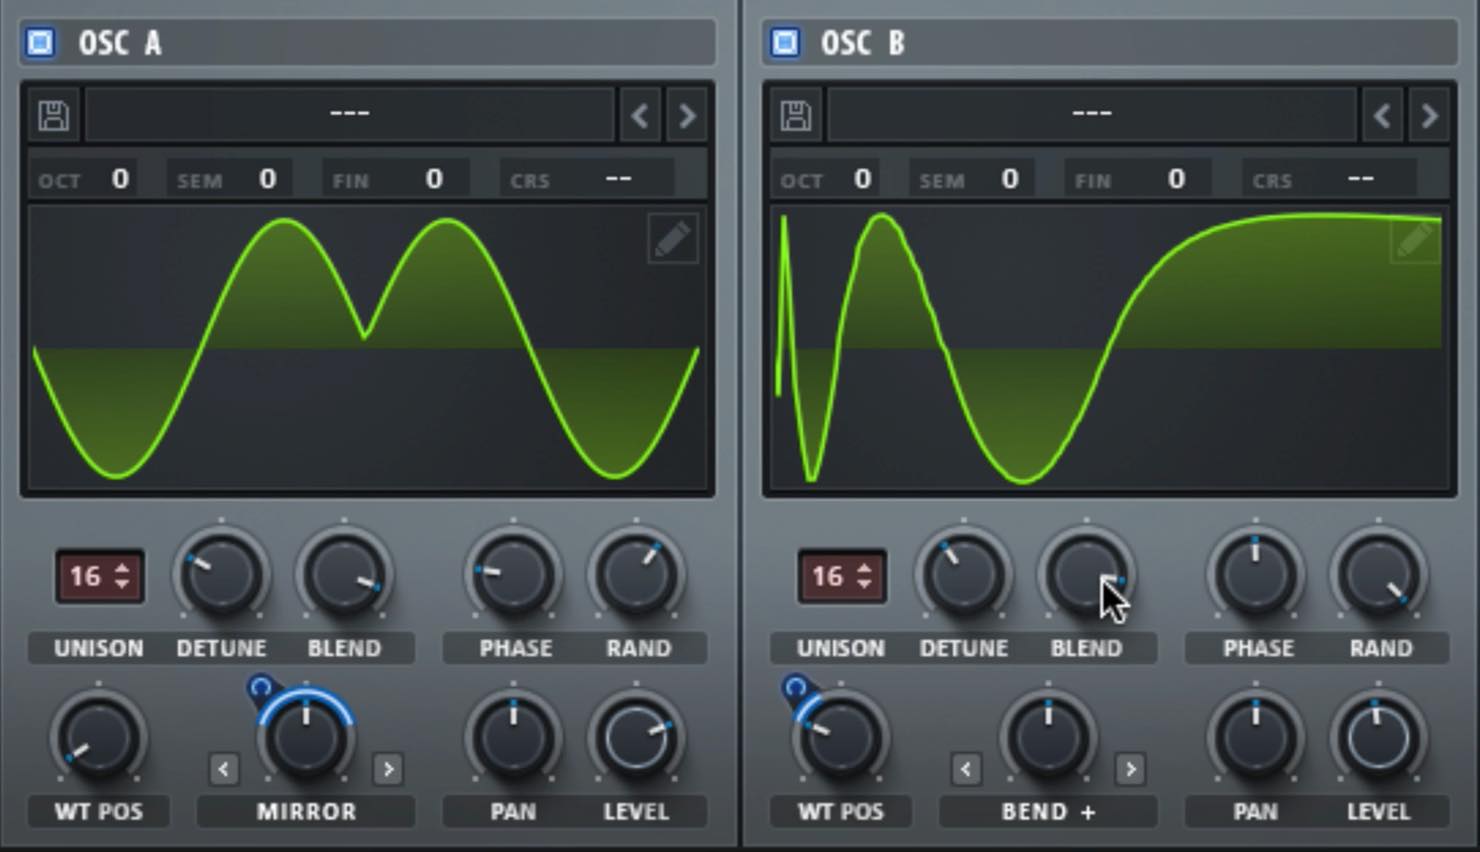
Select 「Analog」→「Basic Shapes」 for OSC A, and 「Digital」→「ICanHasKick」 for OSC B. Put unison on both, and add a little DETUNE and BLEND.
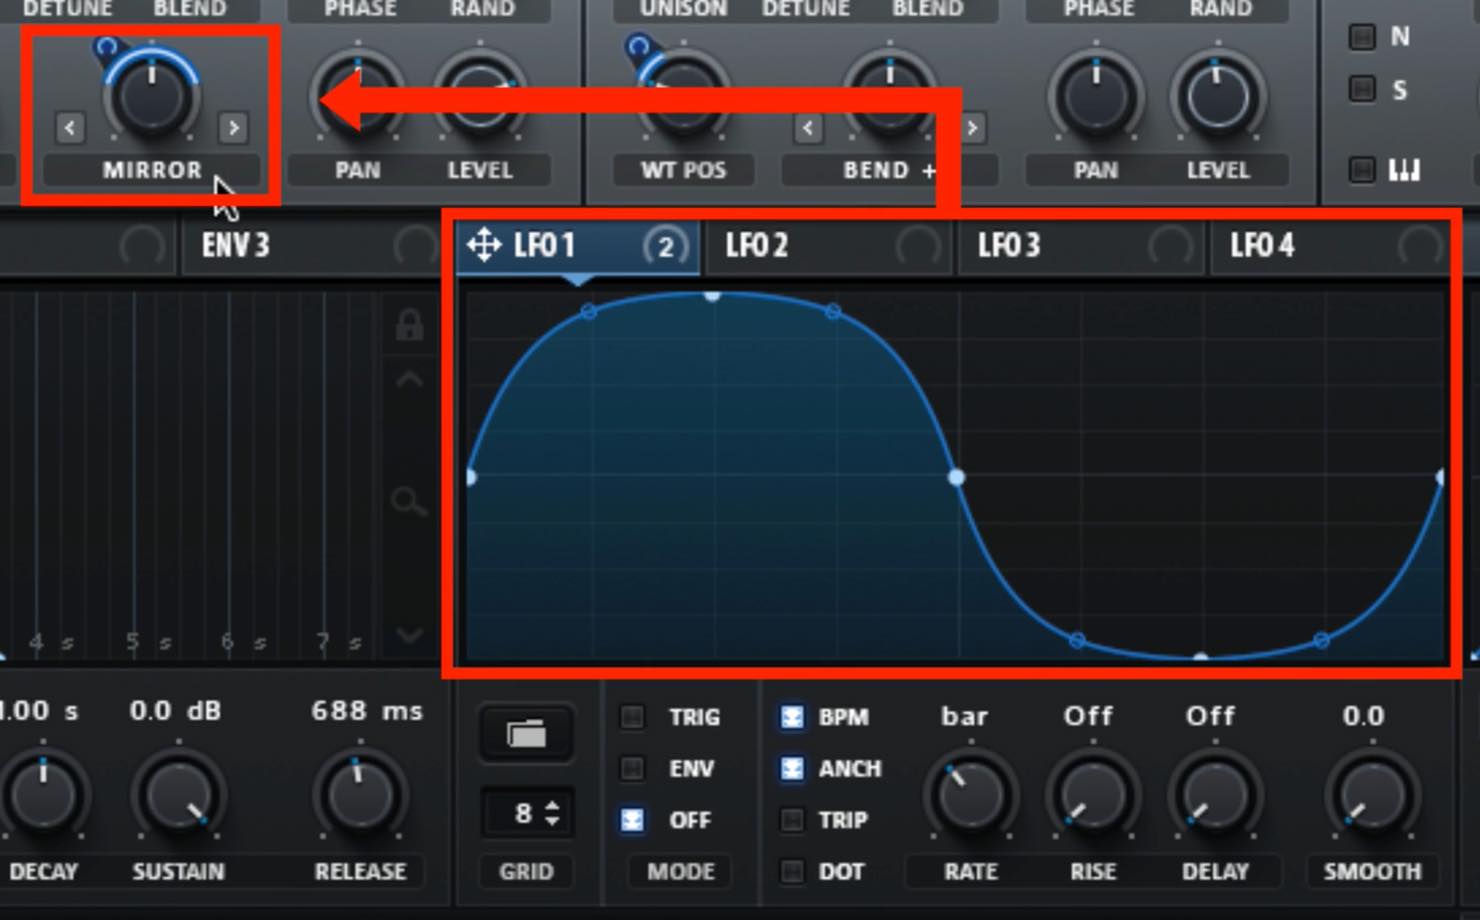
Set A’s warp to “MIRROR,” and assign LFO1.
LFO1 will be set to a Sine wave, with BPM on, RATE for BAR, and MATRIX type “↔︎.”
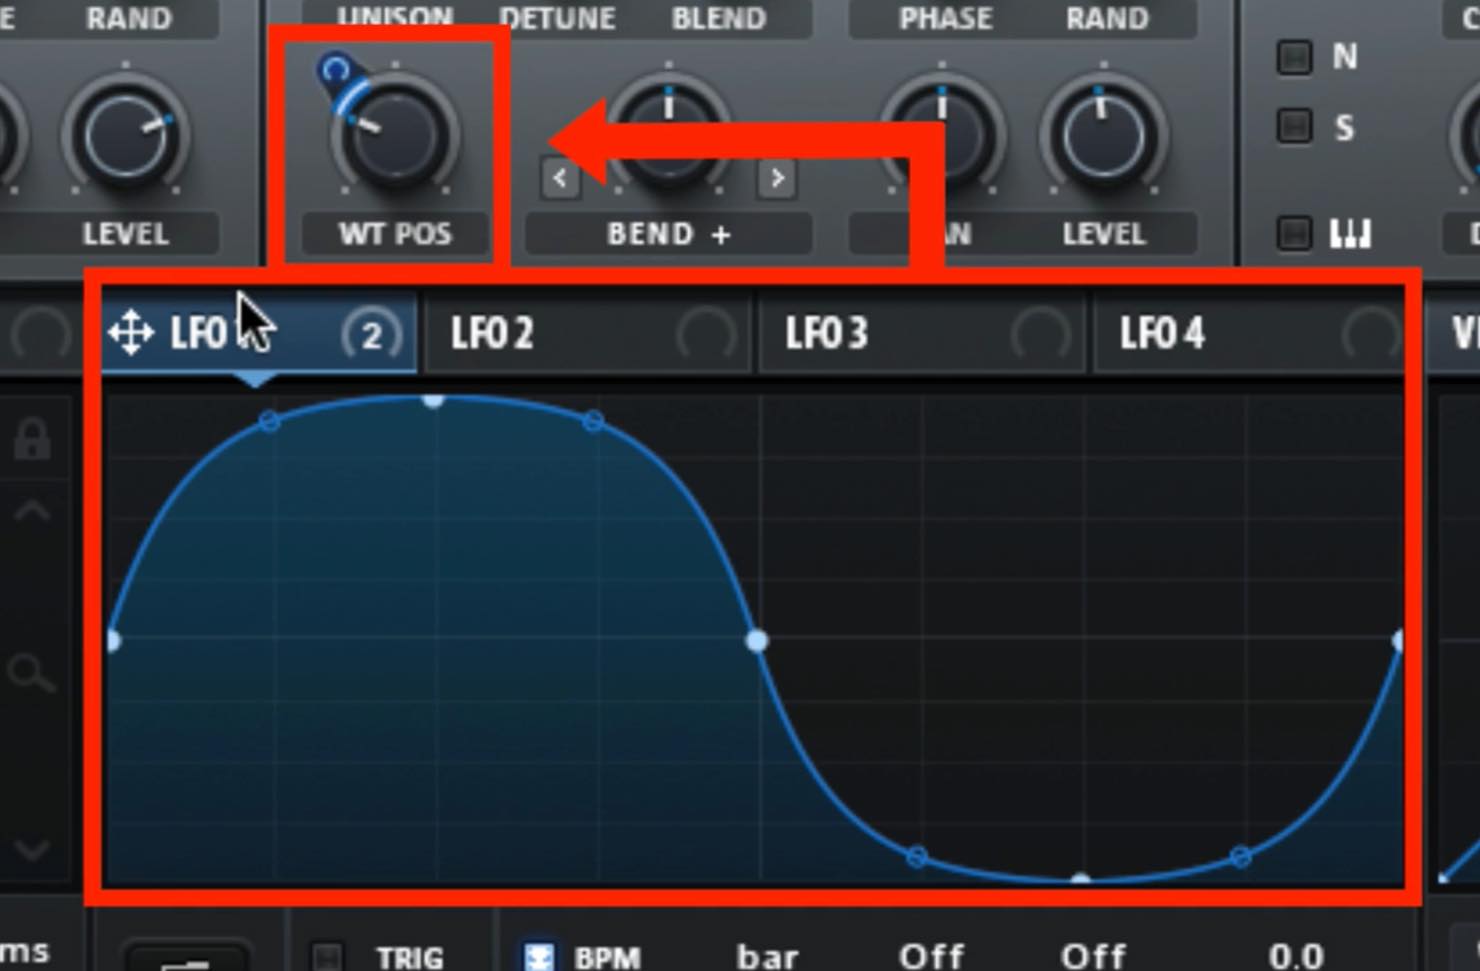
B’s WARP is set in the middle to BEND, and in return, in the WT POS assign LFO1.
MATRIX type is set to “→,” and the knob is not moved further left than set.
Last, apply a high pass filter, and add some spacial effects such as HYPER DIMENSION and DELAY to complete the sound.
Sequence that changes sound with velocity
SERUM can use velocity to manipulate various parameters.
It’s very easy to use; simply assign “VELO” from the right of the LFO to a parameter.
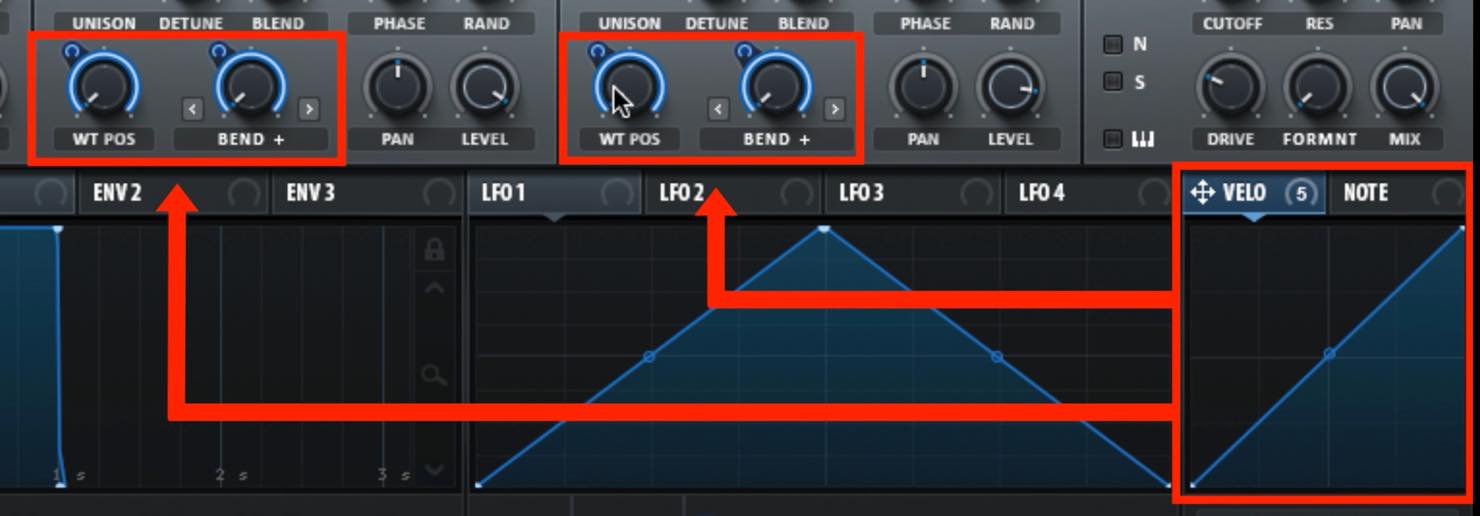
For this sound, we assigned OSC A/B’s WT POS and WARP to VELO.
The velocities min/max amounts are shown on each parameters blue indicator.
Applying a filter is effective as well, allowing the sounds to drastically change.
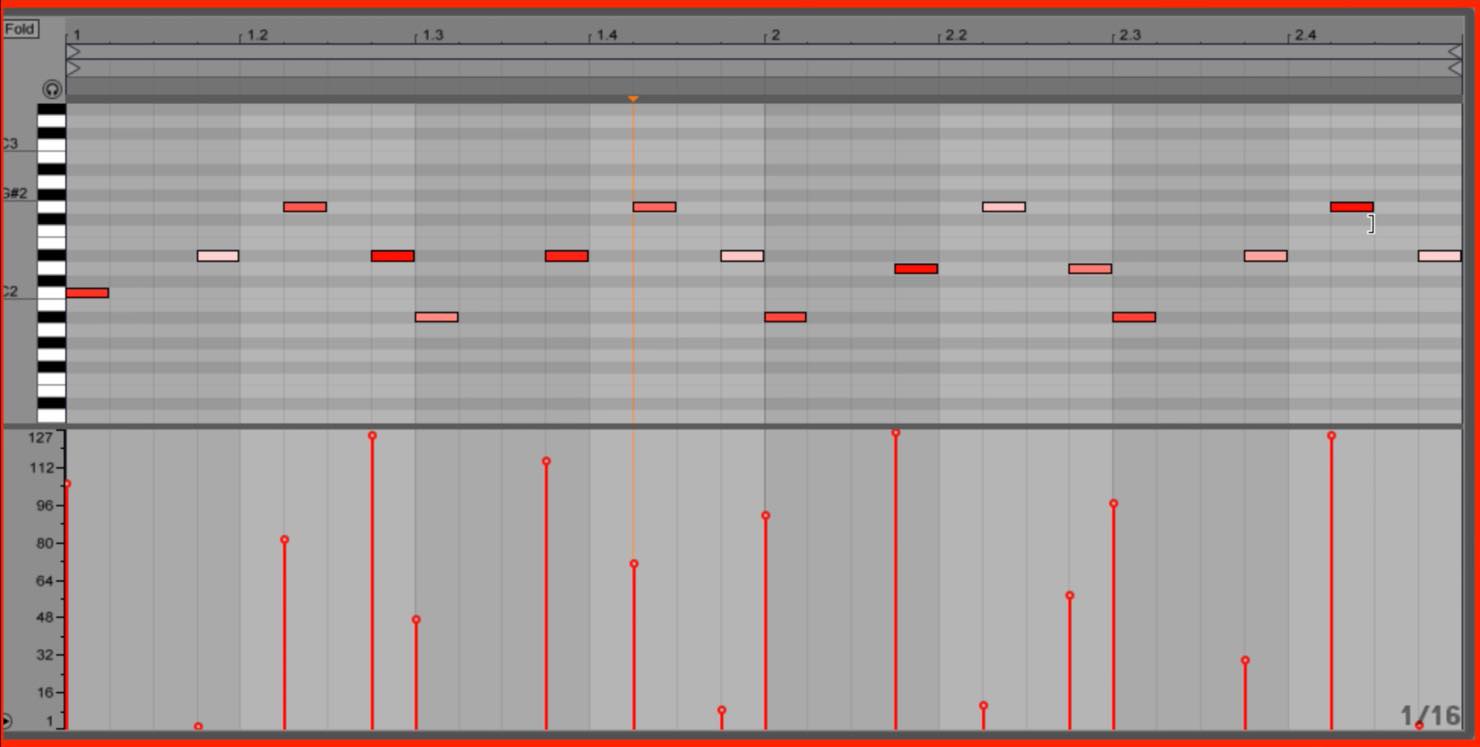
Last, sequence with some variety to the velocity to complete the sound.
Wild shaky lead
We will first set portamento to allow the lead notes to flow smoothly.
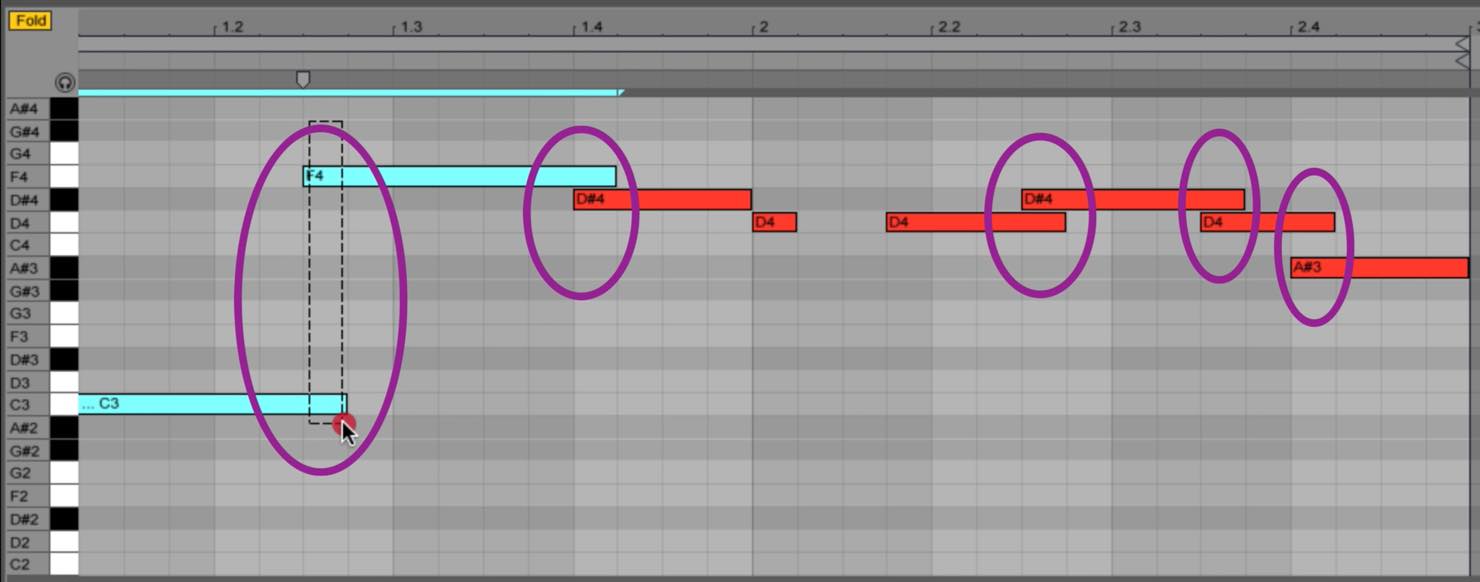
As a precursor, we will just overlap the notes on the sections that we want to flow.
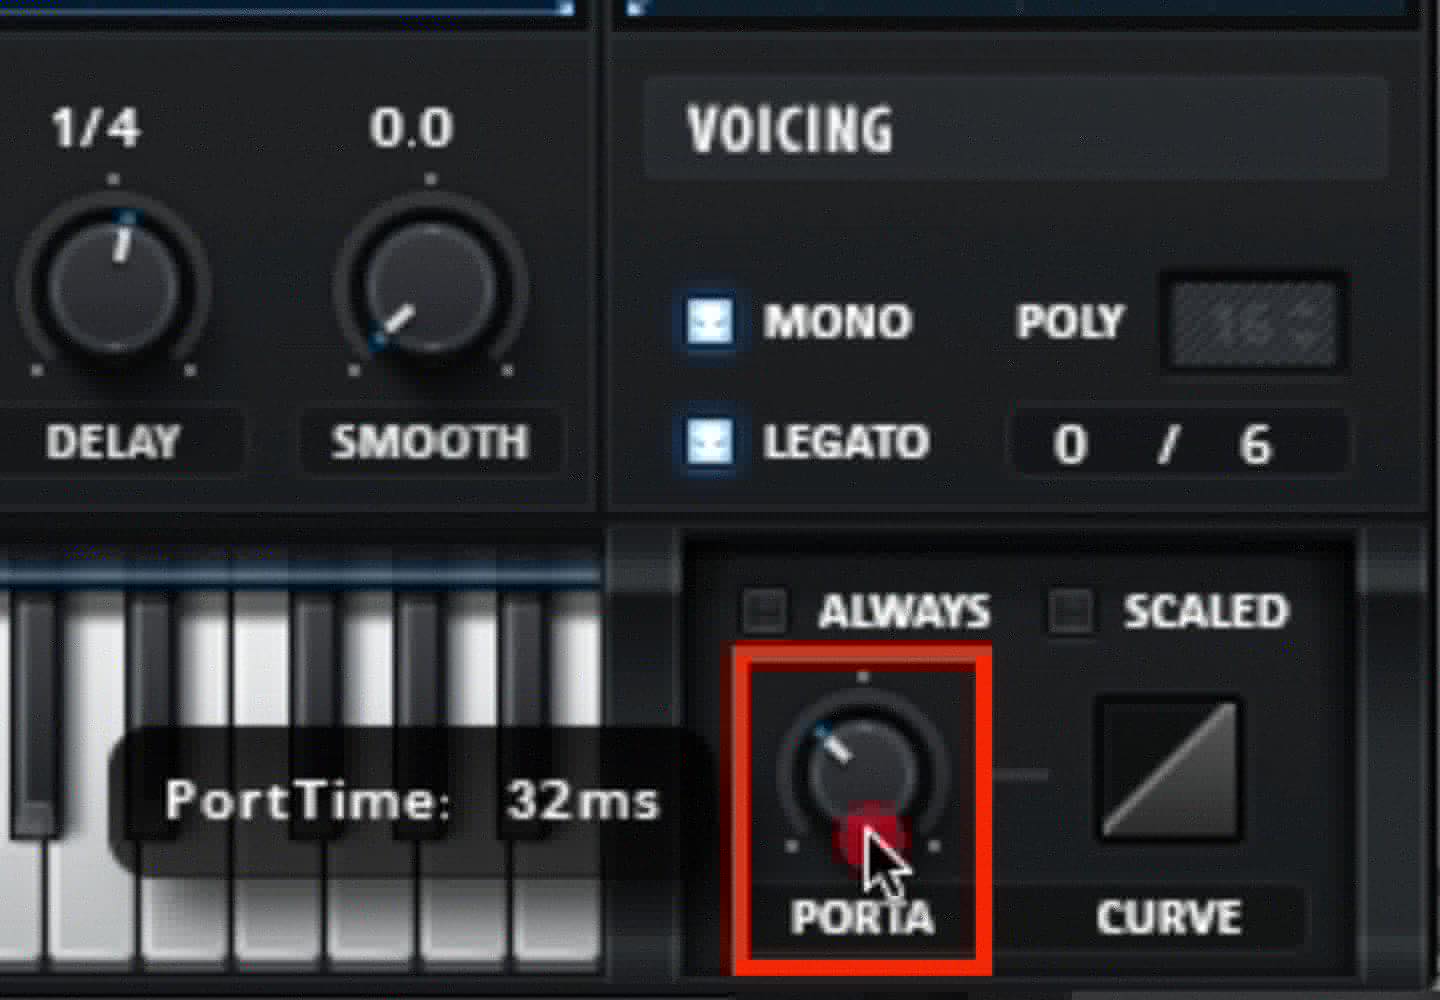
Next, turn on “MONO” and “LEGATO” from the bottom right, and adjust the “PORTA” speed knob.
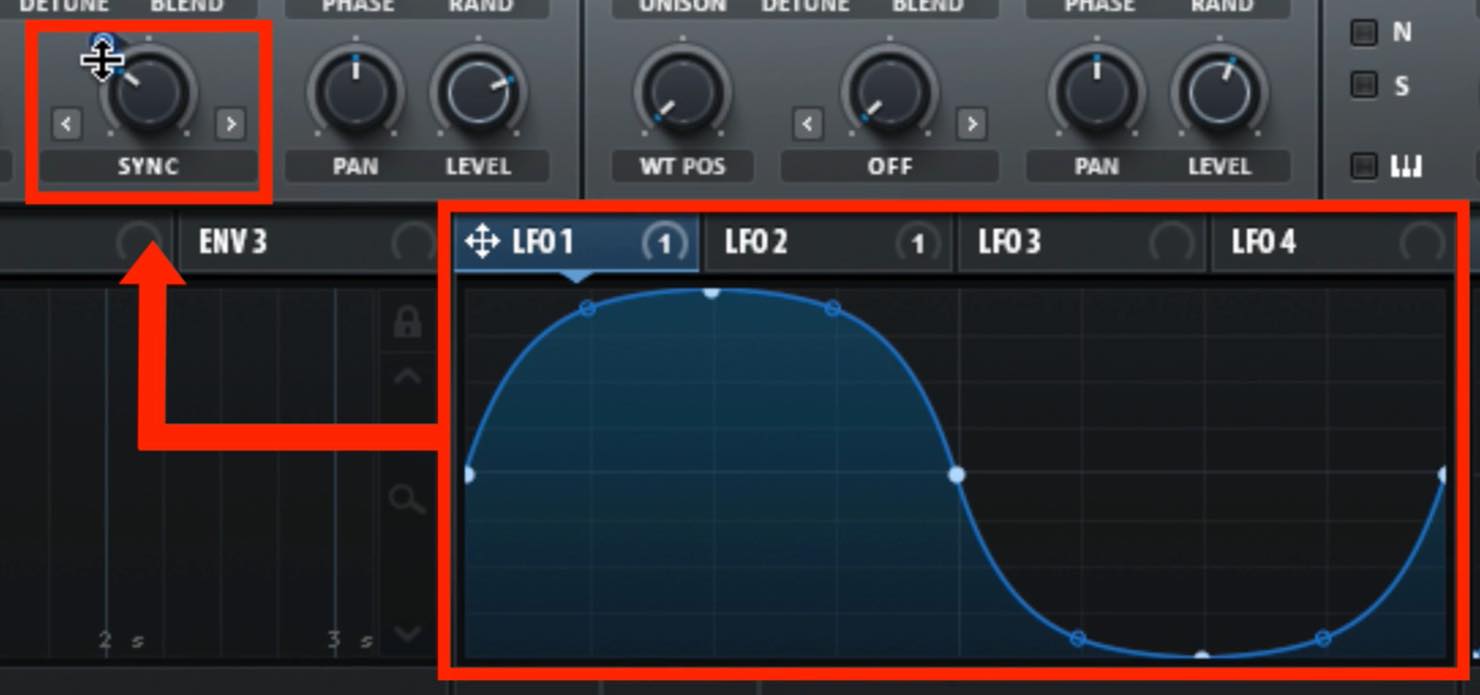
OSC A is set to 「Multi」→「saw/sin reveal」.
SYNC the WARP, and assign LFO1 to it. The MATRIX type is “↔︎.”
We will keep the shake width low.
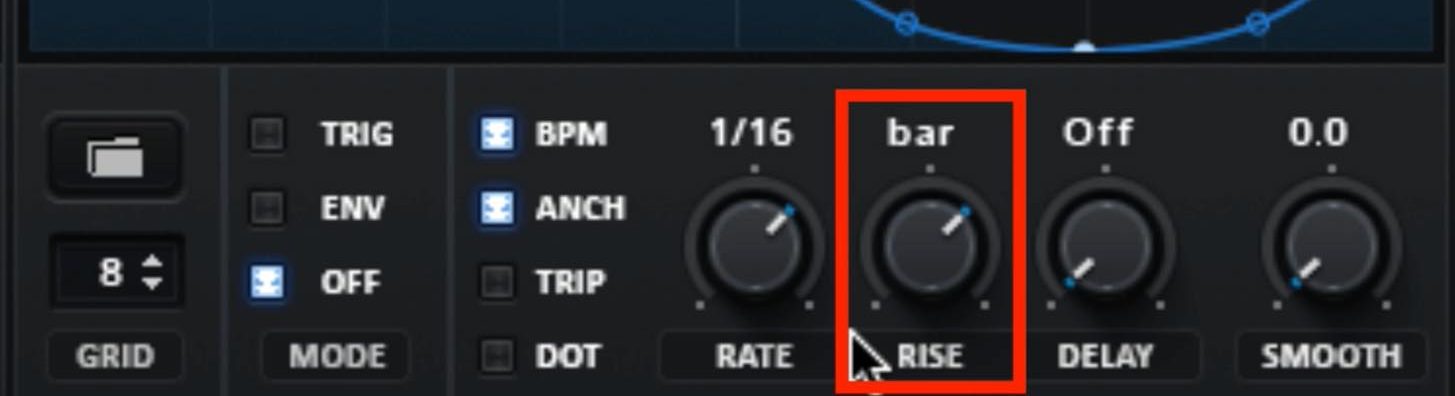
LFO will be set to a RATE of 1/16, with RISE set on BAR.
RISE allows the LFO effect to fade in, so that the LFO is gradually applied to longer notes.
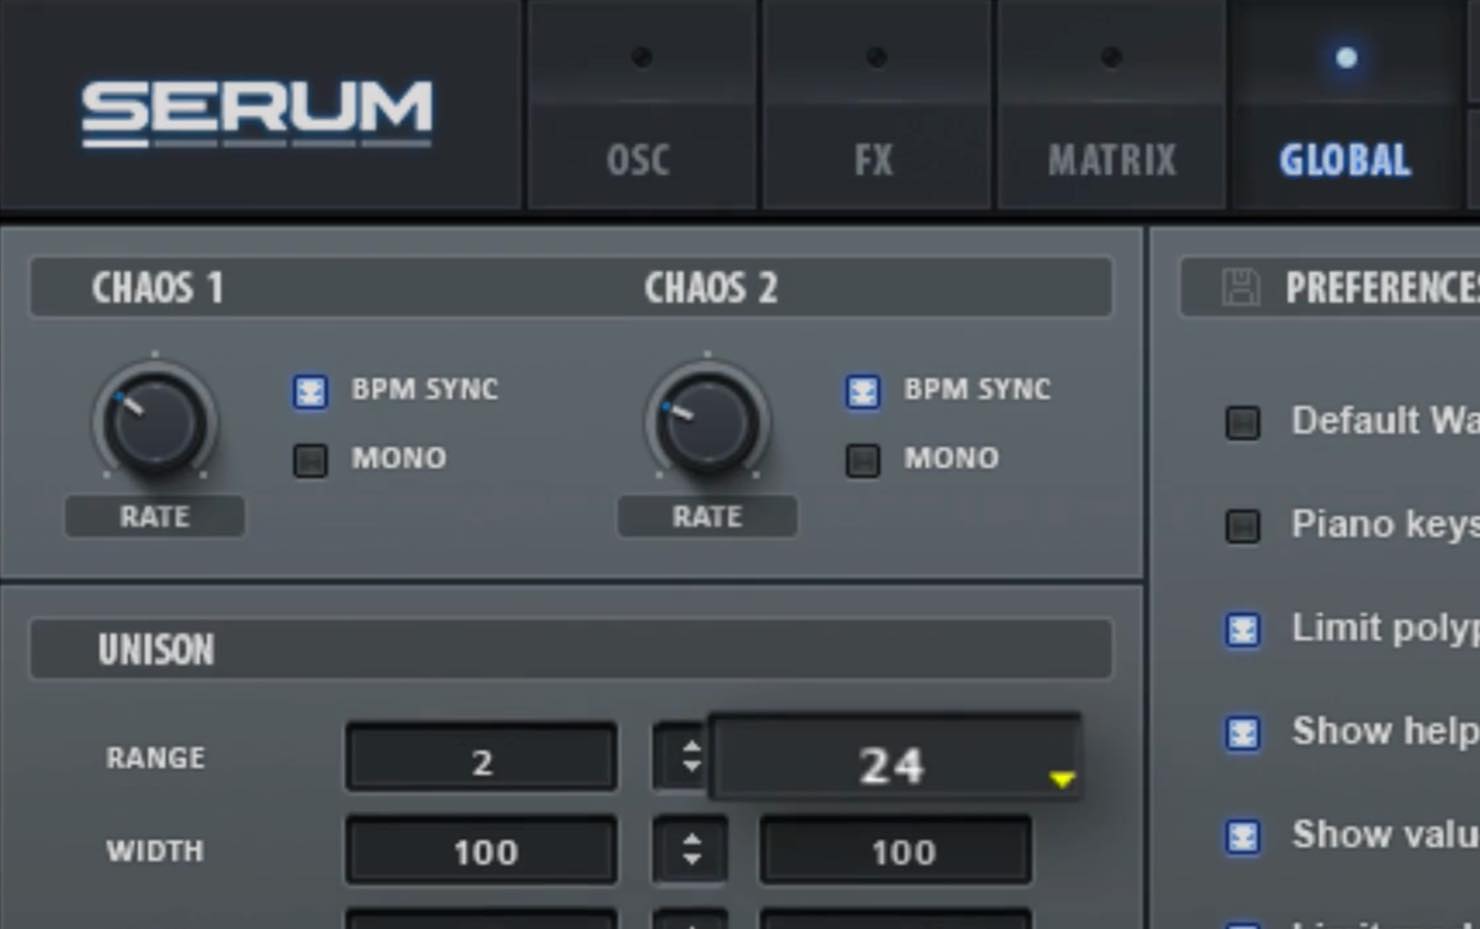
OSC B will use a polished SAW wave, with the UNISON RANGE set to 24 (on the GLOBAL screen).
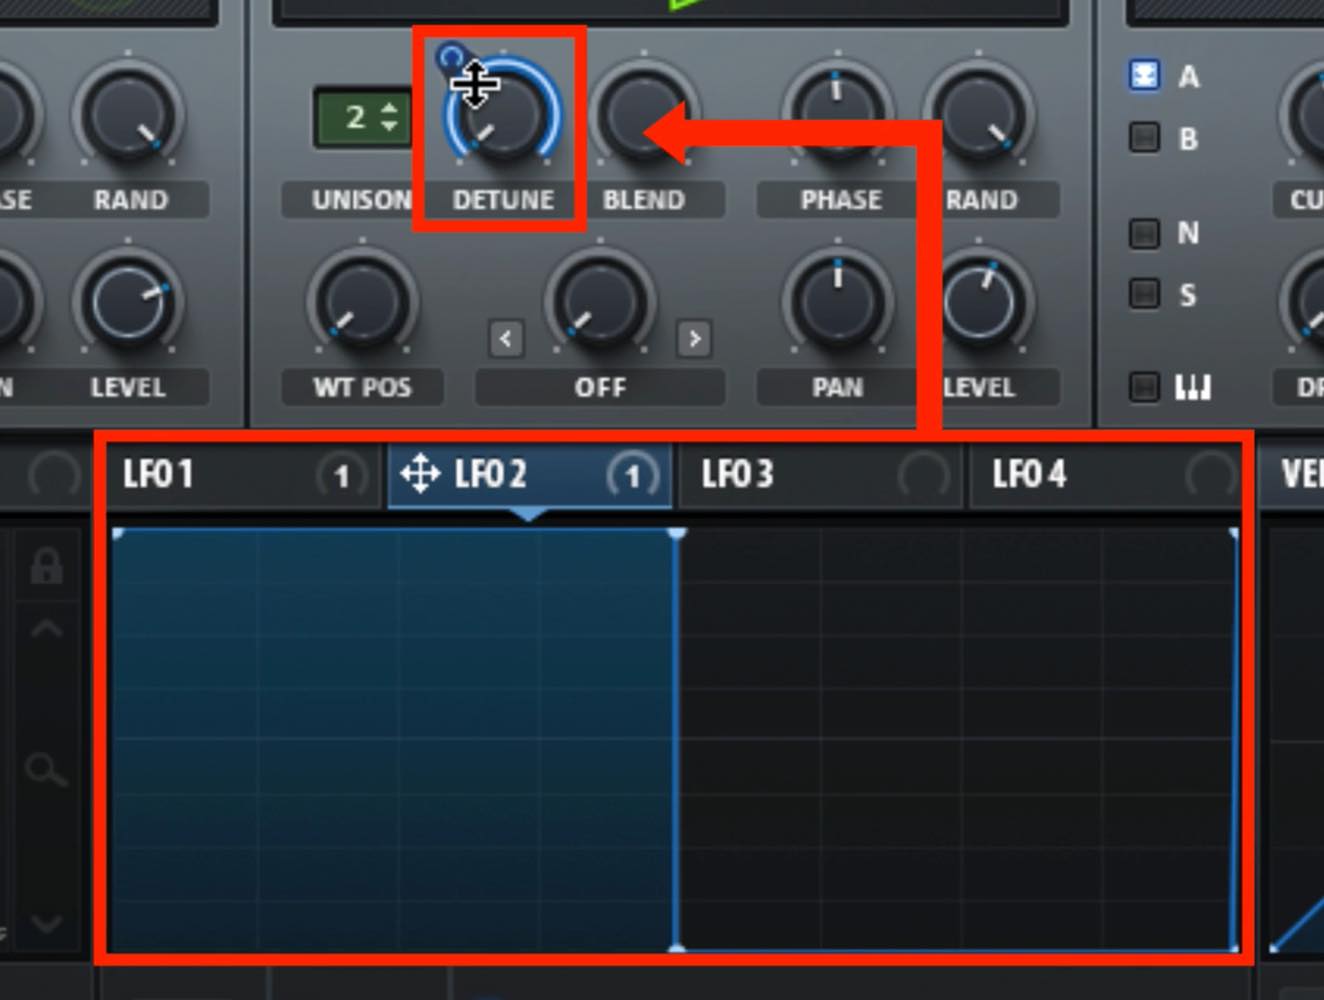
LFO2 will use a Square wave, assigned to DETUNE with the width set to move far left/right.
When doing this, set the DETUNE starting point to the far right, and keep the parameter set on the left (opposite setting of whats shown above).
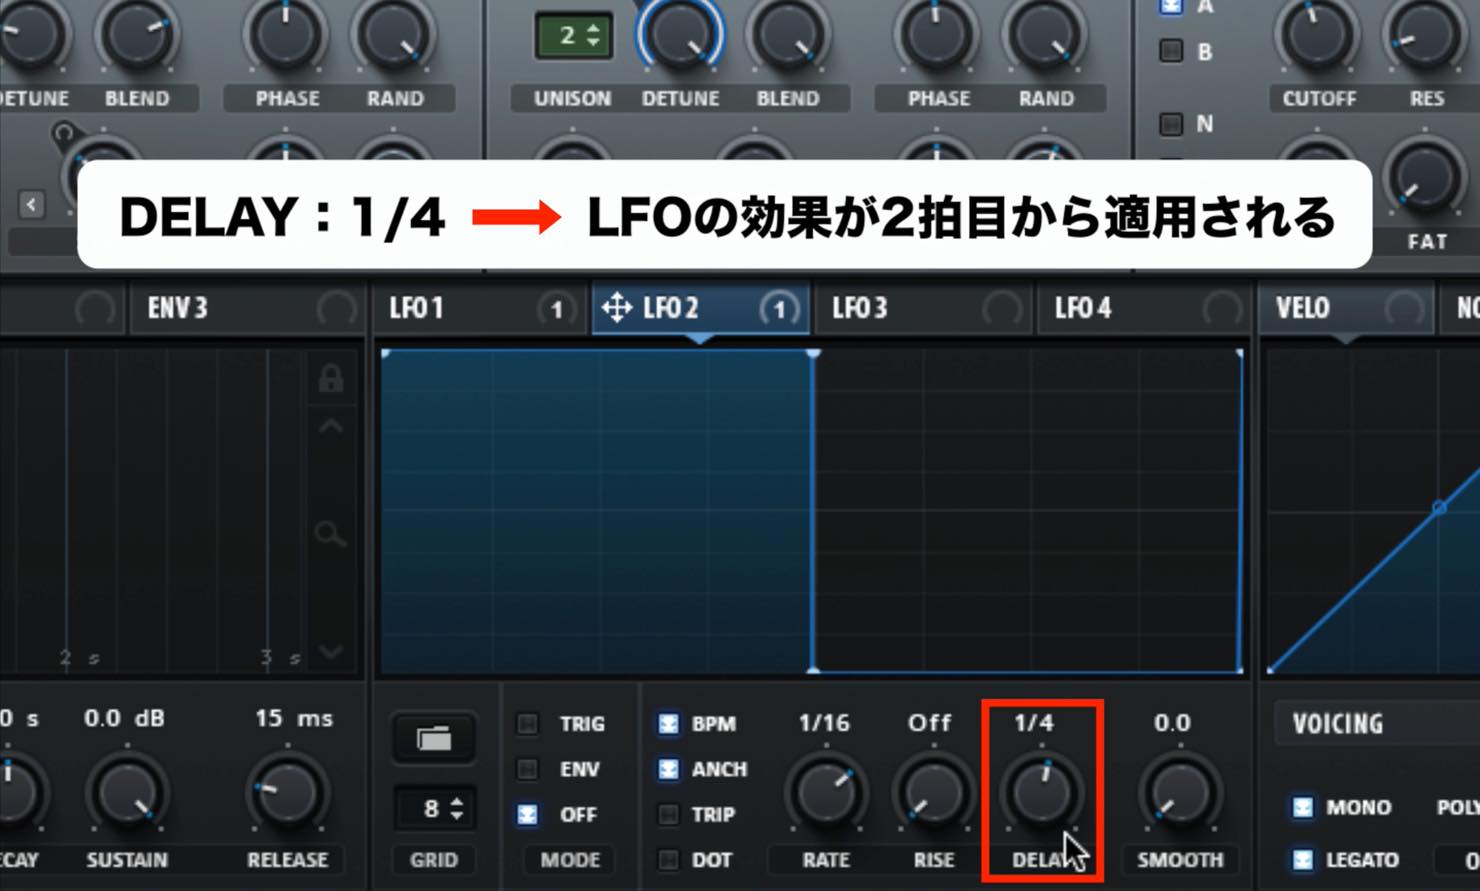
In addition, by setting the LFO’s DELAY to 1/4, the LFO will activate a quarter note later in the sound.
This concludes some of the sound design Tips for SERUM.
We hope you enjoyed this series and try out these techniques in your own sounds!