
The Nektar Panorama T series is a MIDI keyboard designed specifically for making music with a DAW (digital audio workstation). Available as the 49-key T4 and 61-key T6, it offers DAW integration for intuitive hands-on control of major DAWs such as Cubase and Logic Pro. Its faders and encoders let you operate the transport and mixer, adjust track volume and pan, and control automation to make production much more efficient. Learning the initial setup, firmware update procedure, and Mixer, Instrument, Multi, and Internal modes helps you build a comfortable production workflow.
Packed with Features for Making Music in a DAW
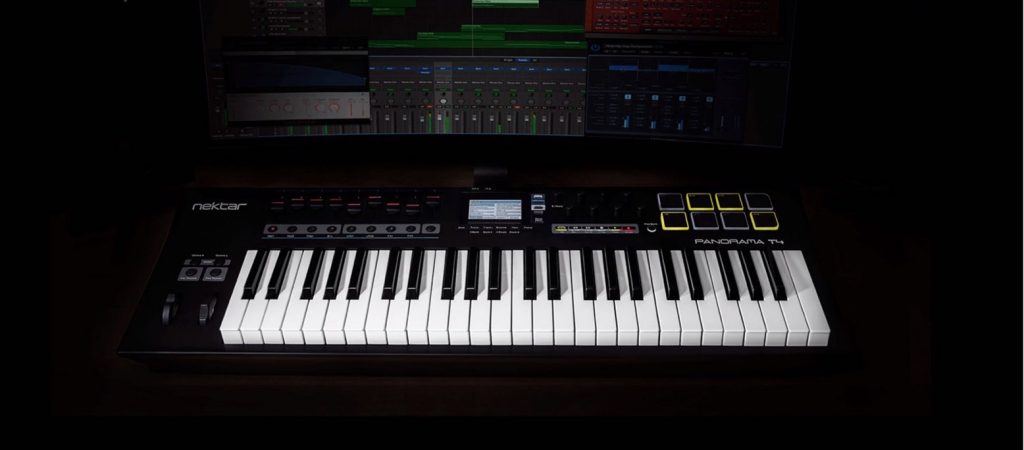
In this tutorial, we will explore the Panorama T series of MIDI keyboards from Nektar Technology.
The T series comes in two versions: the 49-key T4 and the 61-key T6, with identical functionality apart from the number of keys.
- A keyboard with velocity and aftertouch support, plus eight highly sensitive pads
- Faders and knobs for MIDI control
- DAW integration for controlling your DAW from the T series
- Integration with Nektarine for flexible routing and control of software instruments
- USB bus power, with no separate power supply required
And more.
It is packed with features designed specifically for making music in a DAW.
In this article, we will focus on one of its standout features, DAW integration, to show what the product has to offer.

DAW integration provides dedicated control of major DAWs including Cubase, Nuendo, Logic Pro, GarageBand, Bitwig Studio, Reaper, and Reason, making them easy to operate from the T series.
Let's start with the setup.
Nektar Panorama DAW Integration Video Tutorial
Selected Questions and Answers from the YouTube Video

I'm thinking of buying a Nektar Impact 25+. If I buy a used one, can I use the integration features by creating an account and entering the serial code?

I think the seller would need to contact the manufacturer and have the serial number released before selling it, or change the email address on their account to the buyer's address. For that reason, I would recommend checking this with the seller before buying.
Product page: https://hookup.co.jp/products/nektar-technology/panorama-t4-t6
After purchasing the product, visit Nektar's website, create an account, and register your T series keyboard.
http://support.nektartech.com
Once you register your T series keyboard,
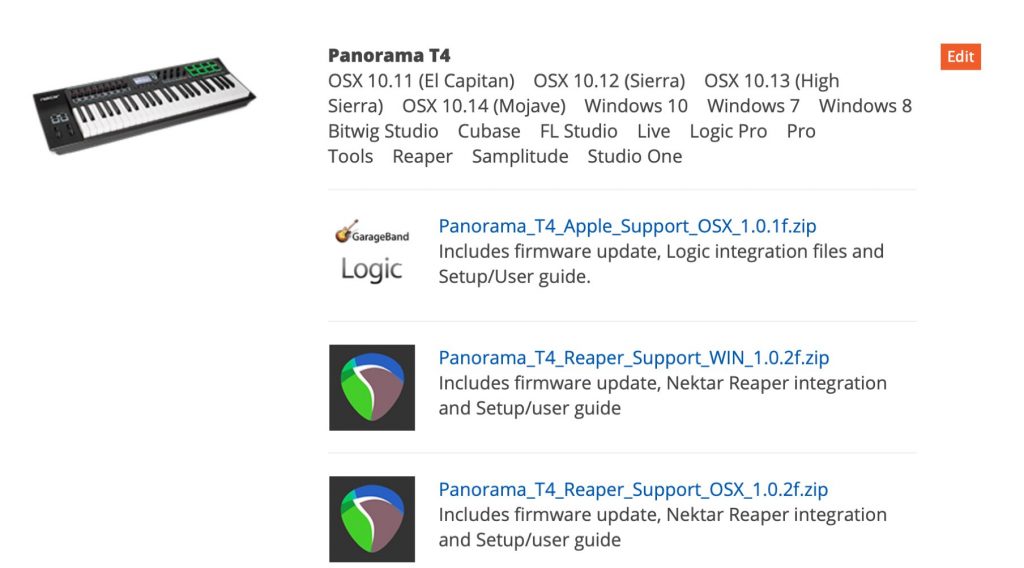
installers for each supported DAW will appear.Click the DAW you use and download its installer.
Run the installer to install the software.
Next, proceed with the firmware update described below.
Updating the T Series Firmware
Along with the installation above, you will need to update the firmware on the T series keyboard itself.
First, turn off the keyboard.
Hold down the button below fader 9 and the Shift button while switching the keyboard on.
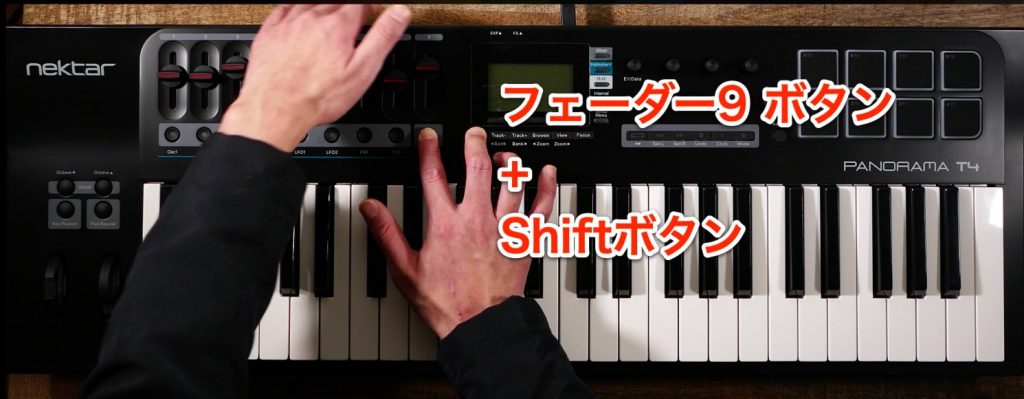
The display will turn white.
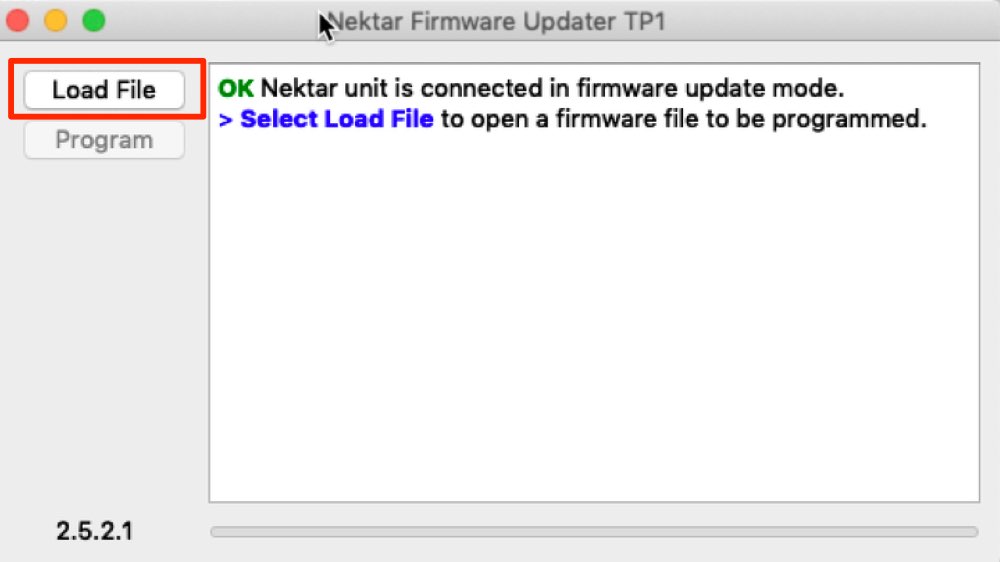
Launch the firmware updater included in the DAW integration installation folder.
Select Load File, then
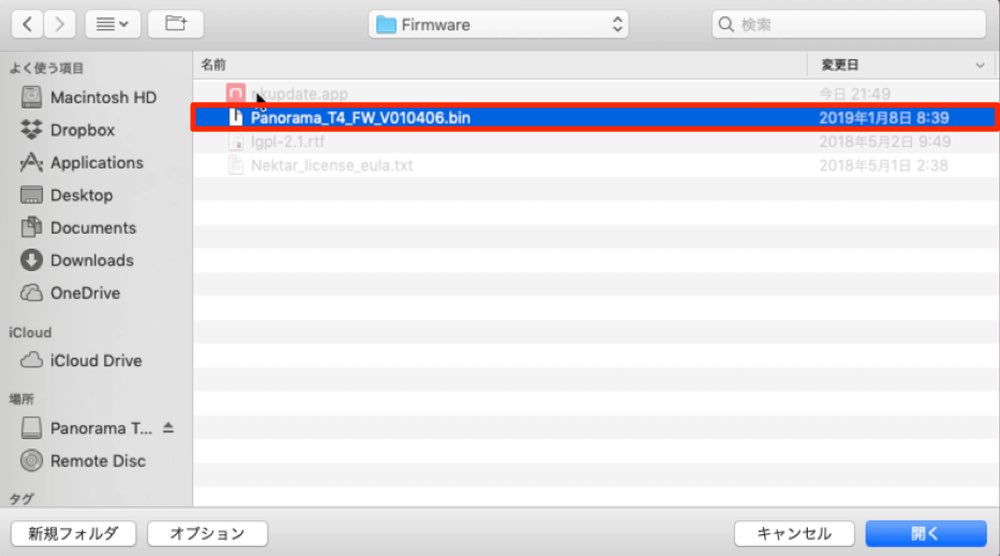
select the .bin file in the firmware folder.
Select Program. If the screen shown here appears, the update has succeeded.
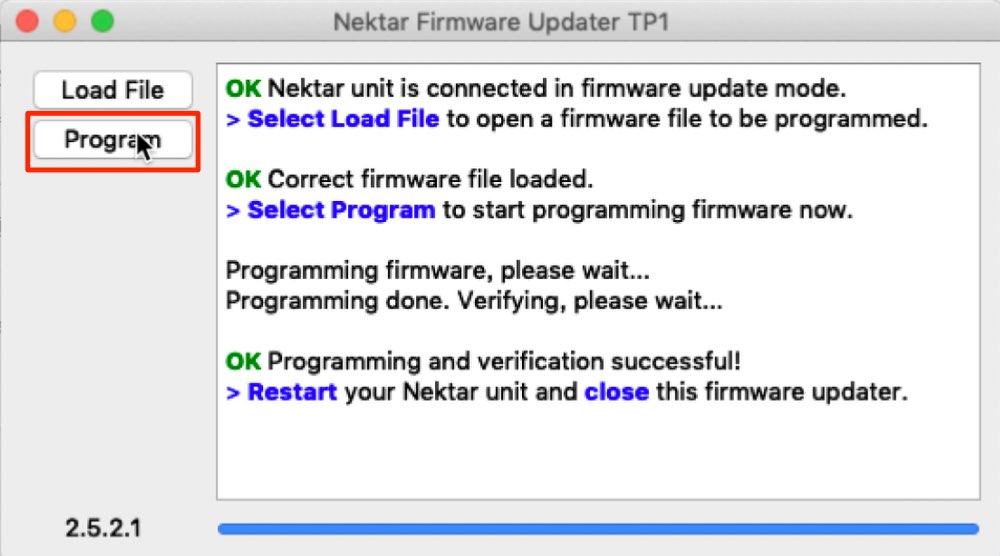
Turn the T series keyboard off and back on to use it with the updated firmware.
Using DAW Integration
The integration settings differ from one DAW to another.
Please refer to the user guide below.
URL:
https://hookup.co.jp/assets/upload/support/attachments/2018/09/25101/Panorama_-T_User_Guide_JP.pdfHere, we will use Cubase to demonstrate the DAW integration features.
Transport Controls
With DAW integration enabled, you can turn looping on or off, fast-forward and rewind, play and stop, and record directly from the T series.
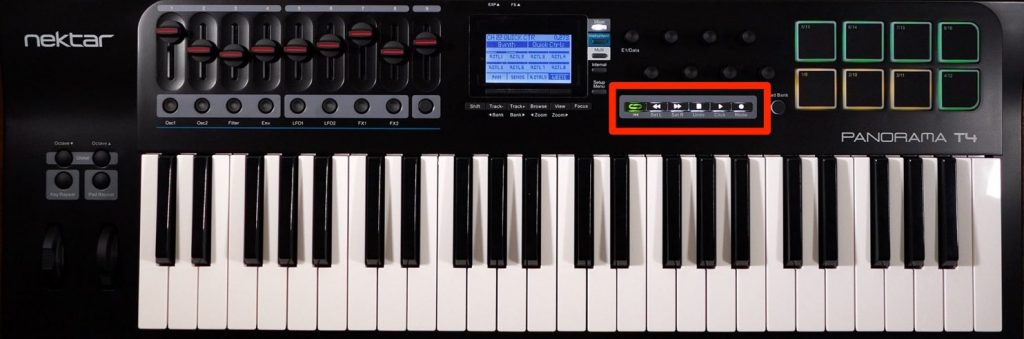
This can greatly improve your workflow.
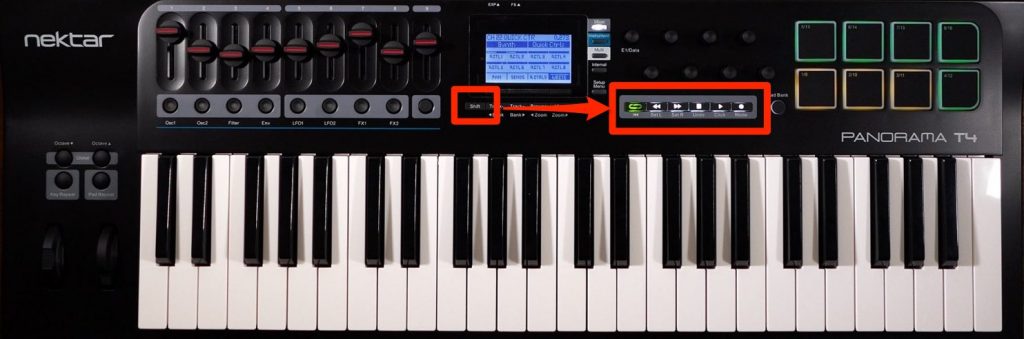
Combining the Shift button with the transport buttons also gives you access to frequently used functions such as setting the loop range, undoing an action, and switching the metronome click on or off.
Understanding the Modes
Switching modes is an important part of controlling the T series.
Note: The transport functions described above work in every mode.
Mixer: Controls the DAW mixer and its tracks.
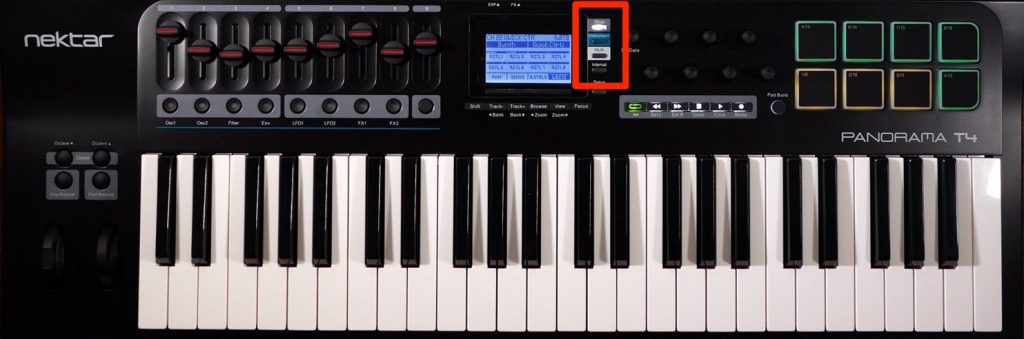
- Instrument: Controls software instruments (covered later).
- Multi: Works when the included Nektarine software is loaded (covered later).
- Internal: Functions as a MIDI controller.
- Mixer Mode: Using the Faders
Mixer mode is designed specifically for controlling individual tracks.
Note: Using only standard, single-byte letters and numbers in track names is recommended.
Faders 1–8 are assigned to mixer channel volume.
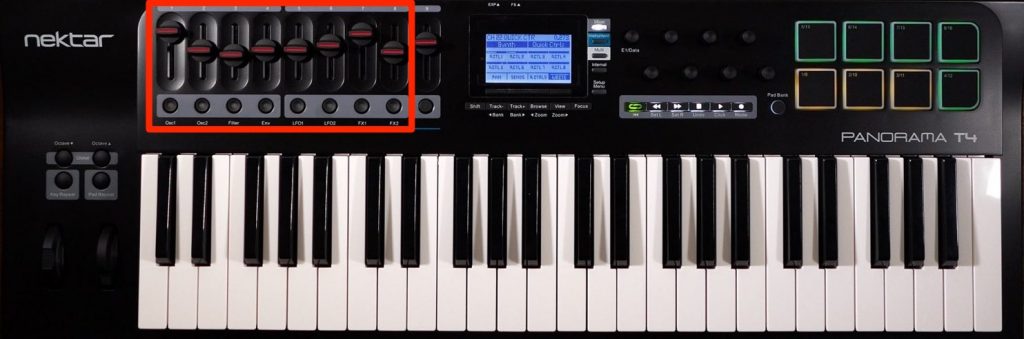
White lines on the tracks in the DAW show which channels are currently assigned.
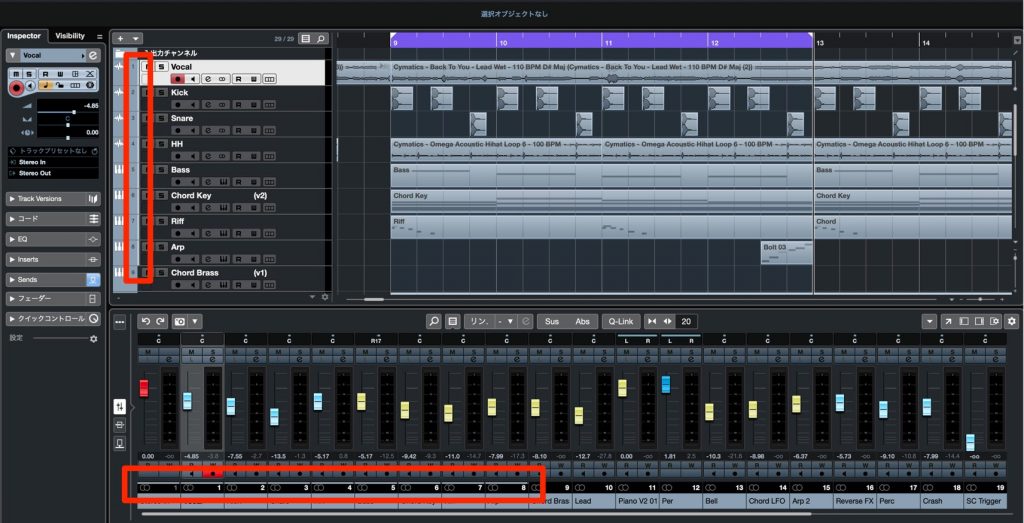
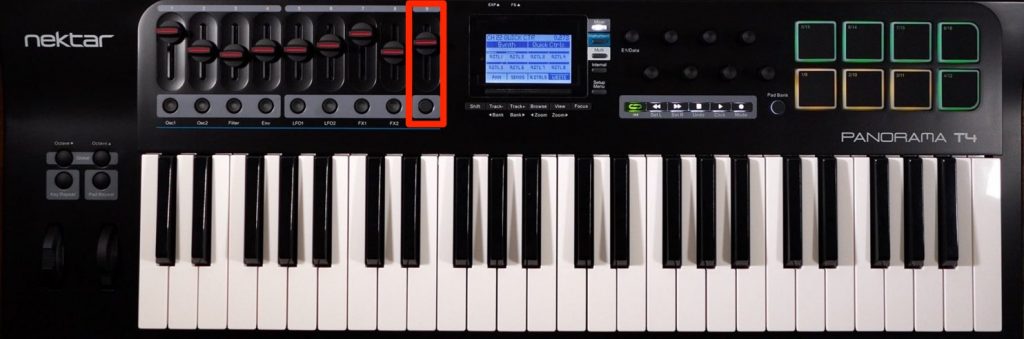
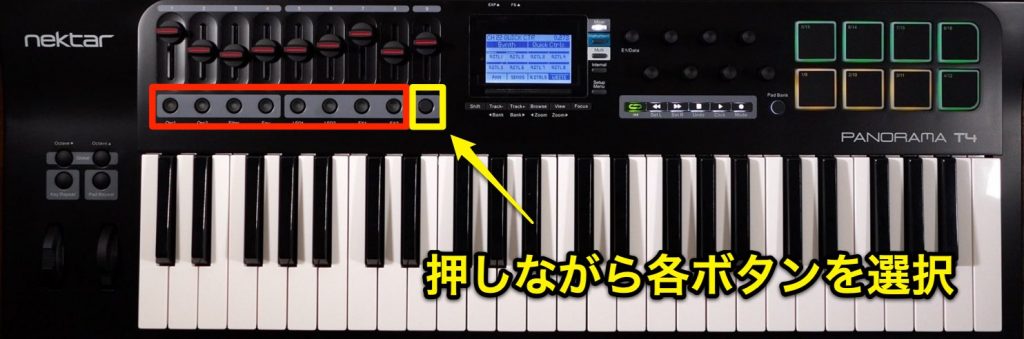
Fader 9 controls the currently selected track. Holding the button below it while moving the fader lets you control the master volume, which is very handy.
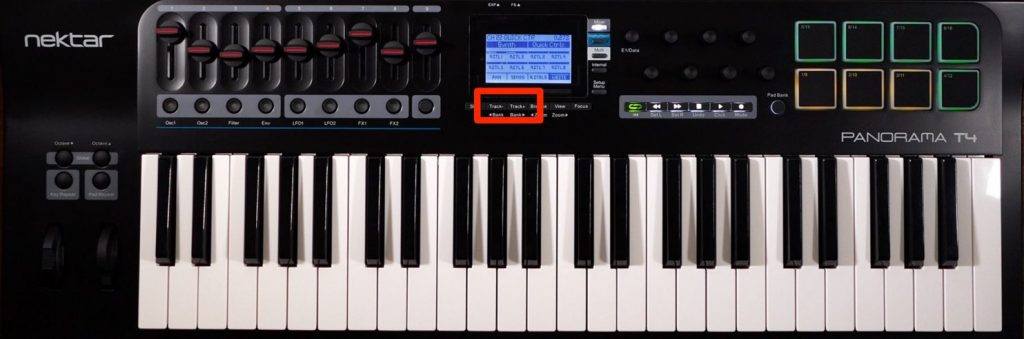
Use the Track− and Track+ buttons to select the previous or next track. The range controlled by the eight faders moves accordingly.
The buttons below the faders toggle mute for the corresponding tracks.
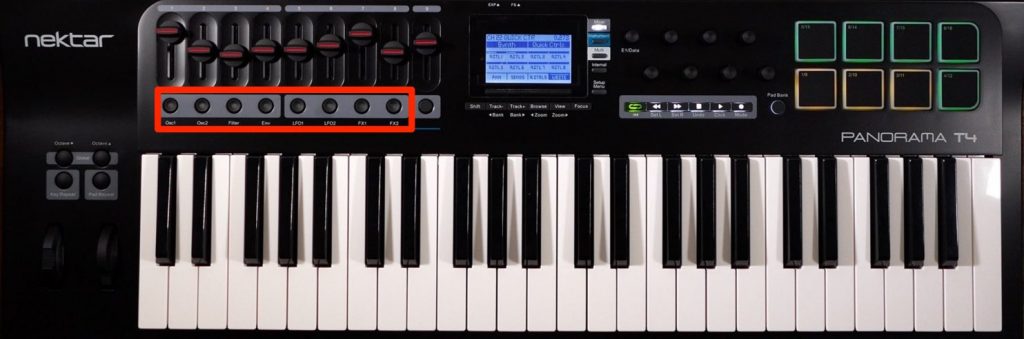
Hold the button below fader 9 and press the buttons below faders 1–8 to control solo for the corresponding tracks.
Mixer Mode: Using the Encoders
The T series has eight encoders that provide further convenient control of your tracks.
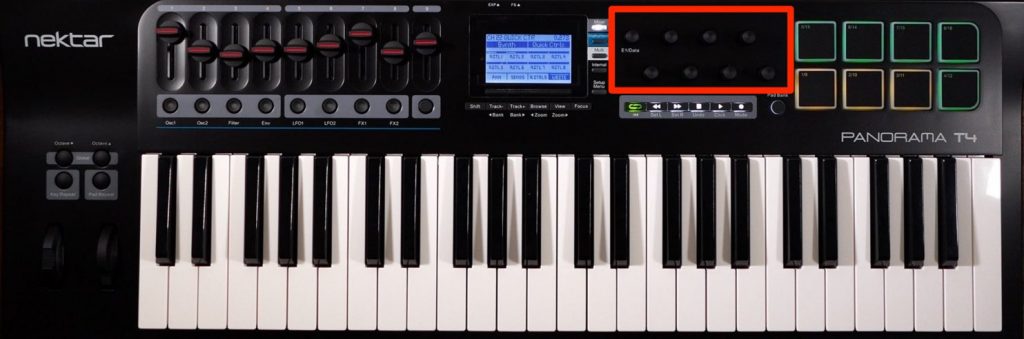
Use the buttons below the display to change what the encoders control to suit the task at hand.
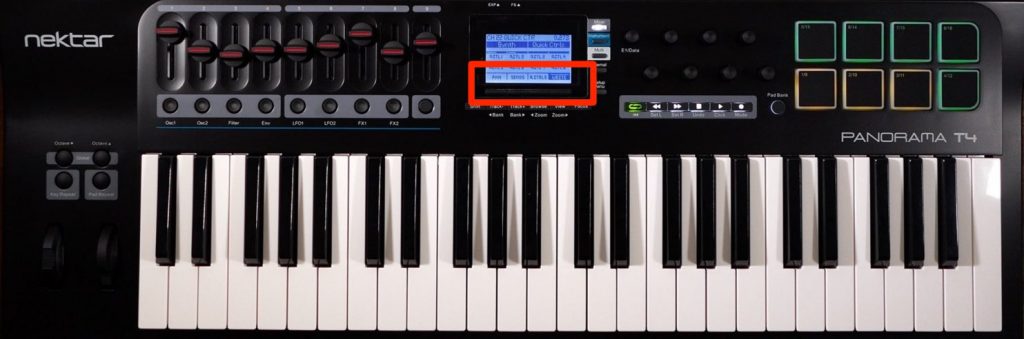
PAN: Controls track pan. As with the faders, the controlled tracks are indicated by white lines.
- SENDS: Controls eight send levels on the selected track.
- Q.CTRLS: Controls the eight Quick Controls on the selected track.
- WRITE: Toggles automation on or off for the selected track.
- What do you think?
We hope this has shown how DAW integration can make your production workflow more comfortable.
Being able to control your DAW right at your fingertips is a big advantage!
Next time, we will look at Nektarine, the software instrument management application included with the T series.
Don't miss the instrument control features that help you get the most out of the T series!
Product page: https://hookup.co.jp/products/nektar-technology/panorama-t4-t6
Product page: https://hookup.co.jp/products/nektar-technology/panorama-t4-t6
Part 1 covers DAW integration.
Watch the rest of the video on YouTube:
https://t.co/i4kXvKwtWm
Product details: https://t.co/8artukSYMD@HookUp_Officialpic.twitter.com/6gzvIaWw5u— SLEEP FREAKS (@SLEEPFREAKS_DTM) April 14, 2019
Frequently Asked QuestionsQ1. Which DAWs does the Nektar Panorama T series support?
It supports major DAWs including Cubase, Nuendo, Logic Pro, GarageBand, Bitwig Studio, Reaper, and Reason. Integration settings differ between DAWs, so checking the user guide is recommended.
Q2. What do I need to do before using DAW integration?
Create an account on Nektar's website and register your T series keyboard. Download and install the installer for your DAW, then update the firmware on the keyboard itself.
Q3. What does fader 9 on the T series do?
Fader 9 controls the currently selected track, or the master volume when used with its button. You can also control solo for the selected track by using Shift.
Q4. What can the encoders do in Mixer mode besides PAN?
You can switch between SENDS (send levels), Q.CTRLS (Quick Controls), and WRITE (automation), depending on what you are working on.
Q5. Does the T series need a power cable?
No. It runs on USB bus power, so you can use it simply by connecting it to the computer running your DAW.
Nektar Panorama
Nektar Technology Panorama T Series MIDI Keyboard Tutorial 1: DAW Integration
NEW ARTICLES
Latest English Articles











