Battery 4 – 2. Editing cells
Battery 4’s treasure – Cells
Previously, we took a look at the “library” and its functions.
In this article, we will take a look at “Cells” that are the core to Battery.
In Battery 4 the “container” that holds samples are called “cells.”
By understanding the basics and functions of the cells,
you will be on the path to mastering this plugin.
Battery Video access
- 1Organizing sound libraries/Saving kits
- 2Editing cells *Current article
- 3Individual outputs
- 4Various Cell techniques
Cell editing techniques
We will go over some cell functions that are important to remember.
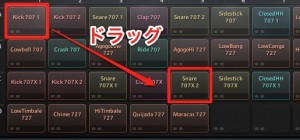
Moving/switching out cells
Drag and drop the cell you want to switch out.
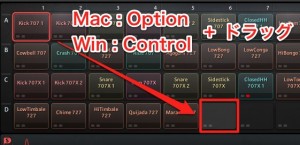
Duplicating cells
You can duplicate cells in the same way by holding
Mac : Option
Windows : Control
and dragging and dropping.
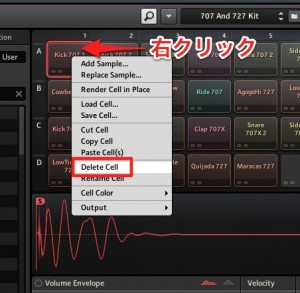
Deleting cells
You can delete un-needed cells and create open spaces.
Right click the cell that you want to delete,
and select “Delete Cell” from the menu.。
Mute/soloing cells
You can mute/solo individual cells as well.
This works great for things like “just playing snare” or “removing hats to hear the other cells.”
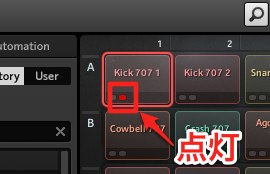
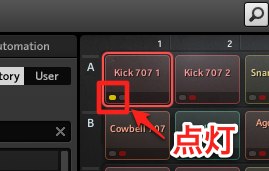
By turning on the area in the red box, it becomes “muted,”
and the cell stops making noise.
By turning on the area in the red box, the cell is “soloed,”
and other other cell sounds will be muted.
Deleting/adding cell rows
You can add in a blank cell row as well.
This allows you to expand your kit’s sounds.
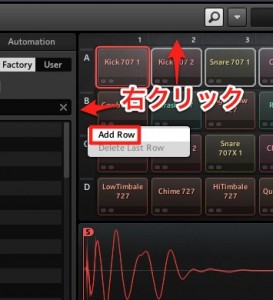
To add a row, right click the “A.B.C.D” area.
To add a column, right click the “1.2.3.4” area.
Select “Add Row” from the menu that pops up.
When deleting cells, follow the same steps and select
“Delete Last Row” from the menu.
Cell mapping
With so many cells lined out, it may become difficult to tell
“which keys/pads play which cell?”
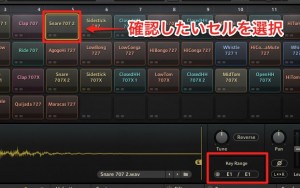
This can easily be checked.
Select the cell you want to check, and check via the area in the red box.
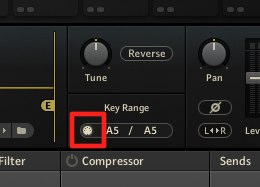
You can also select “MIDI learn” (the area in the red box),
and play the note that you want assigned 2 times, to link the note on your MIDI keyboard to the cell.


