
iZotope Neutron 3 Advanced - New Functions - "Mix Assistant" Tutorial
Track Volume adjustment made just by playing

iZotope has released “Neutron 3”.
“Neutron” is a channel strip plugin that allows you to adjust sound using EQ/Comp/Gate and more.
This product uses artificial intelligence to analyze and apply the plugins.
Neutron is in Ver3, with a new “Mix Assistant” function added.
It is a useful function that automatically optimizes each track’s volume and can be done by simply playing the track 1 time.
In addition to “Mix Assistant”, we will take a look at the improved sound controls.
iZotope Neutron 3 Advanced Video Access
* This Mix Assistant function is only available in “Neutron 3 Advanced”
Please be aware that it is not included in Elements / Standard.
Purchase here

How to use Mix Assistant
We have imported audio into the track to begin mixing.
We have not yet balanced each track’s volume.
Using Mix Assistant, we will quickly adjust the volume balance.
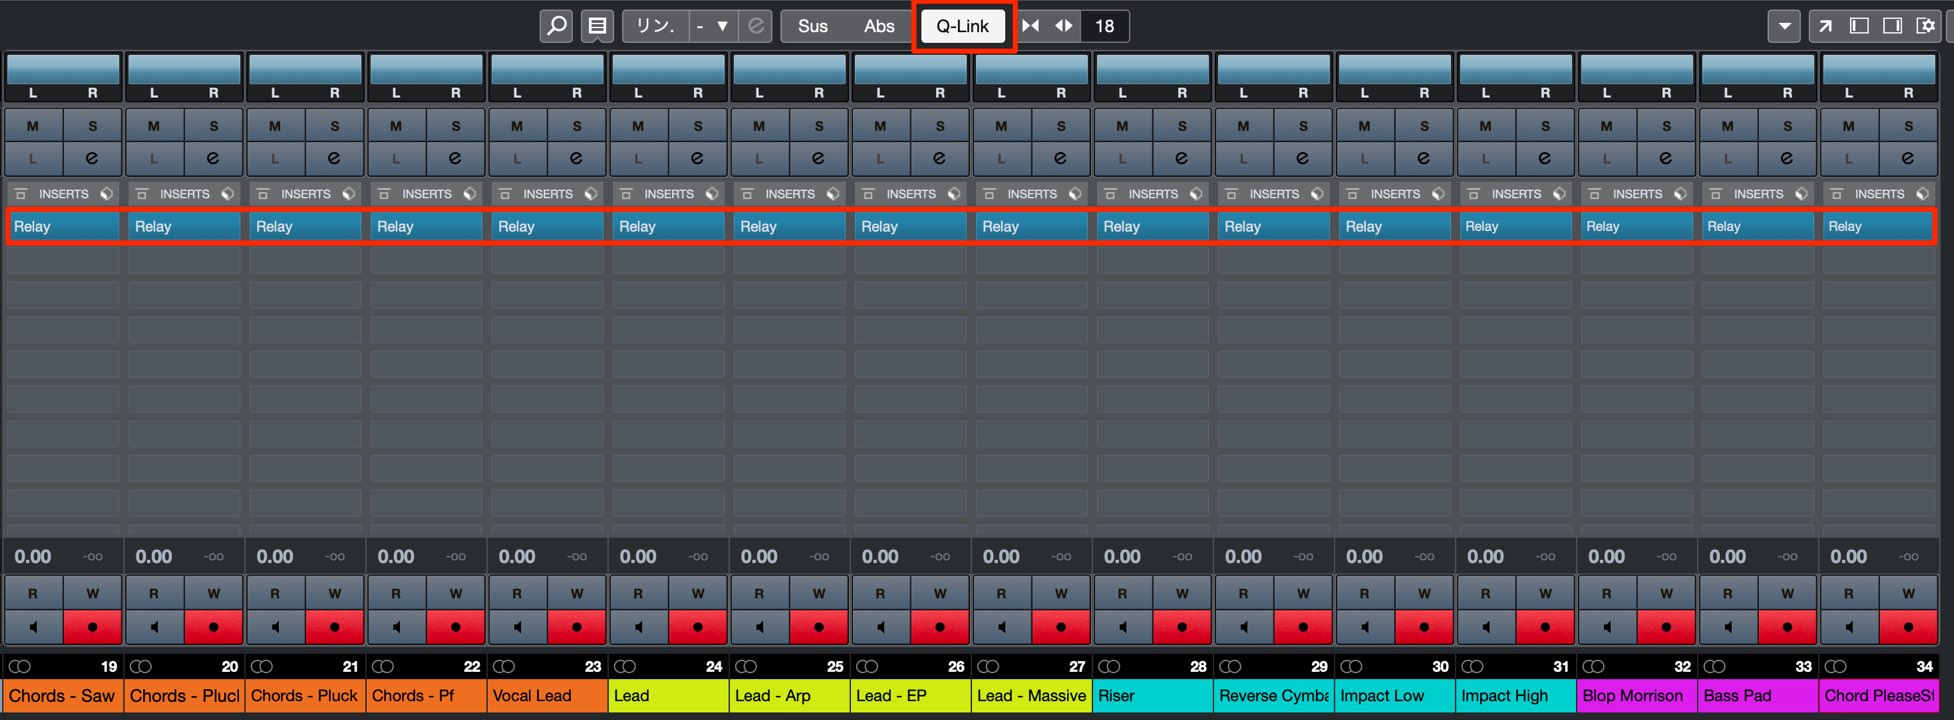
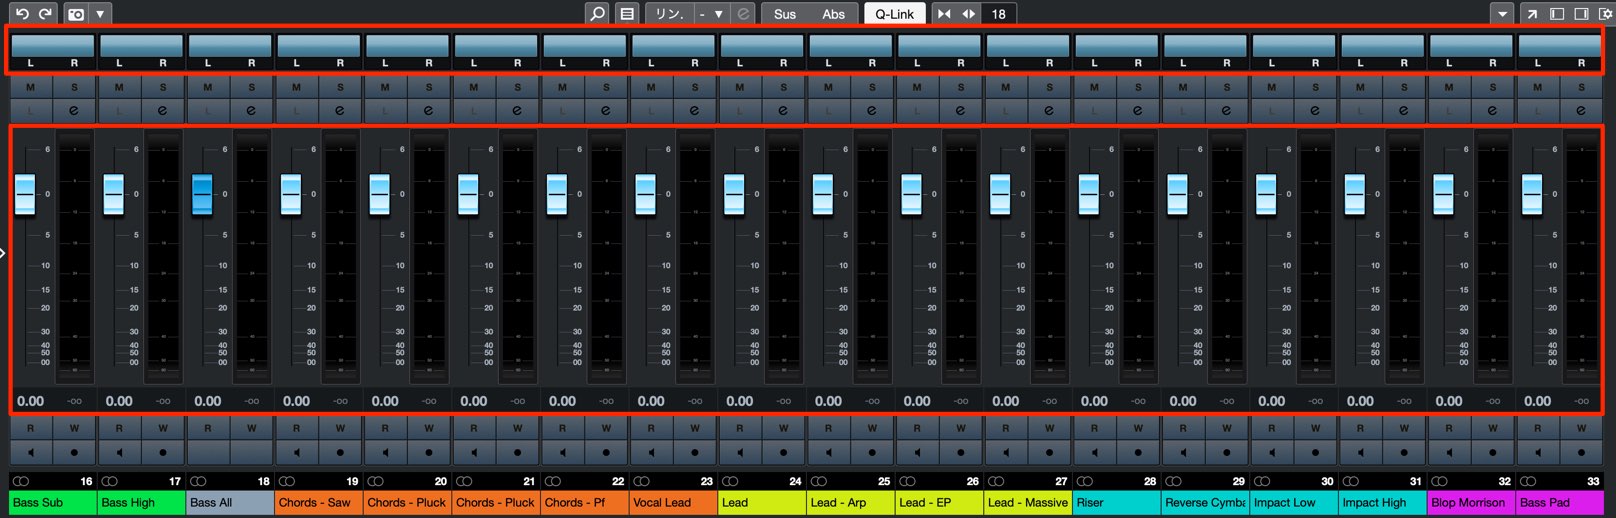
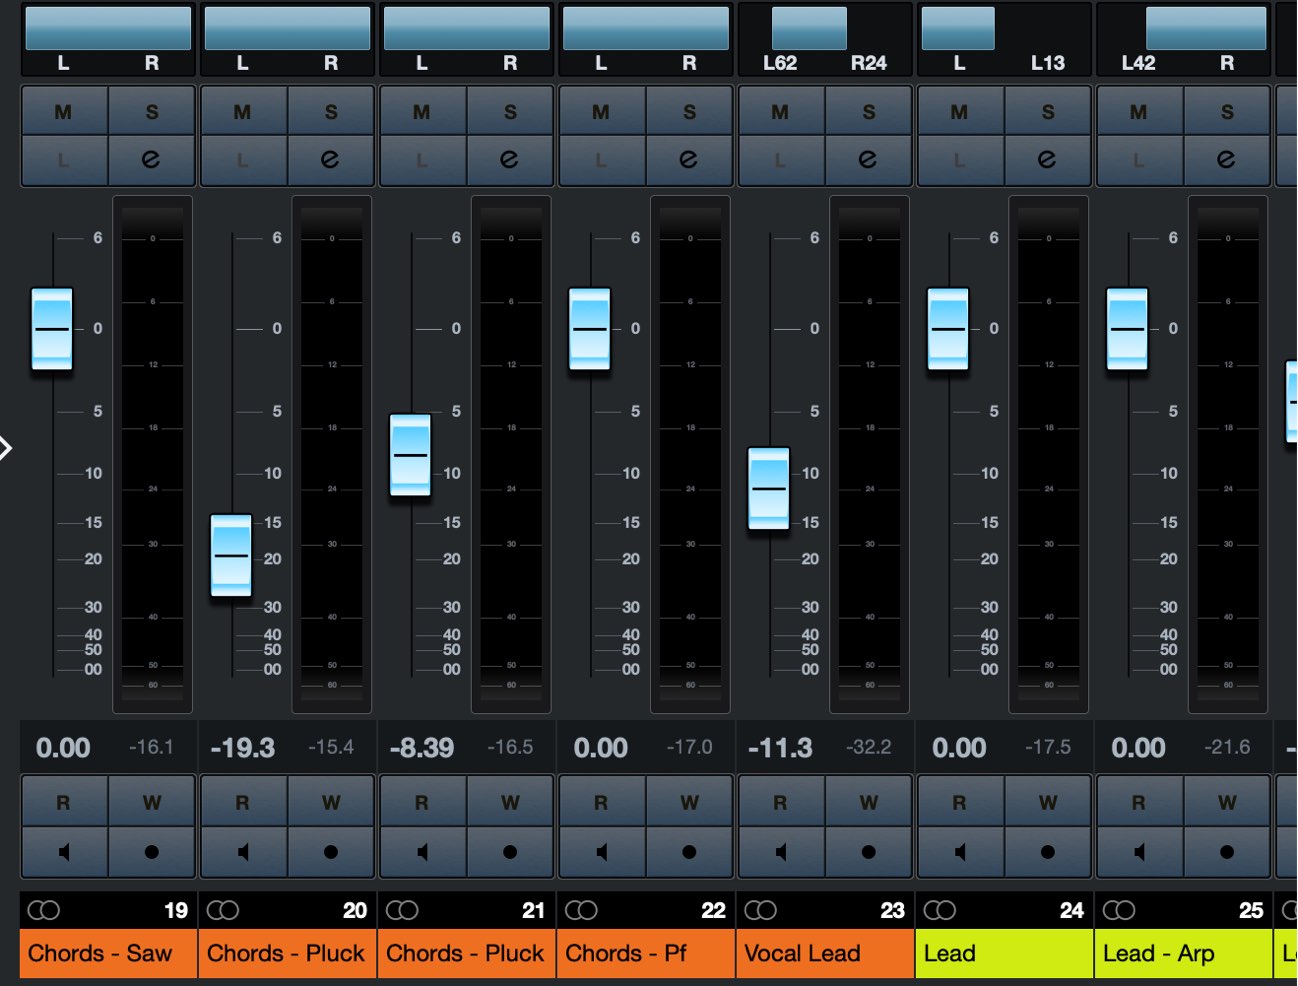
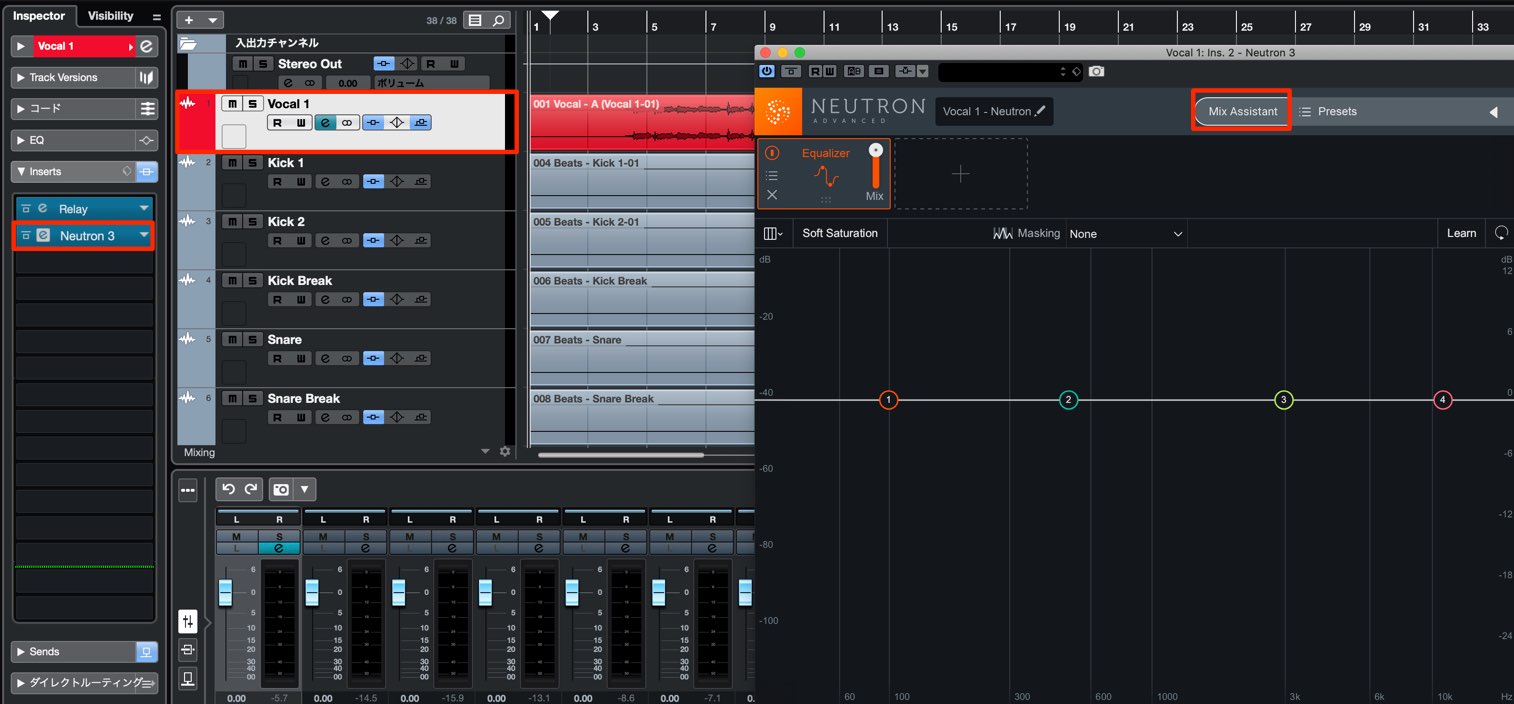
Open “Relay” on the insert slot of all tracks.
Using “Q-Link” for Cubase makes this easy.
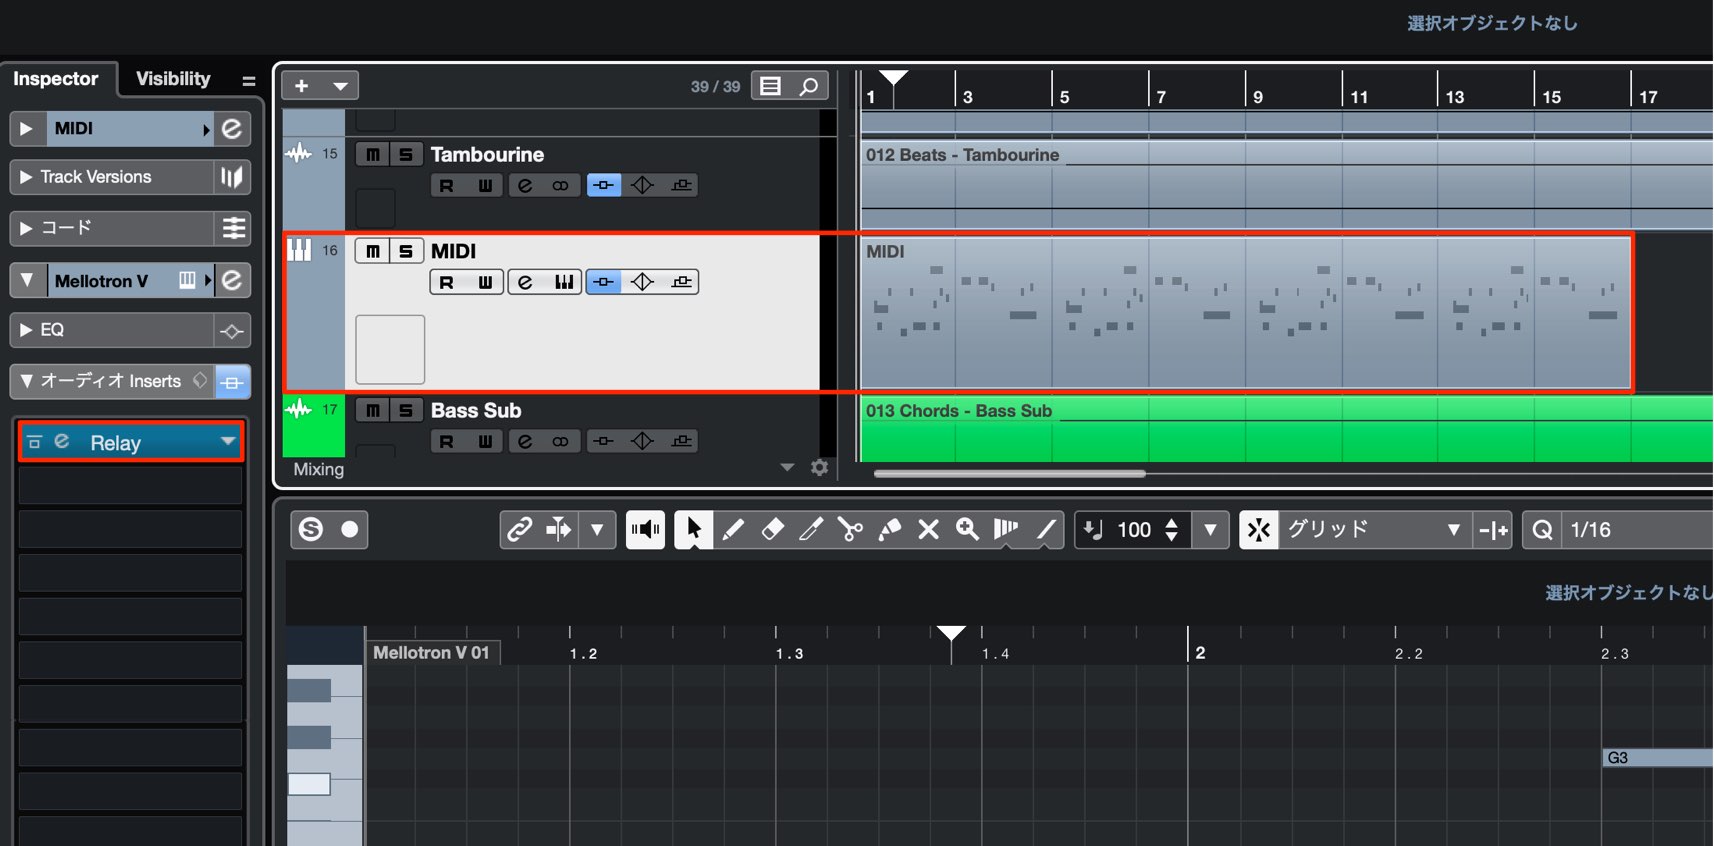
In addition, you can use it on instrument/MIDI tracks as well.
Precaution
There are a few things to be careful of when using Mix Assistant.

You can only have 1 Relay applied on a track.
Keep each track’s volume fader at “0” and keep the panning centered.
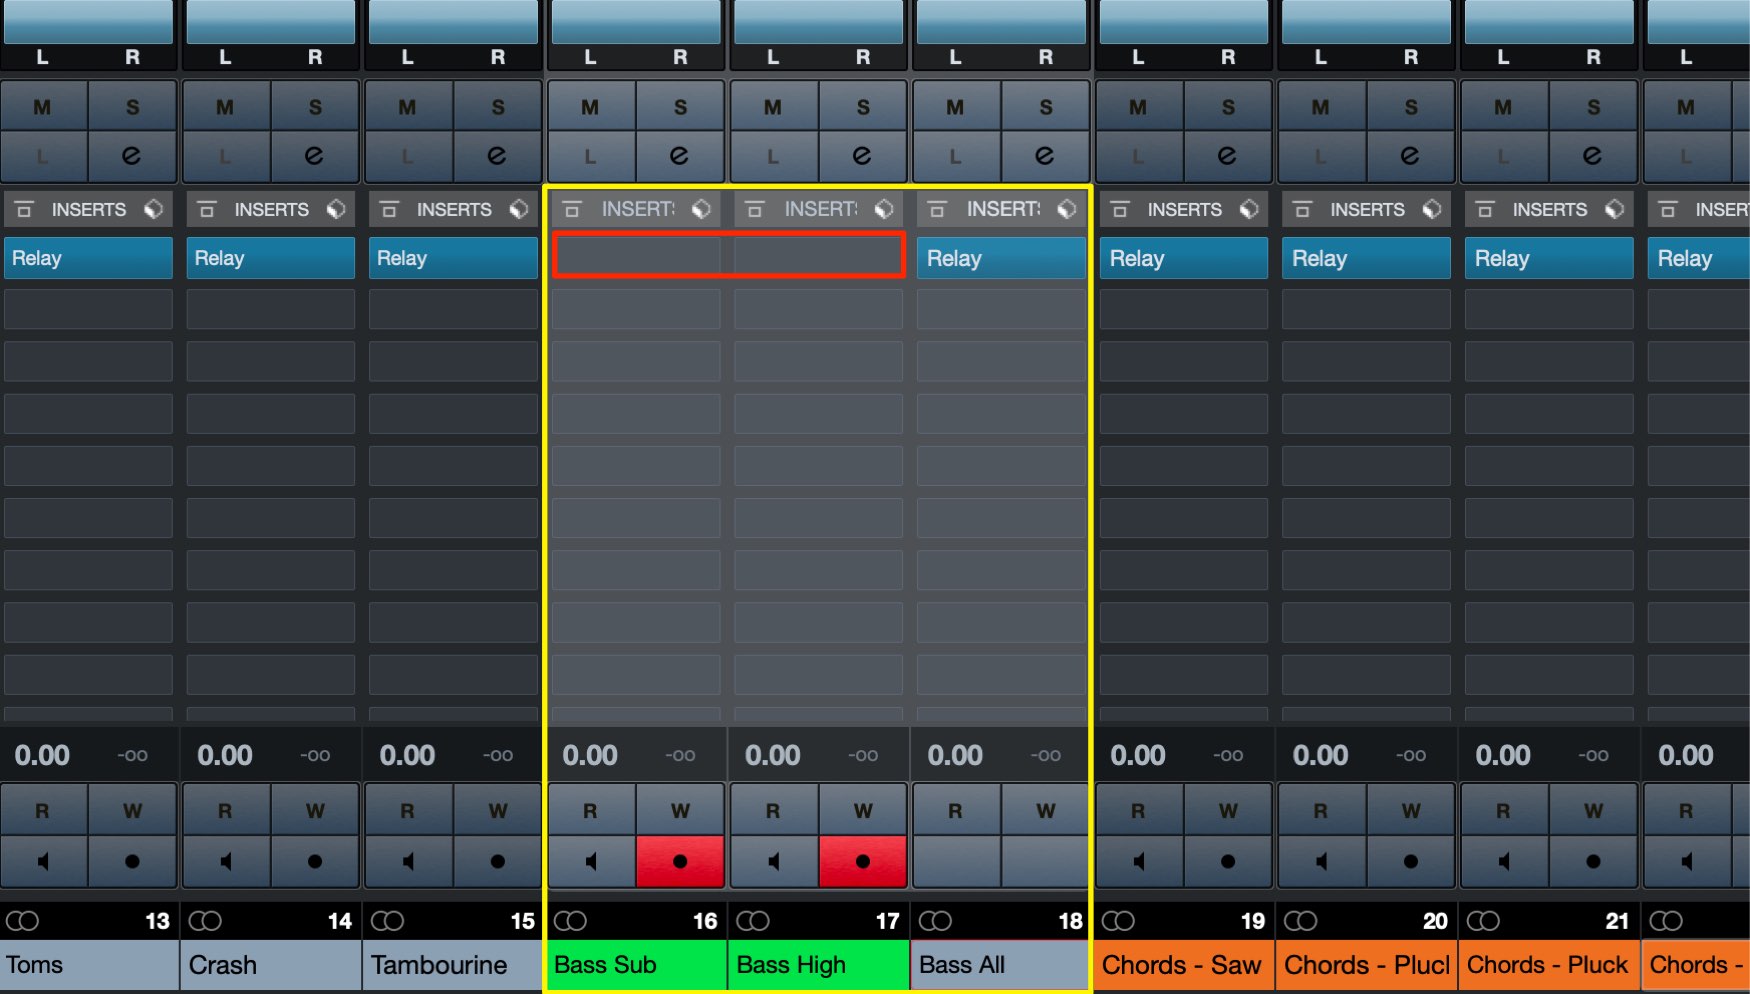
Tracks that are grouped to a Bus (group channel) will have overlapping sound, so remove the Relay on the individual track.
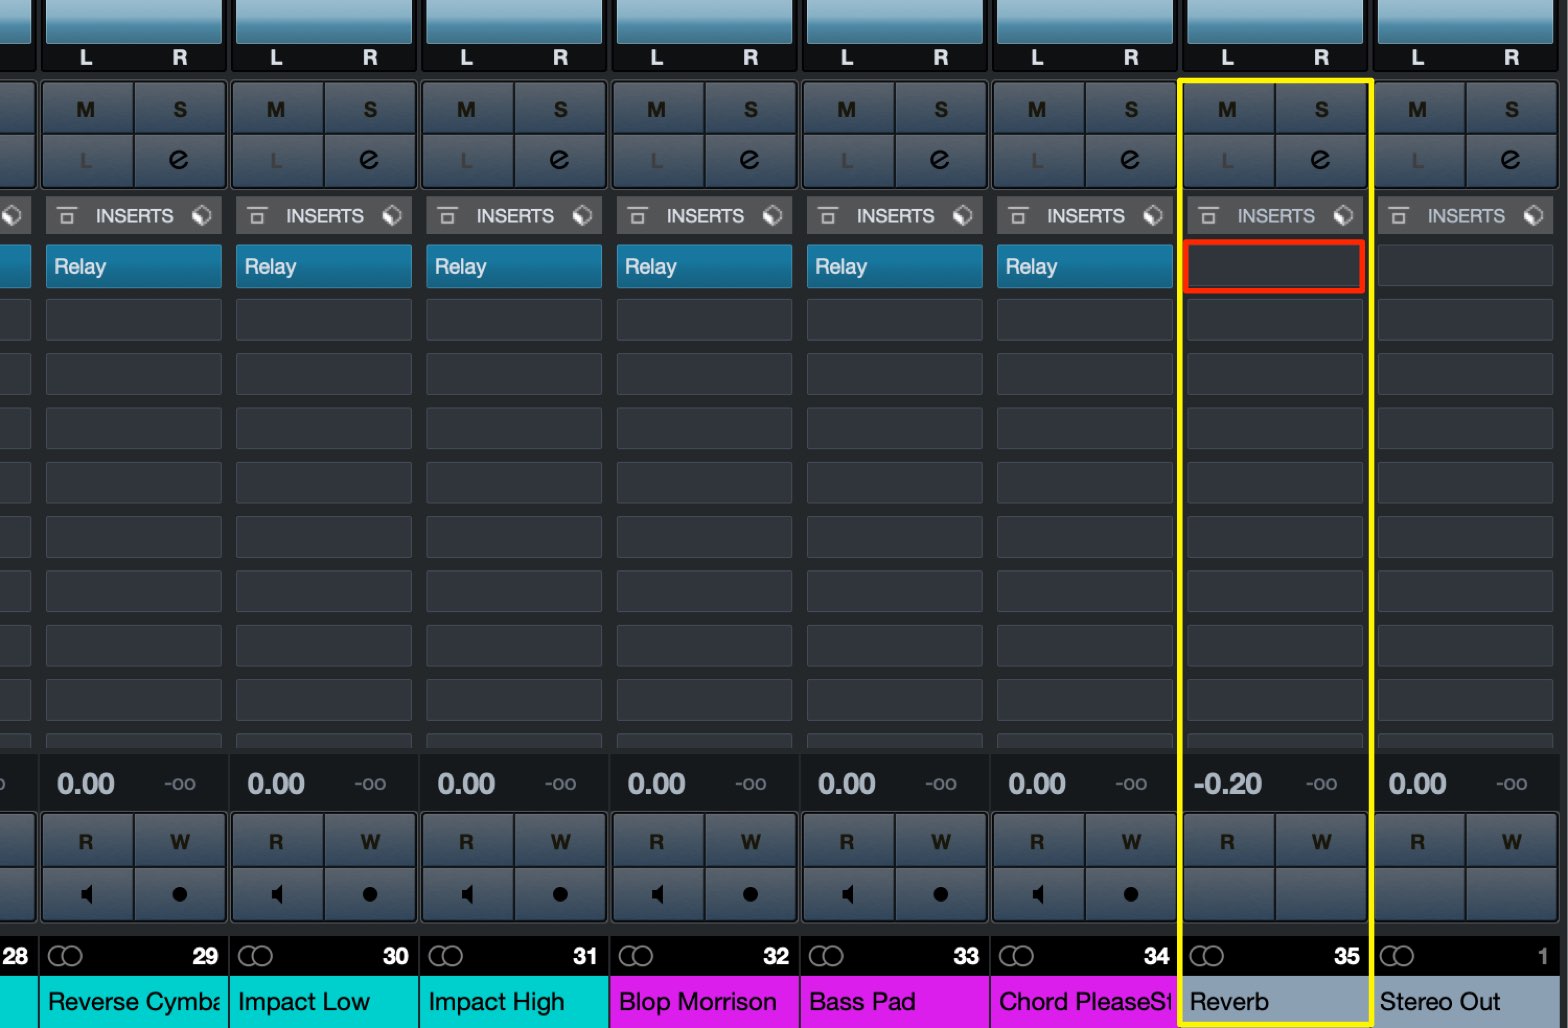
Do not apply Relay to reverb, delay, and other send/return effect tracks.
This completes our preparation.
Applying Neutron 3
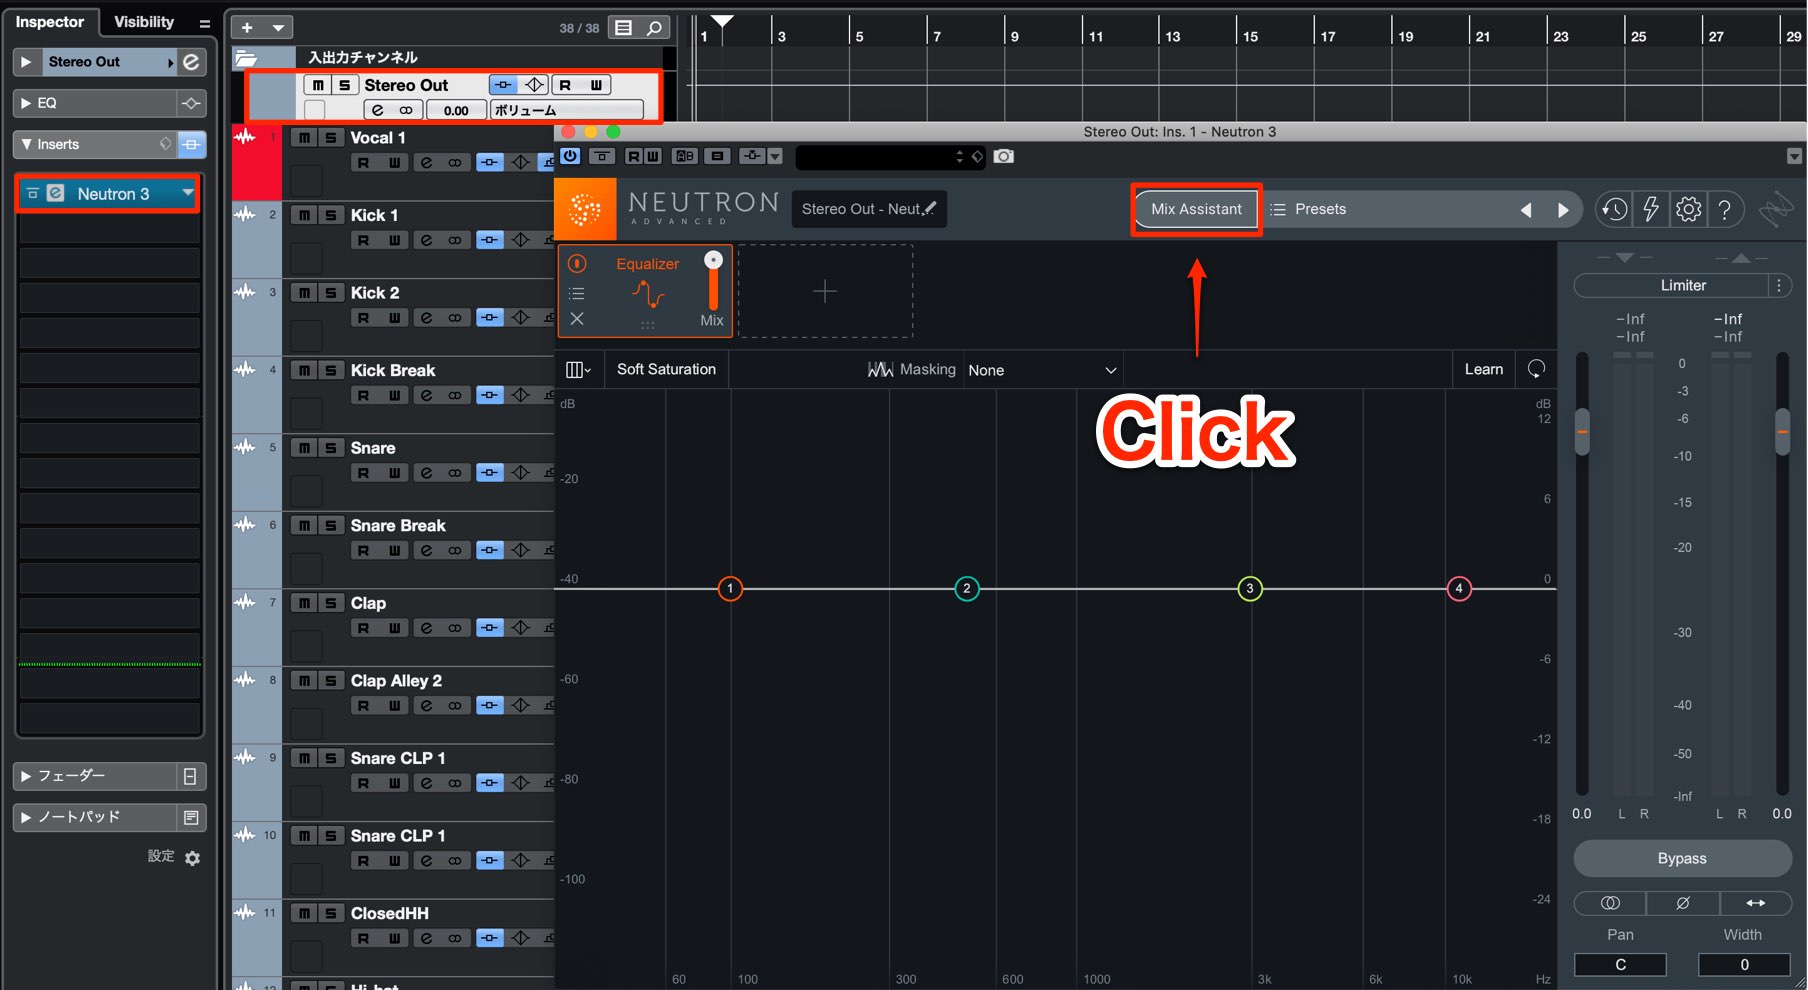
Apply Neutron 3 to the master track.
Next, click the Mix Assistant in Neutron 3.
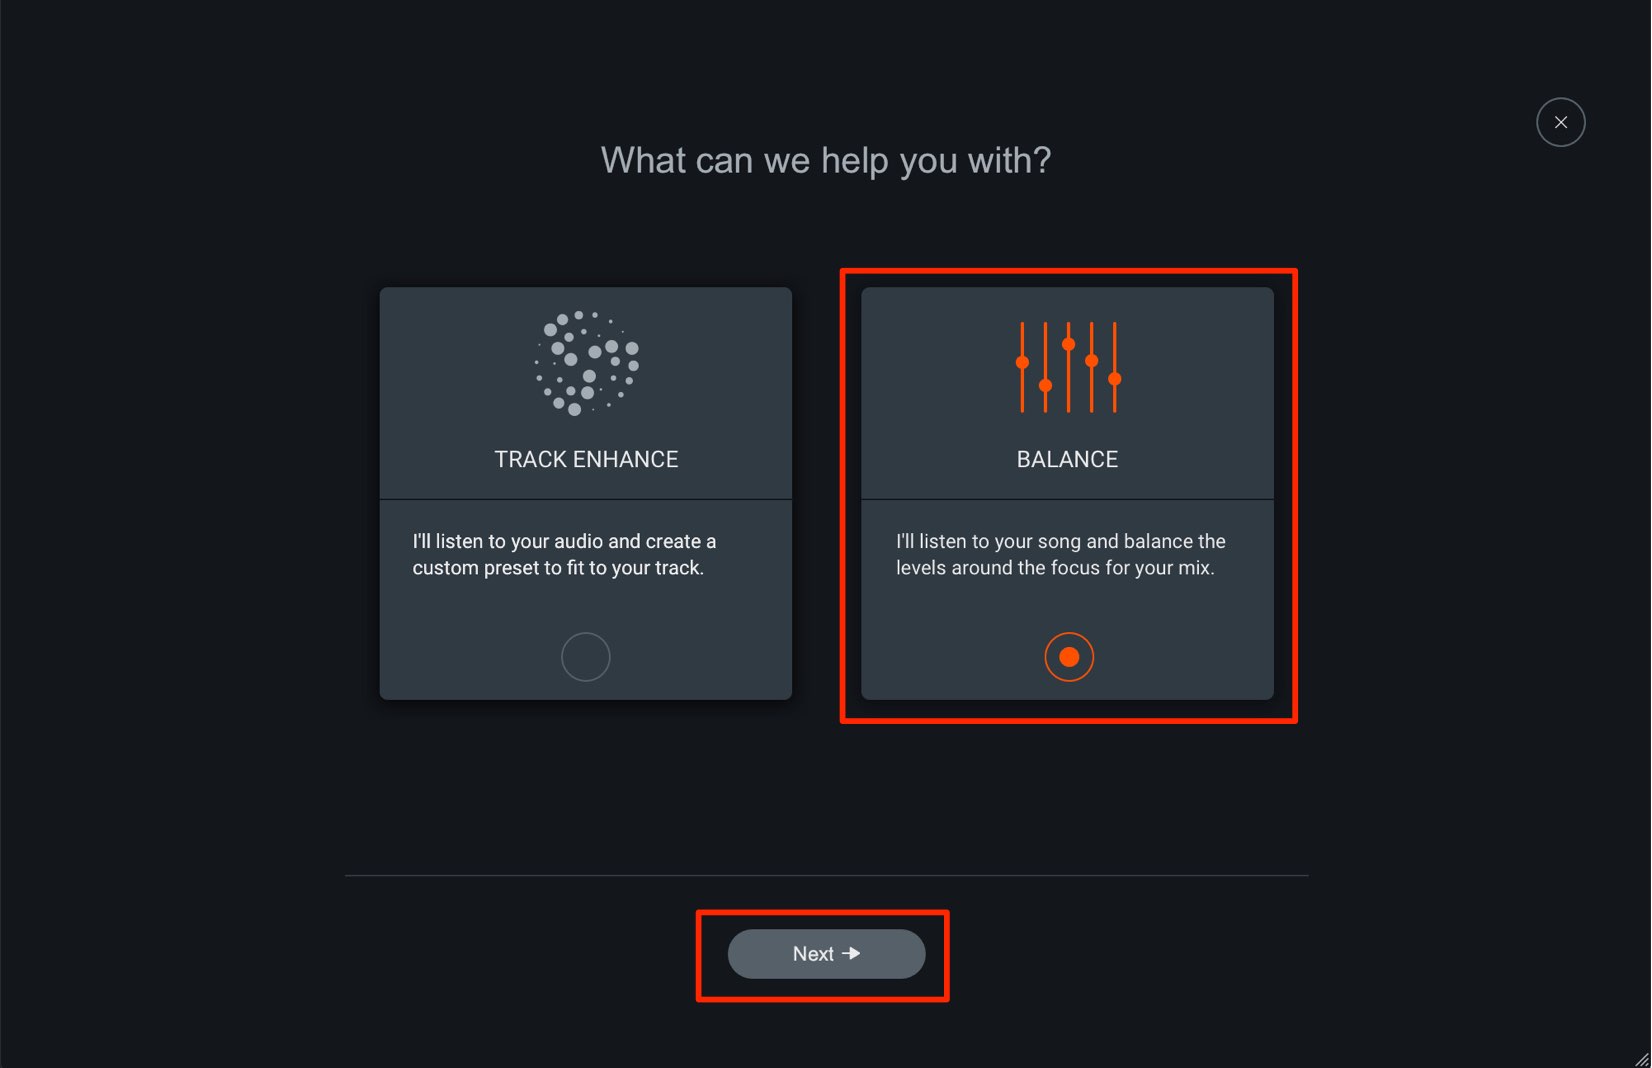
Select “BALANCE” and click “Next”.
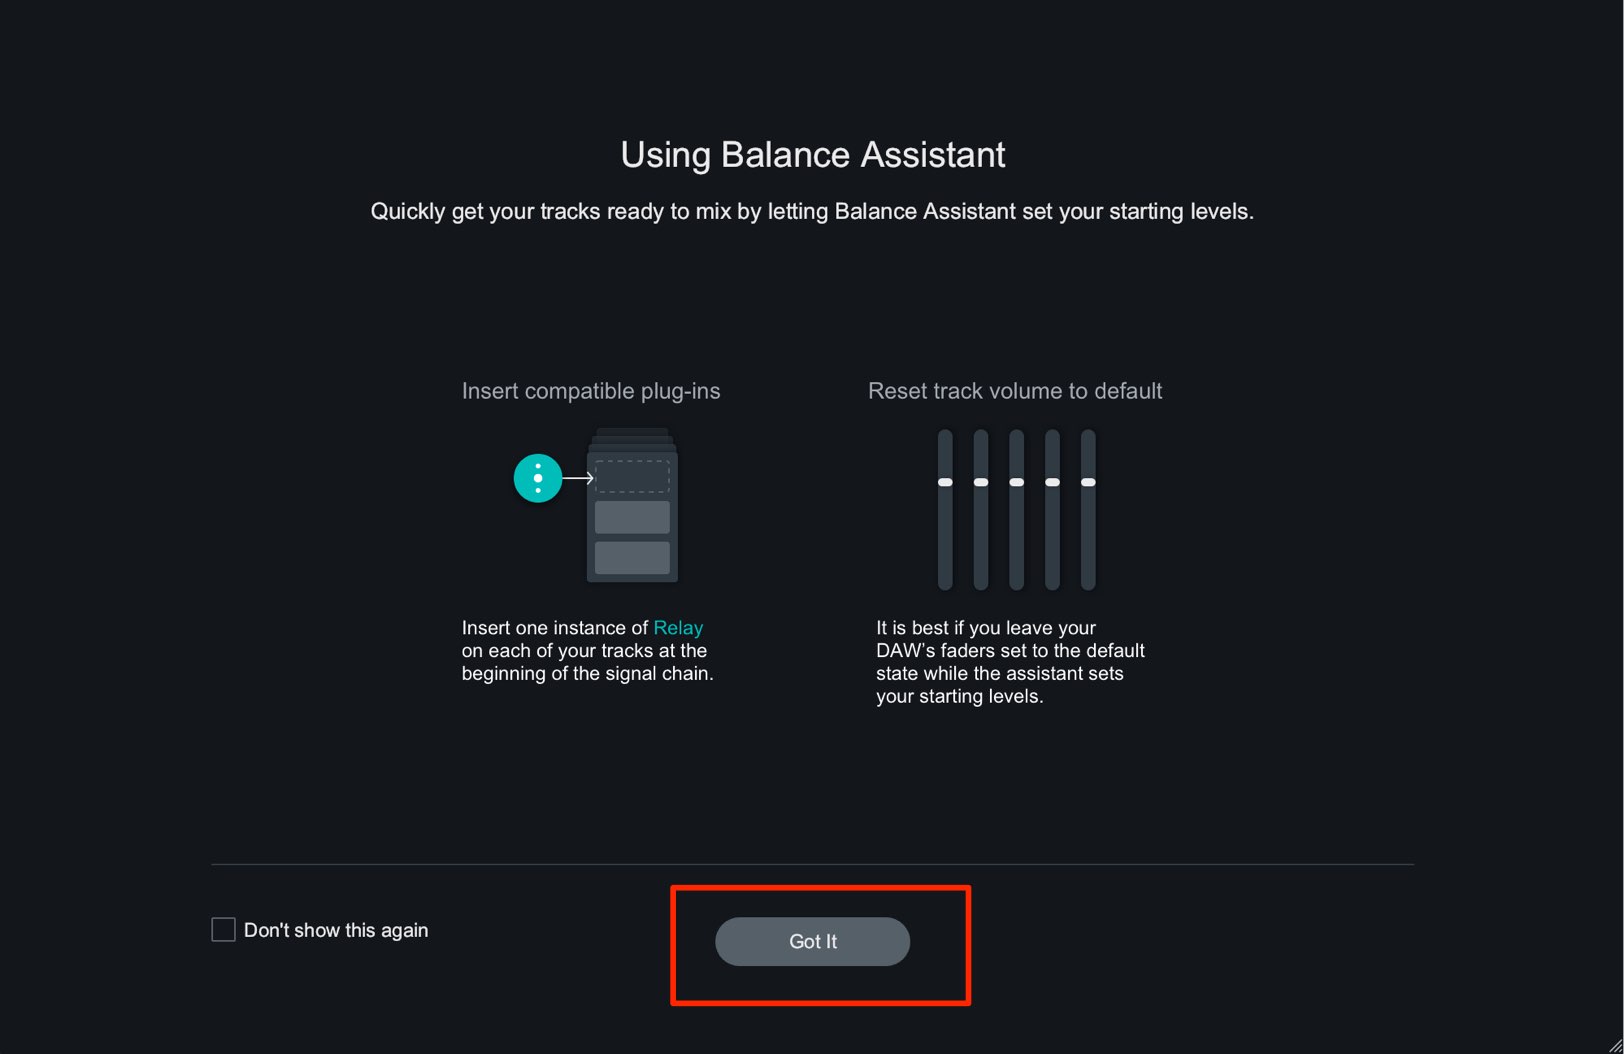
After checking that Relay is applied to each track, with the fader set to “0”, click “Got it”.
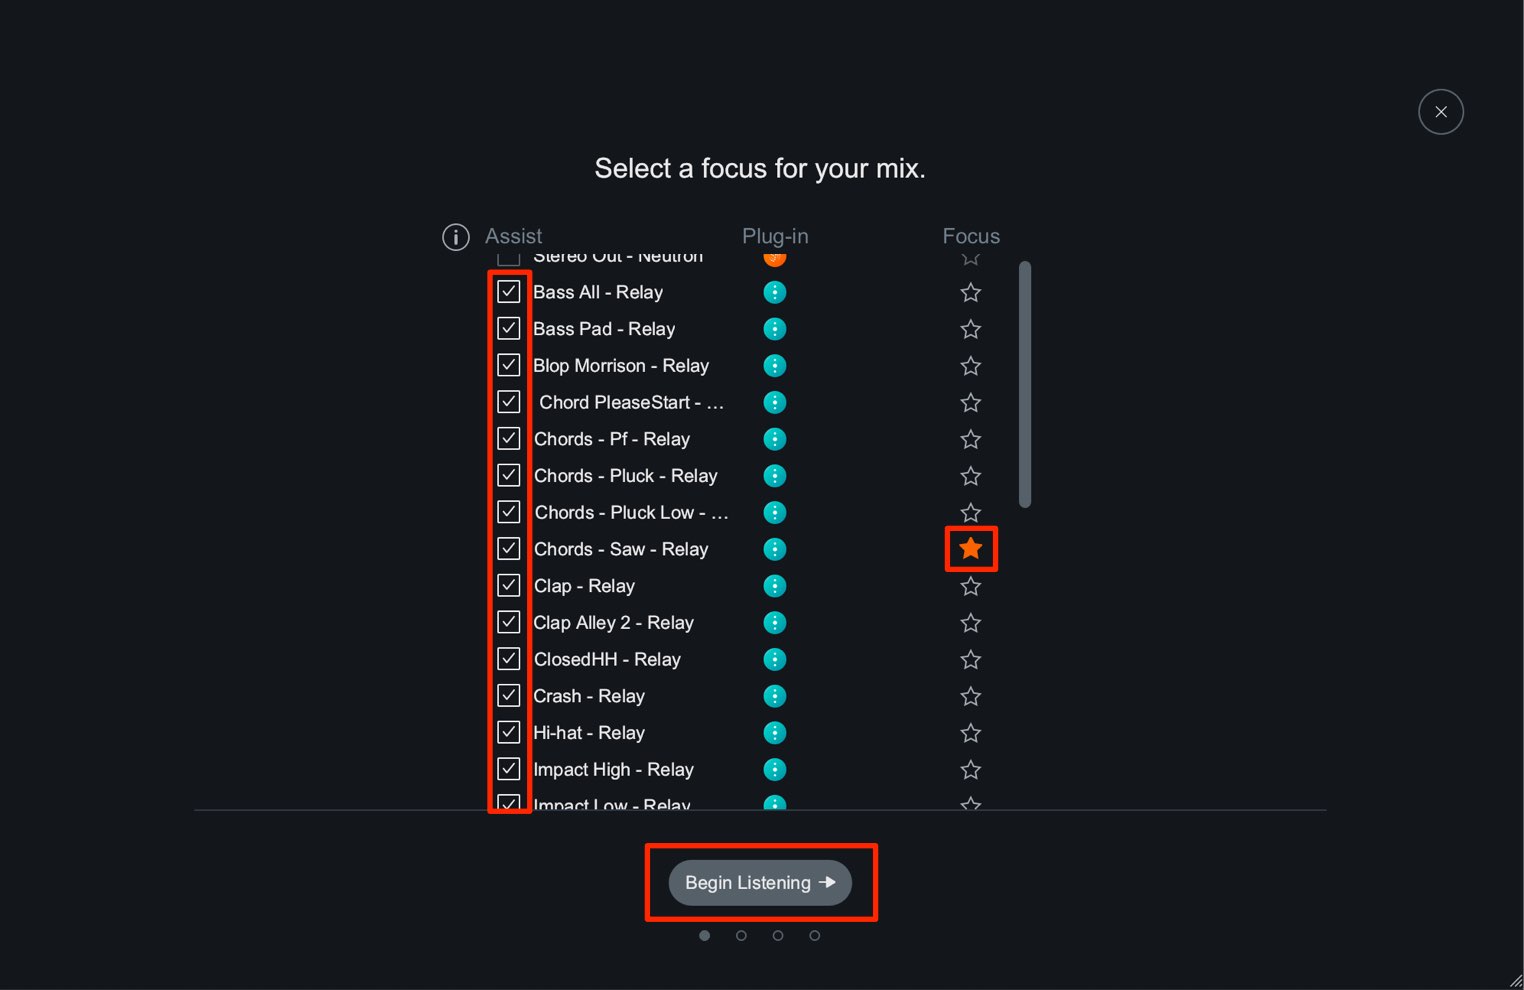
All tracks with Relay applied will be displayed.
By removing the check on the left of a track name, it will be removed from the balance control.
The star icon on the right of a track name is used to designate important tracks in the song, and be sure to select more than one.
After checking these parameters, click “Begin Listening”.
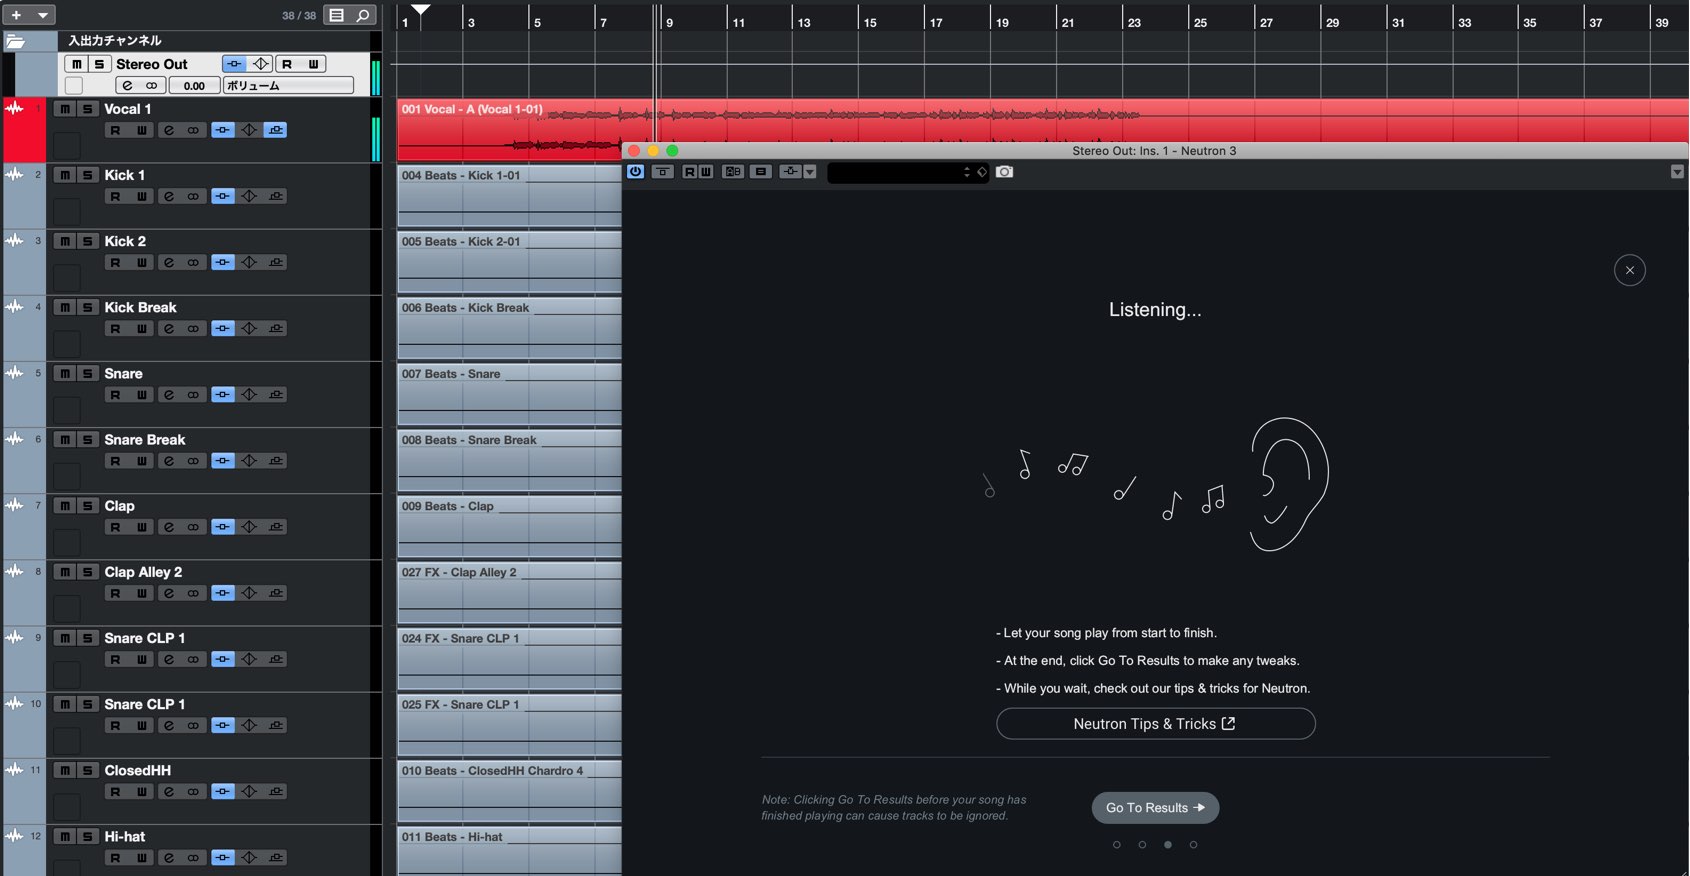
Neutron will go into listening mode, and play the song from start to finish.
Make sure that you do not make change any track’s volume during this process.
After the track is finished, stop the DAW playback and click “Go To Results”.
The analyzing has completed, and each track’s volume has been automatically adjusted and balanced.
The overall track volume will also be optimized.
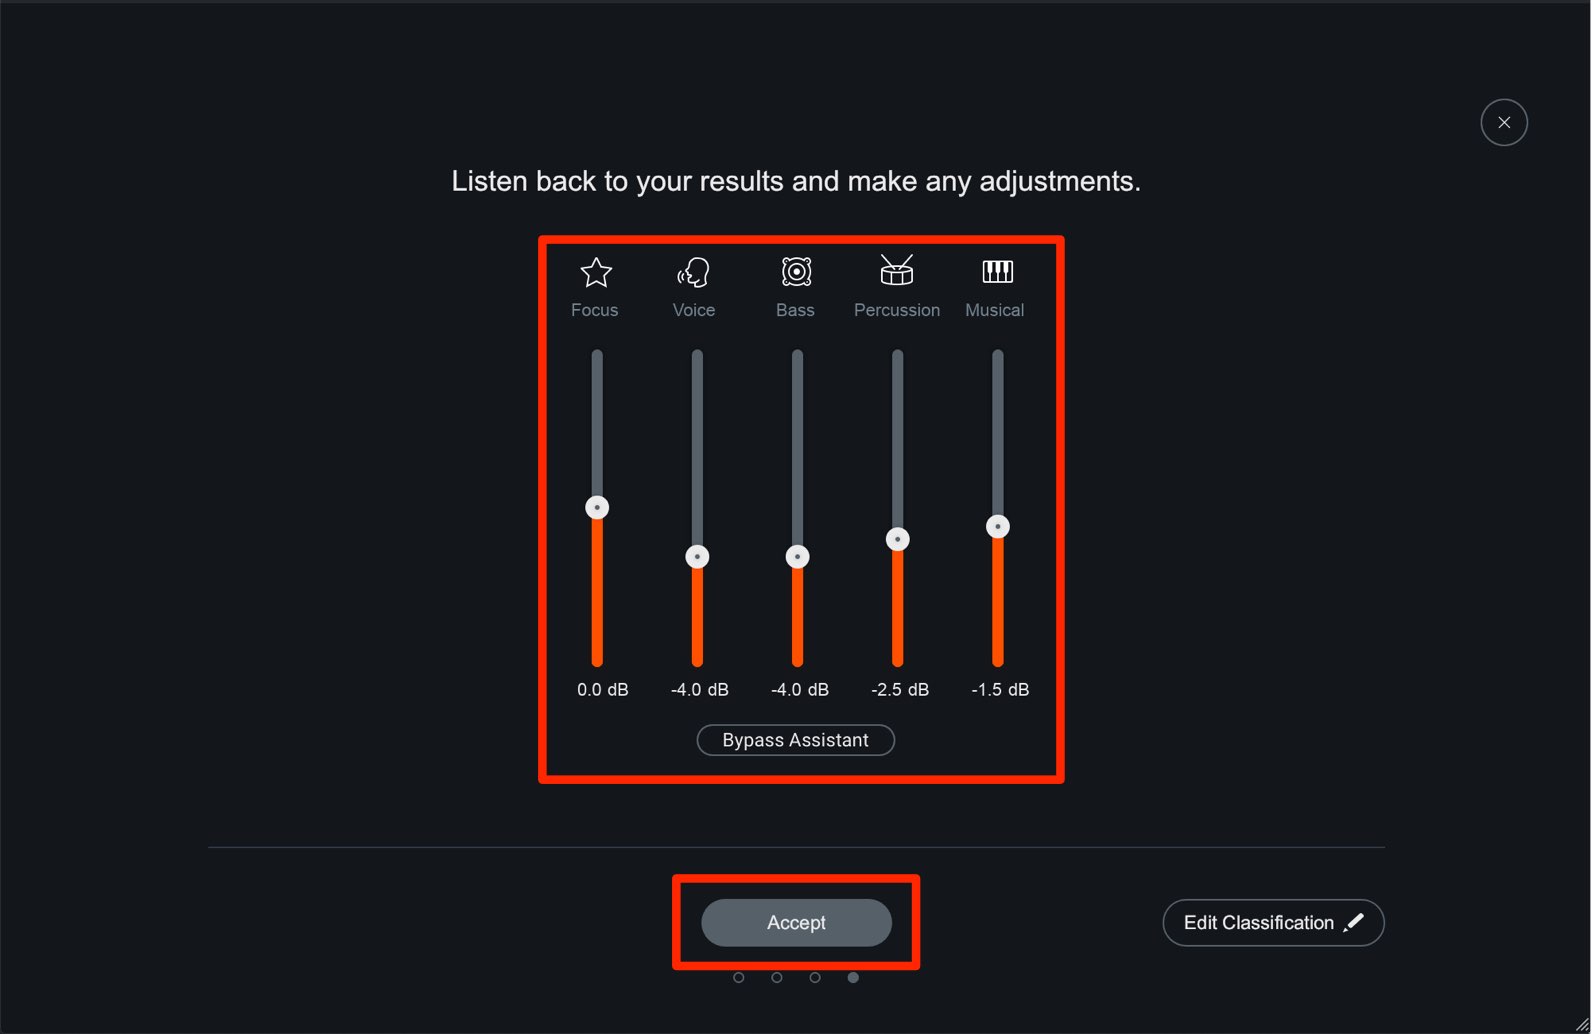
Each track is auto analyzed, and you can make detailed edits from the faders.
By double clicking a fader, you can return it to the original analyzed amount.
In addition, you can use “Bypass Assistant” to compare the sound before/after application.
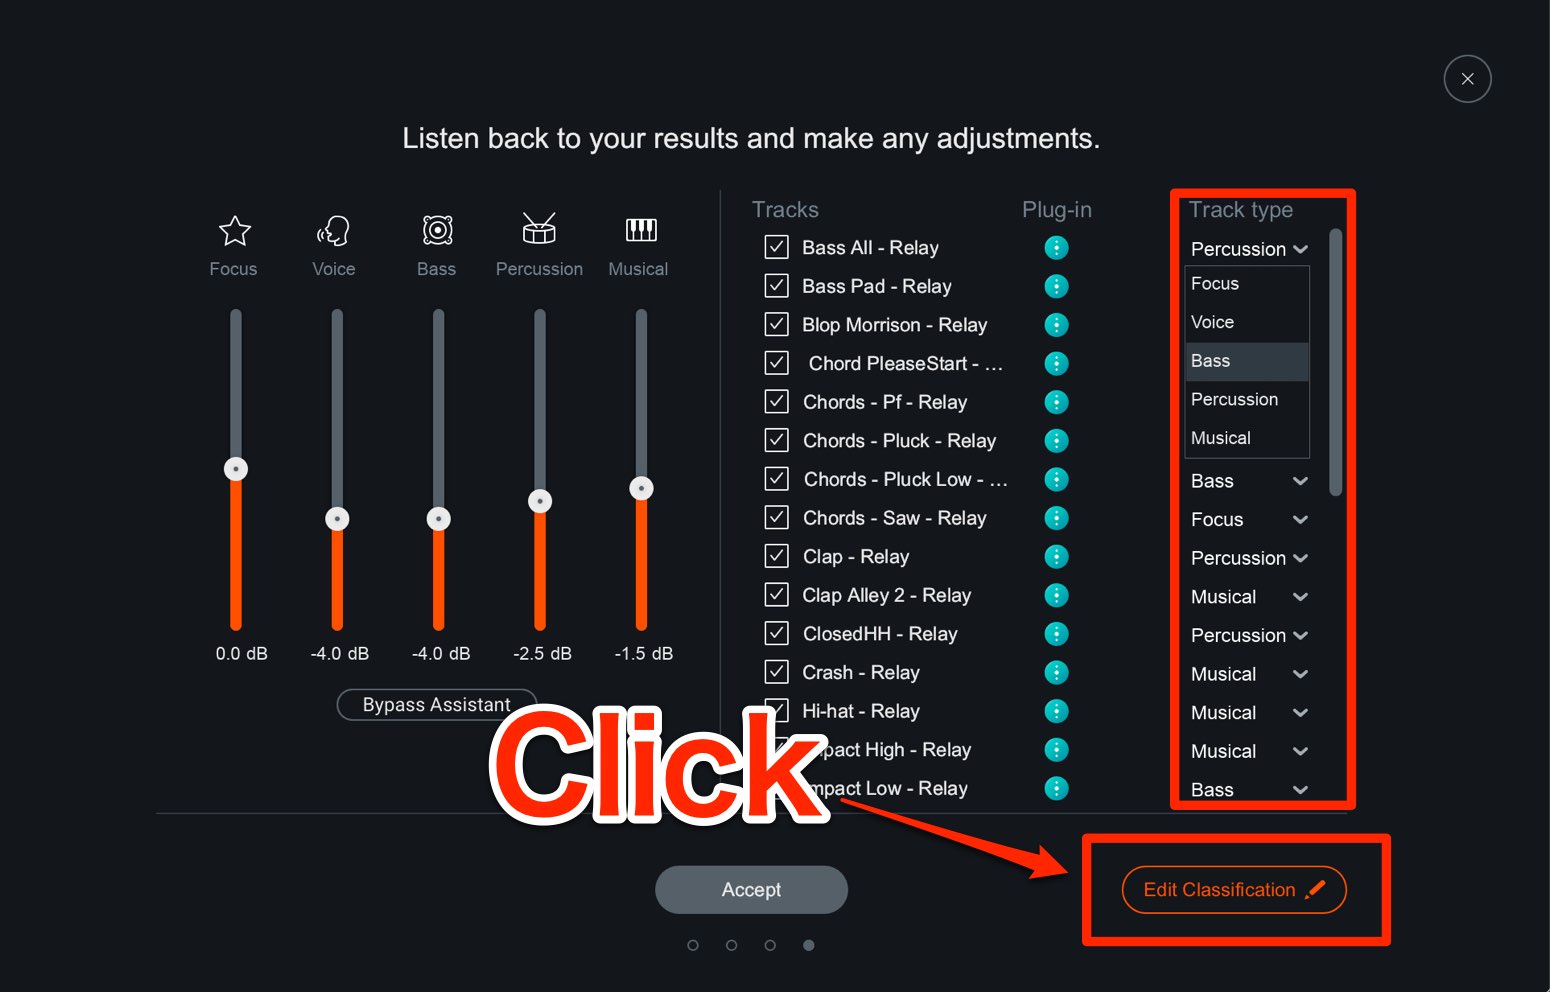
The analyzed track categories can be edited as well.
Click “Edit Classification” to check/change an analyzed track’s classification.
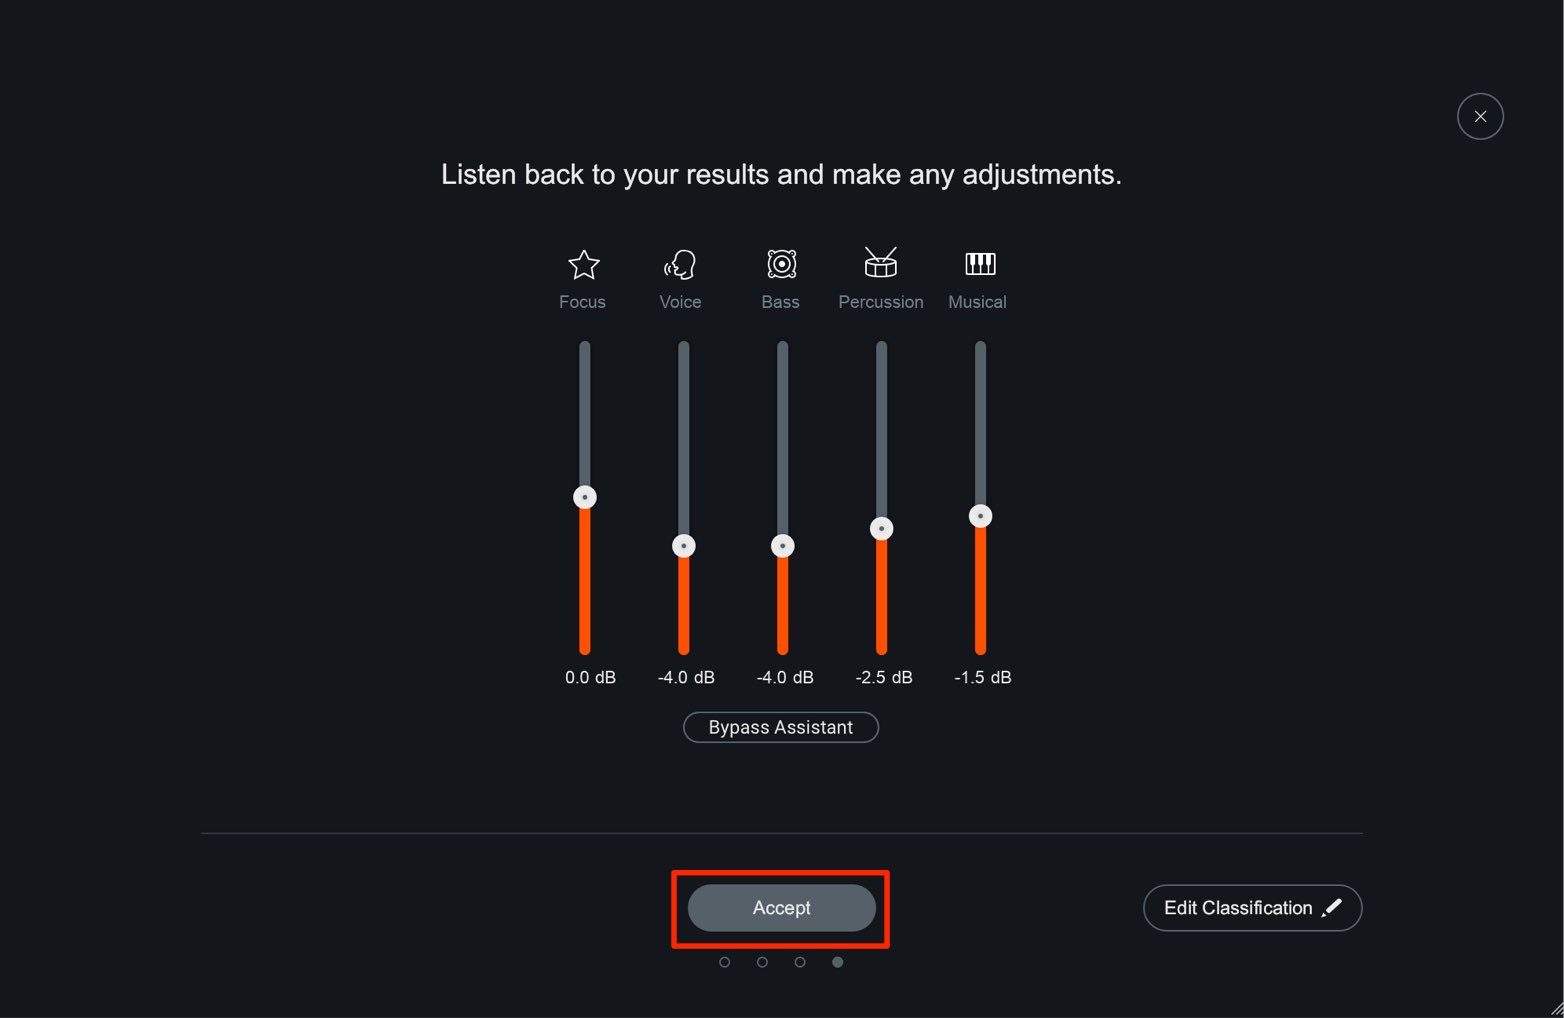
After making preferred adjustments, click “Accept” to set each track’s Relay volume.
This completes the process of making personal volume adjustments.
After that, mix by making volume, pan, and adding effects (after Relay in the signal chain).
Syncing with Visual Mixer 3
You can sync it with Neutron 3’s “Visual Mixer 3” as well.
It’s useful to apply it before clicking the “Accept” button above.
Before clicking “Accept”
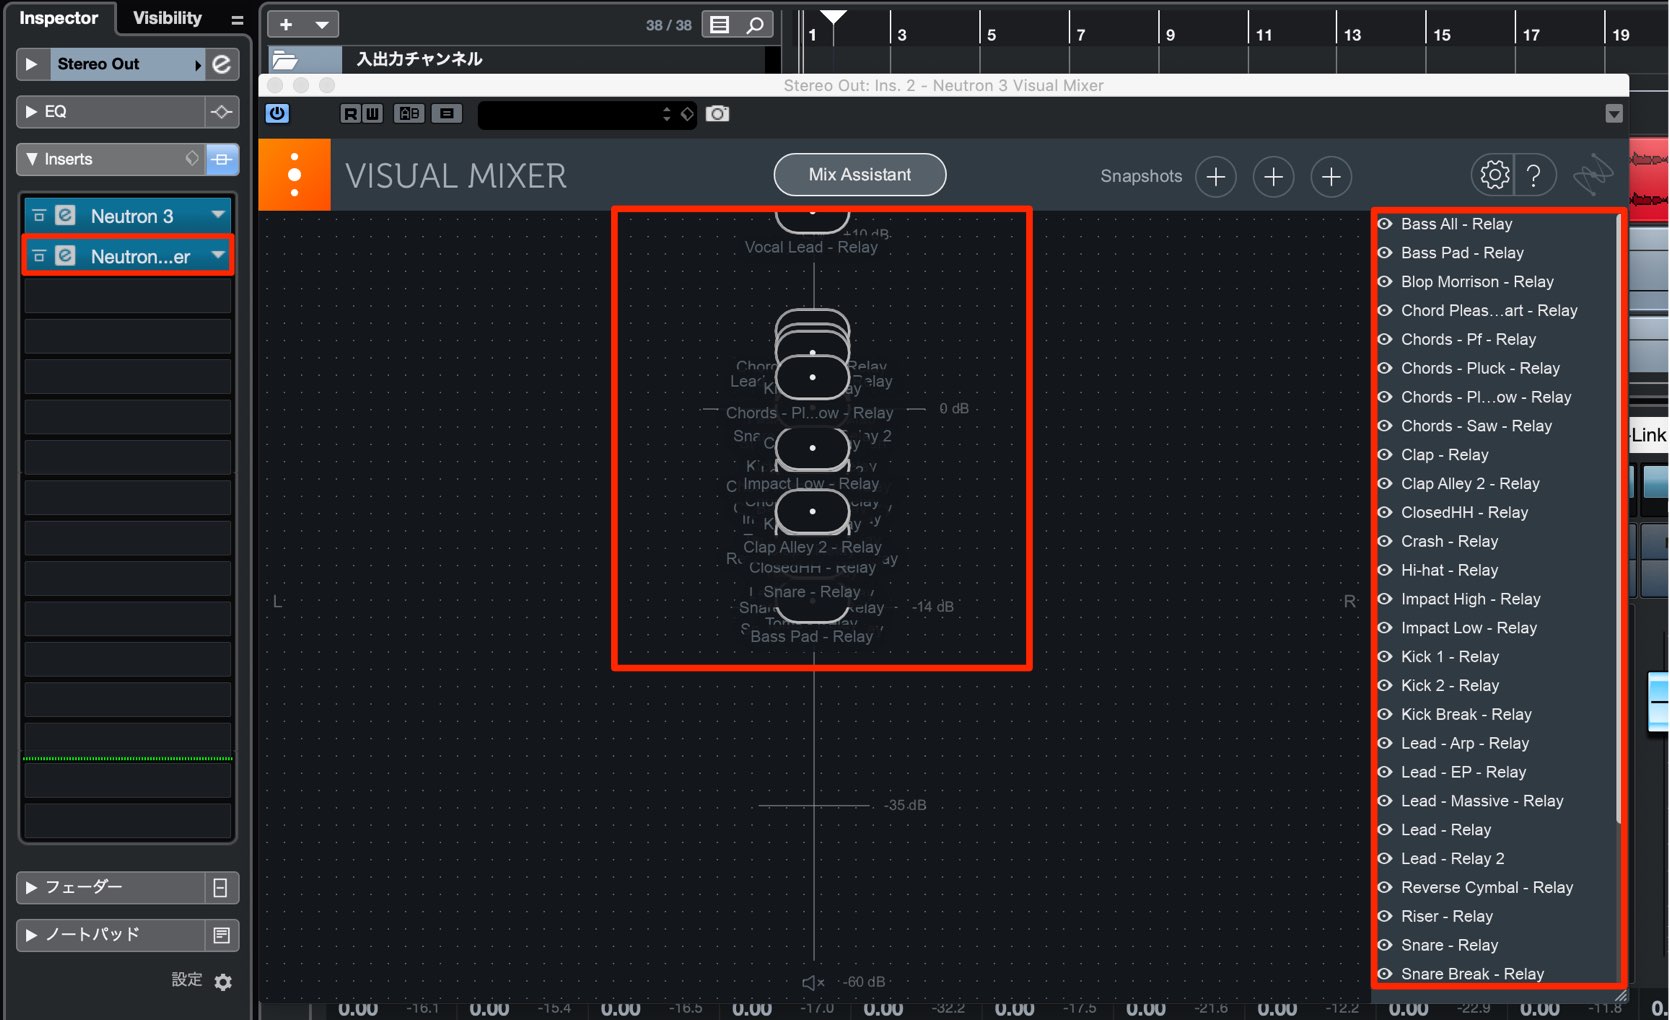
insert Visual Mixer 3 into the master track.
The tracks with Relay applied will be shown.
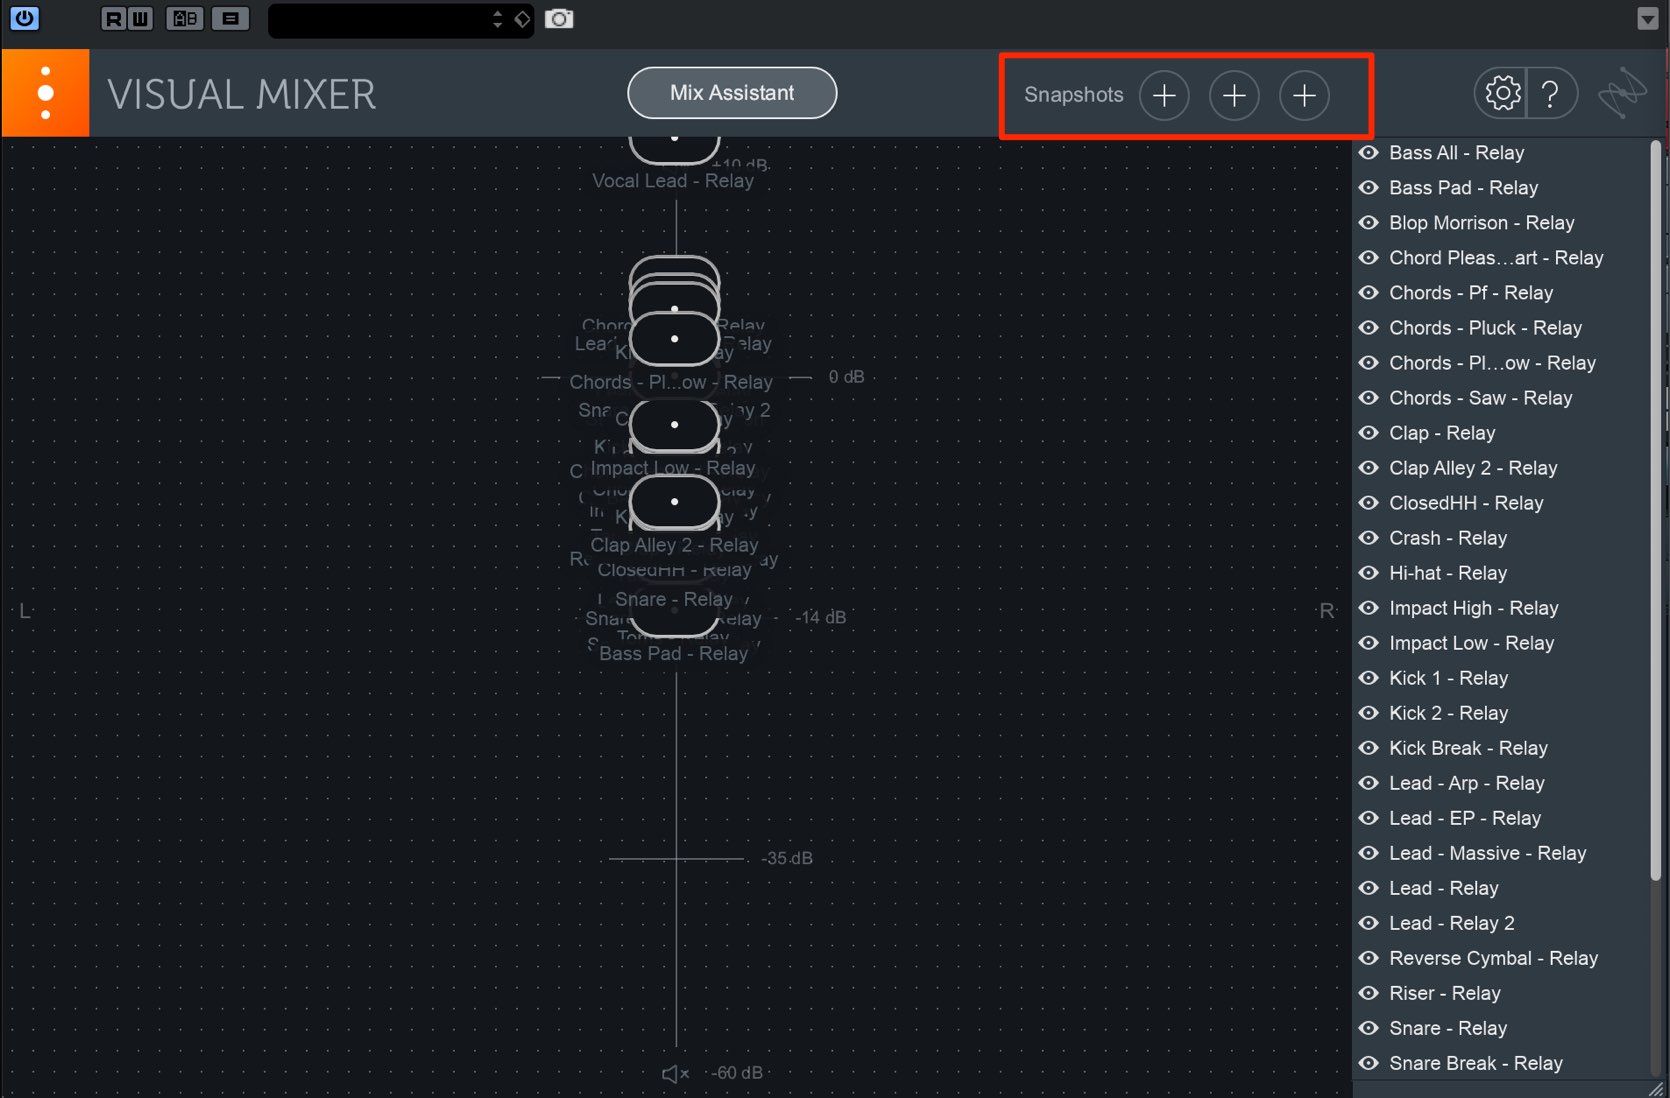
“Snapshots” is included which allows you to save up to 3 settings such as the overall volume balance.
By clicking the “+” button to save the settings before and after pressing Accept,
you can easily return to the previous setting.
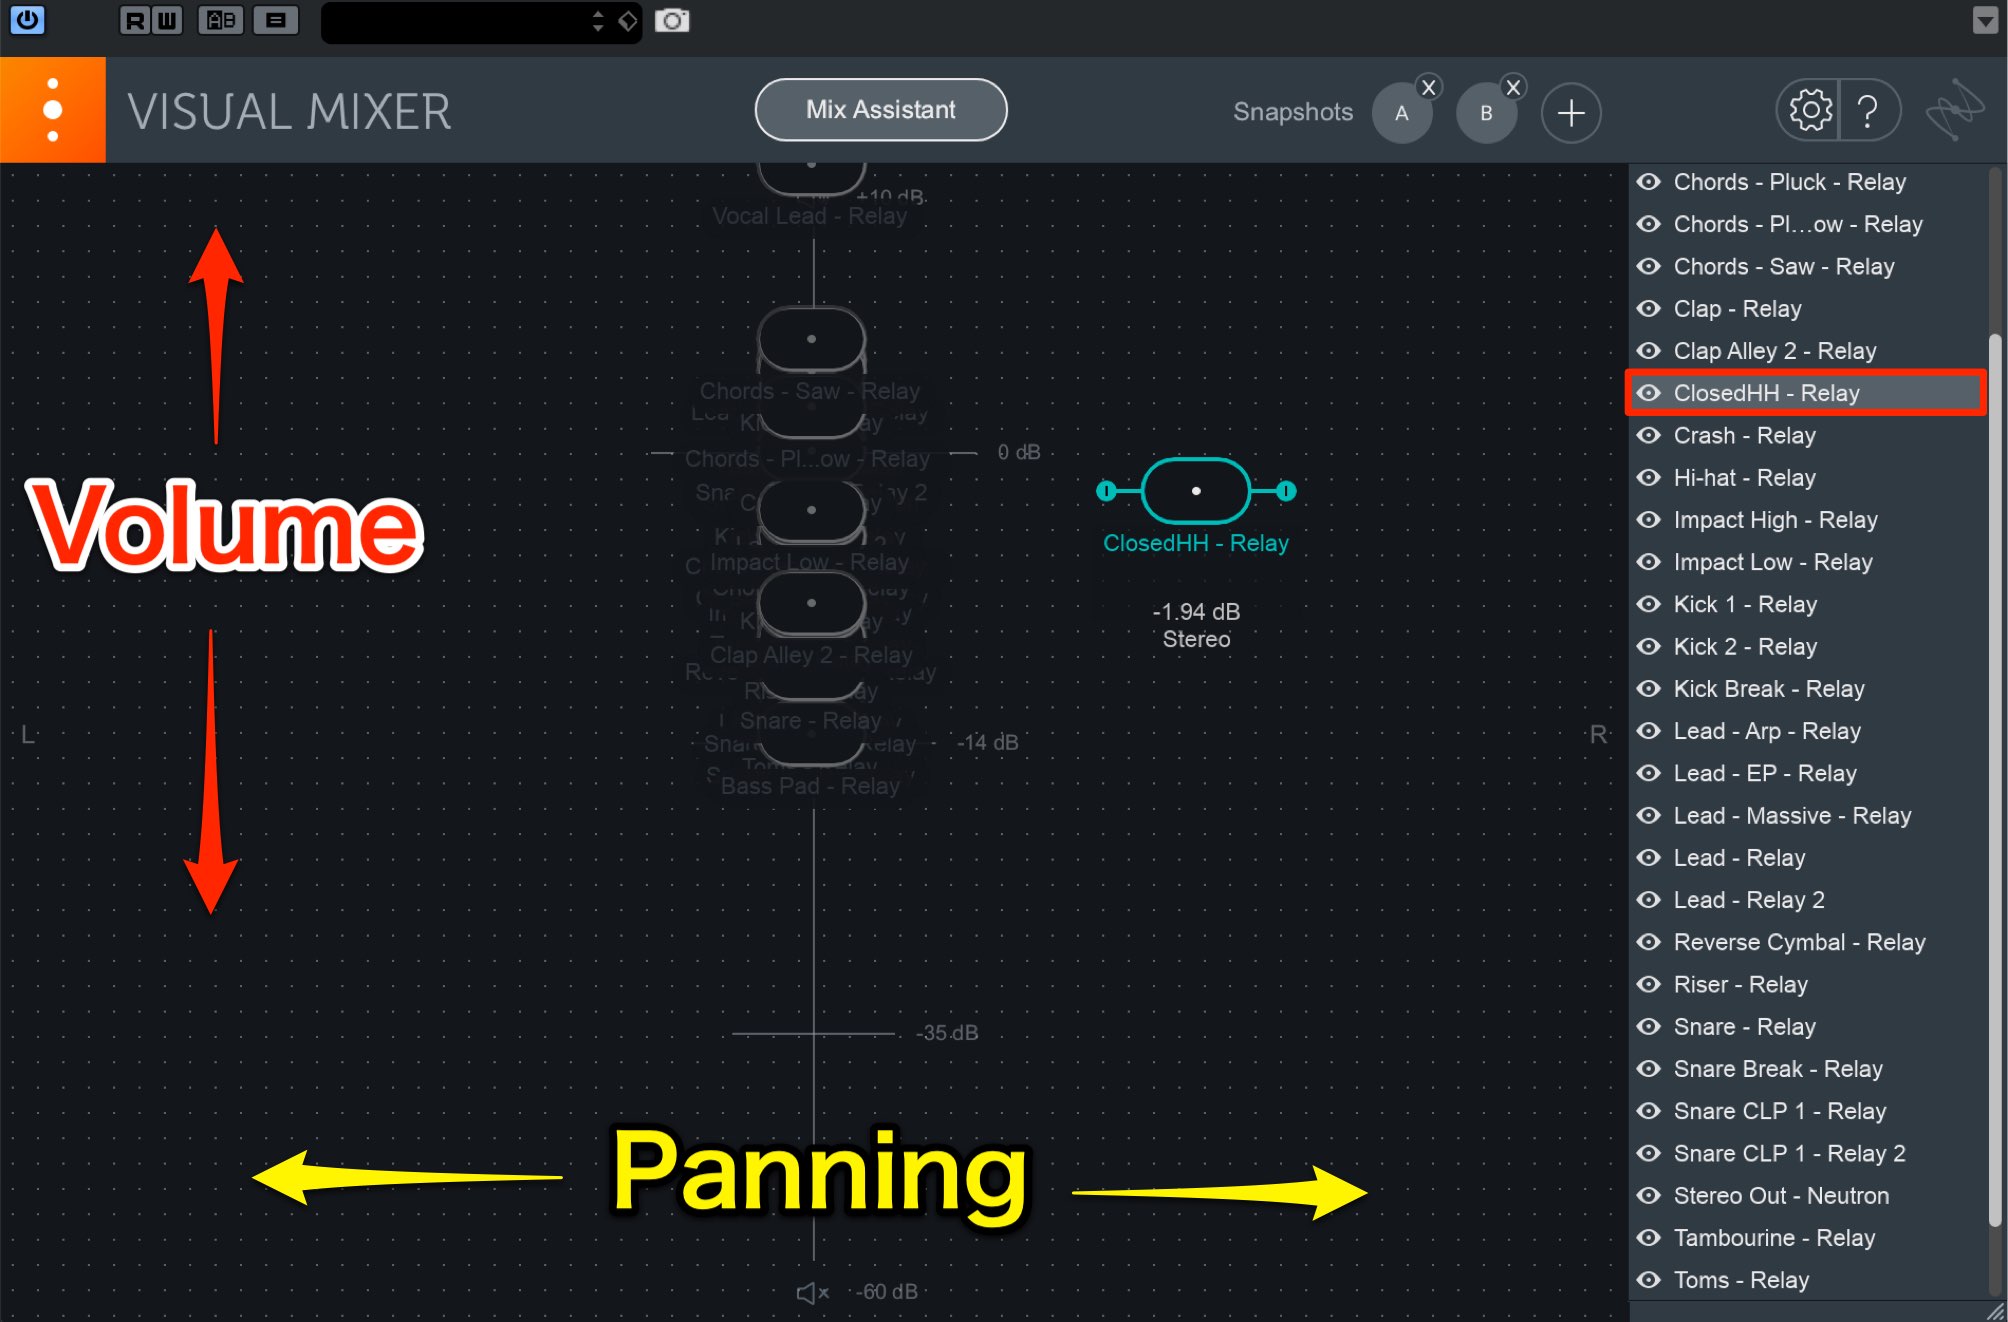
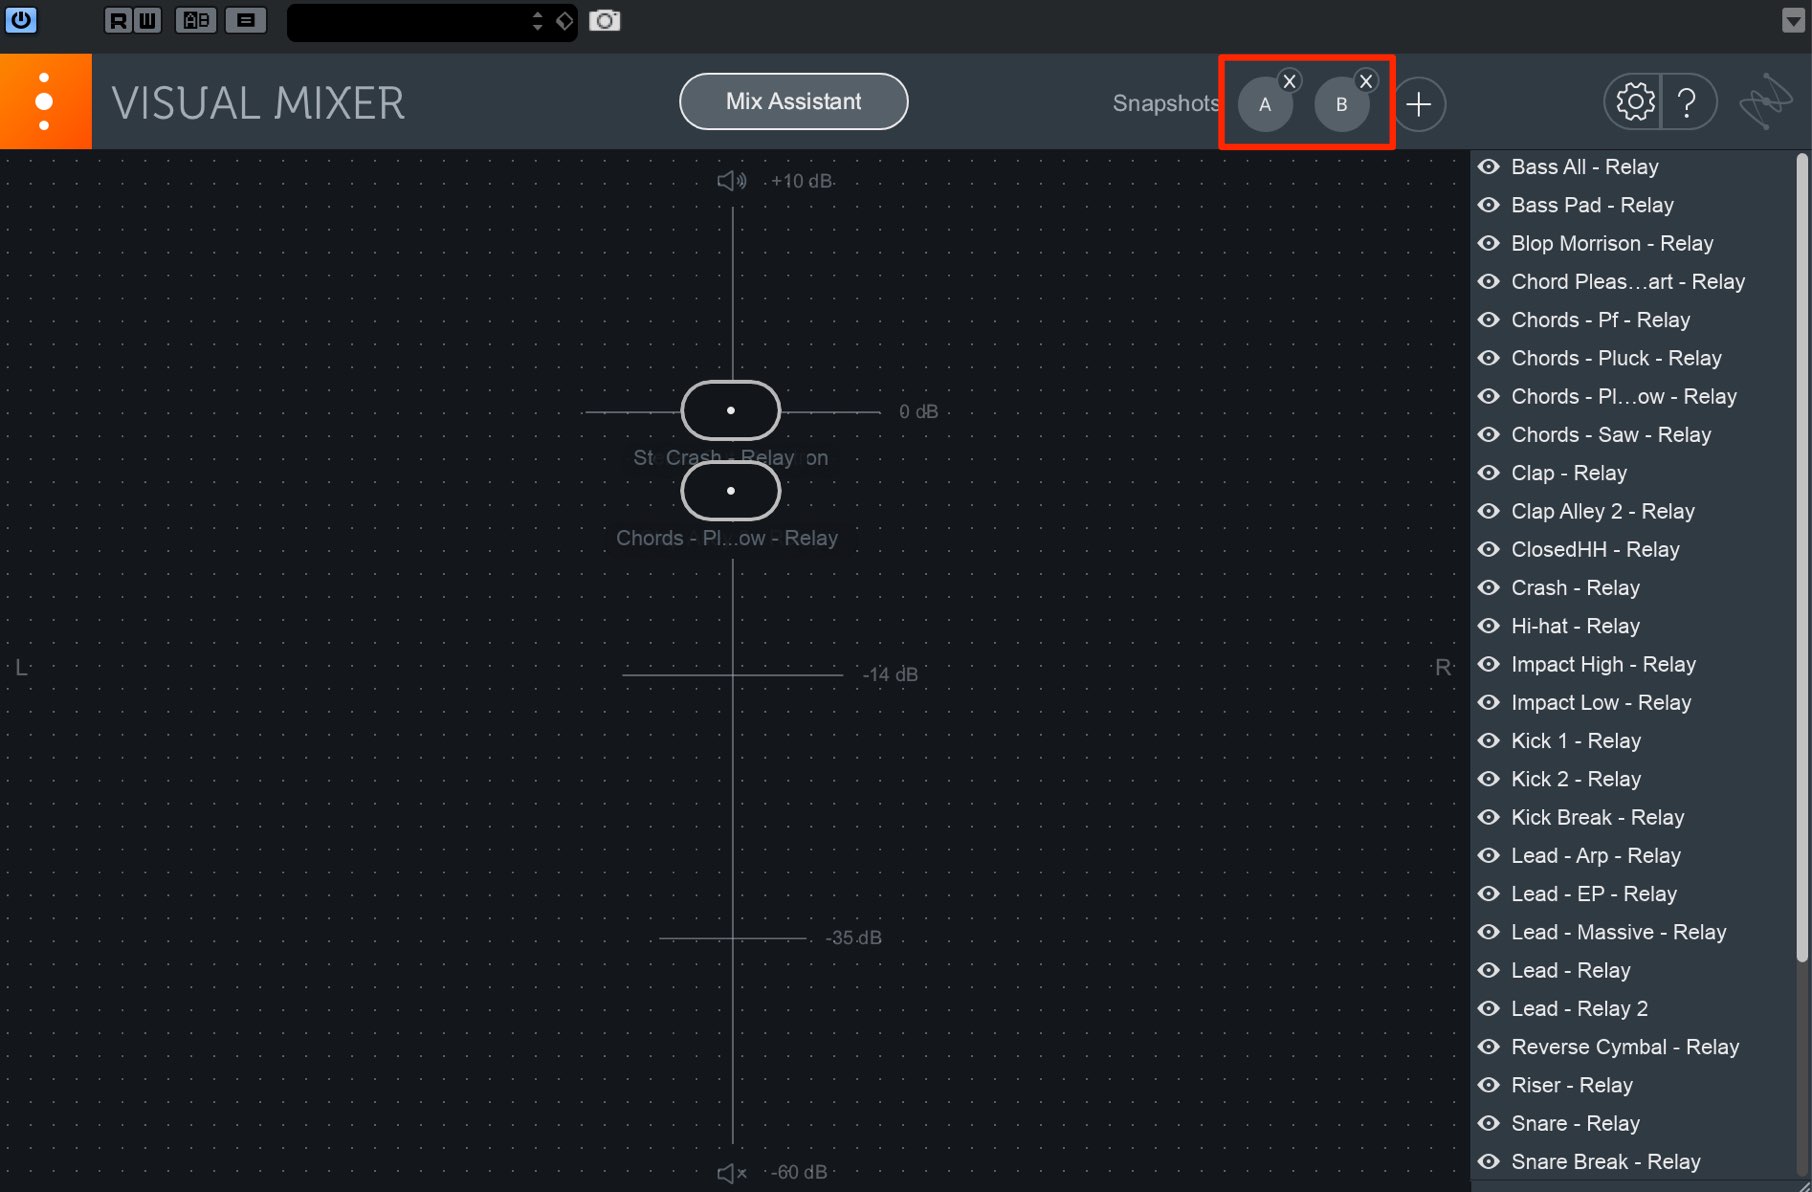
Individual track volume/pan adjustments can be instinctively adjusted from Visual Mixer 3.
Volume is vertical, while panning is horizontal.
Select and drag a track from the list on the right.
You can use the Snapshots above to quickly return to the original settings as well.
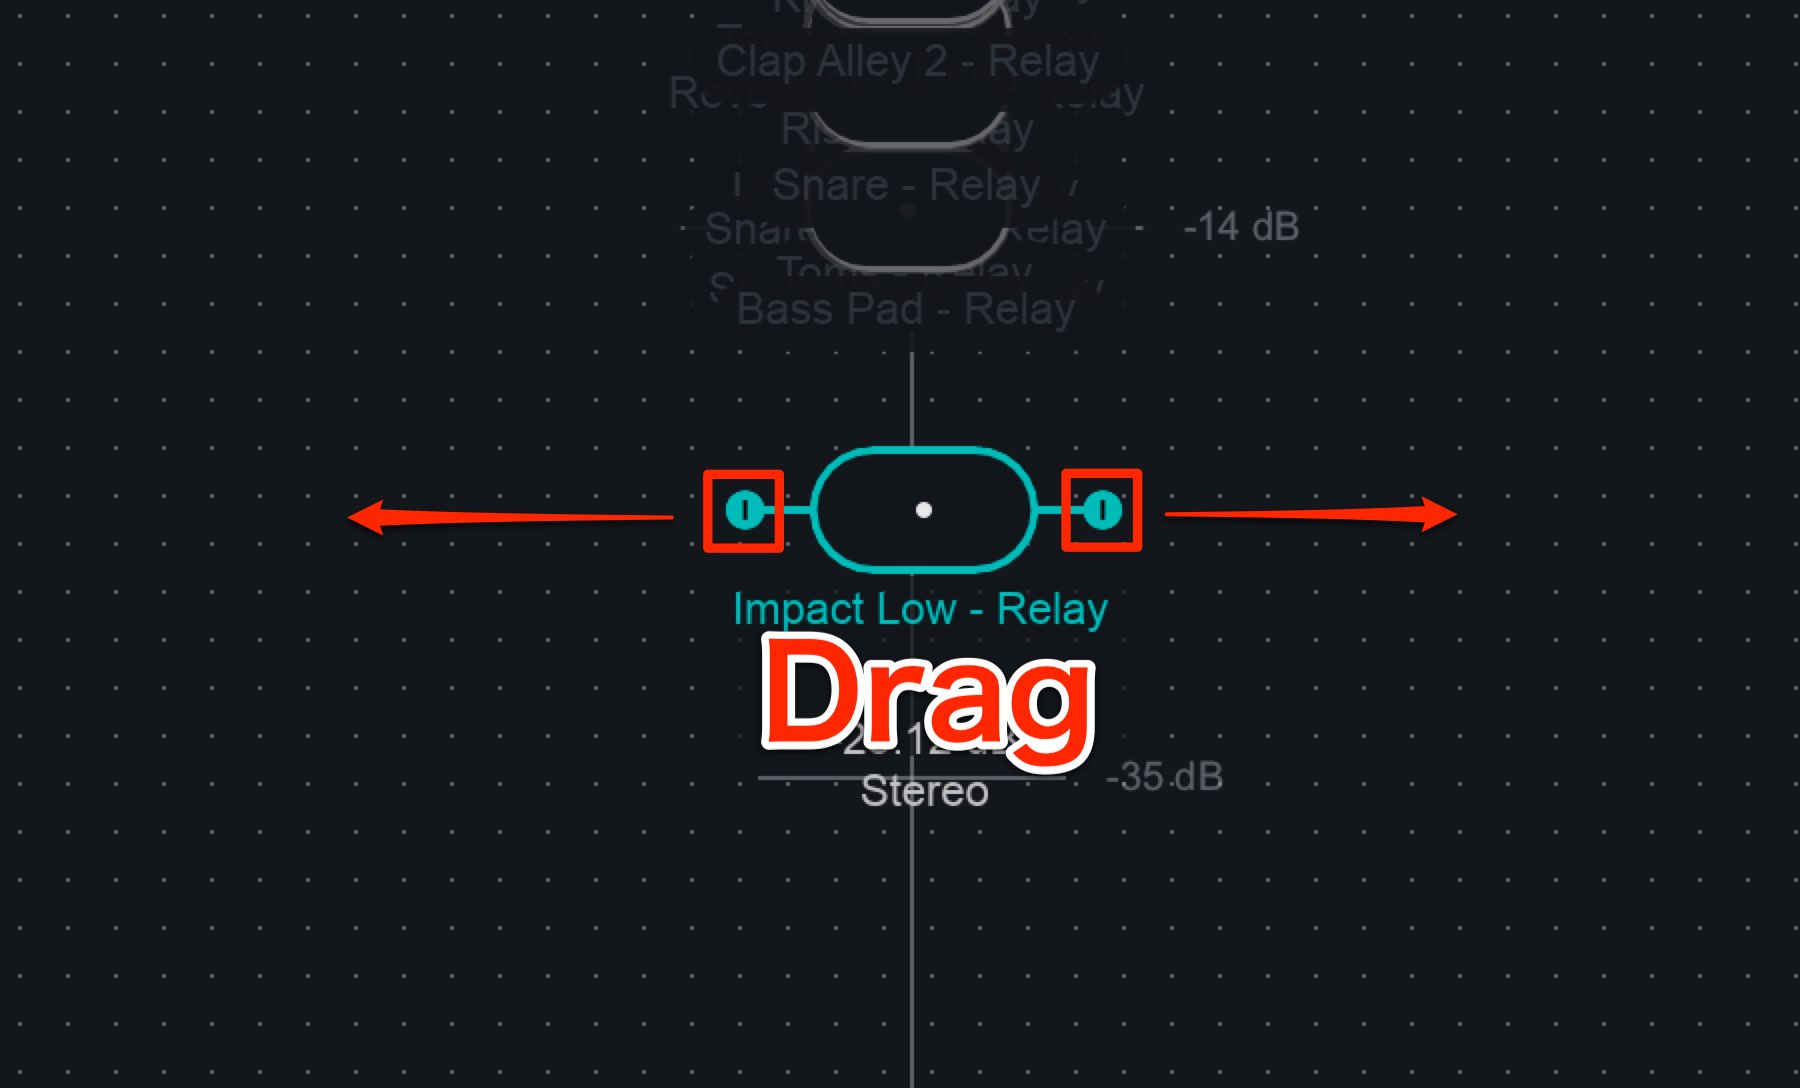
By dragging the icons on the sides of the track name left/right, you can easily control the spread of the sound.
Amazing results for your track using “Track Enhance”
“Track Enhance” allows you analyze each track’s sound and automatically apply professional effect settings.
It was originally called “Track Assistant” in Neutron Ver2 and has been changed to “Track Assistant”.
We will apply Track Enhance to the vocal track in this tutorial.
It can be used in addition to the Relay above as well.
Open Neutron 3 in the track, and select “Mix Assistant”.
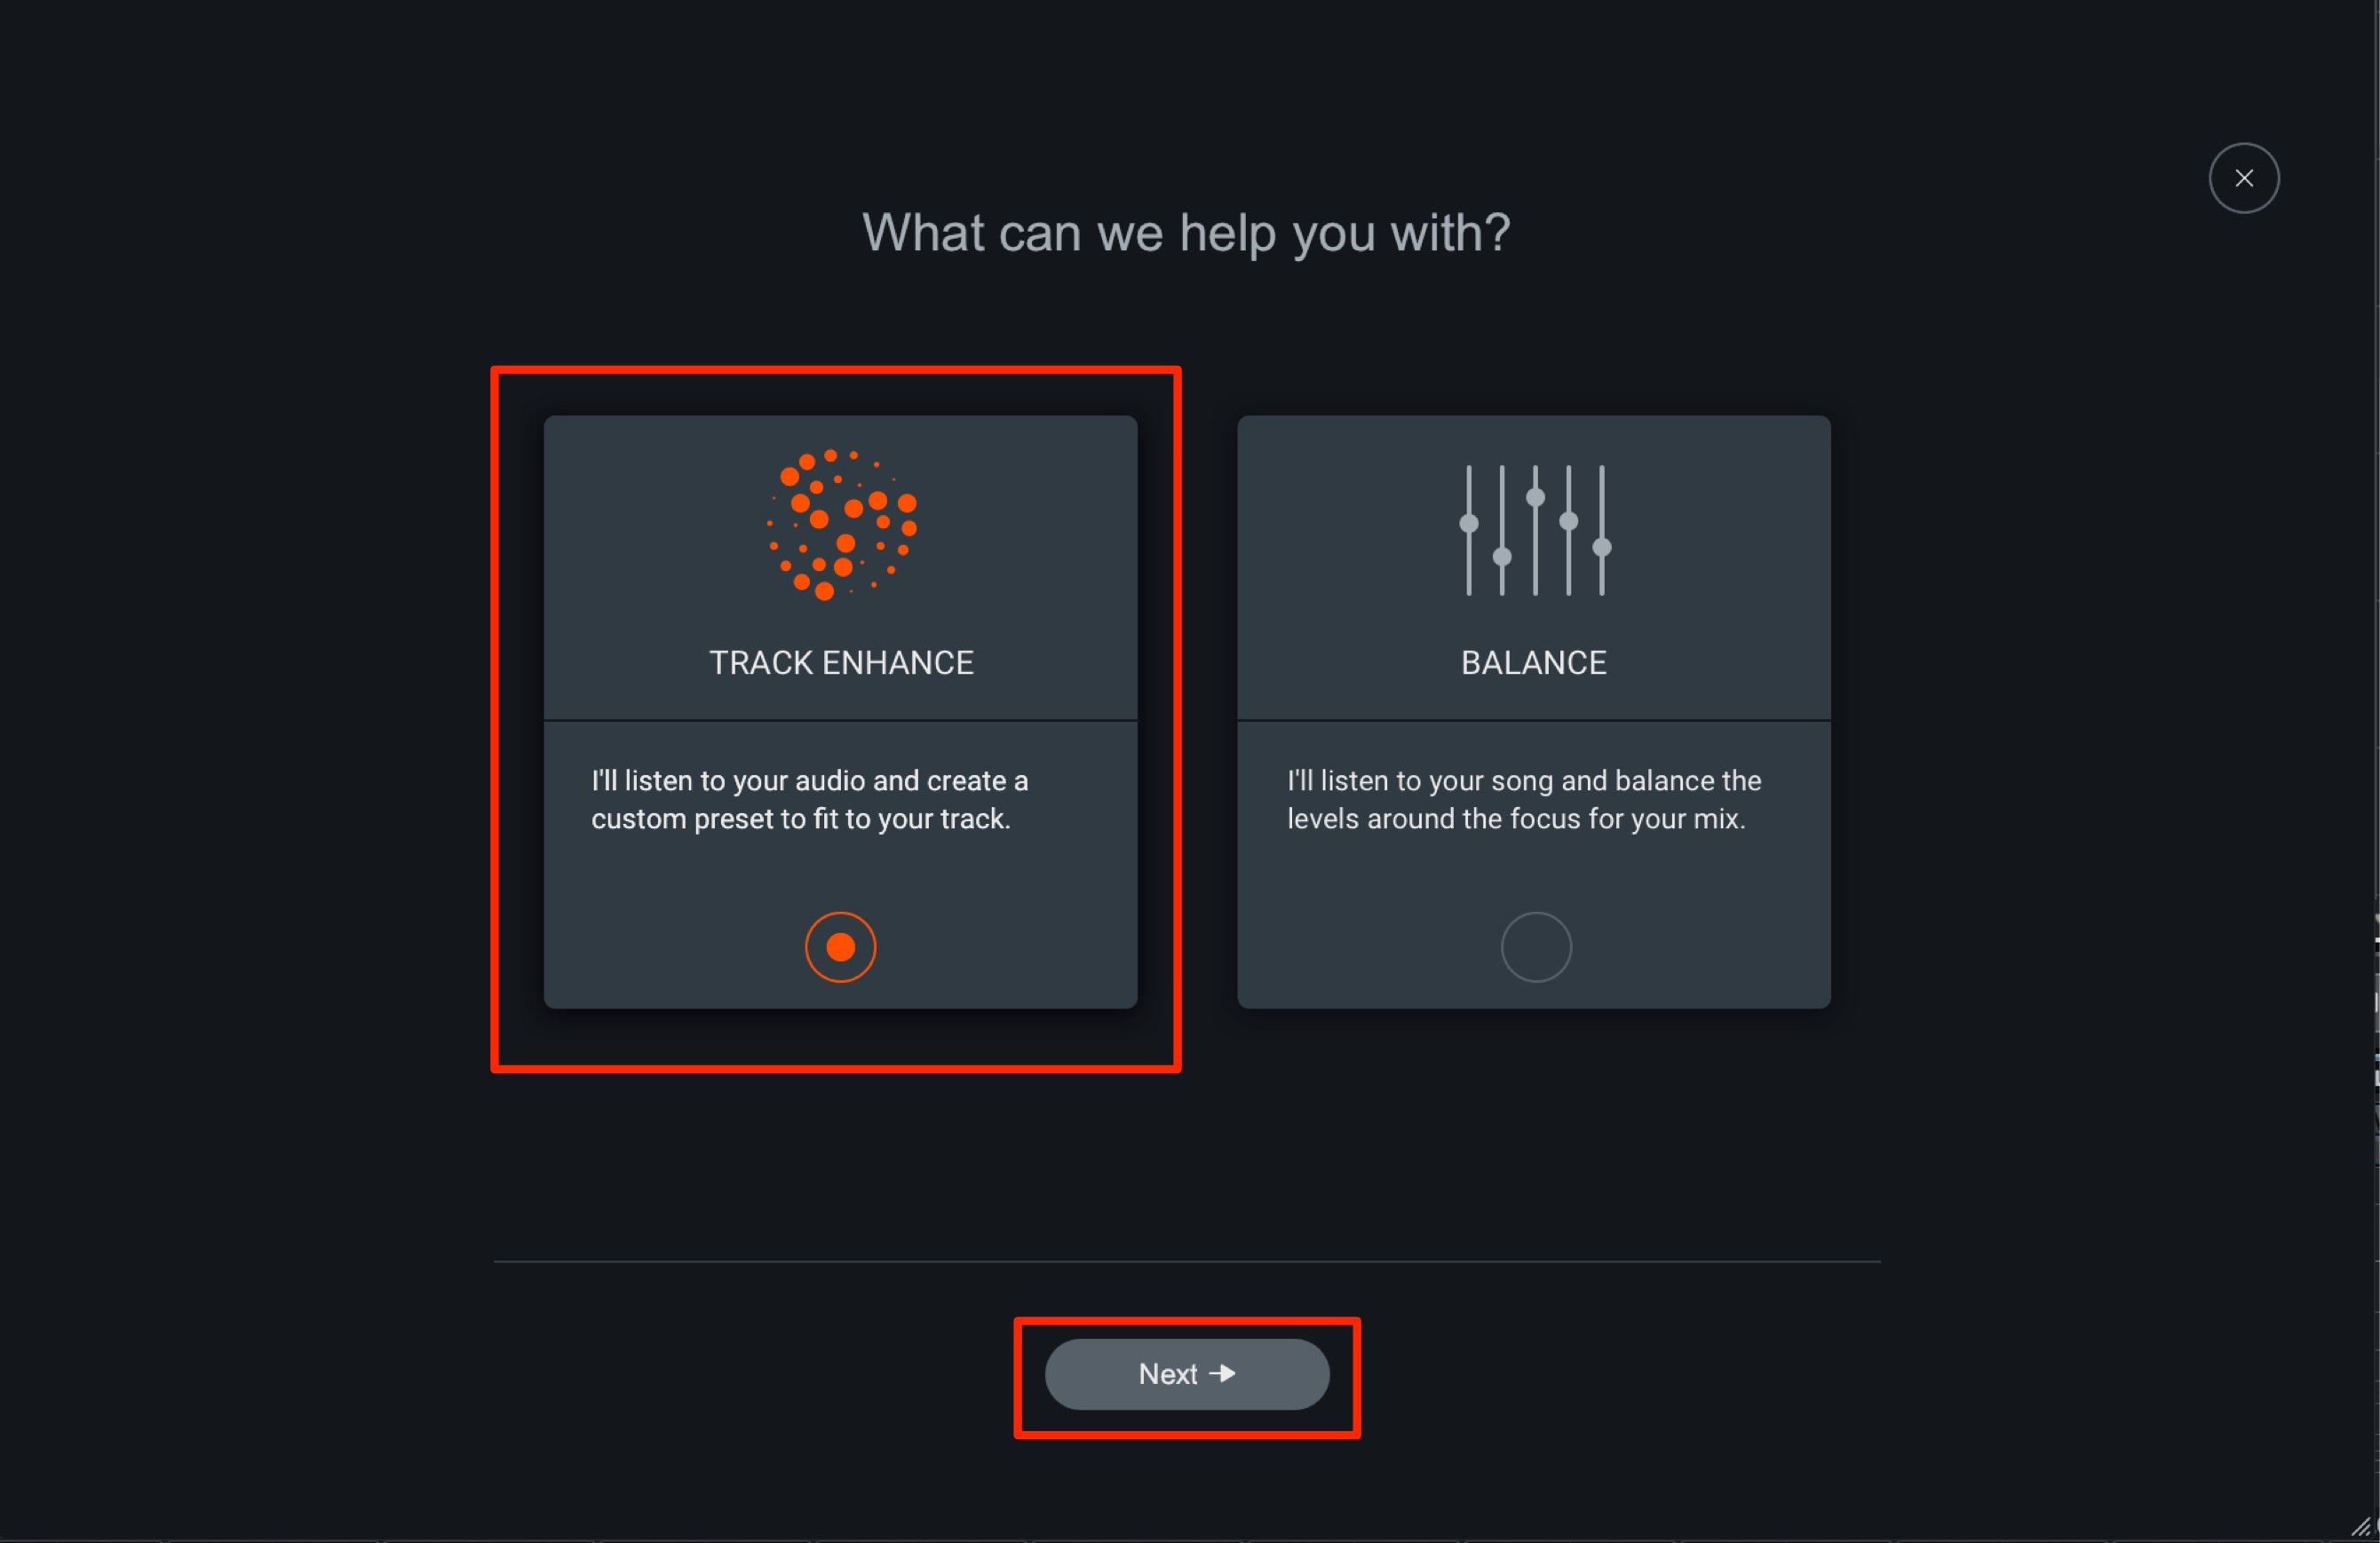
Select Track Enhance and click “Next”.
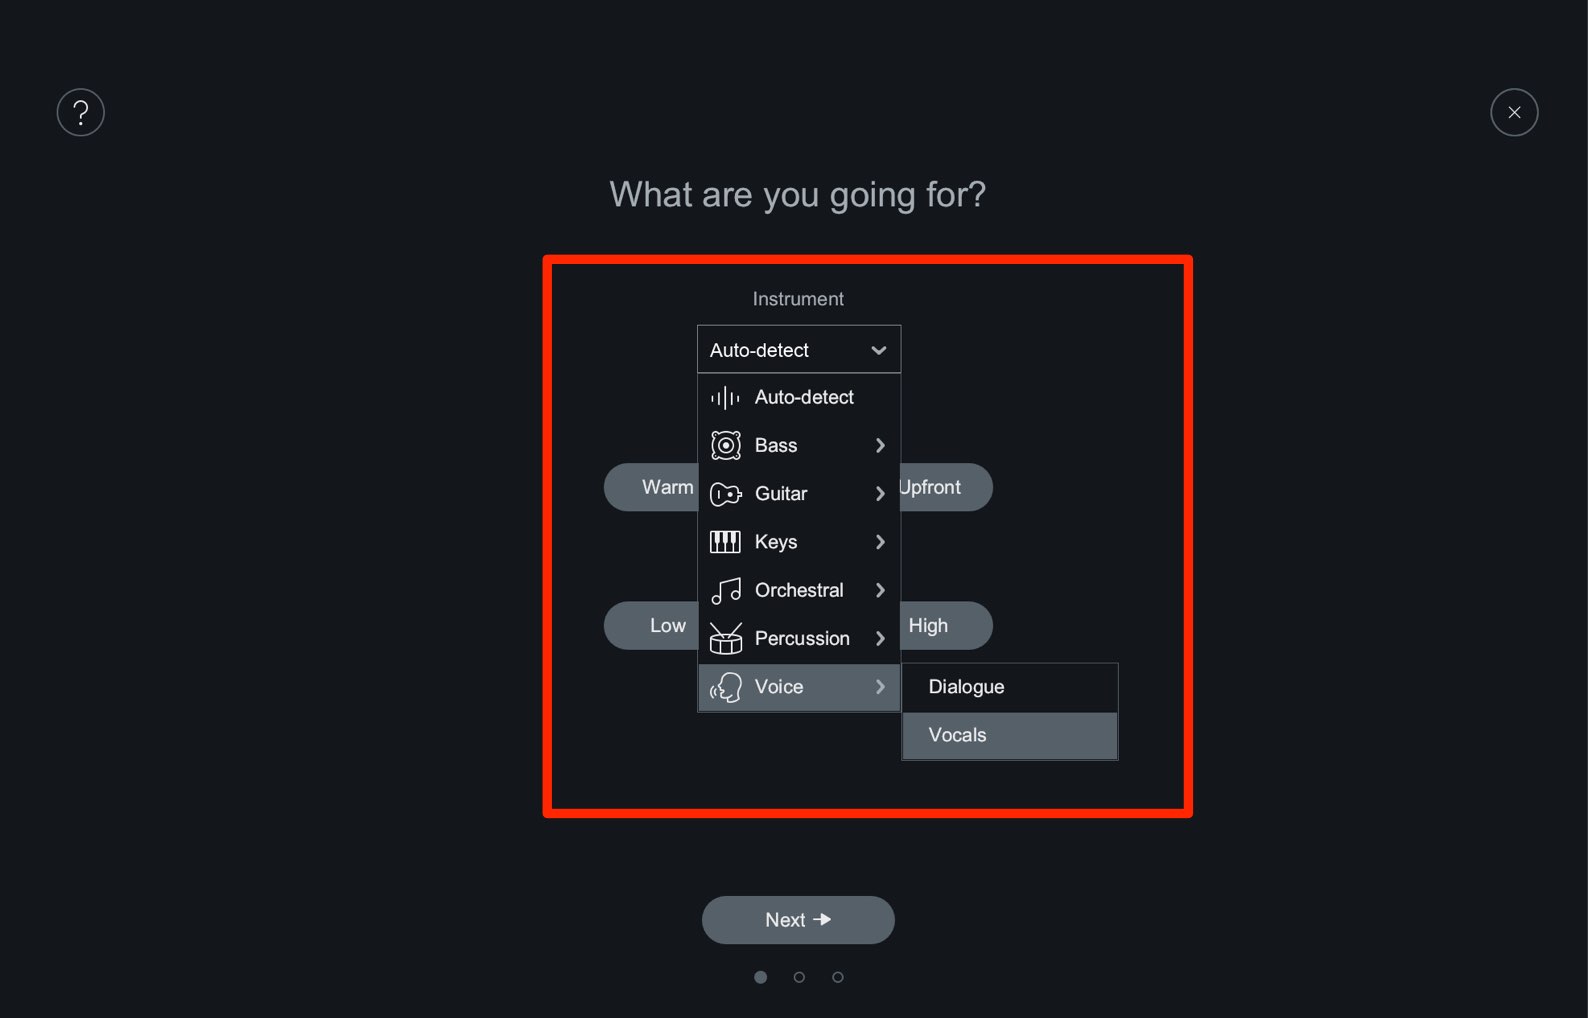
Select the track type/sound and click “Next”.
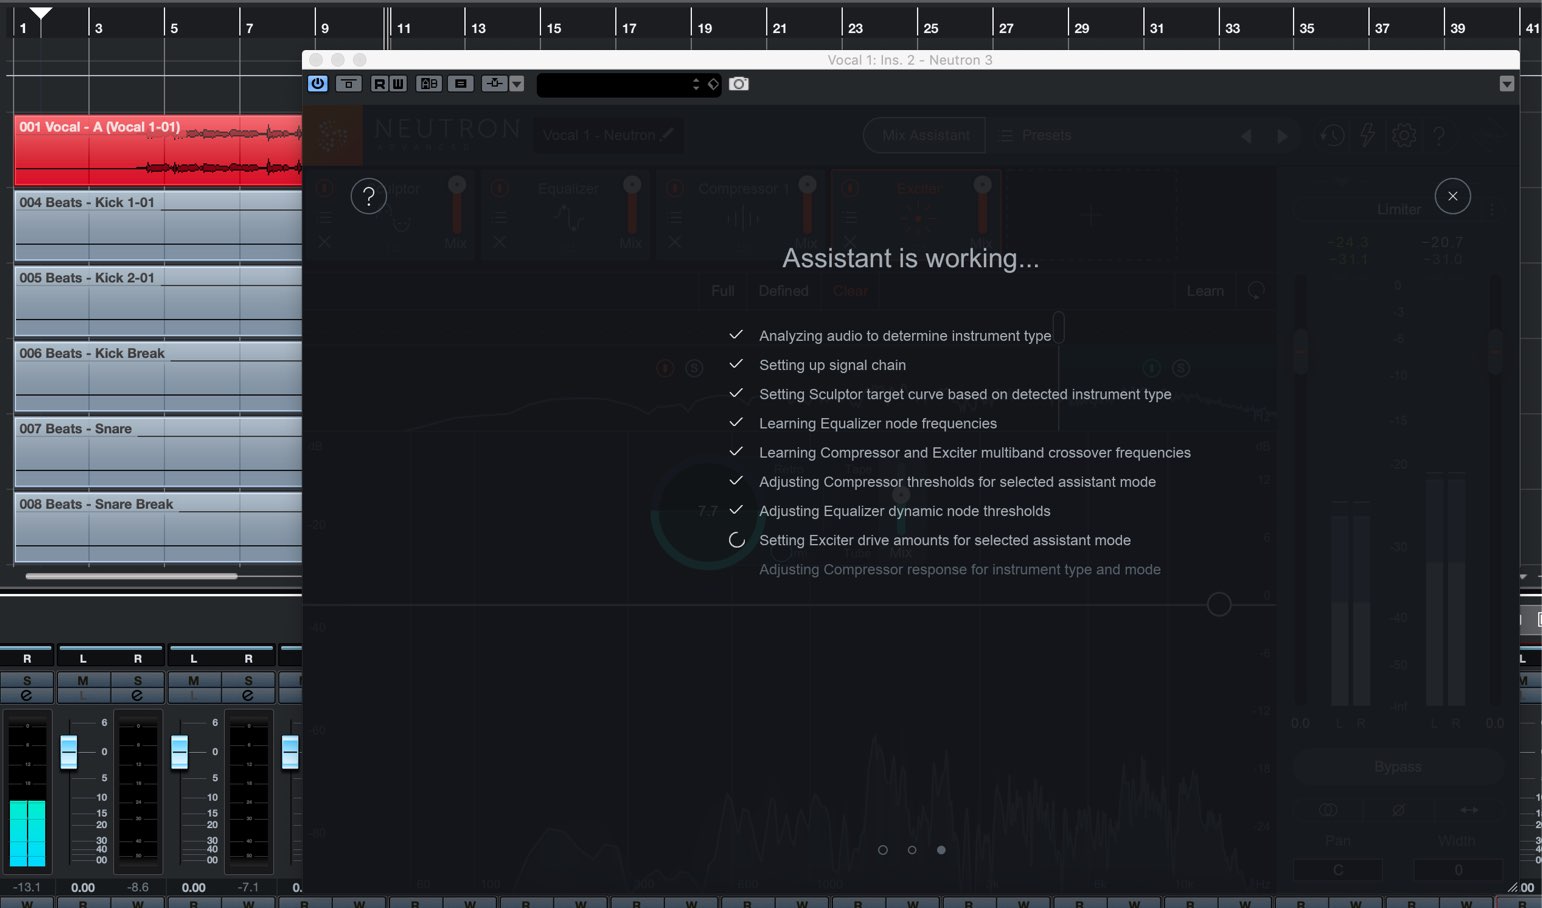
Play your DAW track to begin analysis.
After the analysis is complete, click “Accept”.
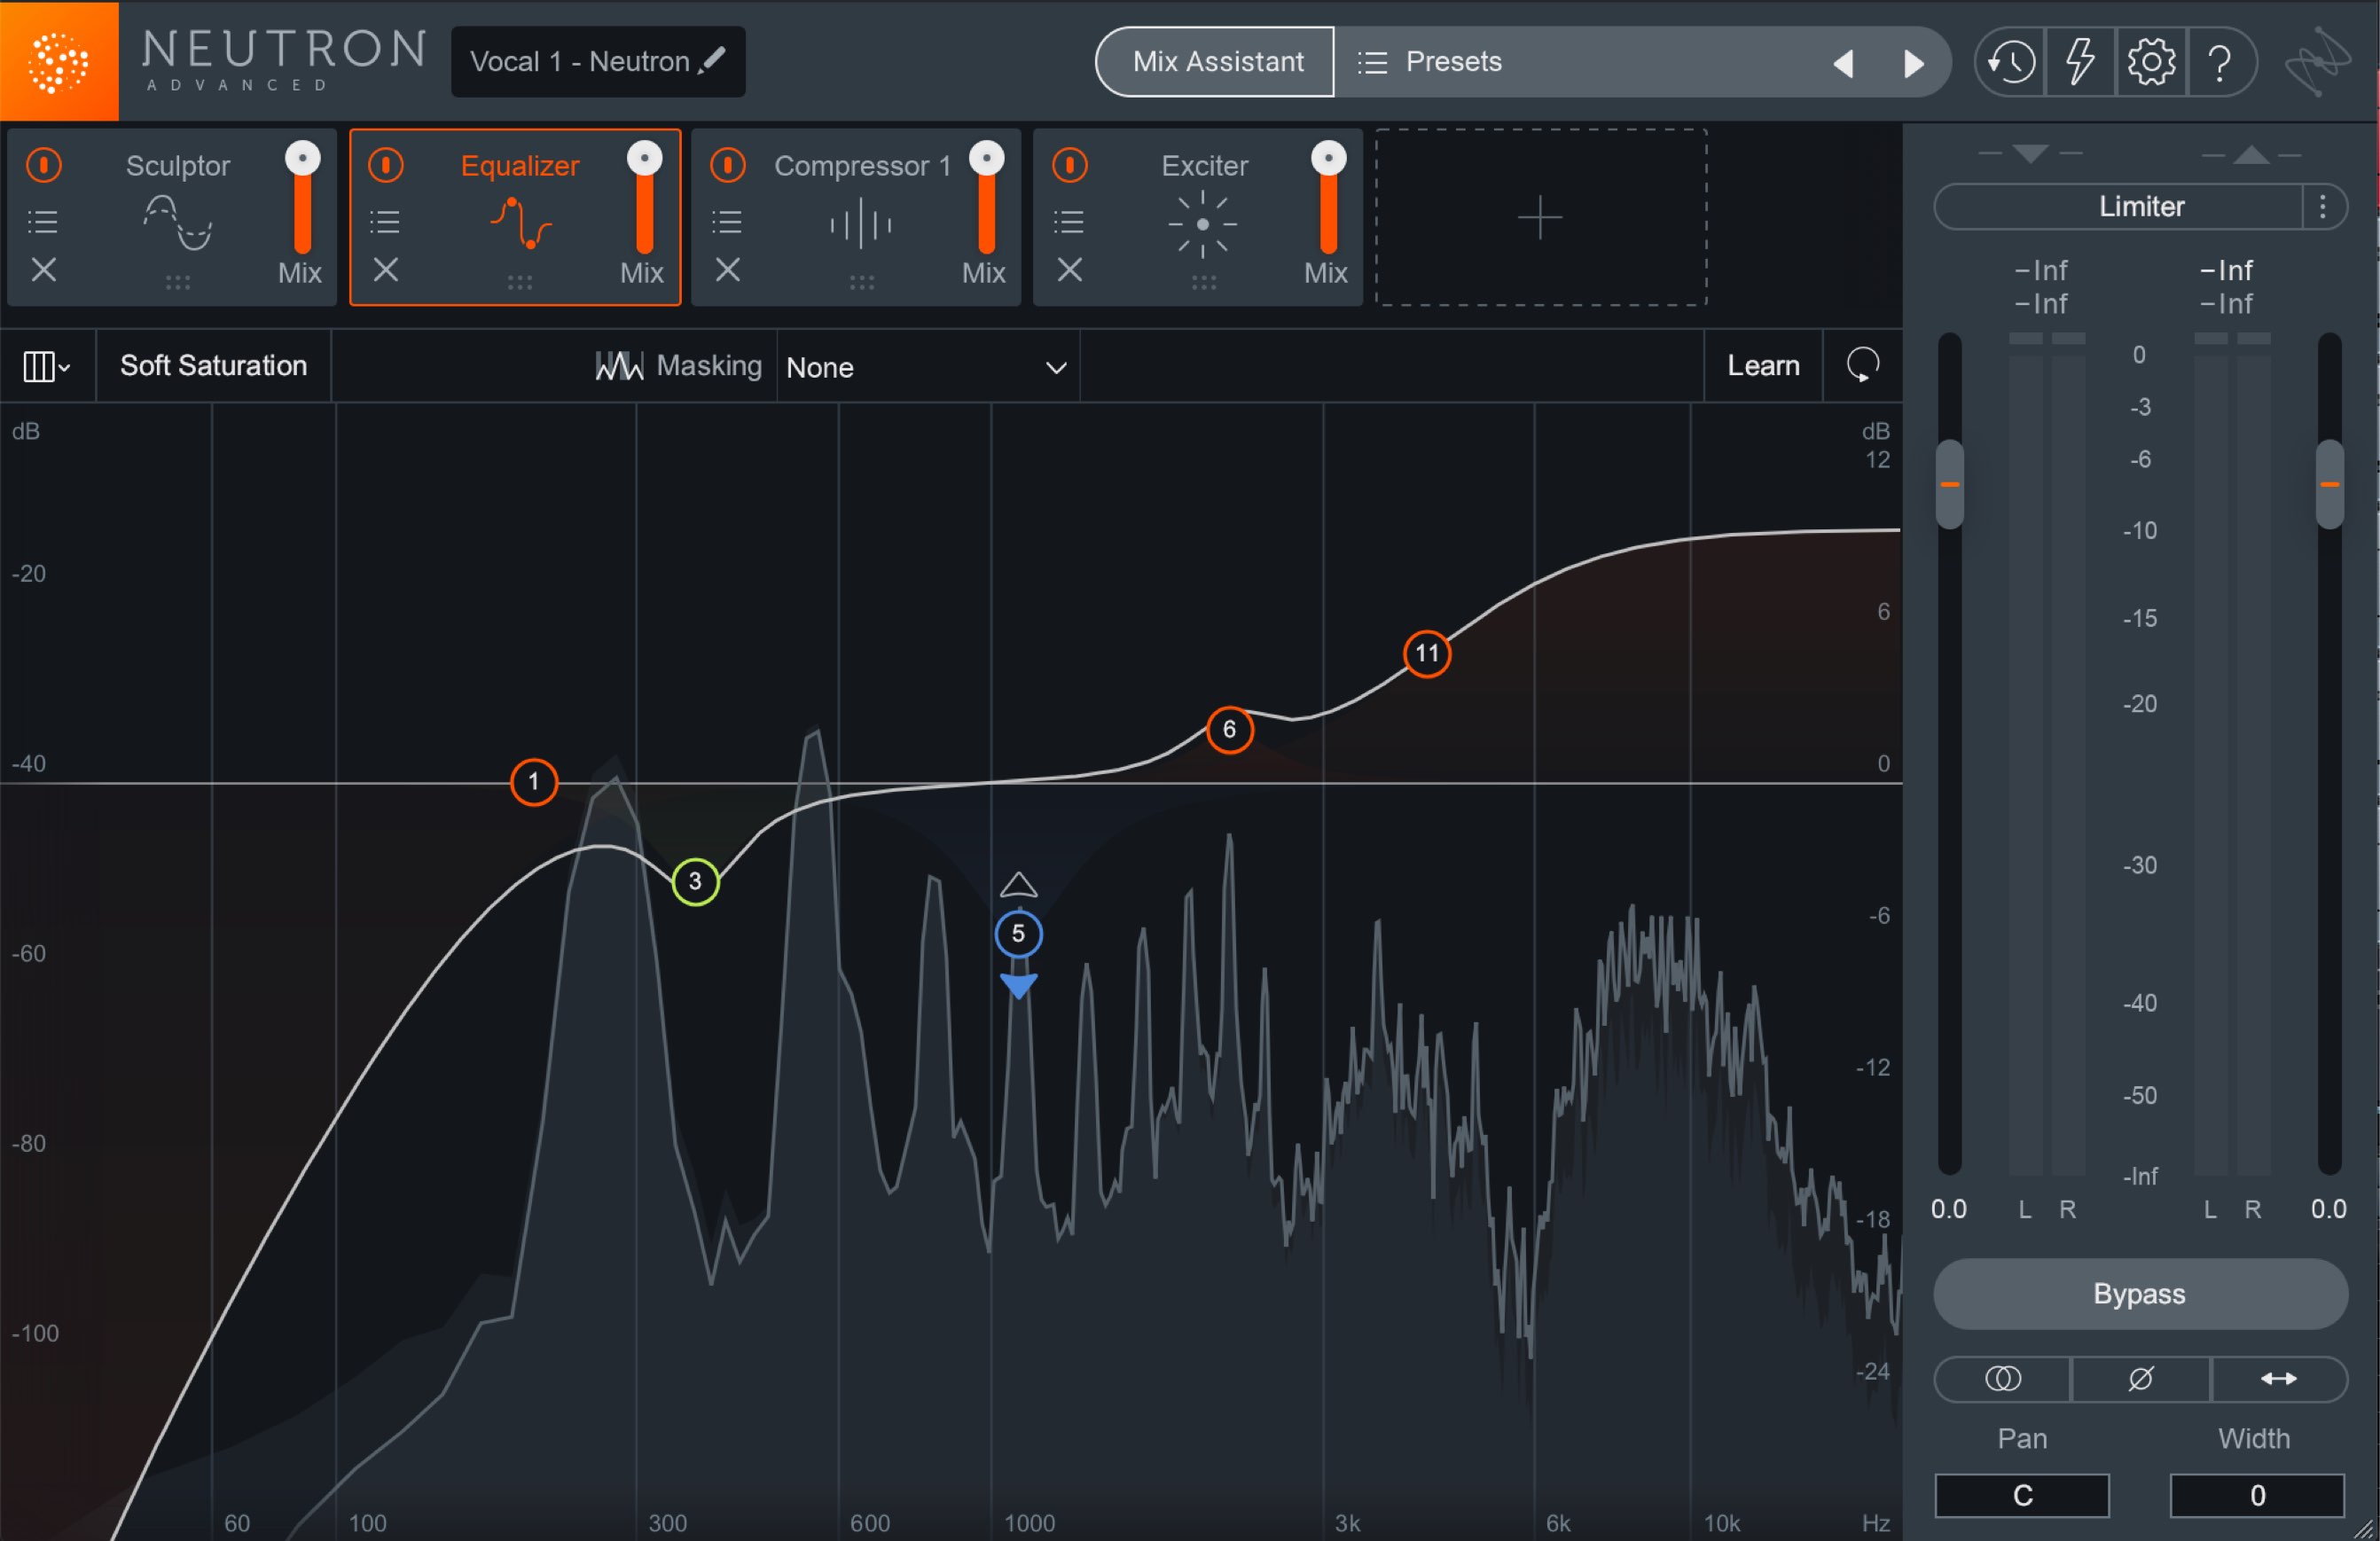
As shown, effects will be automatically applied to the track.
We’ve compared it to Ver2, and the overall detail and quality of the sound has increased, allowing you to easily access great sounds.
We hope you enjoyed this look at “Neutron 3 Advanced”s Mix Assistant function.
In addition to the ability to lay down a solid foundation before mixing,
you can even use the analysis results to learn about mixing and balance and increase your production skills.
In addition, with the highly functional track assistant and improvements in overall quality, you can quickly obtain great sounds.
We highly recommend this product for those with a beginning to intermediate mixing level, so be sure to try it out!
Purchase here
- CATEGORY:
- Mixing plugins