The Quintessential Pitch-Correction Software Melodyne 4 ③ Editor/Studio basics / tutorial
Ground-breaking functions in the top tier editions
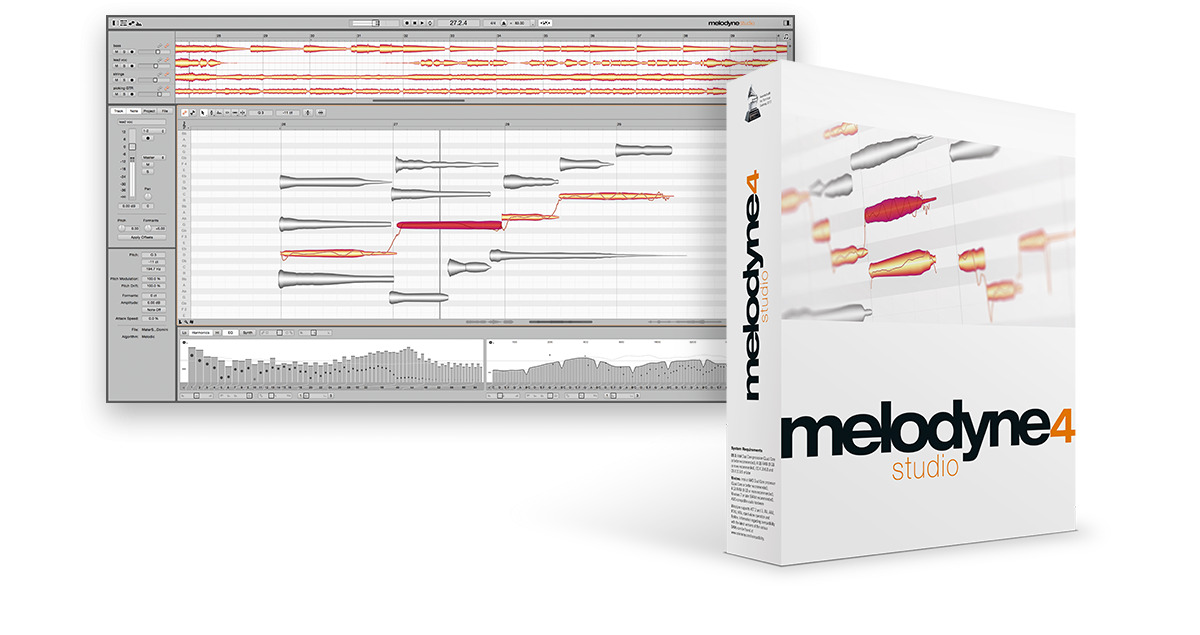
Let’s continue looking at the various editions of Melodyne 4.
In this article, we will be looking at「editor」and「studio」.
Not only does it contain necessary tools for pitch editing, but it allows for more creative edits with some ground-breaking features provided.
Melodyne various editions Video Access
Purchase here
Compatibility with more scales and harmonies「editor」
Editor contains the high level scale analysis and harmony editing allowing for more creative and complicated procedures to be carried out.
Scale analysis
Provided is an incredibly powerful scale analysis tool that can adapt to many needs and situations.
For example, you can use it on eastern and unorthodox playing styles/phrases.
Even if you don’t know the name of a particular scale, by clicking on the「scale editor」icon, an analysis of the pitches and their relevance will be created.
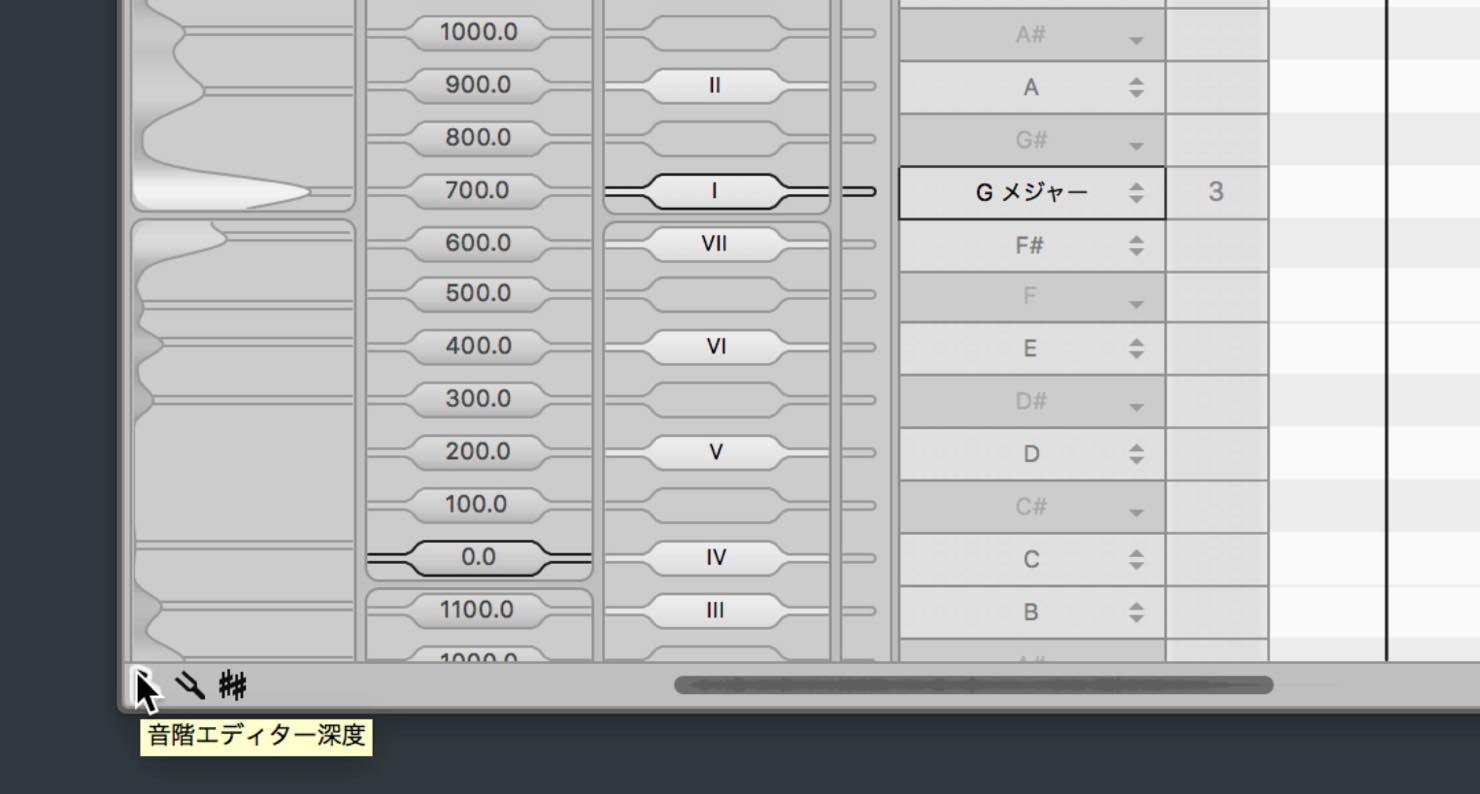
You can adjust the amount of analysis detail with the slider; adjust so that the notes over-lap on the scale analysis.
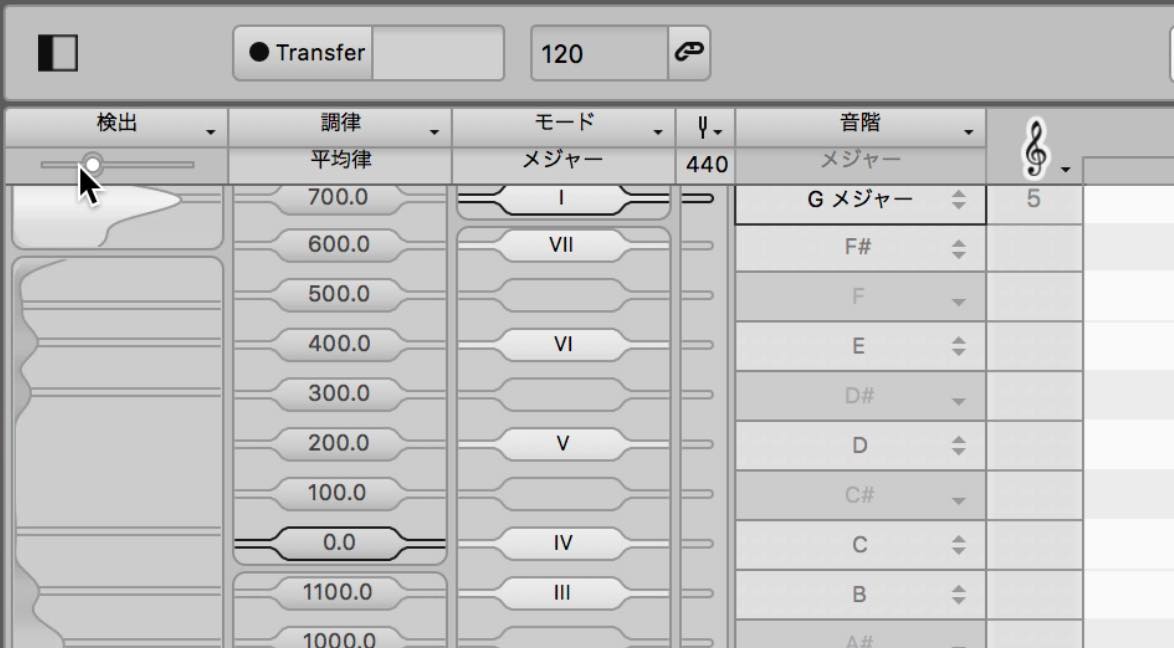
After that, right click on the analyzed result, and select「apply analysis」.
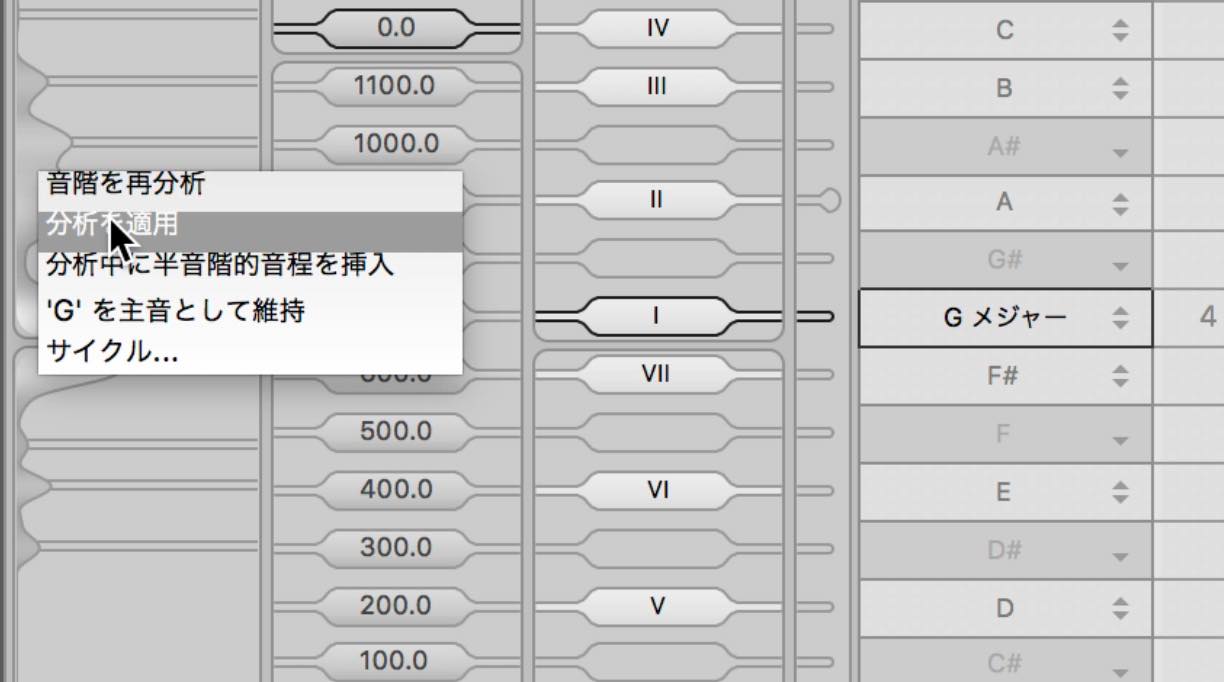
By doing this, the scale width and white/grey placements will change.
In fact, it even adjust scale tuning according to the performance analysis.
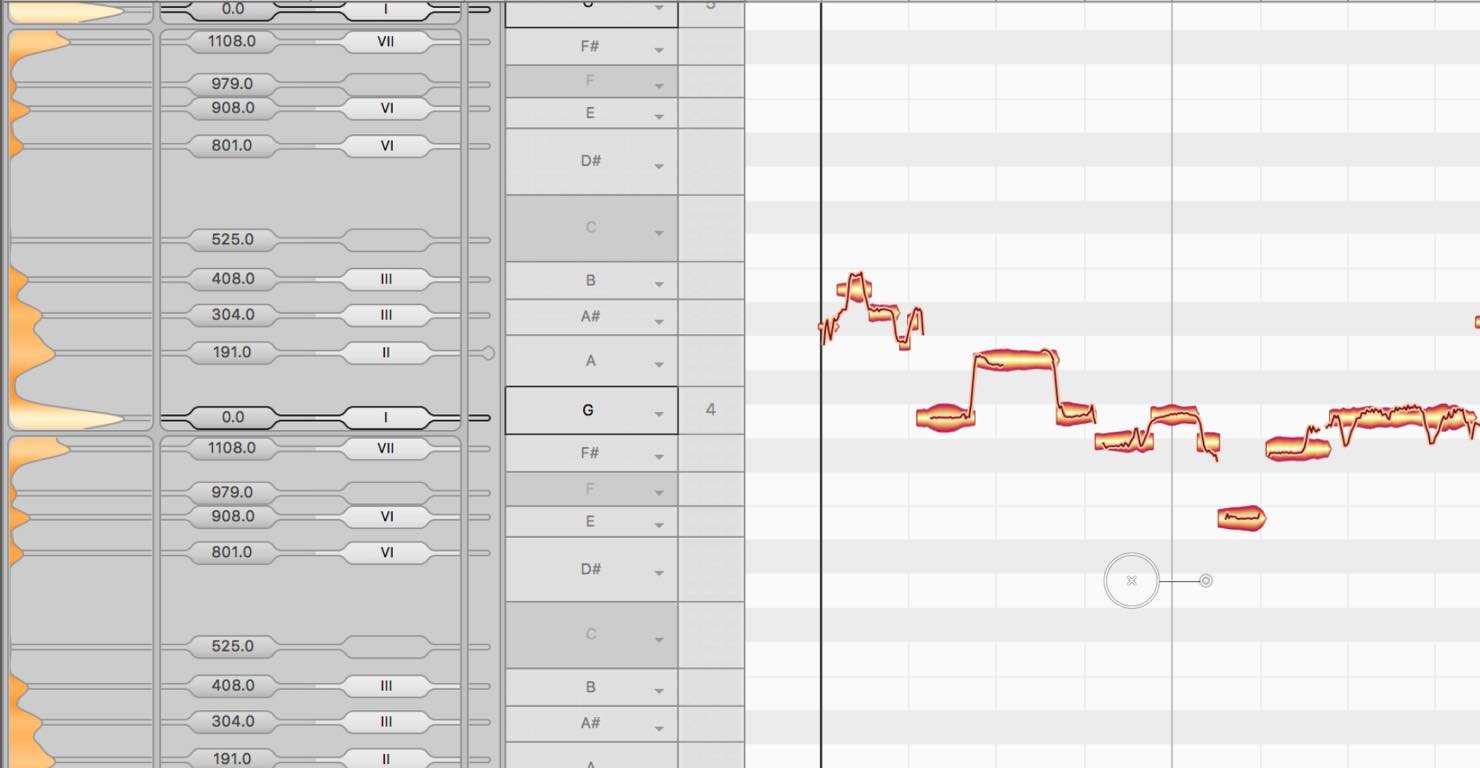
When using a unique scale such as this, changing the snap allows you to better view the situation.
Right click the treble clef mark, and select「pitch line」.
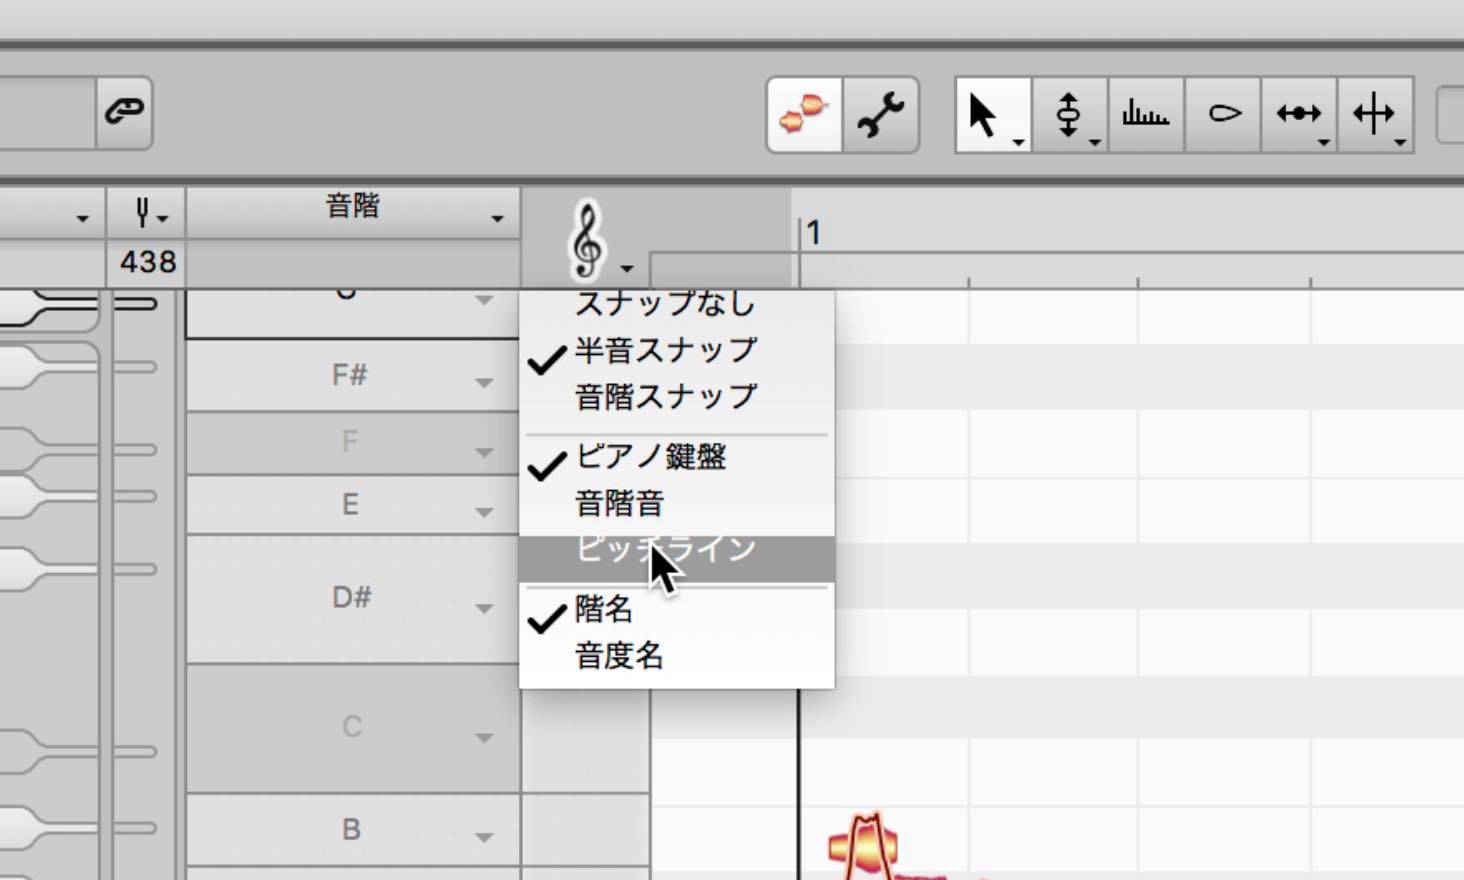
Lines will appear according to the constructed scale’s notes.
If the note is centered on the line, this means its on the correct pitch.
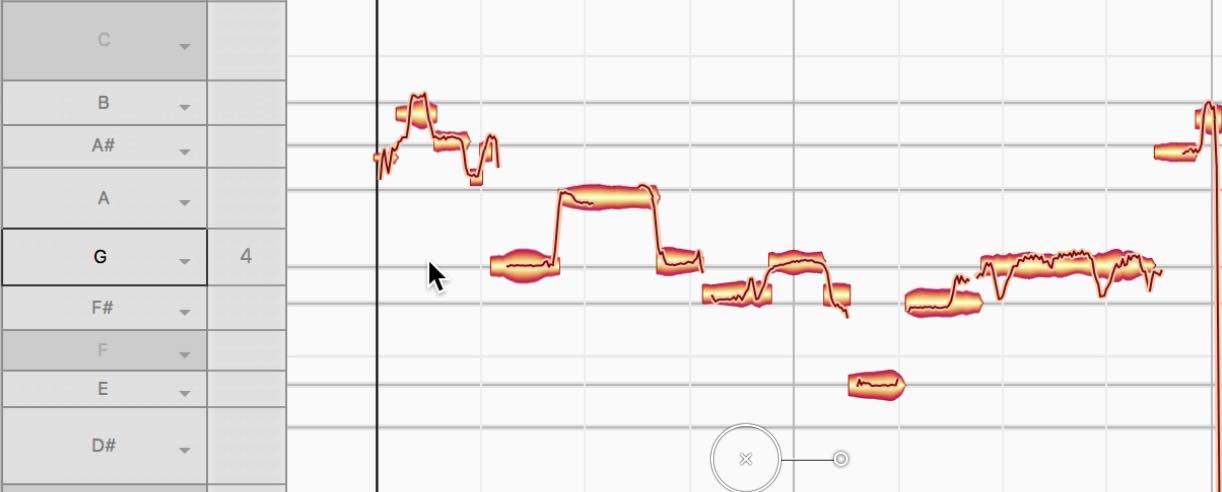
You can also select「scale snap」from the treble clef menu, and the notes will snap to the constructed scale.
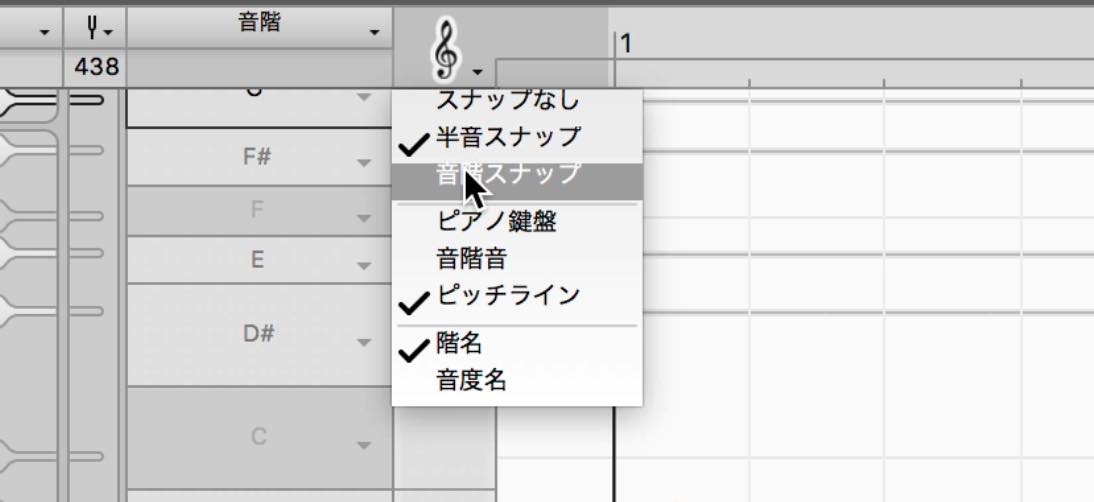
In addition, when analyzing, when no notes are selected all notes are analyzed, and when notes are selected just the selected notes will be analyzed.
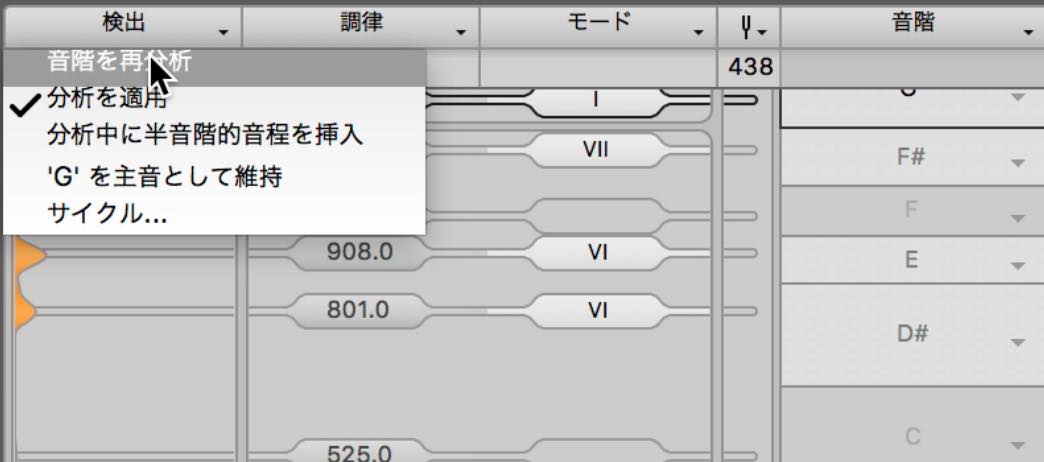
If you want to change the scale analysis later-on, go to the「detection」menu and select「reanalyze scale」.
Editing chords/polyphonics(DNA)
DNA analyzes chords/polyphonic sounds, and allows you to freely edit pitches within that sound.
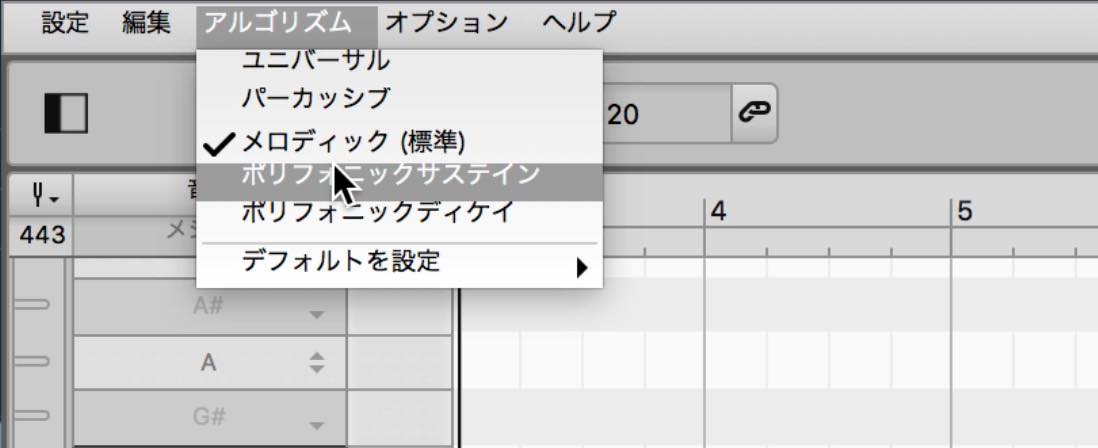
There may be cases when you Transfer and analyze chords, and the result show up as monophonic notes.
In this case, go to the「algorhythm」menu and select「polyphonic sustain」.
A pop-up will come up, so click「reanalyze」.
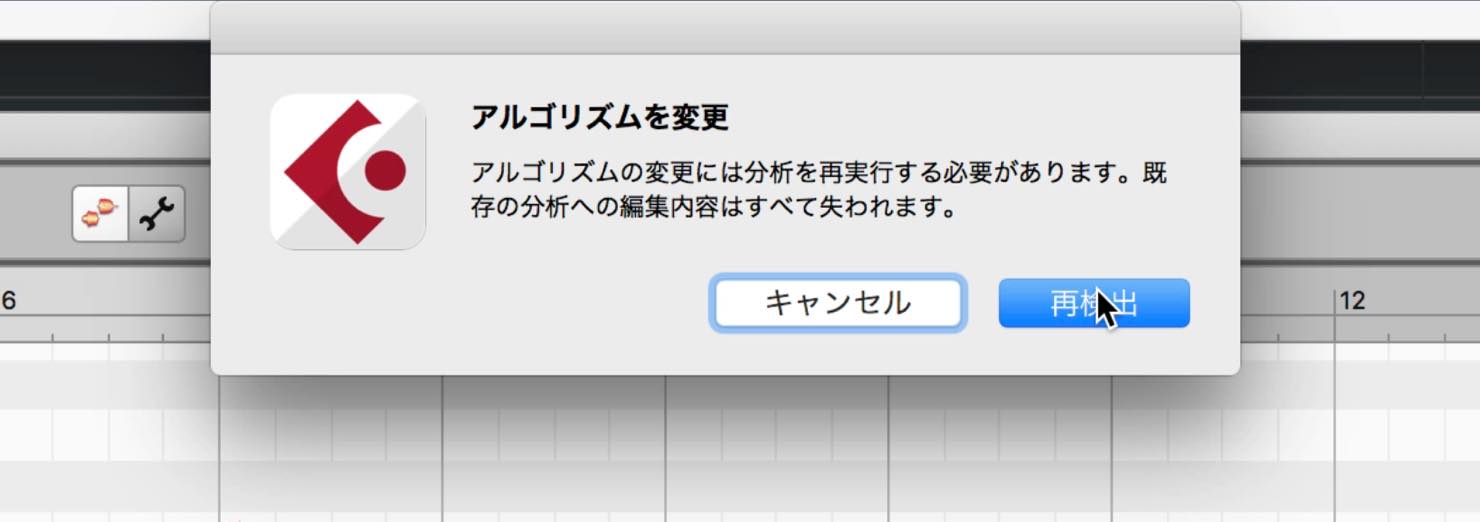
It’ll reanalyze the data and display it as harmonies.
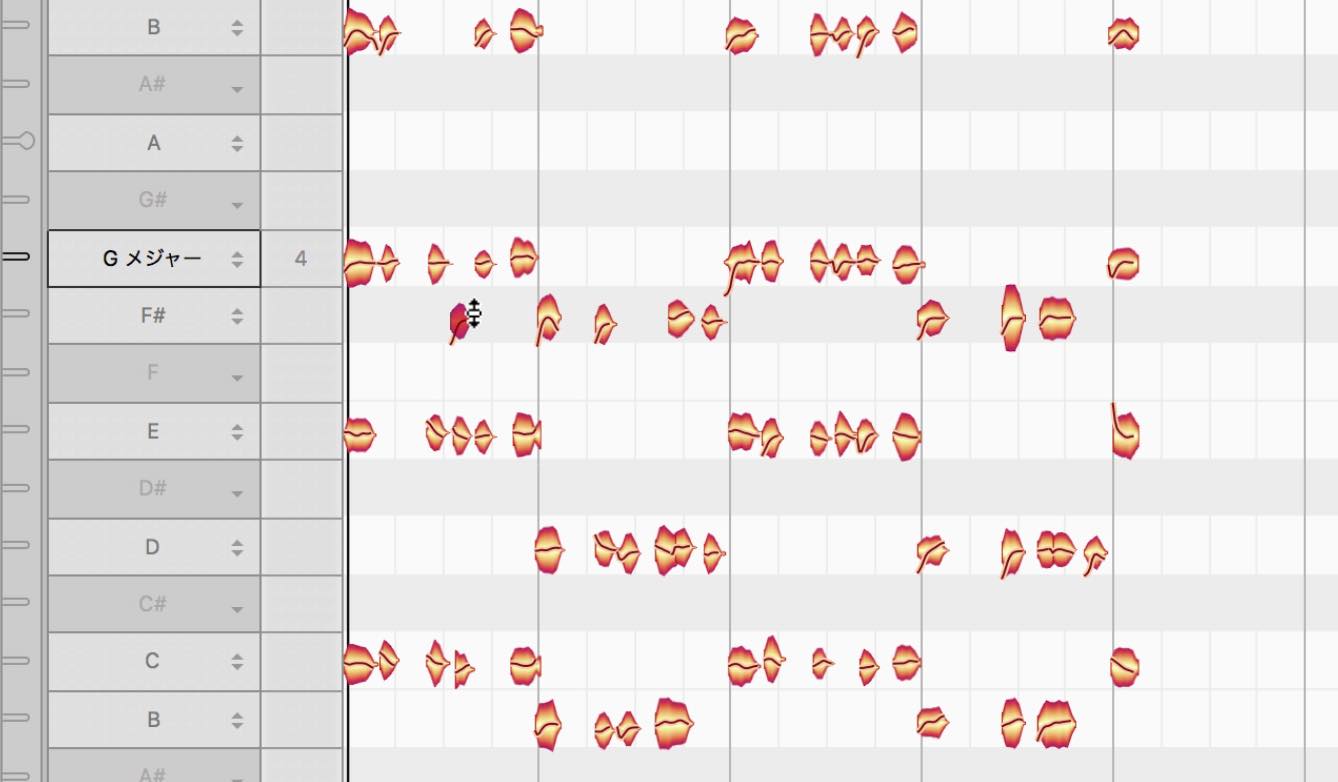
You can edit the content in the same way as single notes, by moving around the notes on the display.
Use this tool to add some phrasing, or even change chords entirely;
if you have loop materials that don’t match your song harmonically, you can even edit individual notes to fit.
All of Melodyne’s potential in「studio」
In「studio」you can perform multi-track editing as well as use sound editing functions allowing you to have full-access to all of Melodyne’s ground-breaking tools.
You can use it beyond the realm of pitch correction, and use it to greatly expand on your mixing and production process.
Multi-track editing
A large upgrade in studio is the ability of multi-track editing.
For example, edit main vocals and back-ground vocals together, by placing Melodyne on multiple tracks.
You can use Melodyne in one track to edit on the contents of Melodyne in another.
Click on the「track list」button to view the tracks that have Melodyne inserted on it.
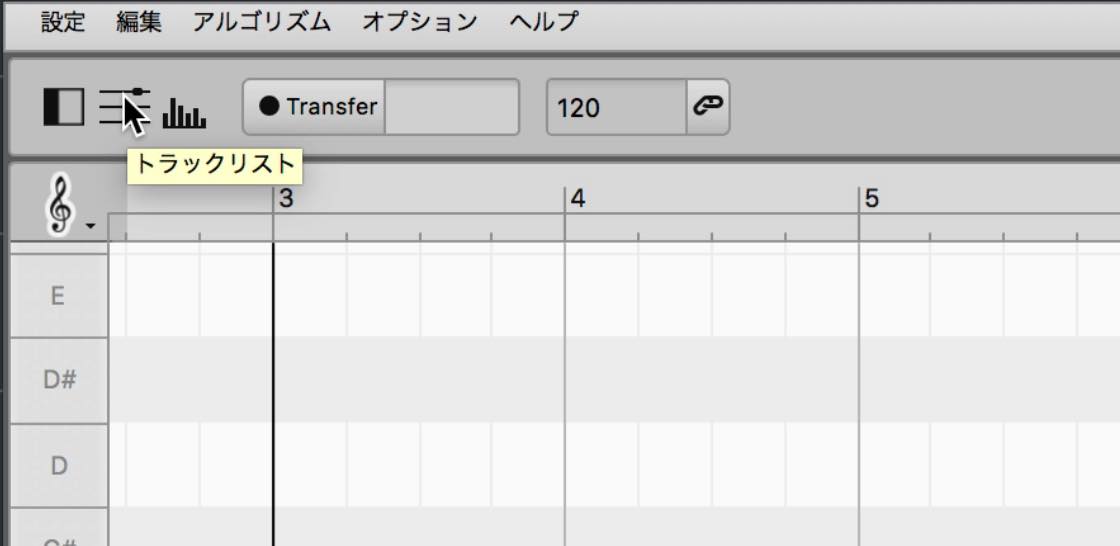
Select the tracks that you want displayed.
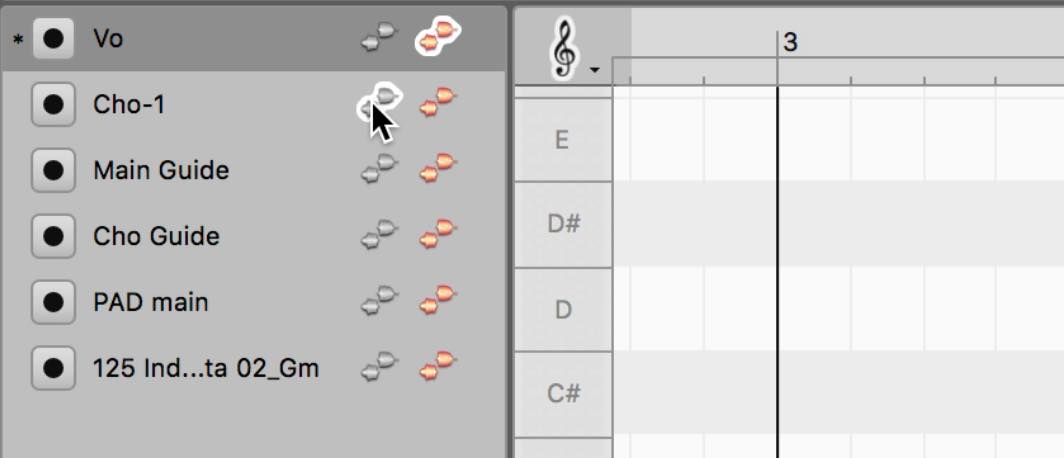
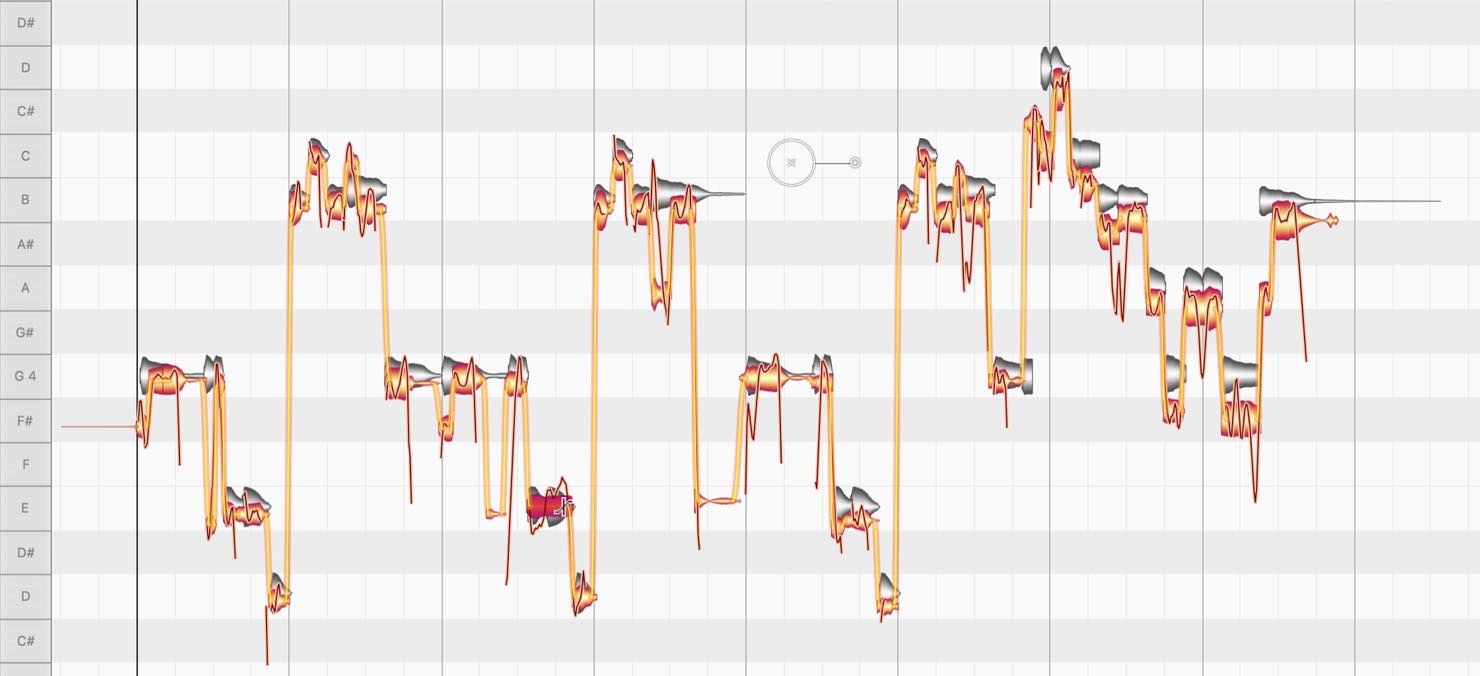
Click on the orange icon to enable editing of the track, and click on the grey icon to use the track as a visual reference.
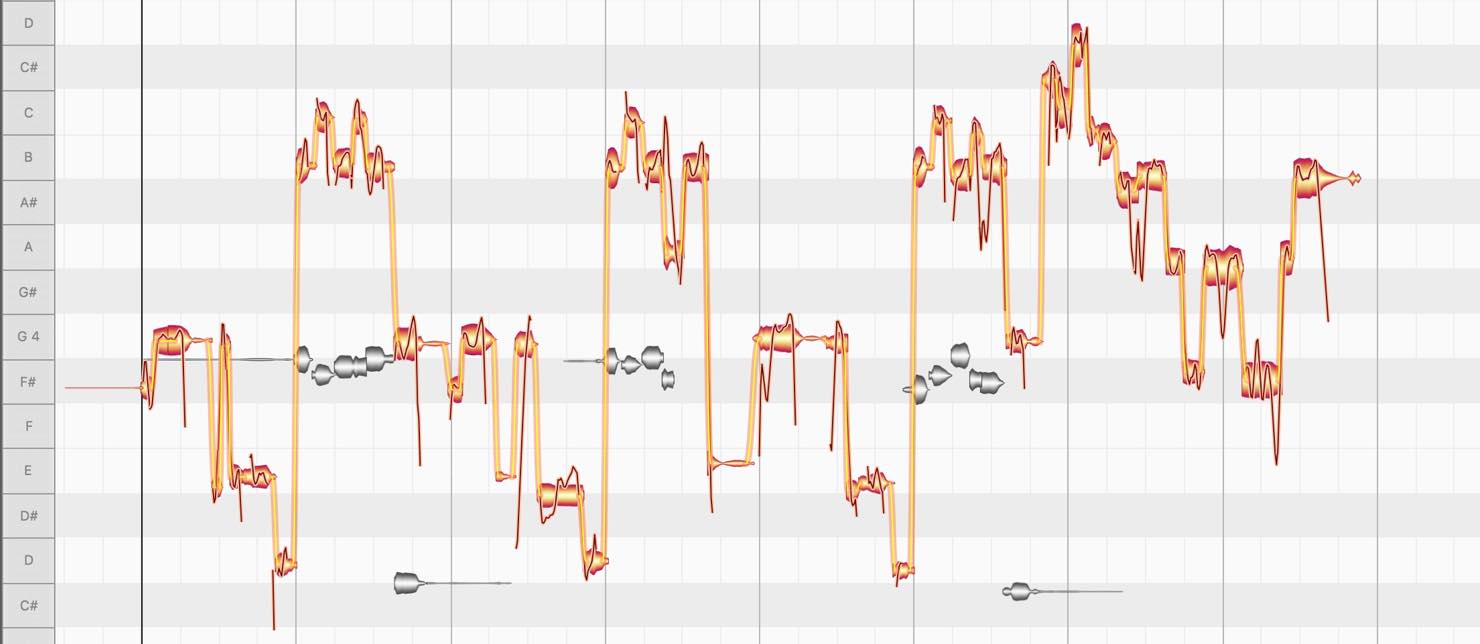
Hold Command (Mac) or Ctrl (Windows) while clicking on an orange icon to allow editing of multiple tracks.
In addition, by turning on the circular button on the left, you can transfer multiple tracks at once as well.
One useful way of using this tool, would be to insert a guide track into Melodyne to quickly and precisely edit a vocal track.
Create a guide track with a piano or synth and transfer it into Melodyne, and use it in the grey mode to visually compare with the vocal track while editing it.
Sound editor
Another powerful tool of studio is the sound editor.
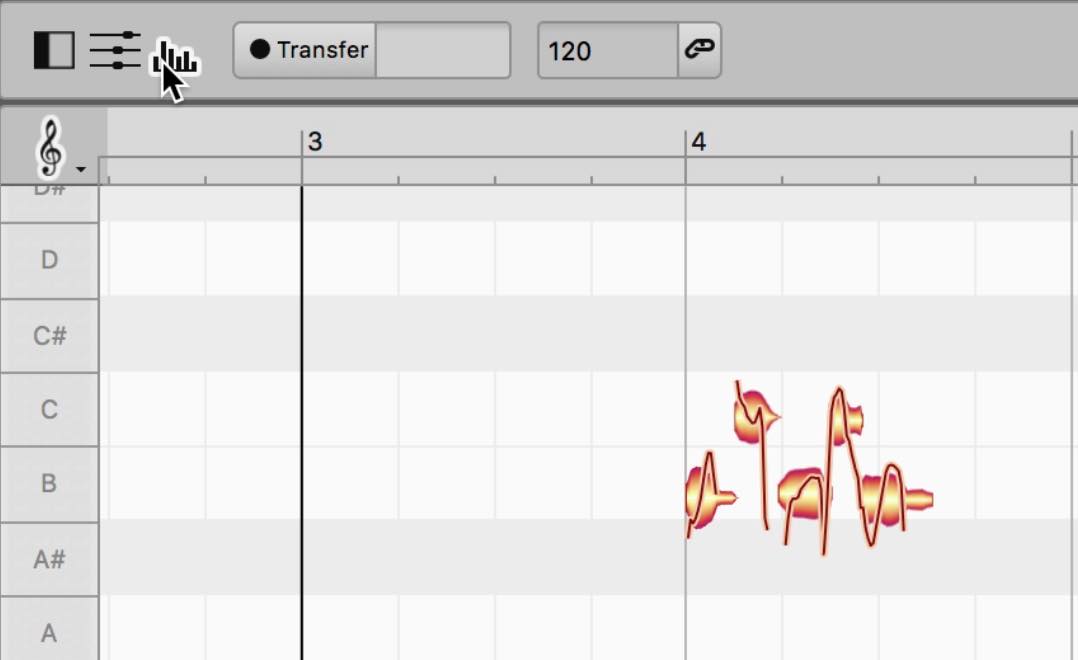
By clicking on the sound editor button on the top left, a section will appear on the bottom of the screen.
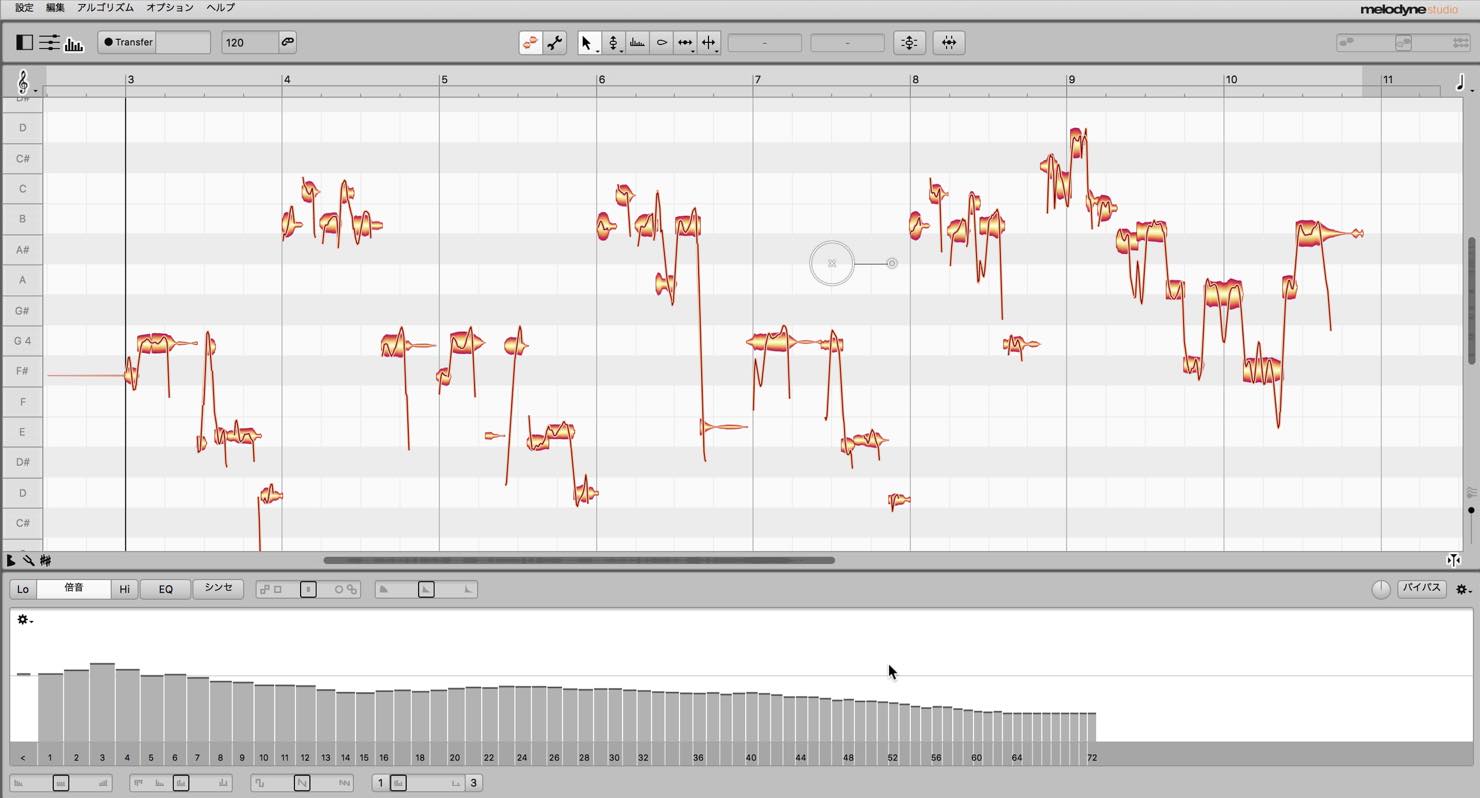
The bar graph type editor represent harmonics (overtones).
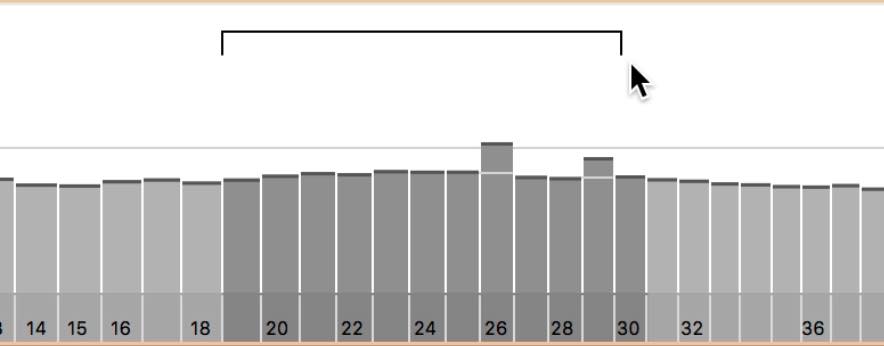
You can individually raise different harmonics,

or drag on empty space to select multiple harmonics and raise them up/down.
In addition, the sound editor doesn’t effect just selected notes, but rather all of the sounds transfered onto Melodyne as a whole.
This means you can approach your sound from a harmonic perspective as well.
This works amazing well for removing unneeded harmonics on vocal or instrument tracks.
To quickly apply harmonic edits, the macros below come in handy.
The brilliance enhances highs as the slider is pulled right, brightening the sound, and pulling it left dampens and darkens the sound.

Sliding contour to the right makes the differences in harmonics more obvious, like making the vocal characteristics more obvious.
By moving it to the left, it flattens and slightly blurs the sound overall.
By moving the amount to 200%, you can reverse the contours.
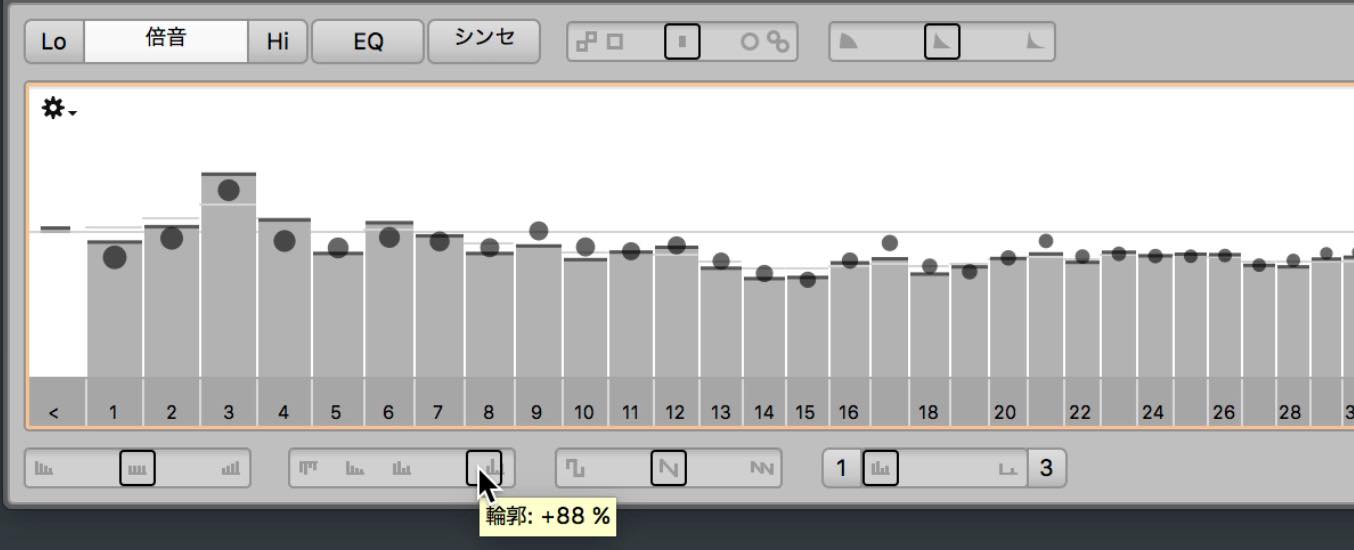
You can also adjust odd/even harmonics, boost/lower sparse harmonics, and more to create interesting effects with these macros.
By switching to「EQ」, you can also edit frequencies.
The pitches will be shown below, making it easy to quickly adjust specific pitches.

Similar to harmonics, you can edit multiple frequencies at once as well.

Macros are available as well, and we suggest listening to the sounds while editing this parameter.
With「synth」you can utilize EQ and harmonic settings by adding an LFO via「spectral」, as well as apply envelopes to「formants」and「volume」.
You can control vocals and raw instruments and transform them into synth like sounds with this tool.
Melodyne & DAW fusion with「ARA」
Last, we will take a look at using Melodyne as a built in tool for specific DAWs, via「ARA」.
ARA compatible DAWs allow you to use Melodyne directly within the DAW rather than as an insert plugin.
For example, when using Studio One, right click on an audio clip and select「Edit with Melodyne」.
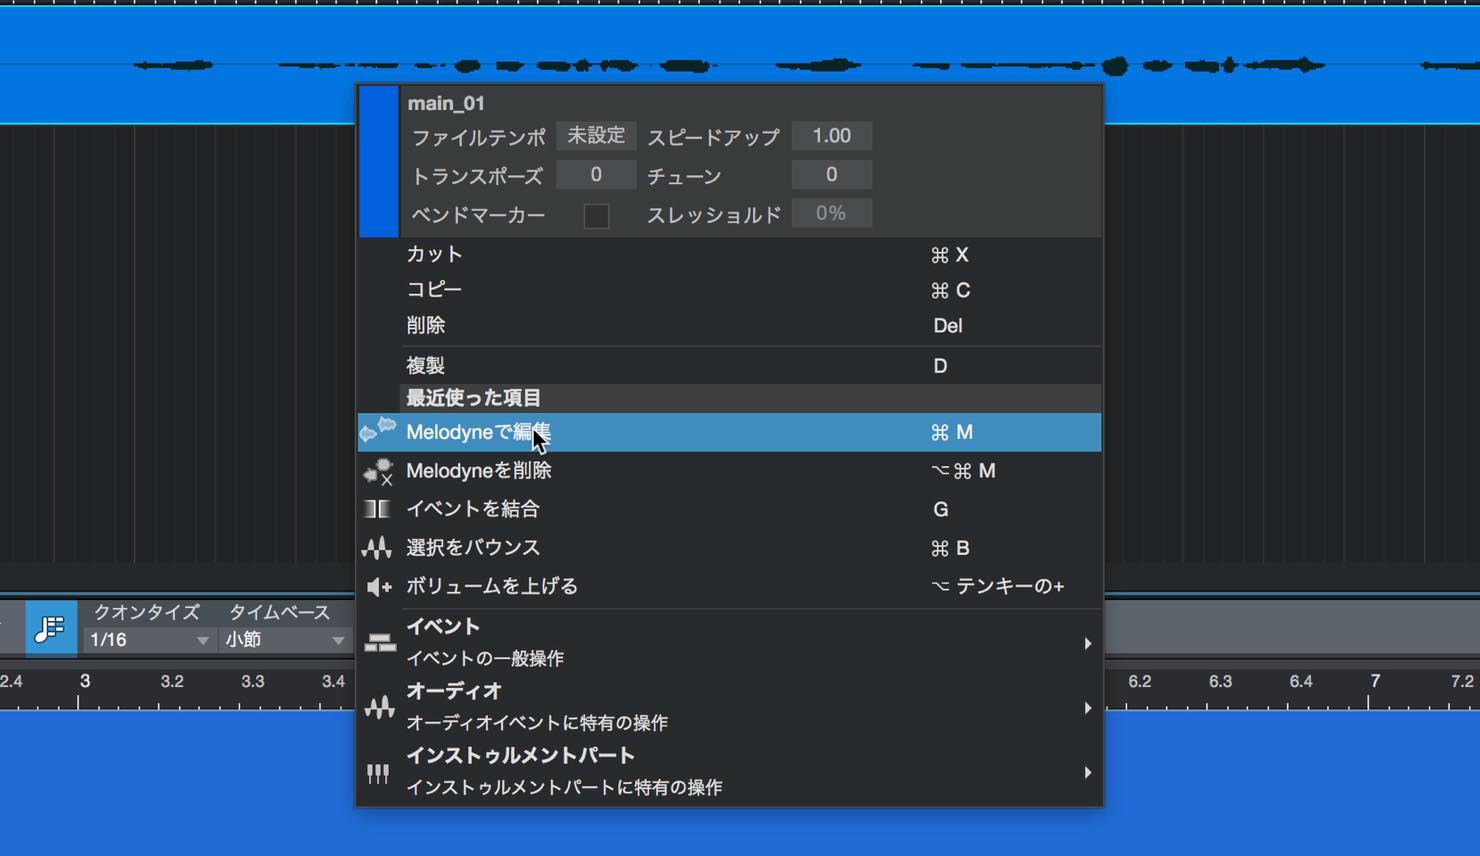
This will automatically start the analysis process, and the edit screen will appear within the DAW.
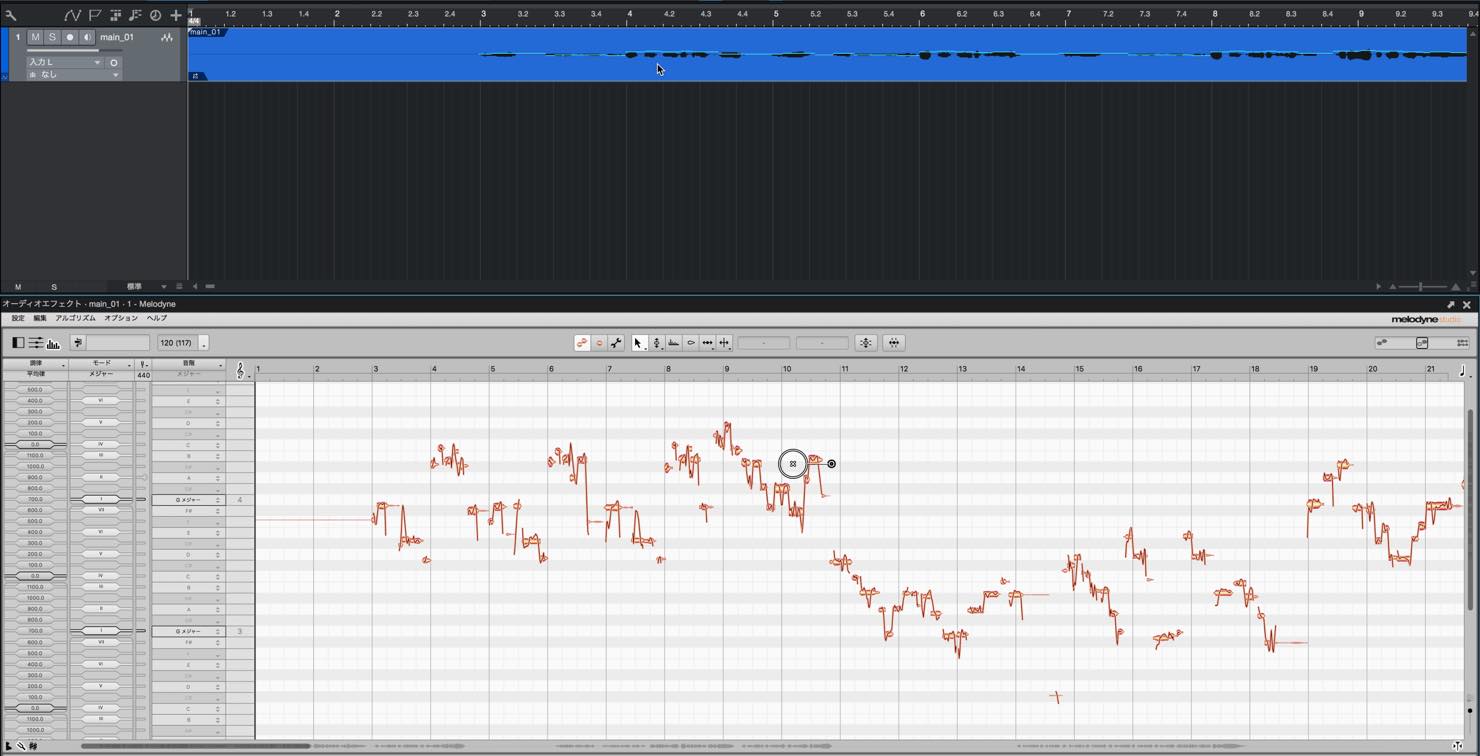
The benefit of using ARA is that you don’t have to transer the audio data. Because of this, edits done within your DAW will be reflected onto Melodyne in real time.
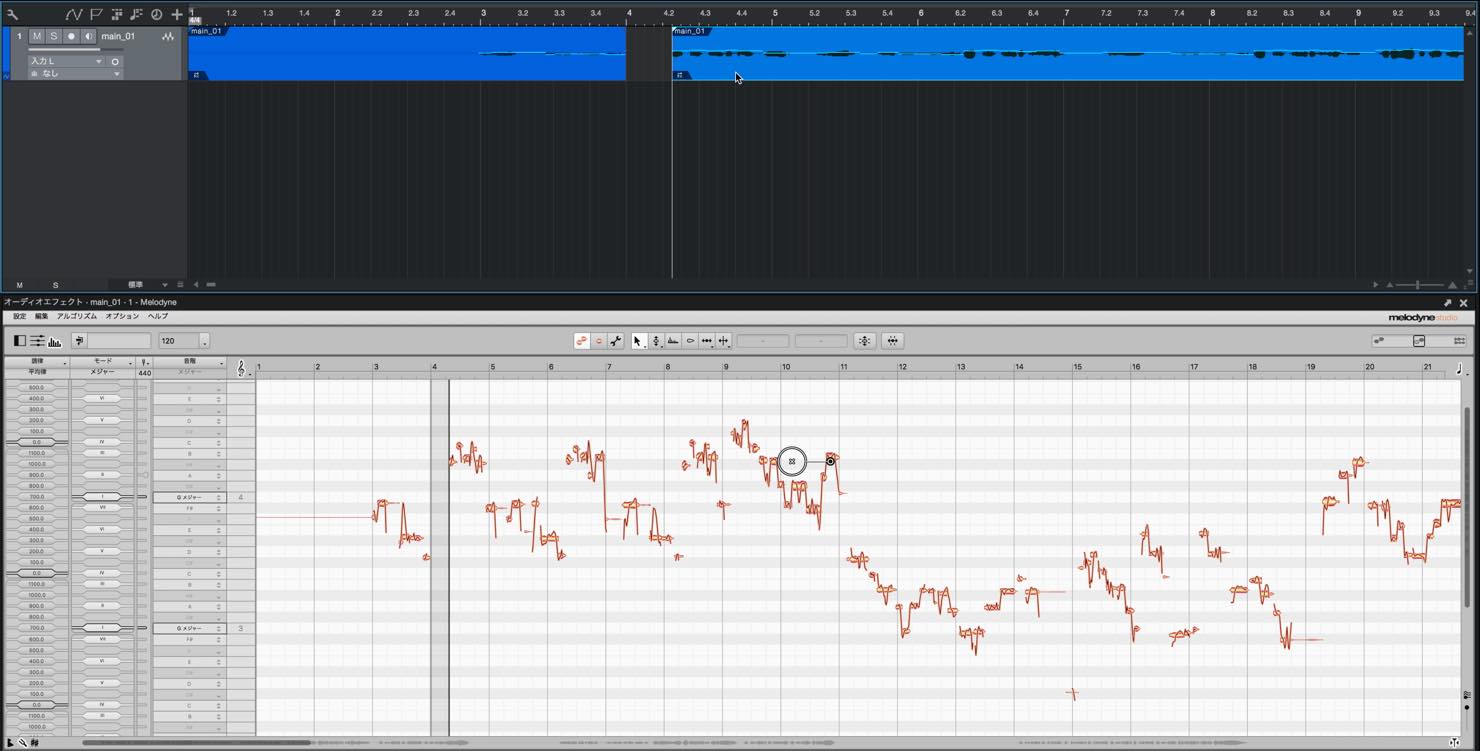
As shown, even if you cut/move audio in the DAW, Melodyne will reflect this change.
Most insert effects won’t reflect this change after transferring data, which makes this a substantial benefit for ARA.
This concludes our 3 part series on Melodyne and it’s various editions.
Melodyne contains massive potential, beyond the limits of just a pitch correction tool.
Please try delving further into it’s possibilities, and expand on your mixing and production processes.


