
IK Multimedia MODO BASS - Tutorial ② Real-world use
Sound design/sequencing with MODO BASS
The Ultimate physical modelling bass plugin -「MODO BASS」.
Previously, we took a look at this plugins potential and basic functions.
As the second article in this series, we will take a look at sound design with the amp/effects, and actual sequencing techniques.
MODO BASS Tutorial Video

Amp/FX settings
Switching Amp/FX
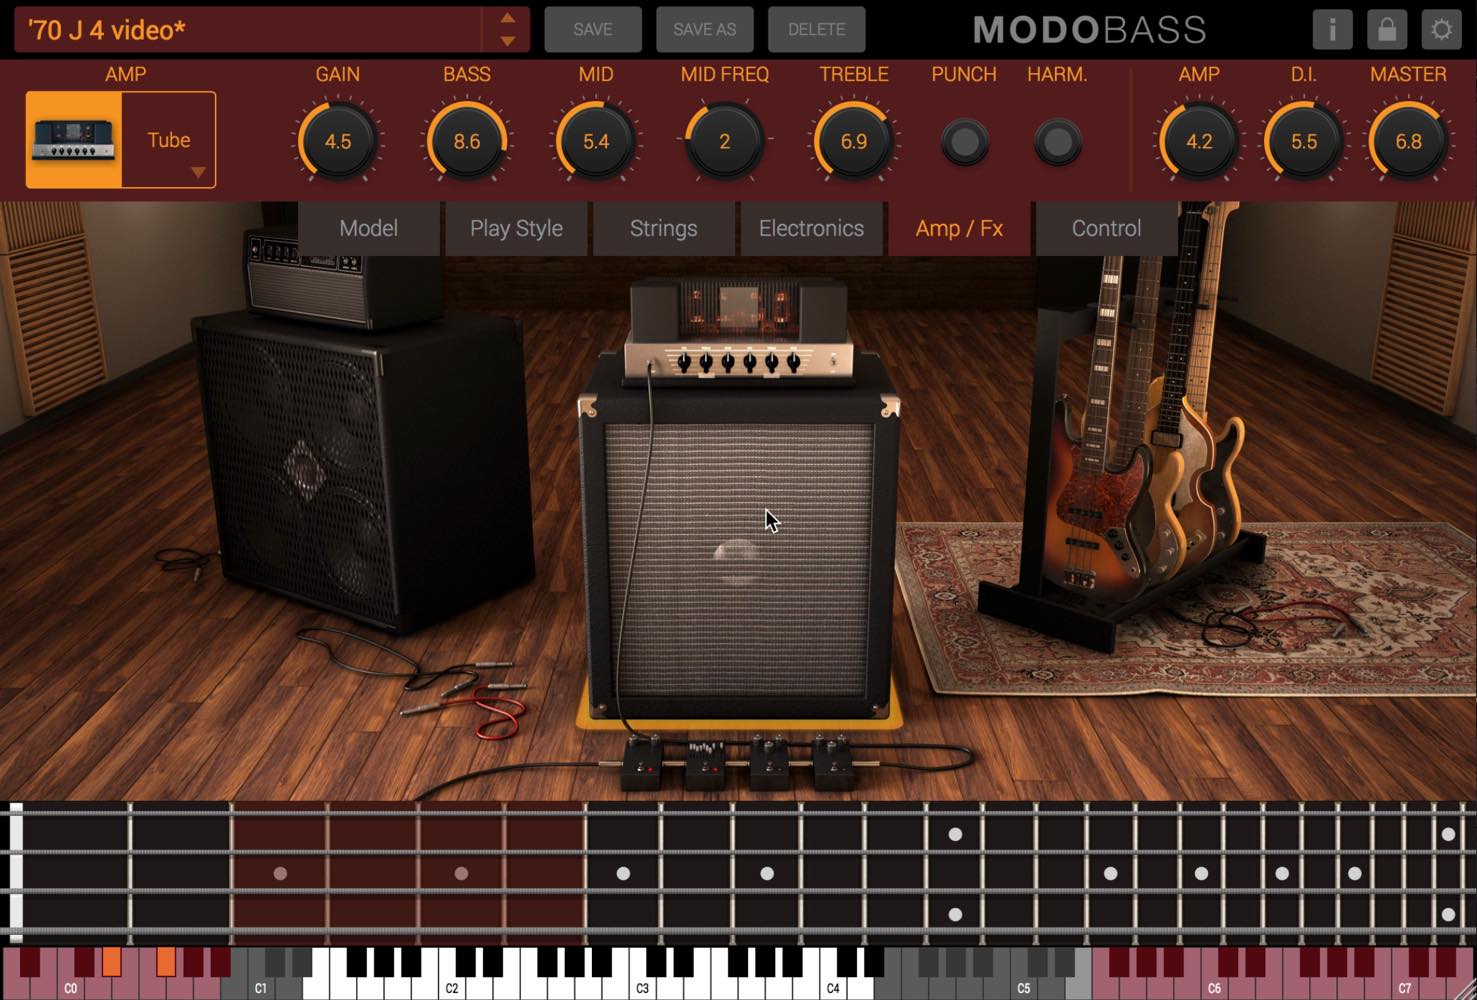
When opening the 「Amp/FX」 tab, a picture of an amp will be placed, with effects lined up similar to the way they line up near your feet in a studio.
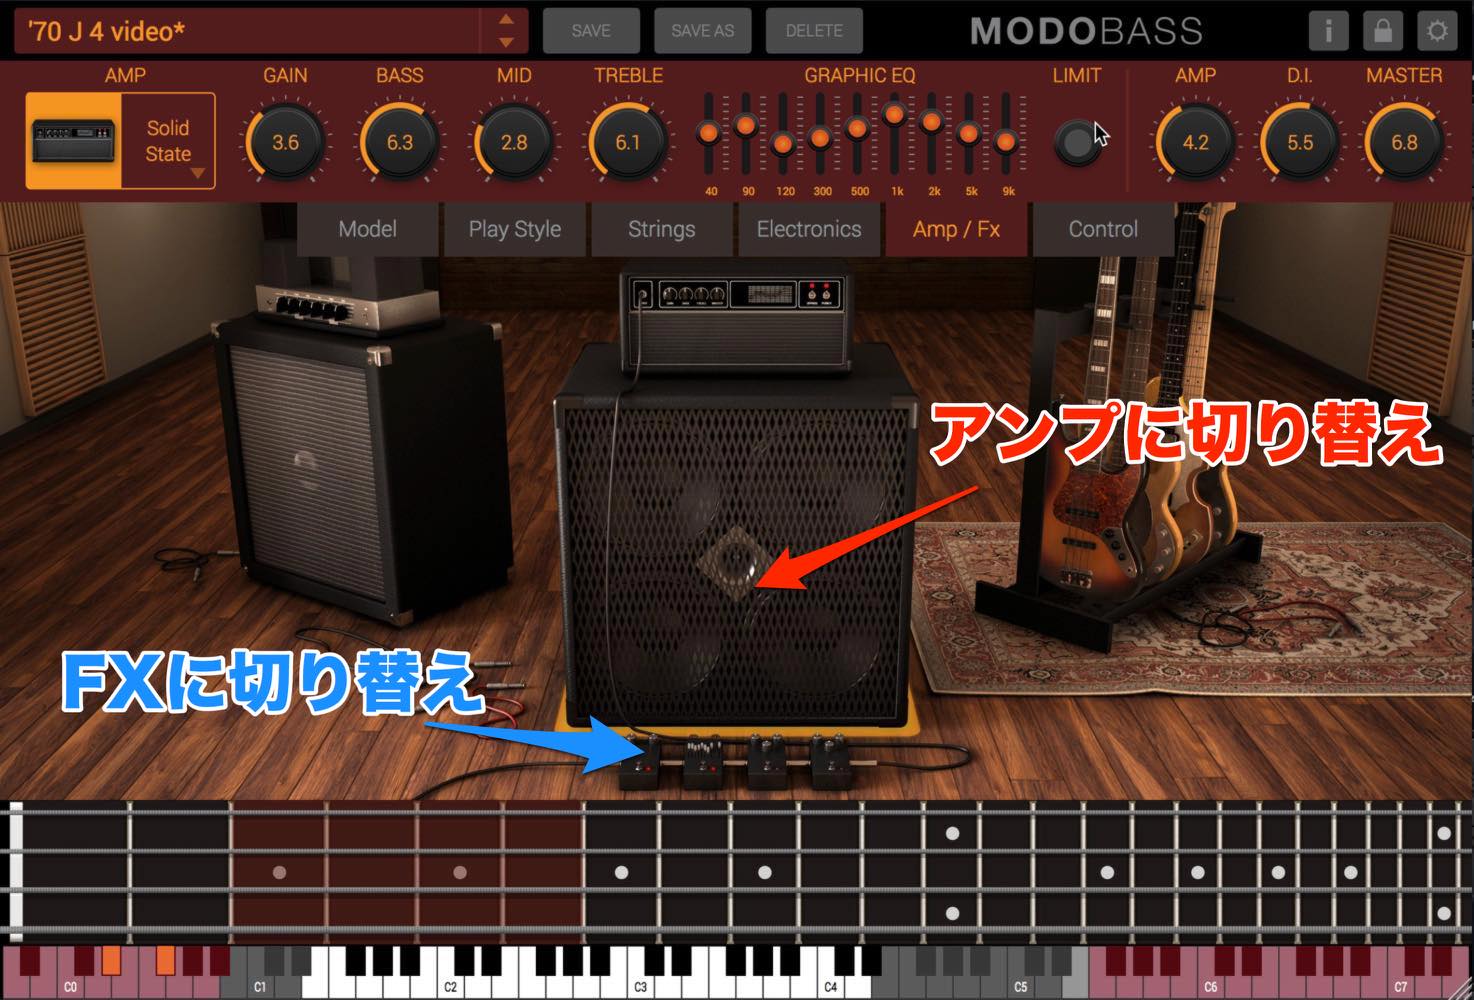
Click on the amp picture to open the amp settings panel, and click on the effects to open the FX settings panel.
Amp selection and settings
Lets first try setting up the amp.
By clicking on the amp again when the amp panel is shown, you can switch between a Solid State/Tube amp.
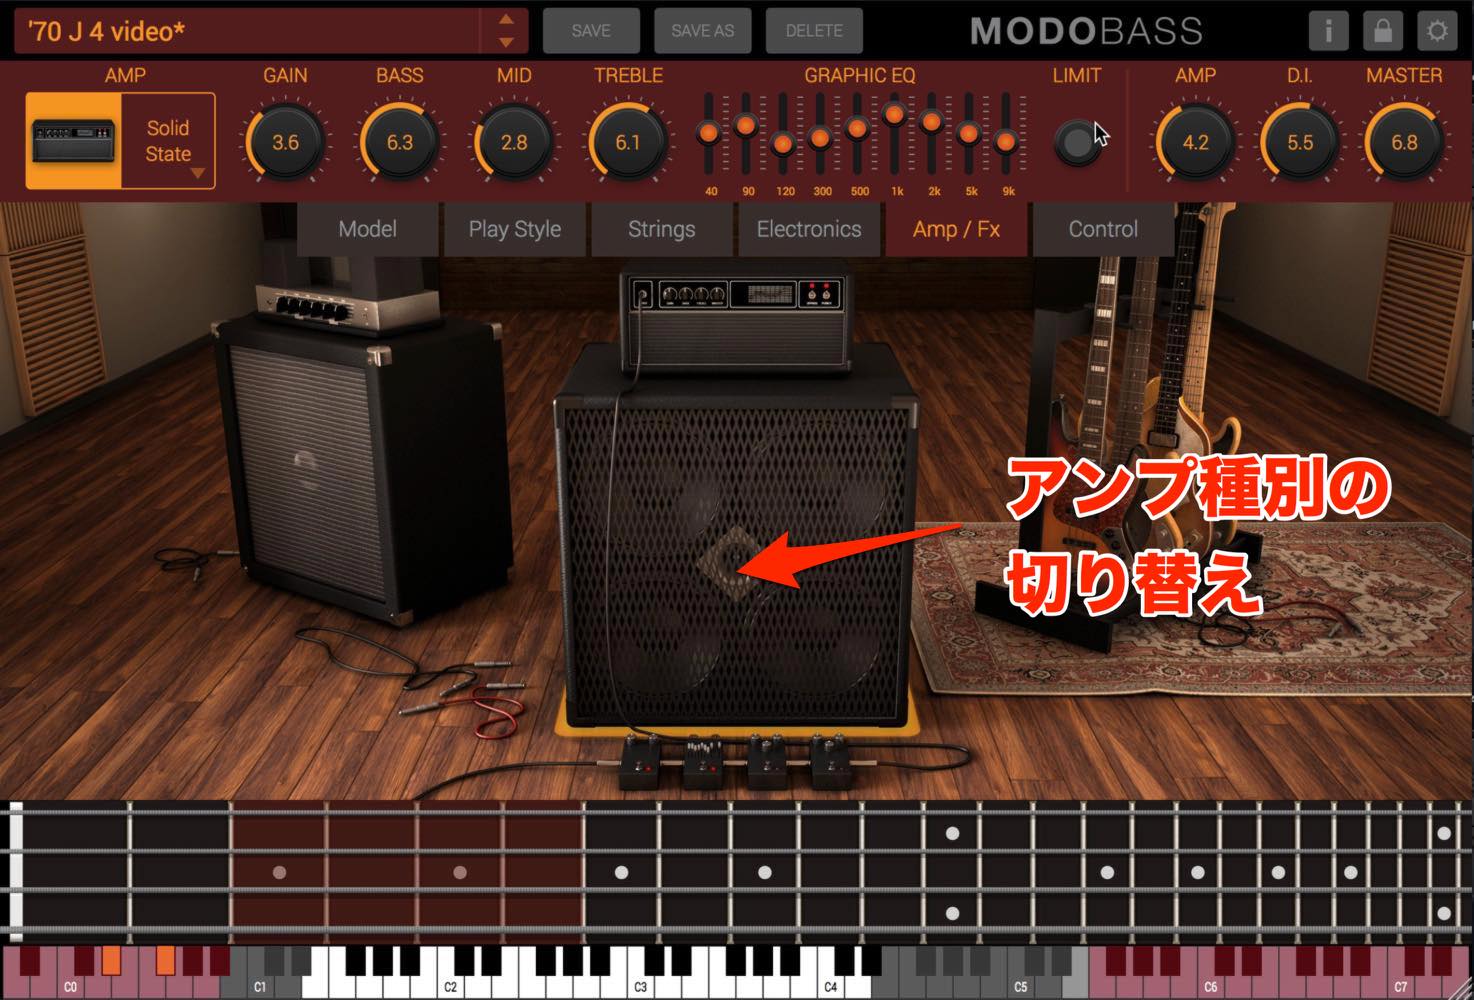
The setting panel differs between amps.
The Solid State amp has parameters as shown below.

- GAIN: Determines amp dynamics/amount of distortion
- BASS/MID/TREBLE: Uses 3 band EQ to make general changes to sound
- GRAPHIC EQ: Uses 10 band EQ to make small edits to sound
- LIMIT: A limiter that gives the effect of a strong compression on the sound
The Tube amp has parameters as shown below.

- GAIN: Determines amp dynamics/amount of distortion
- BASS/MID/TREBLE: Uses 3 band EQ to make general changes to sound
- MID FREQ: Determines what frequency that the MID EQ knob functions around to edit
- PUNCH: Gives the effect of strong compression on the sound
- HARM: Applies overdrive to the sound, giving it character
In addition, compatible to both amps, you can balance the amp/D.I. sound balance.

- AMP: Determines the amount of amp sound
- DI: Determines amount of direct input sound (no amp)
- MASTER: Determines overall volume sent to DAW
FX settings
Lets take a look at the FX settings next.
As shown below, you can use 4 effects at once.
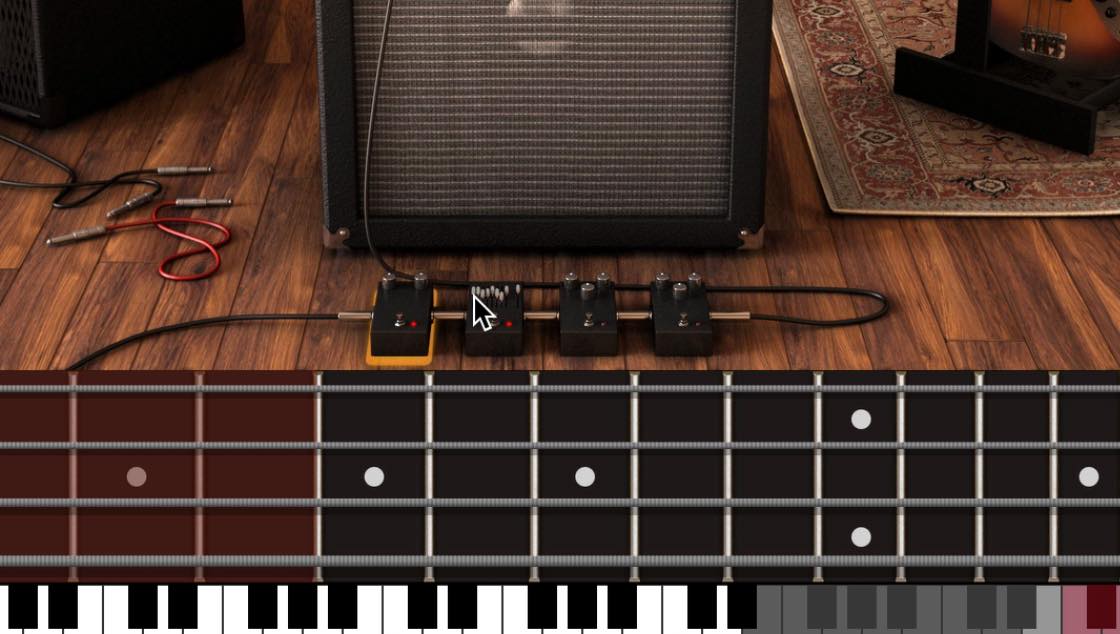
The setting panel at the top can be used to access different settings.
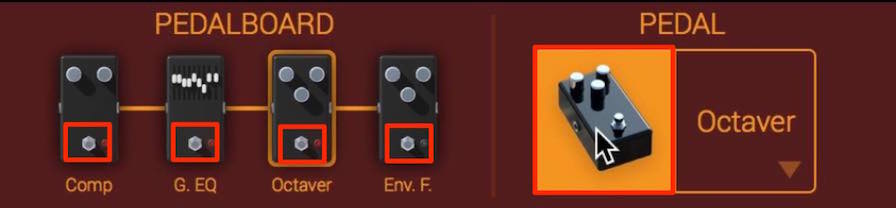
In addition, you can select different effects for each spot from the list.
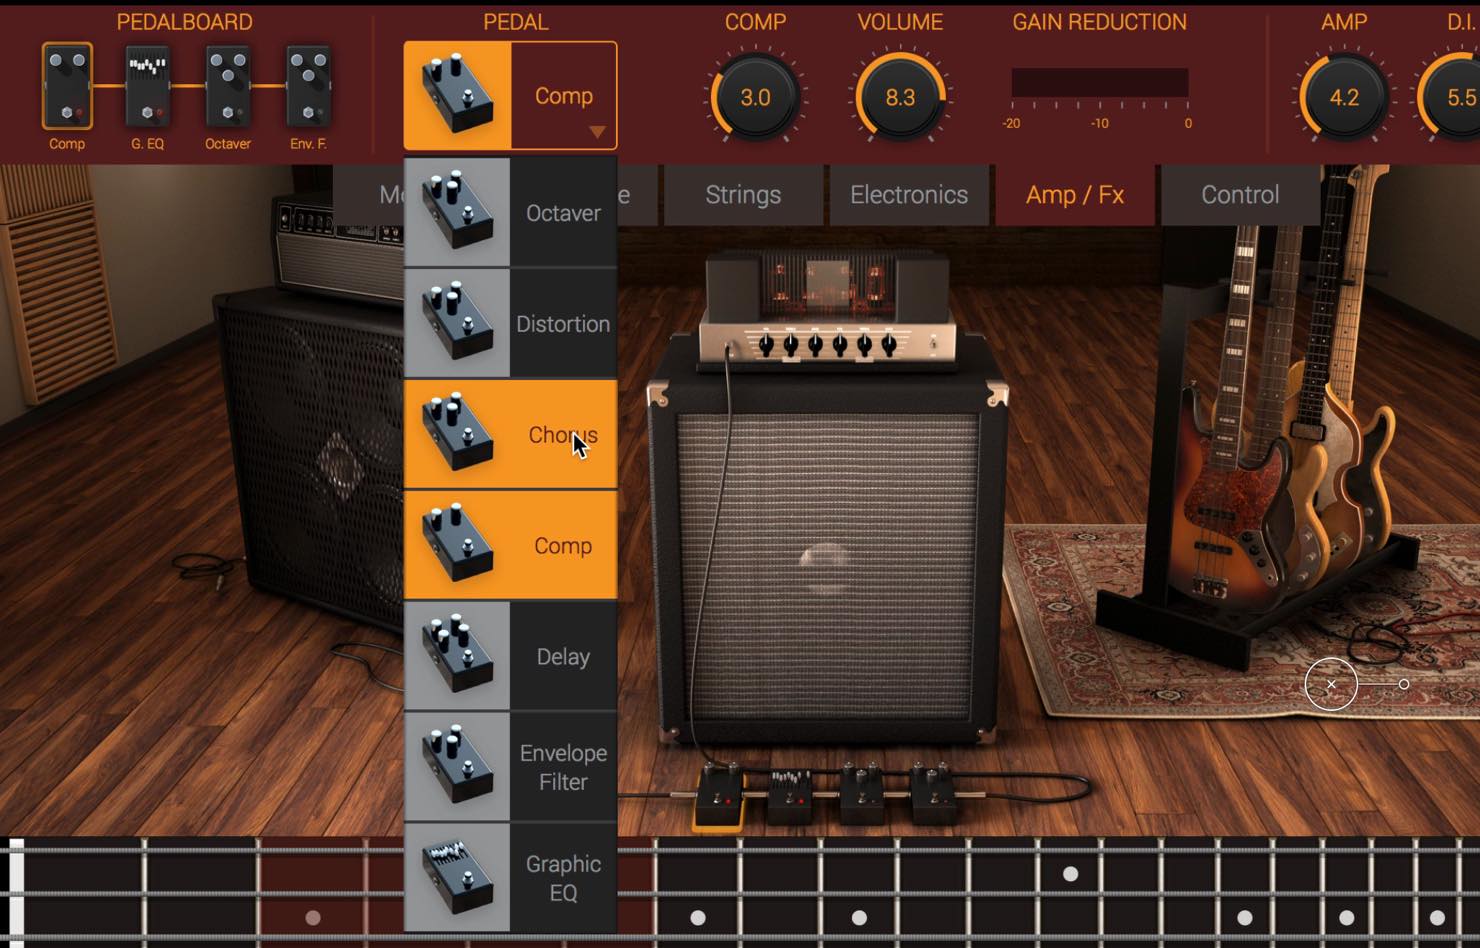
The effects selected from the PEDAL BOARD will be shown on the right.
For this example, lets take a look at the compressor.

This compressor has a simple layout, but the GAIN REDUCTION functions allowing for instinctual adjustment is a useful characteristic.
Click on the footpedal on each effect to turn it on/off.
Checking/setting MIDI CC/key switches with the Control tab
In the 「Control」 tab, you can check/set up MIDI CC and key switches, that allow for changes in articulation mid-song.
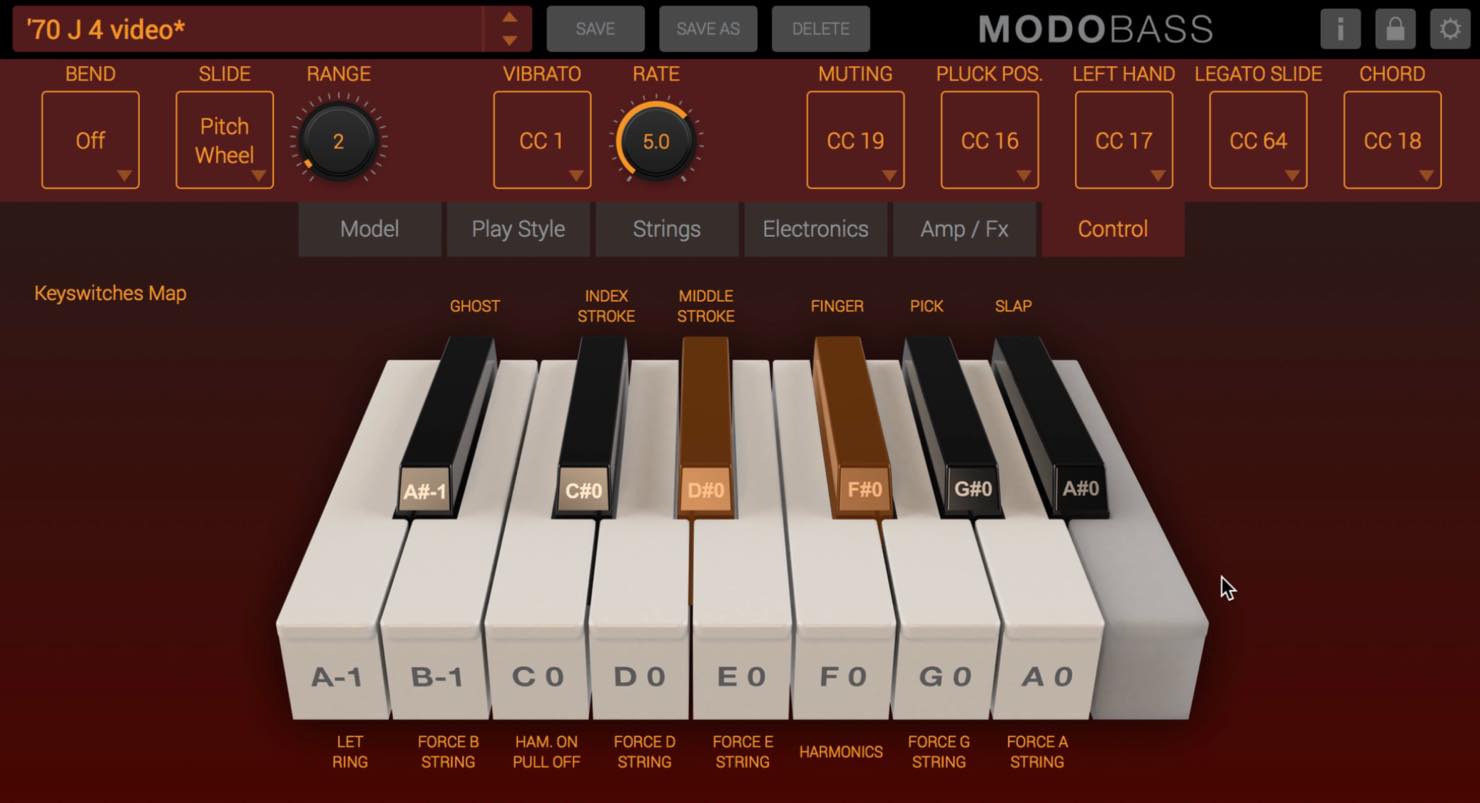
BEND / SLIDE / RANGE
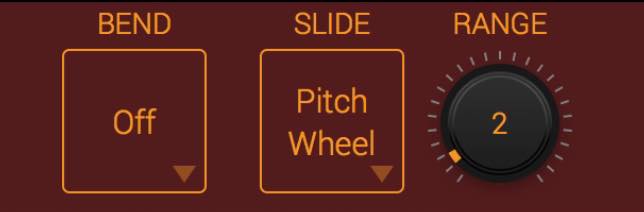
For pitch changing articulations, you can select from different parameters.
「BEND」 bends the strings, 「SLIDE」 slides from one string to another, and in default SLIDEs are done with the pitch wheel, and BEND is turned off.
Bass playing generally utilizes more slides than bends, so we suggest keeping the settings as is.
If you are looking to bend, we suggest setting BEND to CC5.
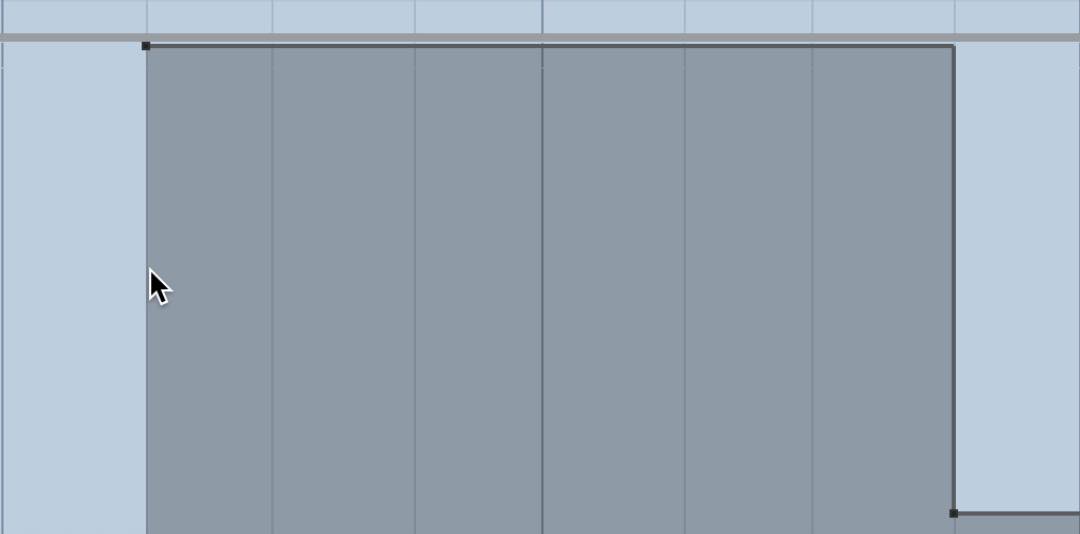
「RANGE」 determines the range of the slides/bends.
VIBLATO / RATE
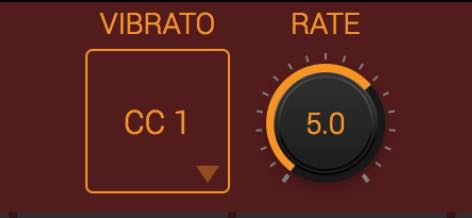
Similar to many plugins, MODO BASS vibrato is set to CC1 (modulation).
Use RATE to set the vibrato speed.
Other MIDI CC settings
Including the Play Style settings discussed in the last article, many small edits can be done to the articulation mid-song.

- MUTING: Determines amount of right hand muting
- PLUCK POS.: Determines what area of the strings are plucked/fingered
- LEFT HAND: Determines left hand position; this can also be similarly adjusted using key switches F5〜E8
- LEGART SLIDE: Articulation style for sliding where you can determine slide speed. We have more info on this later in the article
- CHORD: MODO BASS is generally played mono phonically, but you can temporarily add harmonies
Key switches
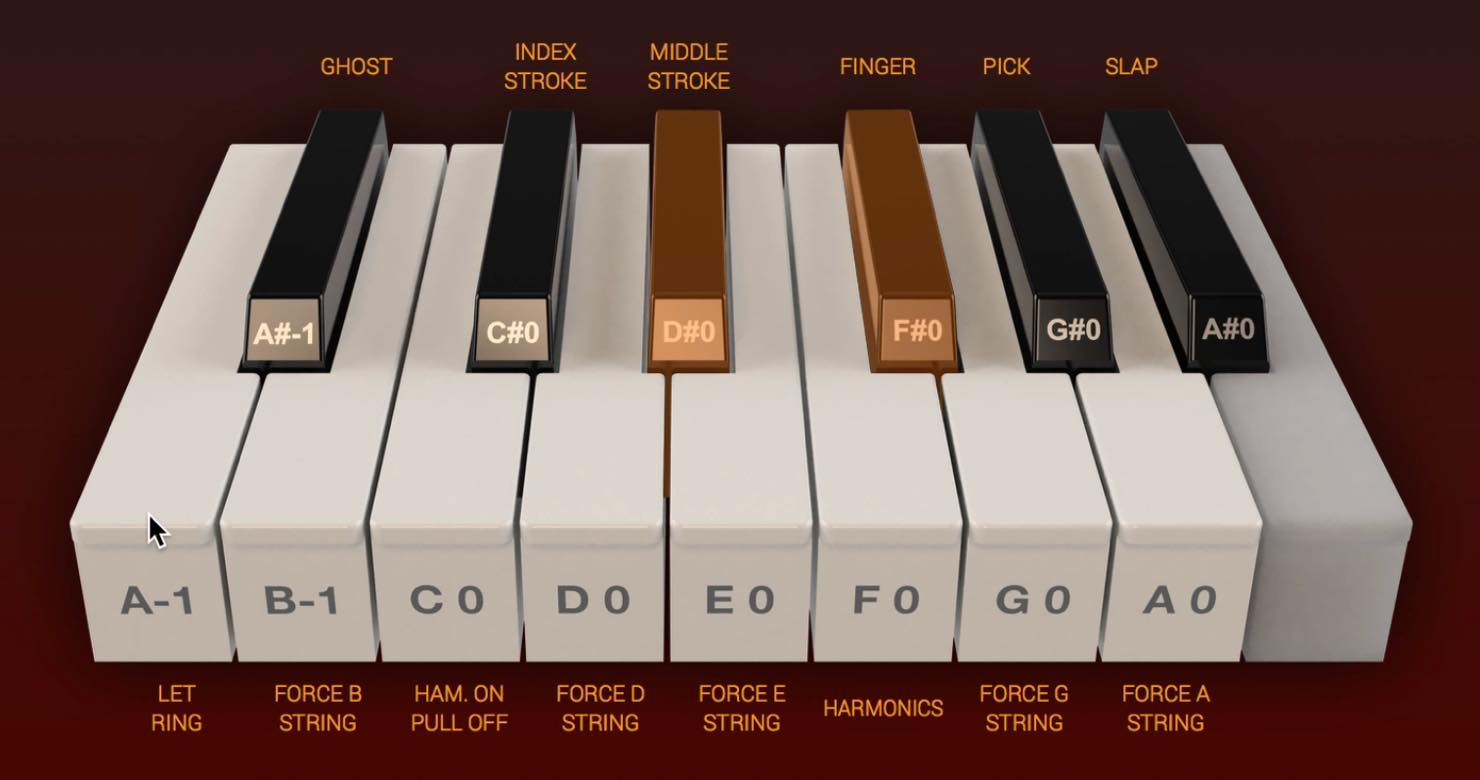
- A-1: When this key is held, LET RING is active
- A♯-1: Plays percussive sounds with very little sustain/pitch
- B-1/E-1/A-1/D-1/G-1: Designated to open strings, and designates which to use
- C0: When this key is held, it allows for hammer on’s and pull offs
- C#0/D#0: Designated index or middle finger us (for picked: Down/Up, for slap: Slap/Pull)
- F0: Plays harmonics
- F#0/G#0/A#0: Switch between FINGER/PICK/SLAP playing. Only this key switch is toggle type, and once selected, it will remain in that playing style unless switched again.
Sequencing using MIDI CC and key switches
After learning these functions, lets try applying it to a sequence.
We will discuss some of the techniques used in the sample song in our video.
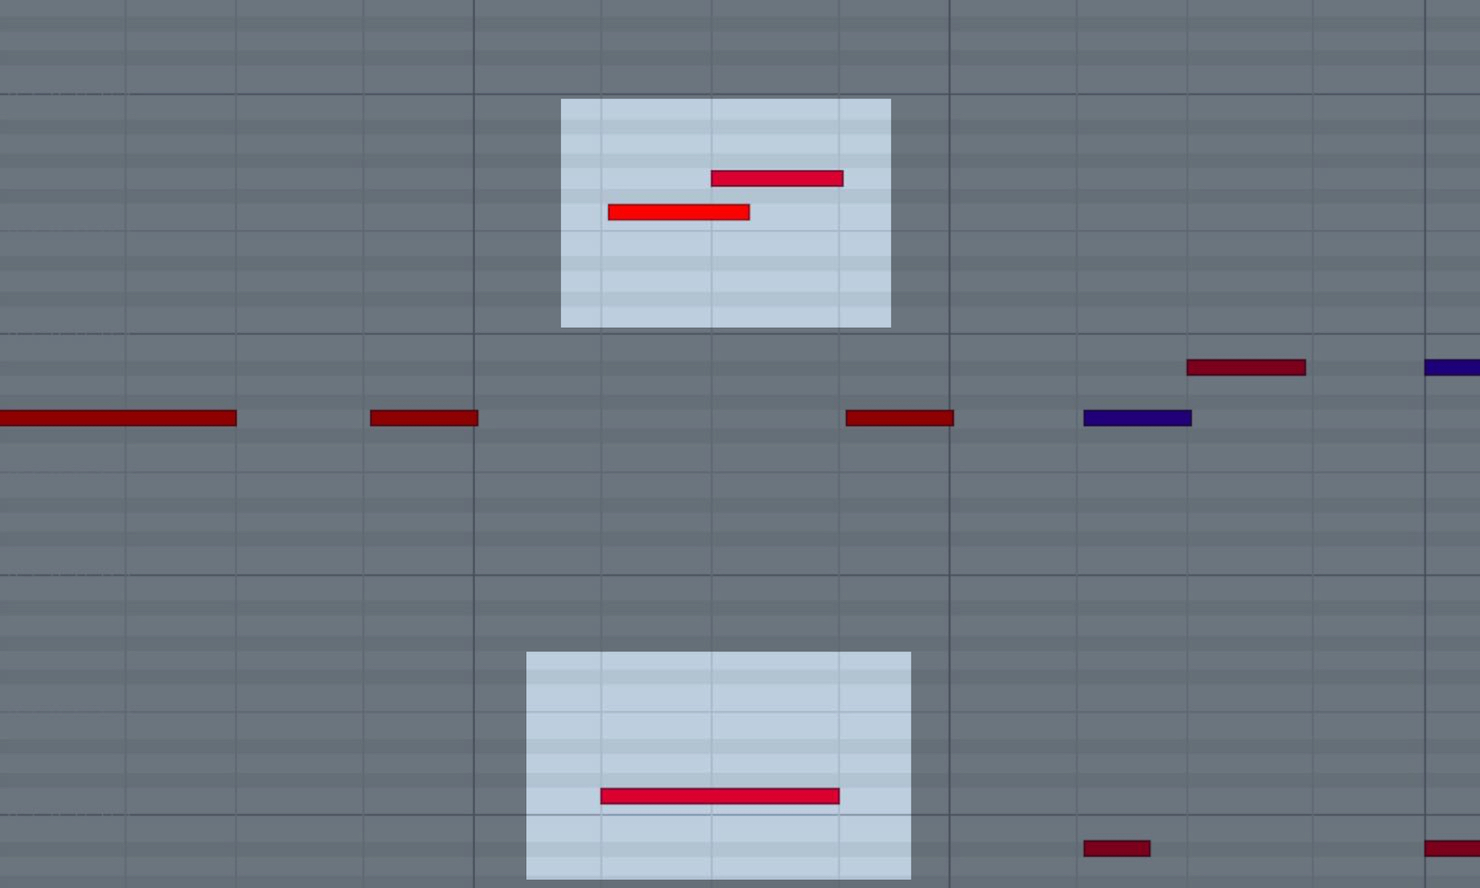
Ghost notes into legato slides

In the beginning, we have some big slide movements in the playing.
Here, we used CC64(sustain), and with the beginning and ending notes designated, determine the slide speed with the ending note’s velocity.
Slides can only be performed on the same string, so its useful to use in coalition with the string designating key switch.
We also used F#0 to designate finger, and added bouncyness with ghost notes via B-1.
Hammer on’s
If you want fast phrases to sound smooth, using hammer on’s and pull offs is a good trick to utilize.
Enter the C0 key switch while removing the space between notes.
Slides via pitch bend
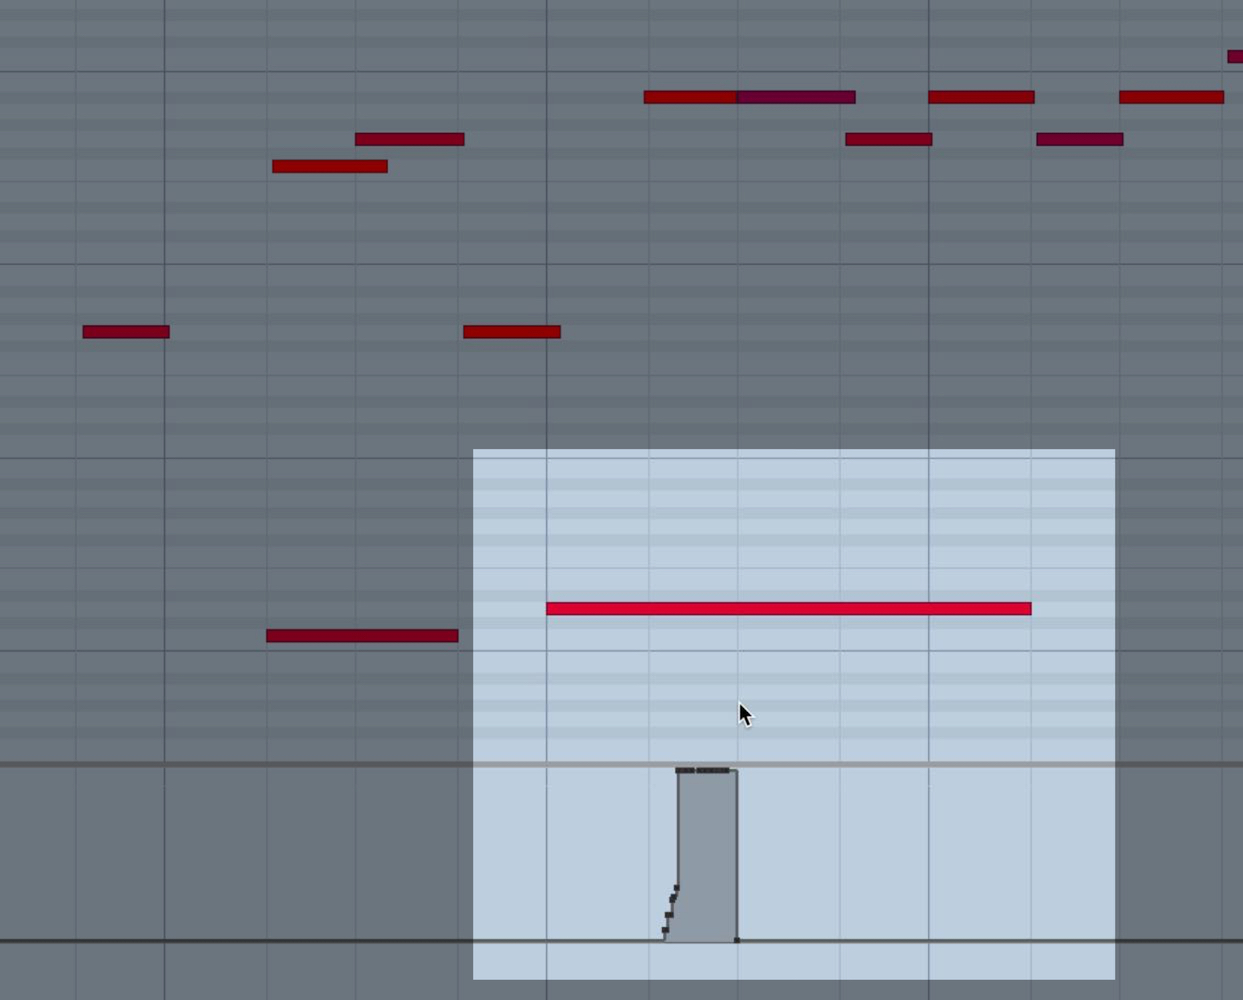
By having short slides at the start of a phrase, you can add realistic expression.
In this case, its best to enter a note below the pitch you want to hit, and use pitch bend to aim towards it.
Playing harmonies
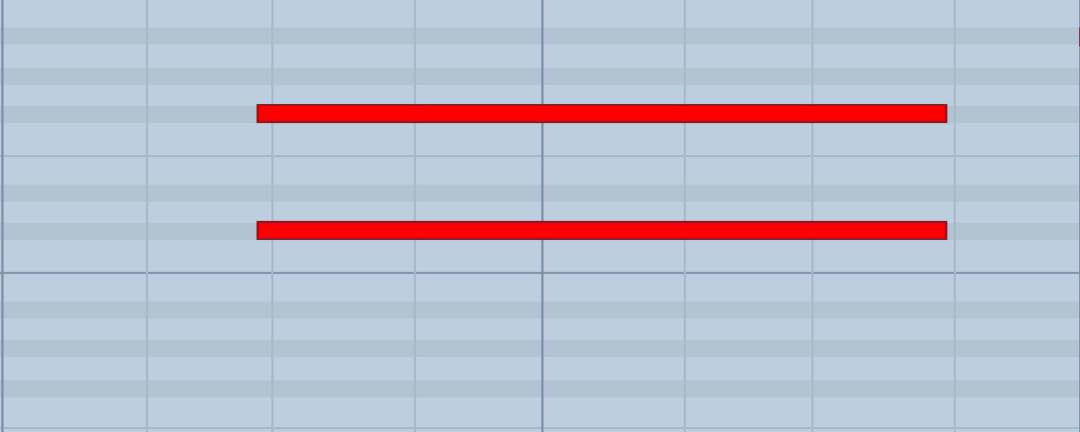
When playing a bass solo in the higher registers, playing long tones in harmonies is a common technique.
Bass harmonies in its upper registers have a very soft feel.
By using CC18, you can turn harmony playing on.
In addition, using CC1 modulation, we added some vibrato.
We hope you enjoyed this series,
and now have a better idea of the allure and realism found in the MODO BASS plugin.
However, the example we created just scratches the surface of what this plugin is capable of.
The more you use it, the further you can reach with this plugins capabilities.
As we learn more about this plugin as well, we hope to share it with you too.