

The Quintessential Pitch-Correction Software Melodyne 4 ① Essential basics / tutorial
Choose from the various editions of Melodyne

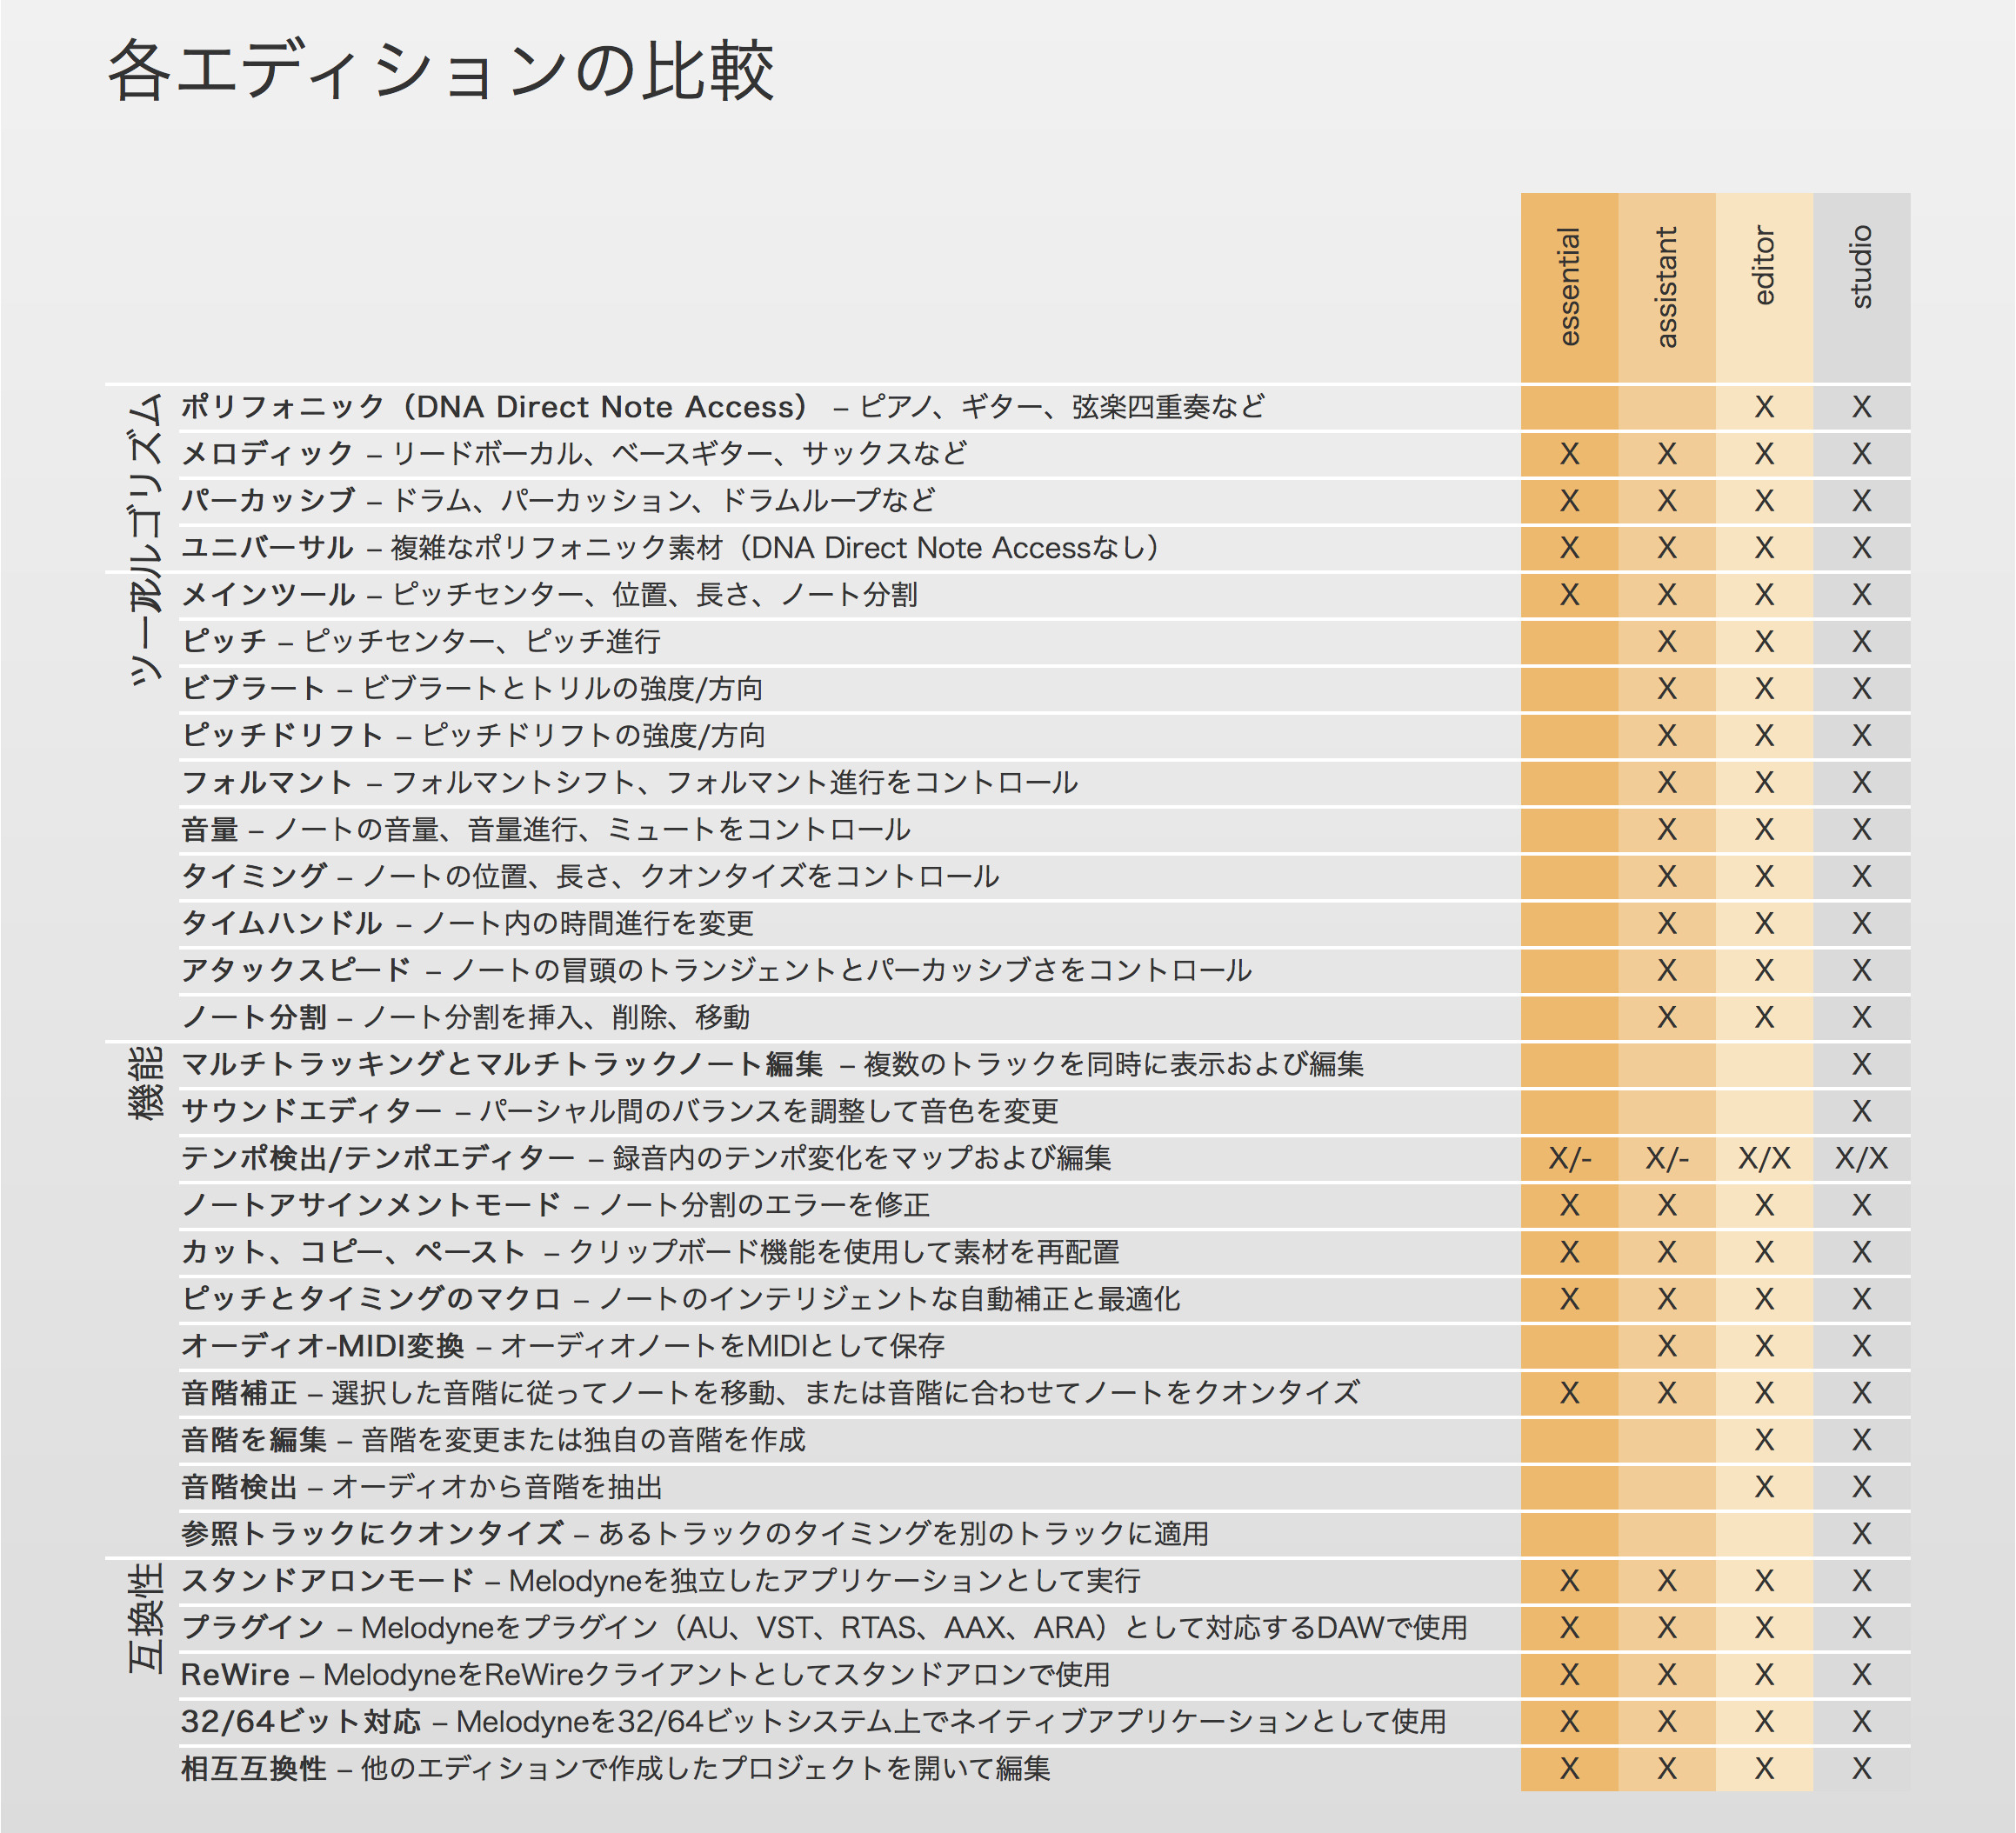
We will take a look at the different editions of「Melodyne 4」through the course of a few articles.
From the most basic edition of Melodyne4 –「essential」, to the following「assistant」,「editor」, and「studio」, there are a total of 4 editions.
There’s different features available, and the higher the grade, the more detailed edits that can be performed.
 Melodyne can be used as a stand-alone plugin, and on your DAW, with AAX, AU, VST, and 32bit/64bit compatibility.
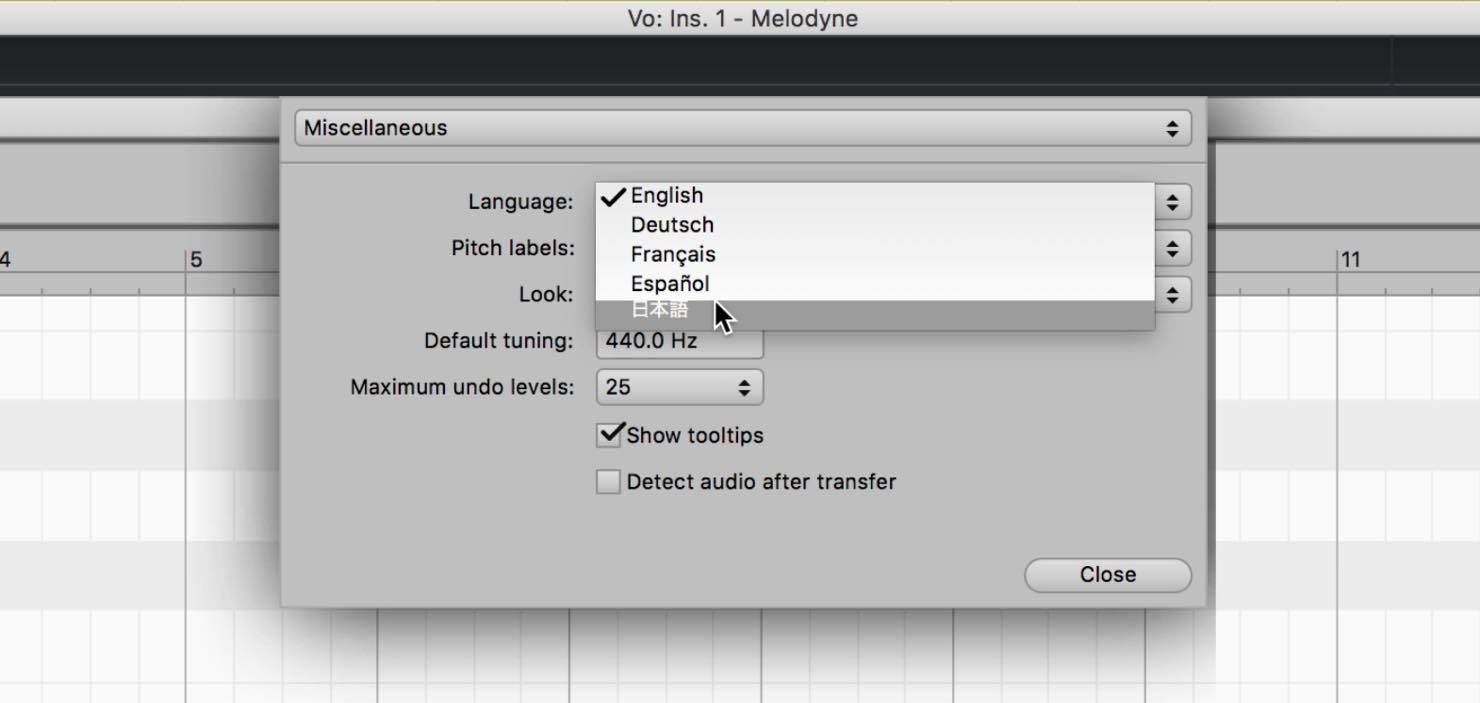
Multiple languages are available, by going to settings – system preferences.

Let’s start by taking a look at the most basic edition of「essential」.
We can take a look at the most basic functions of Melodyne here.
Melodyne essential basics Video Access

Purchase here

All the basics contained in「essential」
Essential contains just the main tools, and is a good place of reference for understanding what Melodyne does.
Pitch editing
Melodyne is of course known for its pitch editing capabilities. Let’s look at how to perform this function.
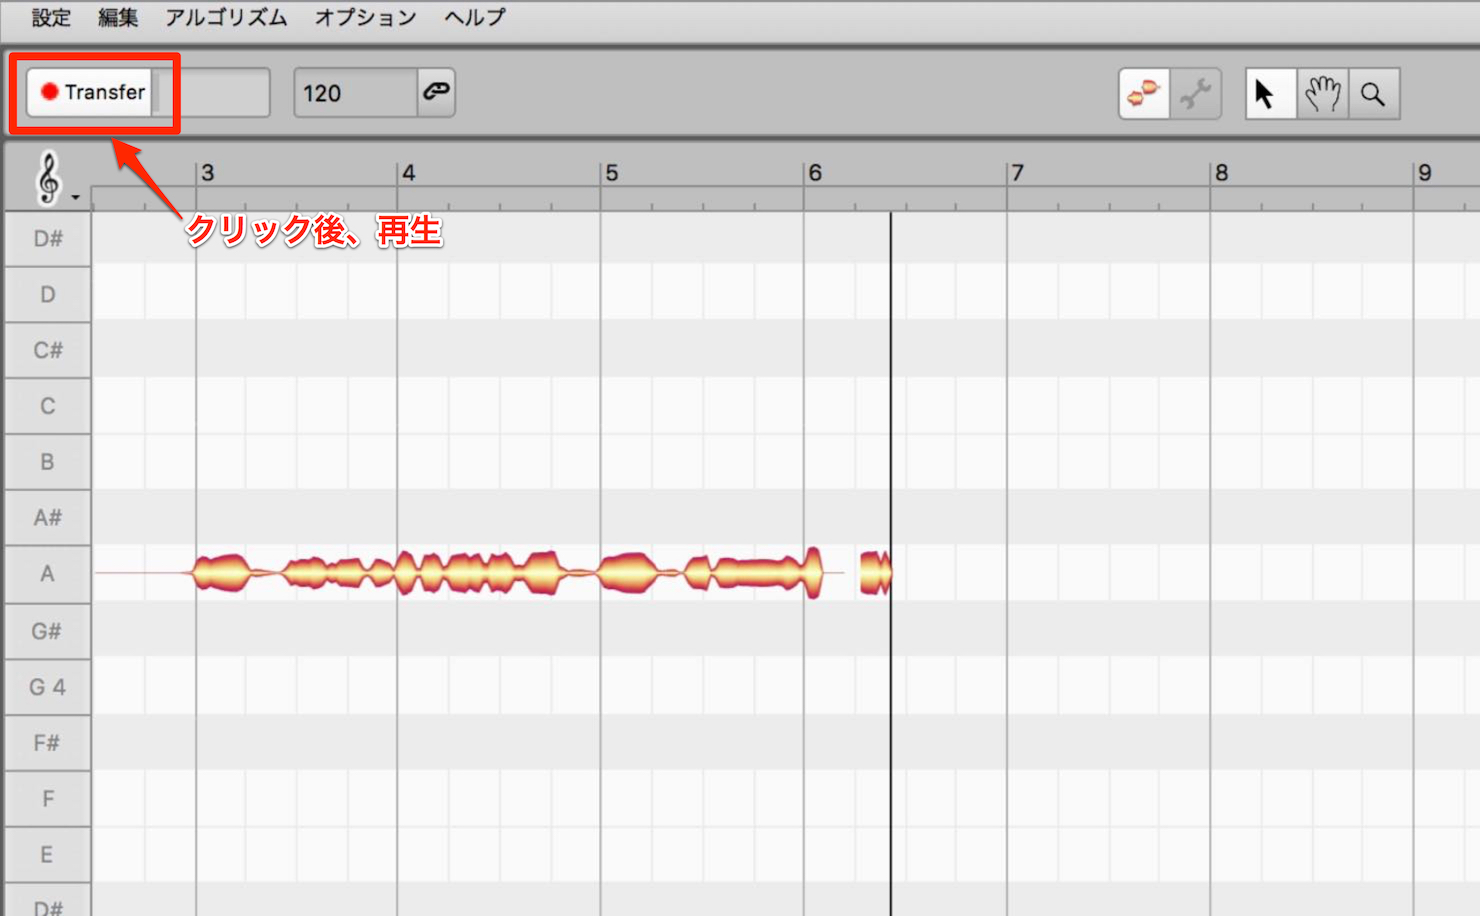
First, the sound you want to edit must be read into Melodyne.
Insert Melodyne on the track you want to edit, and turn「Transfer」on.
By playing your DAW in this state, Melodyne will read the sound on your track and begin analyzing it.
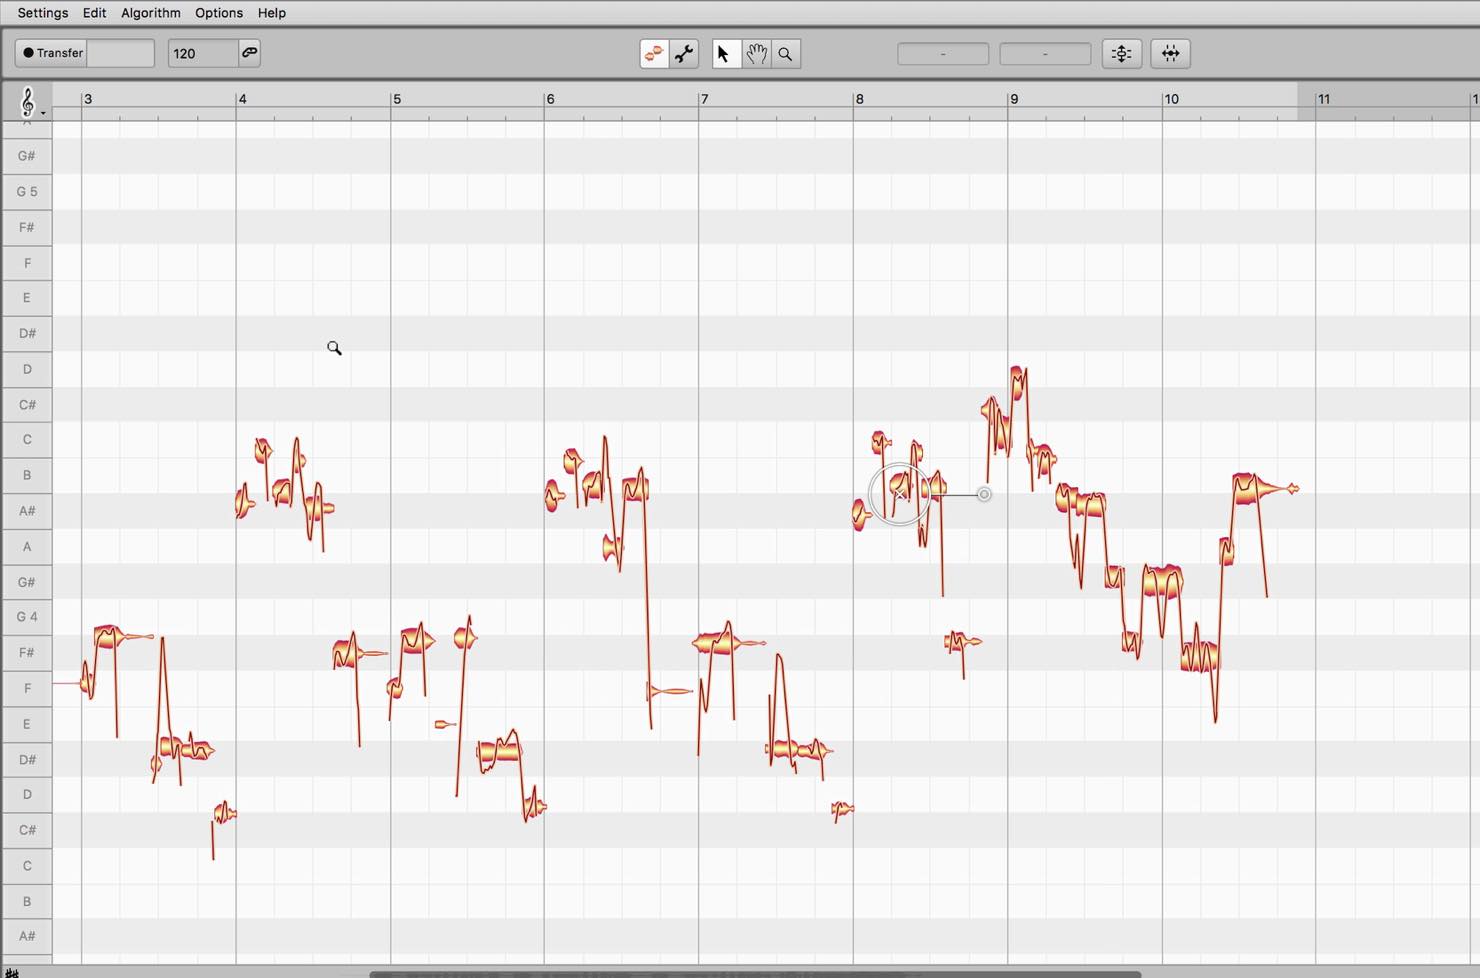
When the transfer is complete, the sound will show up as pitched notes.
If the notes are small and hard to see, press option+command (Mac) or alt+control (Windows) to change to the magnifying glass tool, and drag it horizontally/vertically to zoom in/out.
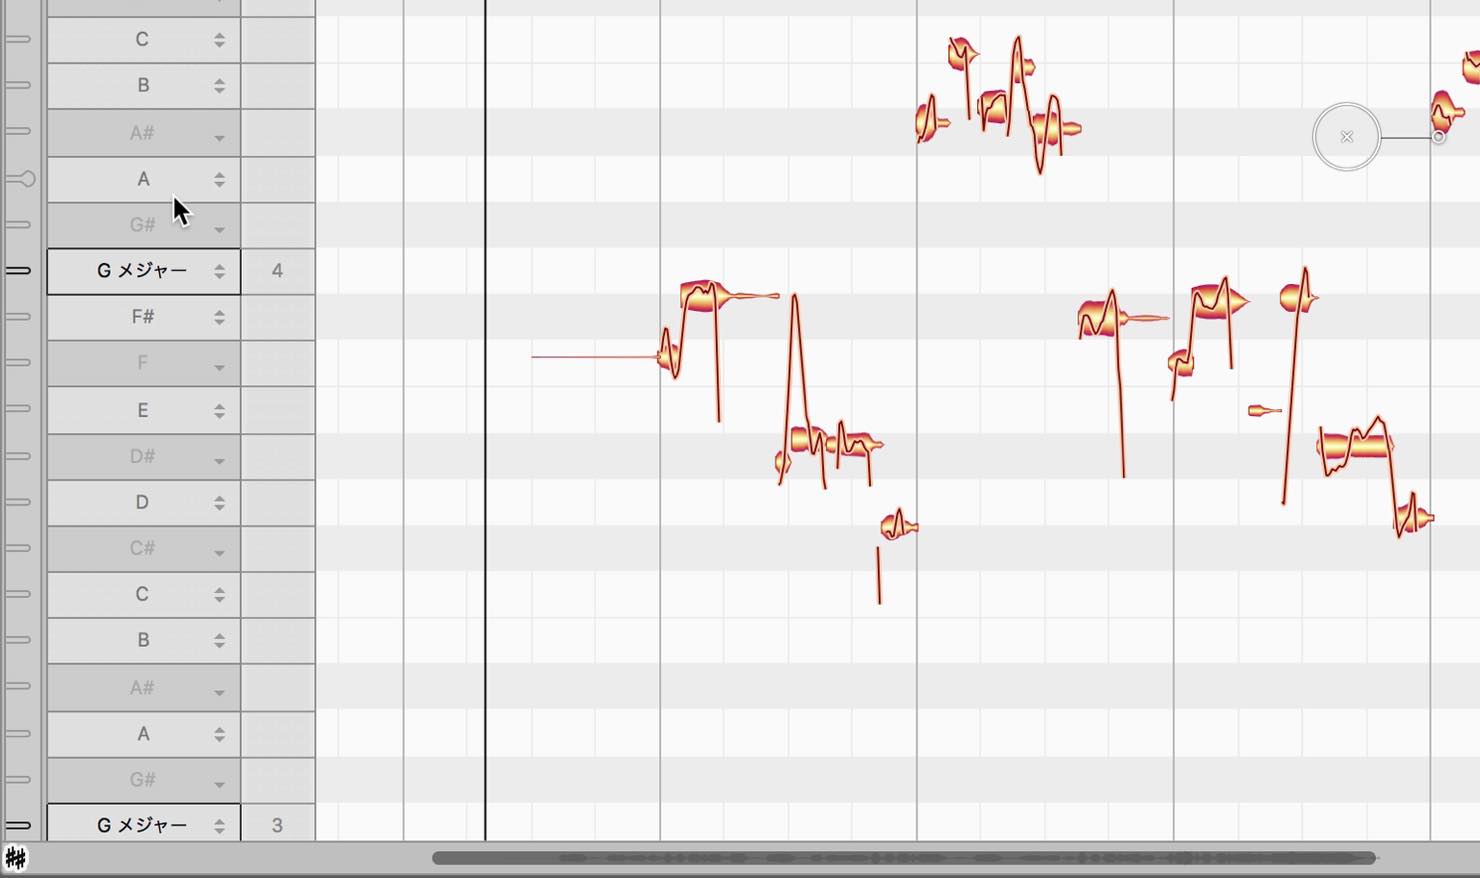
As seen, the pitches are placed in correlation to a piano roll matrix, allowing for a visual representation of notes that may be out of pitch.
By clicking the「♯♯」mark, the zone on the left will change, and an auto-analyzed key scale will appear.
In this example, it has been analyzed as G major, and non-scale notes are greyed out.
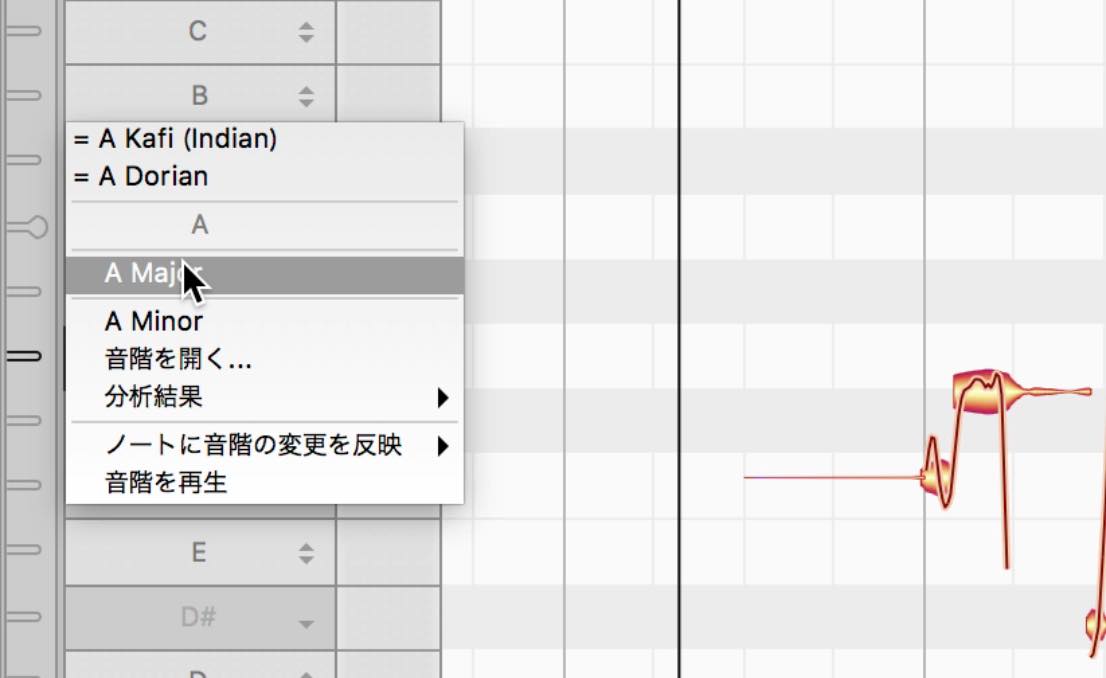
If you want to change the key, click on the scale, and select variations like major/minor.
Let’s try changing some pitches.
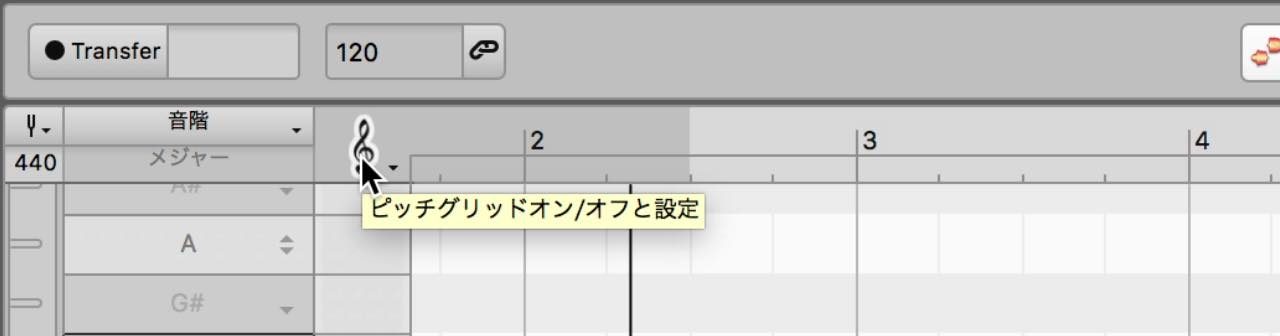
By dragging the notes up/down, it’s snapped to move in half steps. This is because there is a snap-set on movement as a default.
If you want to remove the snap setting, click on the treble clef mark to turn it off.
Or if you want to use it with the snap mode still on, hold option (Mac) or alt (Windows) while dragging the note, to temporarily remove the snap.
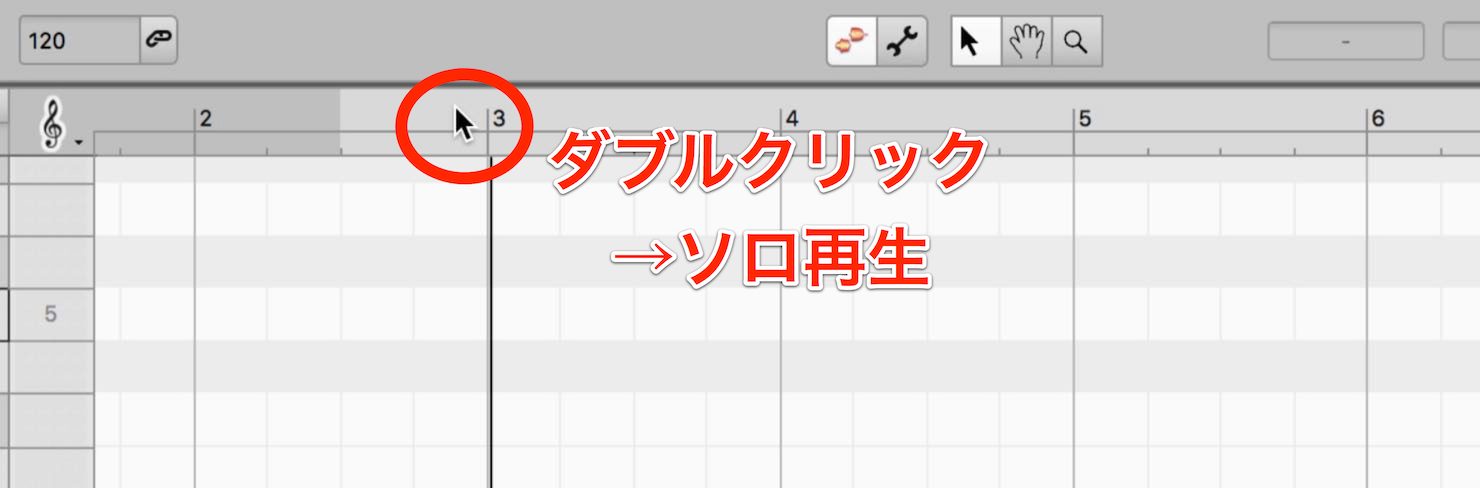
There are many cases when you want to solo your track while editing pitch.
Rather than solo’ing the track in your DAW, double click on the ruler area in Melodyne to solo the contents of Melodyne.
You can select and edit multiple pitches at once as well.
Drag to select the desired notes. Click the correct pitch macro on the top of the screen.
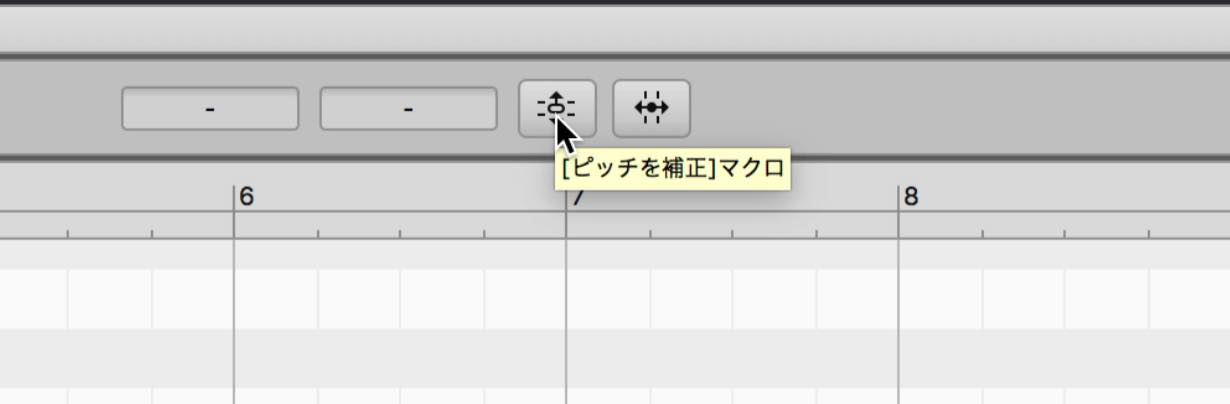
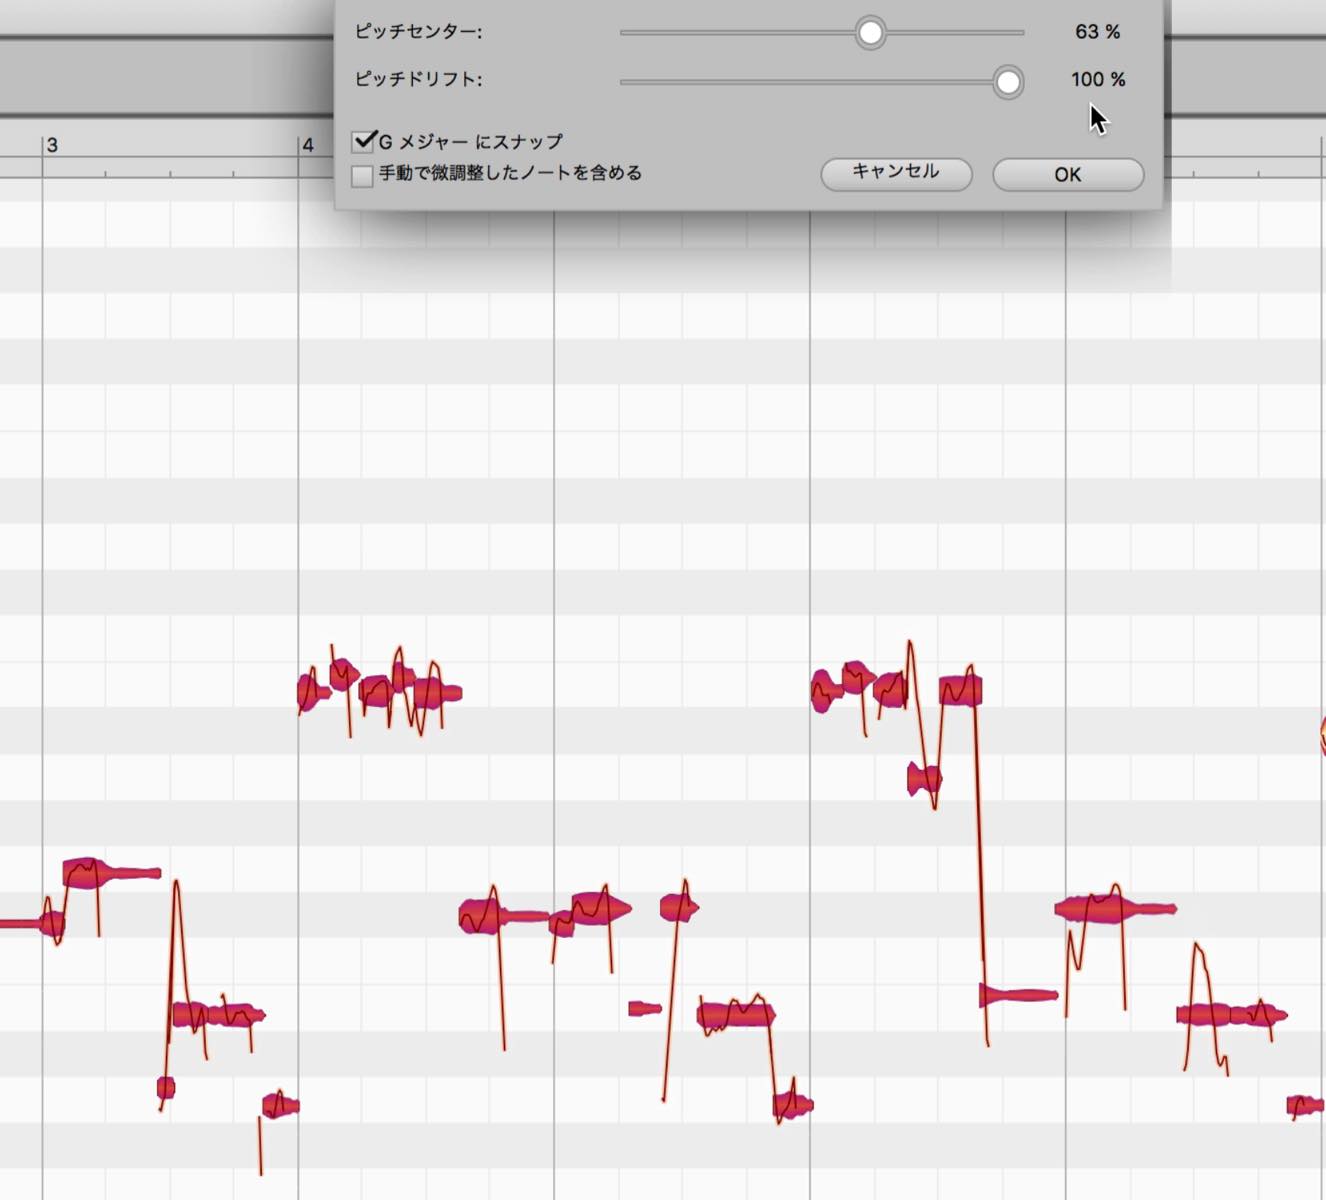
By moving the「pitch center」slider to the right, all of the selected notes will move closer to a corrected pitch.
In addition, by entering「snap to G Major」, it will move to the closest scale note.

Below that, you can edit small movements in pitch using「Pitch Drift」.
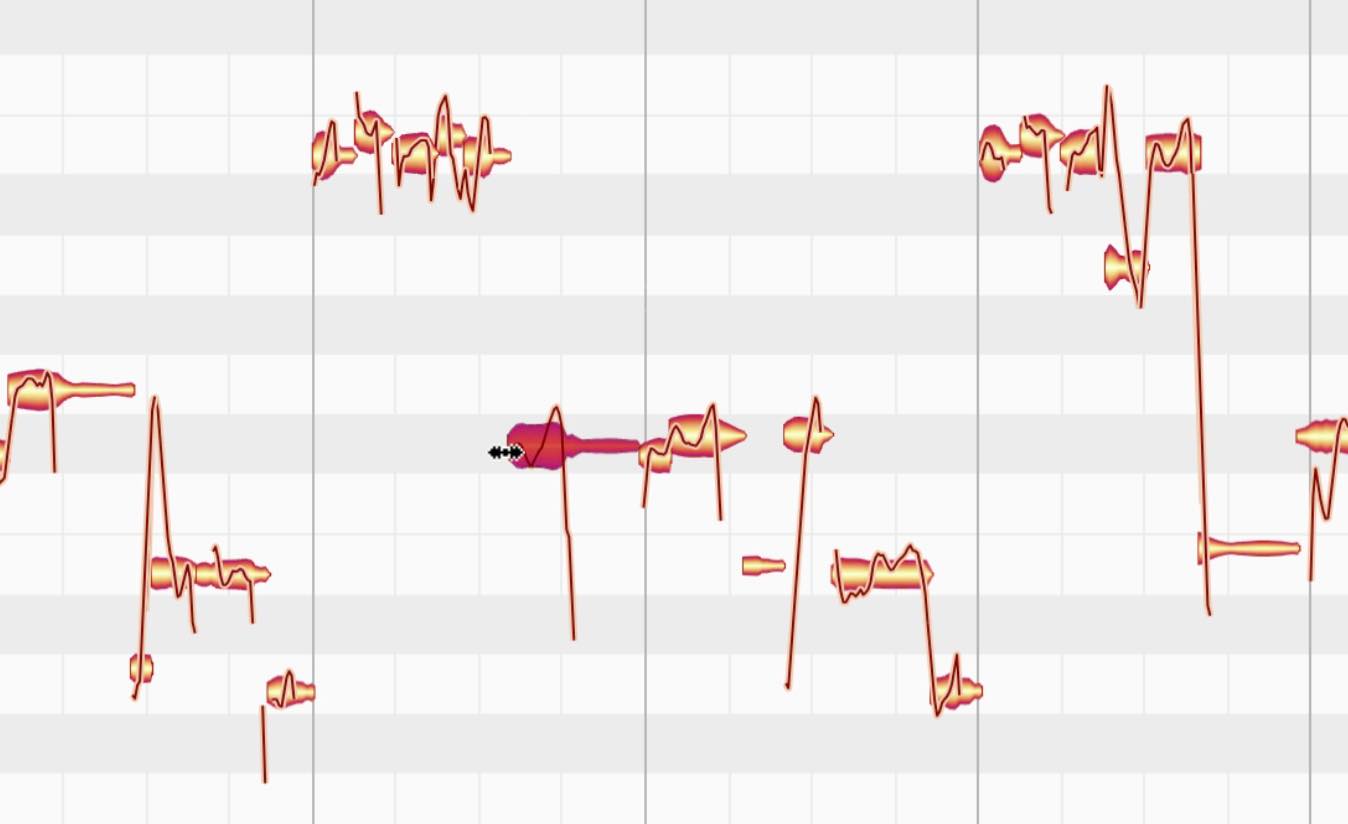
Take a look at the notes, and you can see that there are lines included apart from the regular pitched notes. These represent the actual pitch movement, whereas the pitched notes are representations of the approximate pitches.
「Pitch drift」is used less for getting rid of pitch differences entirely, but to balance the front/end of notes.
By moving the slider to the right, the lines move and smooth out the pitches at the start/end of a note.
Editing timing.
In Melodyne, you can edit pitch as well as timing.
By bringing the cursor towards the edge of a note, it’ll visually change like shown. By dragging left/right in this state, you can change timing, but once again there is a snap set on it.
To remove the snap, click on the music-note on the top right to turn it off, or hold Option (Mac) or Alt (Windows) while dragging to temporarily remove the snap.

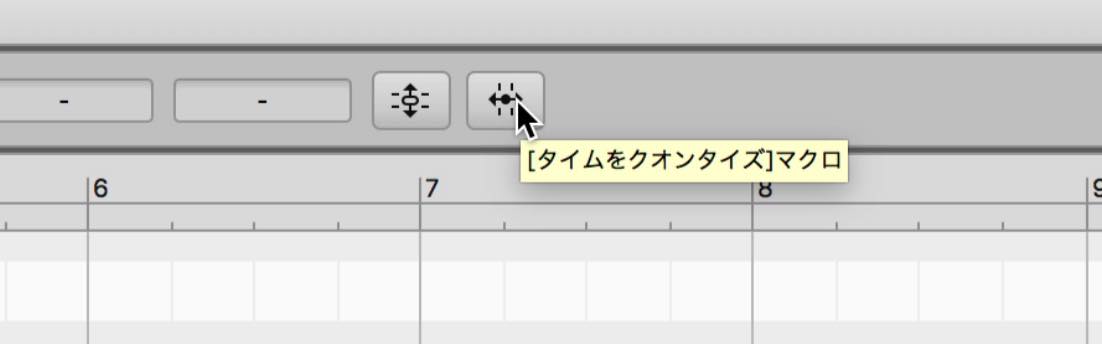
There are macros available for timing as well.
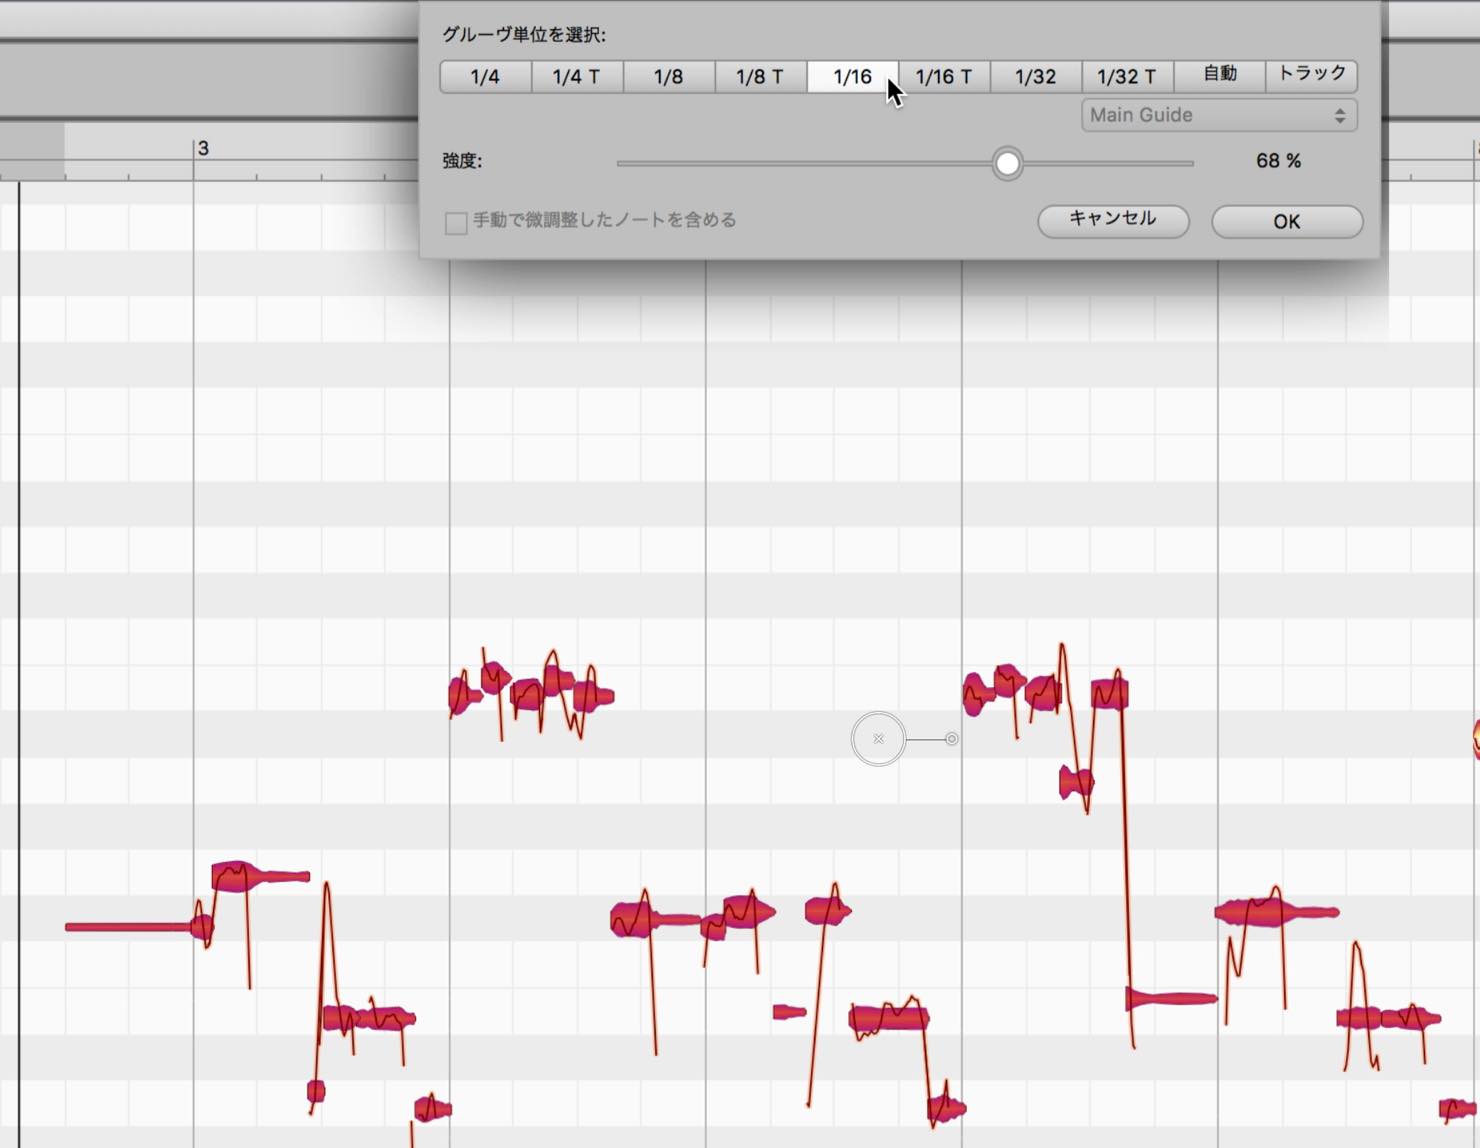
Silimar to pitch macros, drag to select notes, and click the Quantize Timing button on the top of the screen.
Sliders with quantize subdivision and strength will appear.
By selecting「Auto」, it’ll automatically designate a subdivision to quantize to, but if you try editing and find it doesn’t match, try changing to different subdivisions.
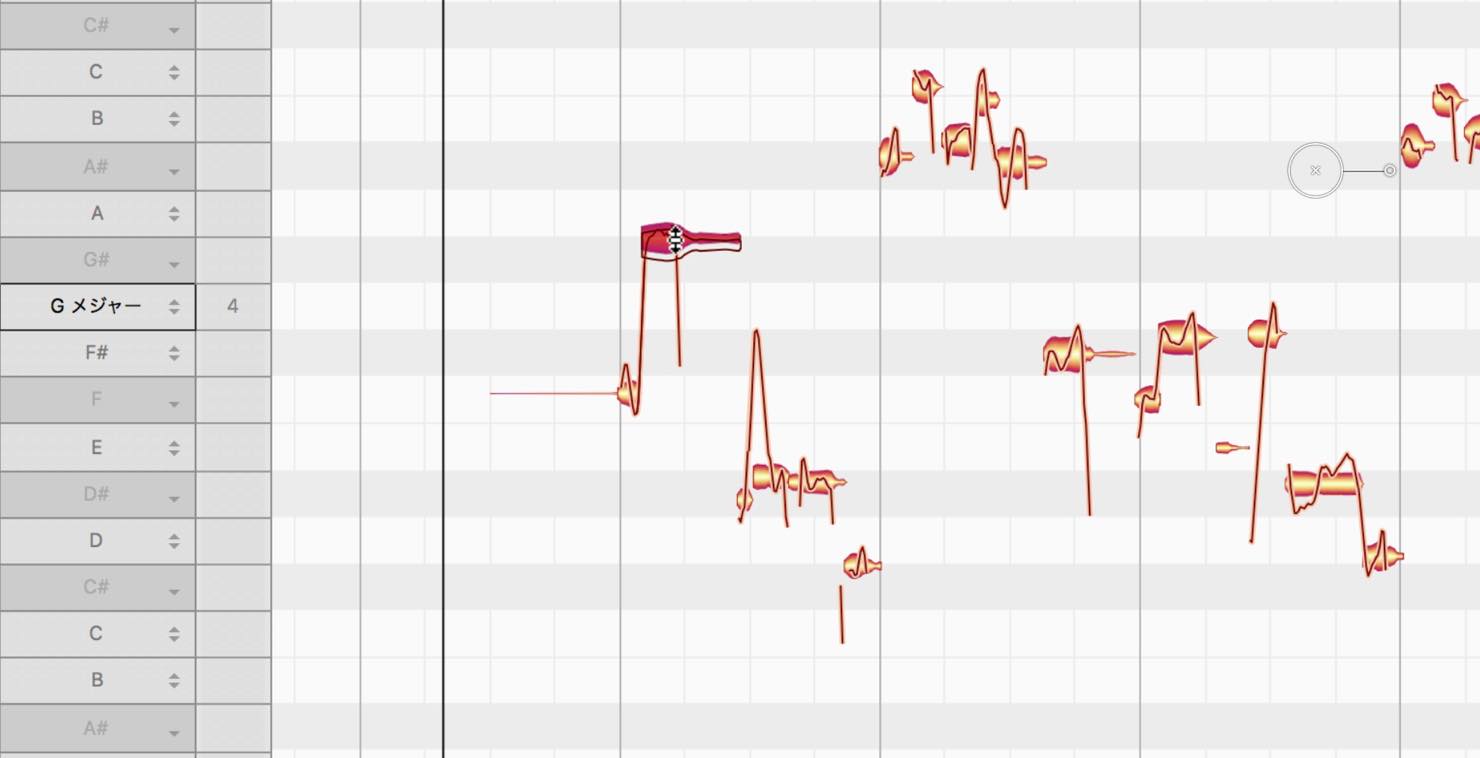
Note splitting
You can also split a note that’s currently being read as 1 note.
By placing the cursor over the top half of a note, it’ll change as shown.

Double click to split the note.

Like shown, this works great when you can see a pitch curve but it ended up read as a single note.
Undo’ing functions
We took a look at alot of ways to edit, but perhaps you end up regretting some steps along the way.
By pressing Command+Z (Mac) or Ctrl+Z (Windows), you can undo the previous edit.
What to look out for here, is when wanting to undo an edit in Melodyne be sure that the Melodyne window is open. If you are on the DAW window instead, it will undo a function within the DAW rather than in Melodyne.
To redo a function, press Command+Shift+Z (Mac), or Ctrl+Shift+Z (Windows).
You can also reset just specific types of edits within Melodyne.
Select a note/multiple notes, and select「Reset specific edits」from the right click menu to see a variety of edits to reset.
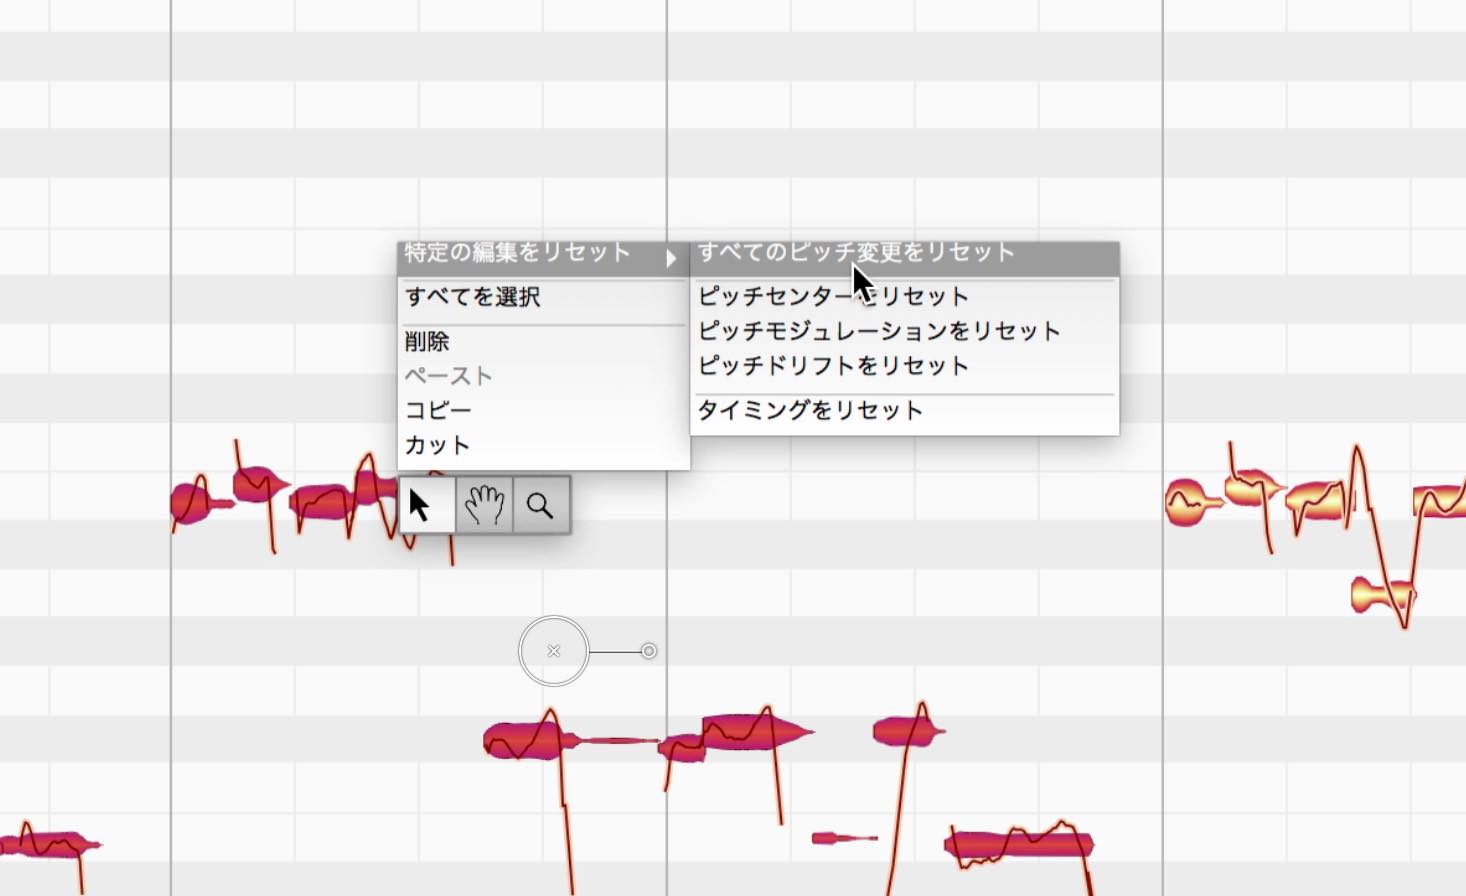
Whatever type of editing you select here will all be reset.
This concludes our look at the basics of Essential.
Next time we will take a look at the next level up with「assistant」.
Purchase here