Compression basics – About threshold
Understanding compression basics
We will take a look at a necessity for MIXING: compression.
This is a very generalized definition.
The difference in volume within a track is lessened, allowing for a more unilateral volume.
However, perhaps you still haven’t fully grasped these concepts.
Many individuals may not understand the functions of the individuals knobs as well.
By understanding these knobs, it is the first step in understanding compression.
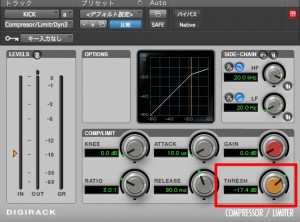
Lets take a look at the 4 main knobs found on compressors.
In addition, these functions are the same across all DAWs like Protools, Logic, and Cubase!!!
Threshold
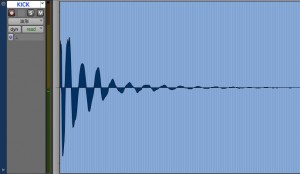
↑ We will use「Kick」as an example
By looking at this waveform, you can see certain areas that are bigger than others.
The starting sounds are louder, and gradually reduce over time.
However, machines don’t work in this way.
What point do you go over to make a「loud sound」?
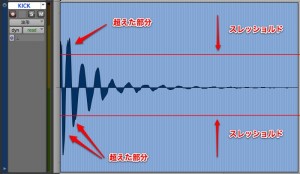
We must first take a look at this line.
This is the「threshold」.
The sound that goes over the threshold will be compressed.
It would look like this
↑ The lower the threshold is set,
the closer the top/bottom lines will reach to the center.
The points that are past these lines will be 「compressed」.
Make sure to start by understanding this parameter!
However, there won’t be magical lines that appear like the picture above when you use compression…
Because of this, you won’t know at what point the threshold is at.
In our next article, we will add onto this knowledge, by taking a look at「ratio」.


